
Starting Special Setting Mode (AM-C6000/C5000/C4000)
 Note / 補足 Note / 補足 |
|
Start from the power ON
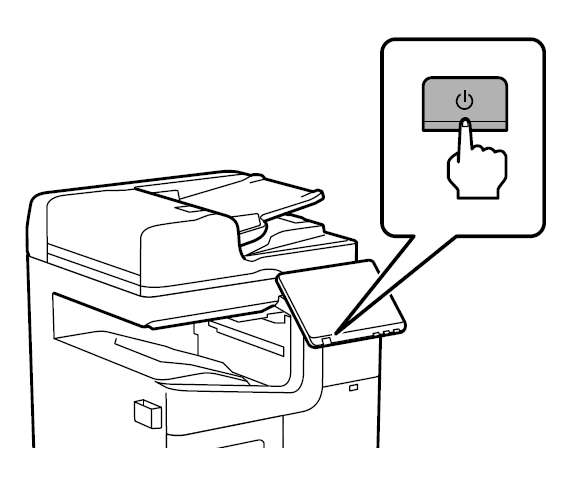
- Press [Power Button] on the operation panel to turn on the product.
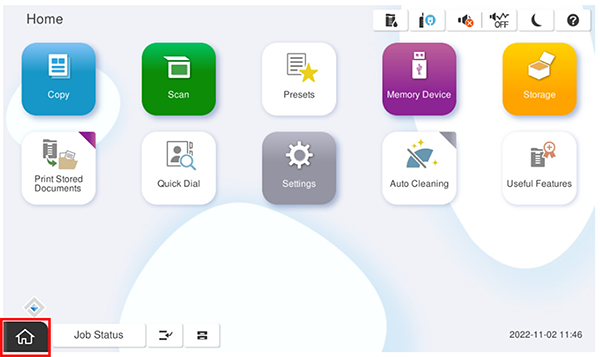
- On the home screen, press and long press the [Home button] (about 7 sec.).
 Check Point / チェックポイント
- Do not move your finger at all while holding down the home button.
- If the starting succeeds, the keypad screen will be displayed.
Enter any ID and press the [OK].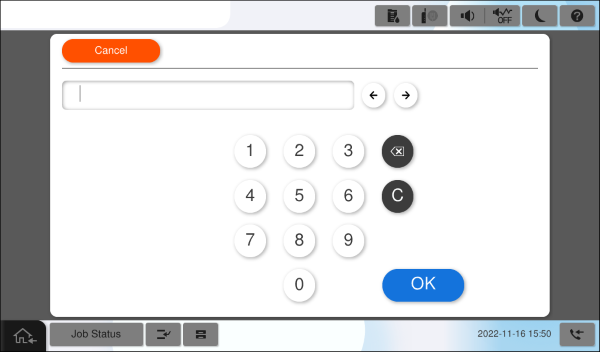 Check Point / チェックポイント
- Europe models only require entering a PIN code before entering the ID (due to UK security restrictions).
The PIN code is unique and printed on the PASSWORD label. *It is labeled near the maintenance box insertion slot.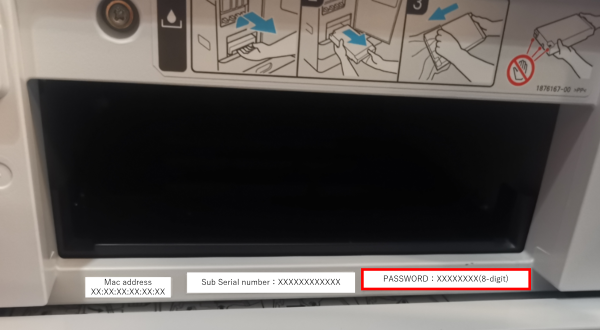
- “PIN Input” is displayed in the left corner of the ID input screen when a PIN code is required.
*This is not displayed in the ID input screen when the ID is required.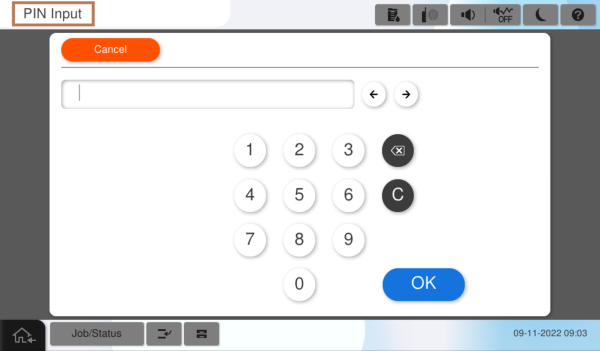
- Workflow(Europe models)
- Press and hold the [Home Button] to activate the ID input screen.
- Open the front cover and then, check a PIN code on PASSWORD label.
- Enter a PIN code and press [OK].
- Enter the ID and press [OK].
- Europe models only require entering a PIN code before entering the ID (due to UK security restrictions).
| Note / 補足 |
|
Start from the power OFF
There are two procedures depending on the firmware version.
Previous version]
Turn off the power and open the right door (A).
Note / 補足- This startup method requires some skill, so there is a risk that the ID input screen will fail to startup.
By opening the right door before turning on the power, the interlock is released and the startup process can be prevented in the event of a failure.
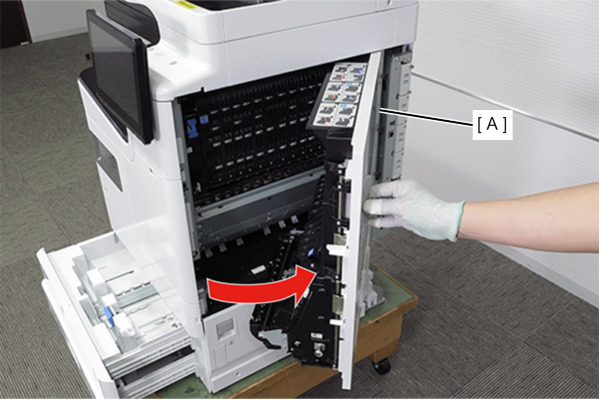
- This startup method requires some skill, so there is a risk that the ID input screen will fail to startup.
- Turn on the product while holding down the [Power button] on the control panel, and at the moment the EPSON logo screen appears, press and hold part of the panel LCD (left side) with finger.
Keep press and hold the power button and panel LCD (left side) until the ID input screen starts up (about 10 sec.)Check Point / チェックポイント- Do not move your finger at all while holding down the home button.
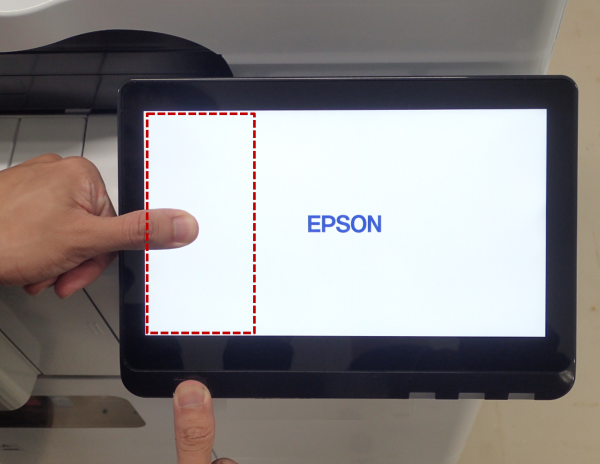
If the starting succeeds, the keypad screen will be displayed. After that, close the right door(D1).
Note / 補足- If startup fails, turn off the power and try again from step 2.
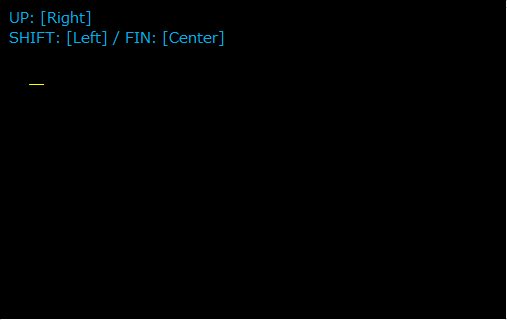
Enter the startup ID according to the following procedure.
Note / 補足- [SW1]: Shifts the input digit
- [SW2]: Executes
- [SW3]: Inputs No. (Each press increments the number)
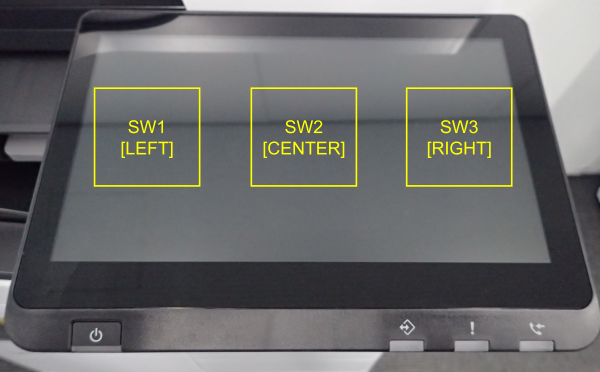
- Press the No. input button [SW3] and enter a number from 1 to 9.
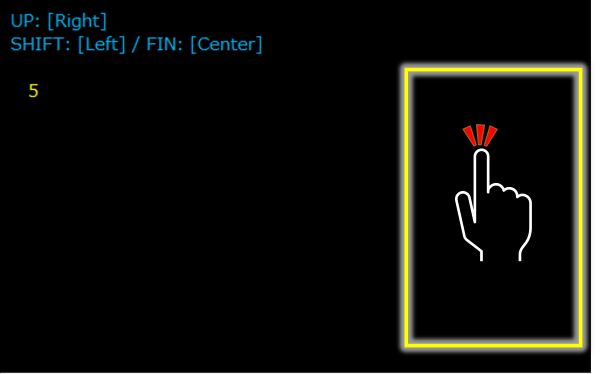
Press the input digit move button [SW1] to move to the next digit.
Note / 補足If you move to the next digit, you cannot change the value of the previous digit. If the front digit needs to be corrected, refer to step 4.
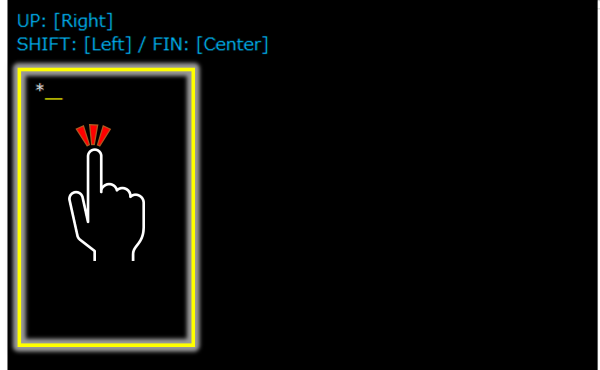
- Repeat the above steps and enter the activation ID.
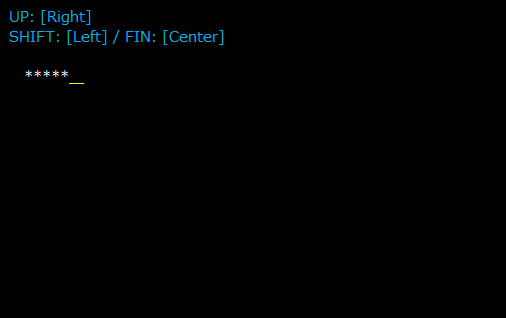
- After inputting the start ID, press the execution button [SW2]. If the entered ID is correct, press the execution button [SW2] again.
To re-enter the ID, press the digit shift button [SW1].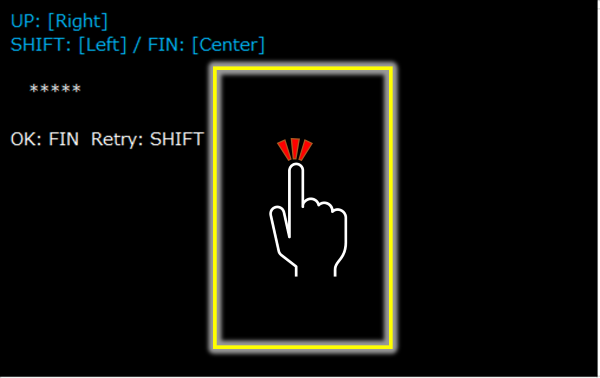
 Caution / 注意
- If you enter an incorrect ID, you may change important settings of the main unit.
- If the ID does not exist, the following message is displayed on the panel (the power turns off automatically).

Check Point / チェックポイント- Europe models only require entering a PIN code before entering the ID (due to UK security restrictions).
The PIN code is unique and printed on the PASSWORD label. *It is labeled near the maintenance box insertion slot.
- “PIN Input” is displayed in the left corner of the ID input screen when a PIN code is required.
*This is not displayed in the ID input screen when the ID is required.
- Workflow(Europe models)
- Press and hold the [Home Button] to activate the ID input screen.
- Open the front cover and then, check a PIN code on PASSWORD label.
- Enter a PIN code and press [OK].
- Enter the ID and press [OK].
New version
The new version has the following changes compared to the previous version.
- The Epson logo is displayed for an extended period of time.
- The ID entry screen now uses numeric keypad input.Check Point / チェックポイント
- Starting with version "GW08O7", this is the method for starting the new version of firmware.
Turn off the power and open the right door (A).
Note / 補足- This startup method requires some skill, so there is a risk that the ID input screen will fail to startup.
By opening the right door before turning on the power, the interlock is released and the startup process can be prevented in the event of a failure.
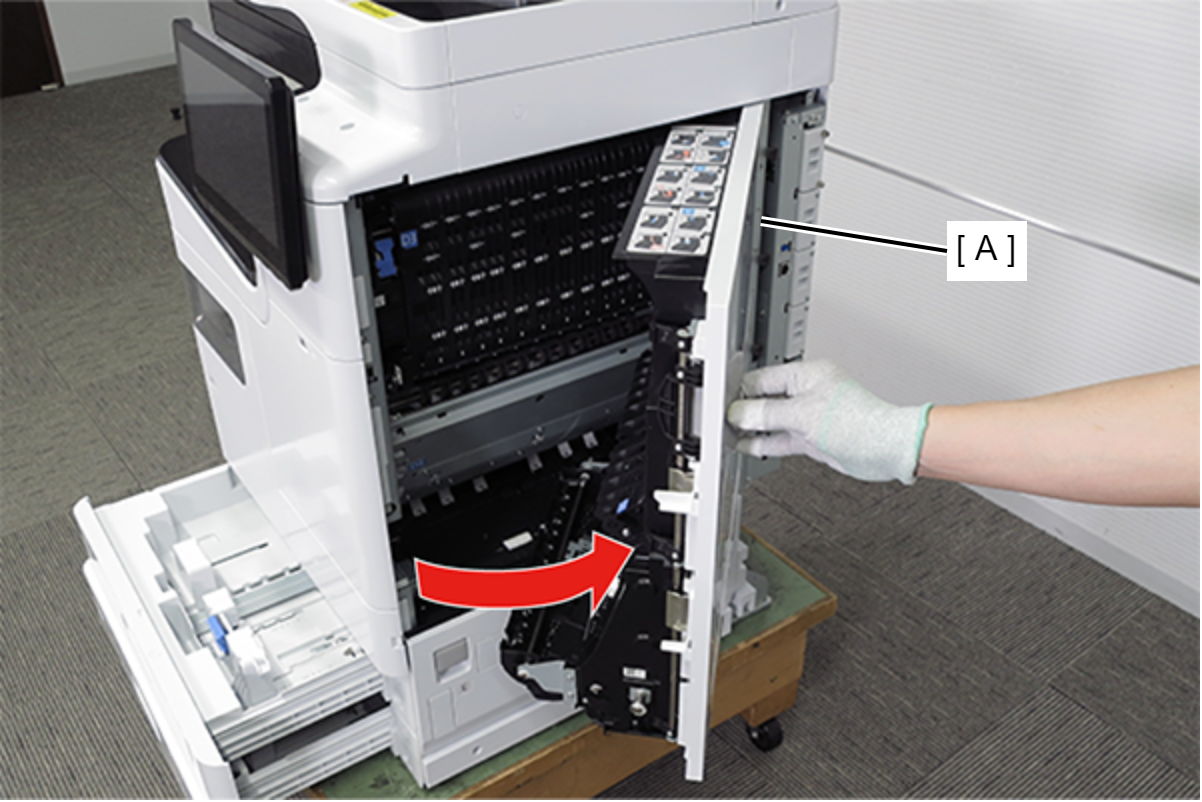
- This startup method requires some skill, so there is a risk that the ID input screen will fail to startup.
- Turn on the product while holding down the [Power button] on the control panel, and when the EPSON logo screen appears, press and hold part of the panel LCD (left side) with finger.
Keep press and hold the power button and panel LCD (left side) until the ID input screen starts up (about 10 sec.)Check Point / チェックポイント- Do not move your finger at all while holding down the home button.
- If you do not operate the panel while the EPOSN logo screen is displayed, it will start up normally in about 15 seconds.
- If you release your finger from the power button while the EPOSN logo screen is displayed without operating the panel, it will start up normally.
If the starting succeeds, the keypad screen will be displayed.
After close the right door (D1), enter the ID, and press the [OK] button.
Check Point / チェックポイント- Europe models only require entering a PIN code before entering the ID (due to UK security restrictions).
The PIN code is unique and printed on the PASSWORD label. *It is labeled near the maintenance box insertion slot.
- “PIN Input” is displayed in the left corner of the ID input screen when a PIN code is required.
*This is not displayed in the ID input screen when the ID is required.
- Workflow(Europe models)
- Press and hold the [Home Button] to activate the ID input screen.
- Open the front cover and then, check a PIN code on PASSWORD label.
- Enter a PIN code and press [OK].
- Enter the ID and press [OK].
- Europe models only require entering a PIN code before entering the ID (due to UK security restrictions).
| Note / 補足 |
|