
SCN Board Assy
 Check Point / チェックポイント Check Point / チェックポイント |
|
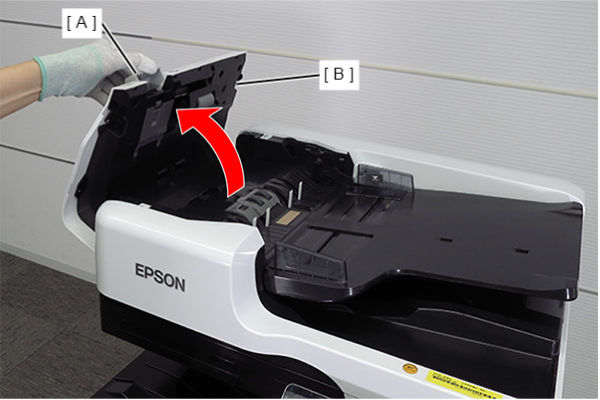
- Open the ADF cover (B) while pulling the lever (A).
- Remove the 6 screws that secure the ADF rear cover (A), and release the 4 hooks.
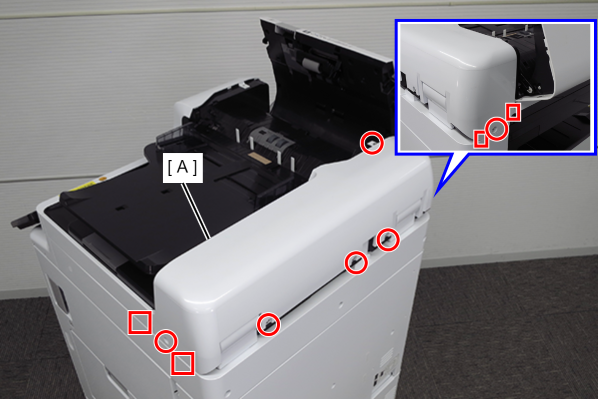
 : 3x10DW
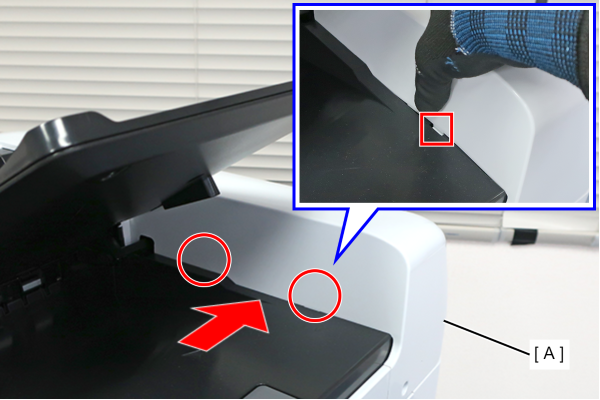
Release the two hooks while pressing the position shown in the figure in the direction of the arrow, and remove the ADF rear cover (A).
 Assembly / 組み立て
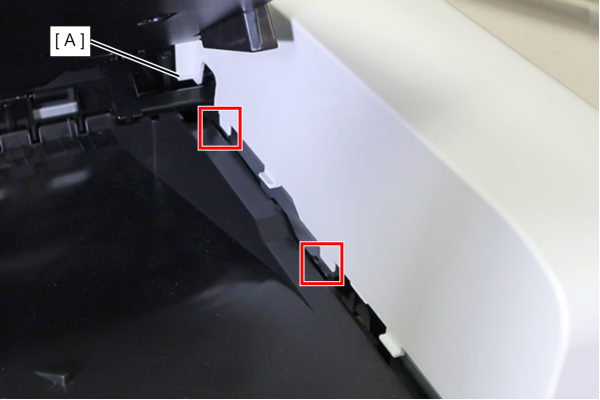
Attach the ADF rear cover (A) by inserting the two tabs into the holes.
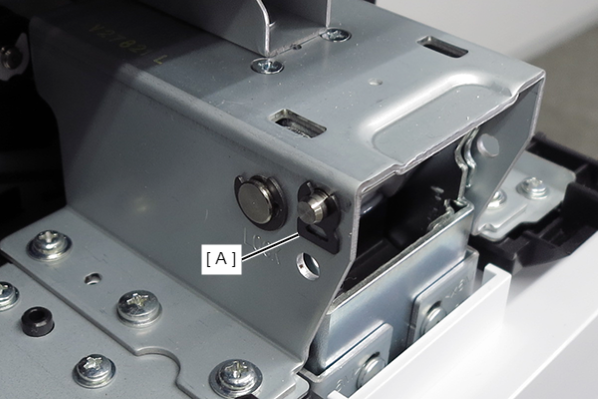
- Remove the C-Ring (A).
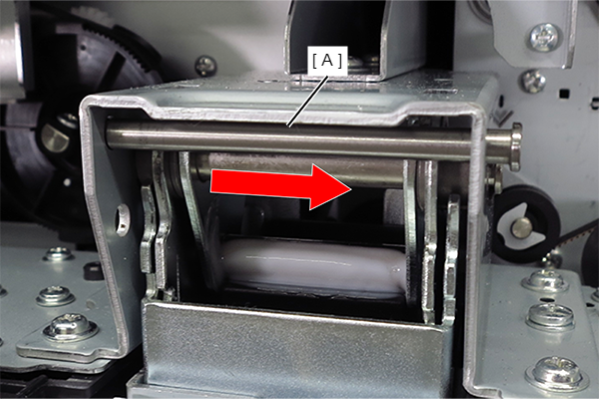
- Pull out the hinge stopper (A) in the direction of the arrow.
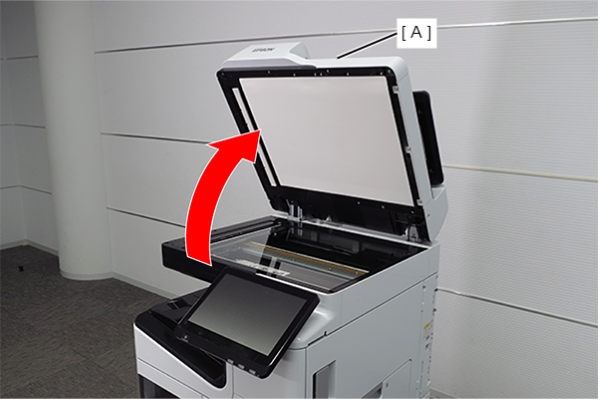
- Open the ADF (A).
- Remove the 2 screws and remove the Panel Upper Cover (A).
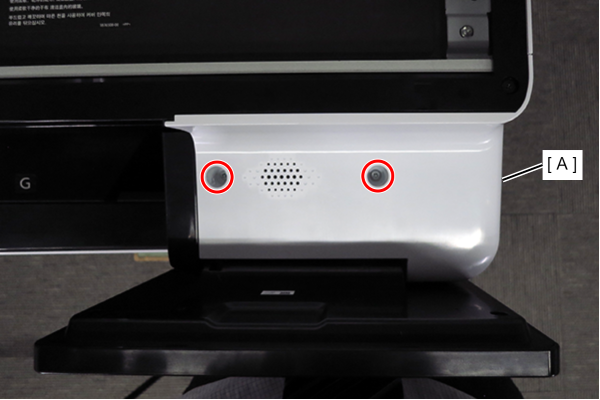
- : 3x10DW
- Remove the 8 screws and remove the SCN upper case (A).
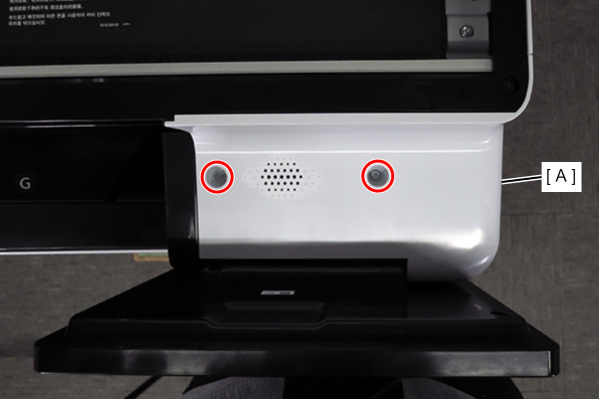
- : 3x5DC/B
- Remove the 2 screws and remove the SCN board cover (A).
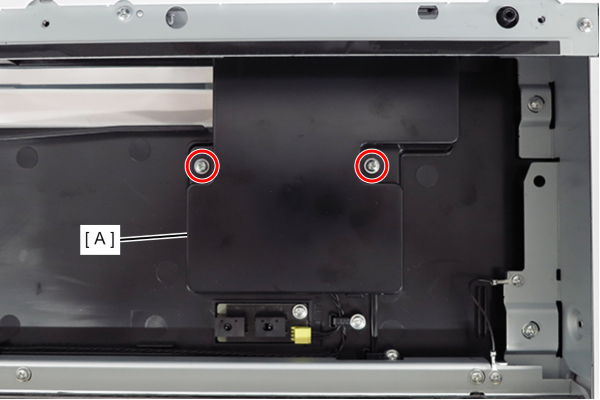
- : 3x8TW
- Remove the 3 screws and remove the SCN rear cover (A) in the direction of the arrow.
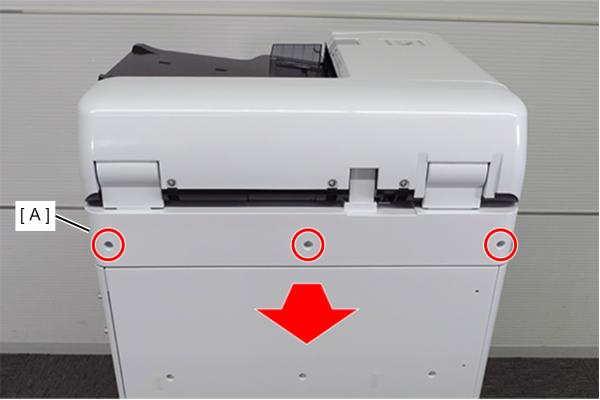
- : 3x10DW
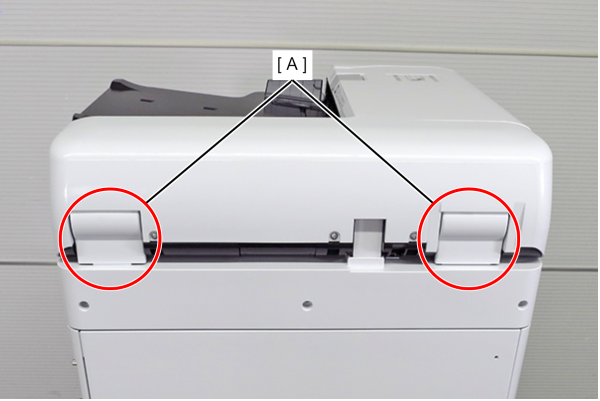
Assembly / 組み立てWhen installing the SCN rear cover, be careful not to get the hinge cover (A) of the ADF unit caught.
- Remove all cables connected to the SCN main board (A) on the rear side.
- Remove the one screw.
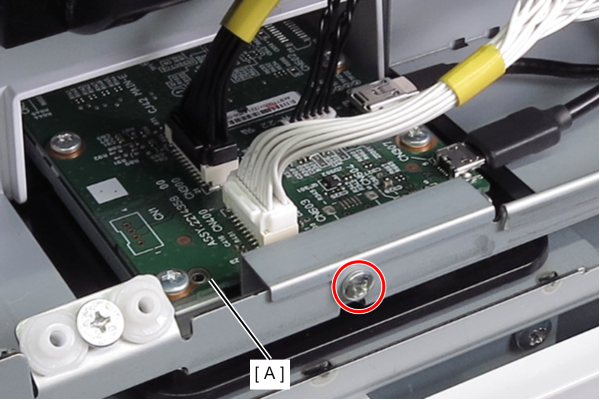
- : 3x8D
- On the front side, release the connector lock and remove FFC (A) from the connector.
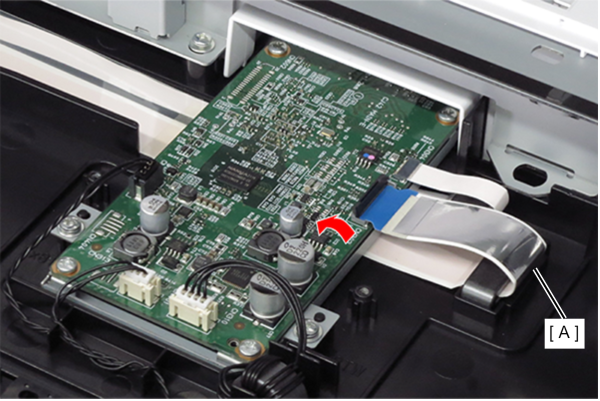
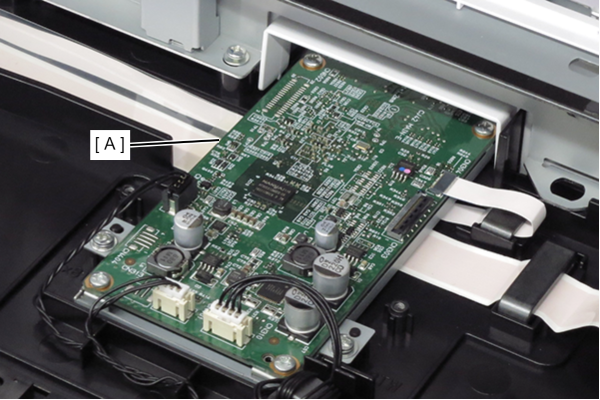
- Remove the remaining FFC and cables connected to the SCN main board (A).
- Remove the two screws and remove the SCN main board Assy (A) from the front.
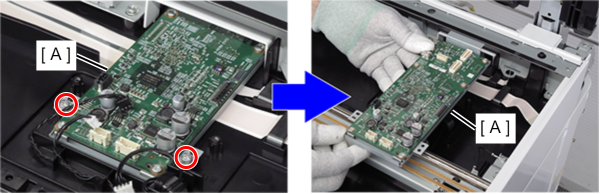
- : 3x6D