
Film
- Remove the 2 screws and remove the Left Cover Upper (A).
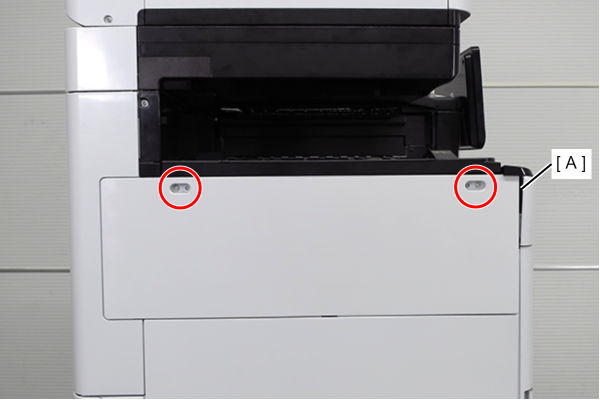
 : 3x10DW
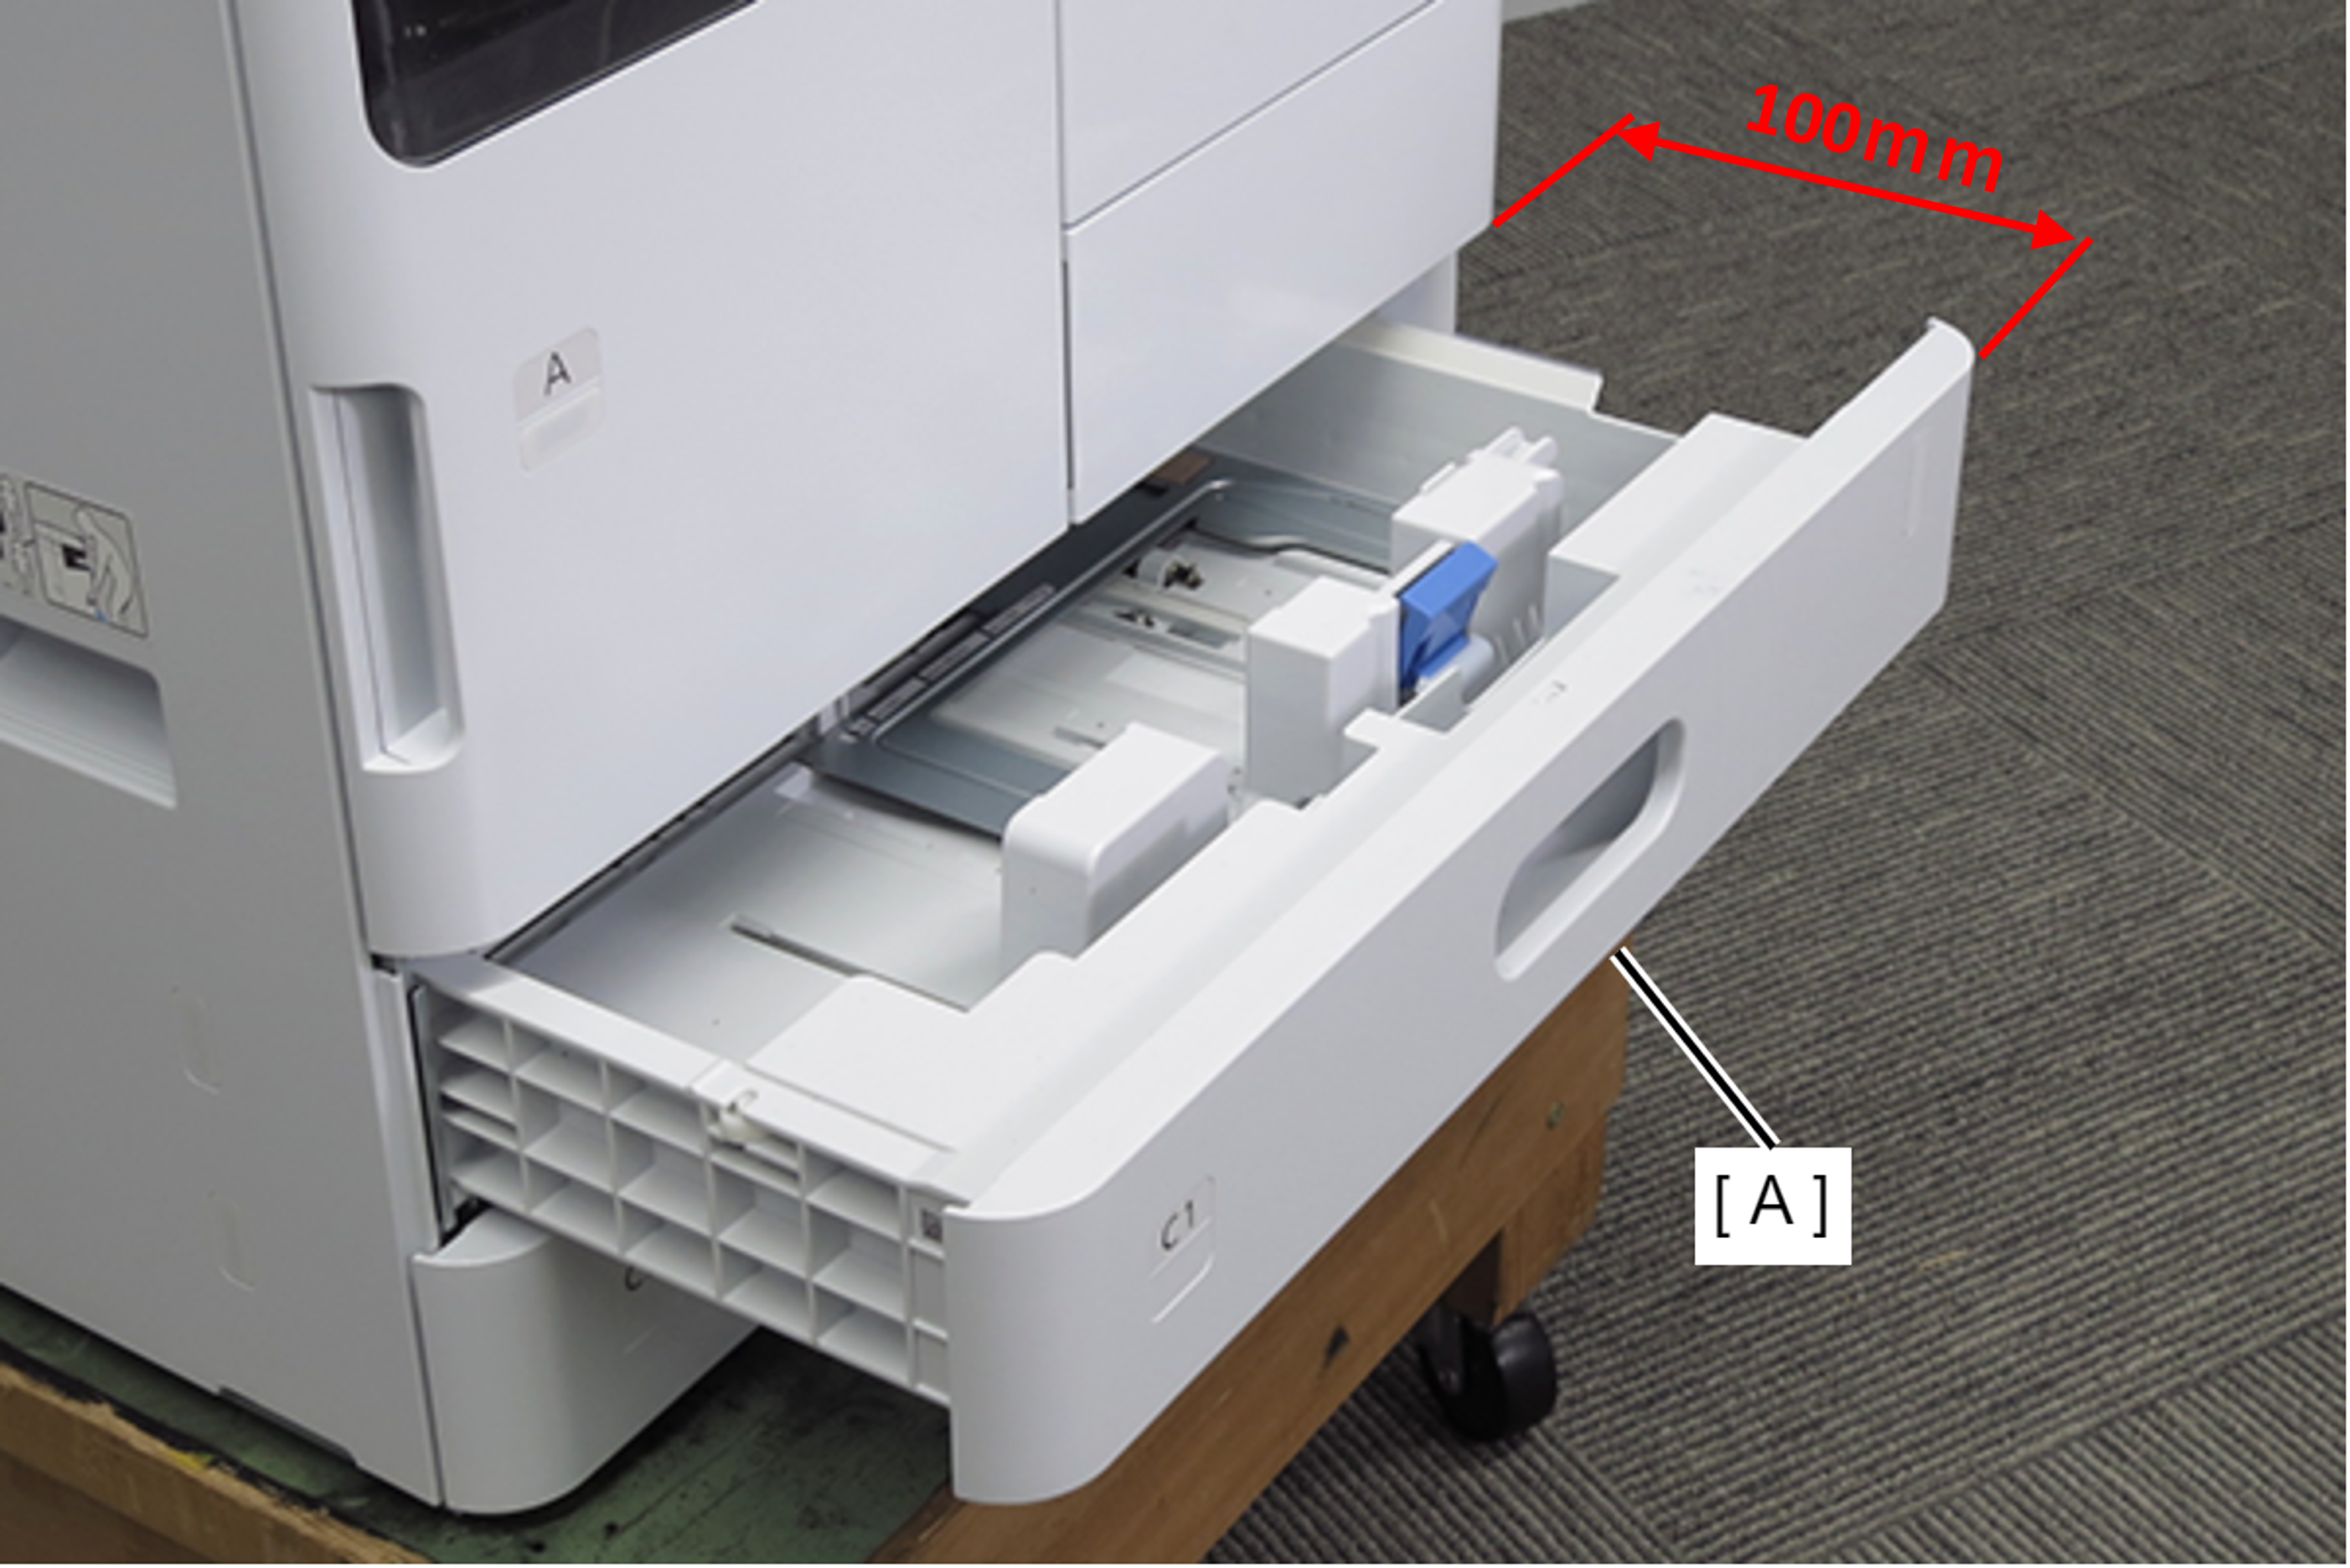
- Pull out the C1 cassette (A). (about 100mm)
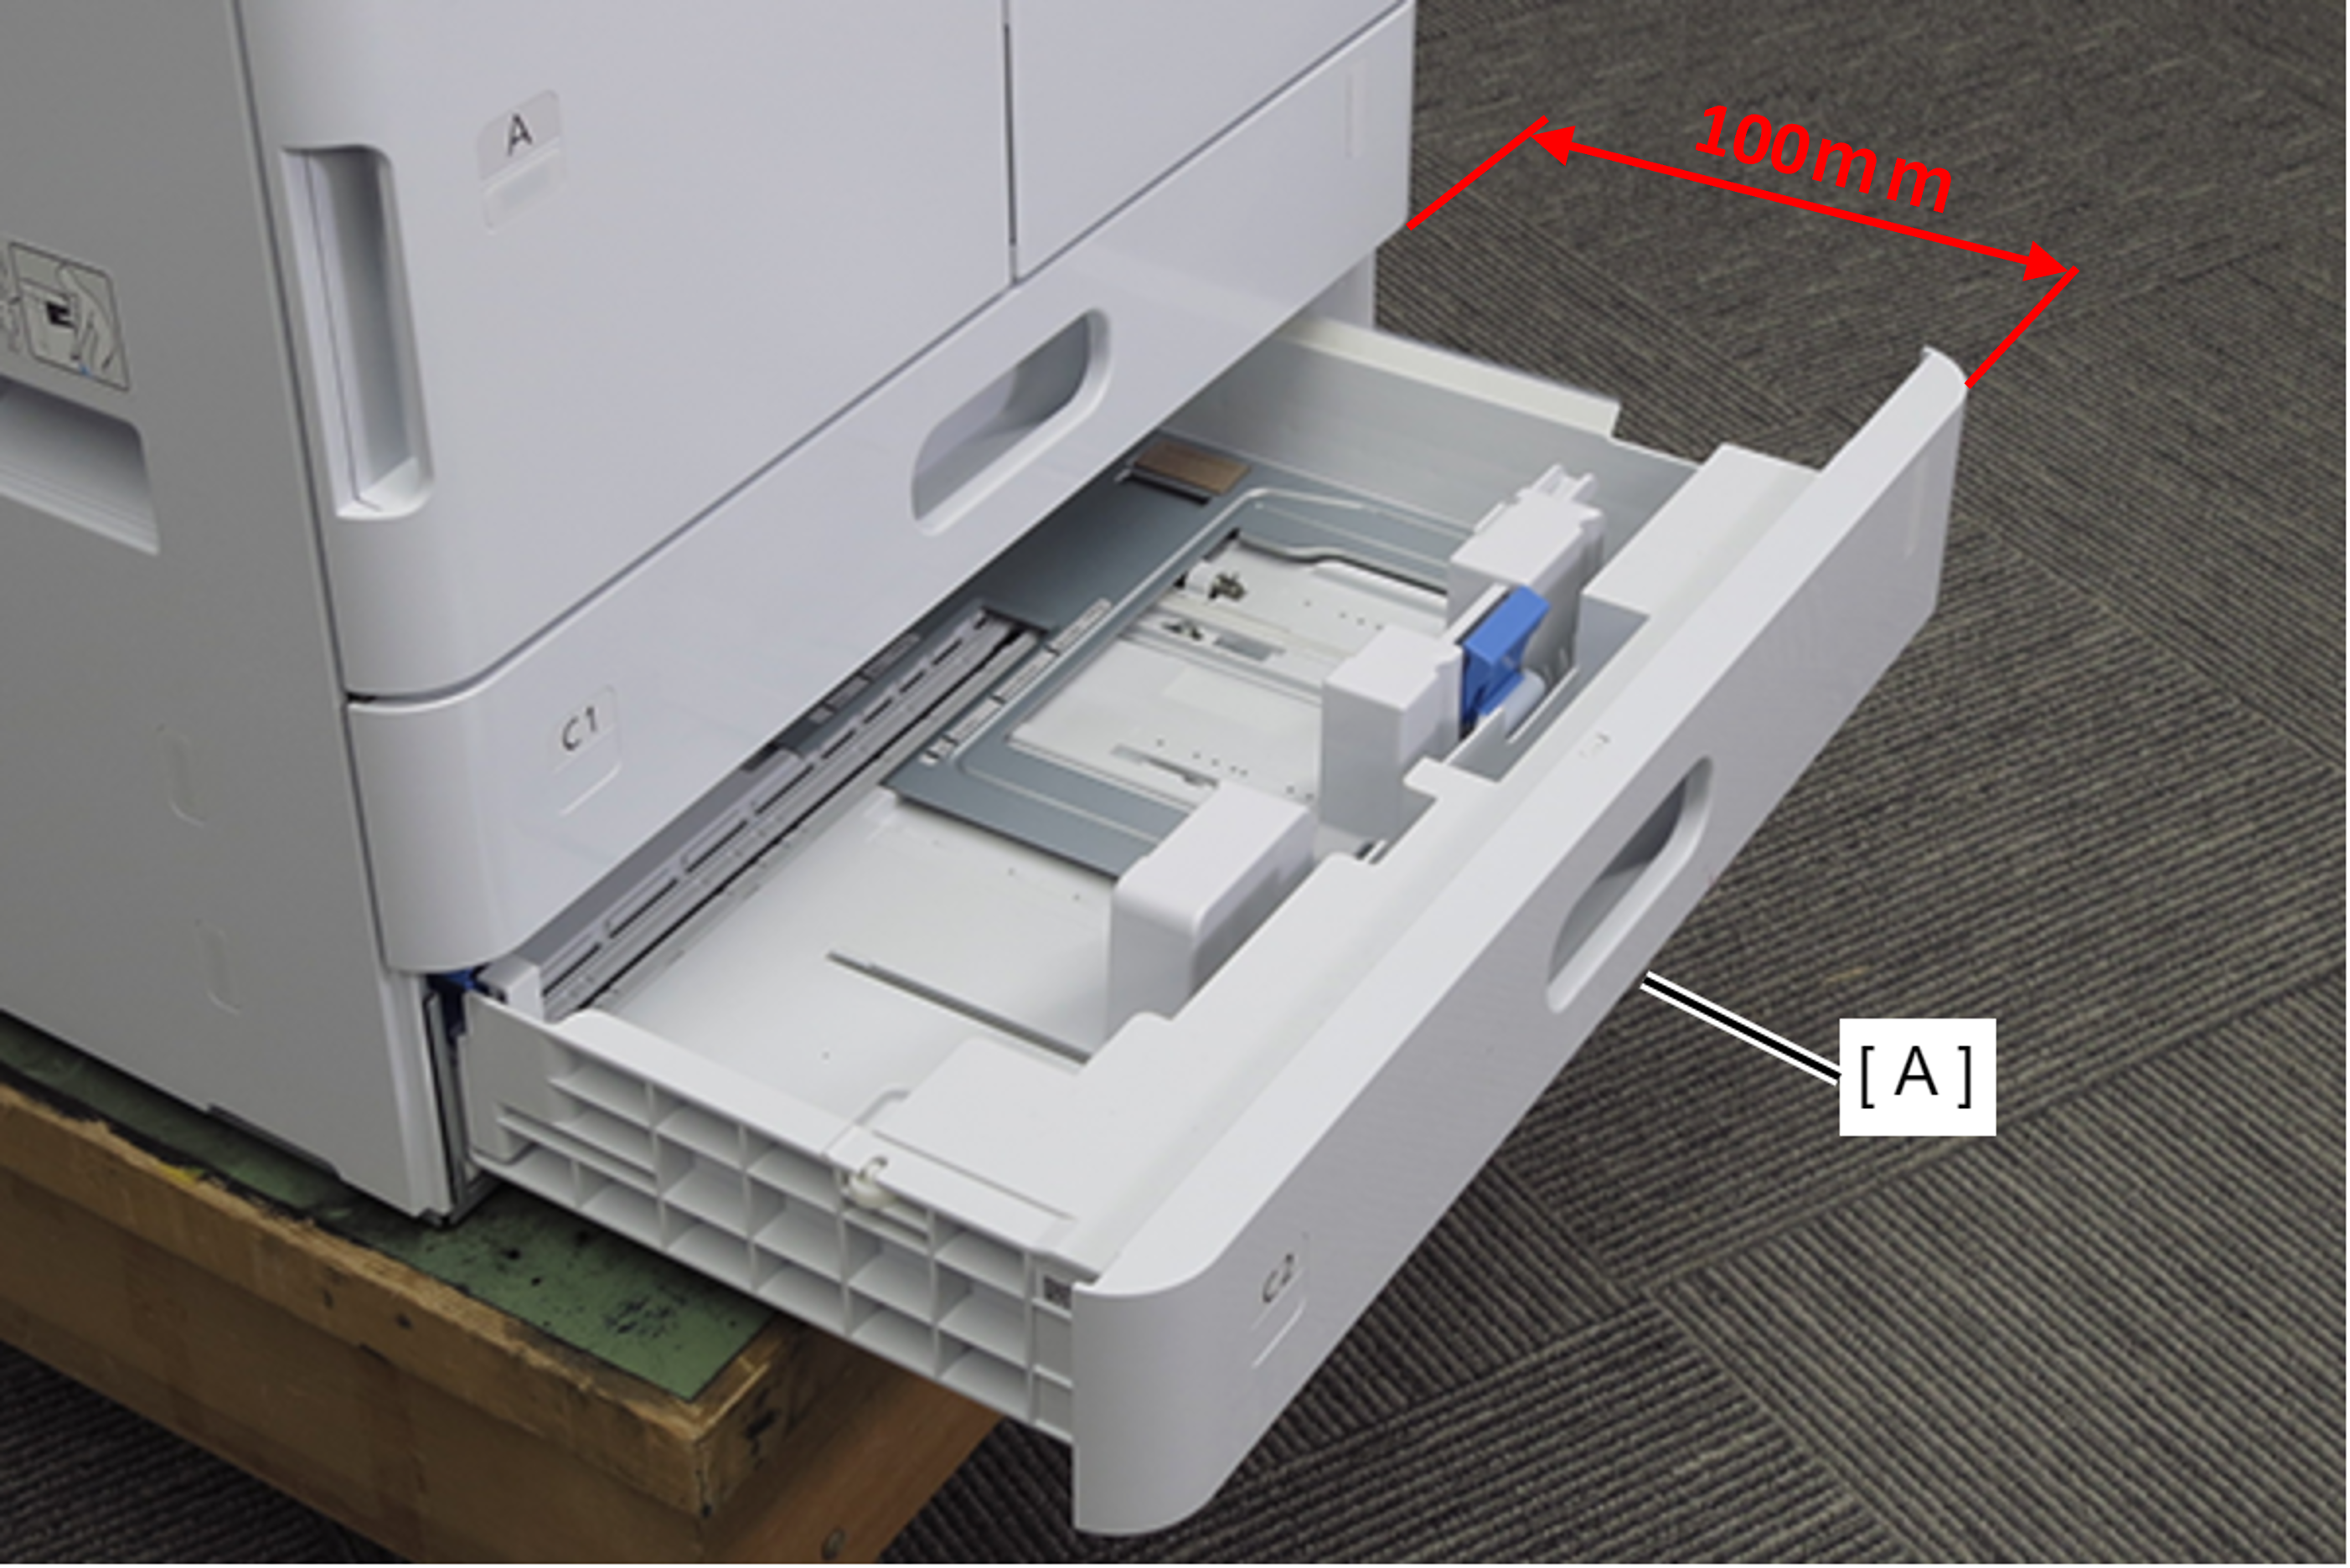
- Pull out the C2 cassette (A). (about 100mm)
- Remove 2 screws and remove the Left Cover Lower (A) in the direction of the arrow.
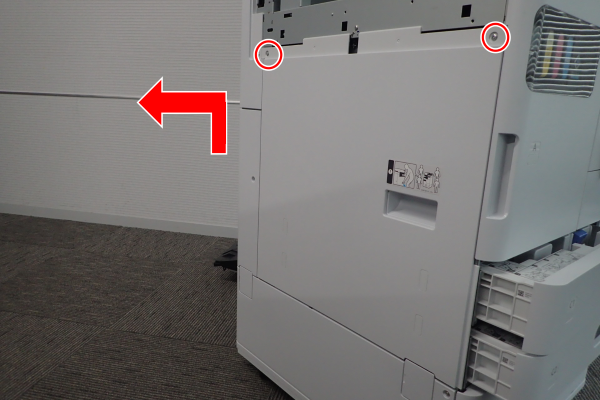
- : 3x10DW
- Remove 1 screw and remove the Left Cover Sub Lower (A) in the direction of the arrow.
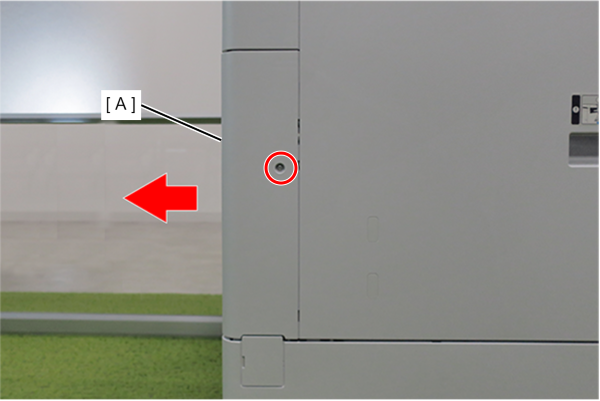
- : 3x10DW
- Open the front cover (A) and remove the Ink Cartridge (A).
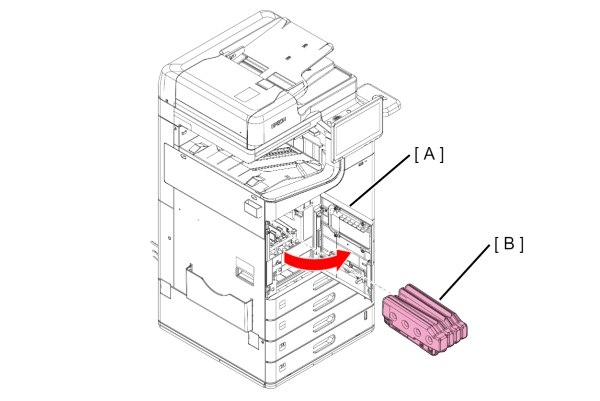
 Caution / 注意
Immediately attach the ink supply port cap (A) to the removed ink cartridge.
If the ink supply port cap is not attached, ink remaining in the supply port may drip. (Ink cartridge )
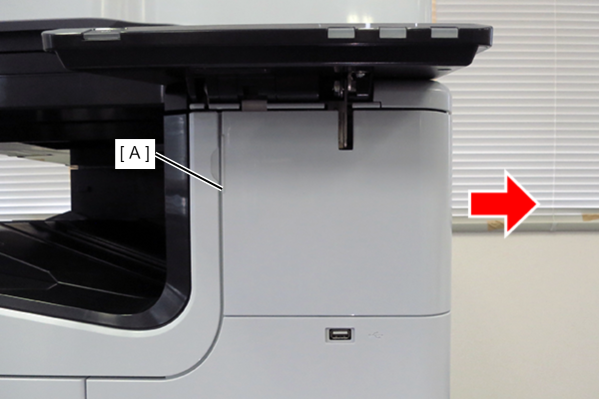
- Slide the front decorative cover upper (A) in the direction of the arrow to remove it.
- Remove one screw, and remove the front cover upper (A) in the direction of the arrow while pressing the hook.
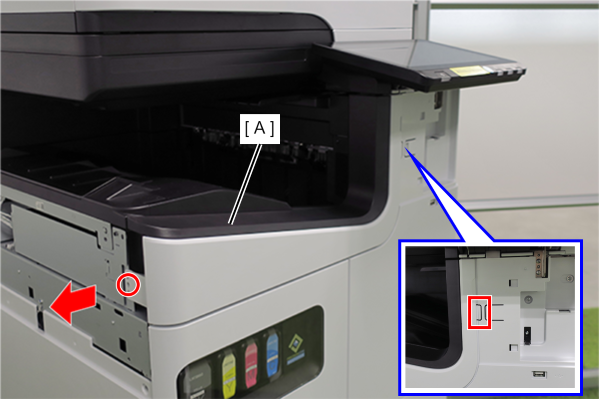
- : 3x10DW
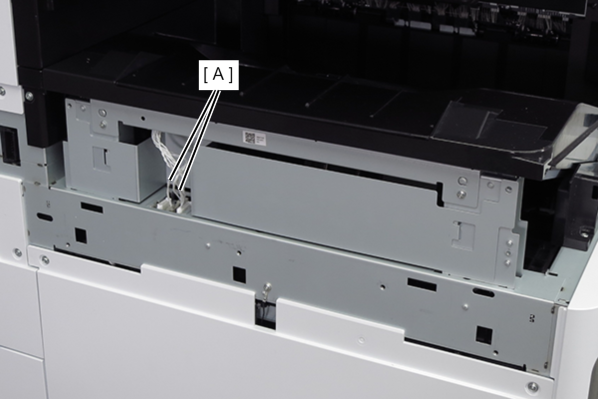
- Remove the two cables (A) from the connectors.
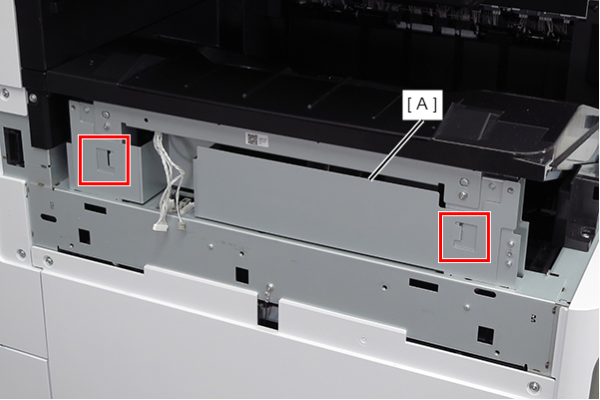
- Lift the FD frame (A), release the two hooks, and remove it to the left side of the product.
- Remove the screw that secures the ground wire (A).
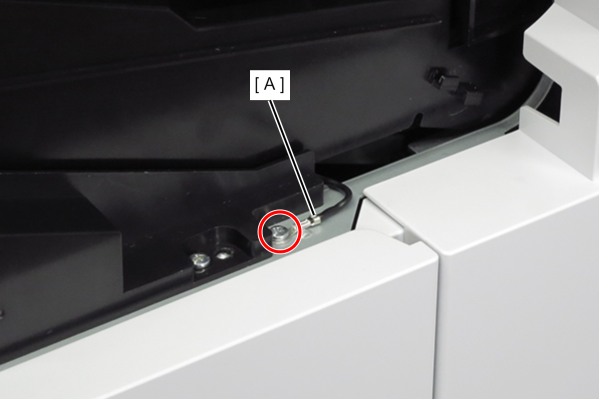
- : 3x8D
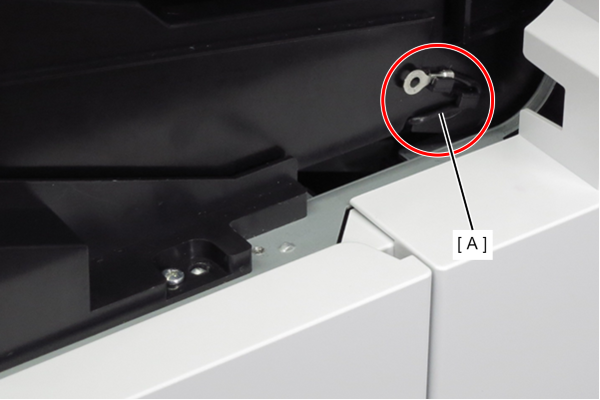
- Route the ground wire (A) around the guide.
- Remove the 4 screws that secure the FD stacker Assy (A).
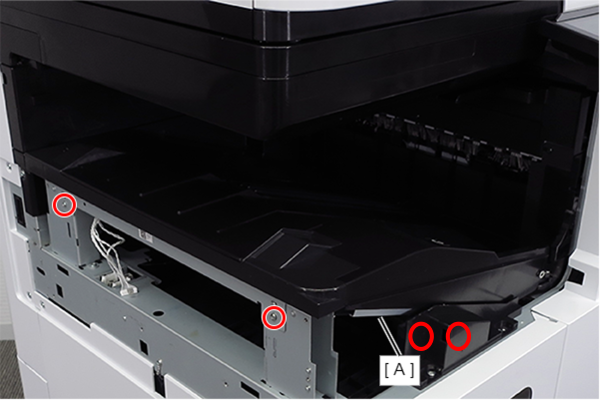
- : 3x8D
- Hold the position shown in the figure and remove the FD stacker Assy (A).
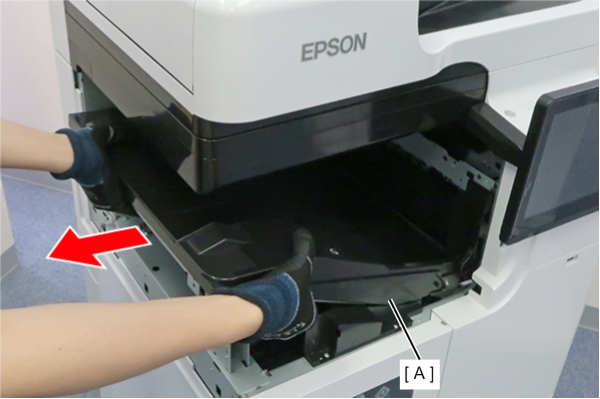
 Assembly / 組み立て
Attach the FD stacker Assy (B) along the rail of the FD stacker guide (A).
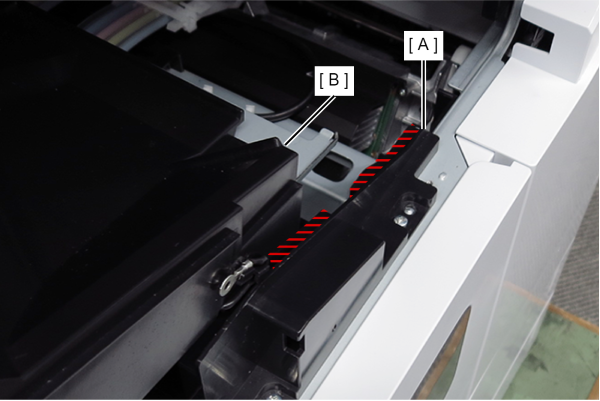
- Remove the 1 screw.
- Remove the FD Frame Support (A) by sliding it in the direction of the arrow.
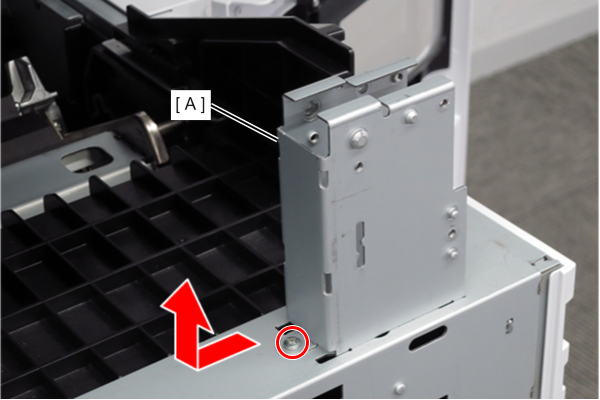
- : 3x8D
- Remove 2 screws and remove the FD Stacker Guide (A).
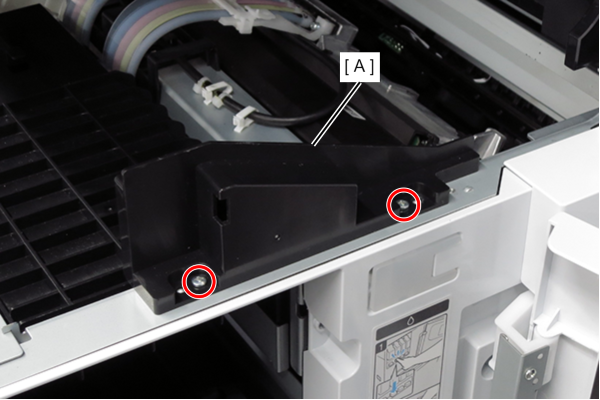
- : 3x8D
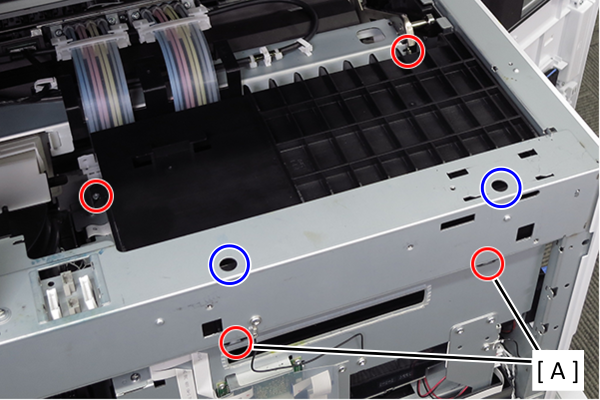
- Loosen the 4 screws (red circles).
 Check Point / チェックポイント
Loosen the 2 screws (A) by inserting a screwdriver through the holes circled in blue.
The screw cannot be removed because it has anti-removal measures.
- Lift the FD cover (A) and remove the FD cover (A) from the two tabs on the frame.
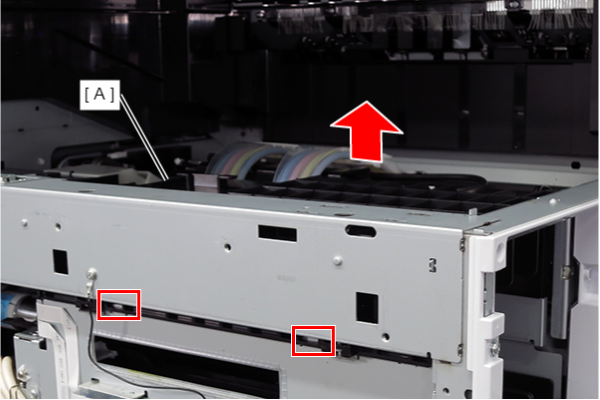
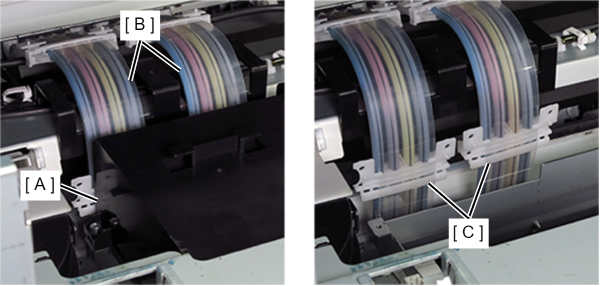
- Lift the FD cover (A) toward the head unit (B) and remove it.
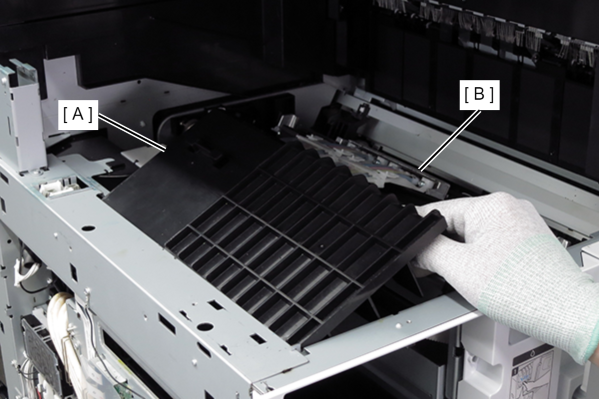 Caution / 注意
When lifting the FD cover (A), be careful not to damage the connecting part (C) of the ink tube (B).
 Assembly / 組み立て
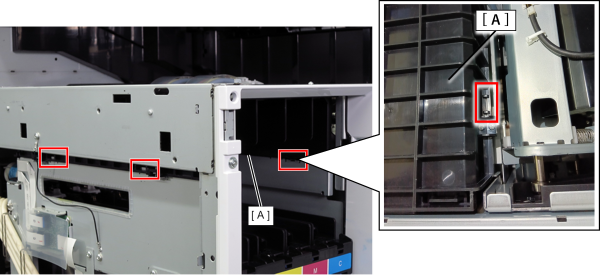
When installing the FD cover (A), make sure that the 3 tabs on the frame are inserted into the FD cover (A).
- Remove 4 screws and remove the Ink Cartridge Front Cover (A).
AM-C6000/5000/4000
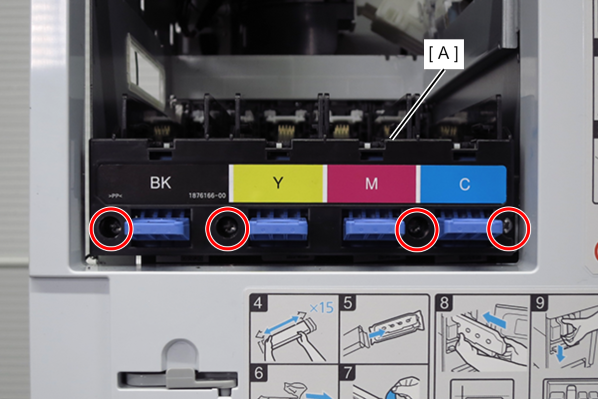
- : 3x8D/BK
AM-M5500
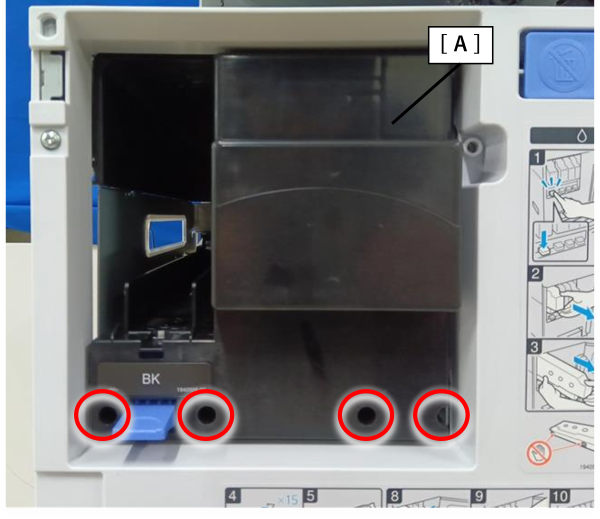
- : 3x8D/BK
- Remove one hook each and remove two tube retainers (A).
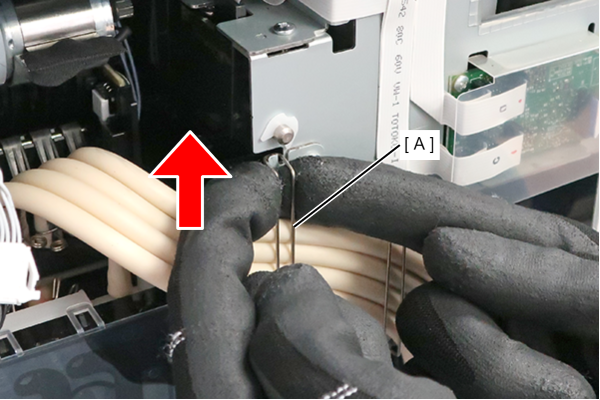
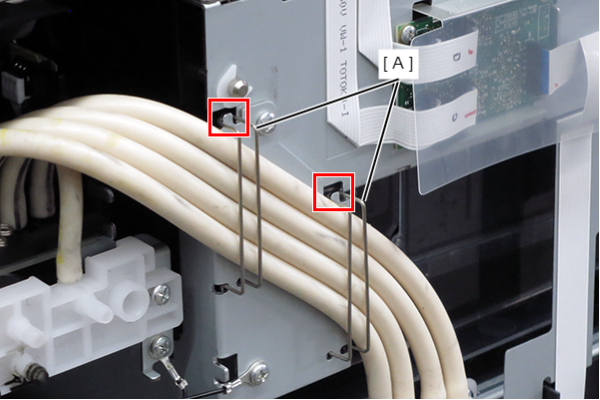 Check Point / チェックポイント
Insert your fingers into the hooks of the tube retainer (A) from the left and right sides and lift it in the direction of the arrow to remove the hooks.
- Remove 2 screws and remove the selector joint (A).
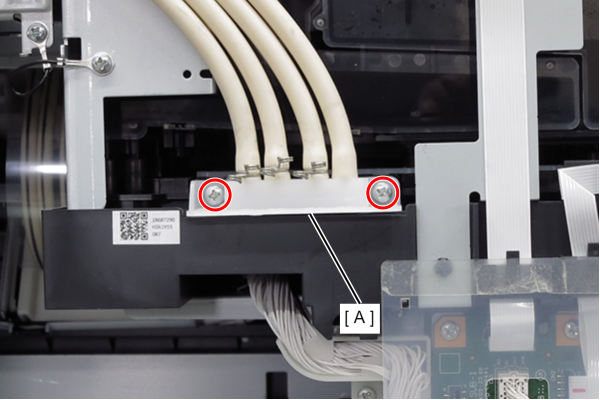
- : 3x14D
- Remove 4 screws and remove the Handle Frame Assy (A) in the direction of the arrow.
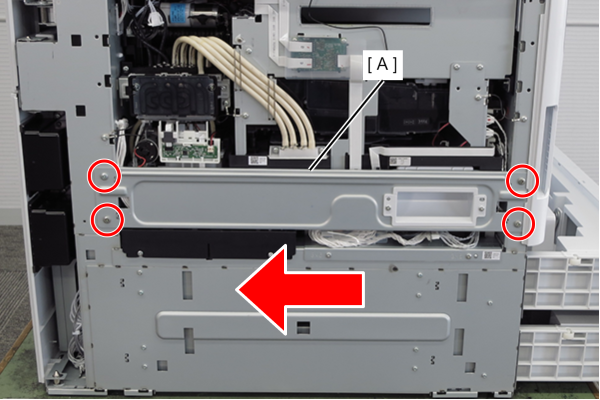
- : 4x8D
- Remove the Film (A).
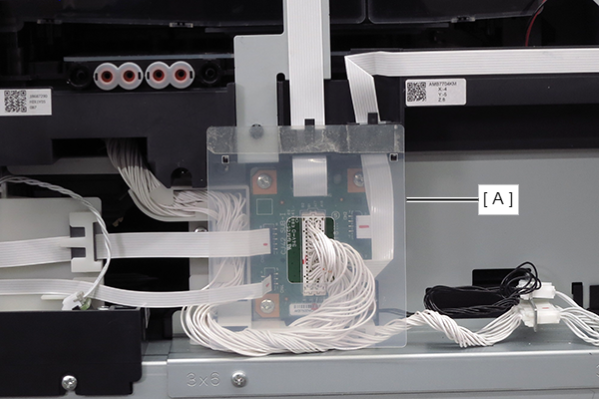 Assembly / 組み立て
If the film (A) is removed, it cannot be reused because the adhesive strength of the double-sided tape weakens.