
Post-Head Paper Guide Assy
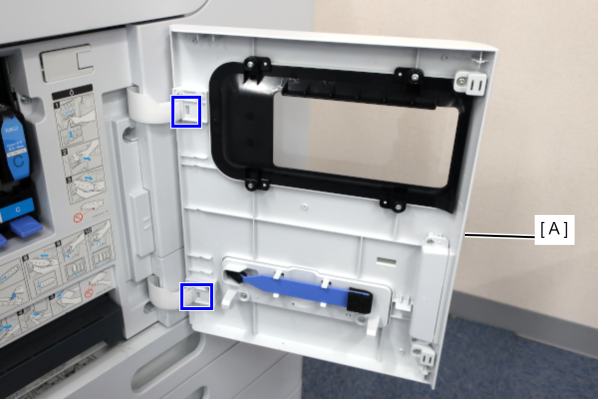
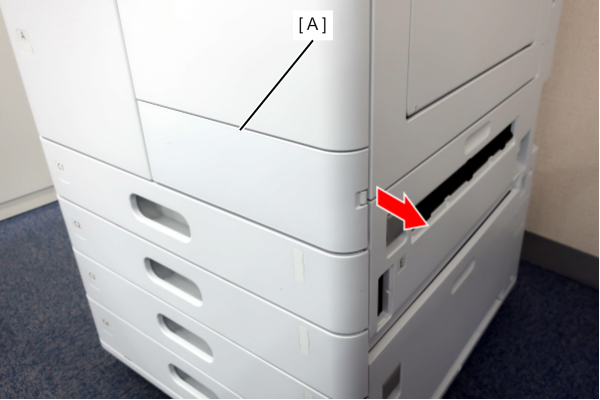
- Release the 2 dowels with a flathead screwdriver and remove the Front Cover (A).
- Remove the 2 screws and remove the Left Cover Upper (A).
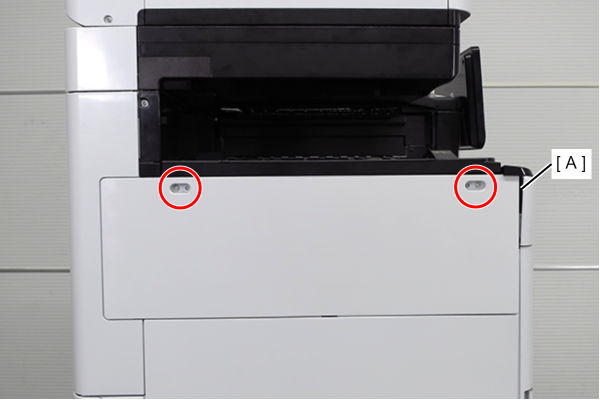
 : 3x10DW
- Remove one screw, and remove the front cover upper (A) in the direction of the arrow while pressing the hook.
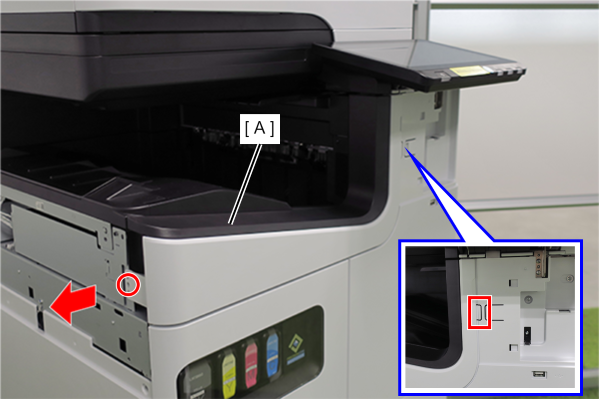
- : 3x10DW
- Slide the front decorative cover upper (A) in the direction of the arrow to remove it.
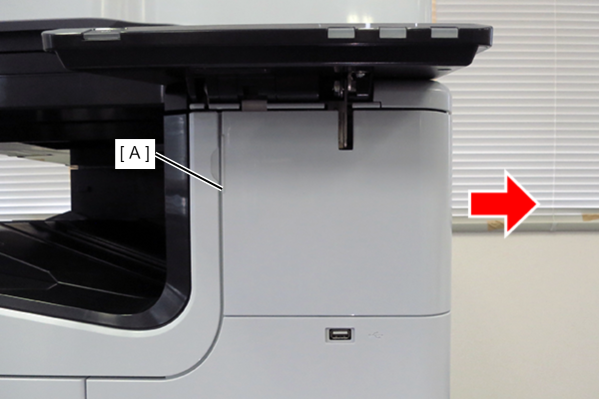
- Release the hook and remove the Front Decorative Cover Lower (A) in the direction of the arrow.
- Remove 6 screws and remove the Front Right Cover (A).
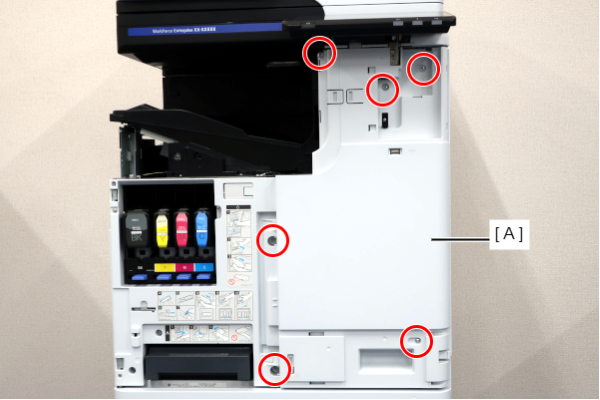
- : 3x10DW/P
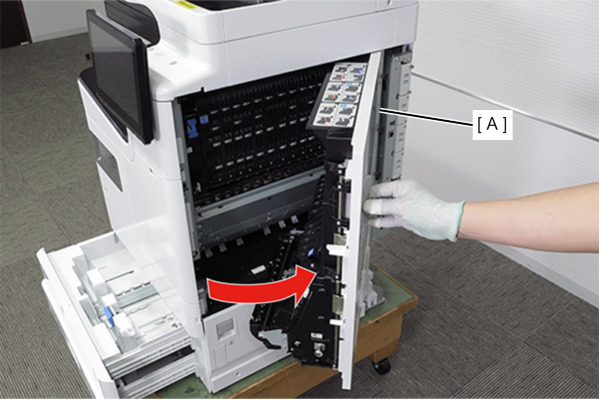
- Pull the lever to open the Right Door Unit (A).
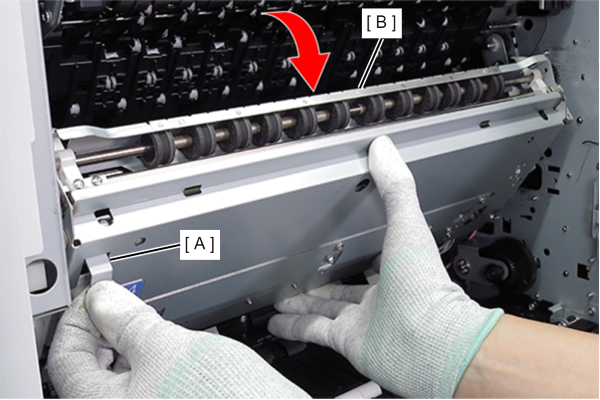
- Pull the lever (A) to open the belt unit (B).
- Pull the lever to open the D3 Unit (A).
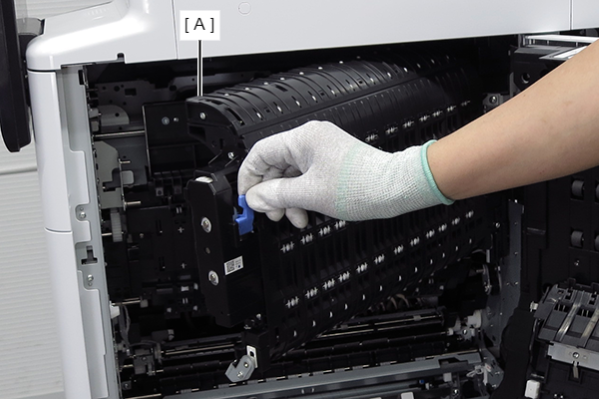
- Follow the steps below to remove the anti static brush connector cover (A).
1.Press and lift the hook (red) to release the dowel (blue).
2. Remove the connector cover (A) from the main unit, avoiding the belt arm (B).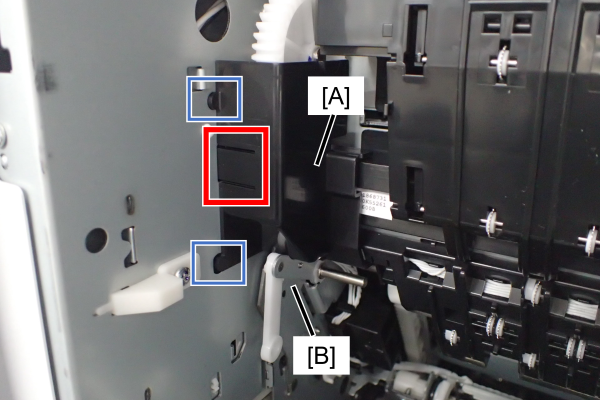
- Release the cable of the Post-Head Paper Guide Assy (A) from the clamp (B) and remove from the connector (C).
- Remove the screw that fixing the Post-Head Paper Guide Assy (A).
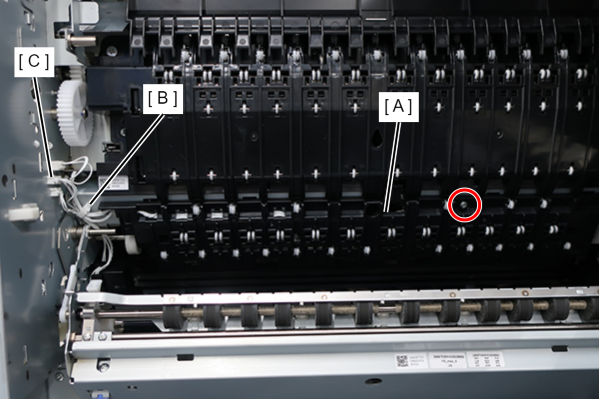
- : 3x8D/P
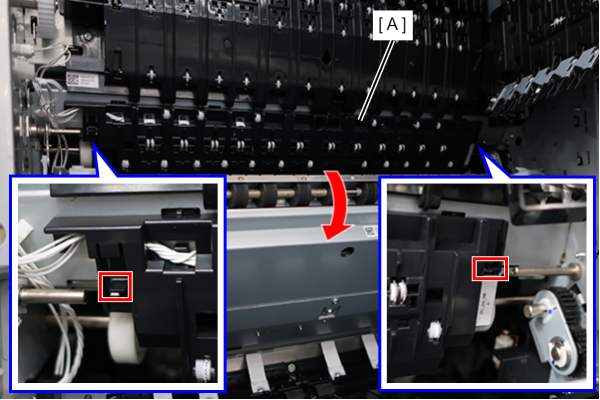
- Release the left and right hooks, and remove the Post-Head Paper Guide Assy (A) in the direction of the arrow.
 Assembly / 組み立て
Assemble it following these steps.:
1. Insert the two protrusions on the back of the Post-Head Paper Guide Assy (A) into the lower edge of the main frame (B).
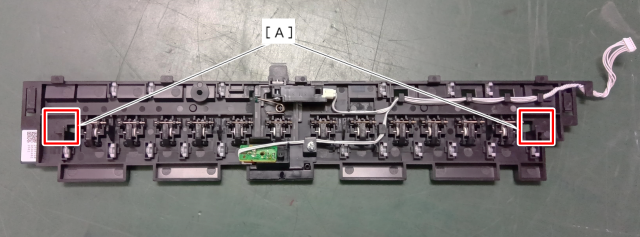
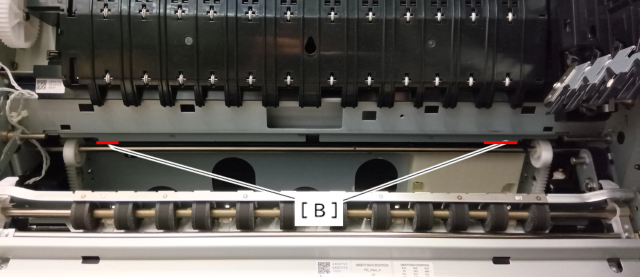
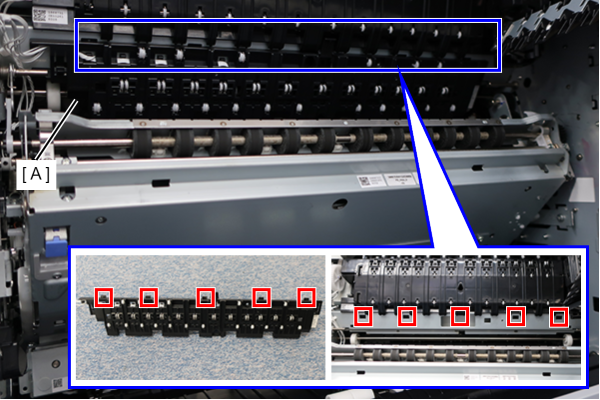
2.While maintaining the position from Step 1, insert the five protrusions of the Post-Head Paper Guide Assy (A) into the five positioning holes on the main frame (B) to secure it.
 Caution / 注意
- Lift the lower section of the Post-Head Paper Guide Assy (A) with your fingers and confirm that both ends do not rise.
- If either end is raised, it may result in paper jams or belt surface damage.