
SDL Folding Option-related - After replacement
 Check Point / チェックポイント Check Point / チェックポイント |
||||||
When this menu is executed, the following menu is automatically executed.
|
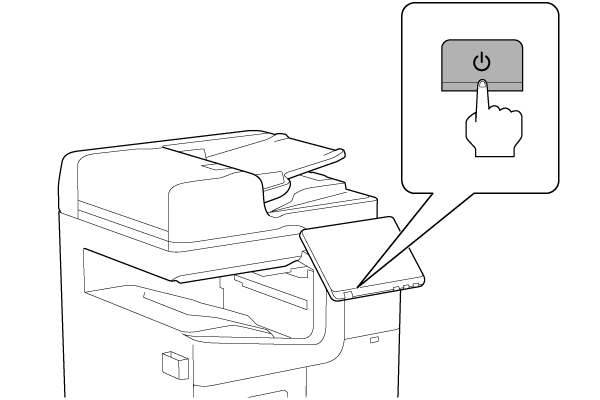
- Turn the power ON.
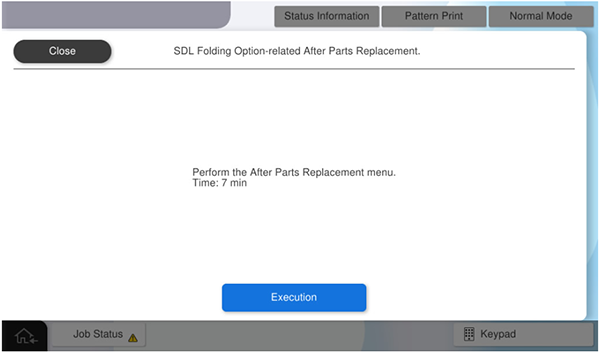
- Press [Execution].
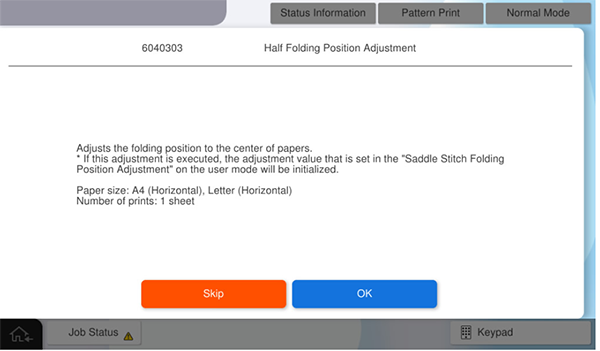
- Press [OK].
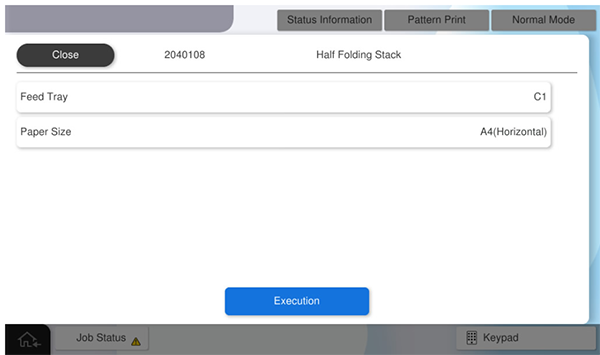
- Press [Pattern Print].
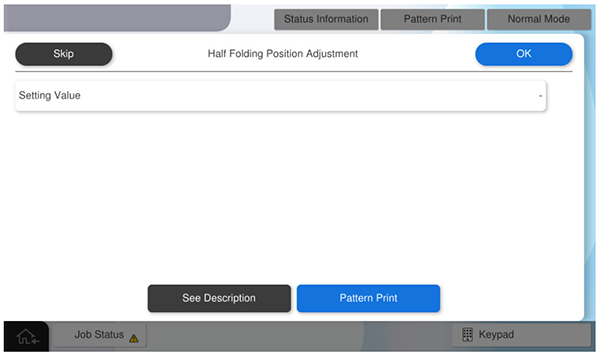
- Press each setting item button to make the print settings.
The parameters that can be set are as follows.Setting Items Selection Feed Tray C1, C2, C3, C4, Paper Tray Available Paper Sizes A4 (Horizontal), Letter (Horizontal)  Caution / 注意
Make sure the paper orientation is as specified (SEF/Horizontal).
If the orientation is different from the specifications (LEF/Vertical), the paper will be ejected without being processed correctly and the operation cannot be checked.
- Press [Execution] to output the adjustment sample.
- Place the adjustment sample with the mark on the bottom.
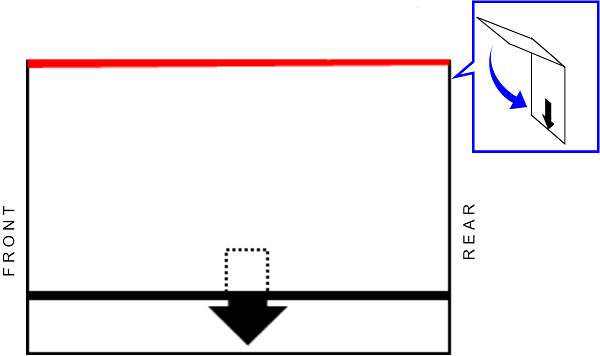
- Measure the distance between the reference edge and the other end edge. (Measurements should be taken in the center position.)
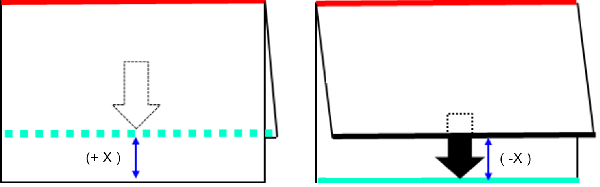
Convert the measurement results to adjustment values.
Check Point / チェックポイントThe conversion method from the measurement result to the adjustment value is as follows.
- Adjustment value calculation
Adjustment value calculation method: Adjustment value = measurement result × 10 - Determination of the sign of the adjustment value from the state of the reference side of the adjustment sample
-
- Reference side not visible: positive adjustment value
- Reference side visible: negative adjustment value
Example) If the reference side of the adjustment sample cannot be seen and is deviated by 3.5 mm, the adjustment value = +35
- Adjustment value calculation
Press [Setting value] and enter the calculated adjustment value.
Check Point / チェックポイントAdjustment value input range: -96 ~ 96 (-9.6 mm ~ 9.6 mm)
Numerical values outside the adjustment value input range cannot be entered.
- Press [Pattern Print] to apply the adjustment values and output an adjustment sample.
- Check the adjustment sample, and if the folding position misalignment is improved, press [Skip] to proceed to the next step.
If the misalignment of the folding position is not improved, repeat the adjustment. - Press [OK].
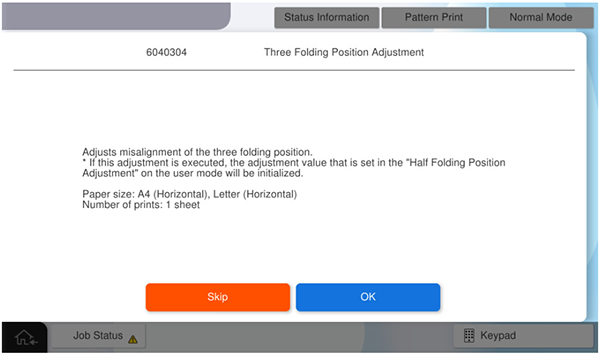
- Press [Pattern Print].
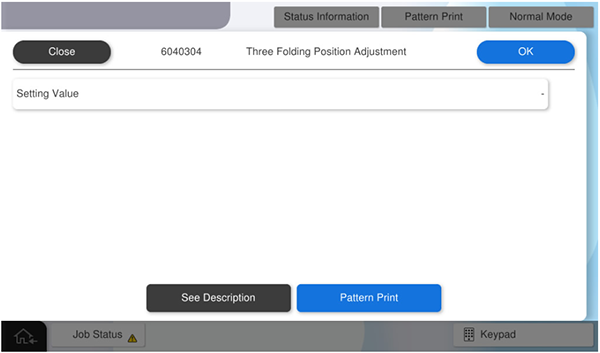
- Press each setting item button to make the print settings.
The parameters that can be set are as follows.Setting Items Selection Feed Tray C1, C2, C3, C4, Paper Tray Available Paper Sizes A4 (Horizontal), Letter (Horizontal) Number of sheets 1~3 - Press [Execute] to output the adjustment sample.
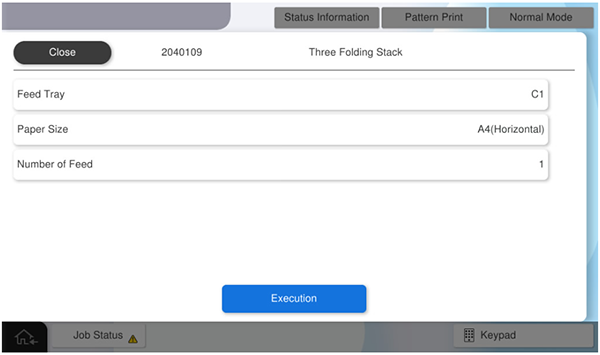
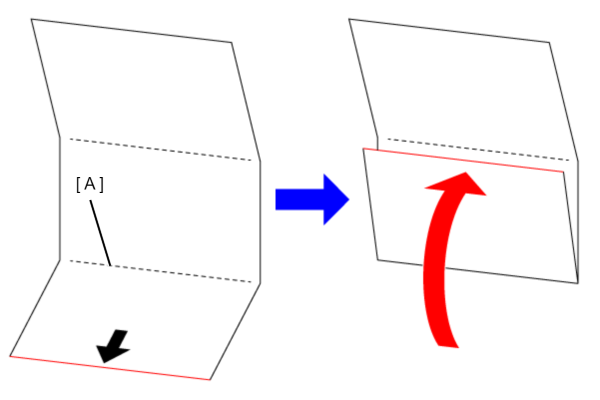
- Open the adjustment sample and place it with the mark facing down.
- Fold the adjusted sample along the bottom fold line (A).
- The edge of the paper on which the mark is printed is used as the reference edge, and the distance between the reference edge and the upper folding line (B) is measured.
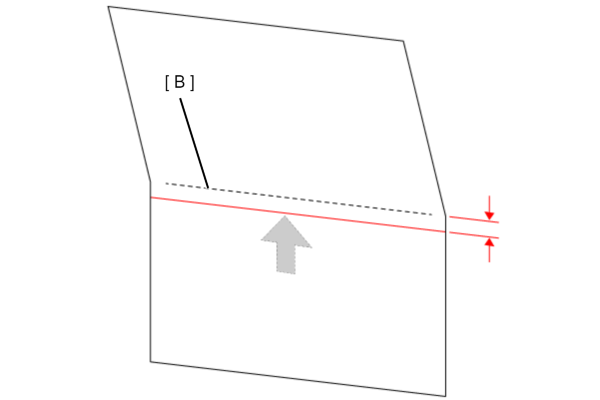
Convert the measurement results to adjustment values.
Check Point / チェックポイントThe conversion method from the measurement result to the adjustment value is as follows.
Adjustment value calculation
Adjustment value calculation method: Adjustment value = measurement result × 10Example) If the measurement result is 4.0 mm, the adjustment value = 40
Press [Setting value] and enter the calculated adjustment value.
Check Point / チェックポイントAdjustment value input range: 38 ~ 118 (3.8 mm ~ 11.8 mm)
Numerical values outside the adjustment value input range cannot be entered.
- Press [Pattern Print] to apply the adjustment values and output an adjustment sample.
- Check the adjustment sample, and if the folding position misalignment is improved, press [Skip] to finish the adjustment.
If the misalignment of the folding position is not improved, repeat the adjustment.