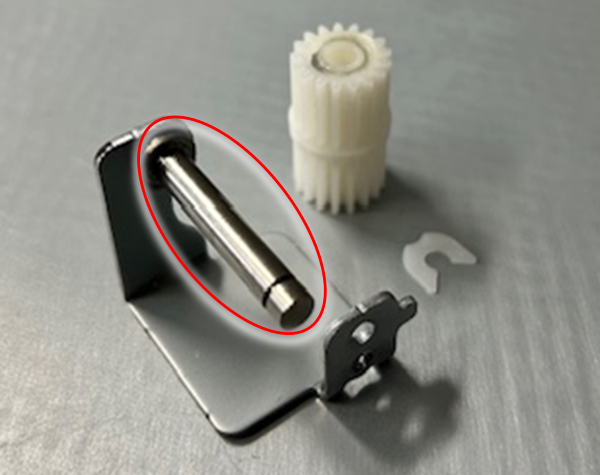
Additional cassette drive plate Assy
- Refer to the following and remove the Additional Cassette Unit from the printer main unit.
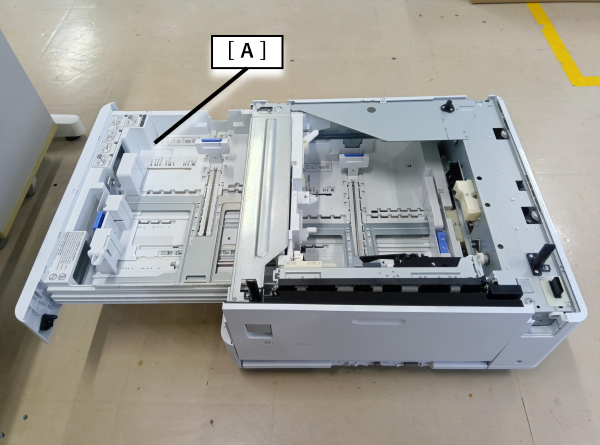
Additional Cassette Unit Installation Procedure - Pull out the C3 cassette (A).
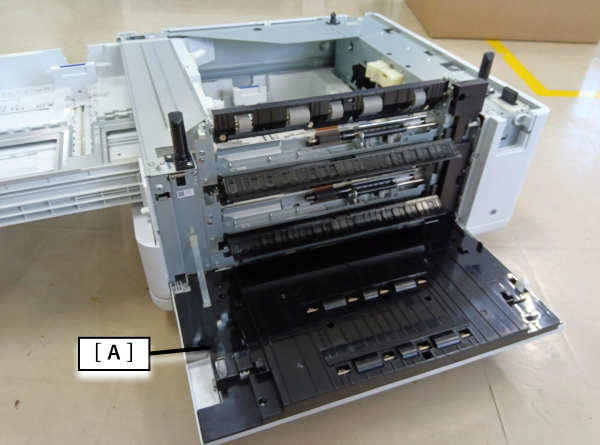
- Open the H3 Cover (A).
- Remove 1 screw.
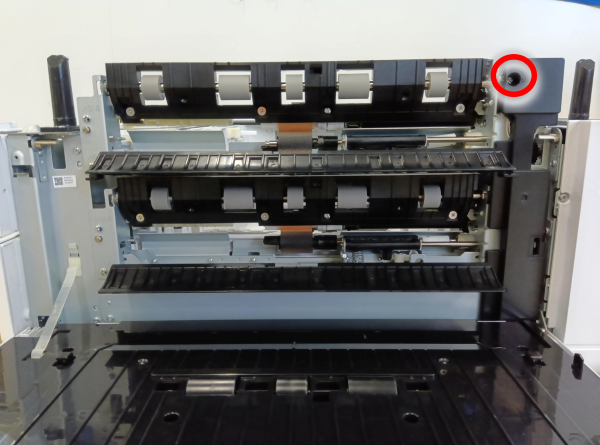
 : 3x8D
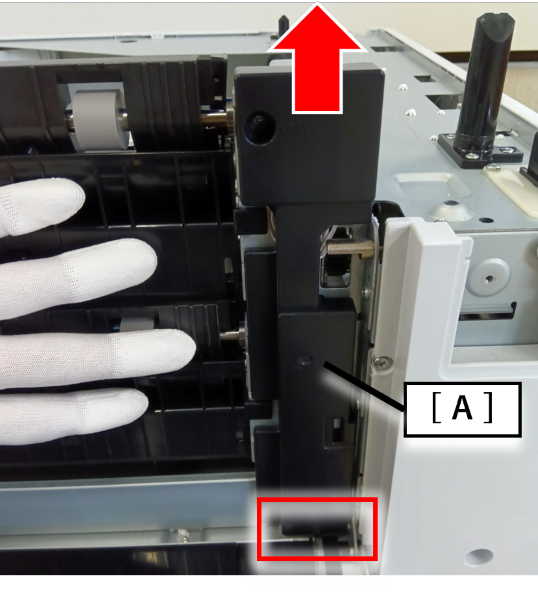
- While holding the flap of the C3, C4 pickup unit with hand, remove the right cover (A) in the direction of the arrow.
- Remove 4 screws.
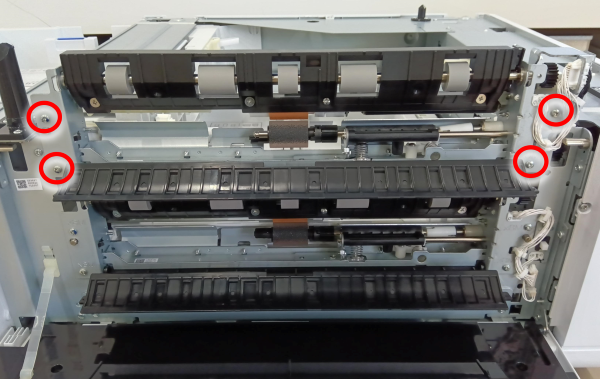
- : 3x8D
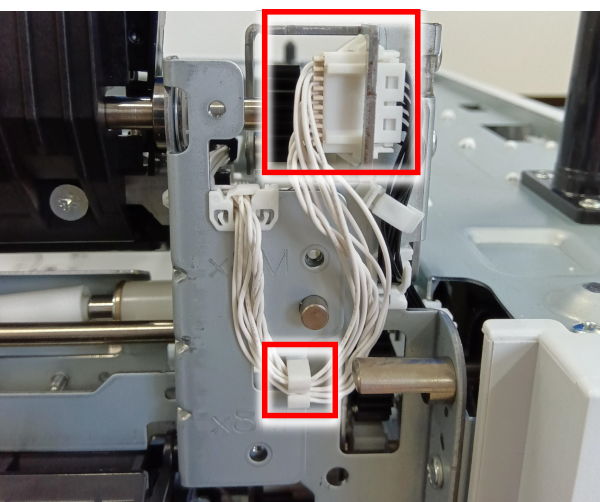
- Remove the cable (A) from the relay connector and release them from the clamp.
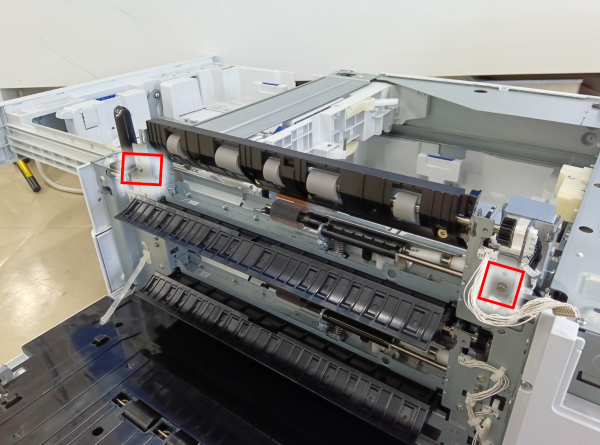
- Release the positioning pin and remove the C3 pickup unit.
 Caution / 注意
- When replacing the C3 pickup unit, be careful not to damage the paper detection lever (A) of the C3 pickup unit.
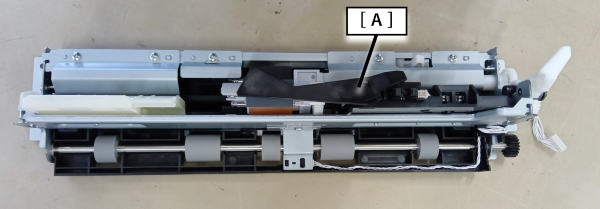
- When replacing the C3 pickup unit, be careful not to damage the paper detection lever (A) of the C3 pickup unit.
- Remove 1 screw.
- Remove additional cassette drive plate Assy (A).
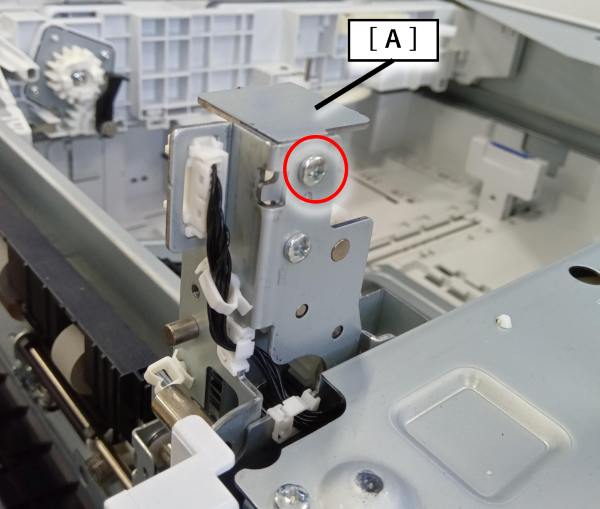
- : 3x8D/P
 Assembly / 組み立て
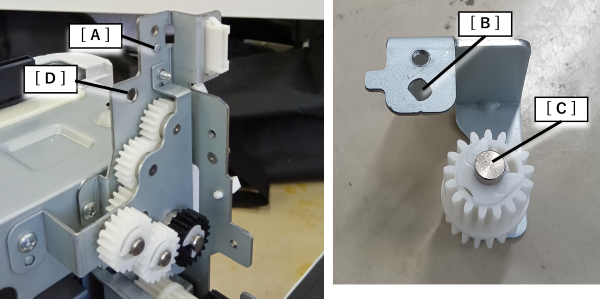
- When assembling, insert the dowel (A) of the plate of the additional cassette into the hole (B) of the additional cassette drive plate Assy, and then assemble by inserting the shaft (C) of the additional cassette drive plate Assy into the hole (D) of the plate of the additional cassette.
 Lubrication / 注油
- The ASP of additional cassette drive plate Assy is supplied as a set consisting of additional cassette drive plate, gears, and plastic E-rings.
When replacing, Lubrication the shaft of the additional cassette drive plate, and assemble the additional cassette drive plate Assy in the following order: gear, resin E-ring.
There is no direction for inserting the gears.