
6040102 FIN Shift HP Adjustment
Adjust the shift arm width of the floor finisher, and improve paper discharge processing problems (misalignment, paper damage) during shift stack.
 Caution / 注意 Caution / 注意 |
|
- Start the service support mode.

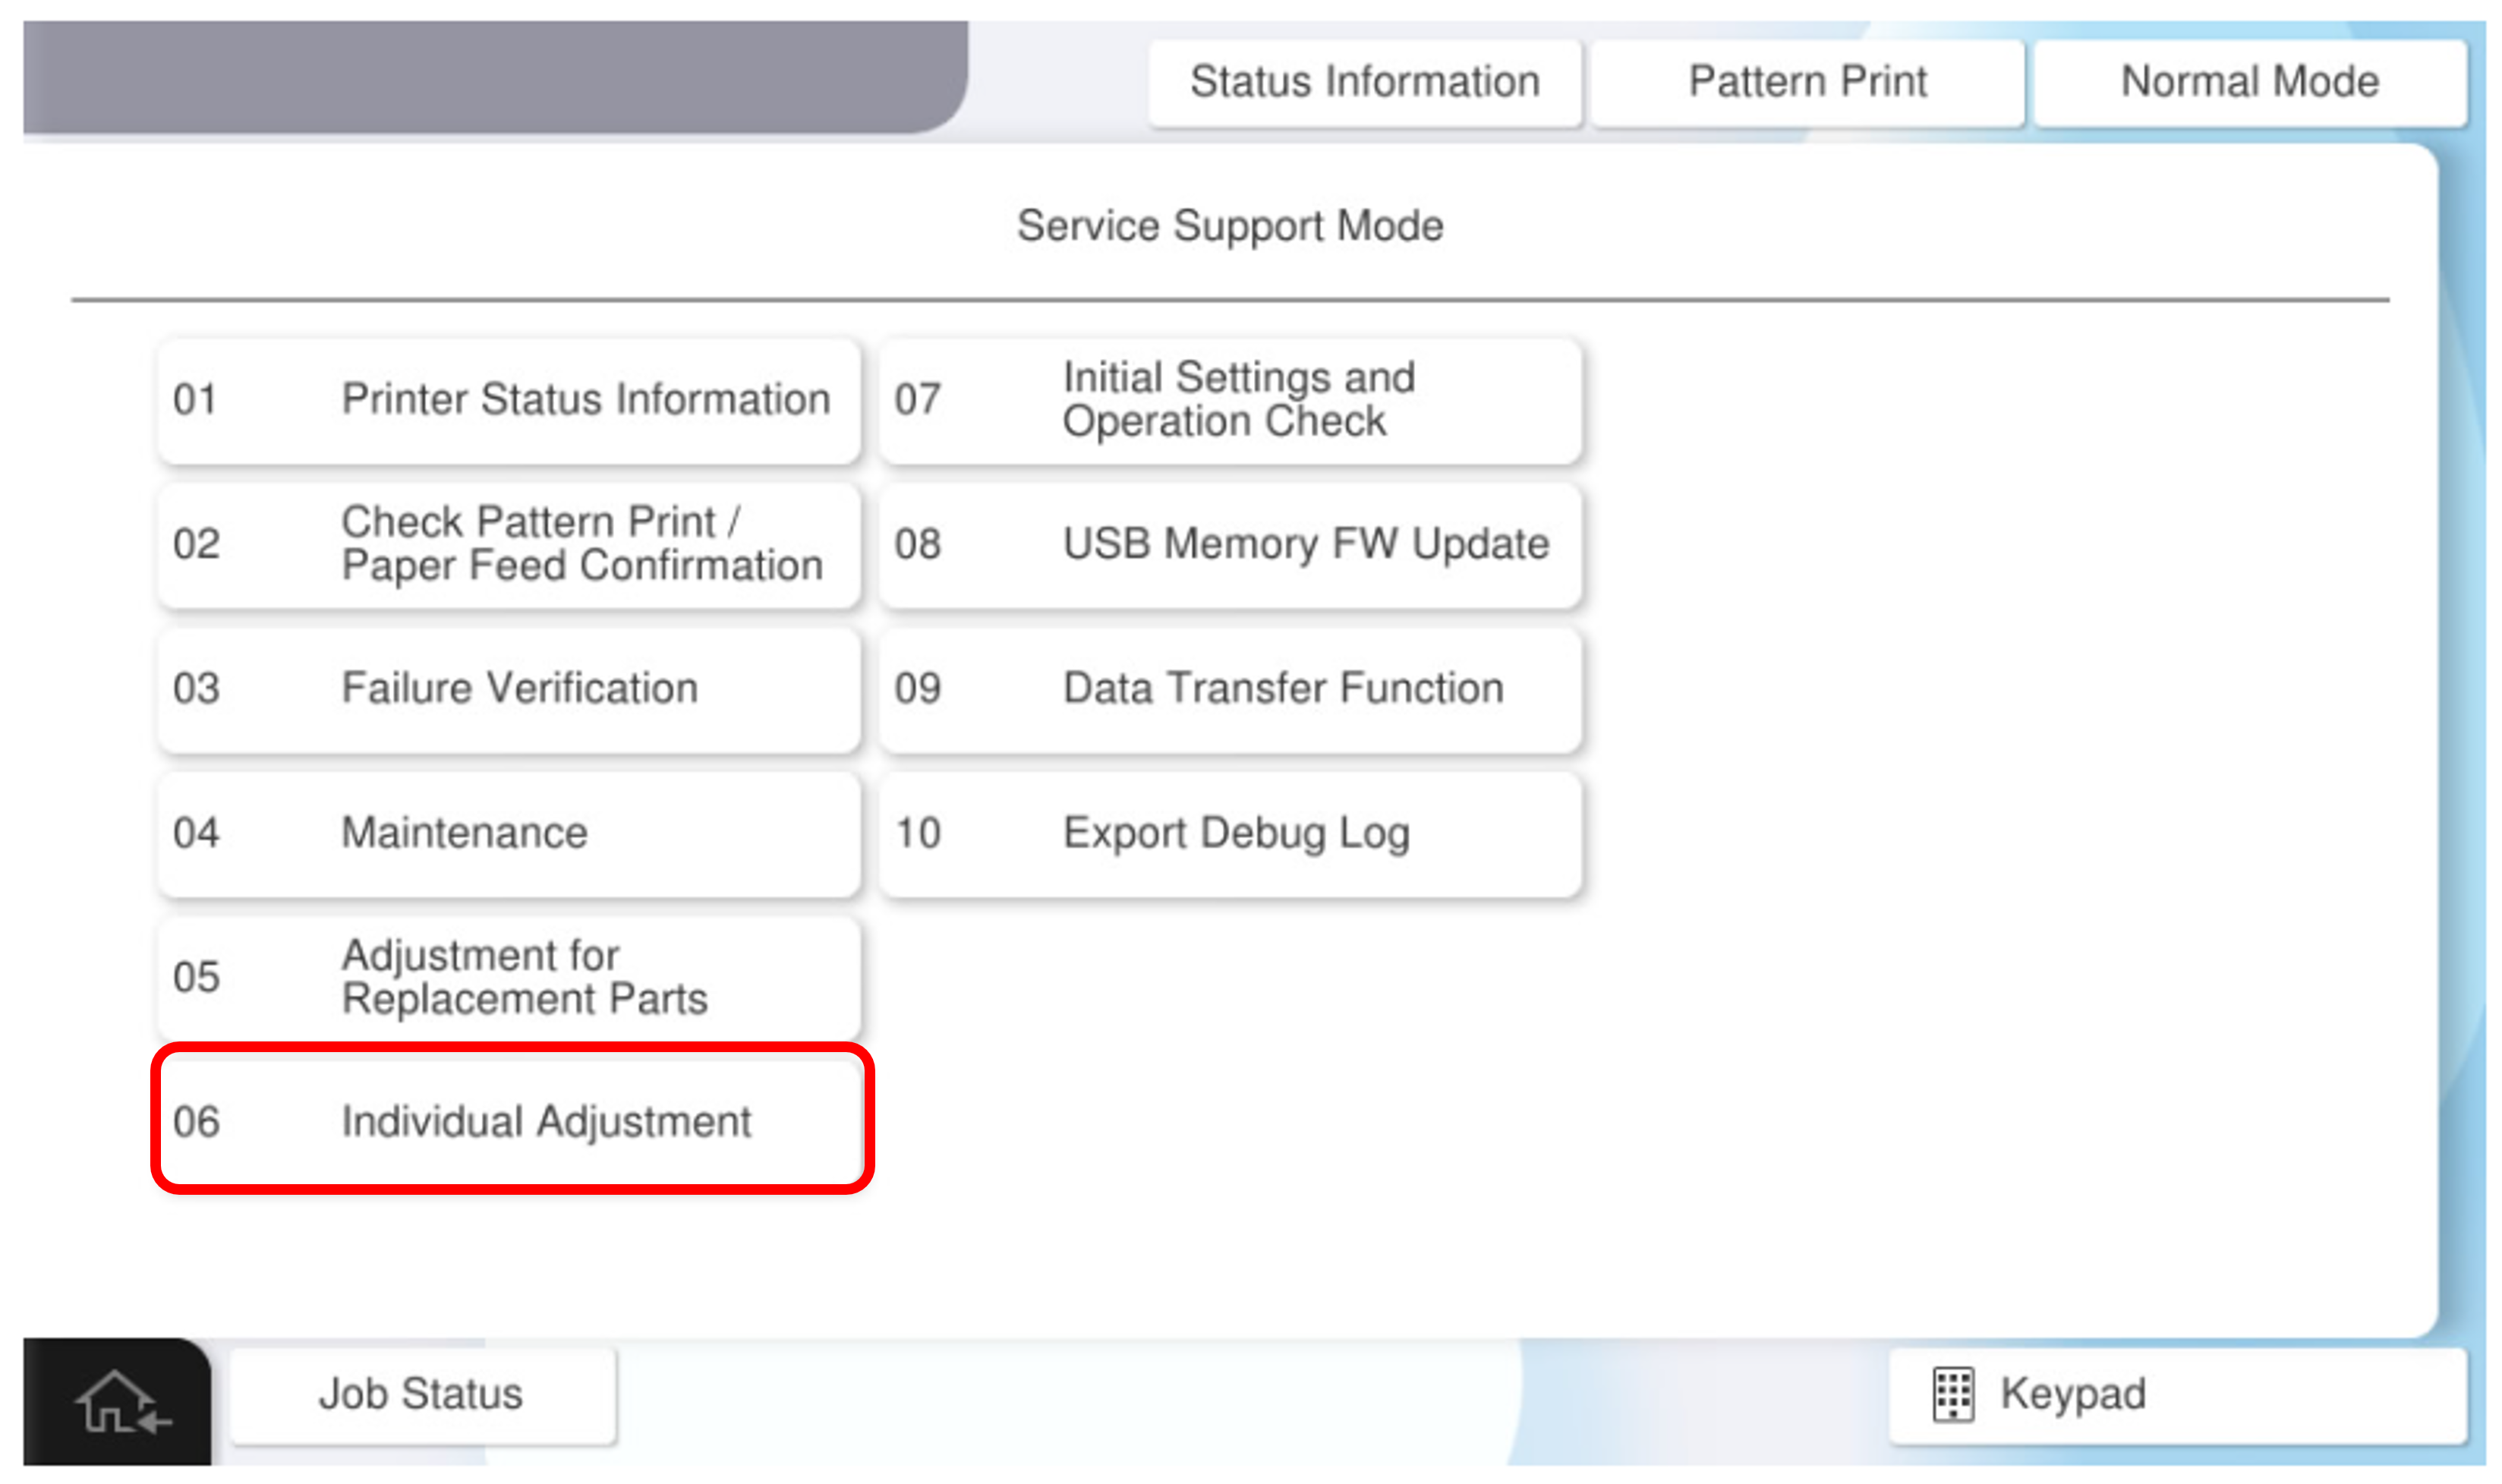
- Select [06 Individual Adjustment].
- Select the [Floor Finisher] tab.
- Check the existing adjustment values and store the difference in the amount of adjustment before and after the shift arm.
Select [6040102 FIN Shift HP Adjustment].
- Press [Pattern Print].
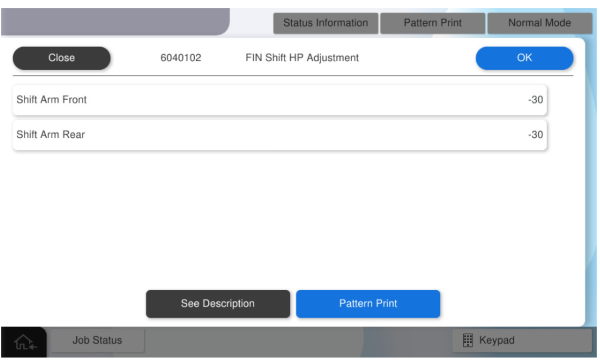
Press each setting item button to make the print settings.
The parameters that can be set are as follows.
 Check Point / チェックポイント
The more sheets you pass, the easier it is to check misalignment, so set the number of sheets to be 50 (30 for A3/Ledger). Since no stapling is performed, the paper can be reused.
Setting Items Selection Feed Tray C1, C2, C3, C4, Paper Tray Available Paper Sizes A4 (Vertical), Letter (Vertical), A3, Ledger Number of sheets 2 - 50 Caution / 注意Make sure the paper orientation is as specified (LEF/Vertical).
If the orientation is different from the specifications (SEF/Horizontal), the paper will be ejected without being processed correctly and the operation cannot be checked.- Press [Execution] to output the adjustment sample.
- Check the state of the paper edge of the shifted adjustment sample (second set), perform the following actions according to the state of the adjustment sample, and calculate the adjustment value.Caution / 注意
Since the adjustment sample is not stapled, it is prone to paper edge misalignment due to external factors.
Care should be taken to calculate the adjustment value so that the condition of the adjustment sample does not change.
- If the paper edge is damaged (the width of the shift arm front/rear is wider than the paper size)
- If the paper edge is damaged (the paper alignment cursor width is narrower than the paper size)
- If the paper edge is damaged (the width of the shift arm front/rear is wider than the paper size)
- Check the paper edge of the adjustment sample, and measure the distance between the most receding part and the most protruding part.
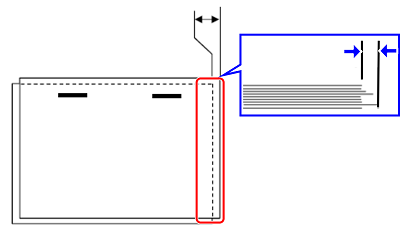
Convert the measurement results to adjustment values.
Check Point / チェックポイント- Adjustment value calculation method: Adjustment value = Measurement result x -1
Example) If the measurement result is 1mm ⇒ Adjustment value = -1
- Adjustment value calculation method: Adjustment value = Measurement result x -1
- Check the paper edge of the adjustment sample, and measure the distance between the most receding part and the most protruding part.
- If the paper edge is damaged (the paper alignment cursor width is narrower than the paper size)
Set the adjustment value that is +1 larger than the currently set adjustment value.
Check Point / チェックポイント- It is not possible to measure how narrow the paper alignment cursor width is relative to the paper size. Therefore, the + sign adjustment value is input by trial and error.
- Press [Before the shift arm] and enter the adjustment value calculated by step .8. Since the adjustment value is an absolute value input, the calculated adjustment value is added to the current adjustment value.
Example) If the current adjustment value is -16 and the calculated adjustment value is -1 ⇒ Adjustment value = -16 + -1 = -17Check Point / チェックポイントAdjustment value input range: -30 to 30 * Values outside the adjustment value input range cannot be entered.
- + adjustment value: Wider shift arm.
- - adjustment value: narrower shift arm.
Press [After shift arm] and enter the adjustment value calculated in step 8 in the same way as in step 9.
Check Point / チェックポイント- Change the adjustment value set at the time of shipment from the factory, but maintain the difference in adjustment amount between the front and rear of the shift arm.
Example) If the adjustment value before the shift arm is -5 and the adjustment value after the shift arm is 10, the difference in adjustment amount is 15.
- Change the adjustment value set at the time of shipment from the factory, but maintain the difference in adjustment amount between the front and rear of the shift arm.
Press [Pattern Print] to apply the adjustment values and print the adjustment sample again.
Check Point / チェックポイントThe adjustment values are reflected by pressing the [Pattern Print] button. Note that pressing [OK] will also reflect the adjustment value, but it will transition to the menu screen one level earlier.
- Check the adjustment sample, and if the phenomenon is improved, press [Close] to end the adjustment.
To continue adjusting, repeat from step 8.