
Ink Absorber Pad (Y/M/C/K)
Remove the cartridge to be replaced from the main unit.
 Caution / 注意
Be careful not to shake or drop the removed ink cartridge, as ink may drip from the supply port.
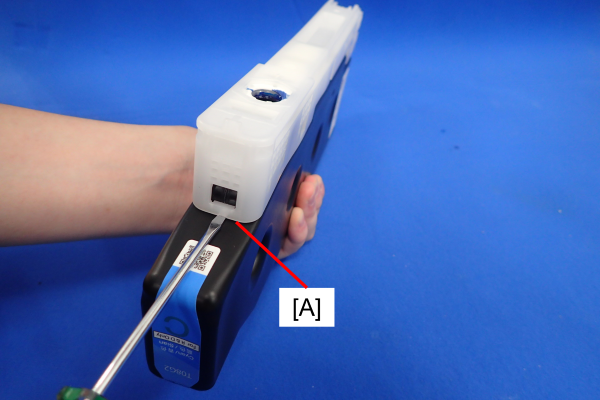
Use a flathead screwdriver to release the hook (A) on the supply side of the ink cartridge.
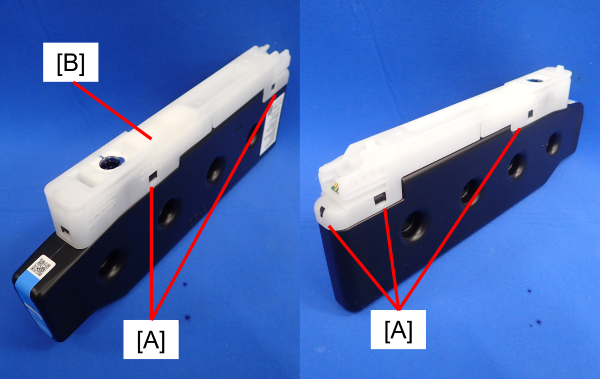
- Use a flathead screwdriver to release the 5 adapter hooks (A) on the remaining ink cartridges and remove the adapter (B).
 Check Point / チェックポイント
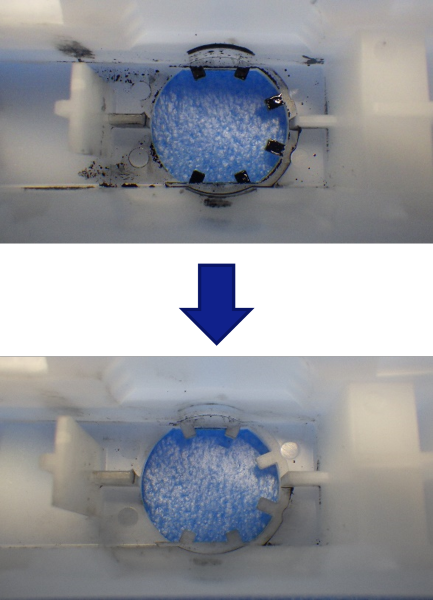
- The area around the hook part of the adapter turns white, but it does not affect the function.
- For the hook of the adapter, first release the hook shown in step 2. If you release other hooks first, there is a risk of deformation.
 Assembly / 組み立て
- To prevent mismatch between the ink cartridge chip and ink color, always replace the removed adapter with the original ink cartridge.
- When attaching the adapter to the ink cartridge, make sure that the 6 hooks are engaged.
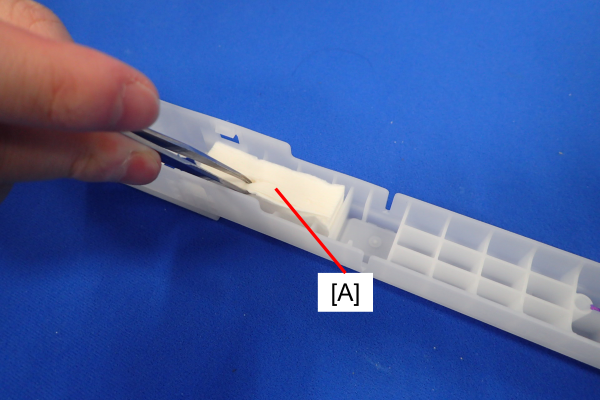
Remove the ink absorber pad 1 (A) set inside the adapter with tweezers.
 Caution / 注意
Be careful when working with the ink absorber as the ink will adhere to it.
It is recommended to put the removed ink absorber in a zip-type bag inside the ASP individual packaging box.
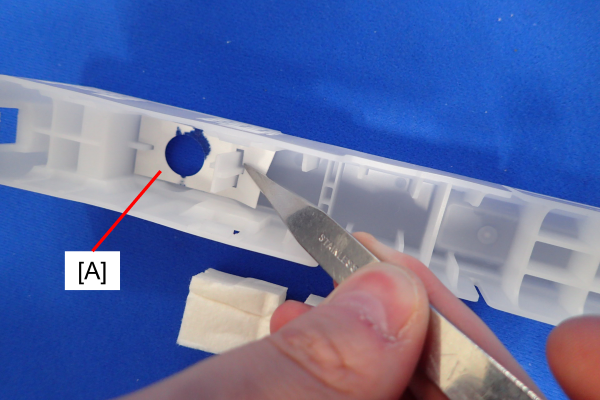
- Remove theink absorber pad 2 (A) with tweezers.
 Assembly / 組み立て
- If the inside of the adapter is stained with ink, wipe it off.
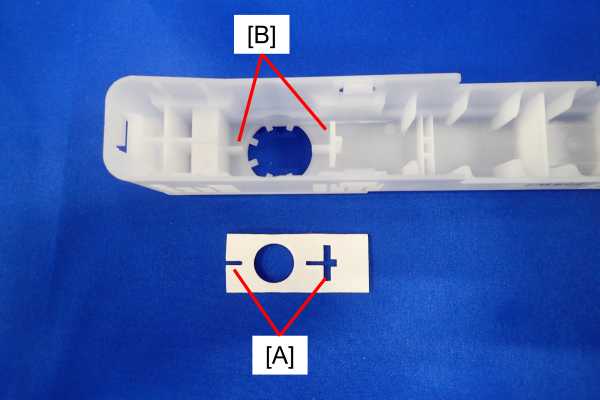
When attaching the ink absorber pad 2, align the notch (A) of the ink absorber pad 1 with the convex part (B) of the adapter. There is no difference between the front and rear.
- When attaching the ink absorber pad 1, align the groove (C) of the ink absorber with the convex part of the adapter.
In addition, the ink absorber pad 1 should be attached while being pushed so that the ink absorber pad 2 is in contact with the ink absorber pad 2 . Without contact, the ink cannot be properly absorbed and retained.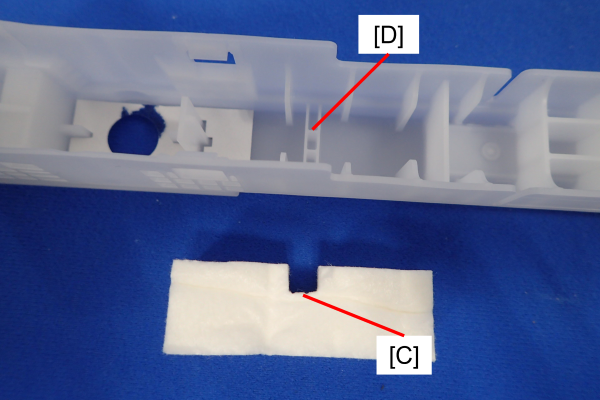
- If the inside of the adapter is stained with ink, wipe it off.
Reset the ink absorber pad counter of the replaced ink cartridge. (103 Counter Information)