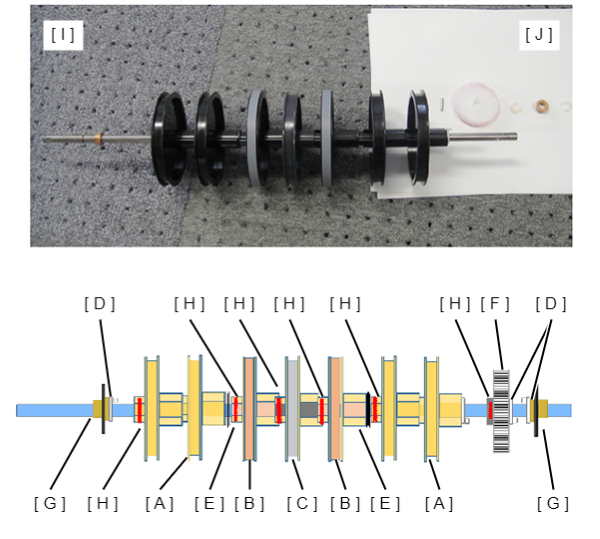
Drum Roller
- Refer to the following and remove the floor finisher from the printer main unit.
Floor Finisher Installation Procedure
 Caution / 注意
- When disconnecting the Floor Finisher from the Main Unit, the power of the Main Unit must be turned off.
- Open the front cover (B).
- Remove one screw and slide the cover hinge (A) upward to remove it.
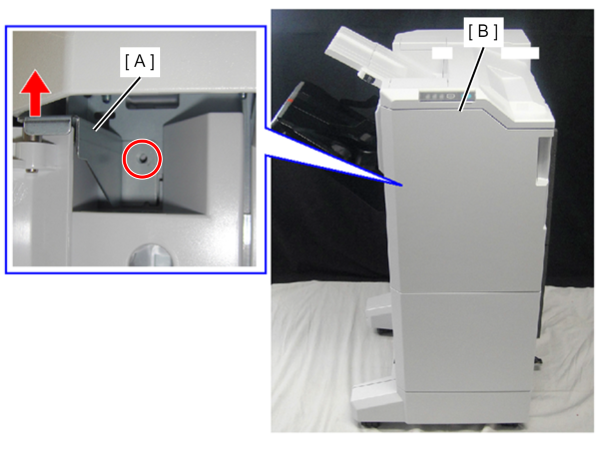
 : 4x8D/P
Open the front cover (A).
- Remove the screw that secures the belt (B).
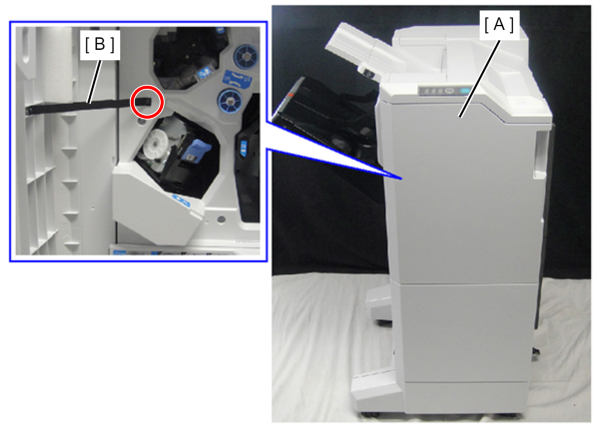
- : 3x8DC/BK
- Remove one screw and slide the cover hinge (A) upward to remove it.
- Remove the front cover (B).
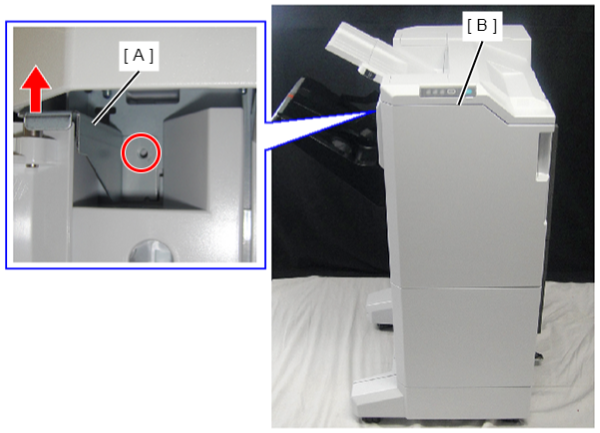
- : 4x8D/P
- Remove one screw and remove the front cover lower (B) and washer (A).
- Remove the washer (A).
- Remove the front cover lower (B).
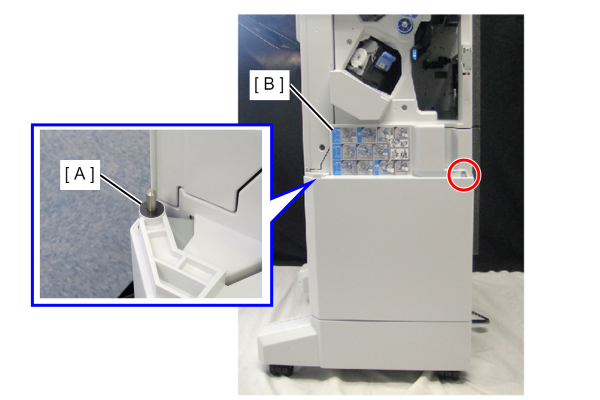
- : 4x10DC
- Remove 3 screws and the Front Inner Cover, Upper (A).
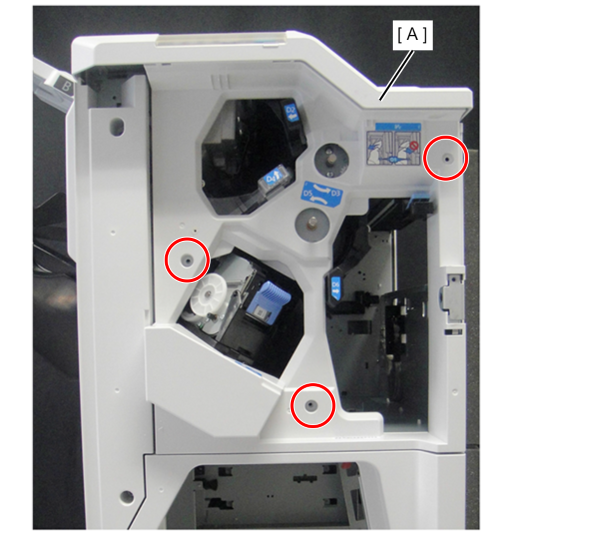
- : 4x10DC
- Remove the one screw.
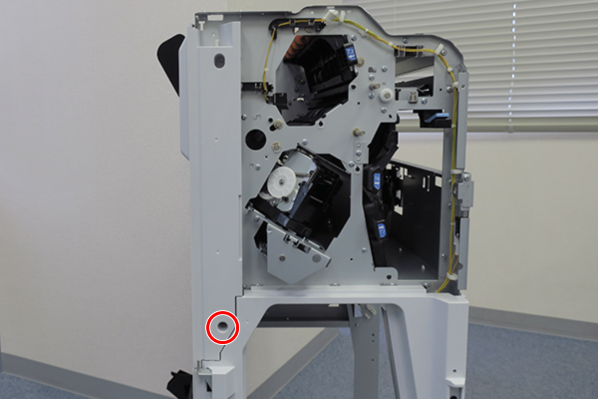
- : 4x10DC
Slightly lift the front inner cover sub (A) to release the hook and remove it.
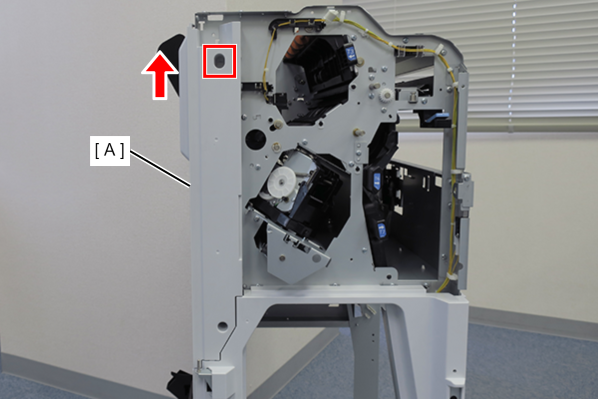
Remove 1 screw of the Rear Cover, Sub (A).
- Put your finger on the recess of the rear cover, sub (A) and open it to the left to remove it.
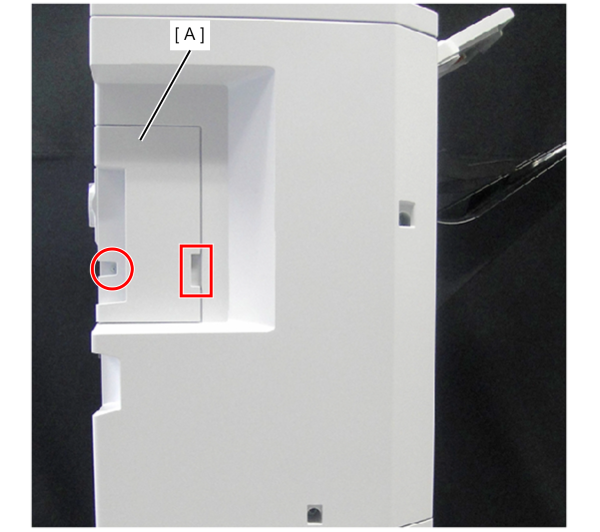
- : 4x10DC
Remove 3 screws of the Rear Cover, Upper (A).
- Slightly raise the top cover (B) and remove the rear cover, upper (A).
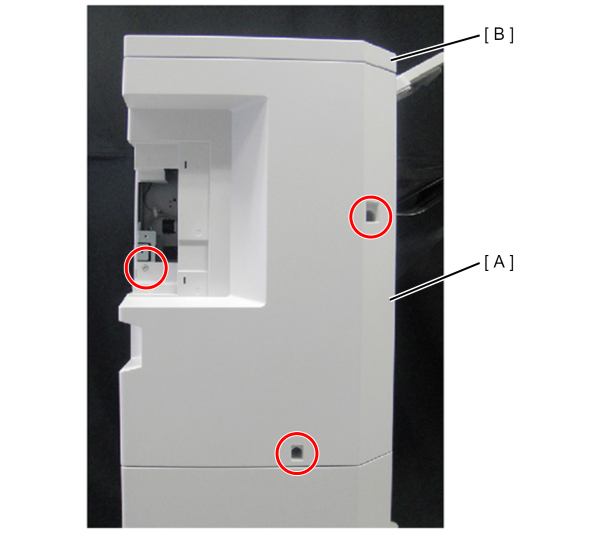
- : 4x10DC
- Remove the 4 screws and remove the Frame Top Plate (A).
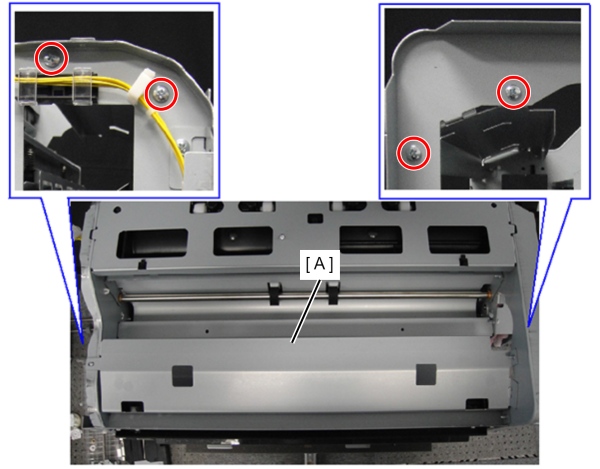
 : 4x8D/P
- Remove 2 screws.
- Release the cable (A) from the 3 clamps (B).
- Remove the screw.
- Disconnect the cable (A) from the connector and remove the FIN Front Cover Sensor (C).
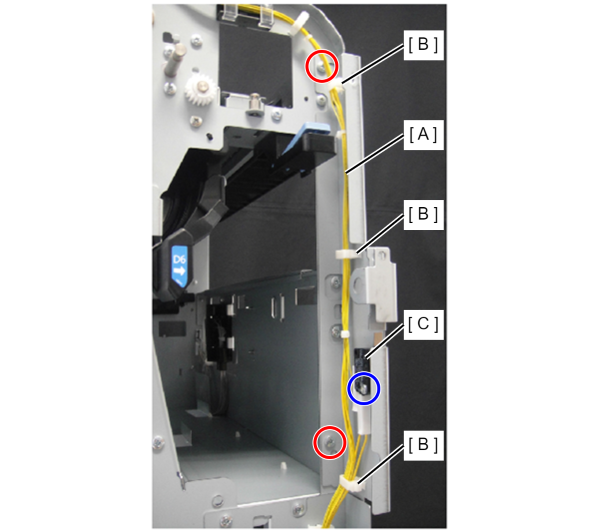
- : 3x8 T/P
 : 3x12 D/P
- Remove 2 screws.
- Remove the cable (B) from the relay connector (A).
- Release the hook and remove the Paper Guide, Paper Jam Release Guide, D1 (C).
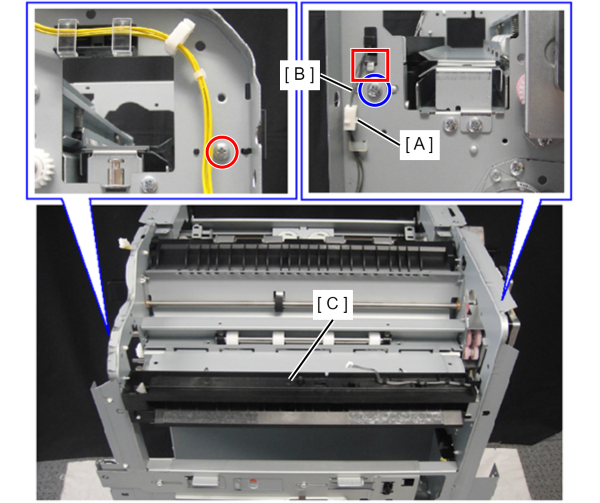
- : 4x10 T/P
- : 4x8 D/P
- Remove the one screw.
- Release the hooks (x2) and slide the Paper Transport Guide Plate (A) in the direction of the arrow to remove it.
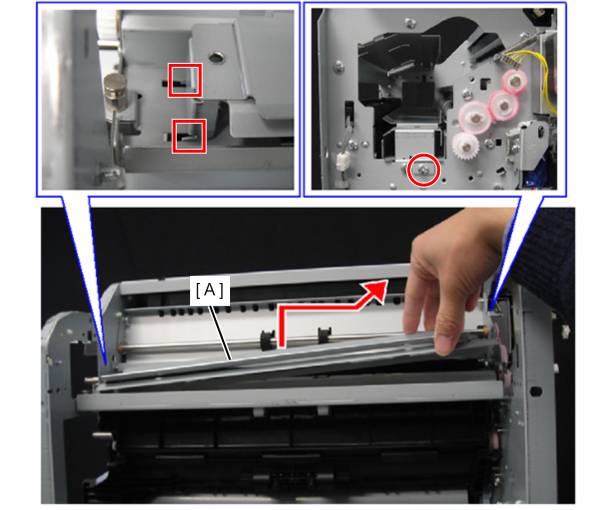
- : 4x8 D/P
- Remove 2 screws.
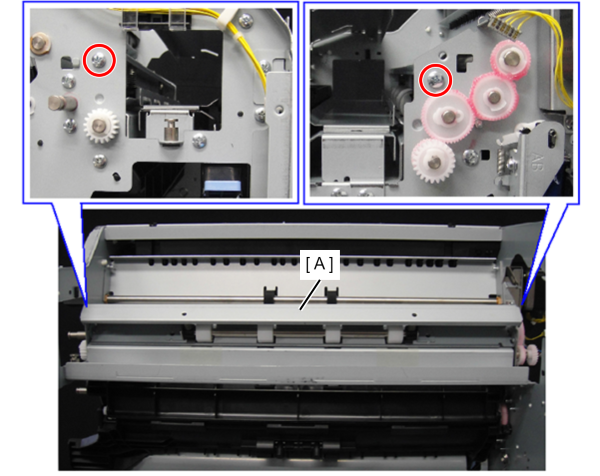
- : 4x8 D/P
- Lift the right side of the Paper Transport Plastic Roller Unit (A) to release the dowels (x2) and remove the Paper Transport Plastic Roller Unit (A) upward.
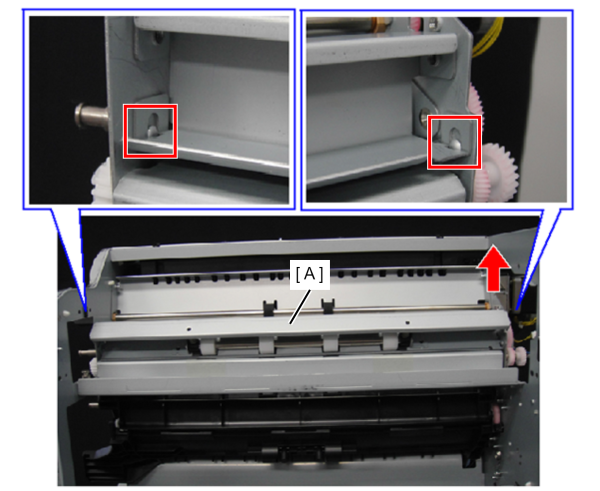
- On the front side (J), remove the plastic E-ring (A), and remove the gear (B) and bearing (C).Caution / 注意
Be careful not to lose the parallel pin (D) when removing the gear (B).
- Remove 3 plastic E-rings (E), 2 gears (F), and bearing (G) on the rear side (K).
- Remove 4 screws.
- Remove the Paper Transport Roller (I) while lifting the Paper Transport Roller Guide (H).
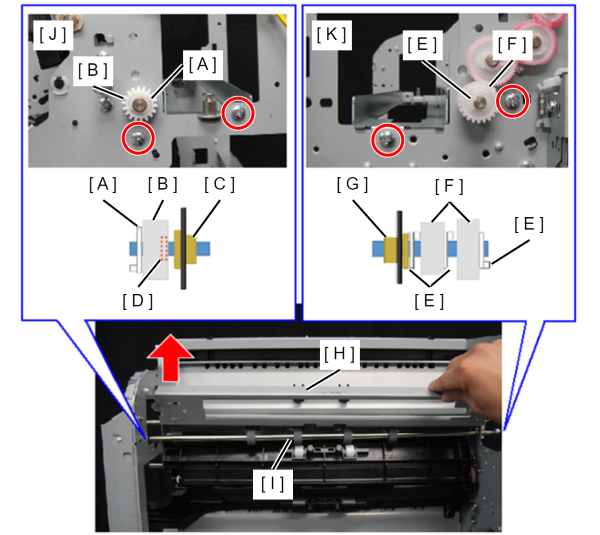
- : 4x8 D/P
- Remove the Paper Transport Roller Guide (A).
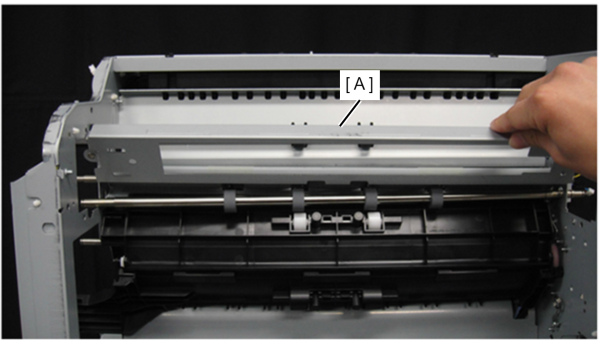
- Remove 2 screws.
- Remove the Drum Transport Guide (C) together with the plate (B) while avoiding the flapper (A).
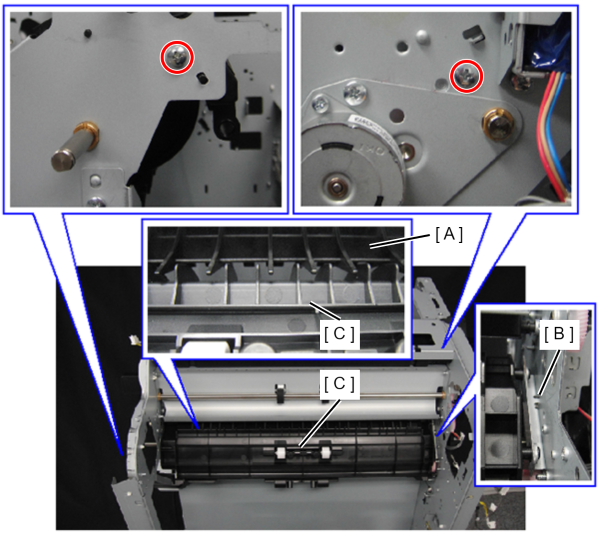
- : 4x10D/P
- Remove 2 screws and remove the Rear Cover, Lower (A).
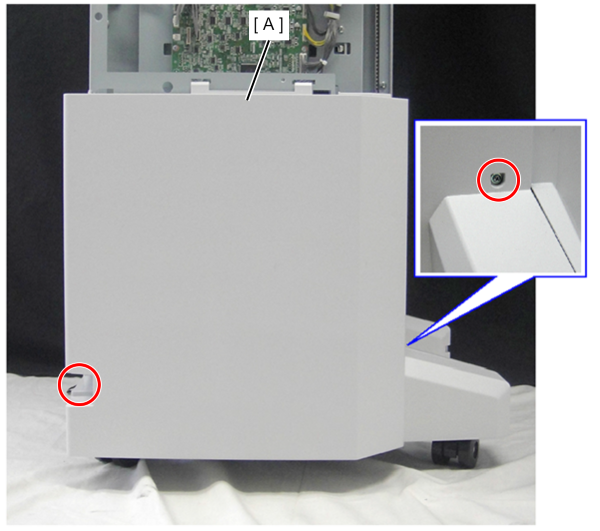
- : 4x10DC
- Disconnect the cable (A) from the connector.
- Remove the 2 screws and remove the FIN Wait Drum Motor (B).
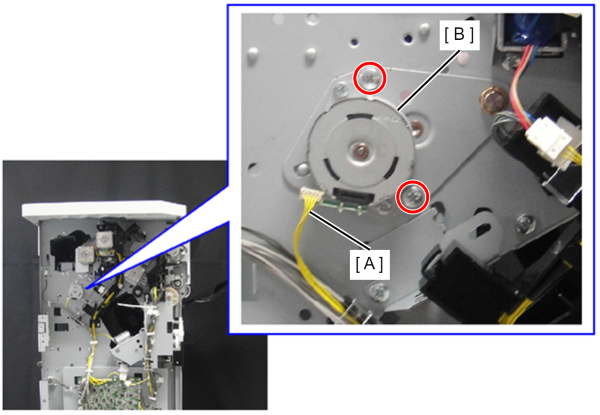
- : 4x8D/P
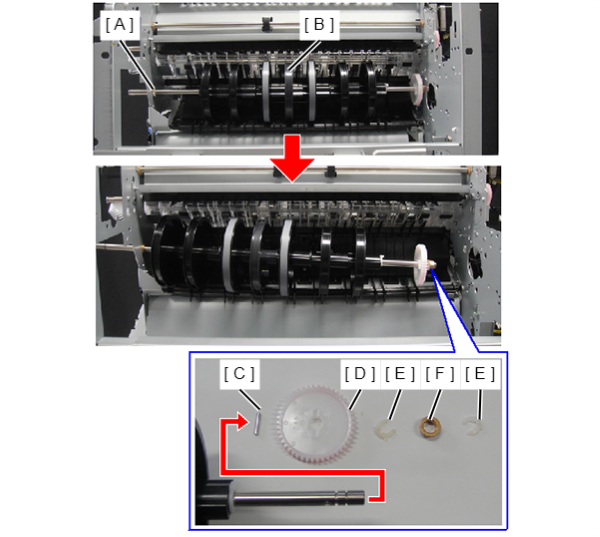
Remove the plastic E-ring (A) and remove the Drum Unit (B).
 Assembly / 組み立て
If the gears, come off, install them in the order shown in the above figure.
C: Parallel pin
D: Gear
E: Plastic E-ring
F: Bearing
- Remove Drum Roller 1 (A) (x2), Drum Roller 2 (B) (x2), and Drum Roller 3 (C) (x1) referring to the illustration above.
D: Plastic E-ring
E: Spacers (3 pieces)
F: Gear
G: Bearing
H: Parallel pin
I:(Front side
J: Rear side