
60110 Head Angular Adjustment
Adjusts poor image quality caused by the tilt of the head with respect to the paper.
 Check Point / チェックポイント Check Point / チェックポイント |
For adjustments after replacing the Head Unit, be sure to use the included special adjustment paper. If the poor image quality is not resolved after adjustment with the adjustment paper, the adjustment should be made with the paper type used by the user. * Since image quality defects may occur on other paper types if adjustments are made on the paper type used by the user, inform the user of this in advance. |
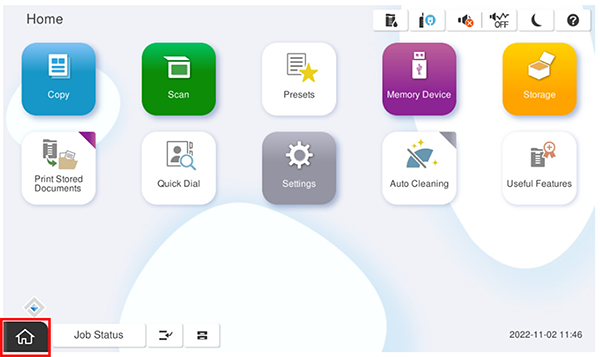
- Start the service support mode.
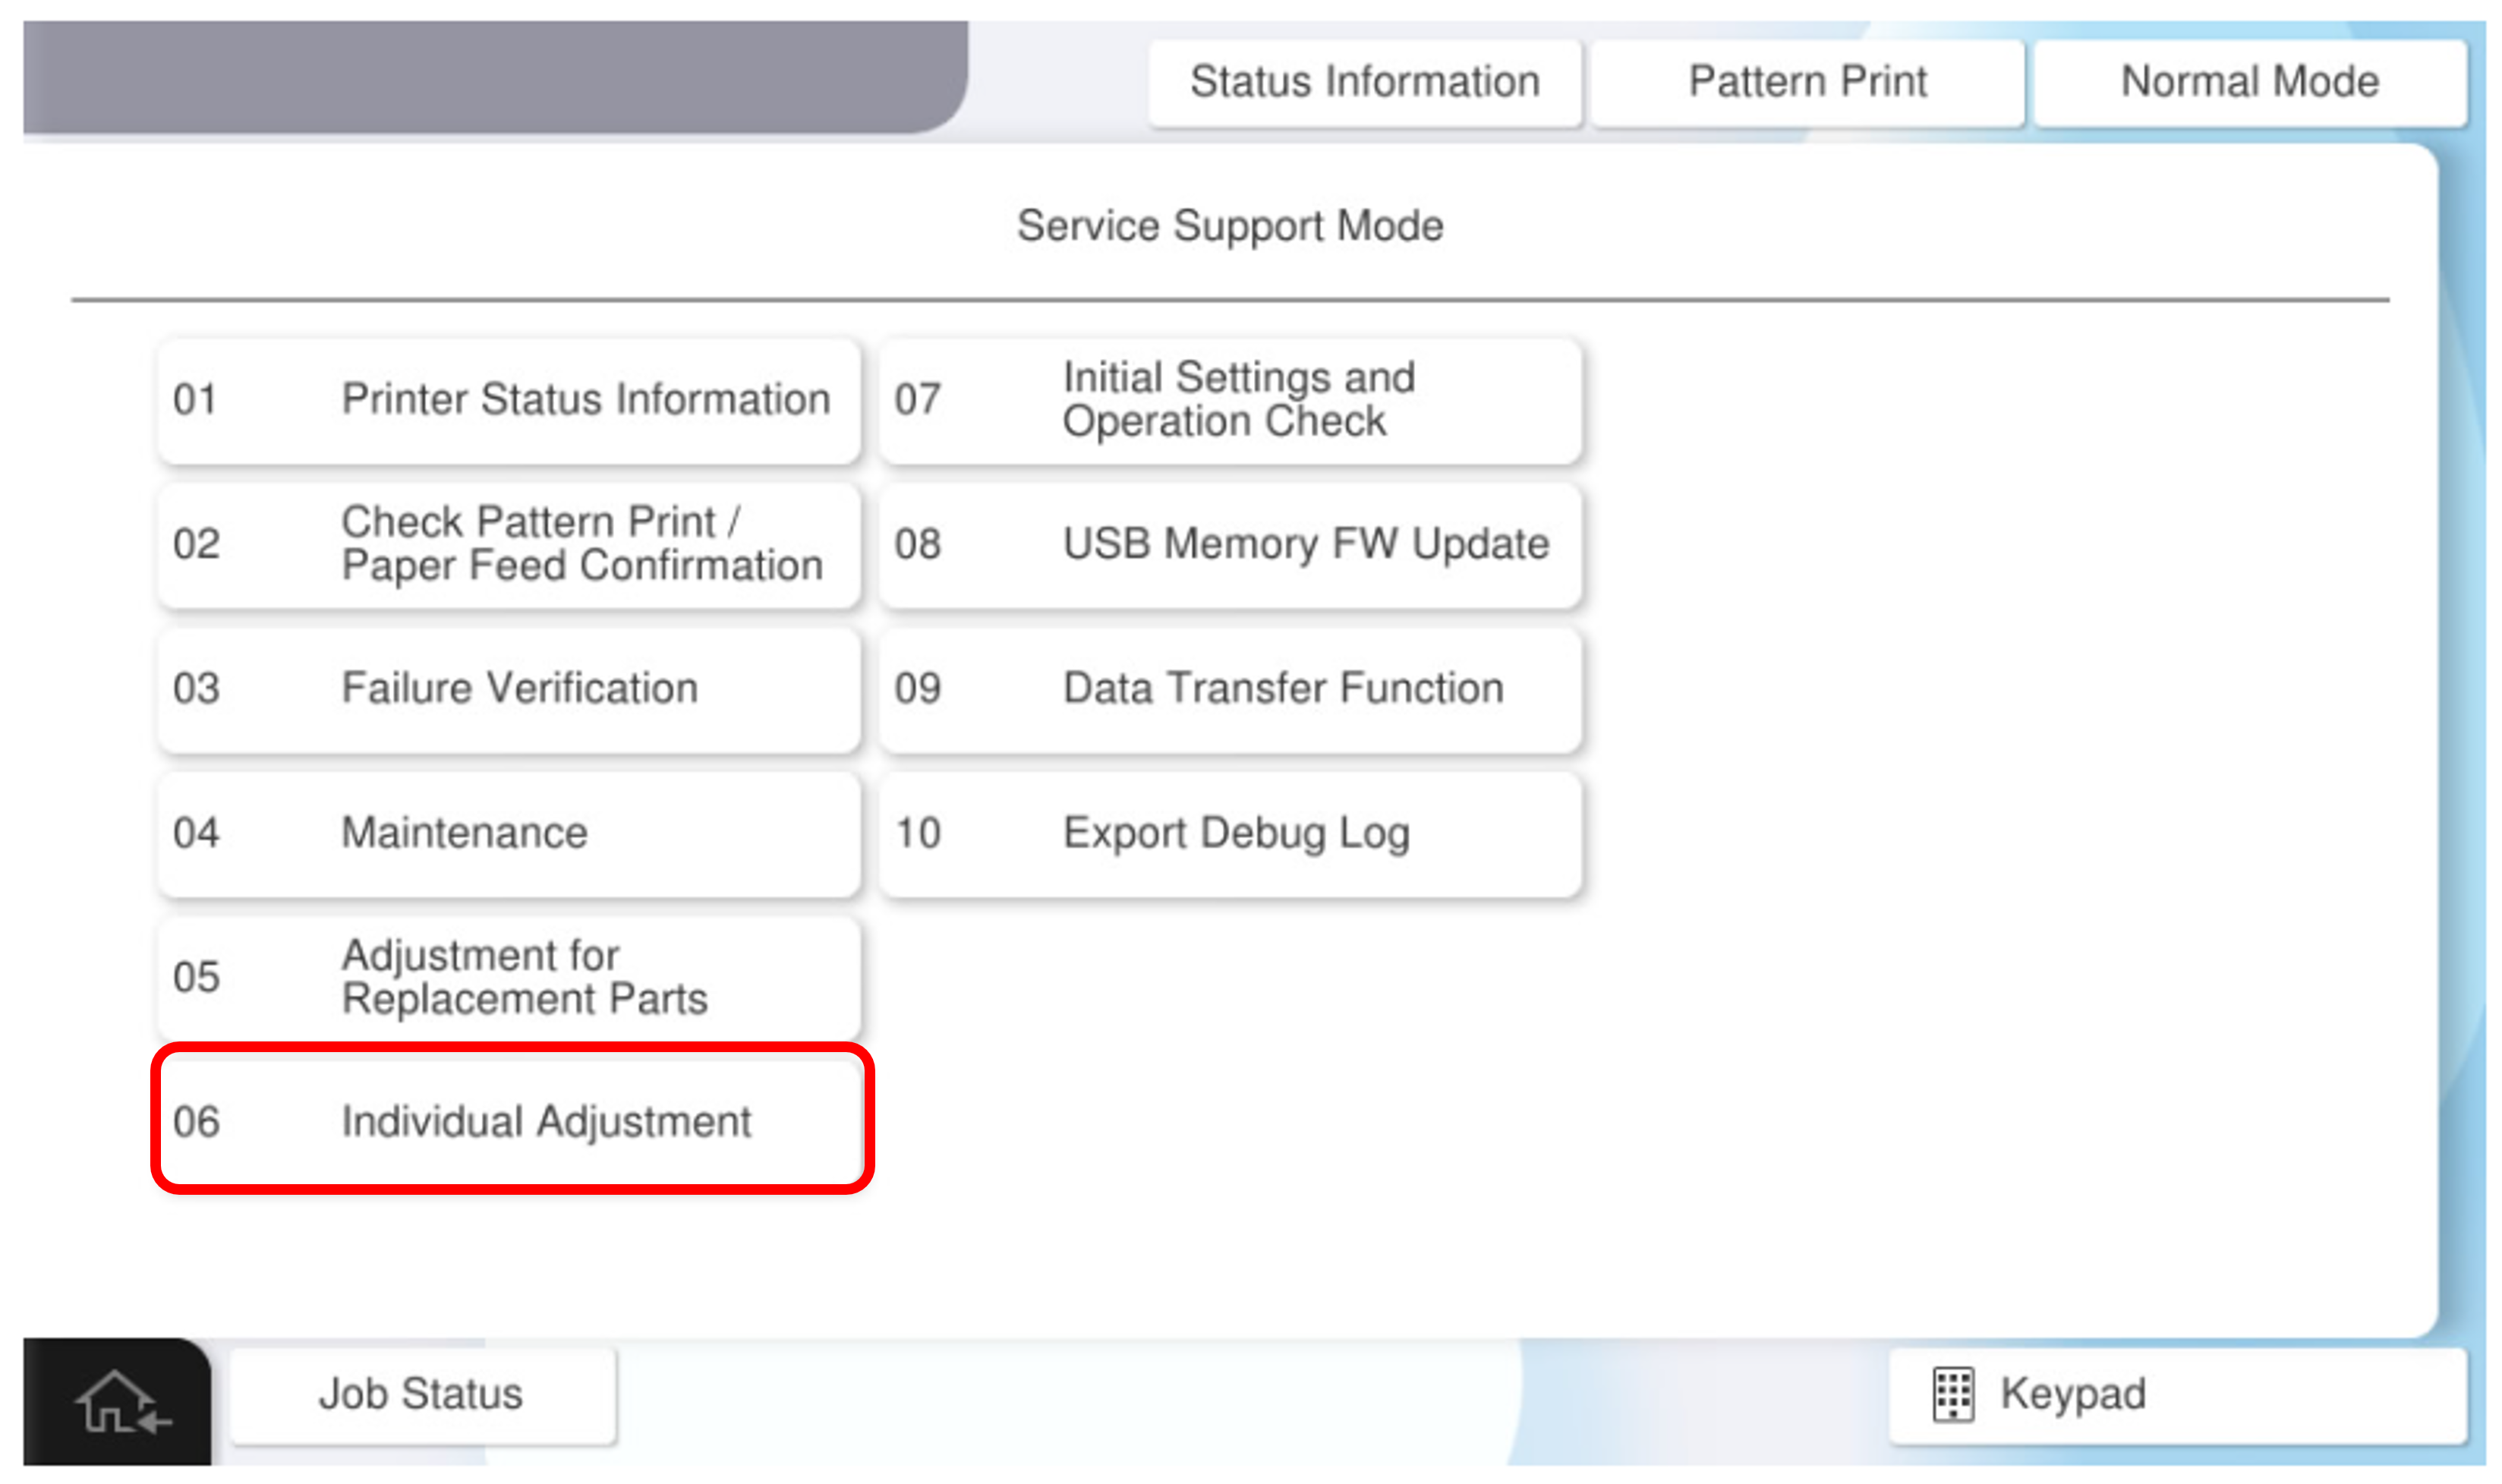
- Select [06 Individual Adjustment].
- Select the [Main Unit・Additional Cassette] tab.
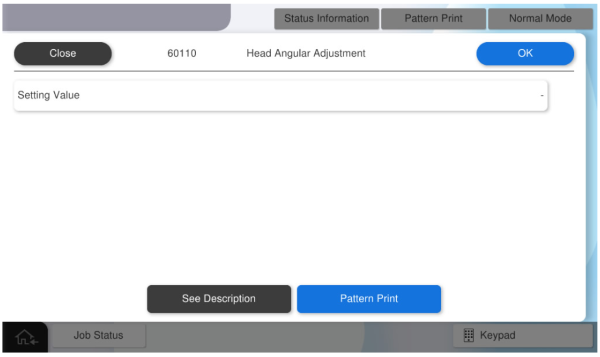
- Select [601110 Head Tilt Adjustment].
- Press [Pattern Print].
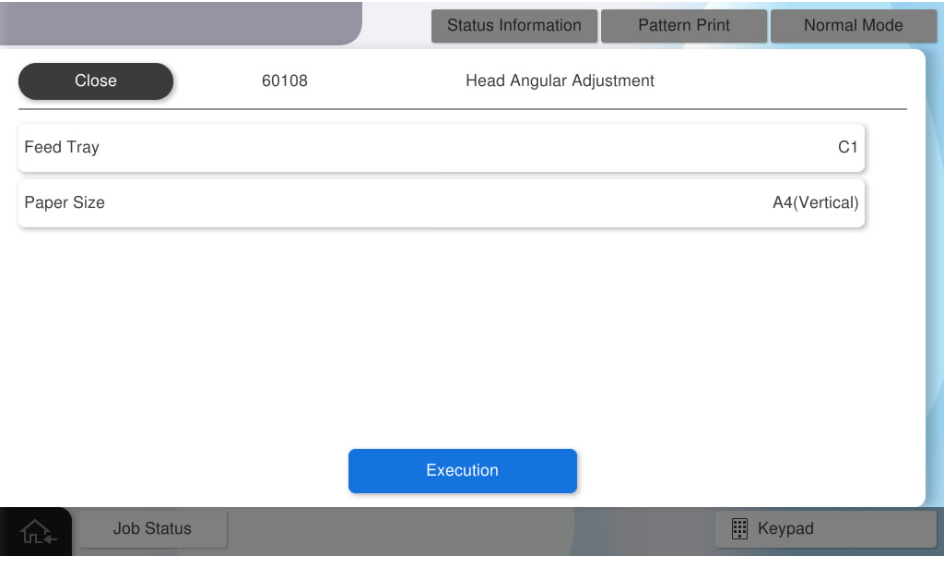
- Press each setting item button to make the print settings.
The parameters that can be set are as follows.Setting Items Selection Feed Tray C1, C2, C3, C4, Paper Tray, High Capacity Unit Available Paper Sizes A4 (Vertical), Letter (Vertical) Check Point / チェックポイントMatch the paper feeder to be adjusted with the paper feed tray for pattern printing.
e.g., To perform the Paper tray’s head tilt adjustment, press [Feed Tray] and select [Paper Tray].
- Press [Execution] to print the adjustment pattern.
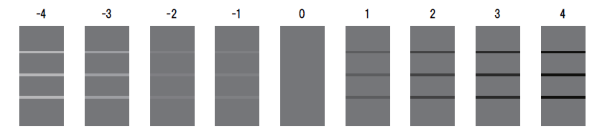
Check the output adjustment pattern and determine the setting value.
Check Point / チェックポイントAdjustment value judgment method
From the printed pattern, the one with the closest gradation difference between the four blocks and the three horizontal lines is selected, and the numbers in the figure are set as the setting value.
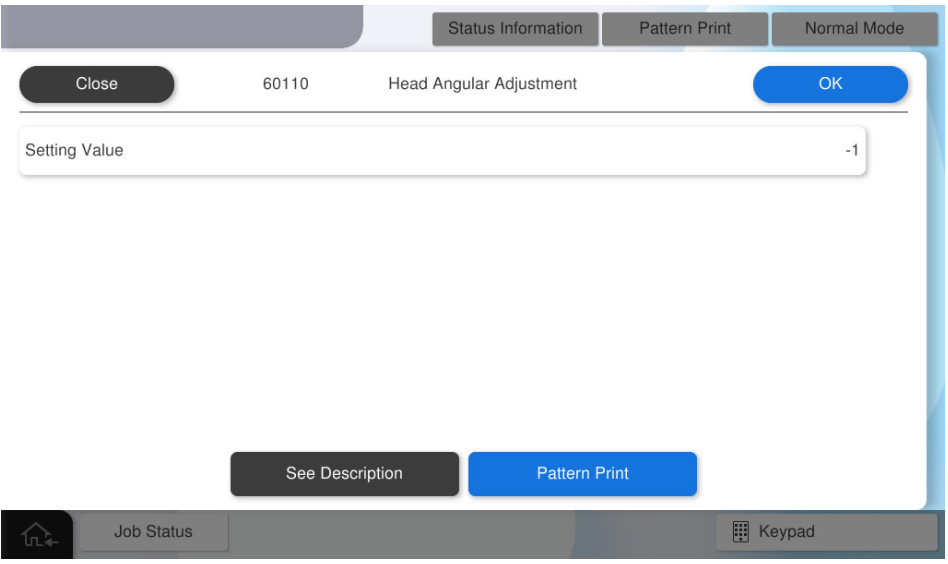
Press [Value] and enter the setting value.
Press [OK] to reflect setting value.
 Check Point / チェックポイント
If you press [Pattern Print] with all values entered, the adjustment values will be reflected.
By execute printing as it is, output the adjustment pattern after reflecting the adjustment values.
After the adjustment value is reflected, all the adjustment values input to the panel are cleared. Press [Close] to end the adjustment.