
C1 Damper
- Remove the 2 screws and remove the Left Cover Upper (A).
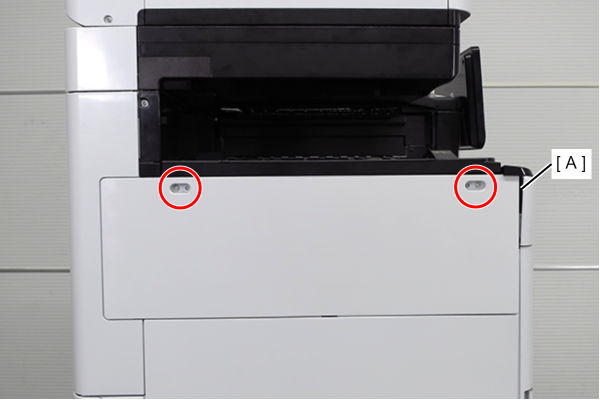
 : 3x10DW
- Remove the two screws and slide the Left Cover Sub Upper (A) in the direction of the arrow to remove it.
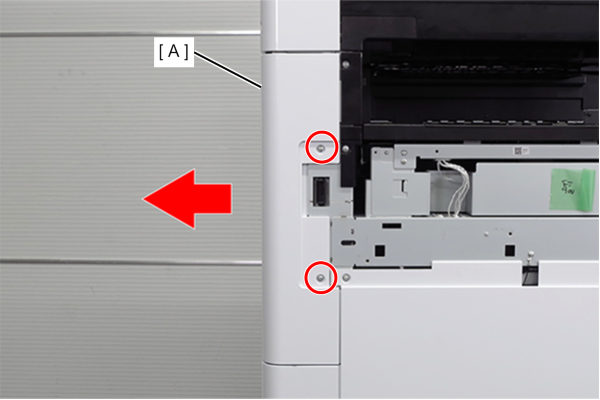
- : 3x10DW
- Remove the 4 screws and remove the right cover sub (A).
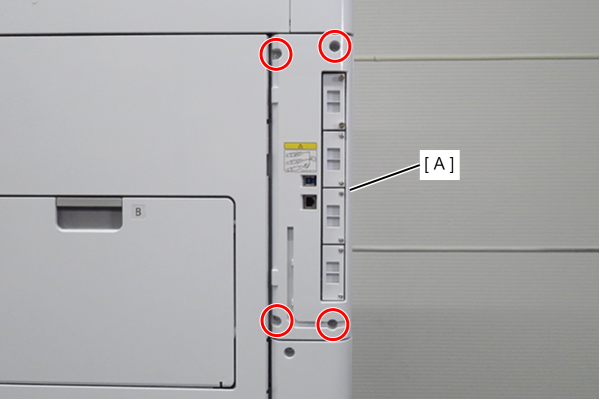
- : 3x10DW
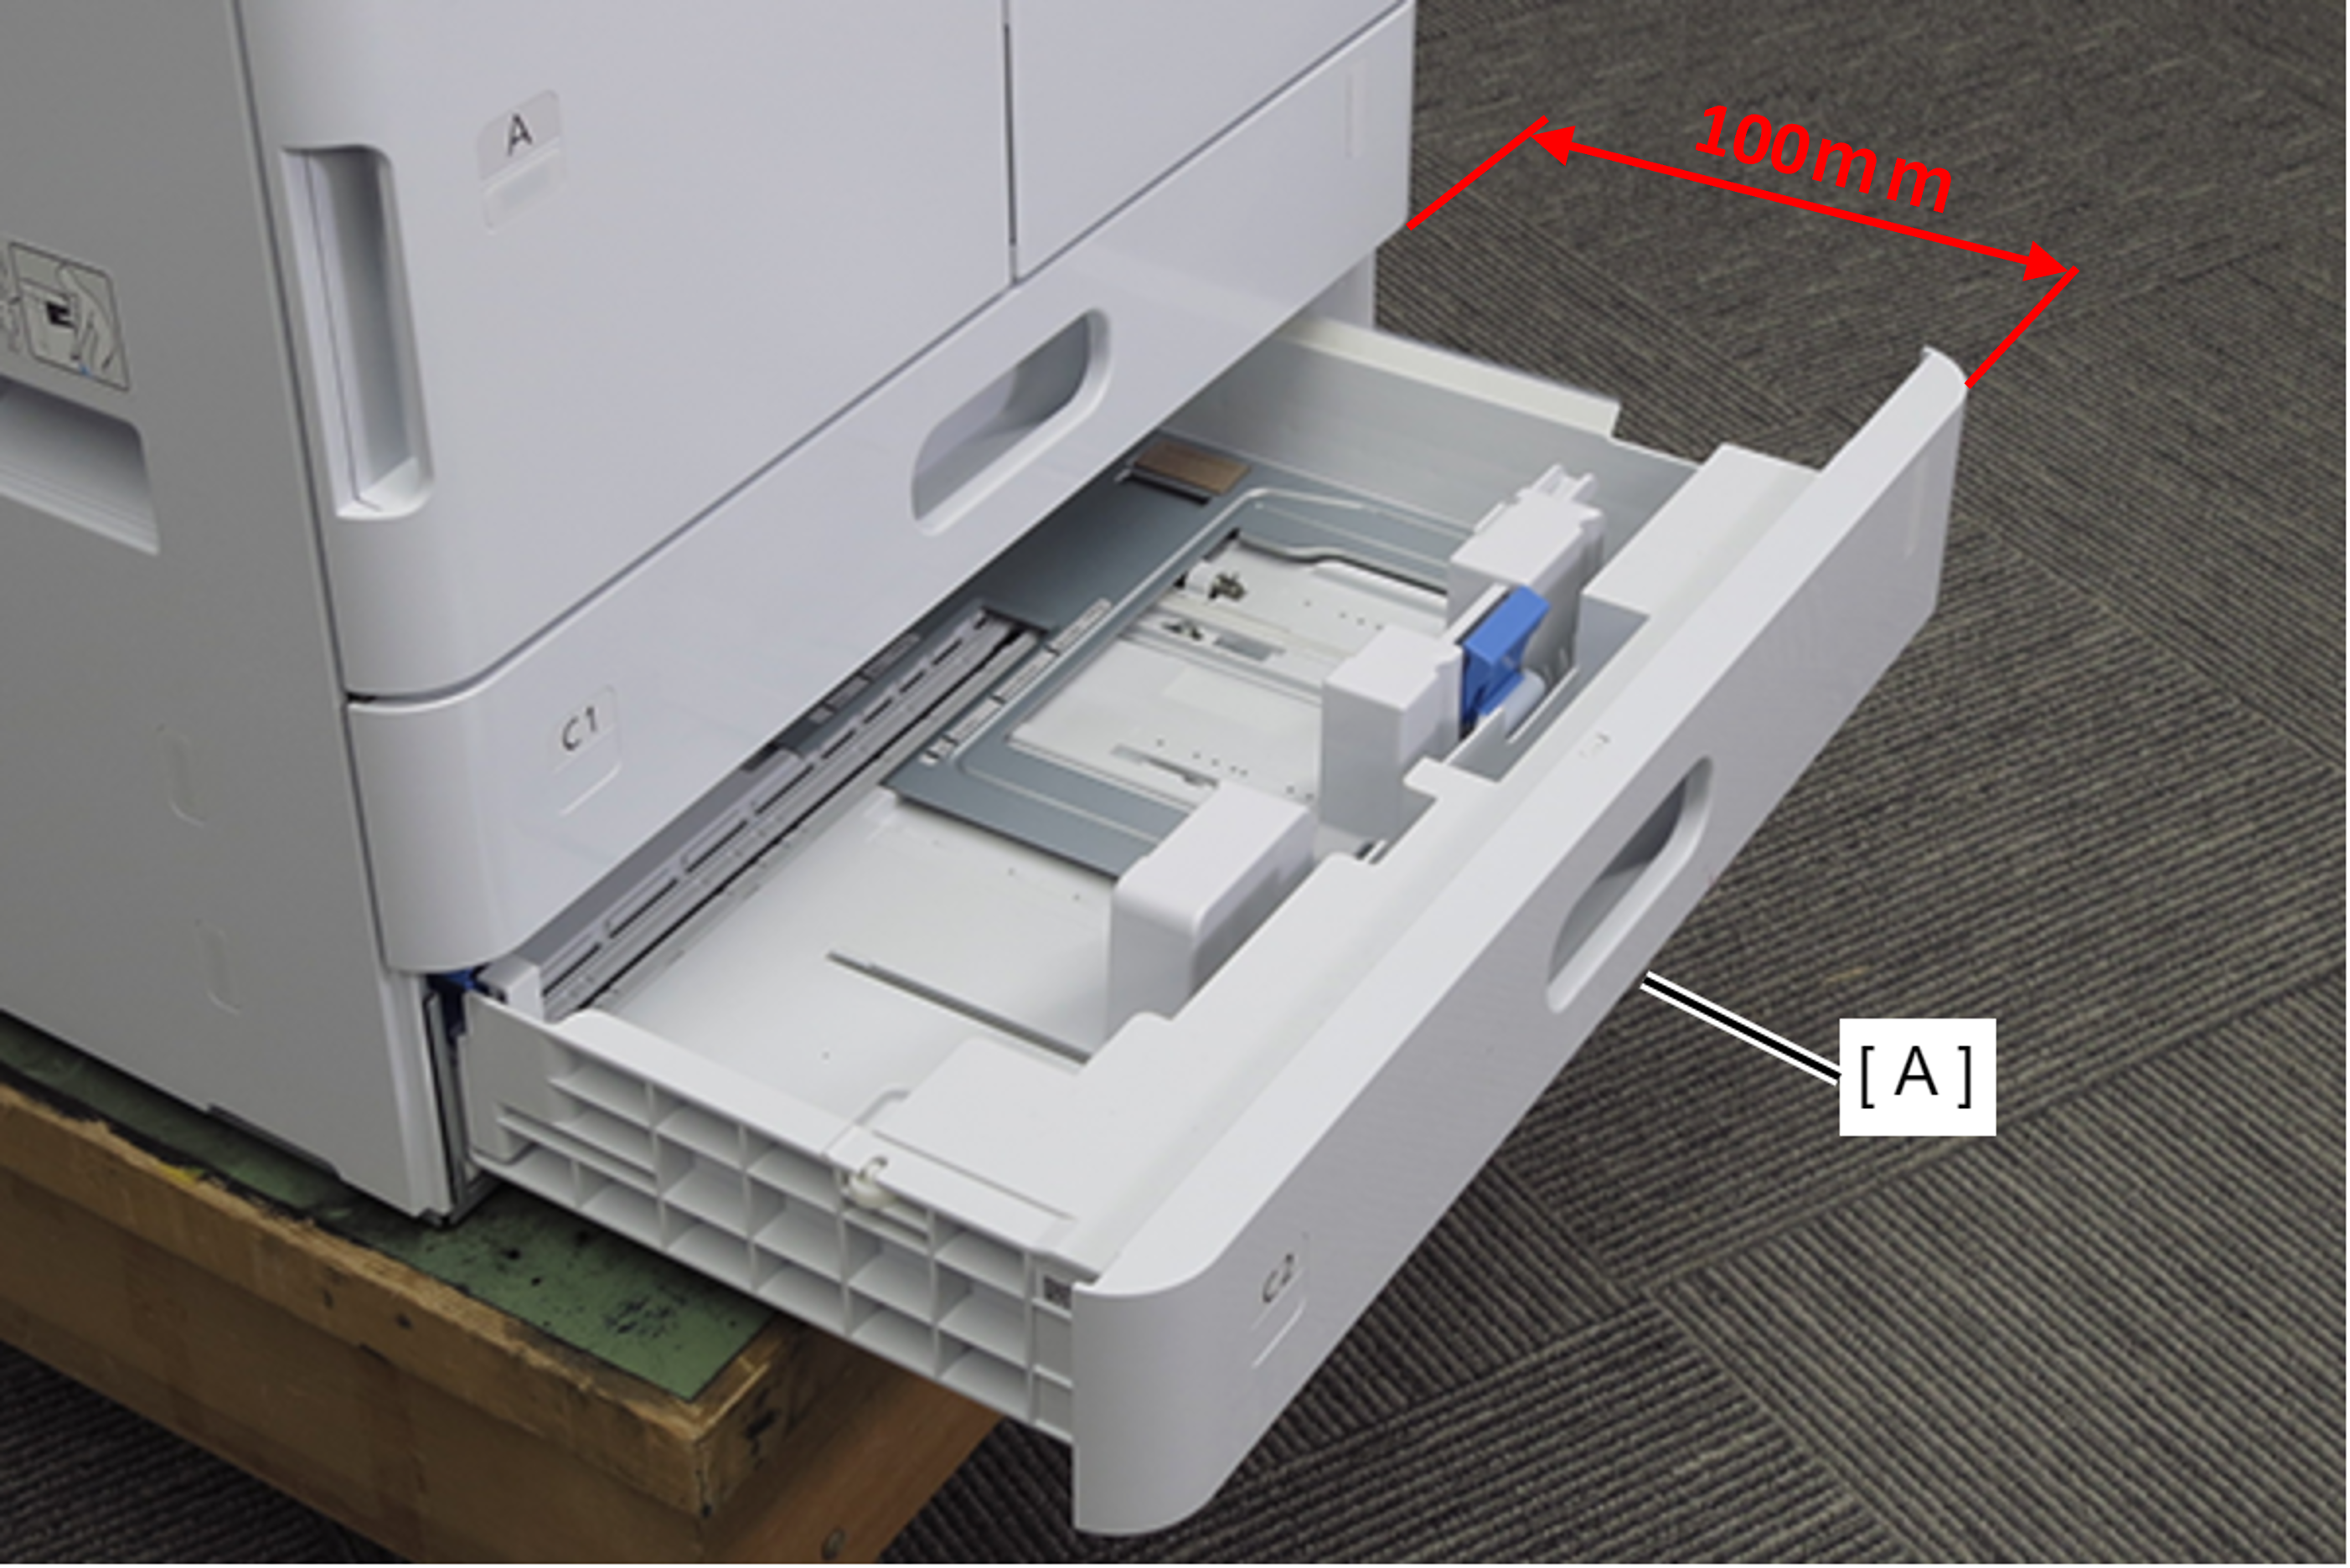
- Pull out the C1 cassette (A). (about 100mm)
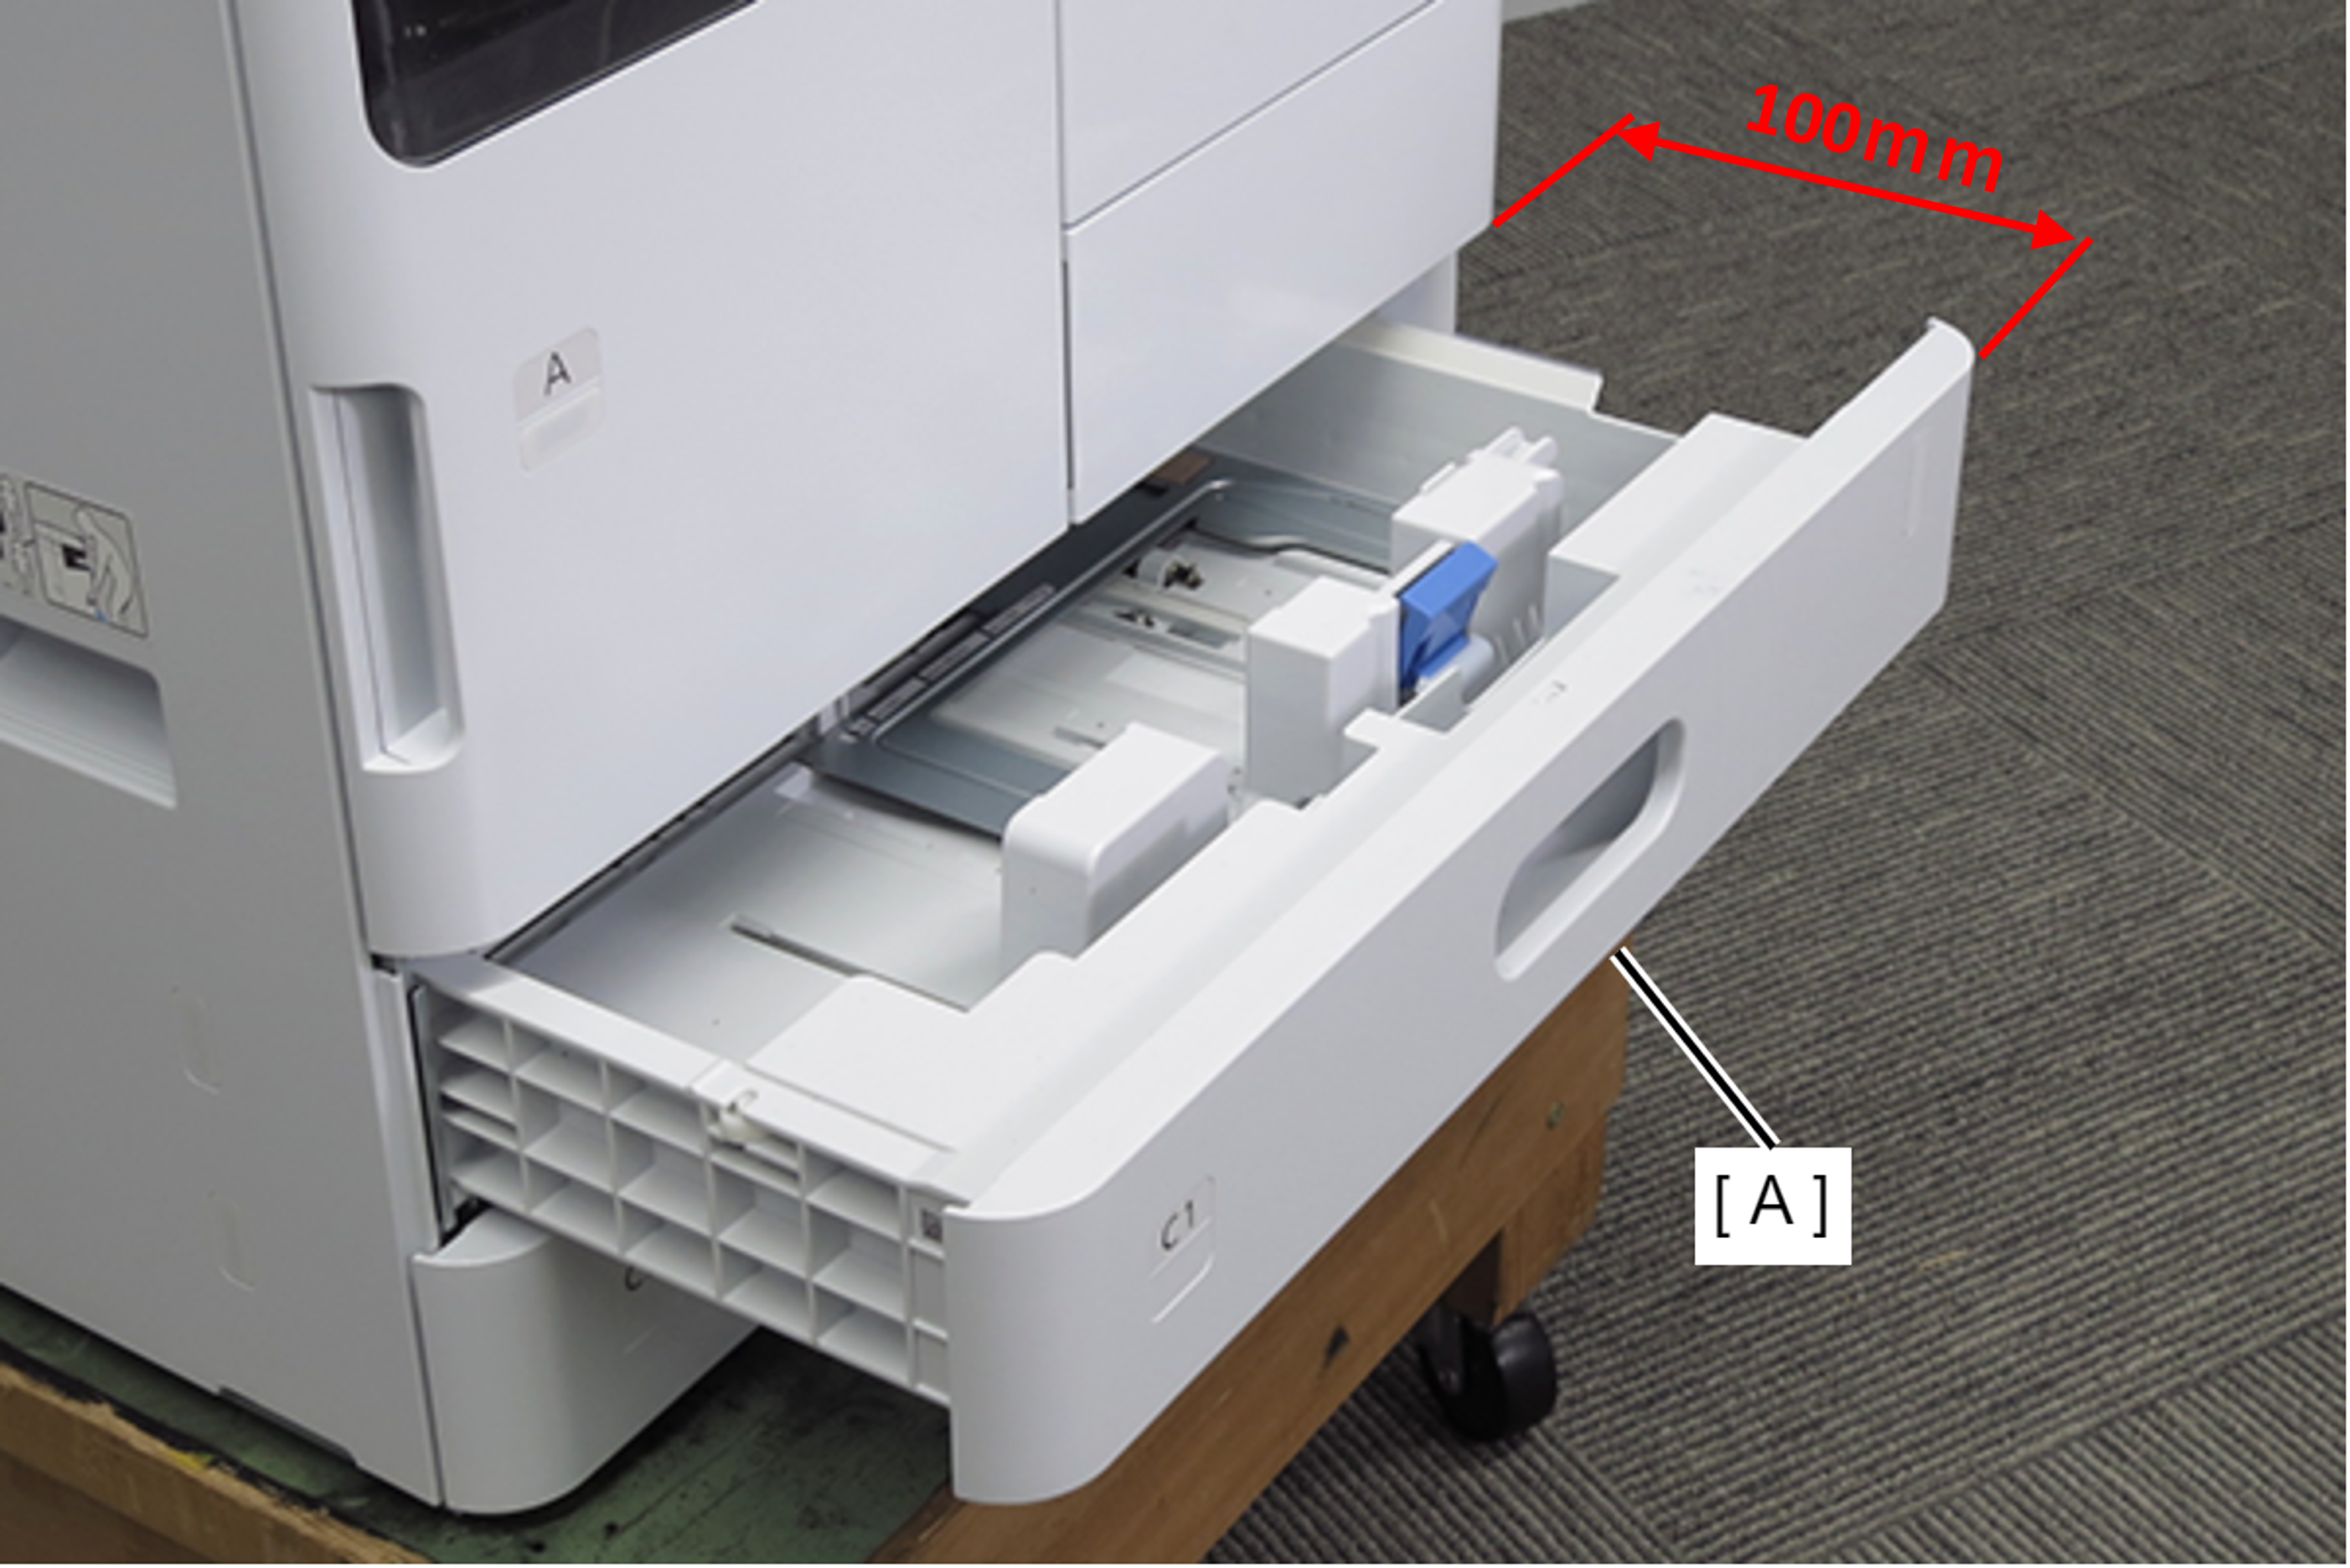
- Pull out the C2 cassette (A). (about 100mm)
- Remove 2 screws and remove the Left Cover Lower (A) in the direction of the arrow.
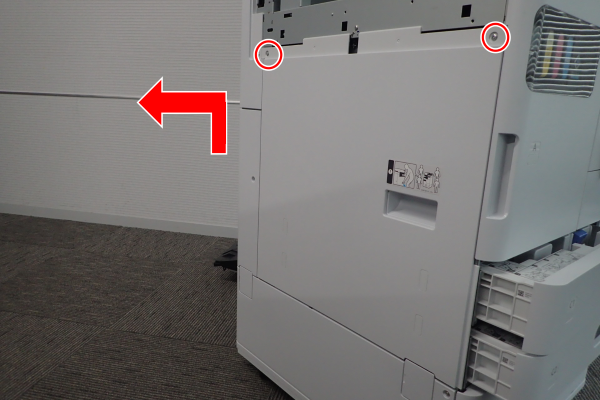
- : 3x10DW
- Remove 1 screw and slide the rear cover (A) in the direction of the arrow to remove it.
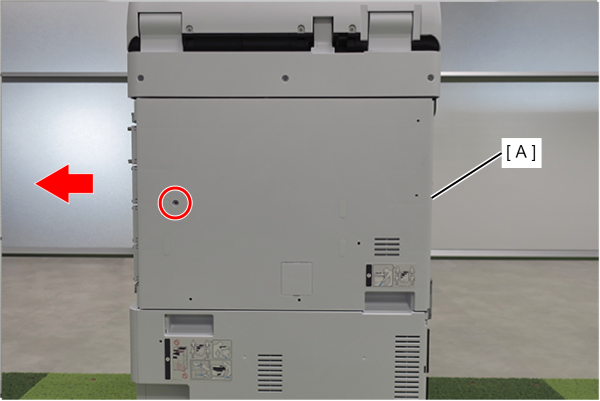
- : 3x10DW
 Assembly / 組み立て
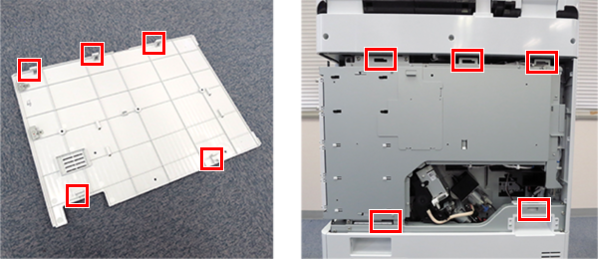
Align the 5 hooks on the rear cover with the 5 holes on the main unit and attach it.
- Remove 1 screw and remove the Left Cover Sub Lower (A) in the direction of the arrow.
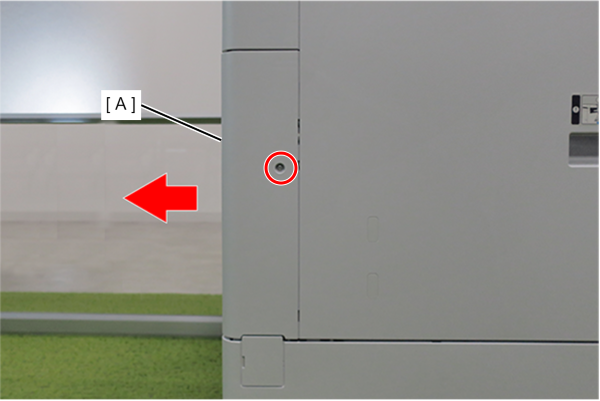
- : 3x10DW
- Remove 4 screws.
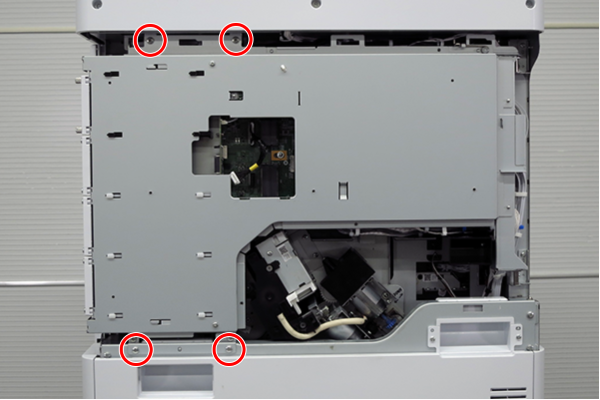
- : 4x8D
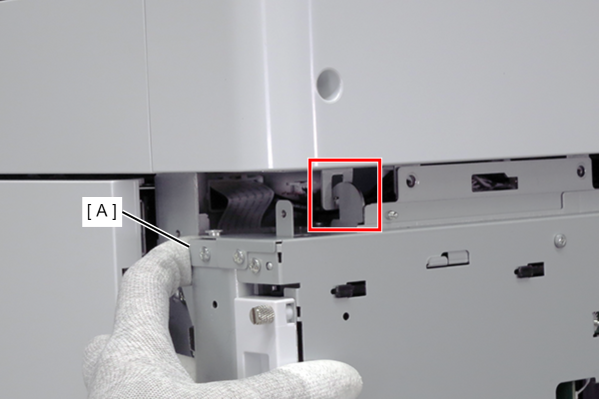
- Slightly lift the board box (A) to release the hook.
- Open the board box (A).
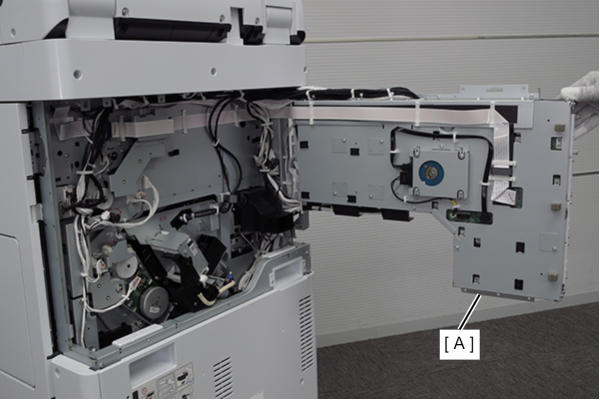
 Check Point / チェックポイント
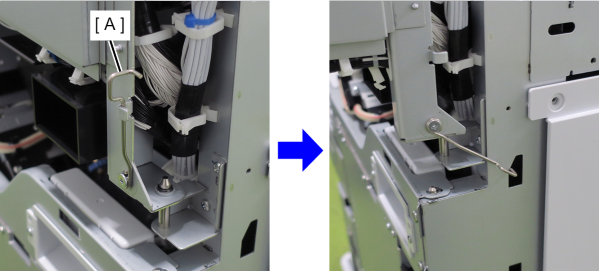
- By hooking the hook (A) of the board box to the hole in the main body, the position of the board box is stabilized, making it easier to work.
- Do not close the circuit board box while hooking the hook (A) on the main unit. The frame may be deformed.
- Remove one screw and remove the Rear cover lower (A) in the direction of the arrow.
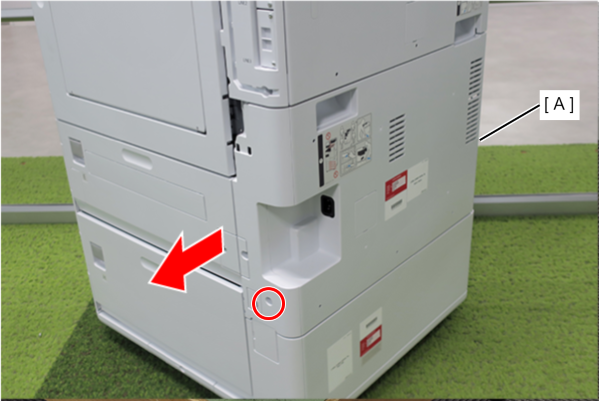
- : 3x10DW
- Remove 8 screws and open the power supply box (A).
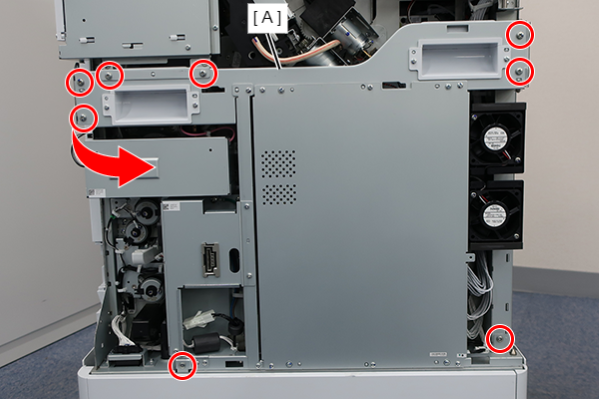
- : 4x8D/P
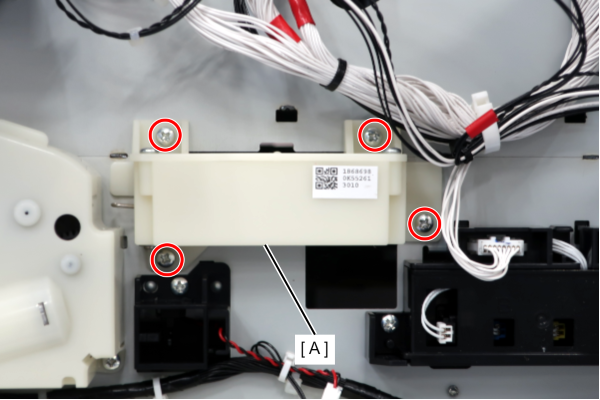
- Remove 4 screws, and remove the C1 Pulling Unit (A).
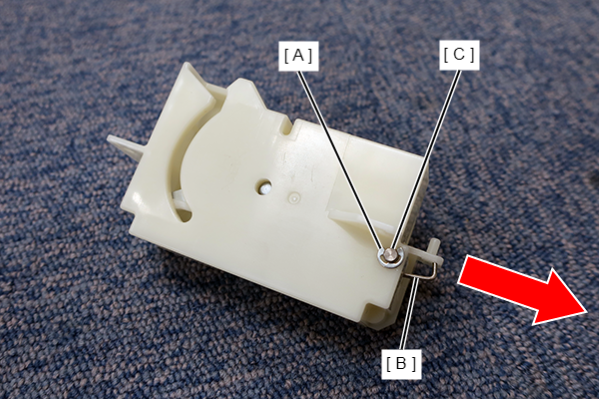
Remove the E-ring (A) and remove the pin (C) while pulling the damper lever (B) in the direction of the arrow.
 Caution / 注意
- Be sure to remove the pins before opening the cover, as opening the cover before removing the pins may damage the cover.
- The damper has a strong tension, so be careful not to damage the parts or injure your fingers when pulling the lever.
 Note / 補足
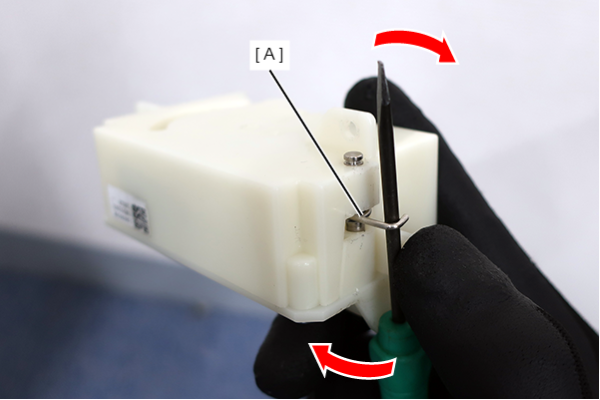
When pulling the damper lever (A), it is easier to work by using the principle of leverage with a tool such as a flathead screwdriver.
 Assembly / 組み立て
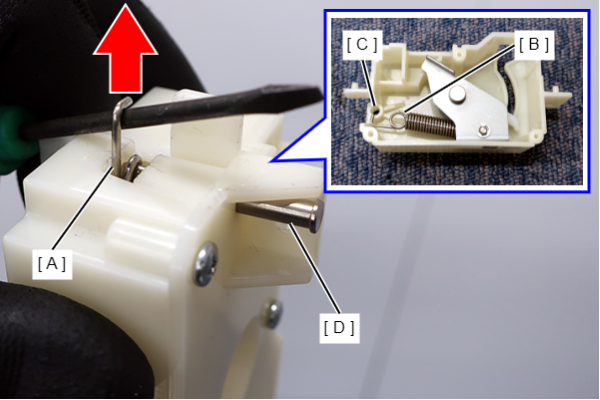
- Pull the damper lever (A), align the damper ring (B) with the case hole (C), and attach the pin (D) through the ring and hole.
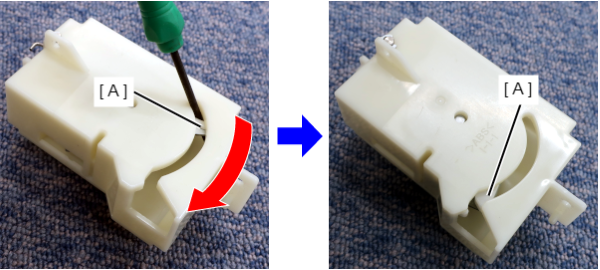
- After installing the pin, move the C1 Damper (A) to the position shown in the figure using a flat tipped tool such as a flathead screwdriver.
- Remove the 3 screws and remove the cover (A).
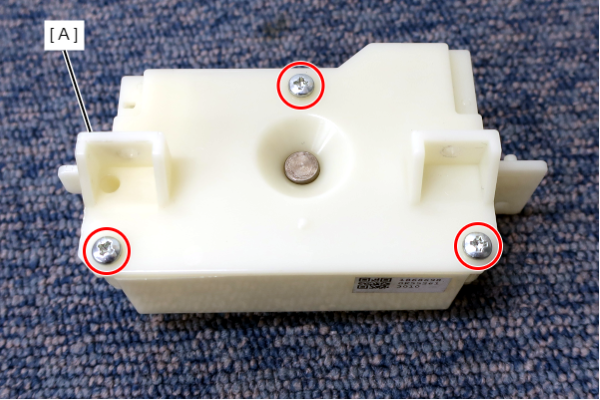
- : 3x10T/P
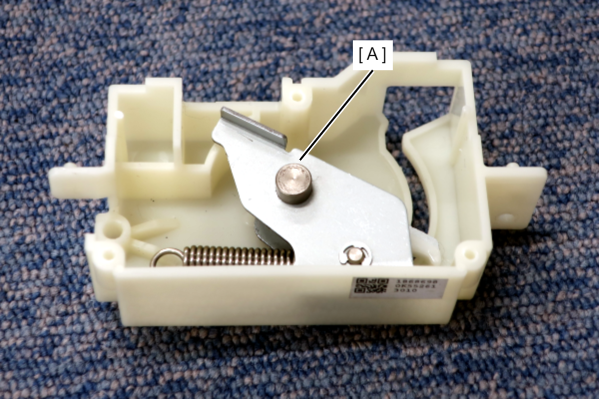
- Remove the C1 Damper (A).
-
- : 3x8D/P