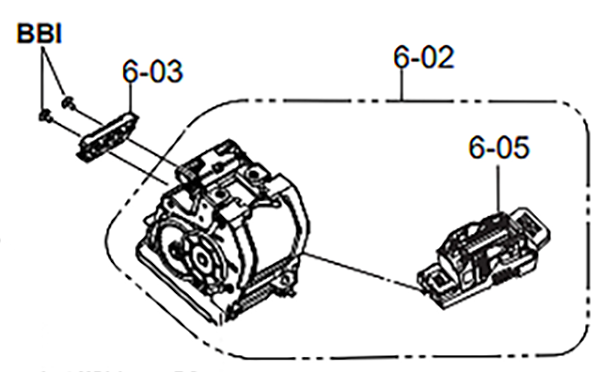
Stapler Unit
- Refer to the following and remove the inner finisher from the printer.
Inner Finisher Installation Procedure
 Caution / 注意
- When disconnecting the Inner Finisher Unit from the Main Unit, the power of the Main Unit must be turned off.
- Remove the two screws and remove the tray assembly (A).
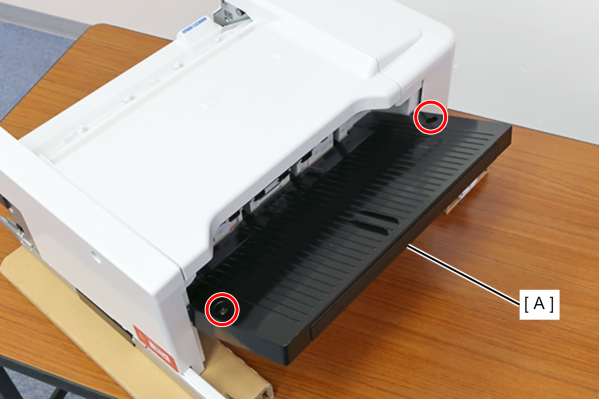
 : 4x8DC/BK/P
- Open the cartridge cover (A) and remove the Staple Cartridge (B).
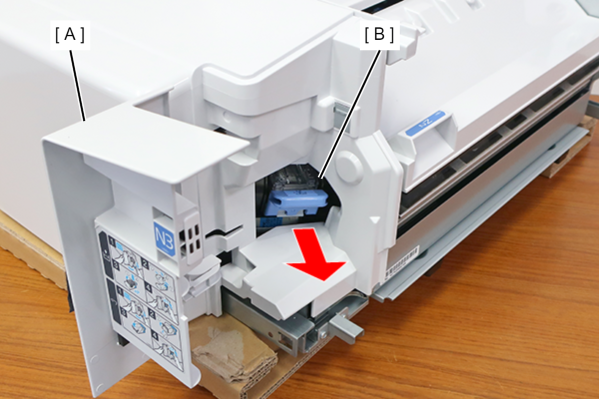
- Remove 1 screw of the Housing Front (A).
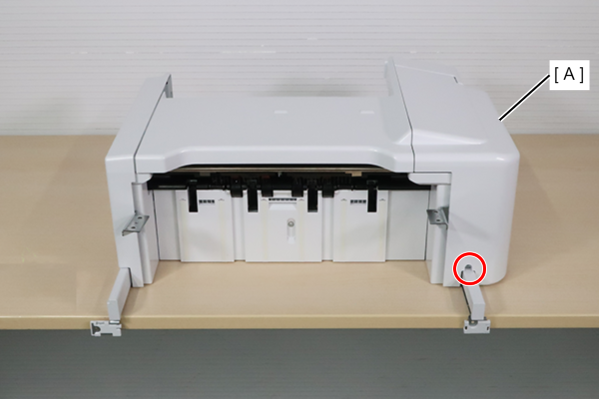
- : 3x8DC
- Open the cartridge cover (A) and remove the screw securing the Housing Front.
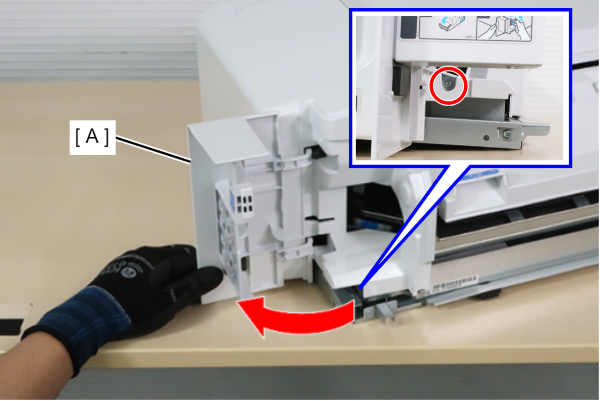
- : 3x8DC
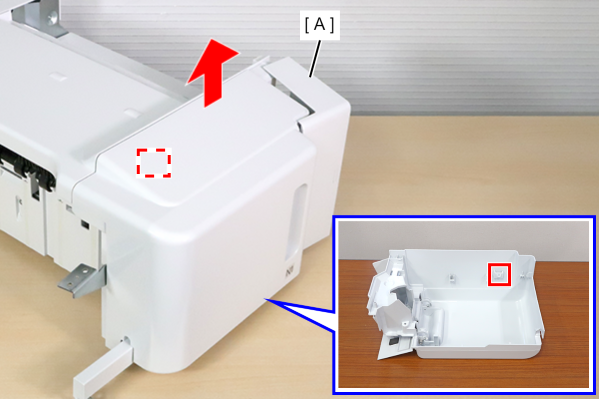
- Lift the Housing Front (A) to unhook.
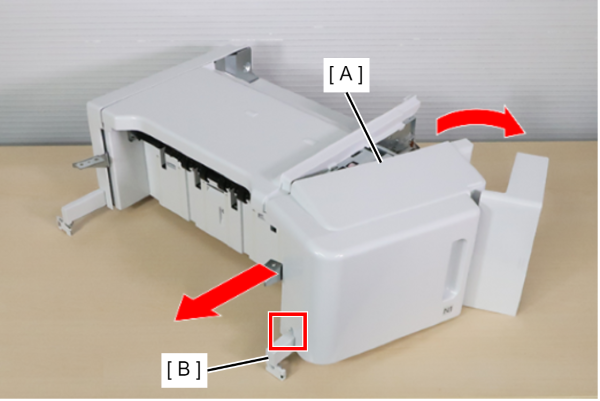
- Open the right side of the Housing Front (A) and slide it to the left to remove the interference with the rail (B) and remove the Housing Front (A).
 Check Point / チェックポイント
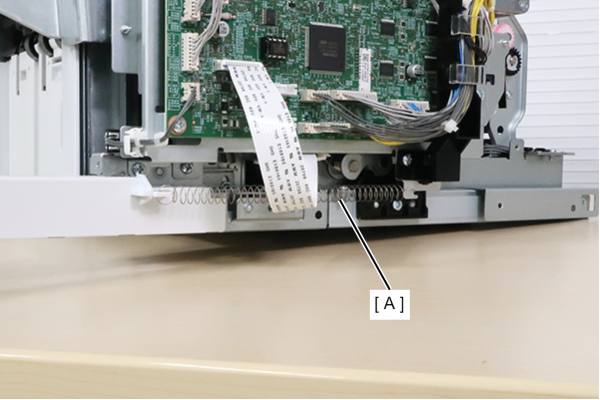
Be careful the Housing Front (A) can easily get caught by extension spring on the inside.
 Assembly / 組み立て
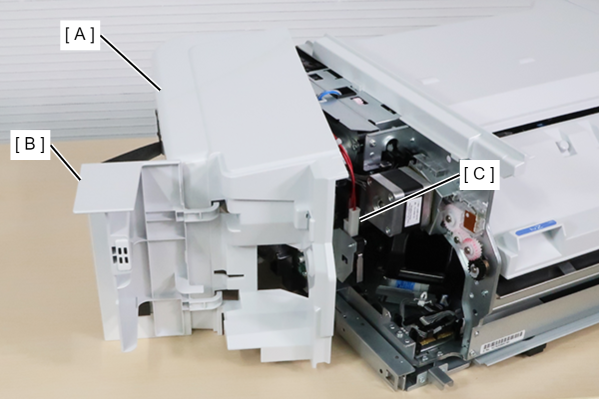
Install the Housing Front (A) with the cartridge cover (B) opening. The protrusion inside the cartridge cover (B) may contact the cover open sensor (C) and damage it.
- Remove 1 screw, rotate the cover open sensor (A) toward the product to remove the dowel, and lift it upwards to remove it.
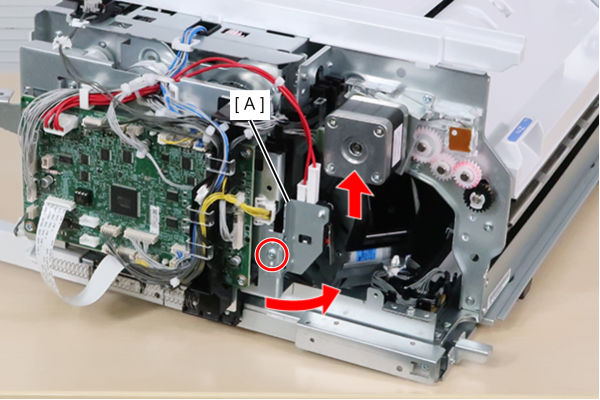
- 3x8D
- Release the cable (B) from the holder (A).
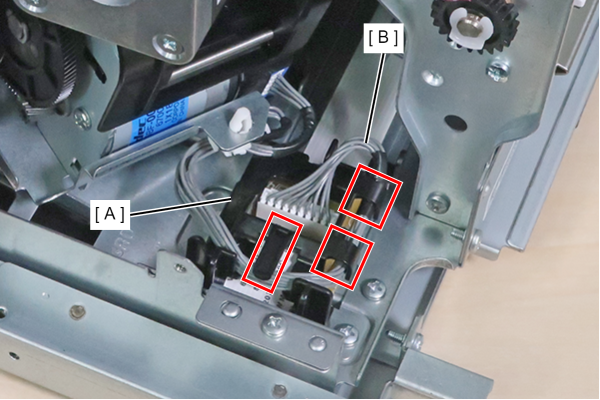
While pressing the tab of the wire saddle (A), move it downward to release the hook and remove the wire saddle (A) from the frame (B).
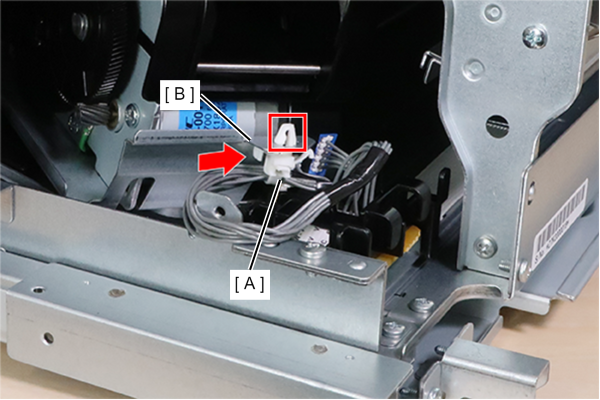
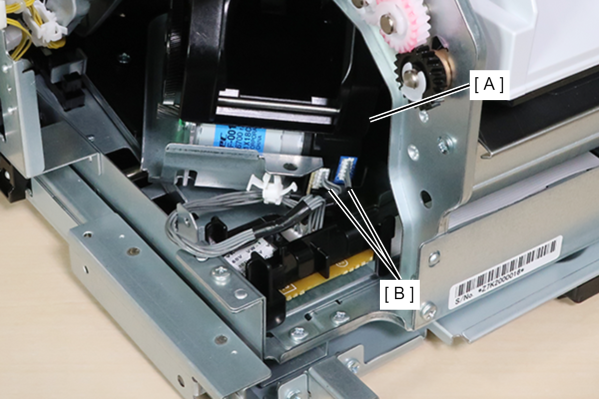
- Disconnect 2 cables (B) from the Stapler Unit (A).
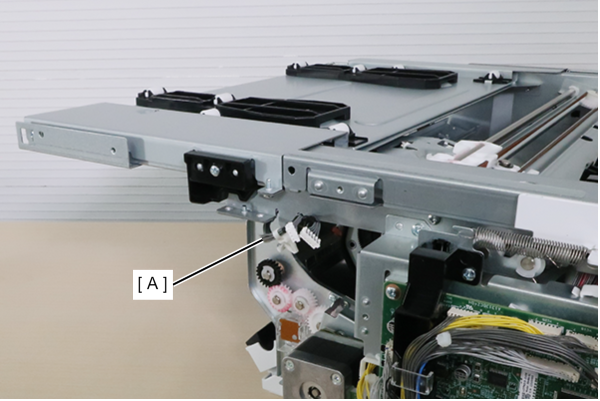
- Turn the Inner Finisher (A) over so that the bottom side faces up. (refer to notes below)
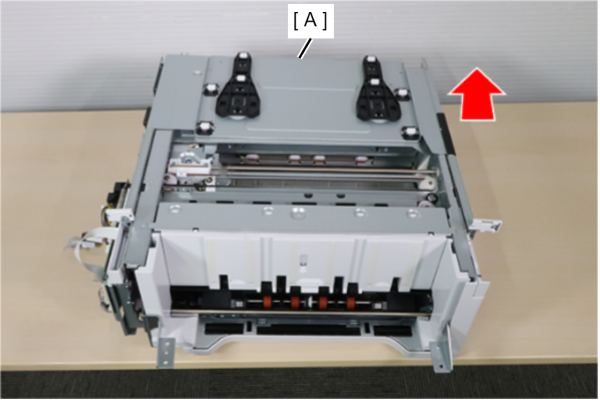 Caution / 注意
- Be careful not to damage cables, boards, etc.
- Since the slider base will moves, be careful not to get your fingers caught.
- Make sure the stapler carriage is in the home position (carriage lock position) to prevent the stapler carriage from moving.
Check Point / チェックポイントHold the slider base (A) on the bottom with both hands and rotate it so that the rear side (B) with the exterior faces down.
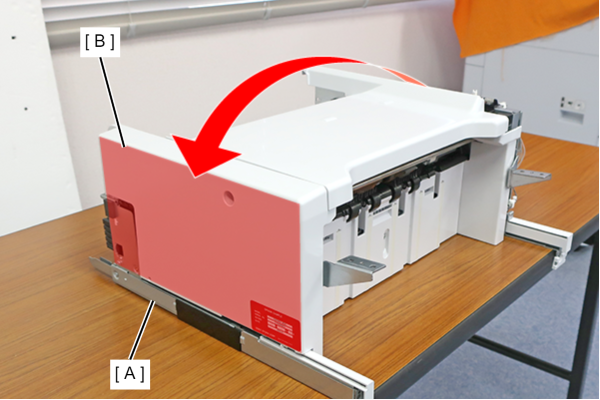
- Slide the slider base (A) to open it to the maximum.
Pull the timing belt (A) and move the stapler carriage (B) to the position where you can see the screw. (refer to notes below)
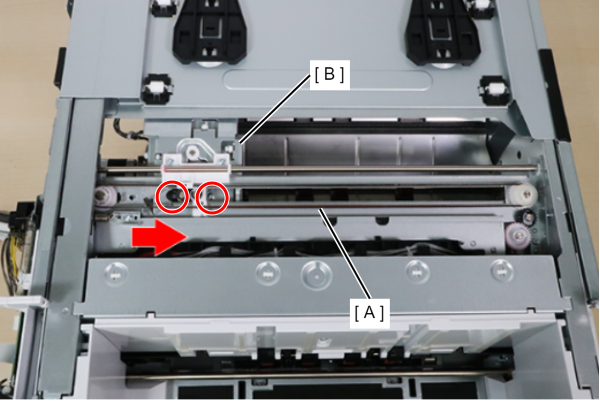 Caution / 注意
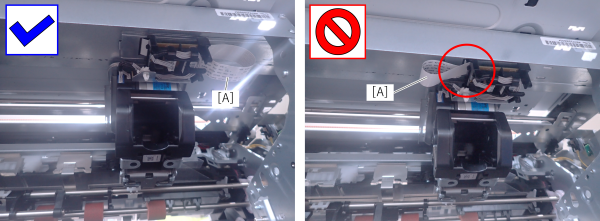
When moving the stapler carriage, be careful not to damage the removed cable (A) or stapler unit FFC (B) by getting them caught or pinched in the frame or stapler carriage.
If the stapler unit FFC (B) is disconnected, a staple cartridge recognition error will be displayed and the product will need to be replaced (parts cannot be replaced).
Clamping the stapler unit FFC (B)
- Remove 2 screws by fixing Stapler Unit (A).
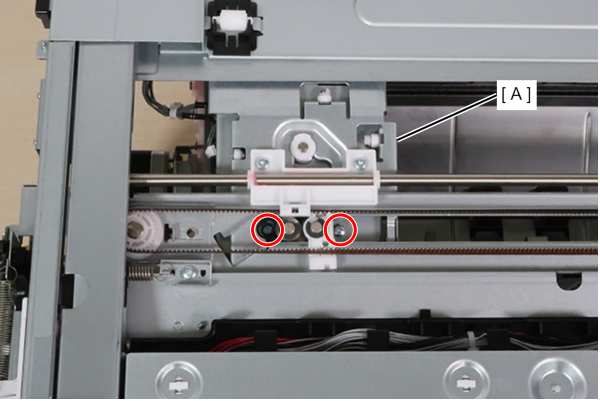
- 3x8D
- Move the stapler carriage (A) to the rightmost position where it does not interfere with the stapler unit (B).
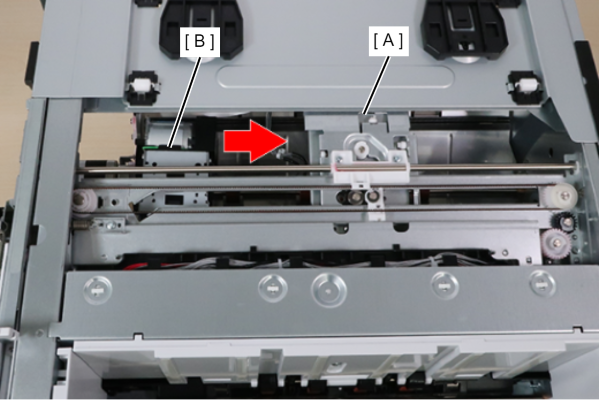 Caution / 注意
When moving the stapler carriage, be careful not to damage the removed cable (A) or stapler unit FFC (B) by getting them caught or pinched in the frame or stapler carriage.
If the stapler unit FFC (B) is disconnected, a staple cartridge recognition error will be displayed and the product will need to be replaced (parts cannot be replaced).
- Rotate the stapler unit (A) 90 degrees counterclockwise when viewed from above to place in landscape orientation.
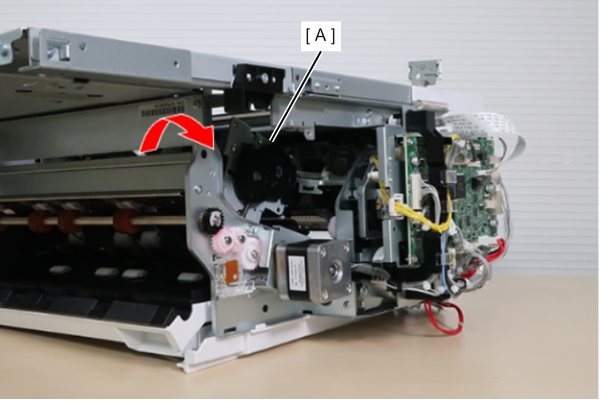
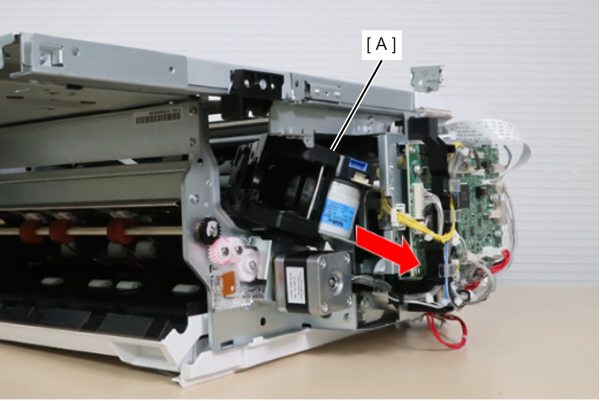
- Remove the Stapler Unit (A), being careful not to interfere with the frame, etc.
 Caution / 注意
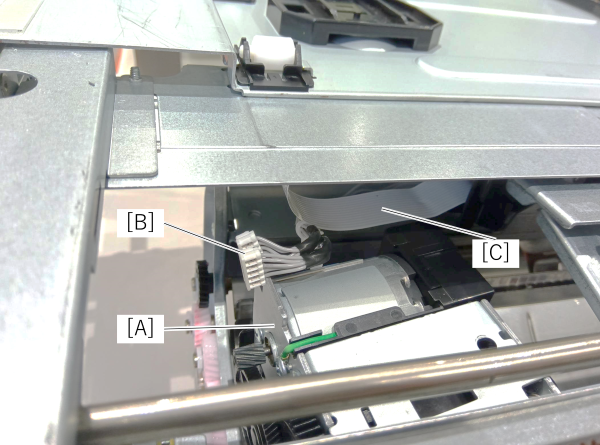
When removing the stapler unit (A), be careful not to interfere with and damage the removed cable (B) and stapler unit FFC (C).
If the stapler unit FFC (B) is disconnected, a staple cartridge recognition error will be displayed and the product will need to be replaced (parts cannot be replaced).
 Check Point / チェックポイント
The ASP (6-02) Stapler Unit does not come with a guide stapler (6-03), so when replacing the Stapler Unit, remove them from the old Stapler Unit and attach them to the new one.