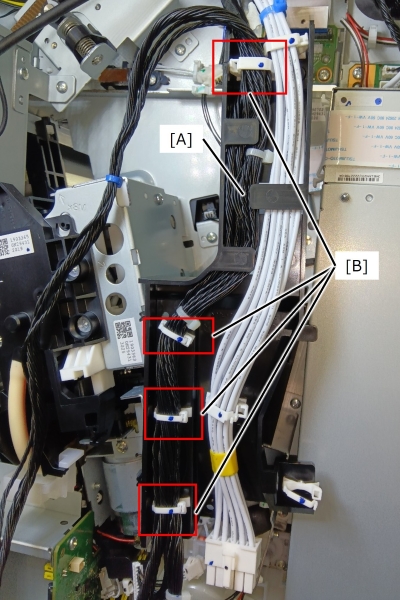
Print Head Harness
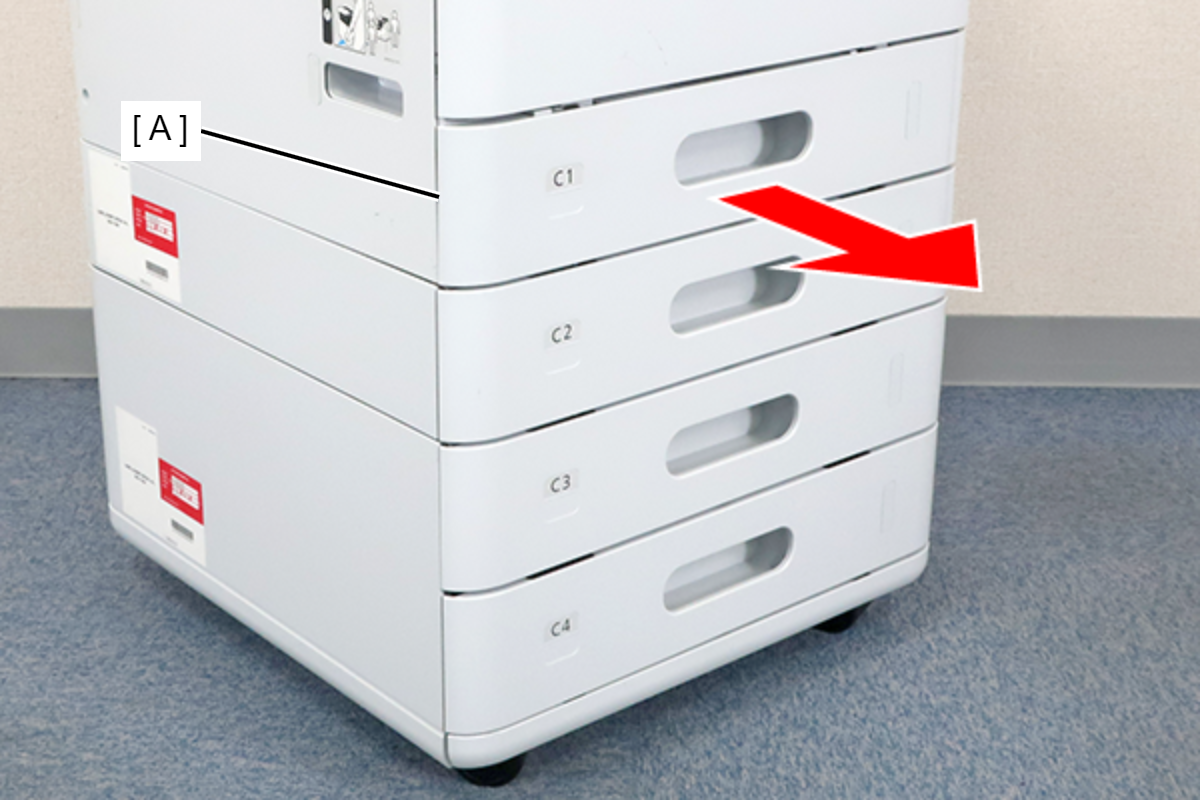
- Remove the C1 cassette (A).
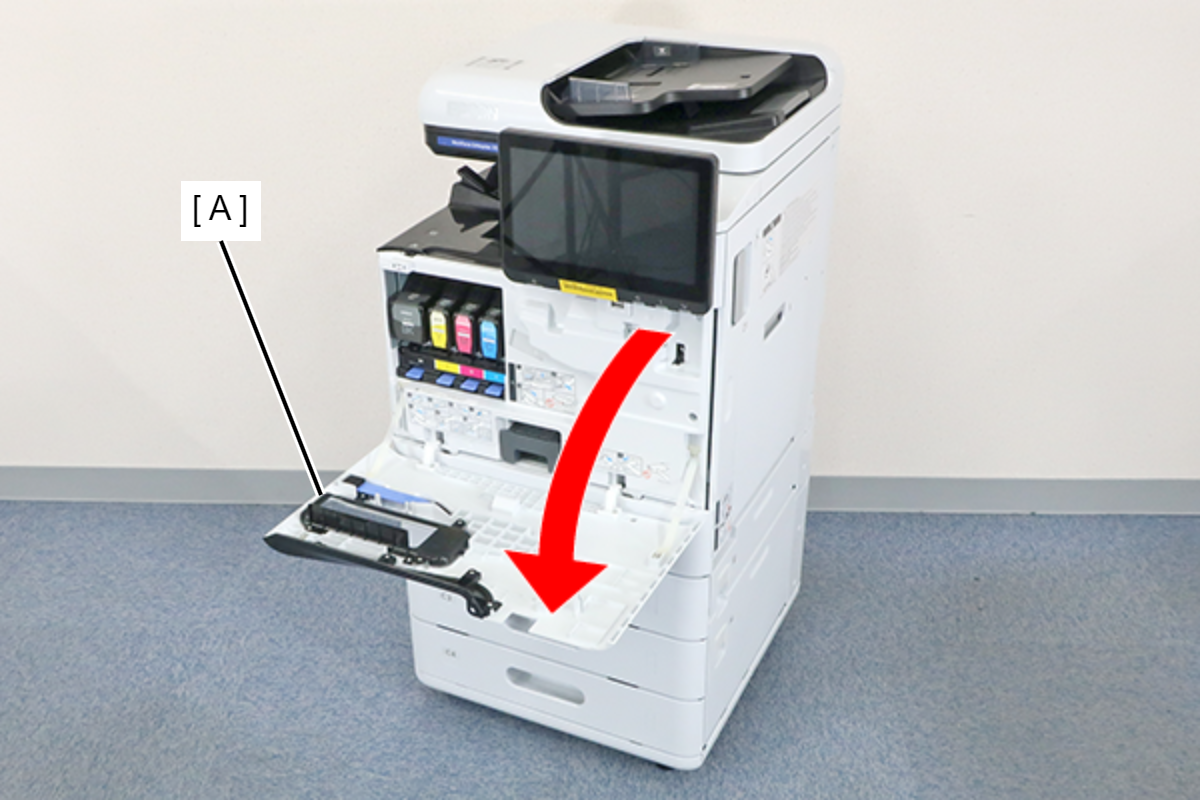
- Open the Front Cover (A).
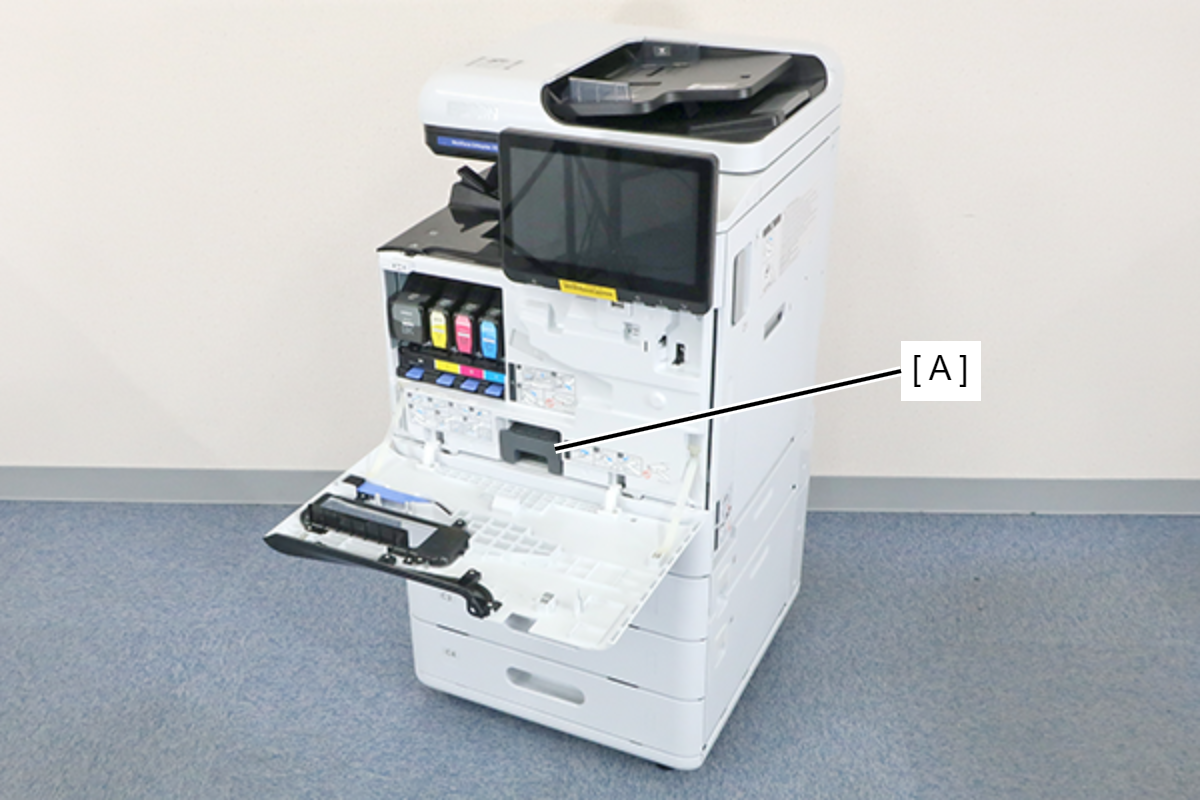
- Remove the Maintenance Box (A).
- Remove the 7 screws and remove the Front Inner Cover (A).
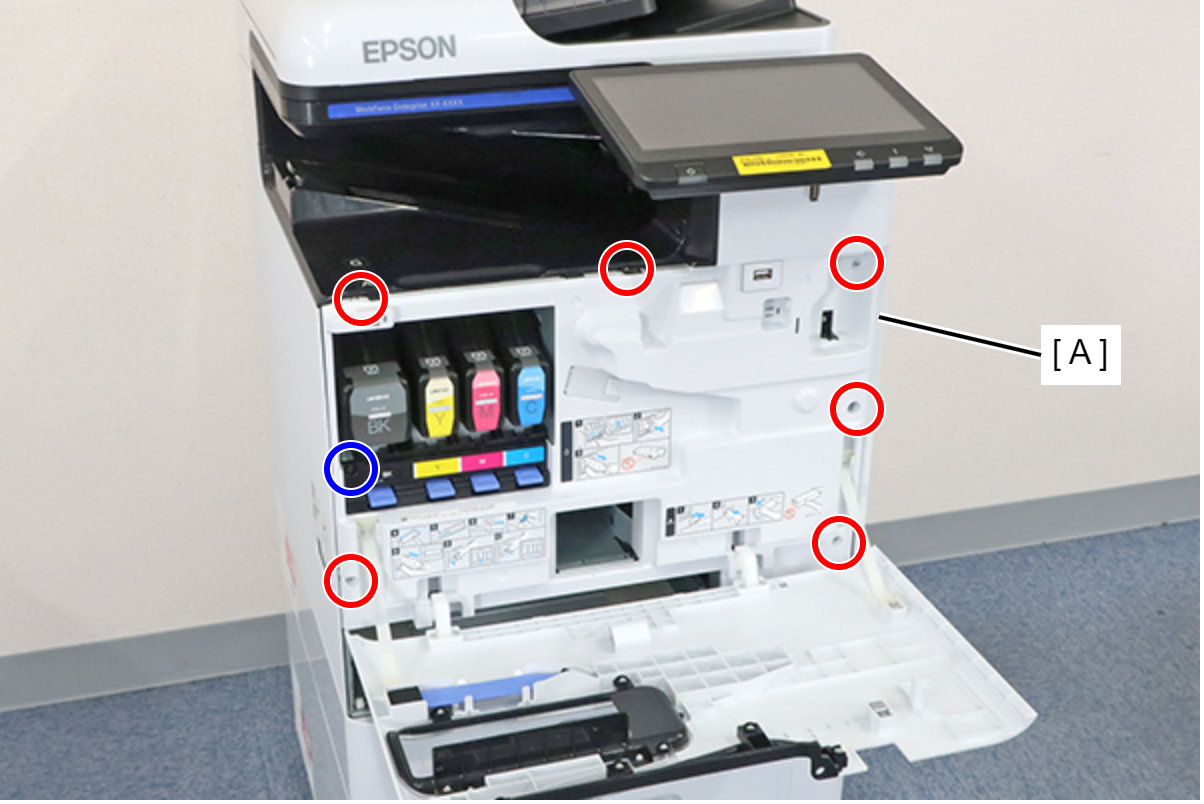
 : 3x8D
 : 3x8D/BK
 Assembly / 組み立て
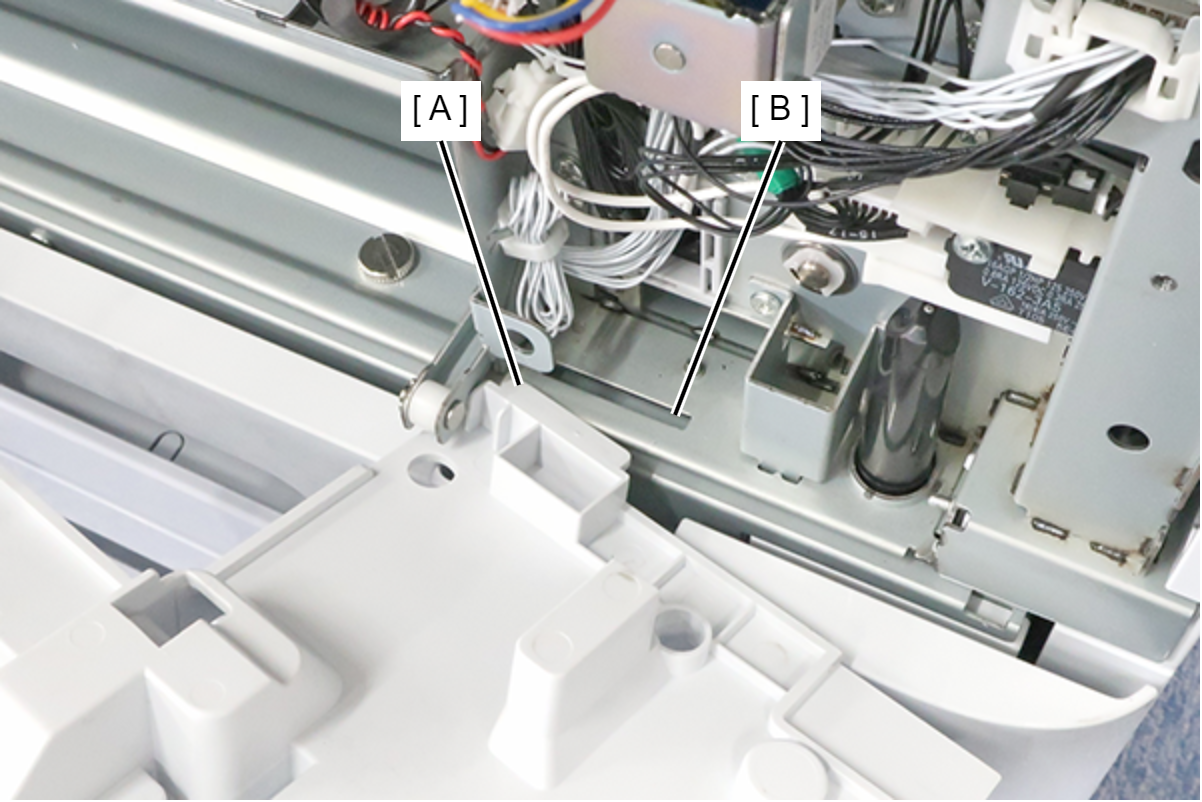
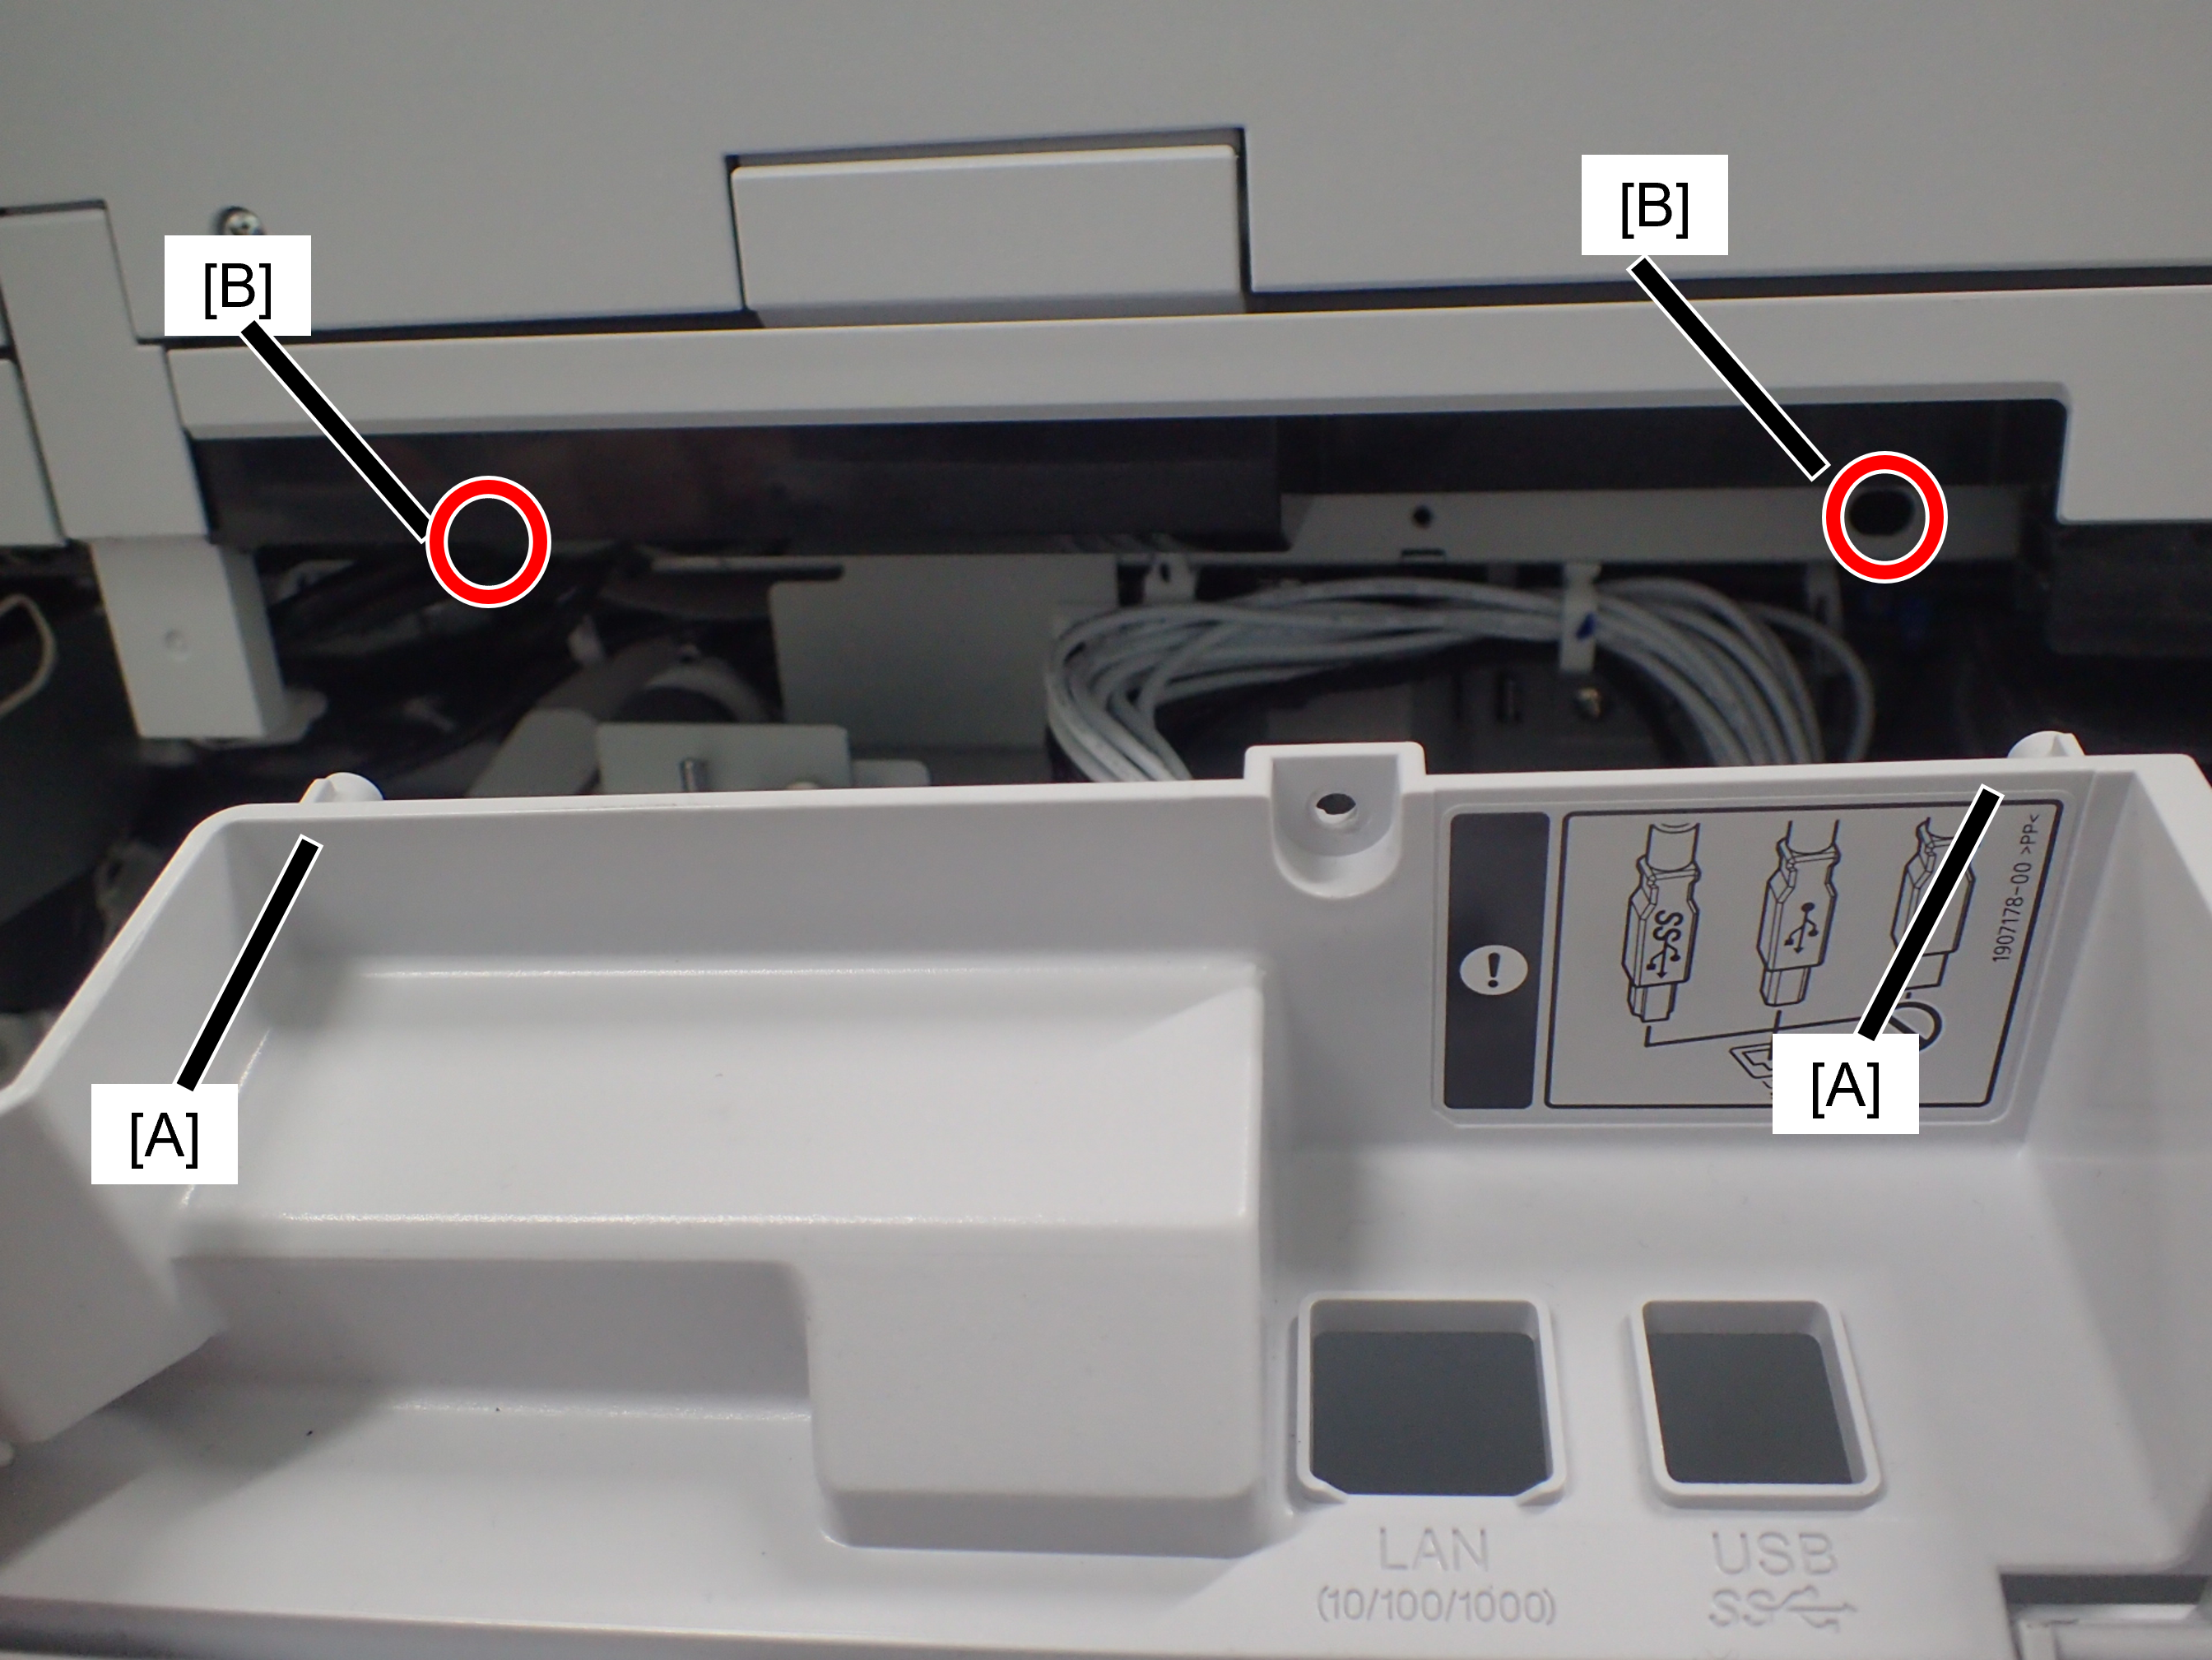
Insert the protrusion (A) of the Front Inner Cover into the hole (B) of the main unit and install.
 Note / 補足
If the wireless LAN unit (A) is installed, remove it.

- Remove the FFC (A) from connector.
- Remove the 2 screws and remove the Panel Unit (B).
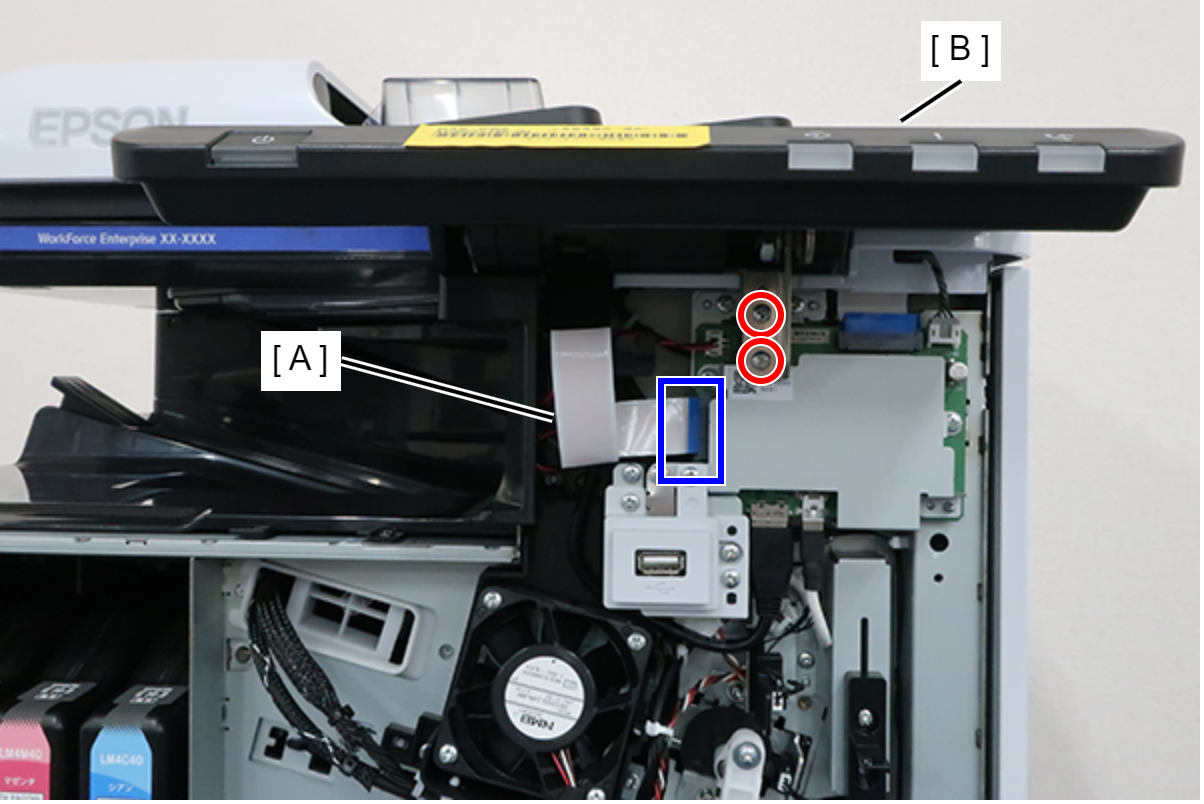
 : 3x8D
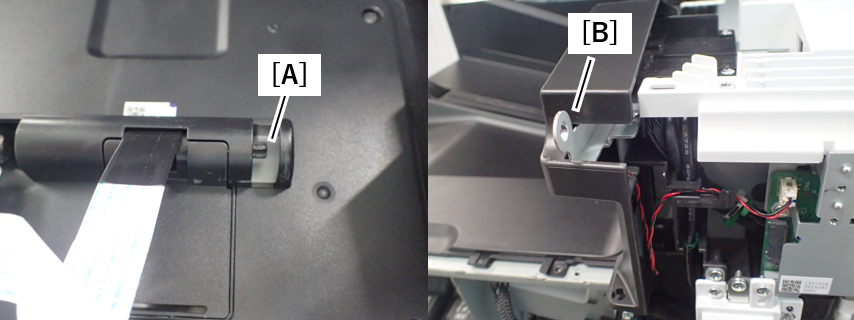
Assembly / 組み立てWhen installing the panel unit, align the dowel (A) of the panel unit with the plate hole (B) on the main unit side.
- Remove the screw and slide the Panel Upper Cover (A) in the direction of the arrow to remove it.
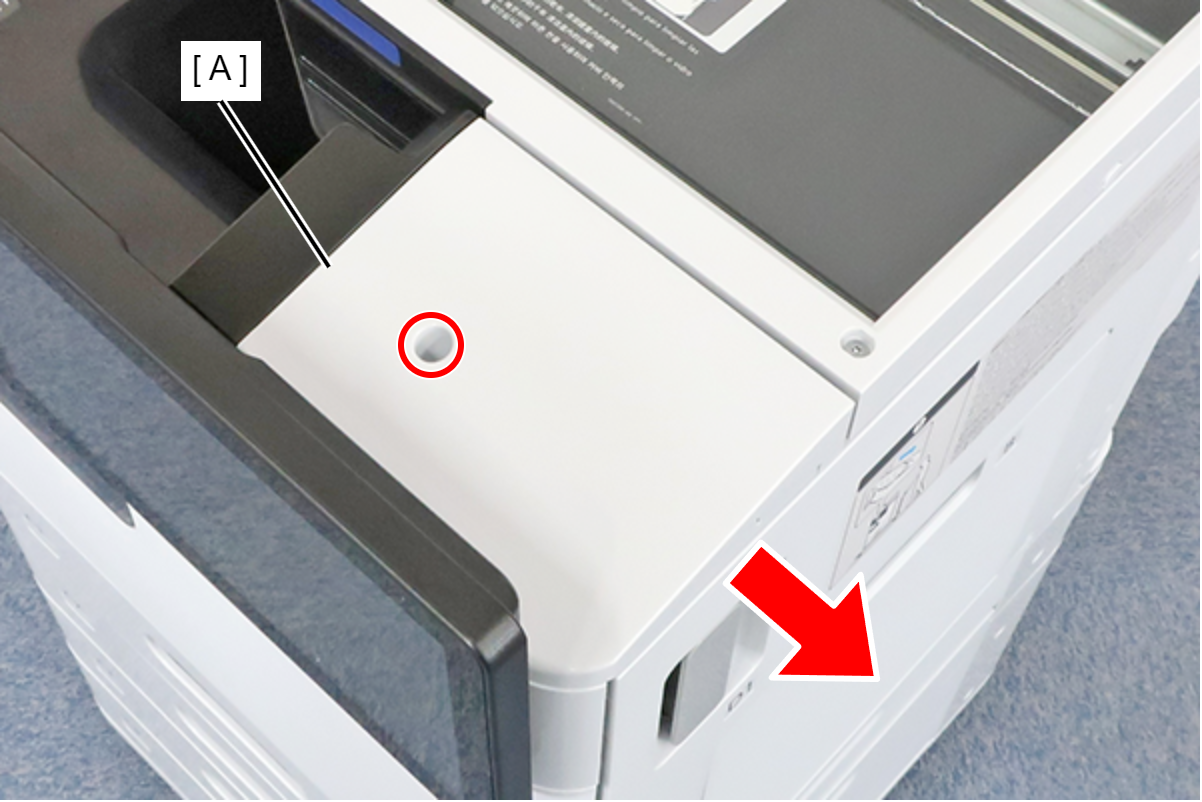
- : 3x8D
- Remove 3 screws.
- Disconnect the cable from the connector (A) and remove the Panel Inner Cover (B).
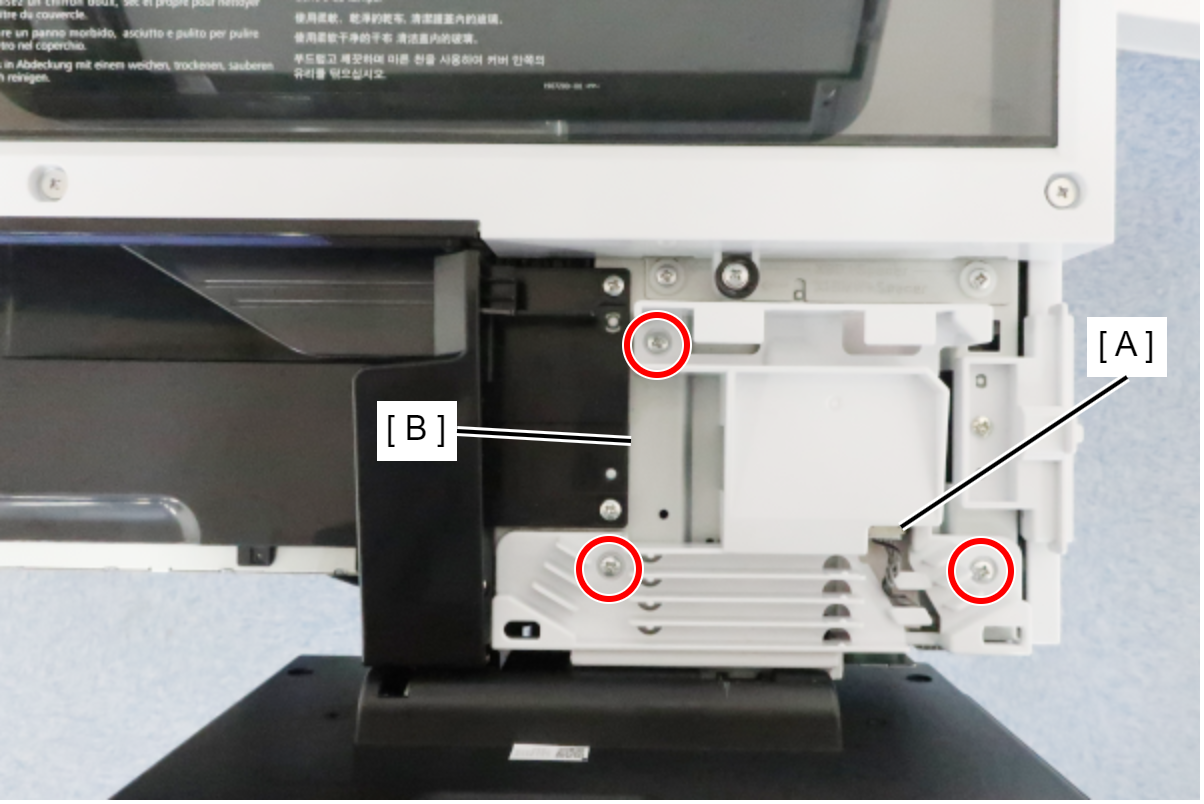
- : 3x8D
- Remove the FFC (A) from connector.
- Disconnect the cables from the 3 connectors (B).
- Remove 6 screws and remove the Panel Relay Board Assy (C).
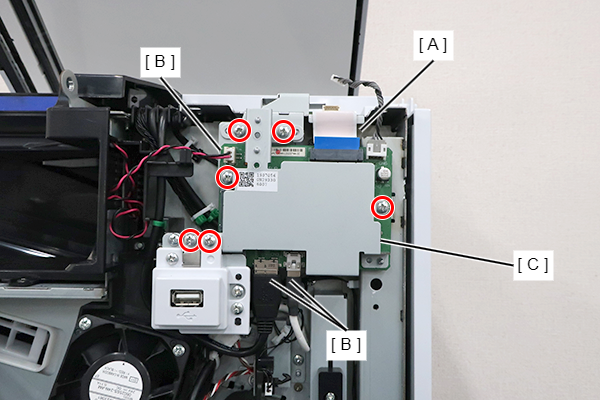
 : 3x8D
- Remove the cables from the connector (A).
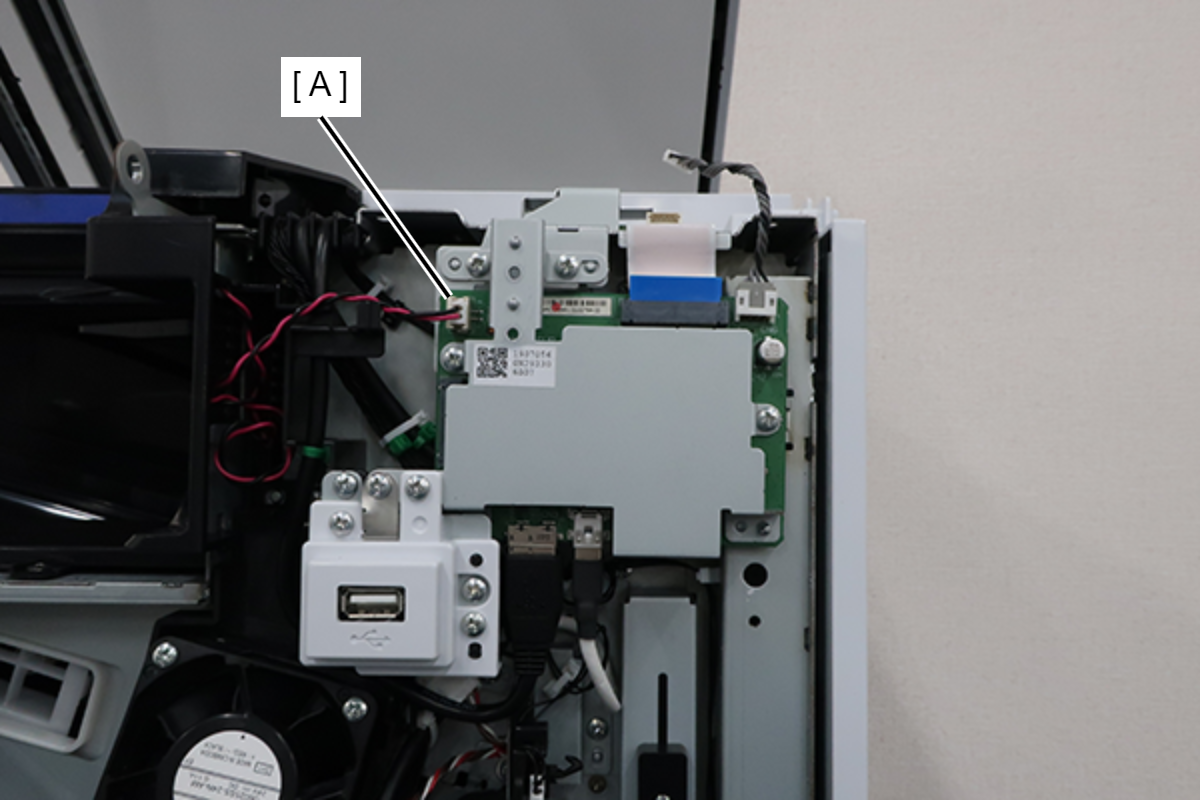
- Remove 2 screws and remove the Speaker Assy (A) in the direction of the arrow.
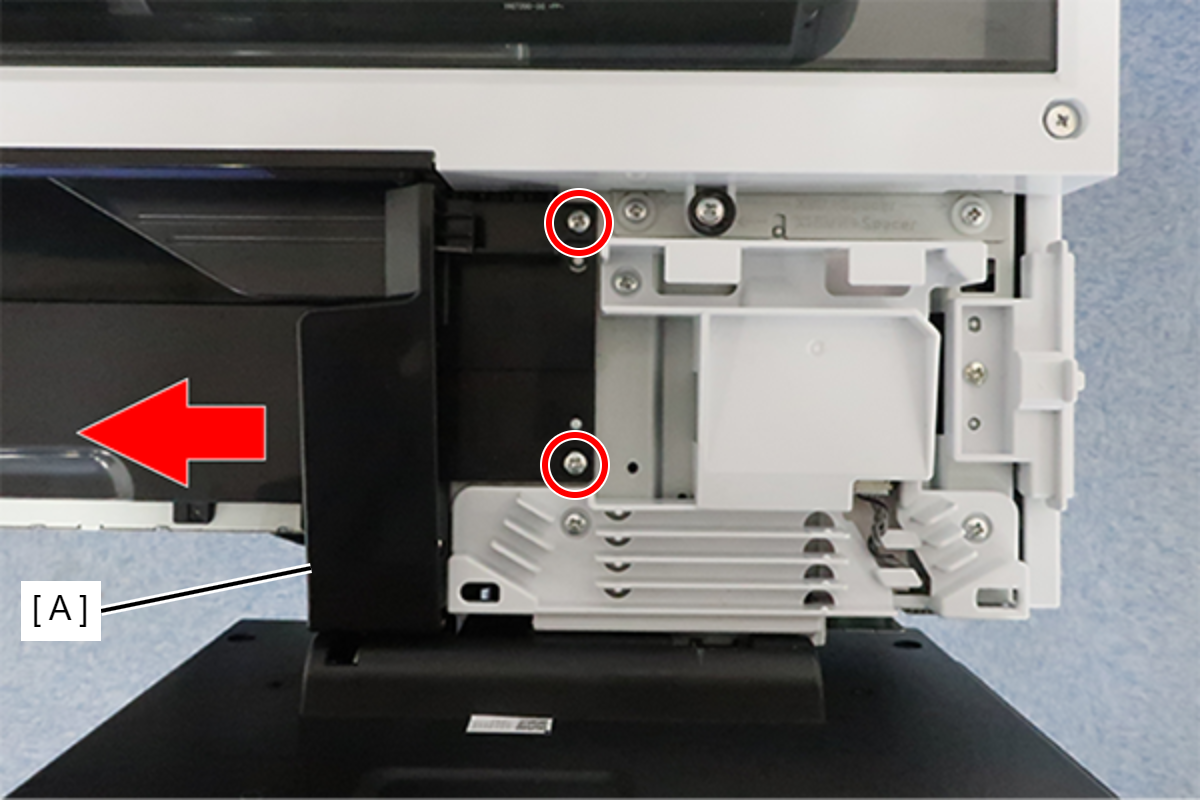
- : 3x8D
Assembly / 組み立てWhen installing the Speaker Assy, align the protrusions with the notches on the main unit side.
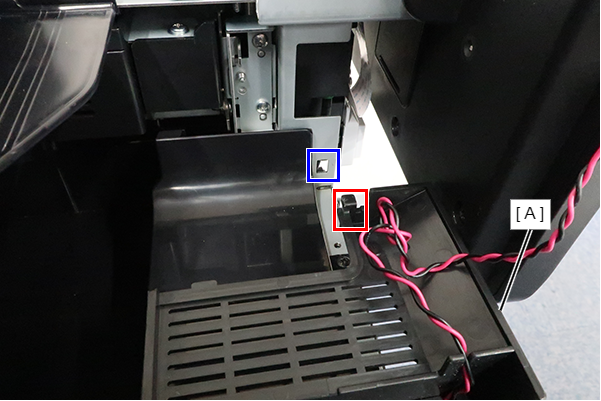
- Remove the cables from the connector (A).
- Remove the 4 screws and remove the Front USB Port Assy (B).
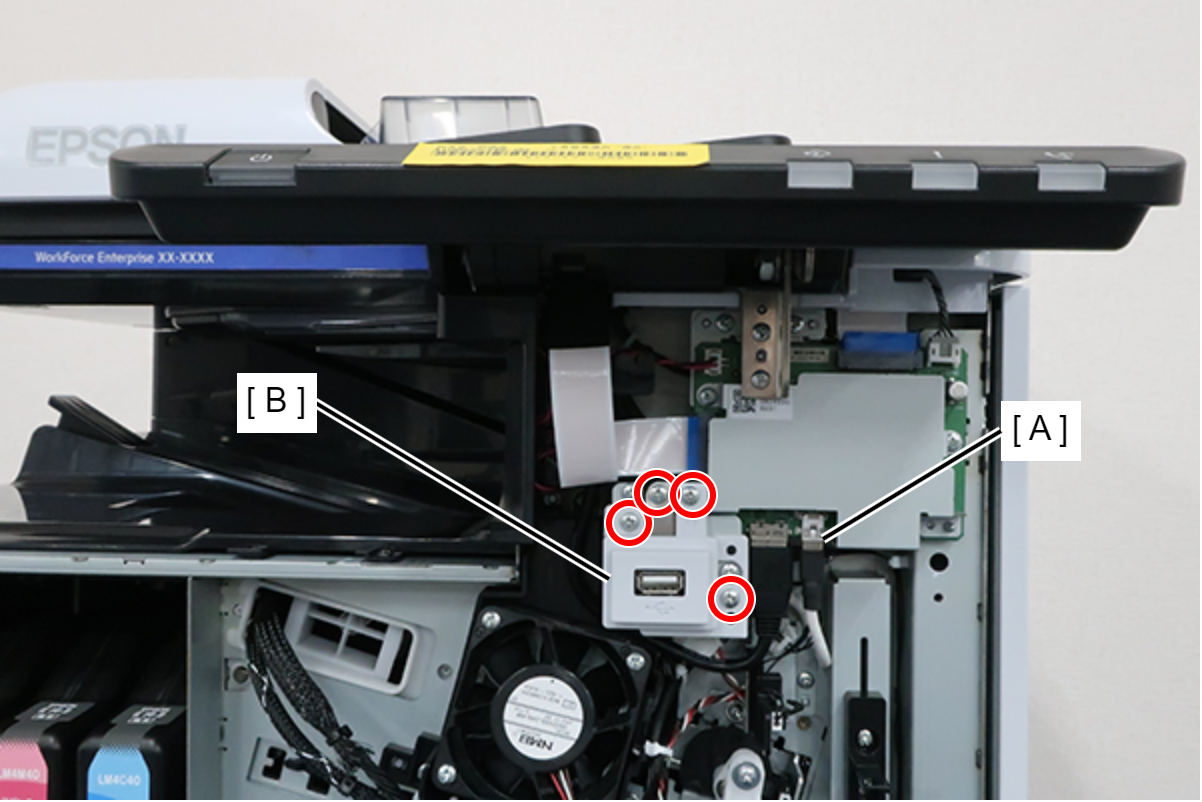
- : 3x8D
- Remove the screw and remove the Left Cover Upper (A) in the direction of the arrow.
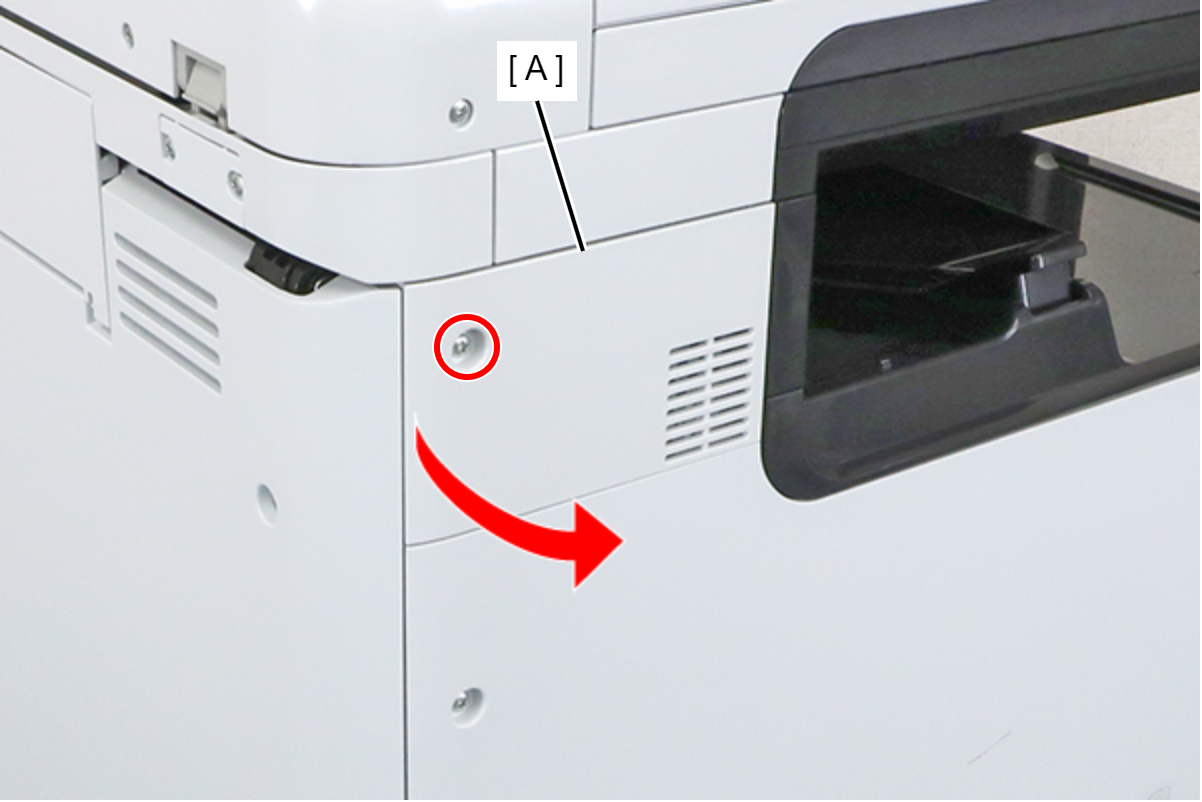
- : 3x8D
- Remove the 4 screws and remove the SCN Fixing Plate (A).
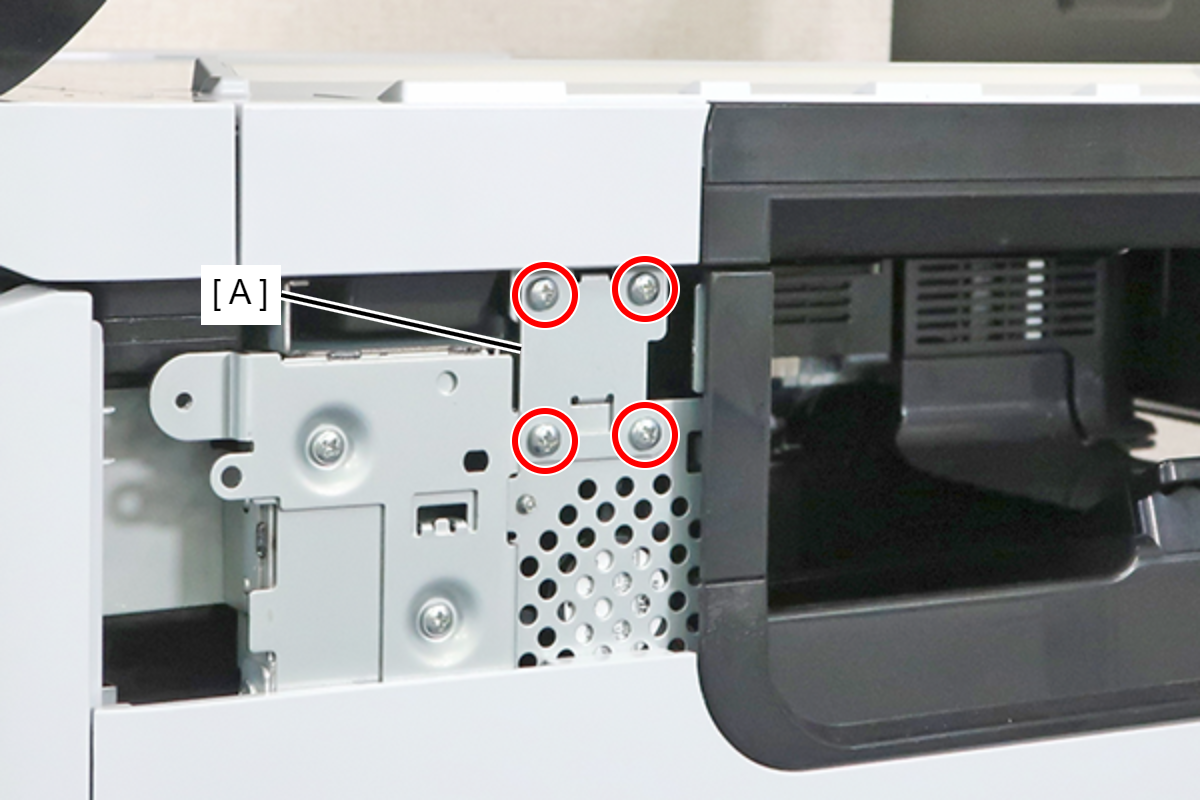
- : 3x8M
 Caution / 注意
Be sure to completely remove the SCN Fixing Plate.
If you attempt to carry out the operation without completely removing the screws and leaving the lower 2 screws removed, there is a risk of an accident, such as pinching your finger, when opening or closing the SCN.
- Open the ADF (A).
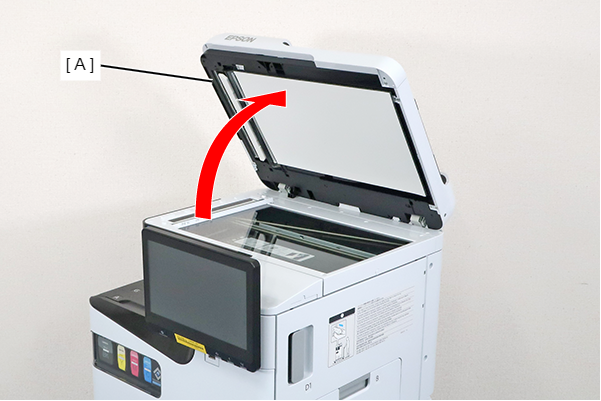
- Remove the screw and slide the Panel Upper Cover (A) in the direction of the arrow to remove it.
- : 3x8D
- Remove the 2 screws and the spacer.
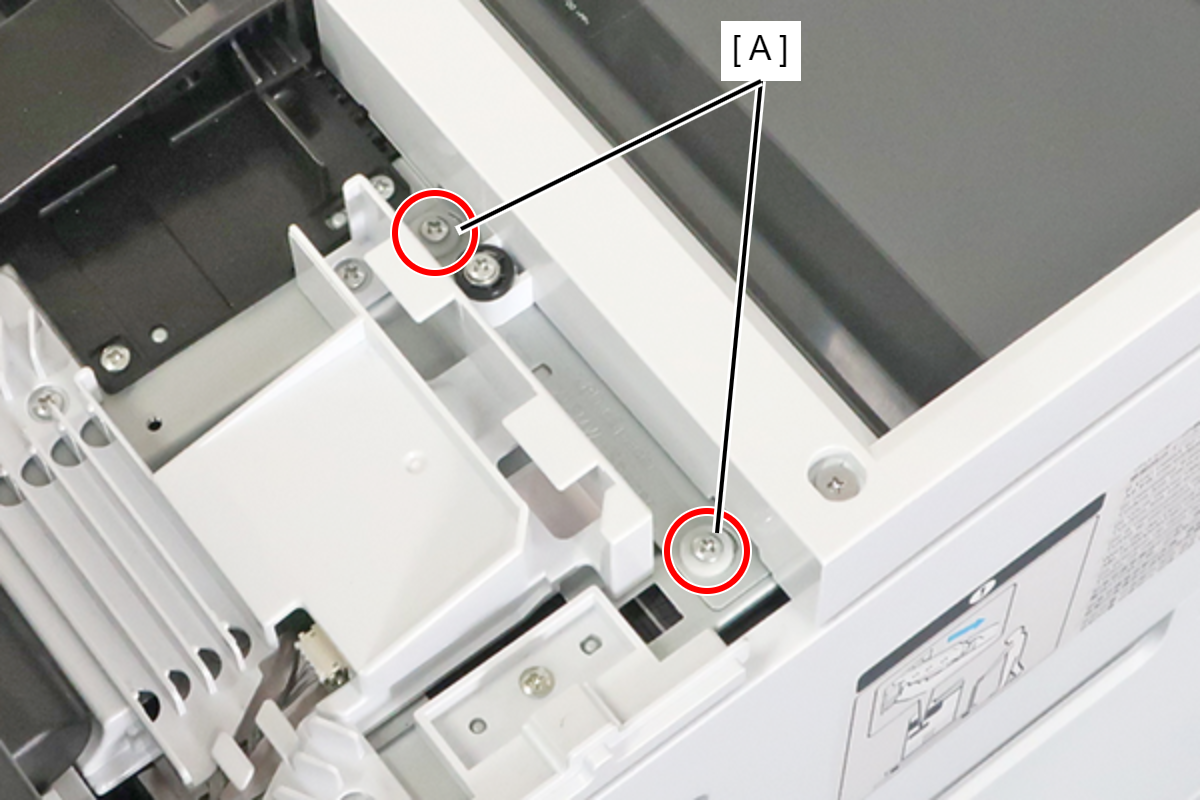
- : 3x8D
- Remove the screw and remove the spacer (A).
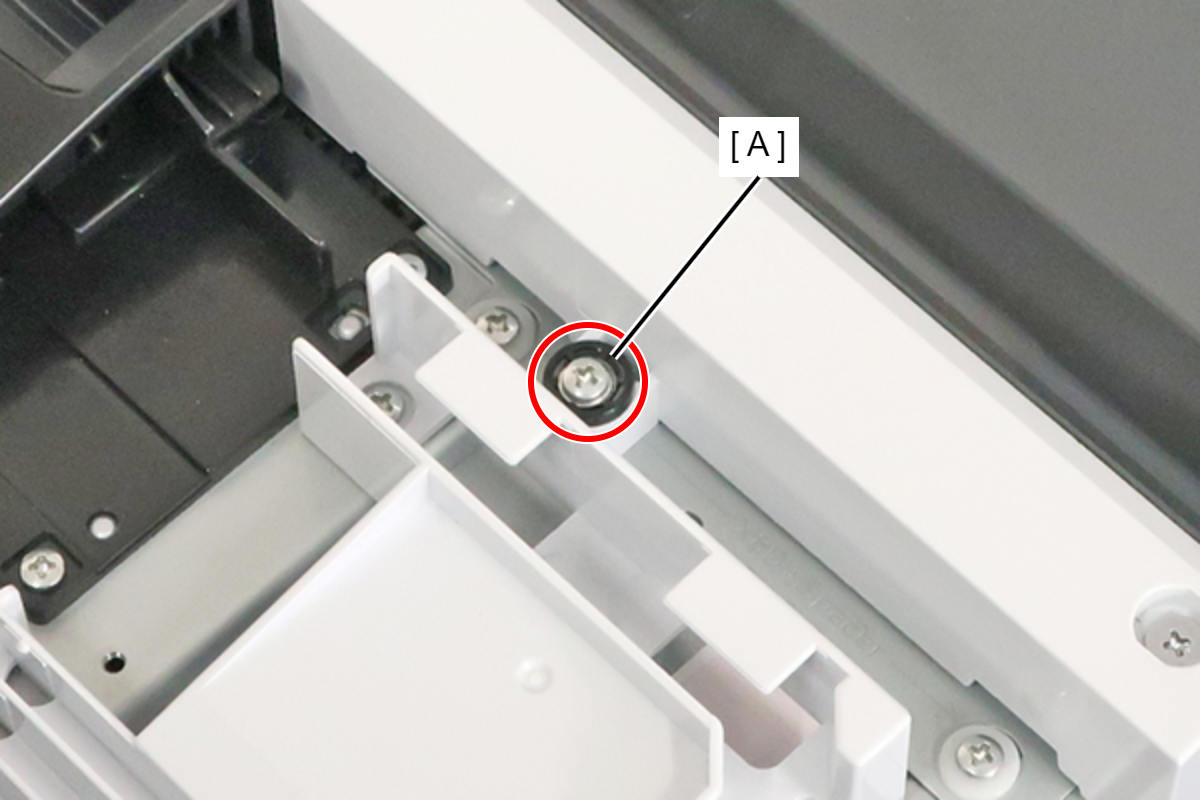
- : 3x18MW
- Remove the screw, and attach the spacer (A) removed in the preceding step.
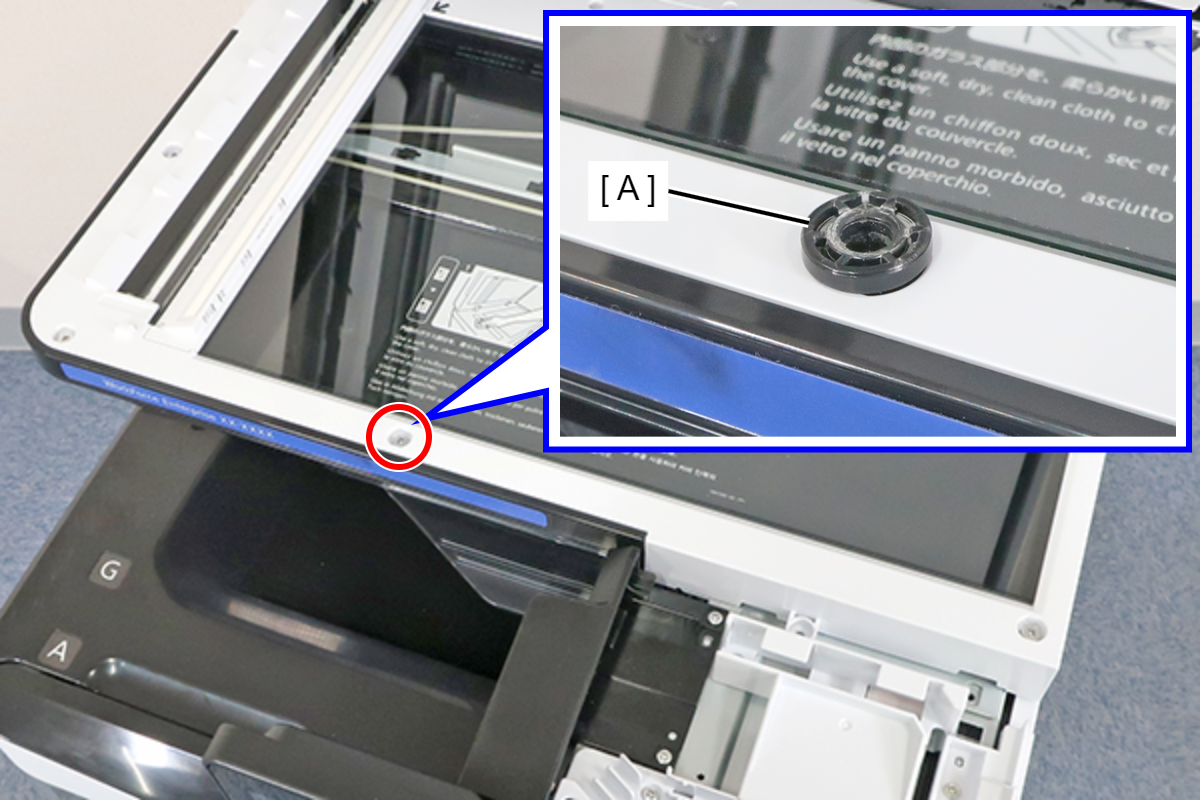
- : 3x5D
- Close the ADF (A), and fix the ADF and SCN Unit (B) with the screw that had been fixing the spacer in place.
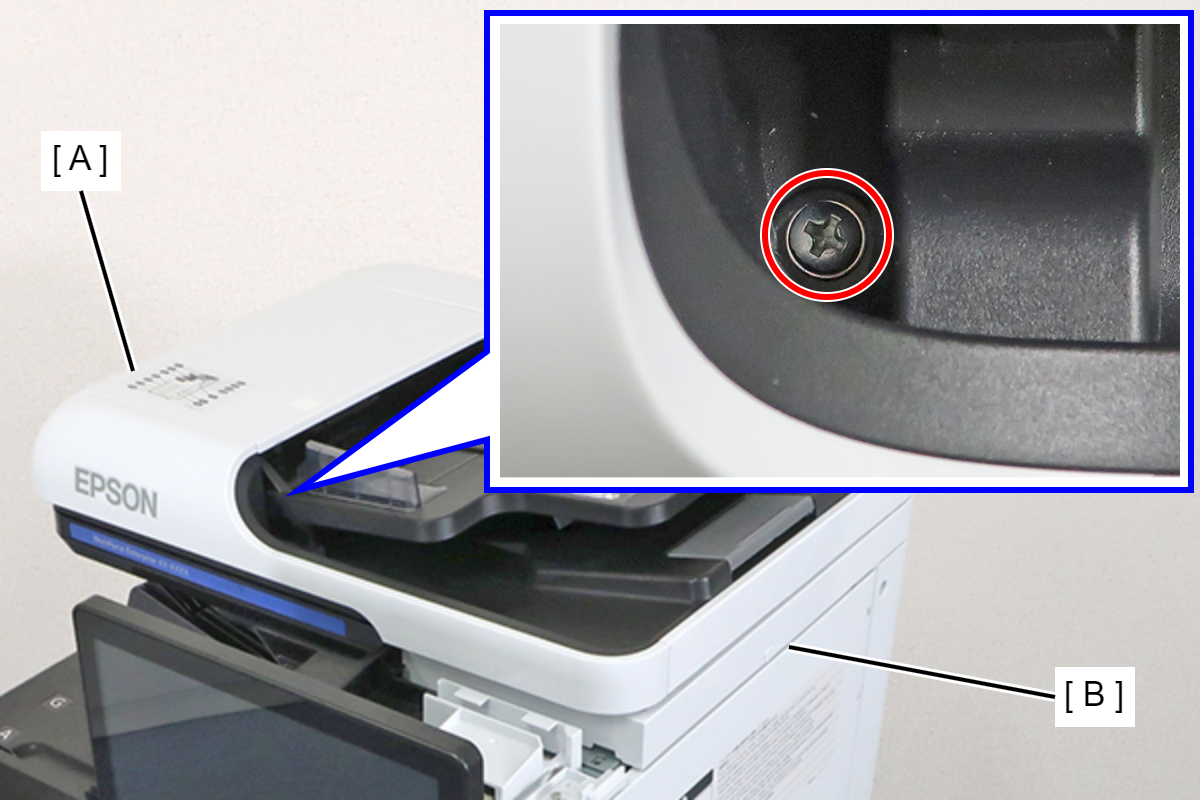
- : 3x18MW
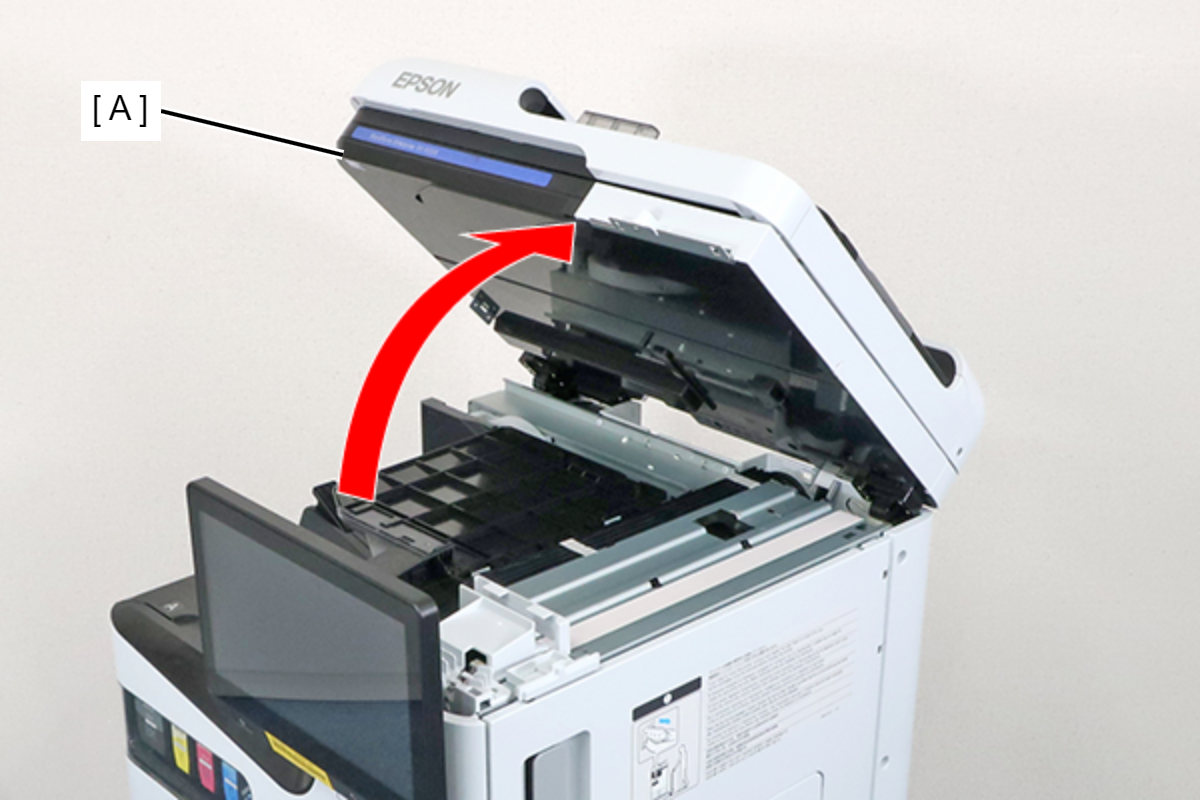
- Raise the ADF/SCN Unit (A).
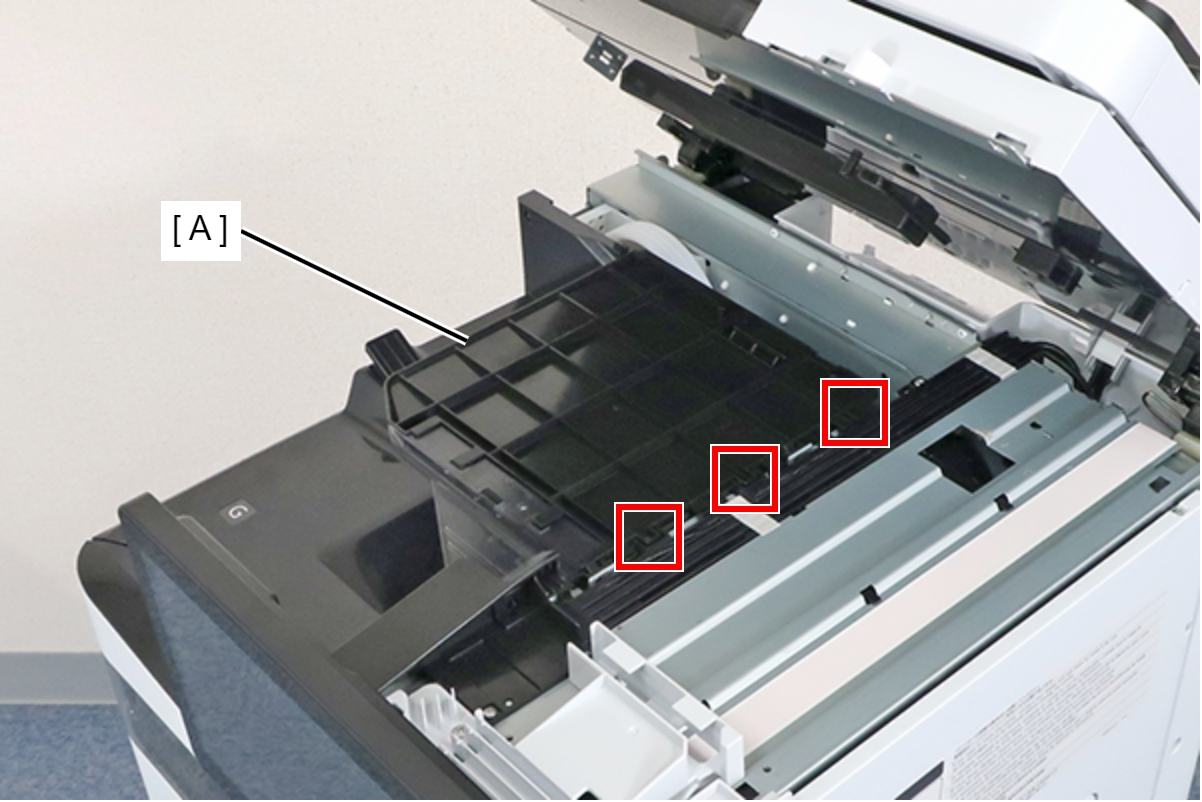
- Lift the duplex tray Assy (A), remove the 3 hooks, and remove the duplex tray Assy (A).
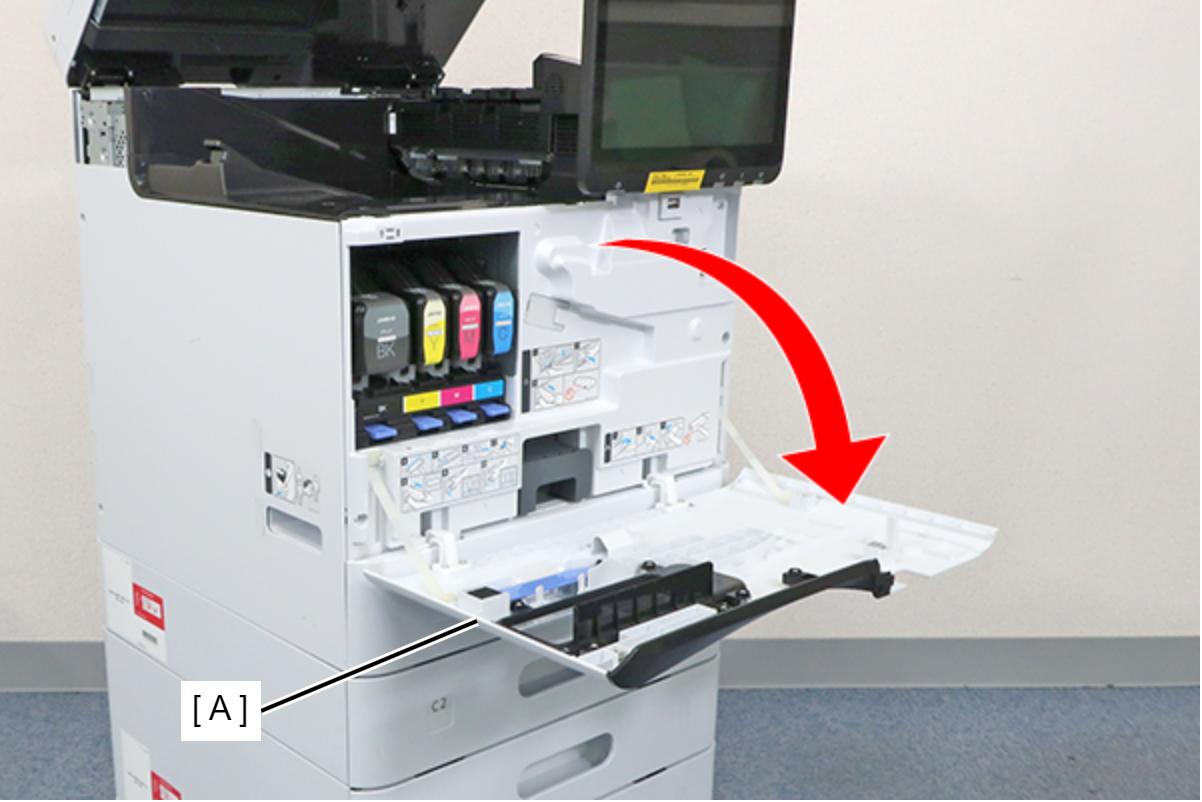
- Open the Front cover (A).
- Remove 4 screws and remove the FD Stacker Assy (A).
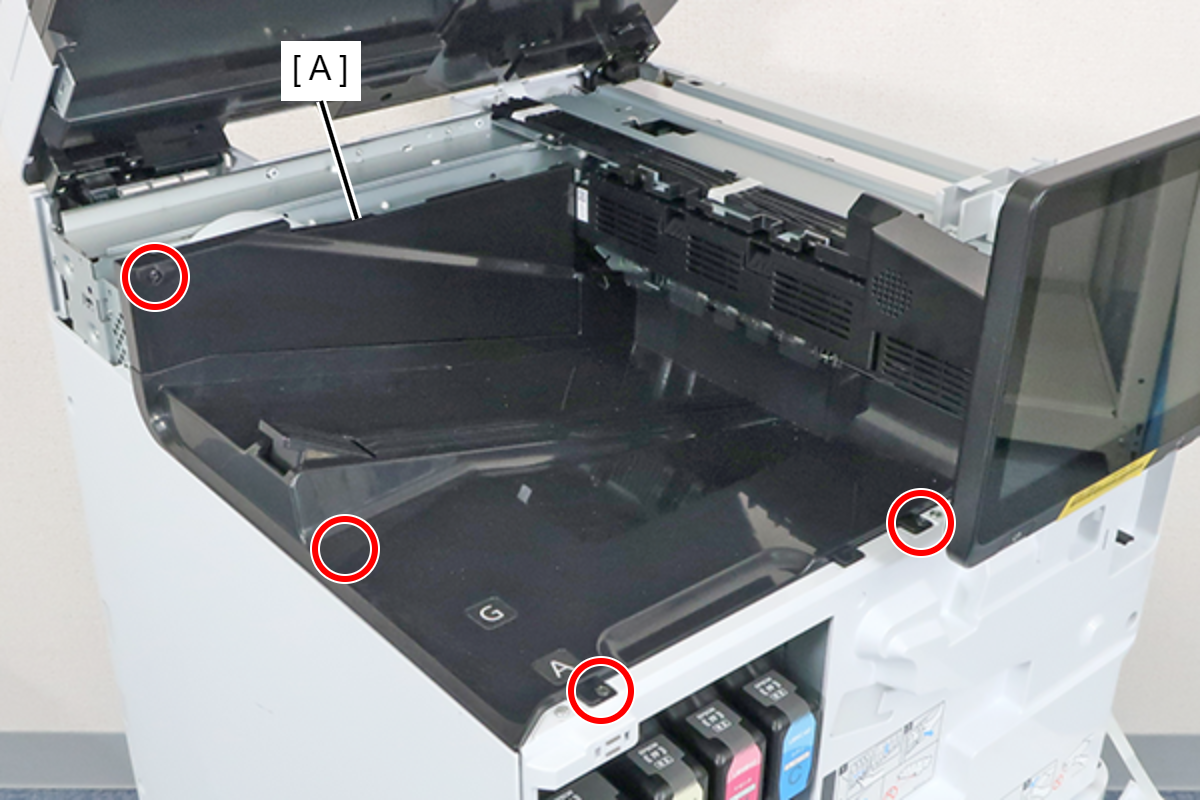
- : 3x8D/BK
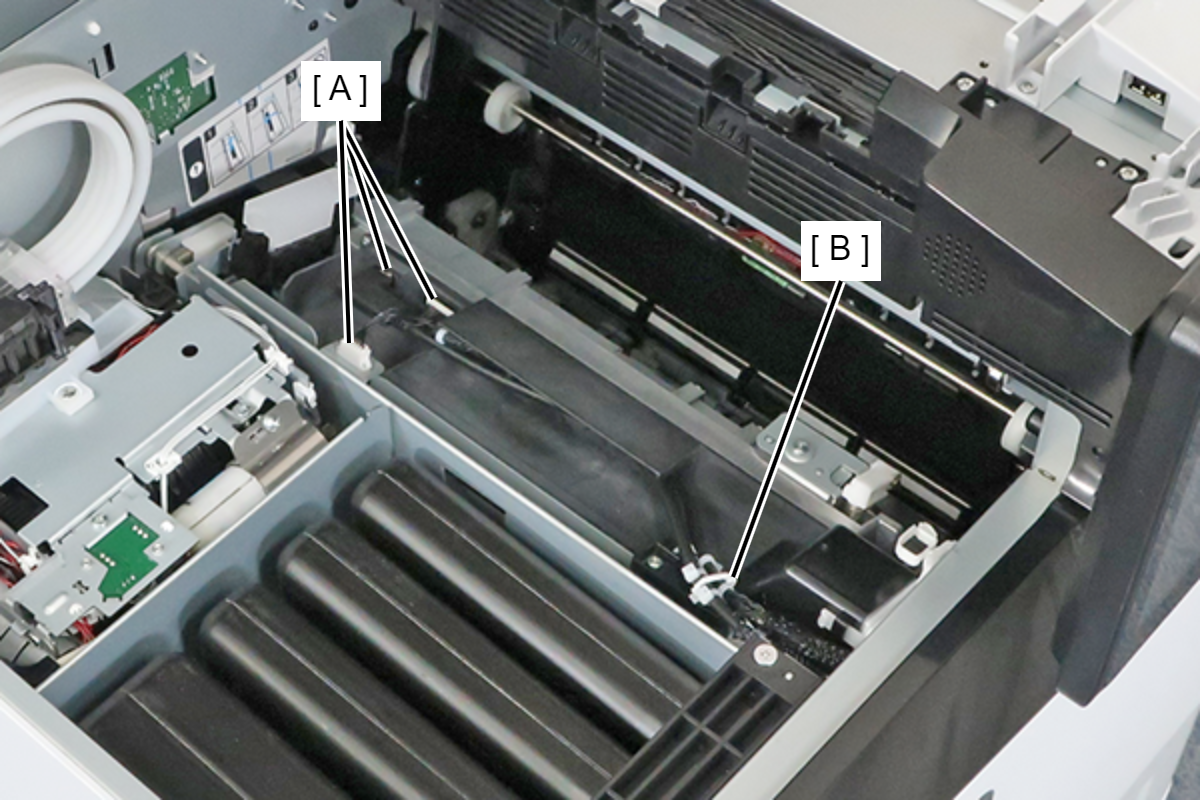
- Remove the cables from the 3 connectors (A) of the Head Unit, and release the cables from the clamp (B).
 Assembly / 組み立て
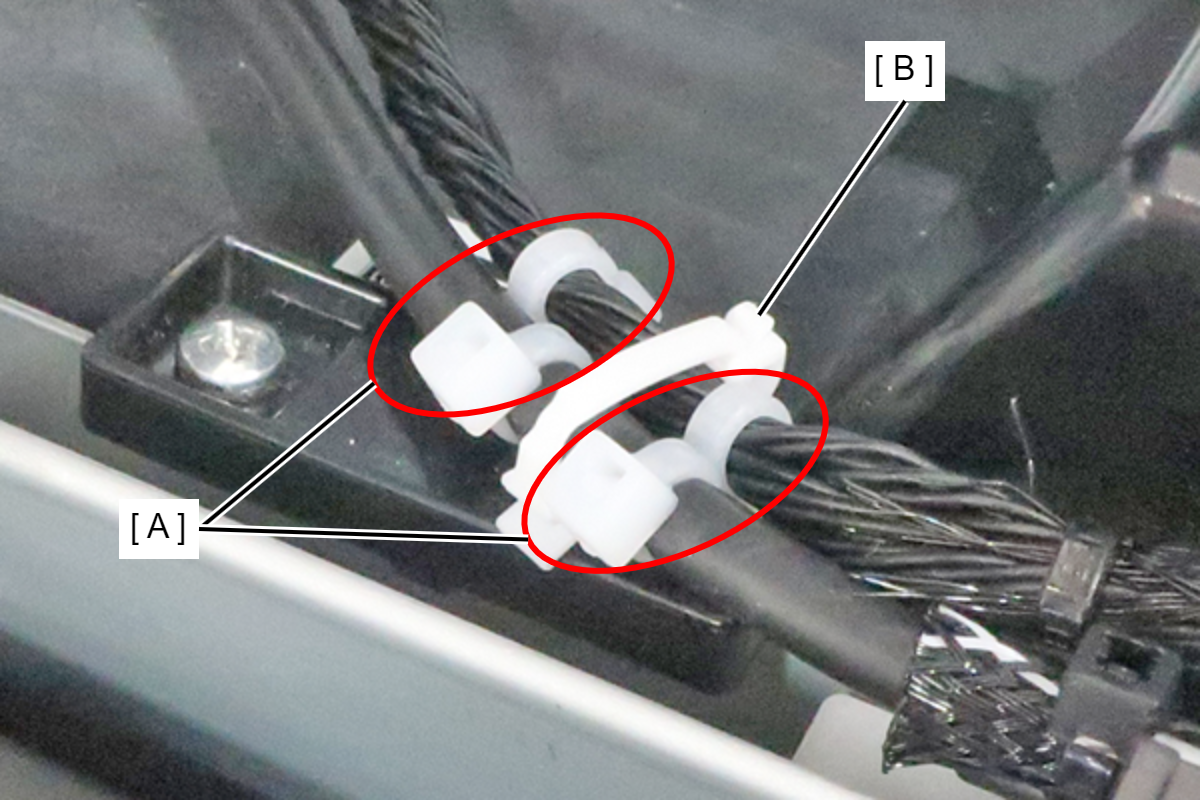
Fix the cable ties (A) installed to the cable with the clamp (B) in the area between the cable ties.
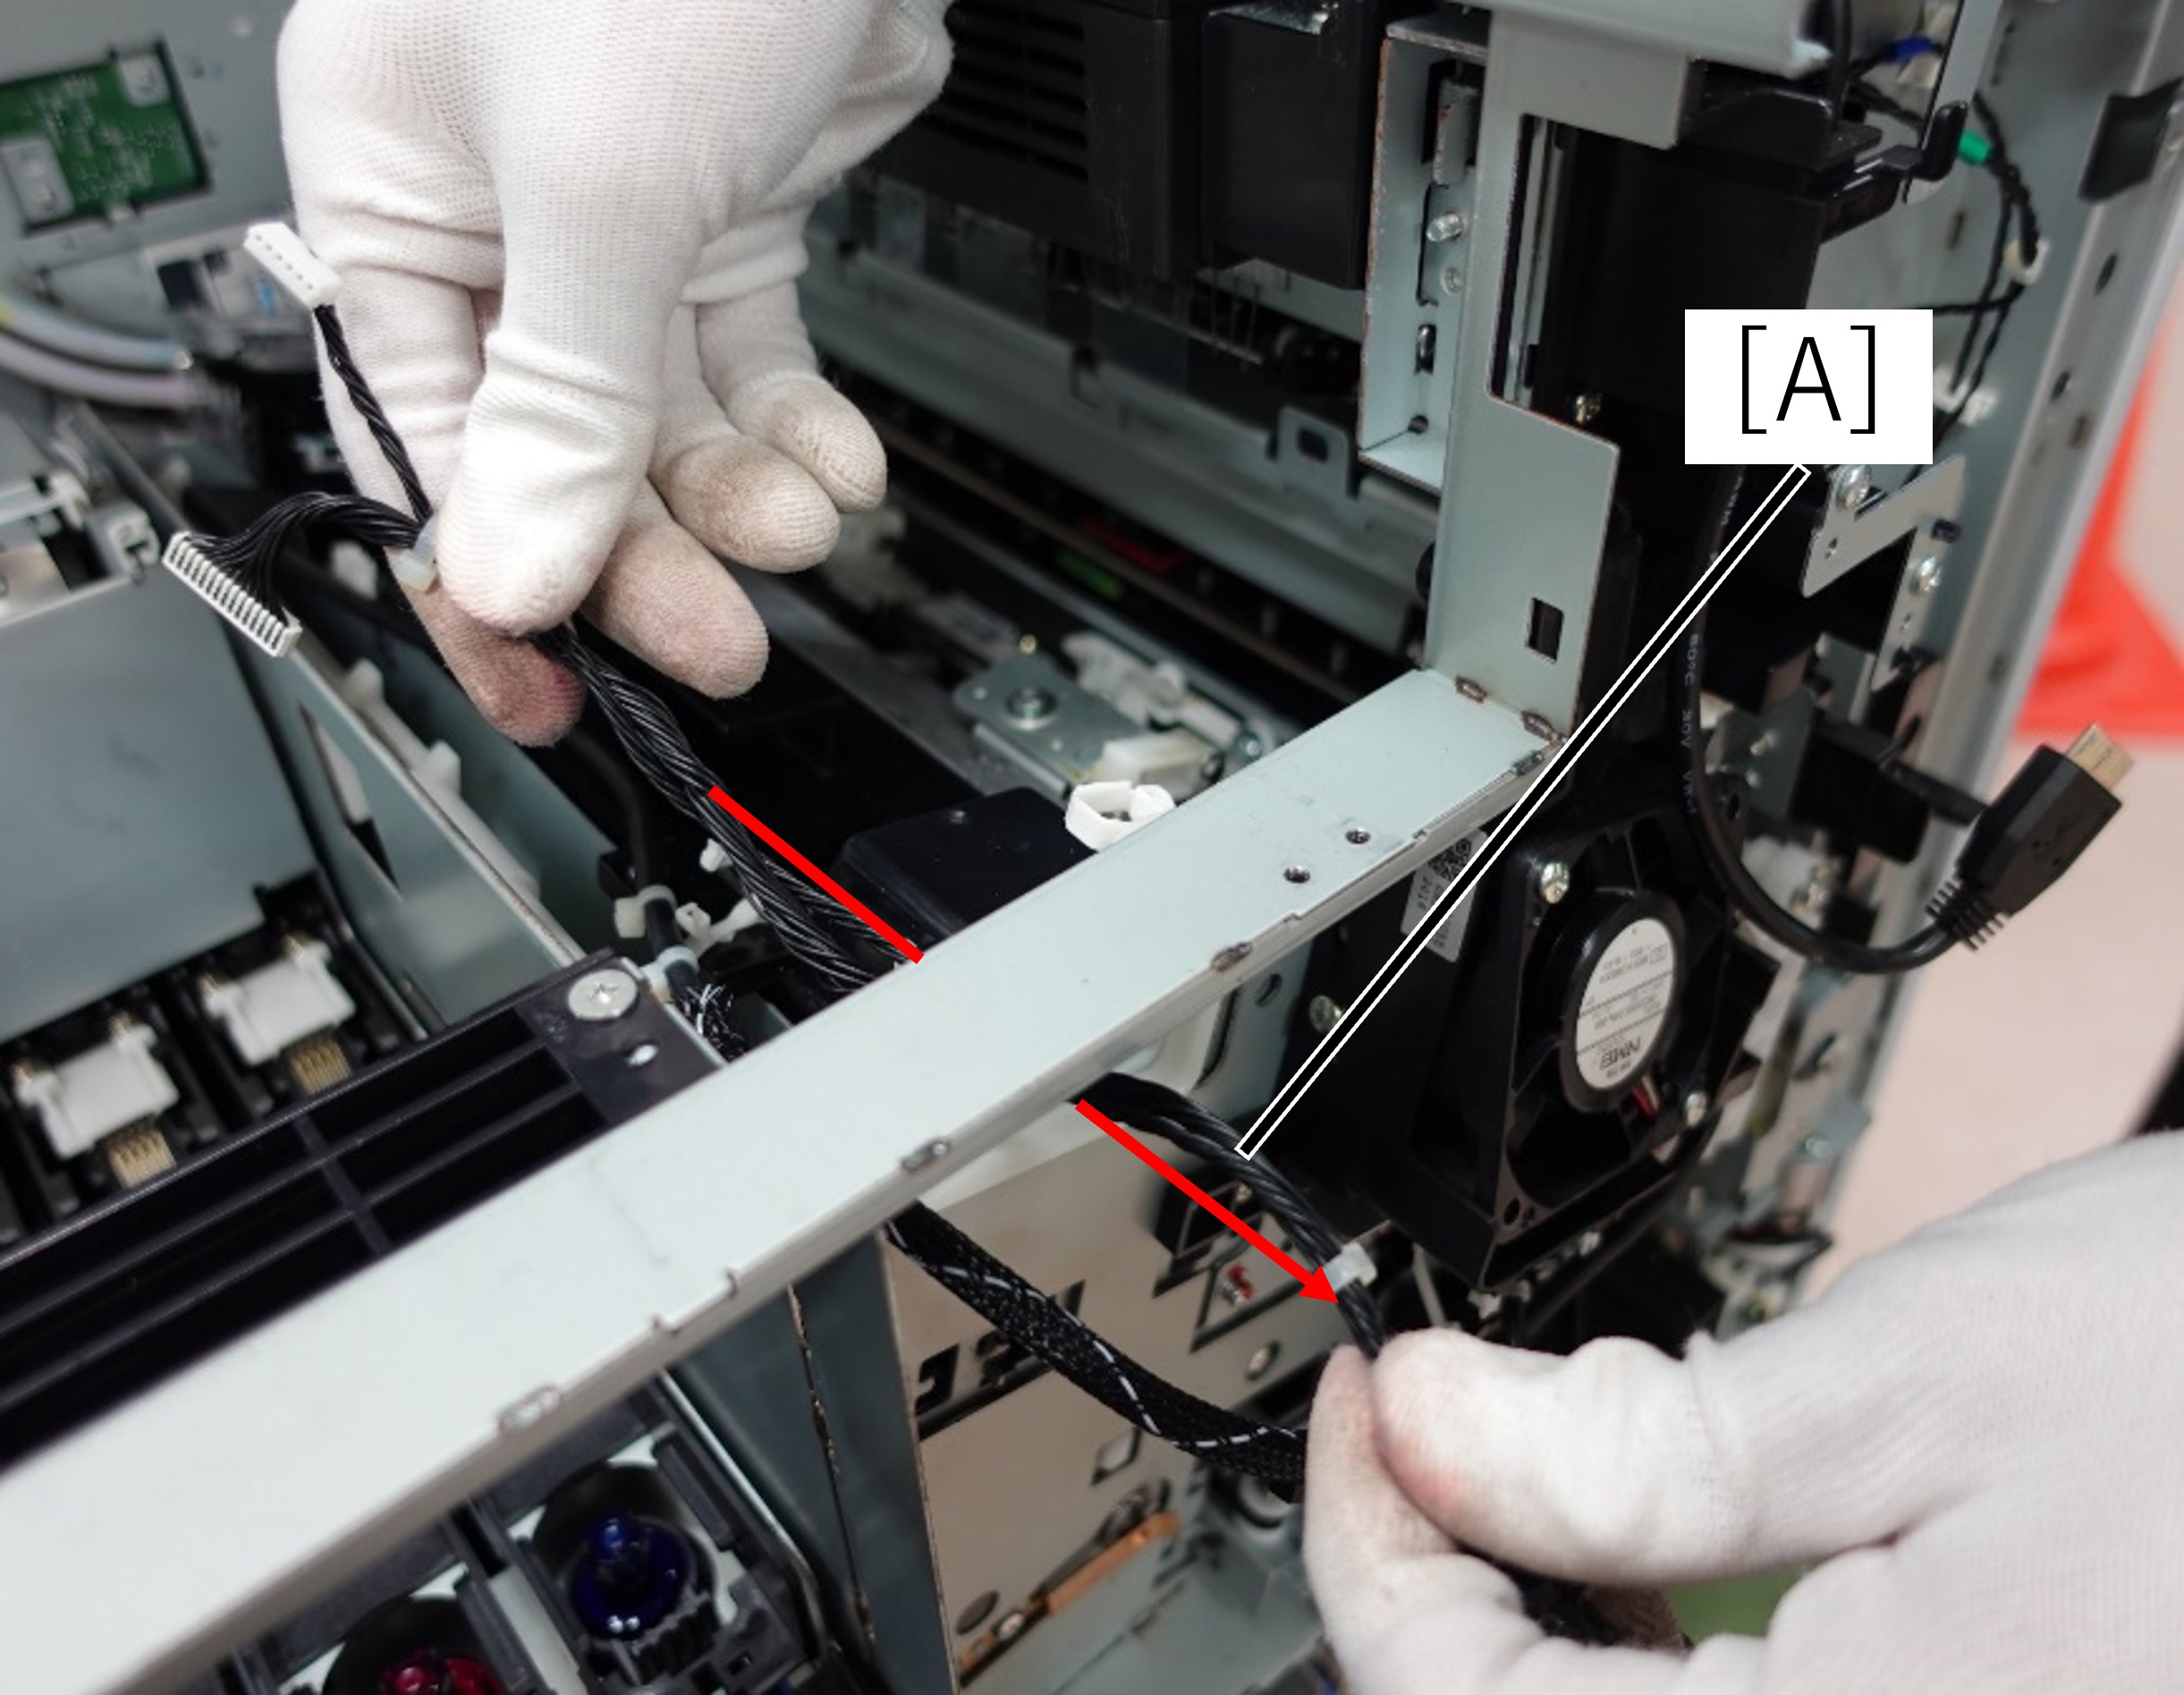
- Pass the head harness (A) through the hole next to the duct and pull the harness out to the front.
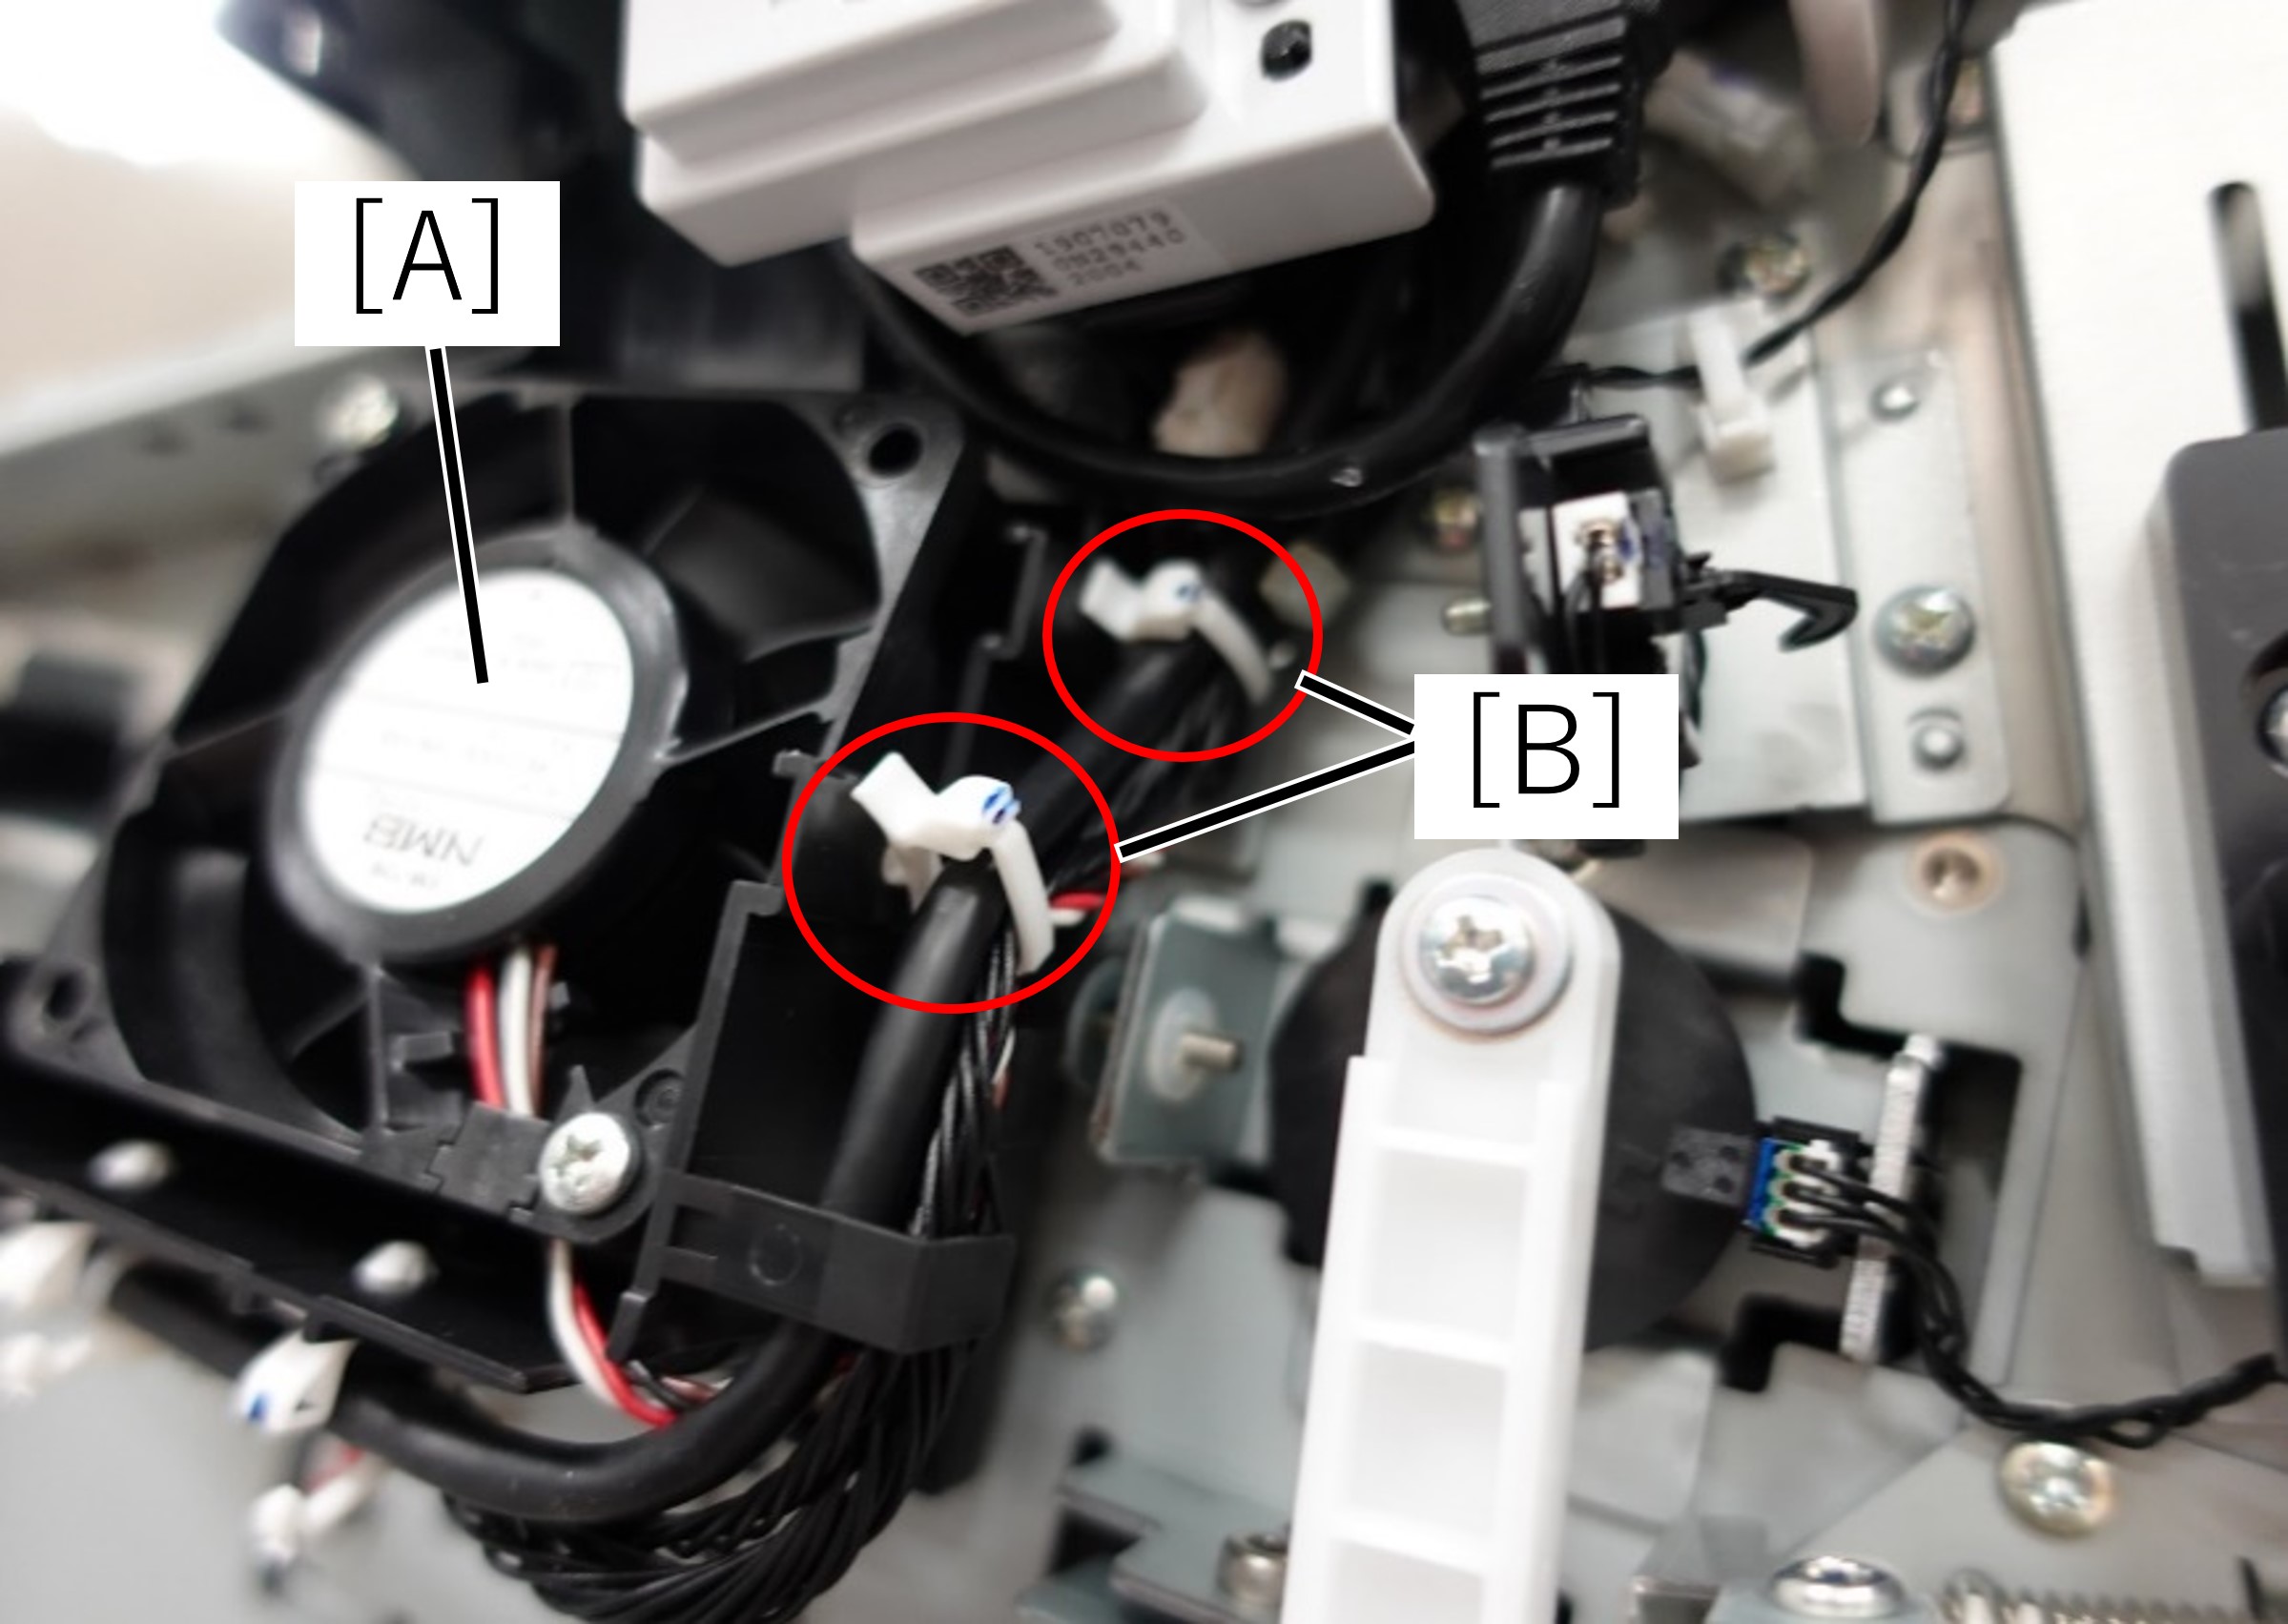
- Release the head harness from the four clamps (B) on the head board cooling fan (A).
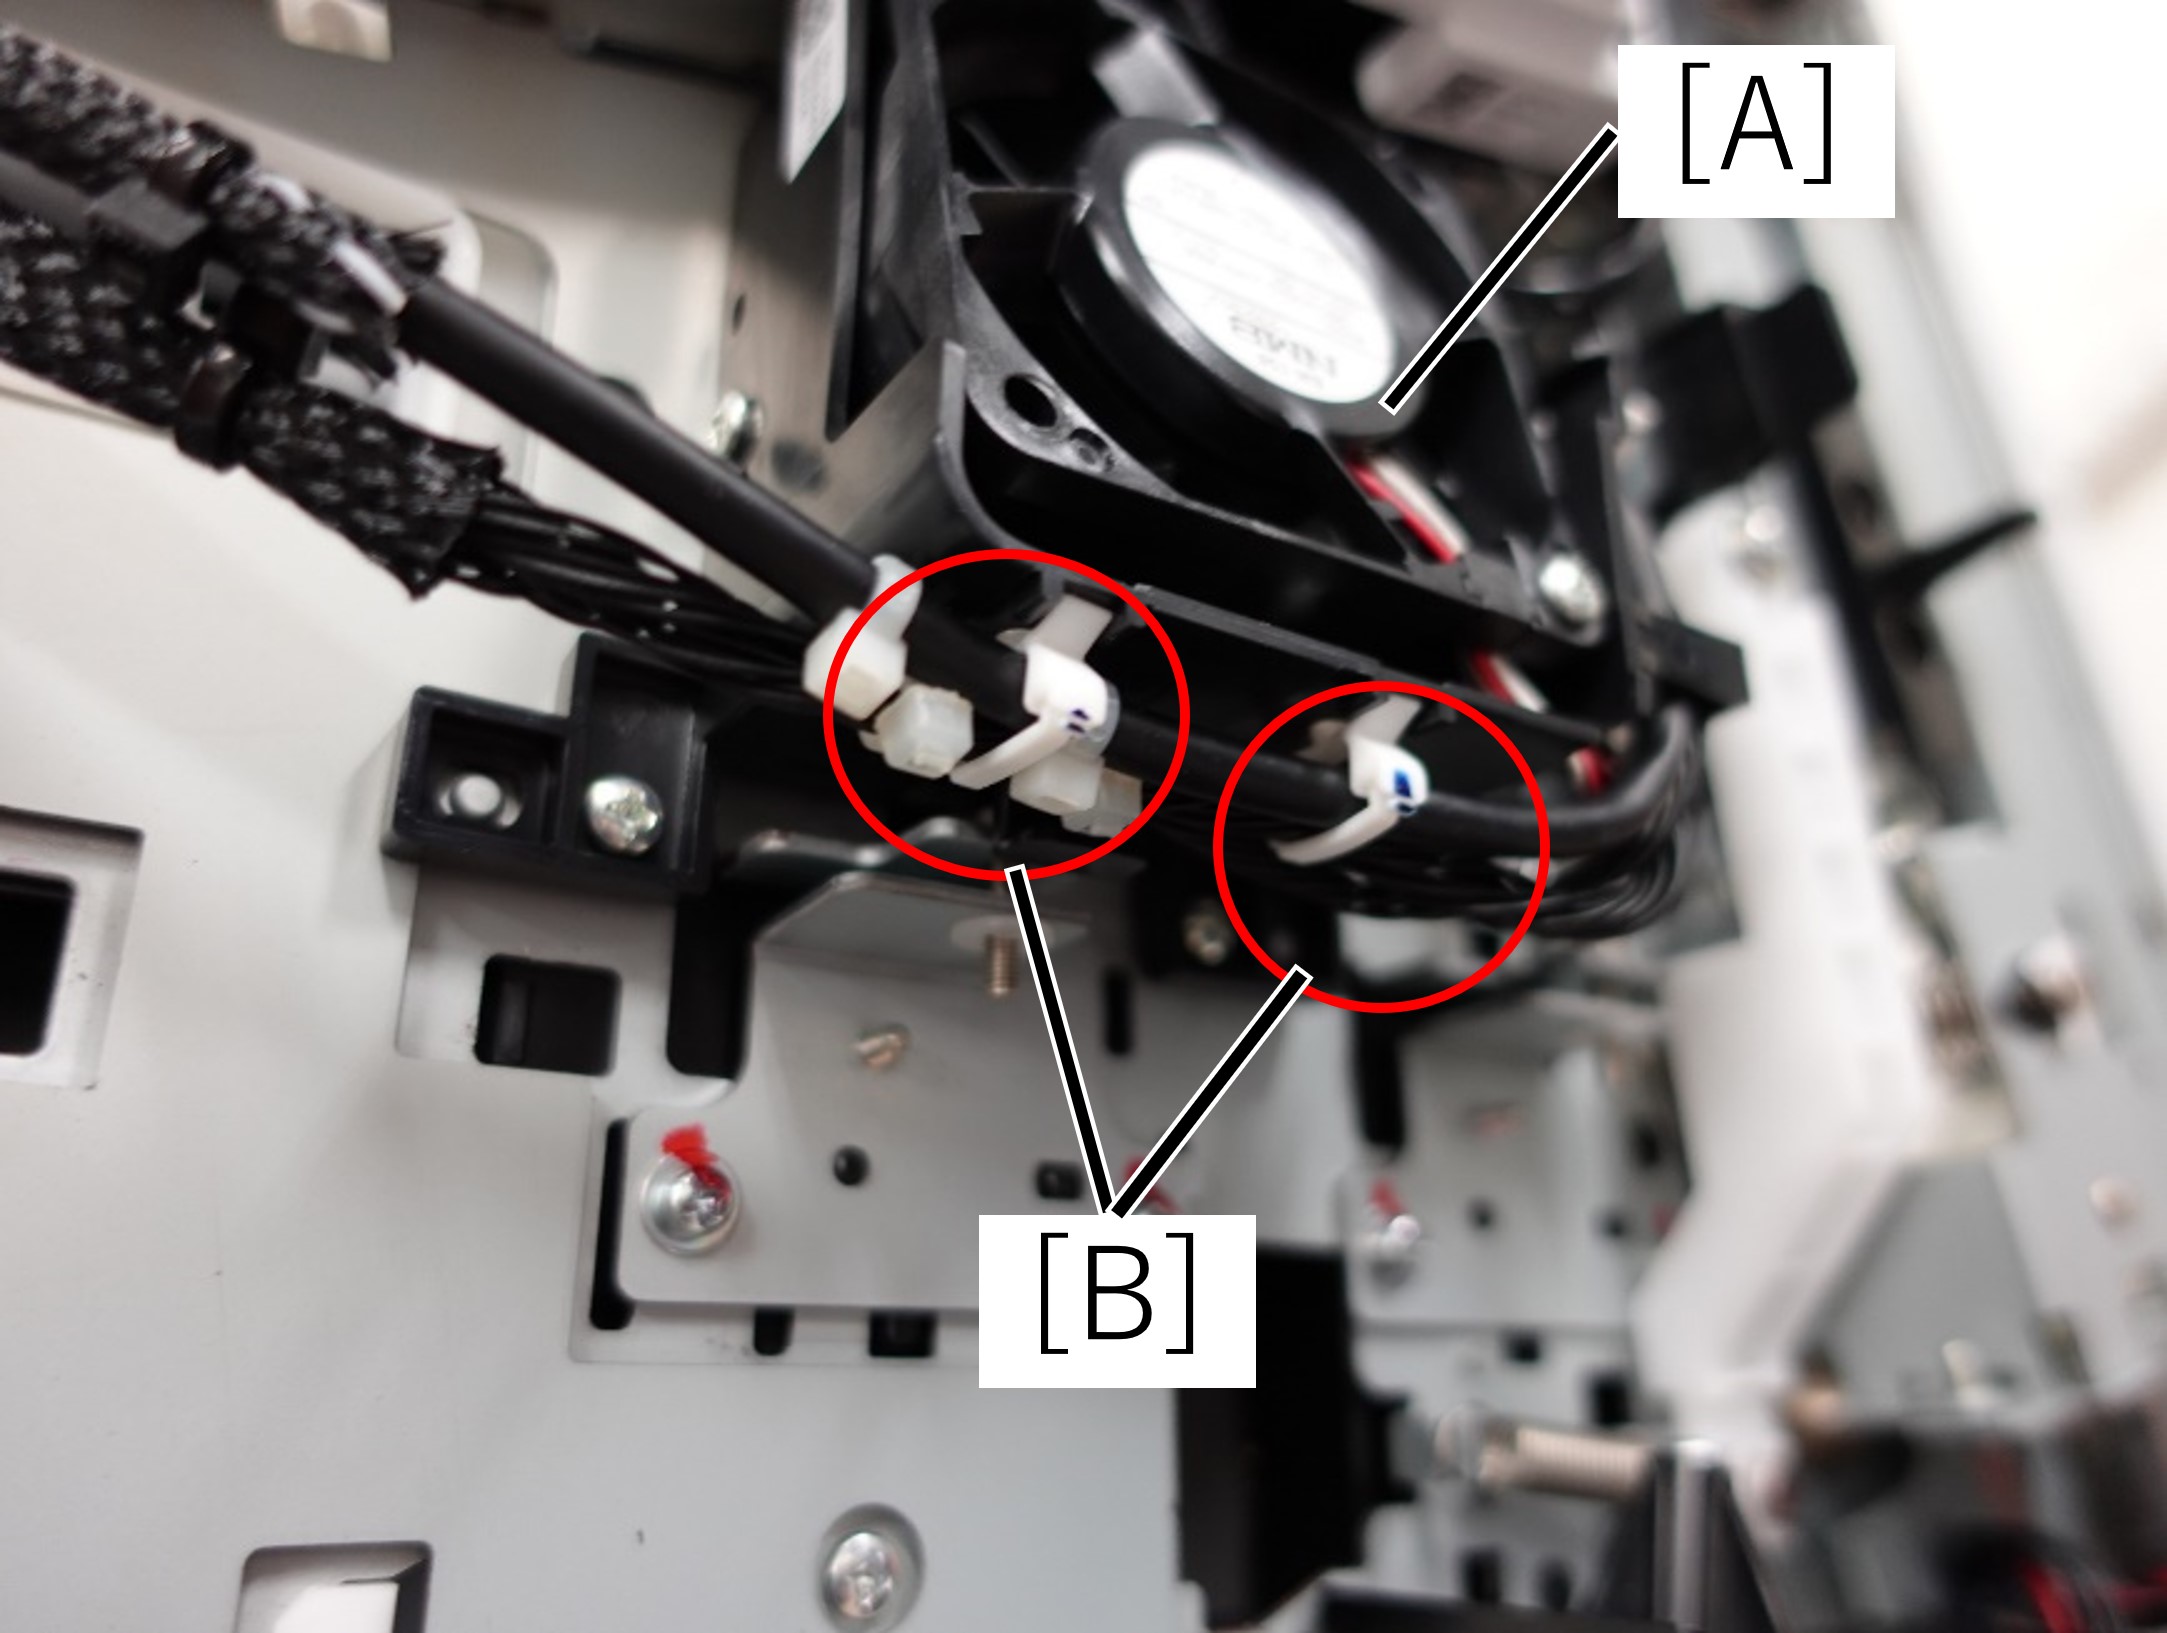 Assembly / 組み立て
Fix the cable ties (A) installed to the cable with the clamp (B) in the area between the cable ties.
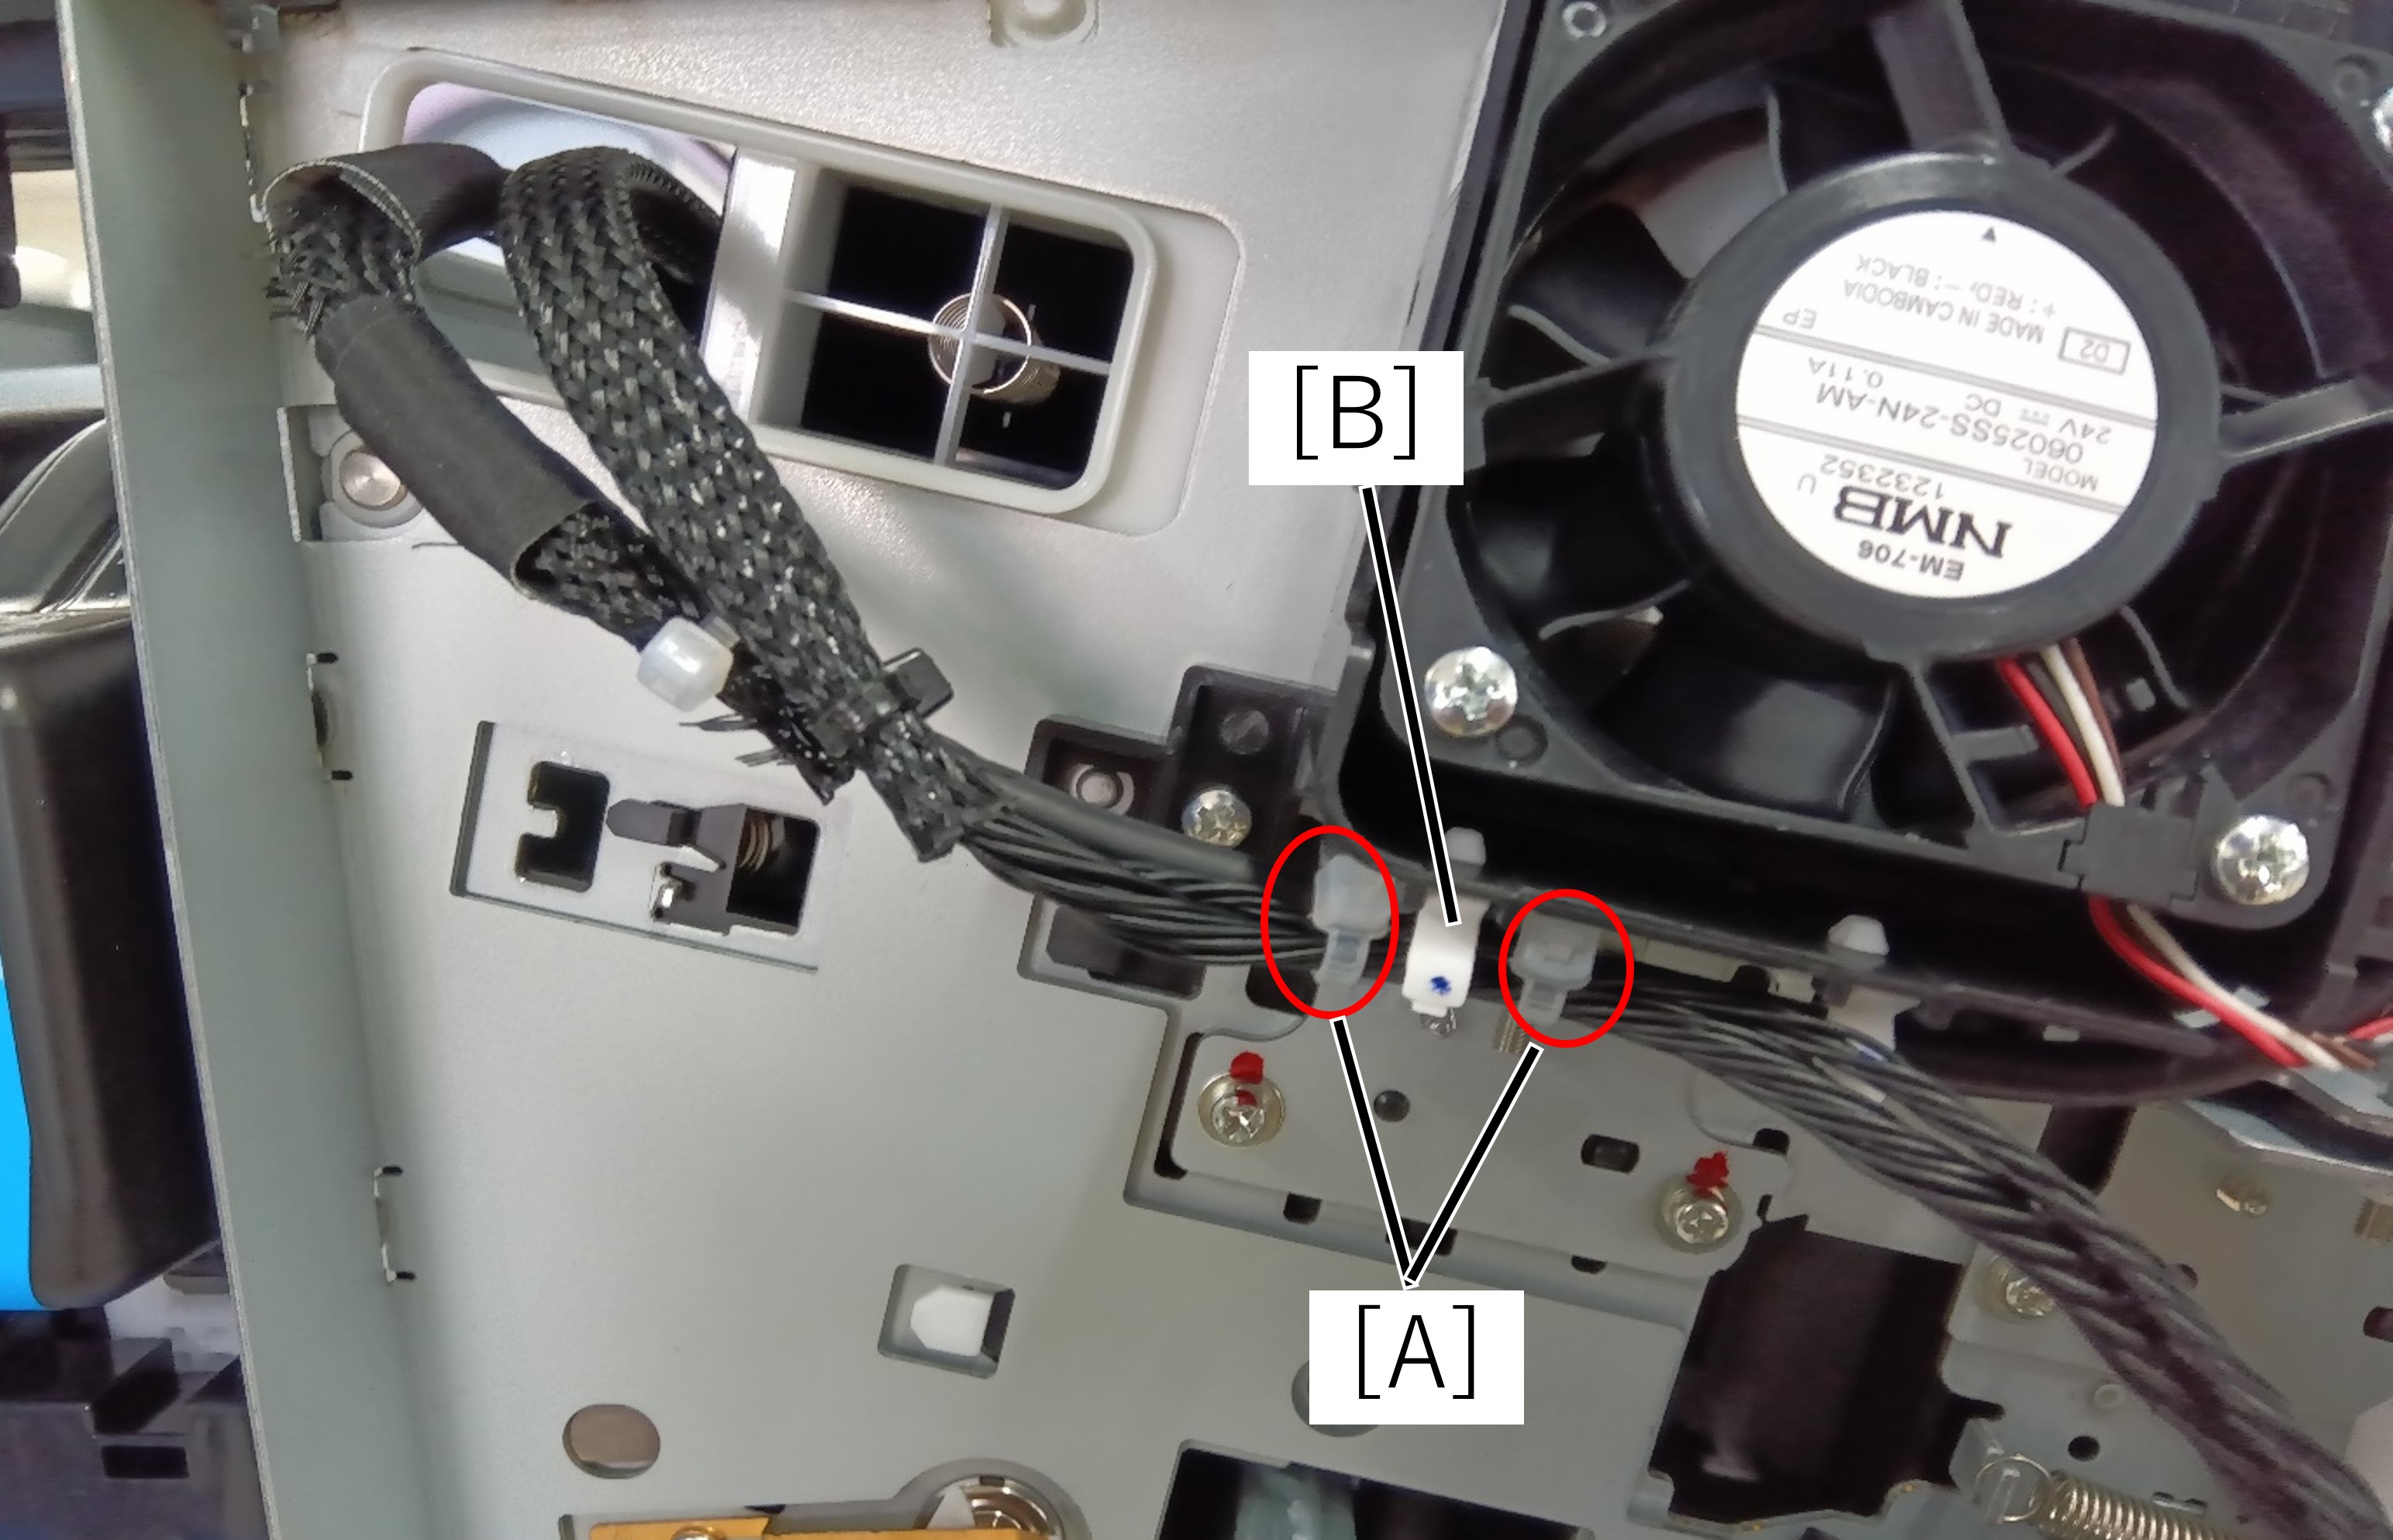
- Disconnect the connector (B) of the head board cooling fan (A)
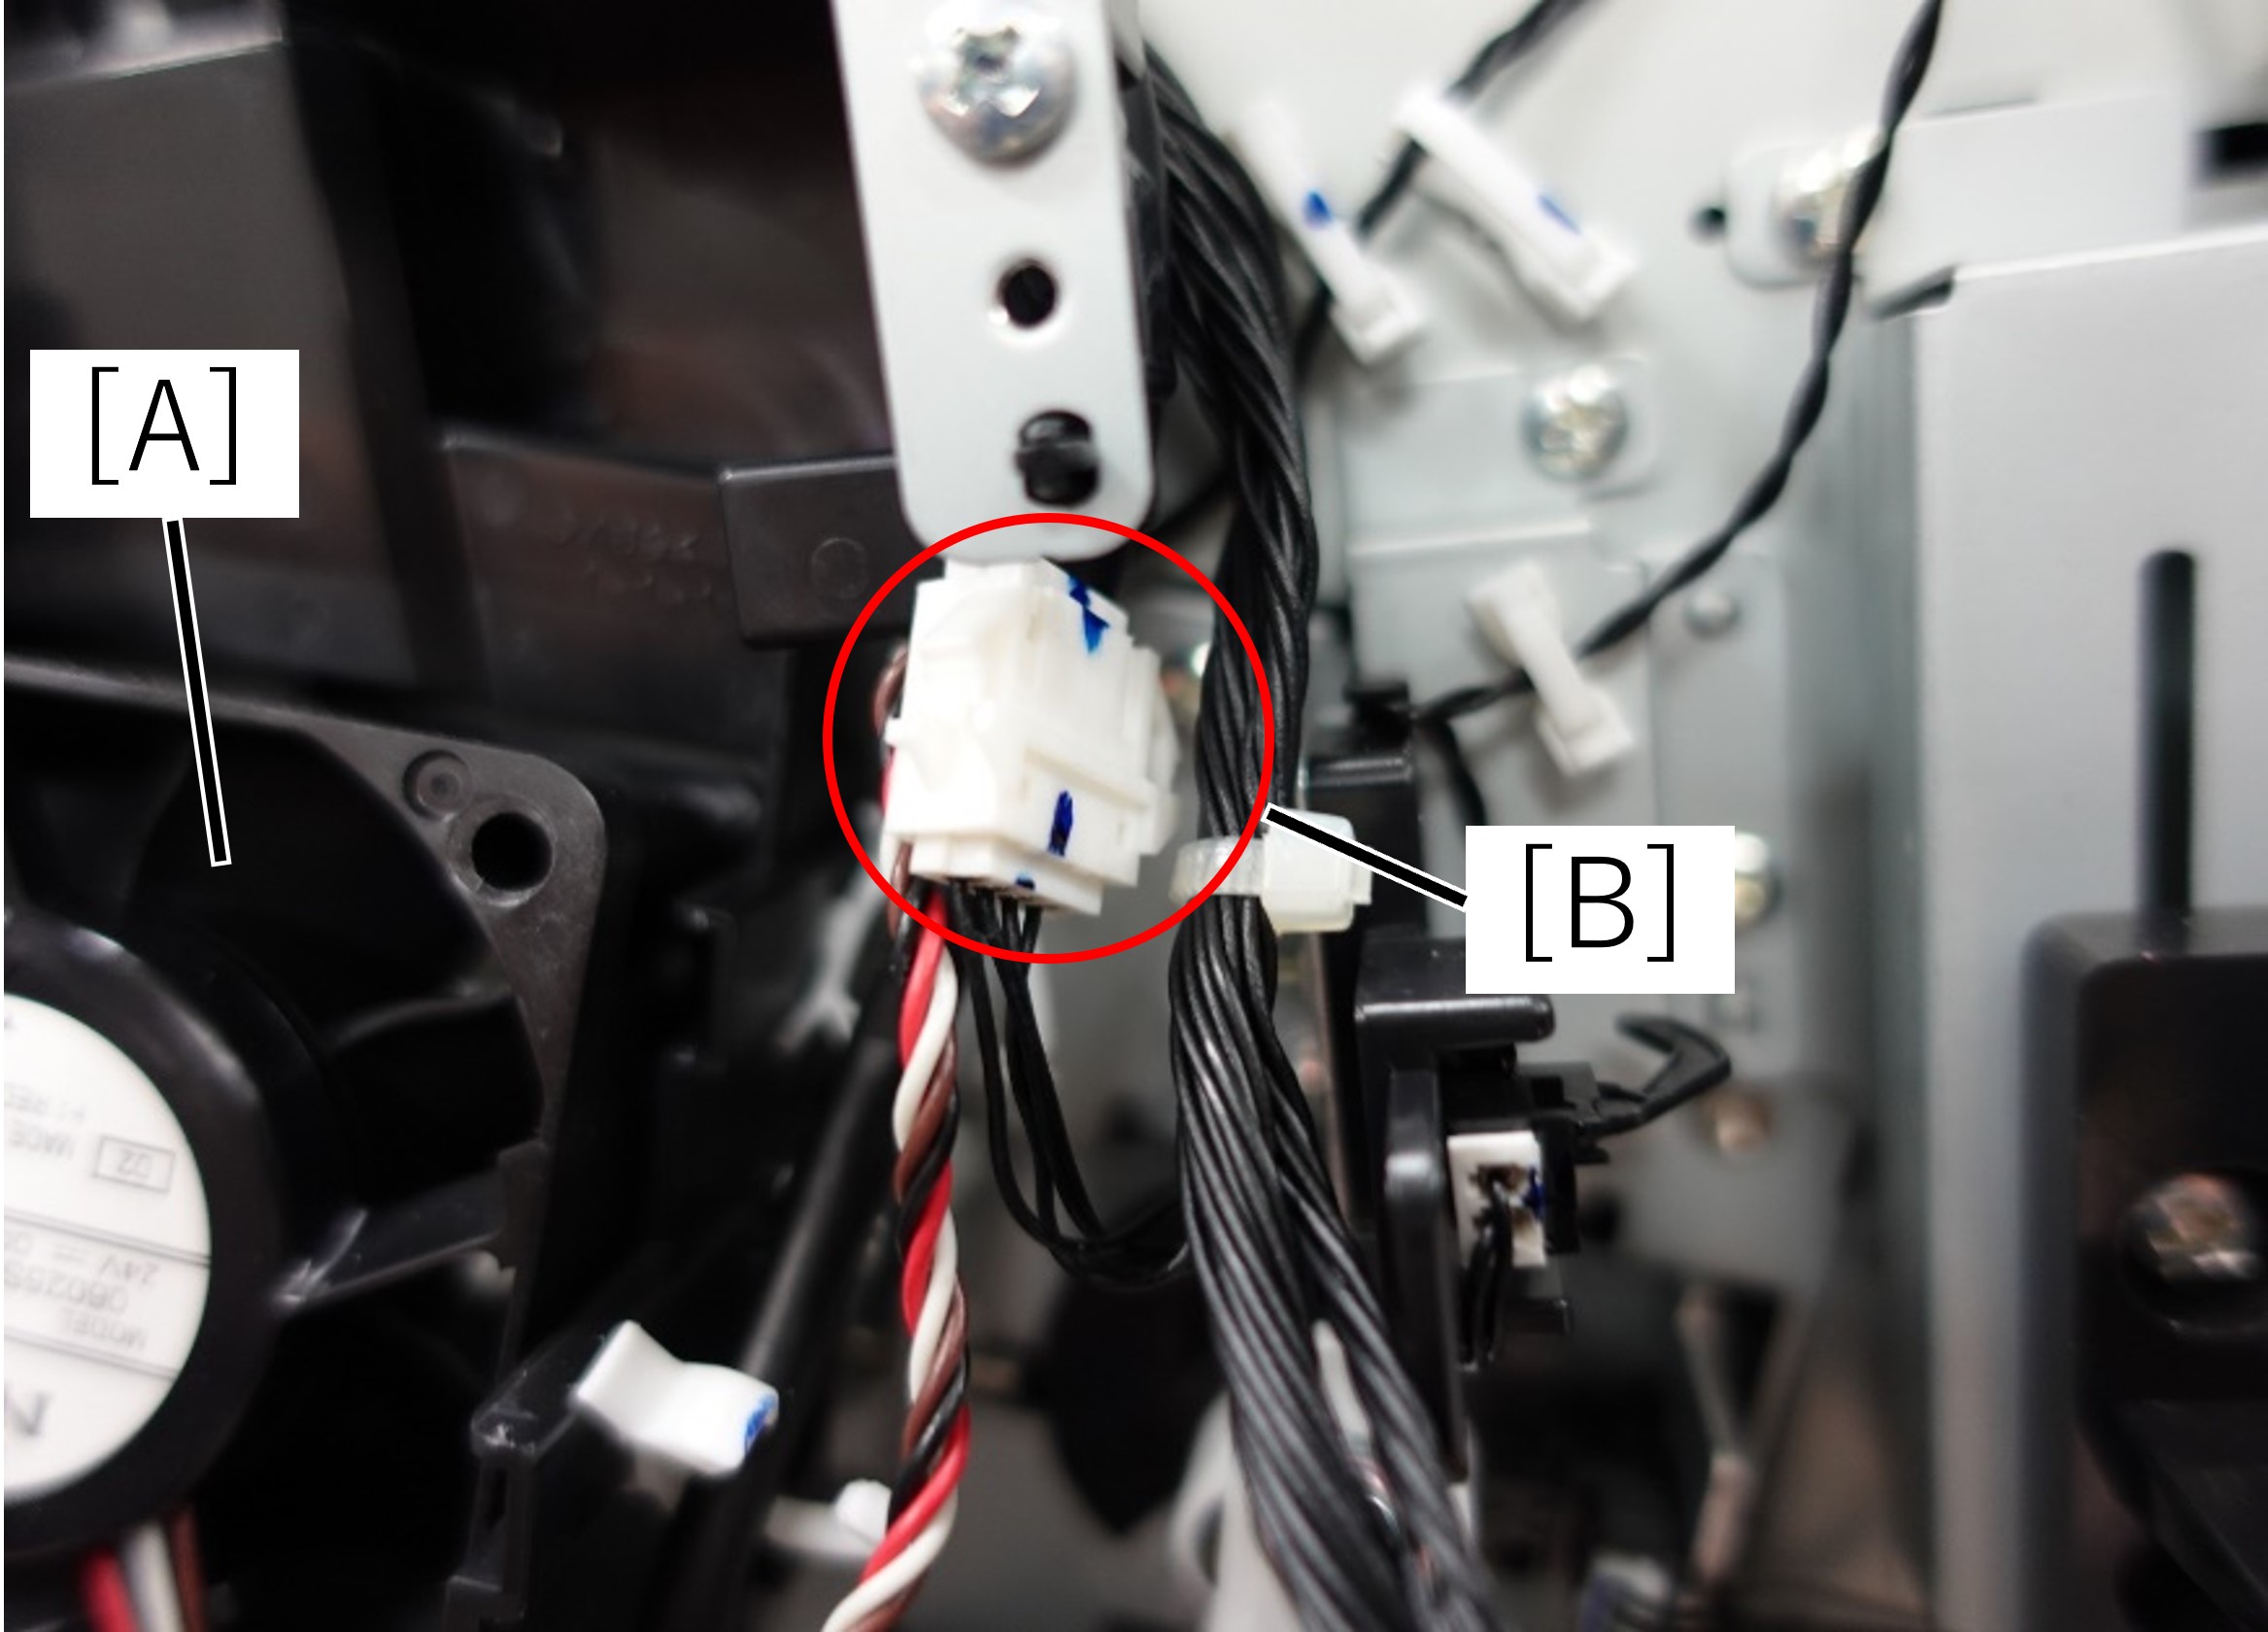
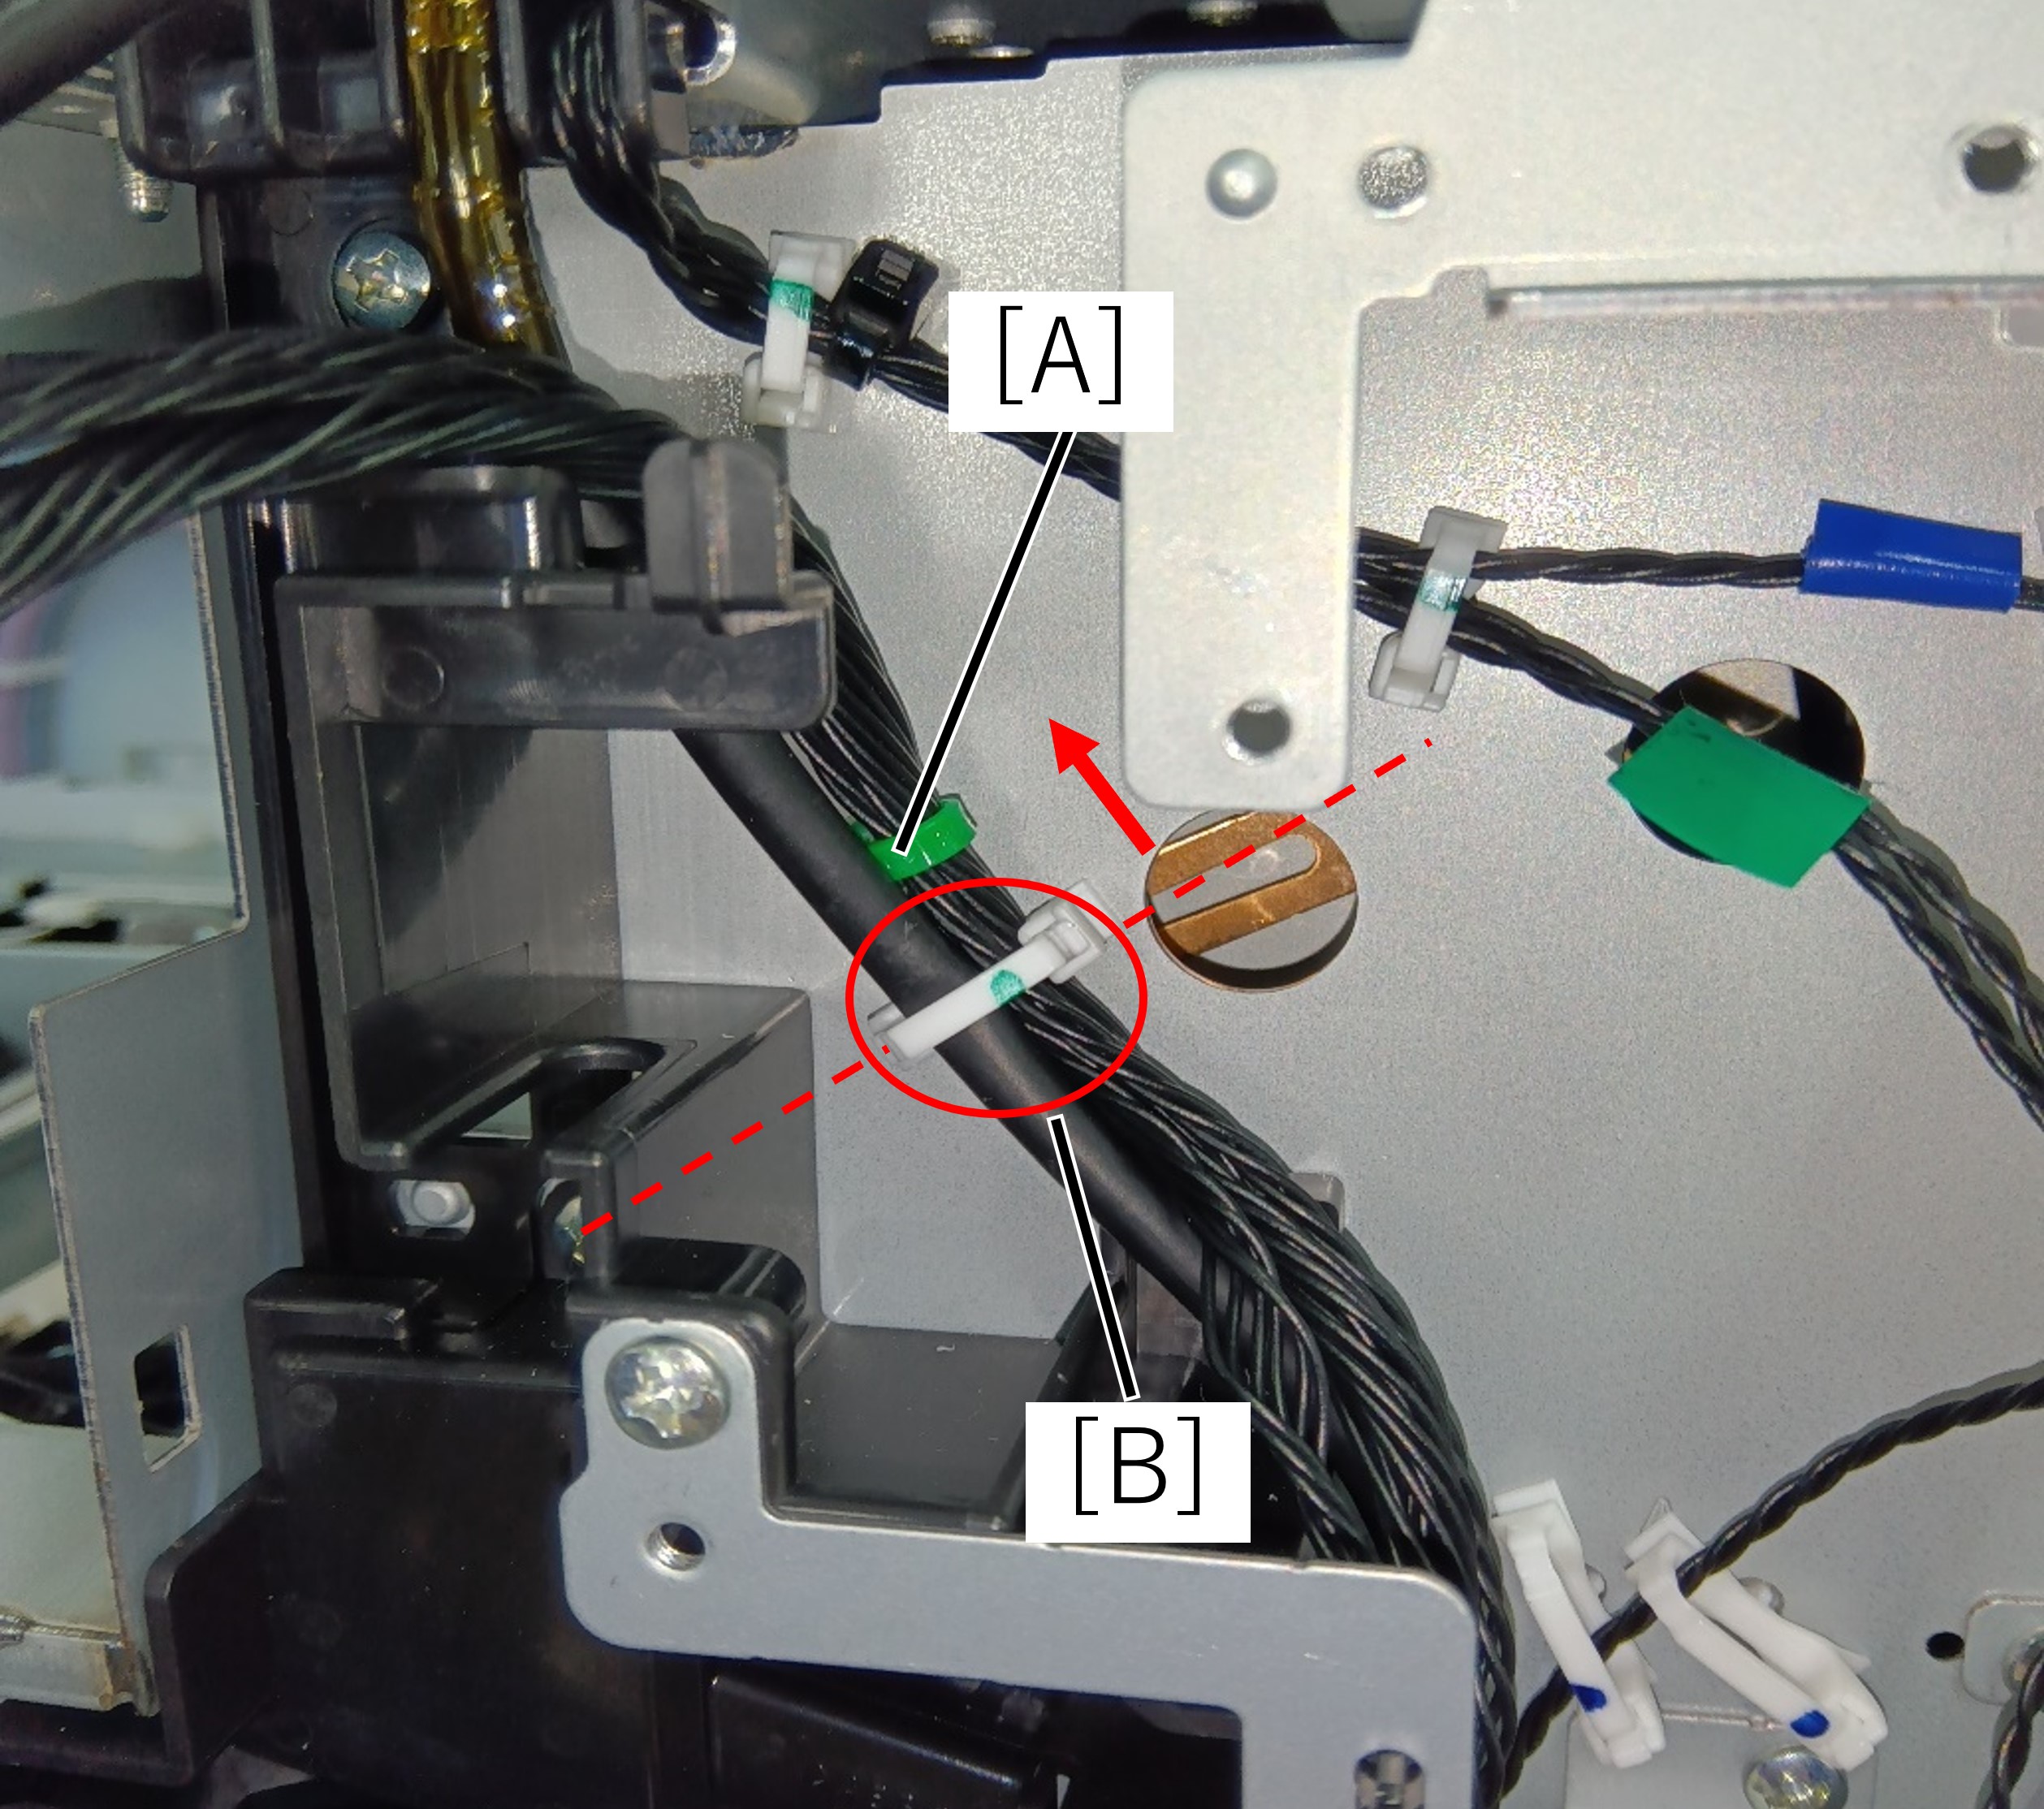
- Release the head harness (A) near the panel relay board from the clamp (B).
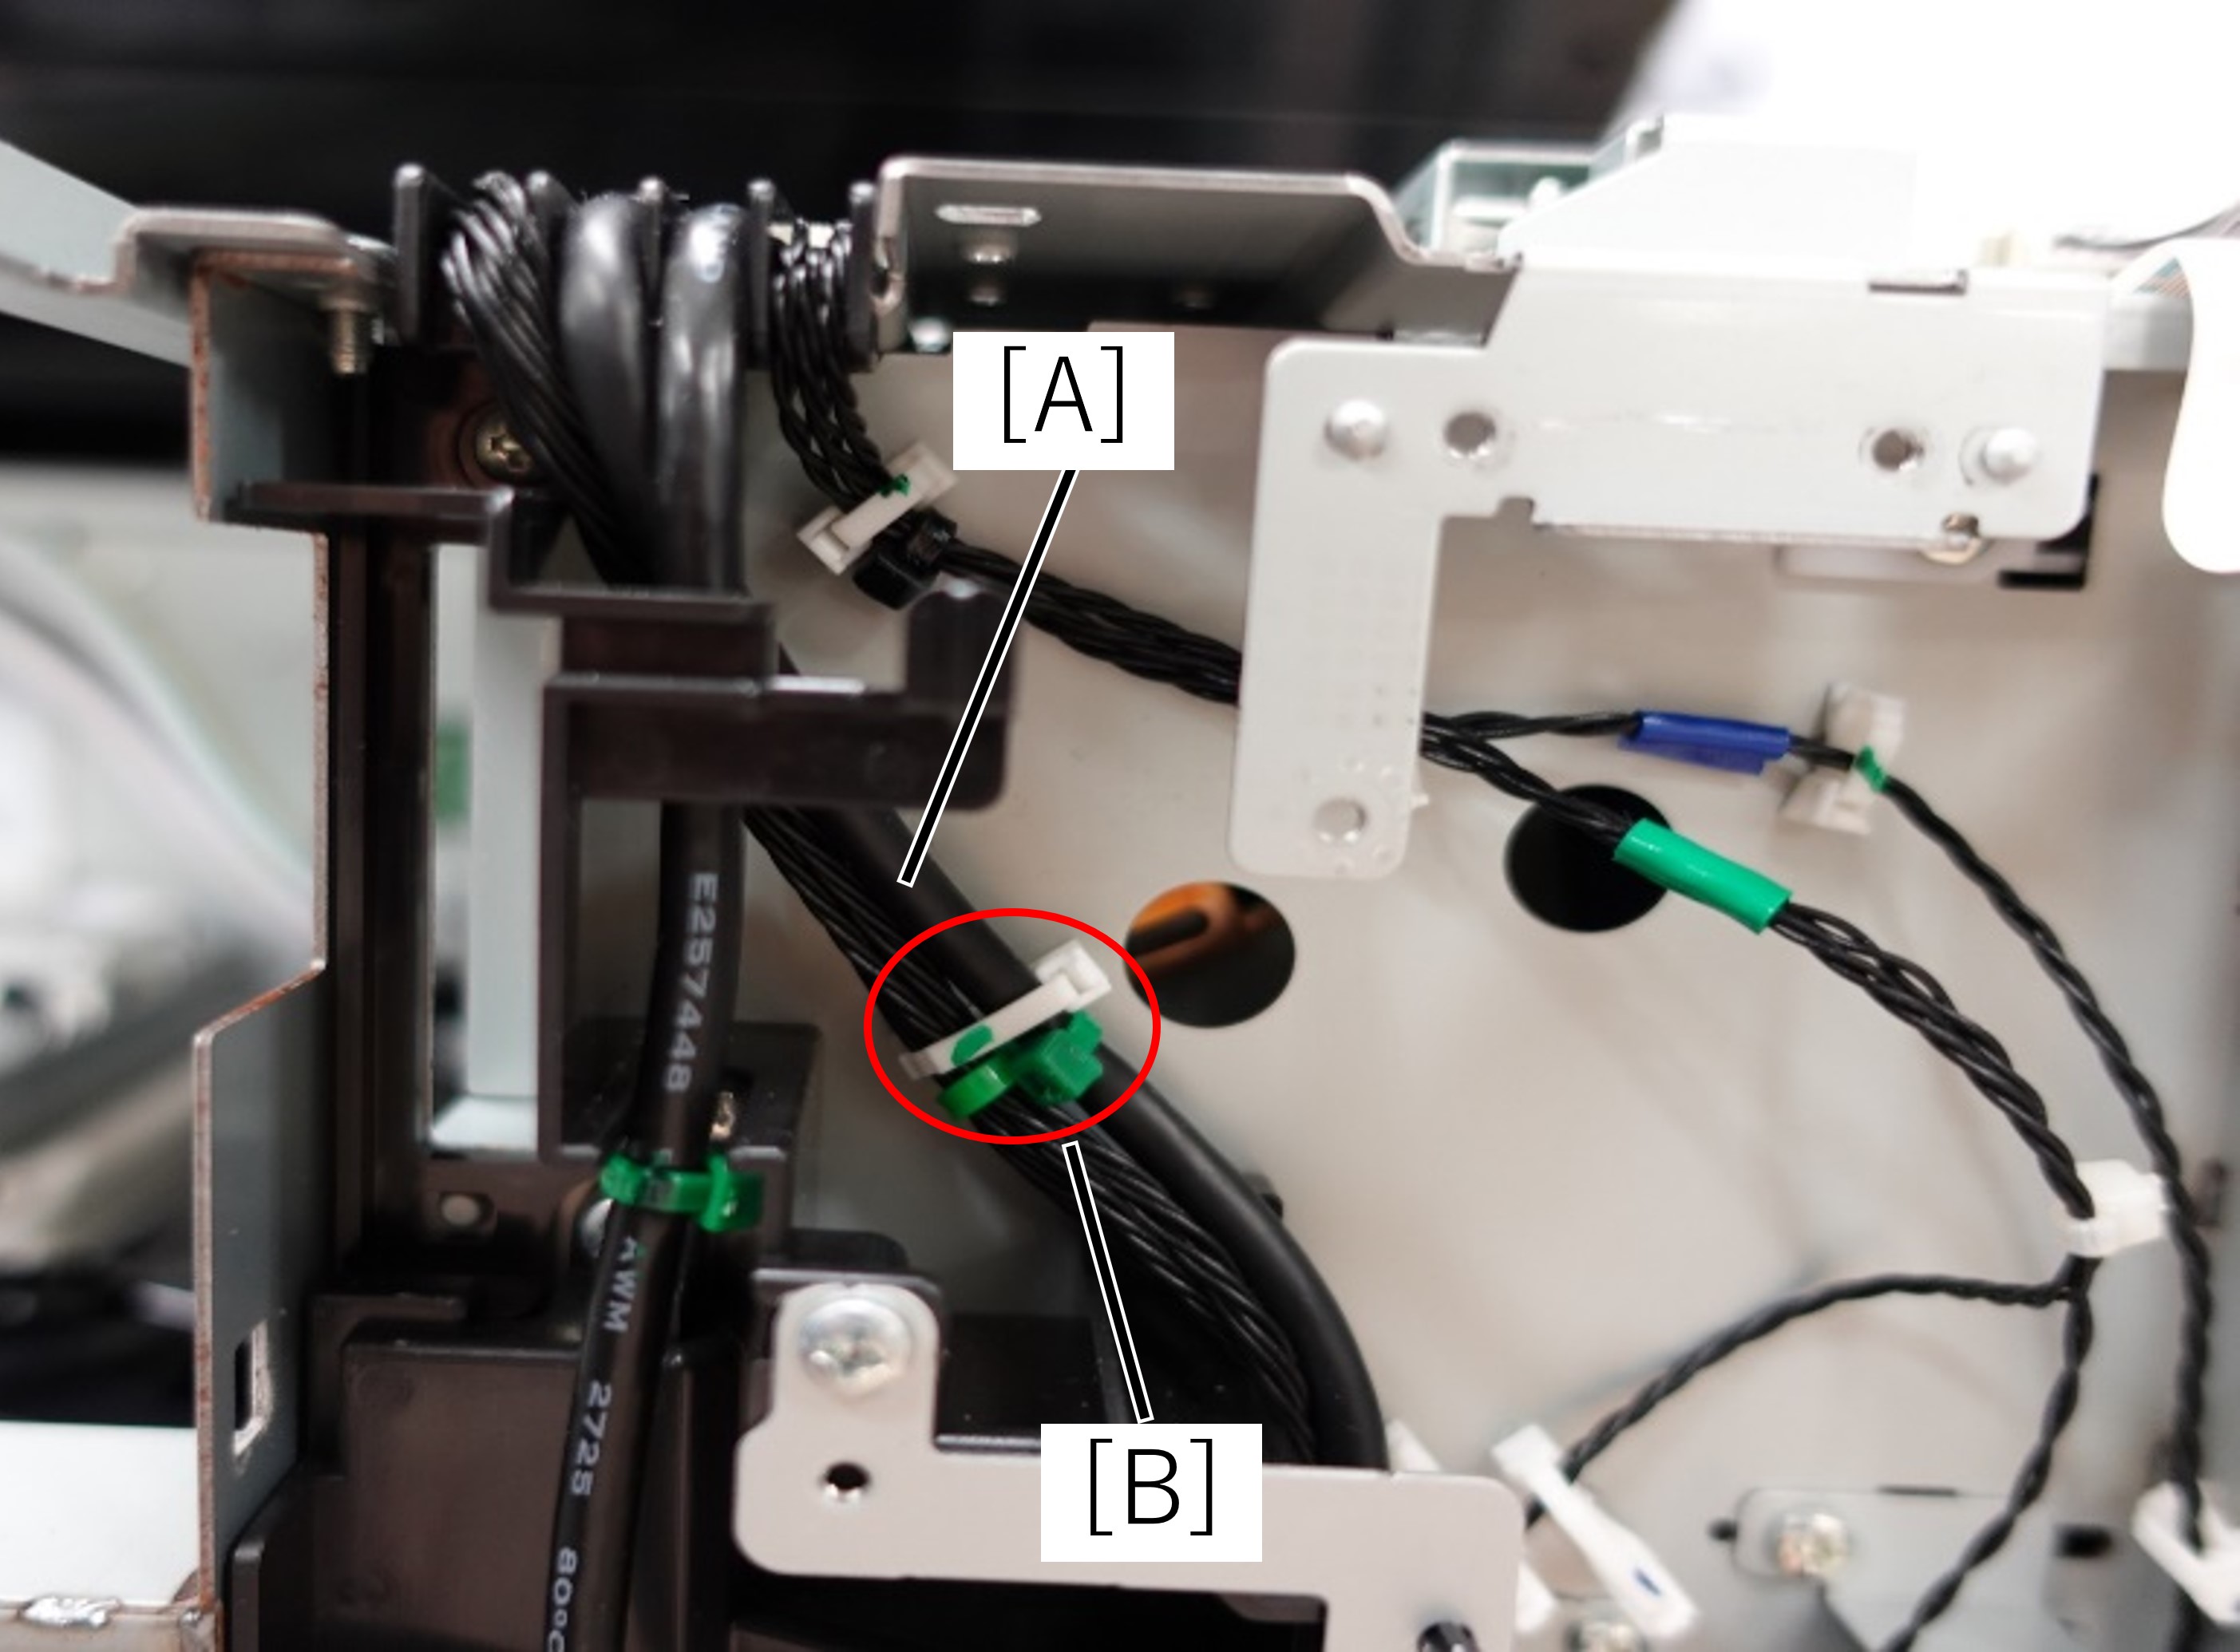 Assembly / 組み立て
Fix the green cable ties (A) installed to the cable with the clamp (B) in the area between the cable ties.
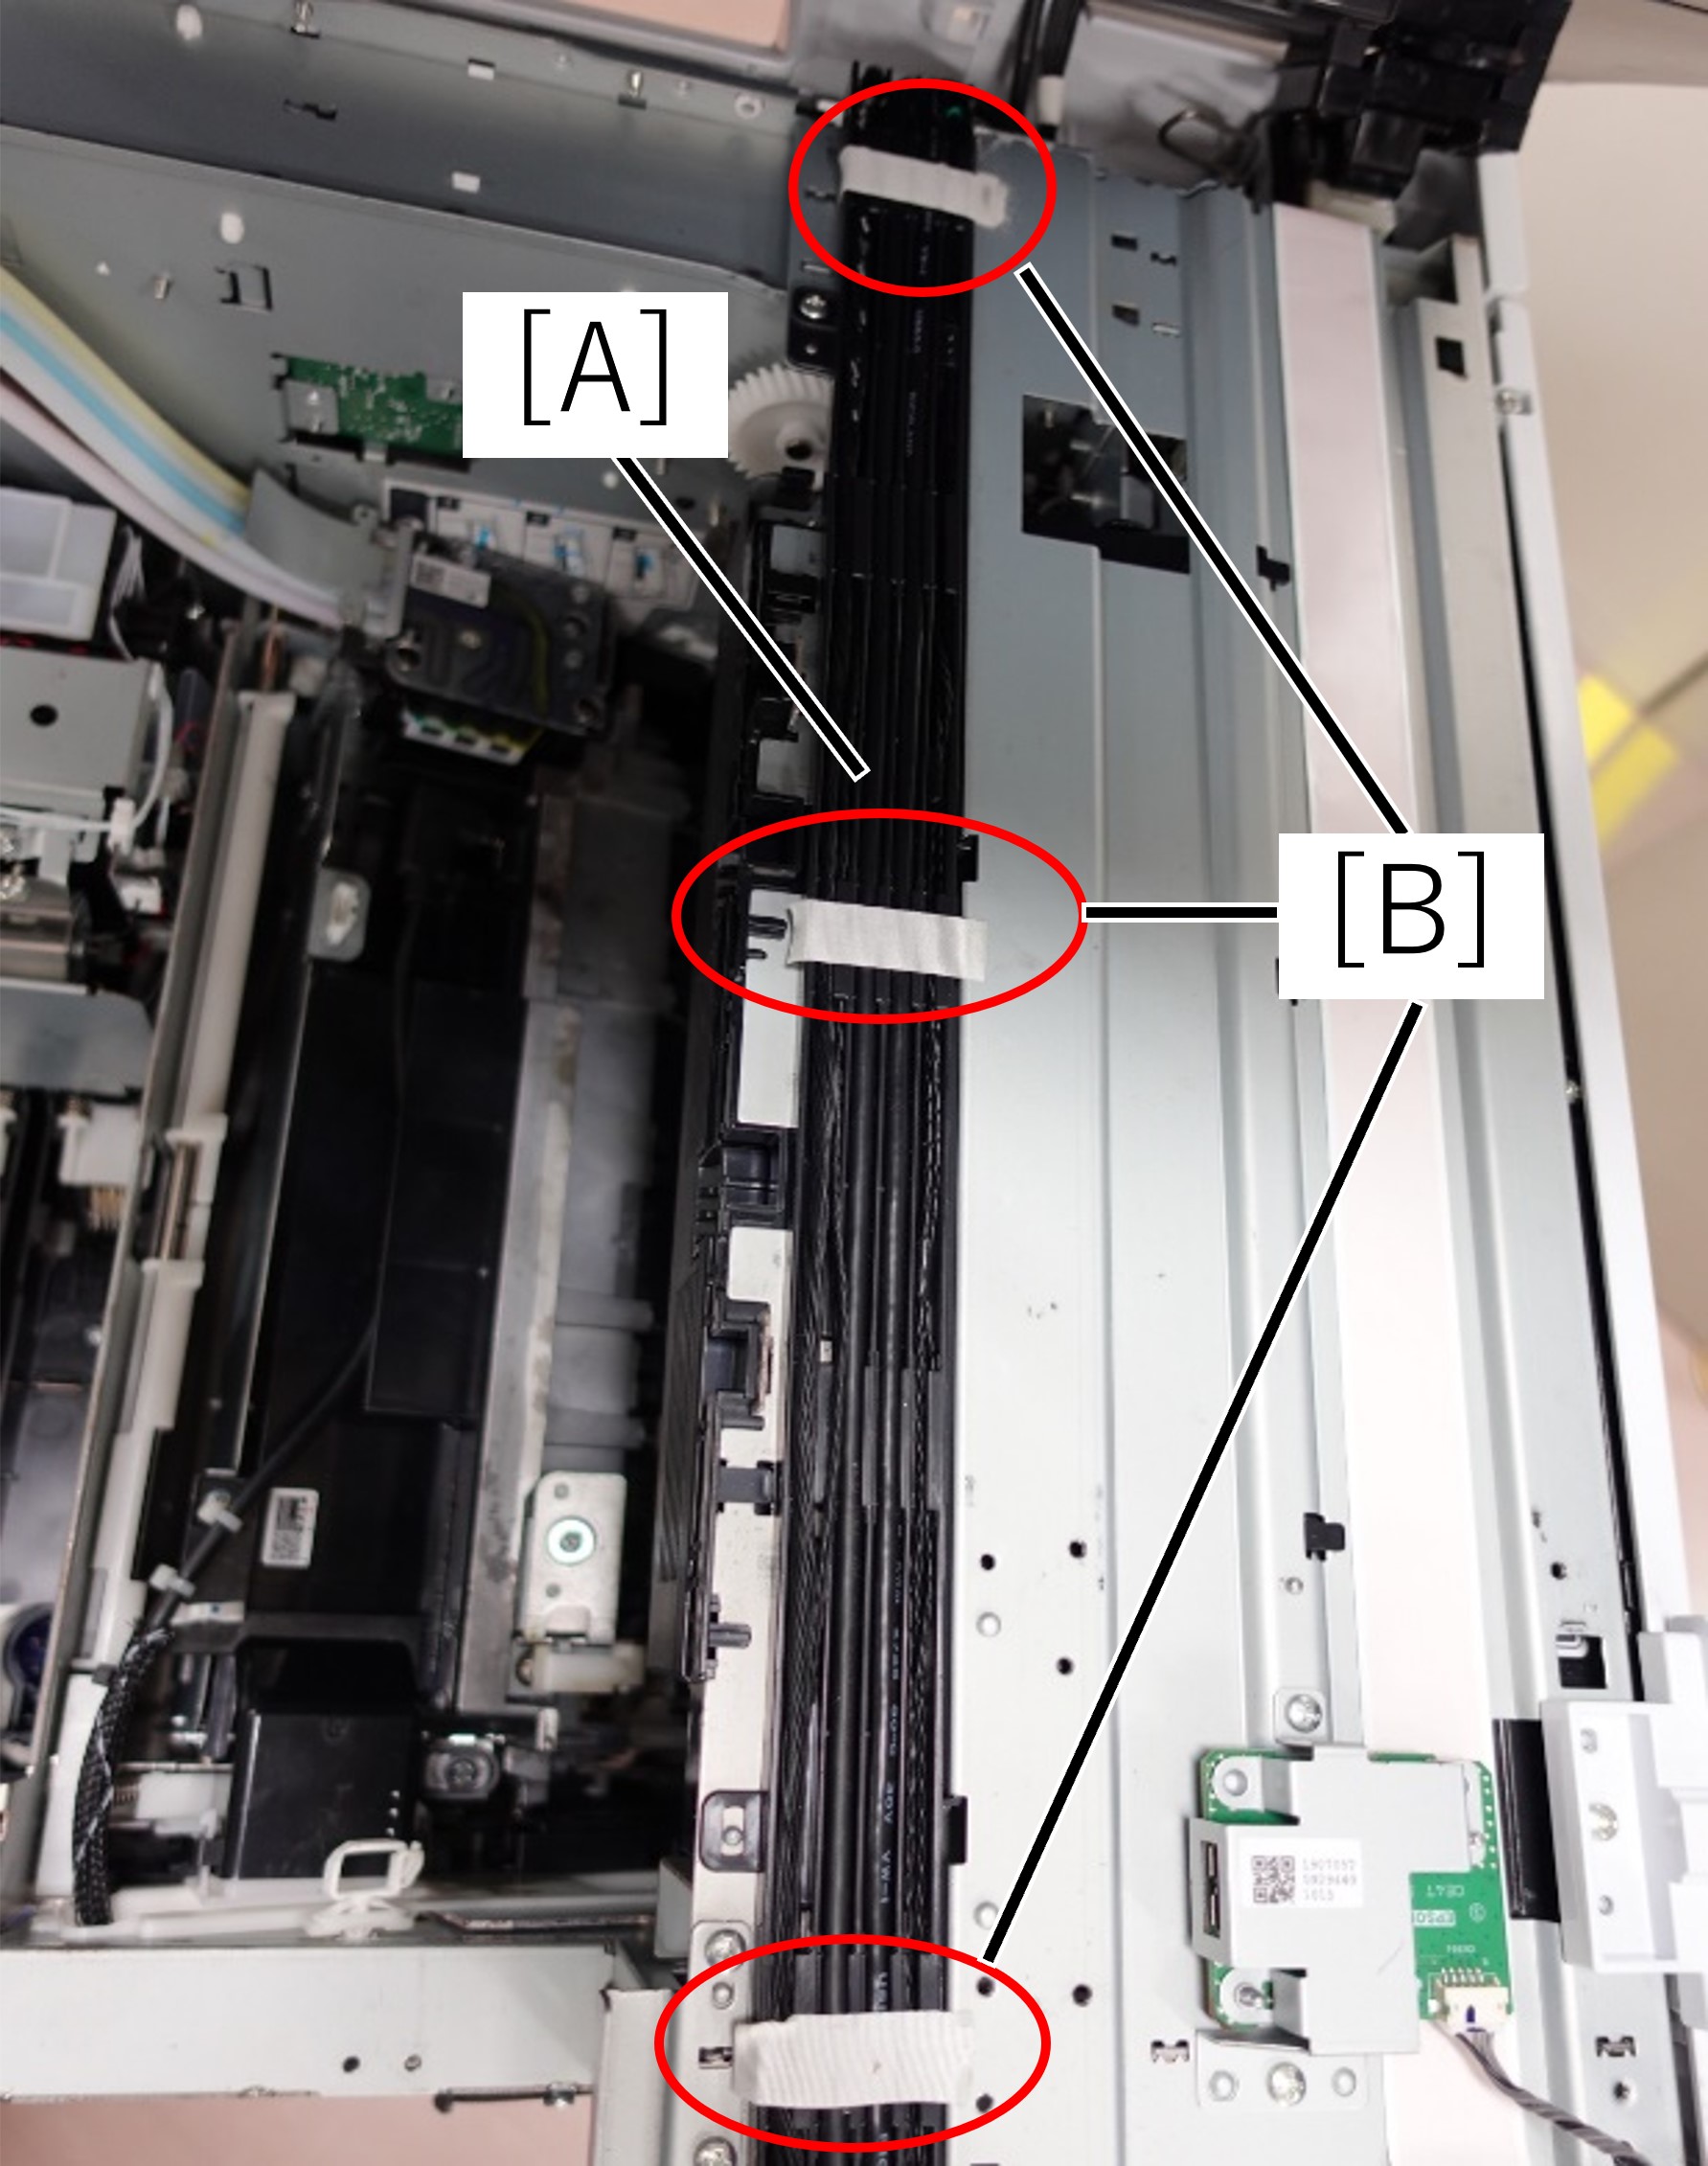
- Remove the head harness (A) by peeling off the fixing tape (B).
- Remove the 3 screws and remove the Right Cover (A).
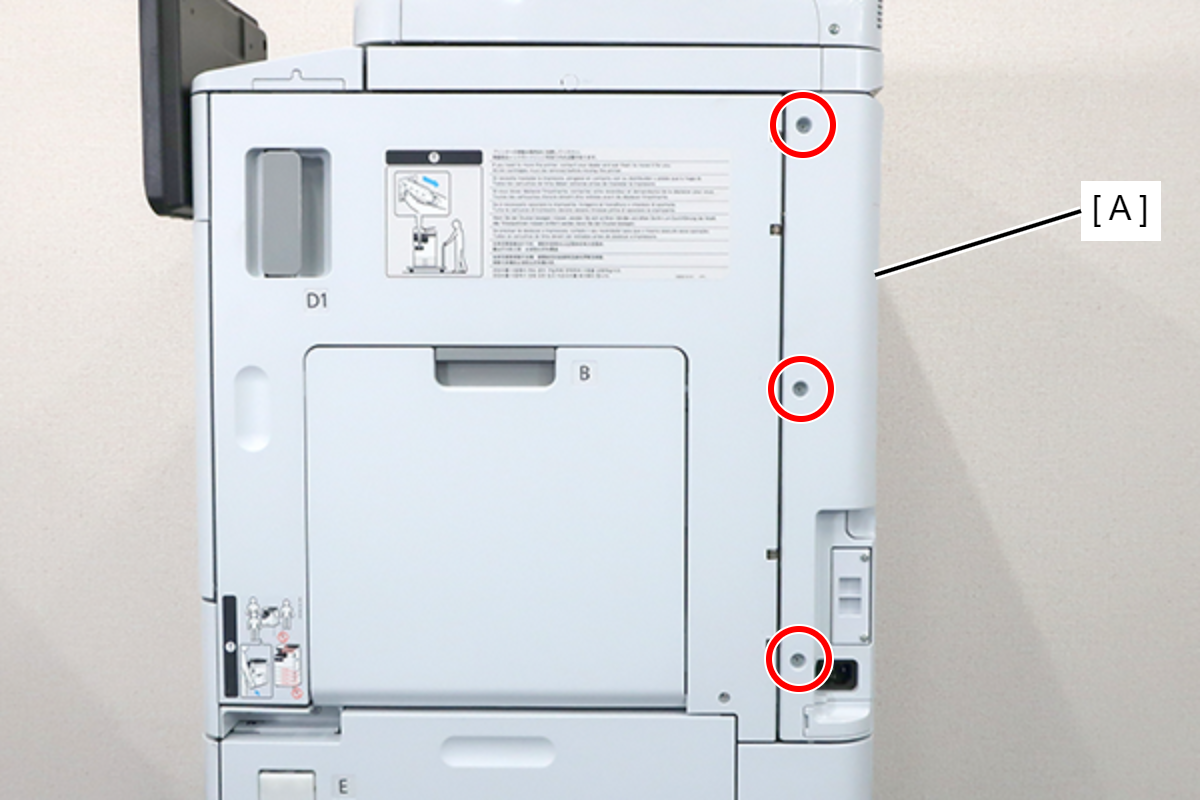
- : 3x8D
- Remove the 5 screws and pull the rear cover (A) toward to remove it.
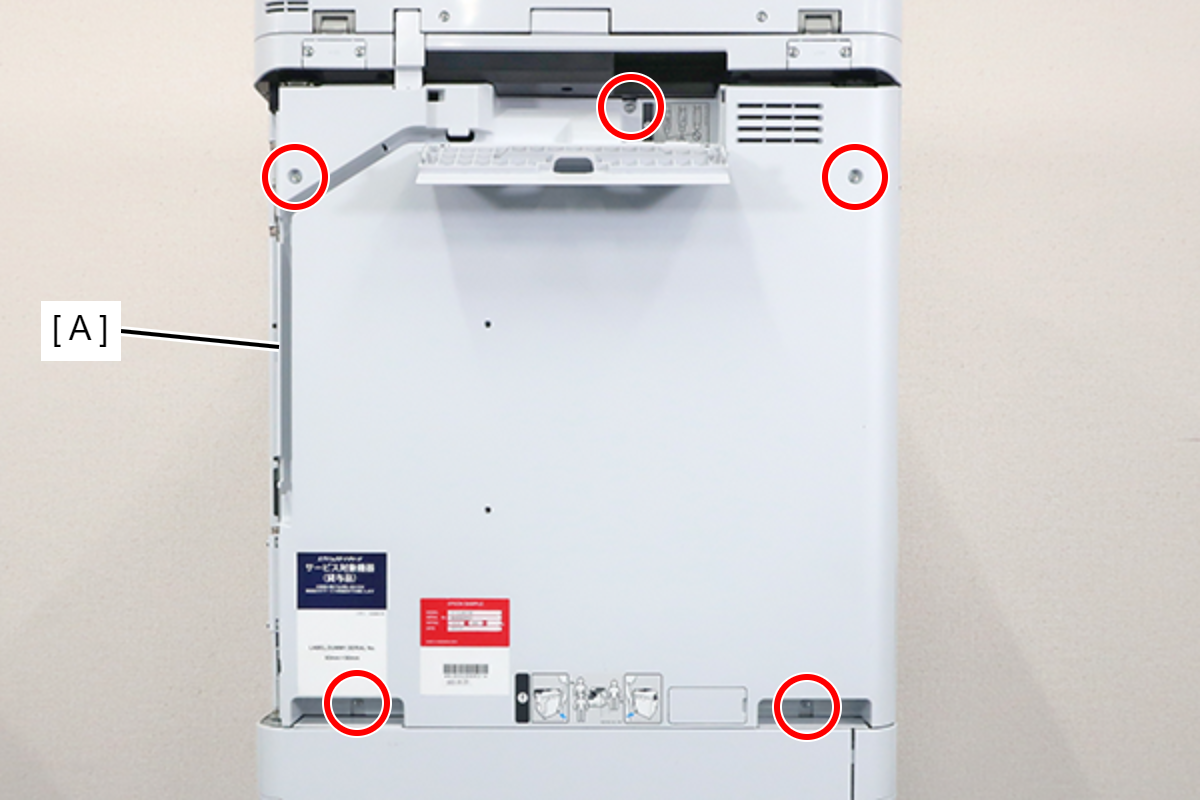
 : 3x8D
Assembly / 組み立てConfirm that the rear cover is not floating. The positioning pin (A) may not fit into the hole (B).
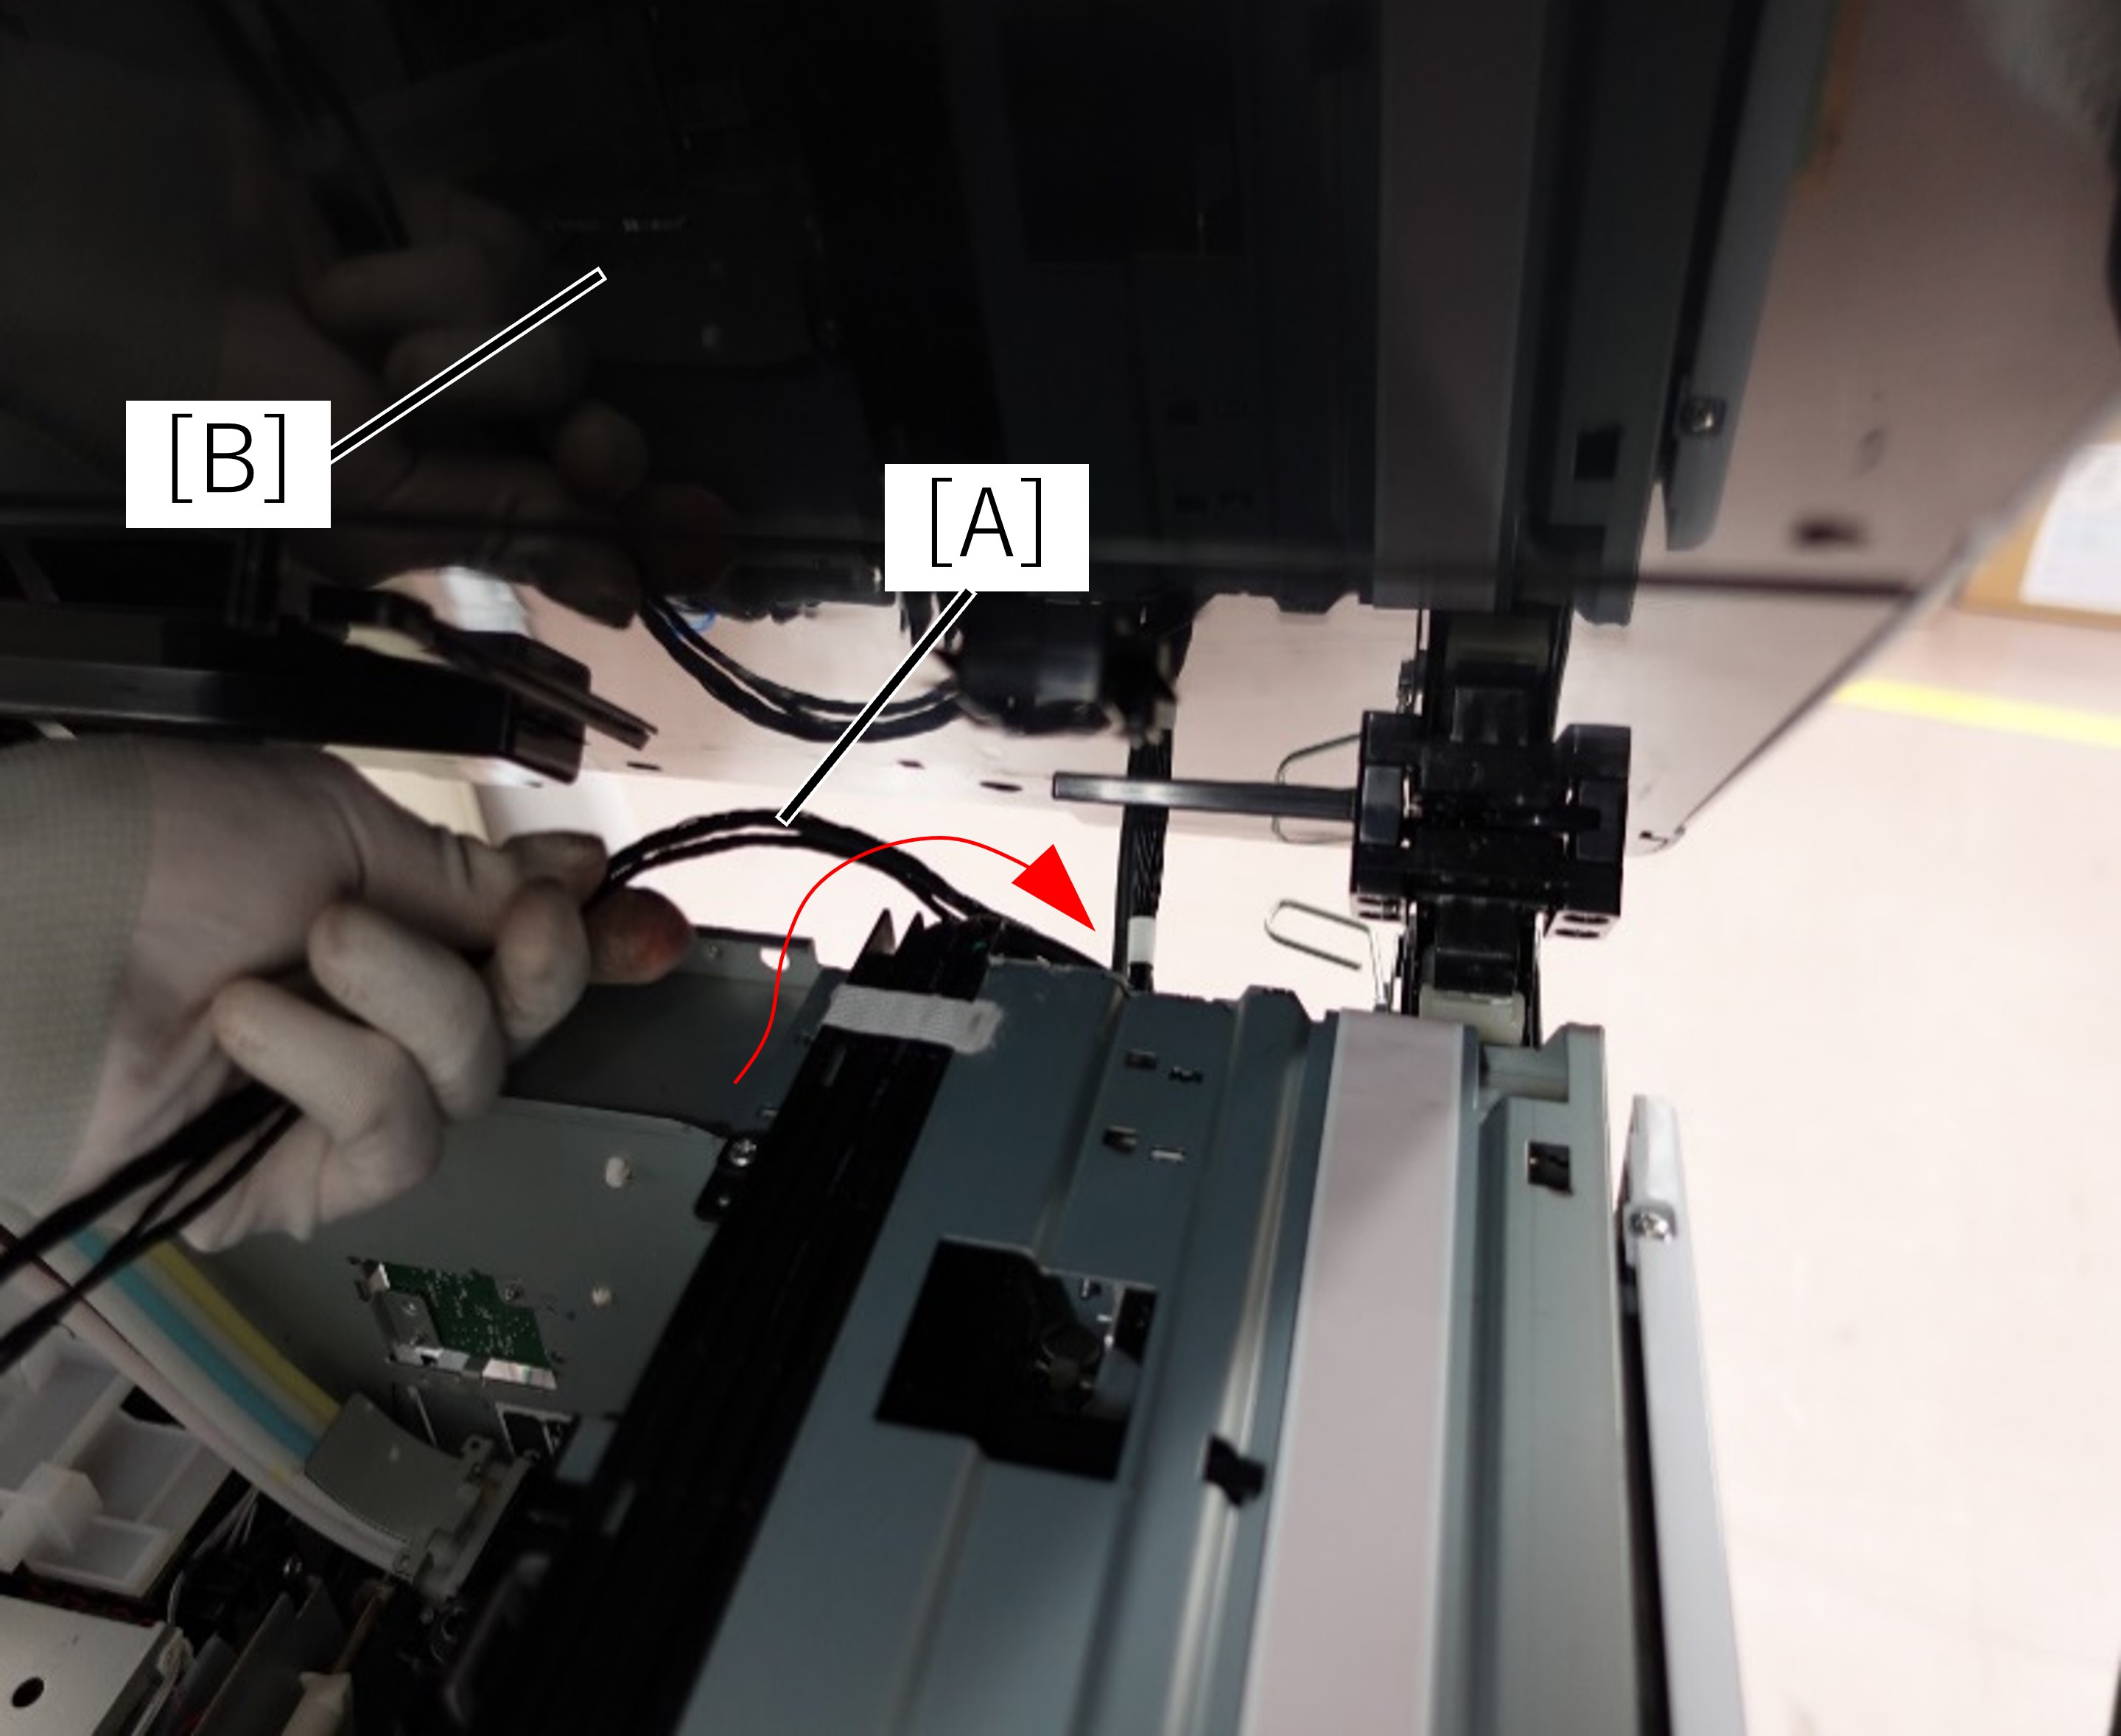
- Pass the removed harness (A) through the gap between the main unit and the ADF/SCN unit (B) to the back side of the product.
- Remove the 5 screws fixing the Main Board Cover (A).
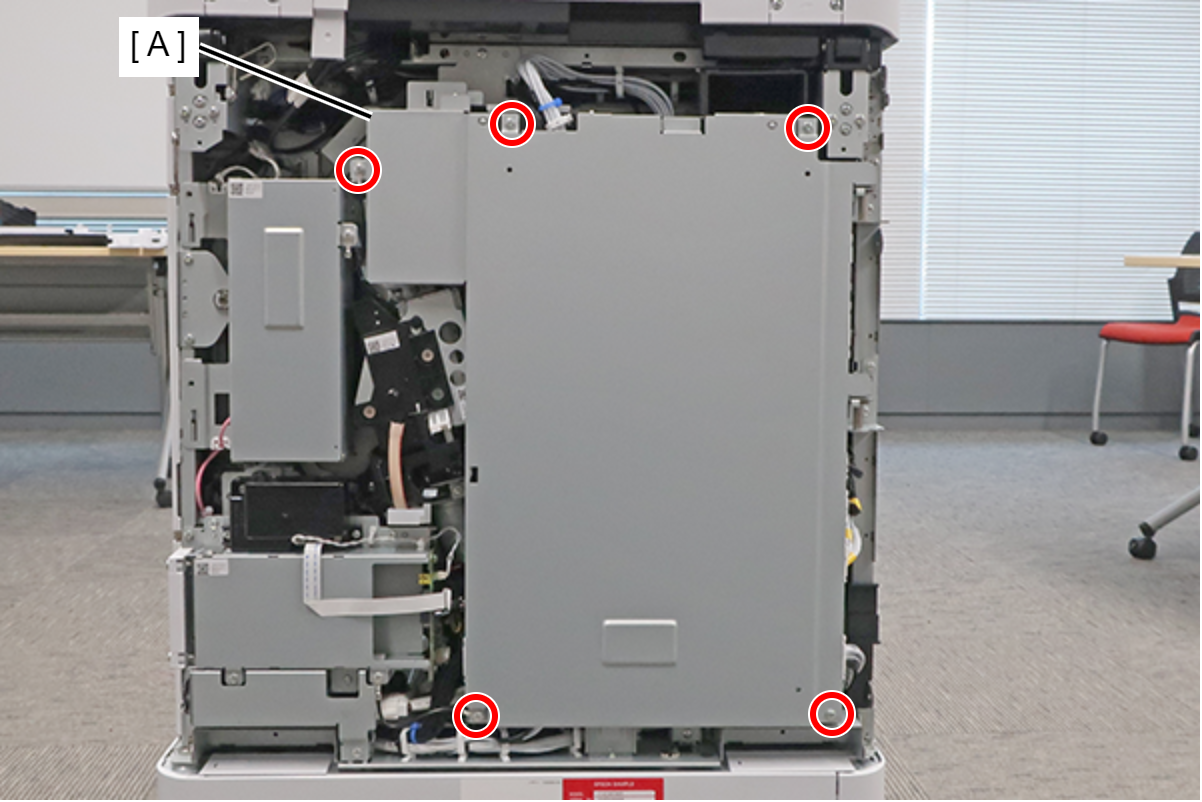
- : 3x8D
Assembly / 組み立てThe screw shown in the figure must be fastened together with the ground wire (A).
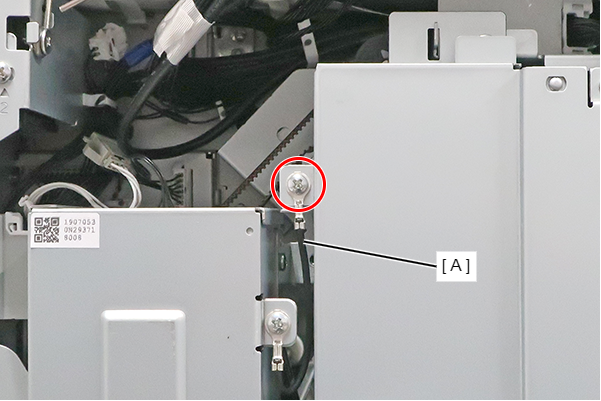
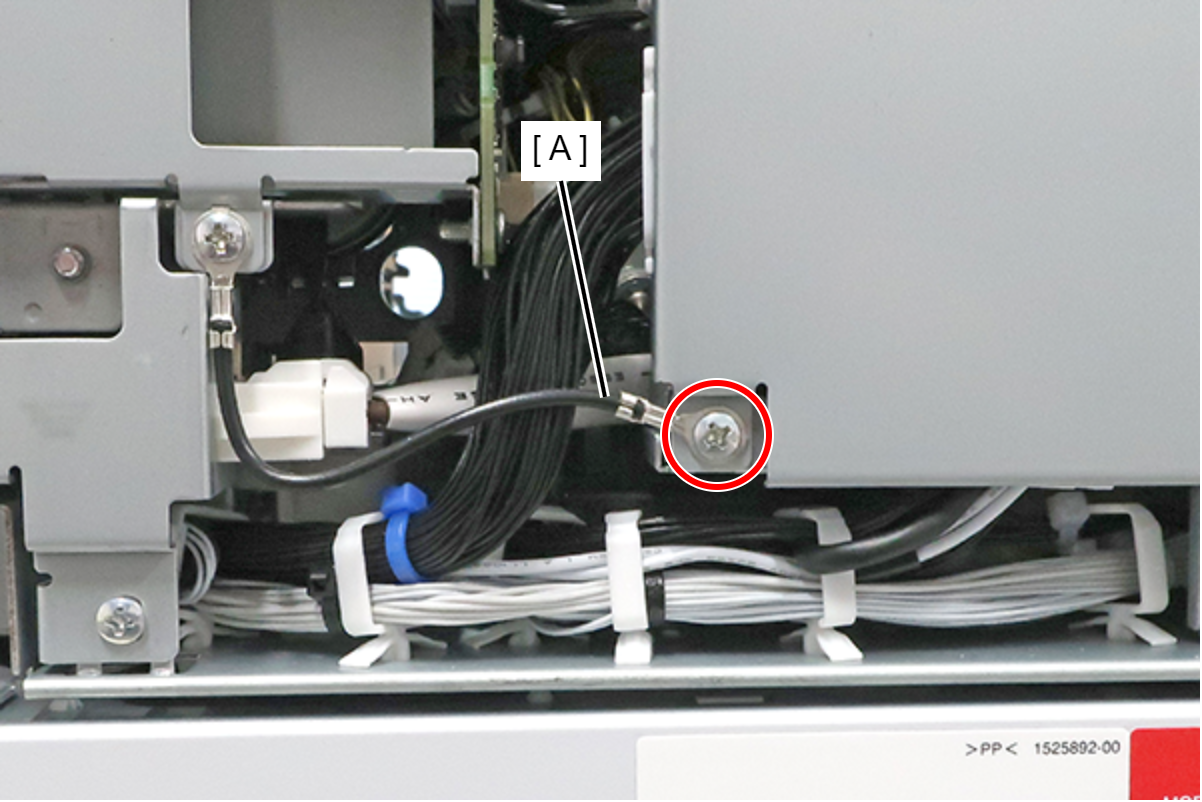
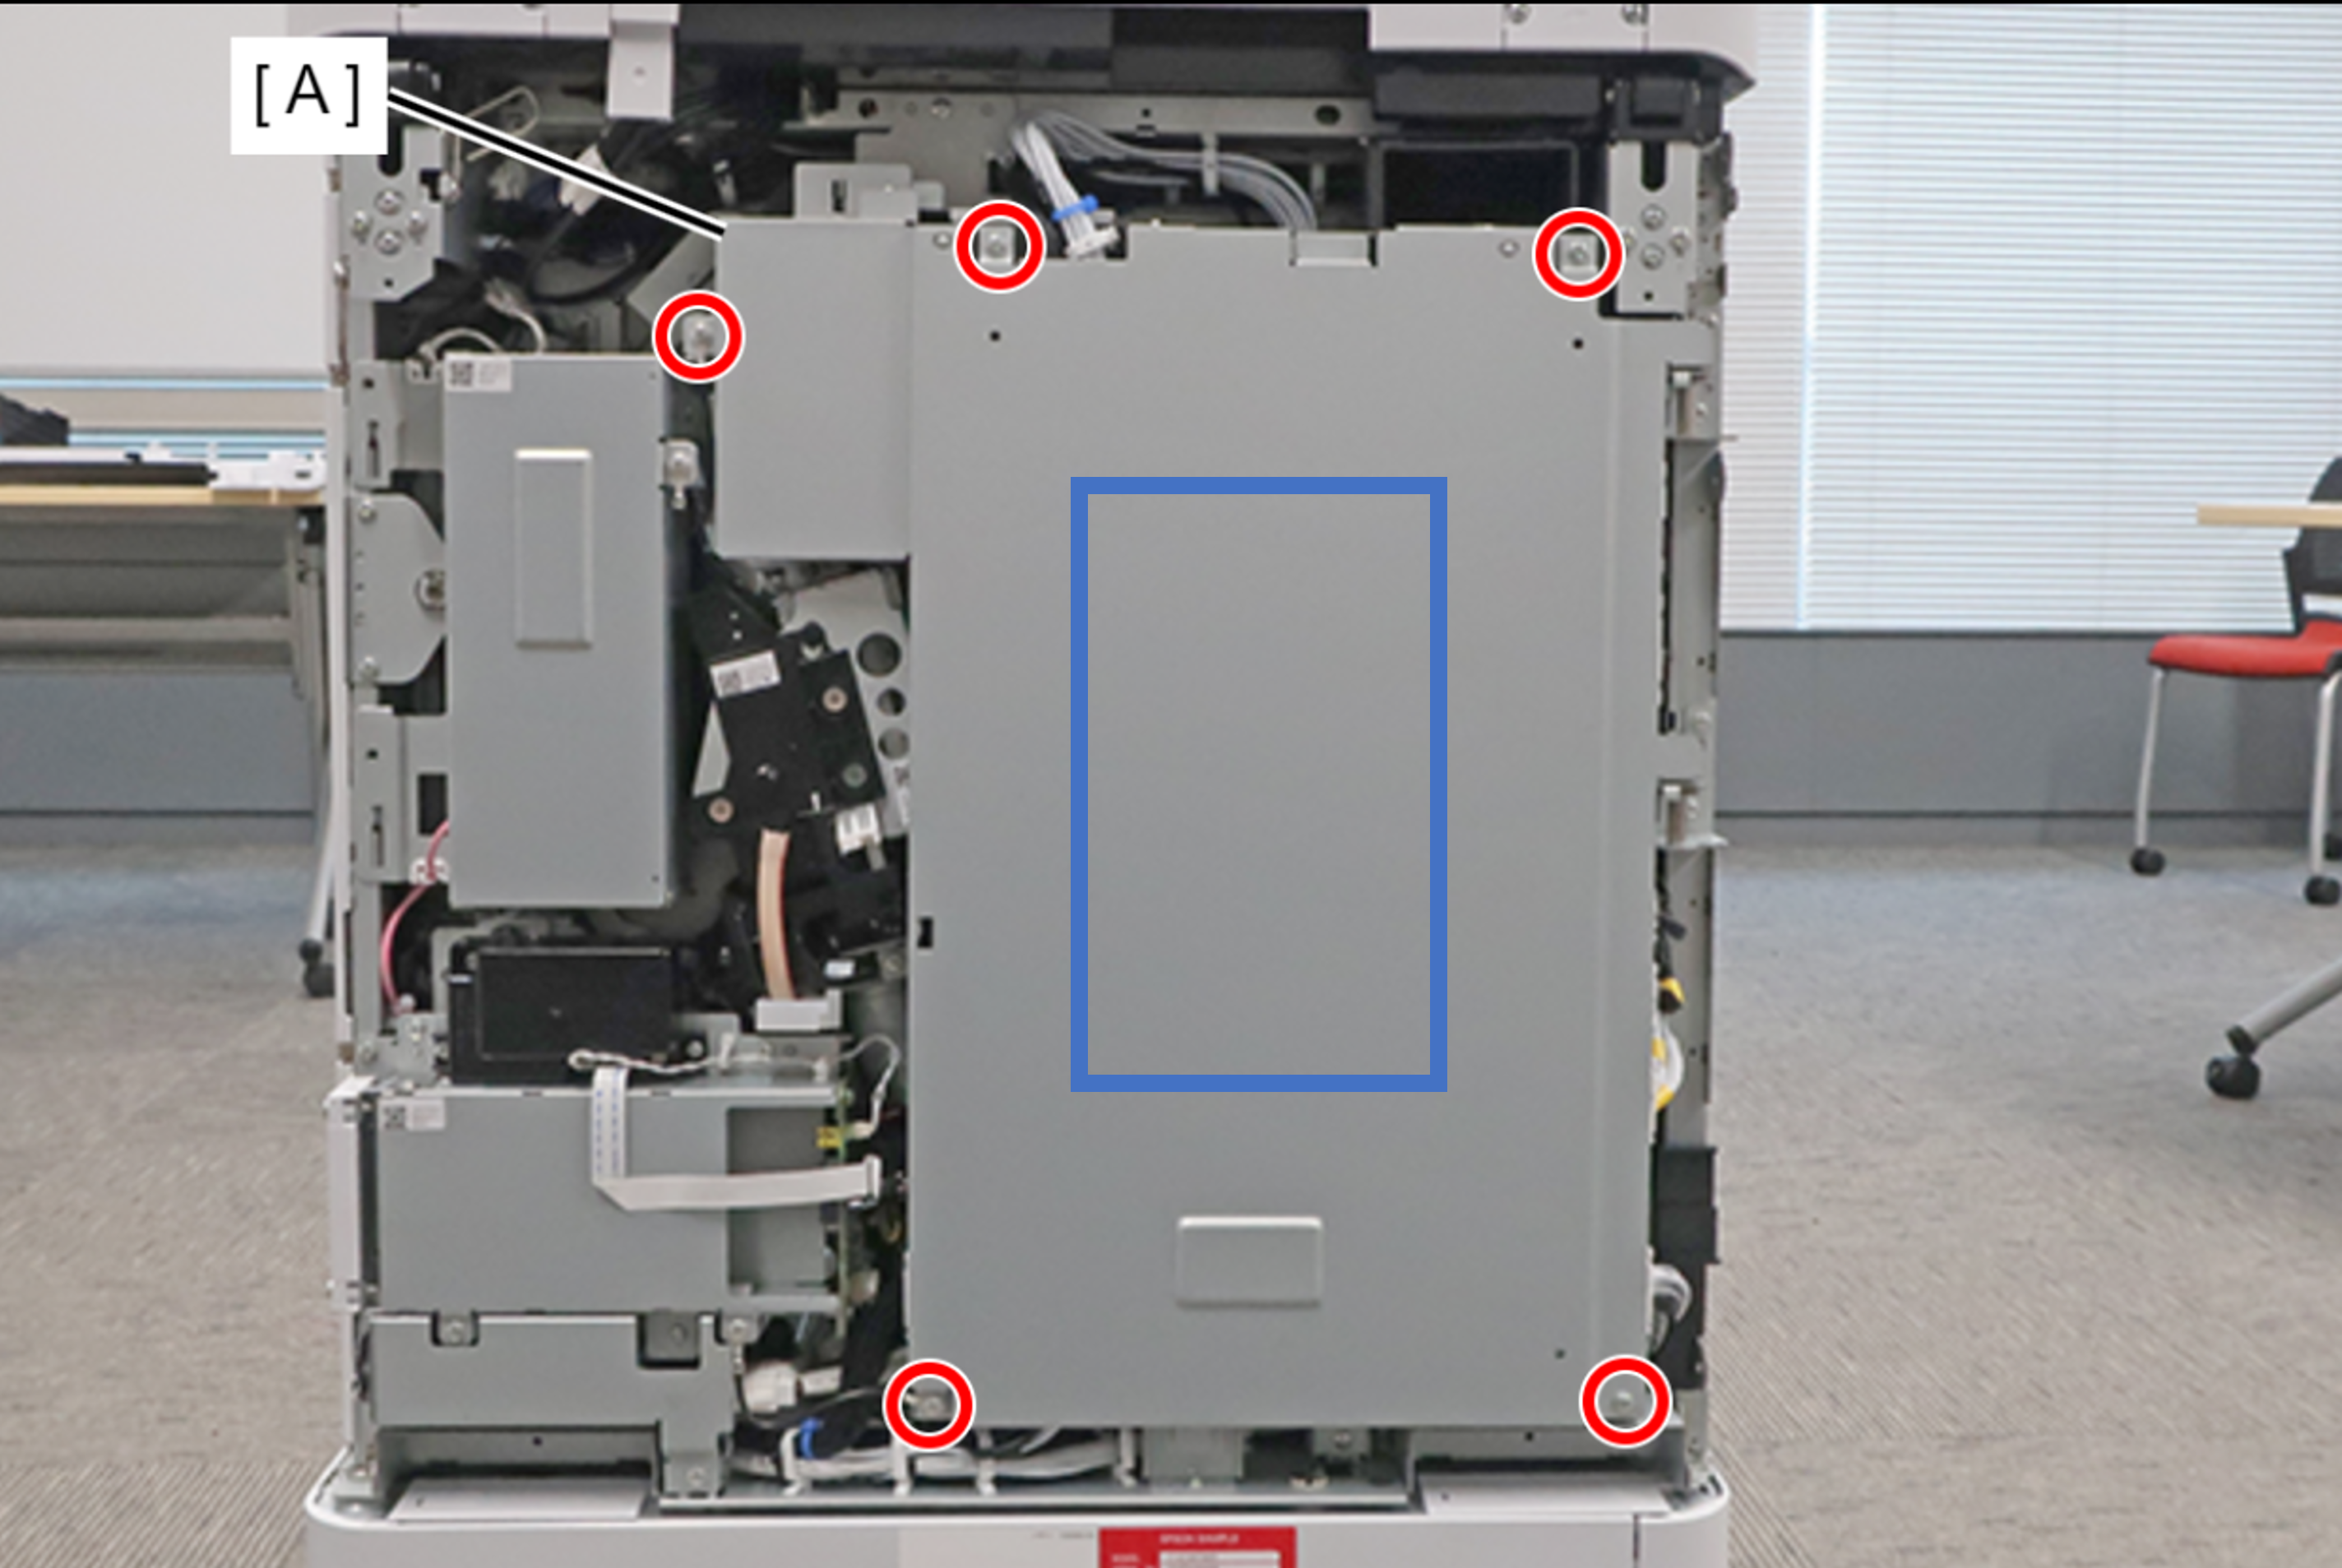
When installing the Main Board Cover, hold the center part with your hand while tightening the screws to prevent the cover from lifting.
- Lift the main board cover (A) slightly to release the dowel (B) and open the main board cover (A).
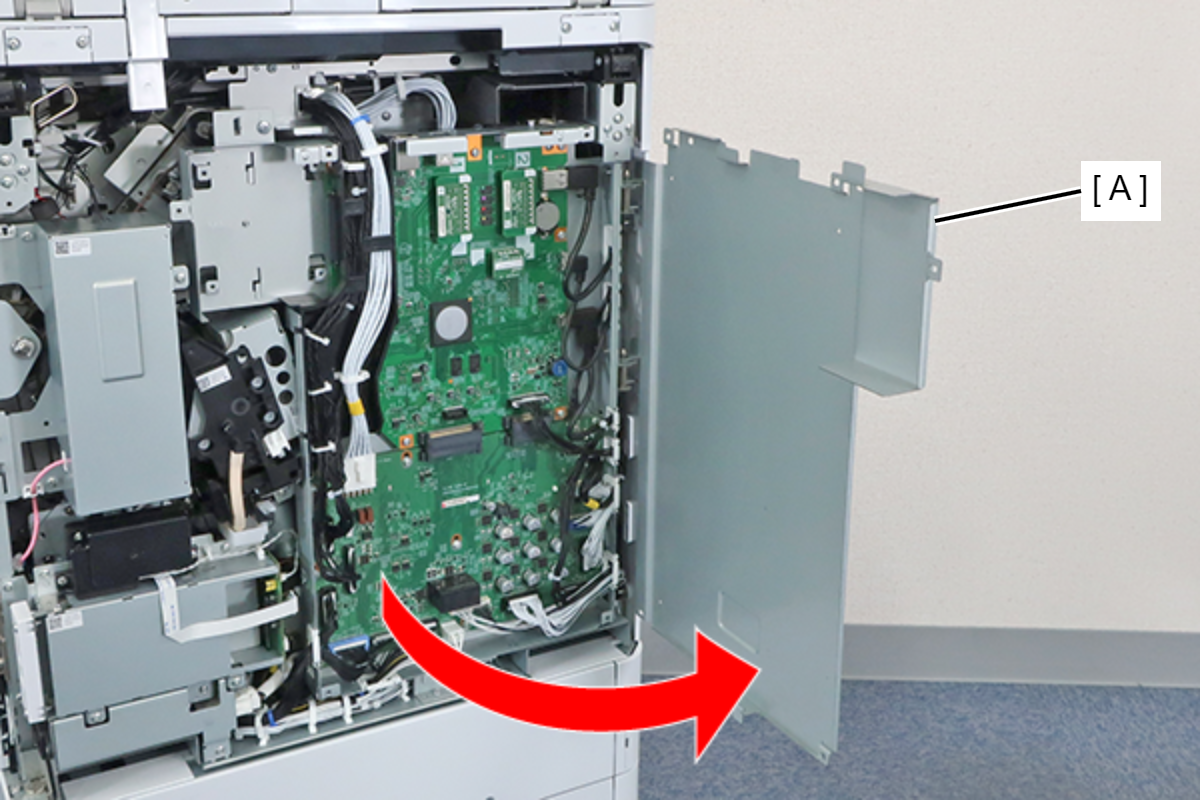 Note / 補足
The Main Board Cover (A) can be completely removed by lifting it in the open position shown above.
- Disconnect the cables from the connectors (B) (CN3/CN4/CN6/CN13) of the MCU Board (A), and remove the screw. Remove the clamp (C).
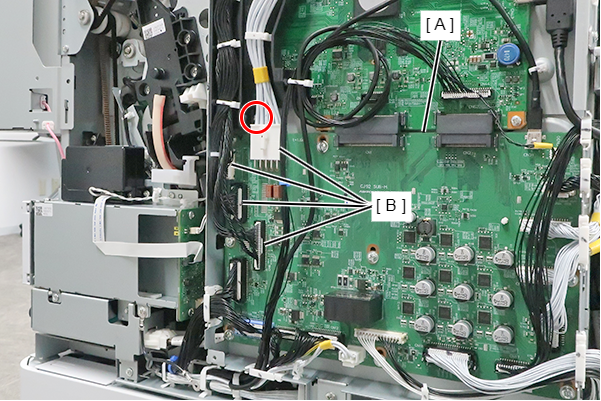
- : 3x8D
- Hang the protrusion of the MCU Wiring Rail (A) on the Wire Hook (B), and withdraw it.
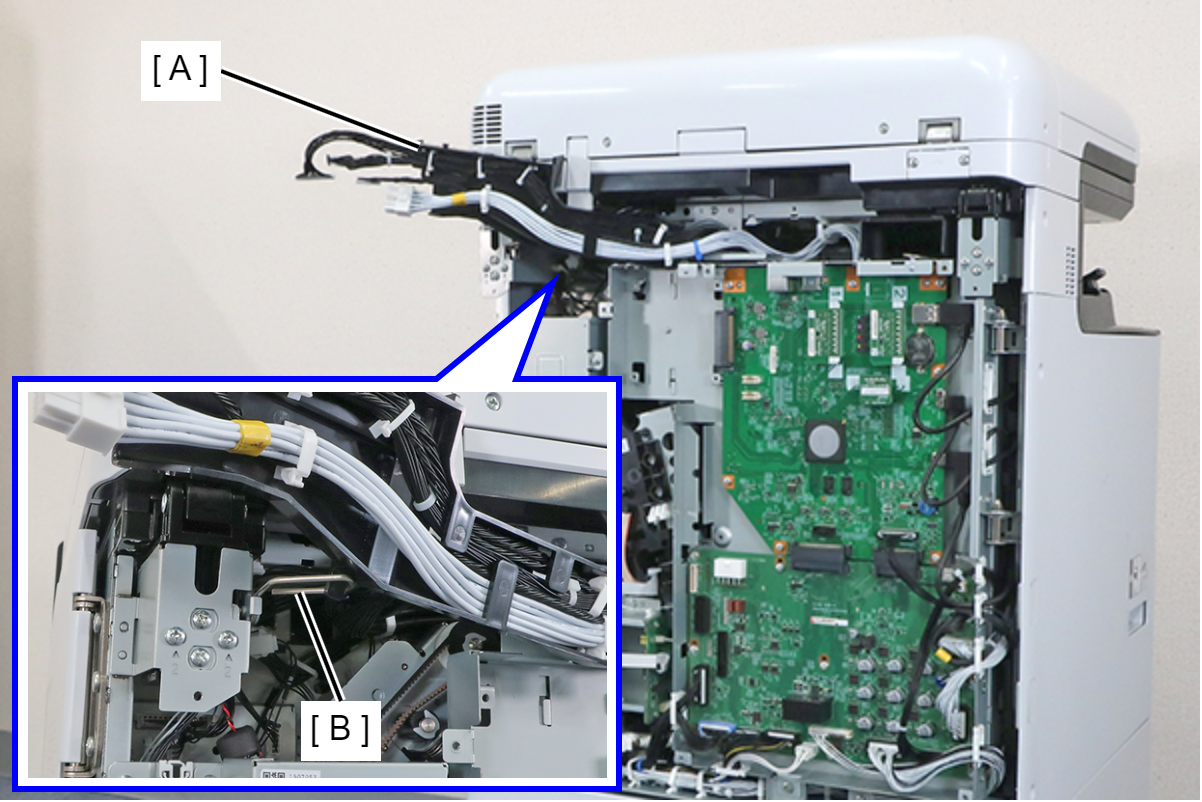 Assembly / 組み立て
Engage the hook (A) of the MCU Wiring Rail in the hole (B) of the Board Box and install.
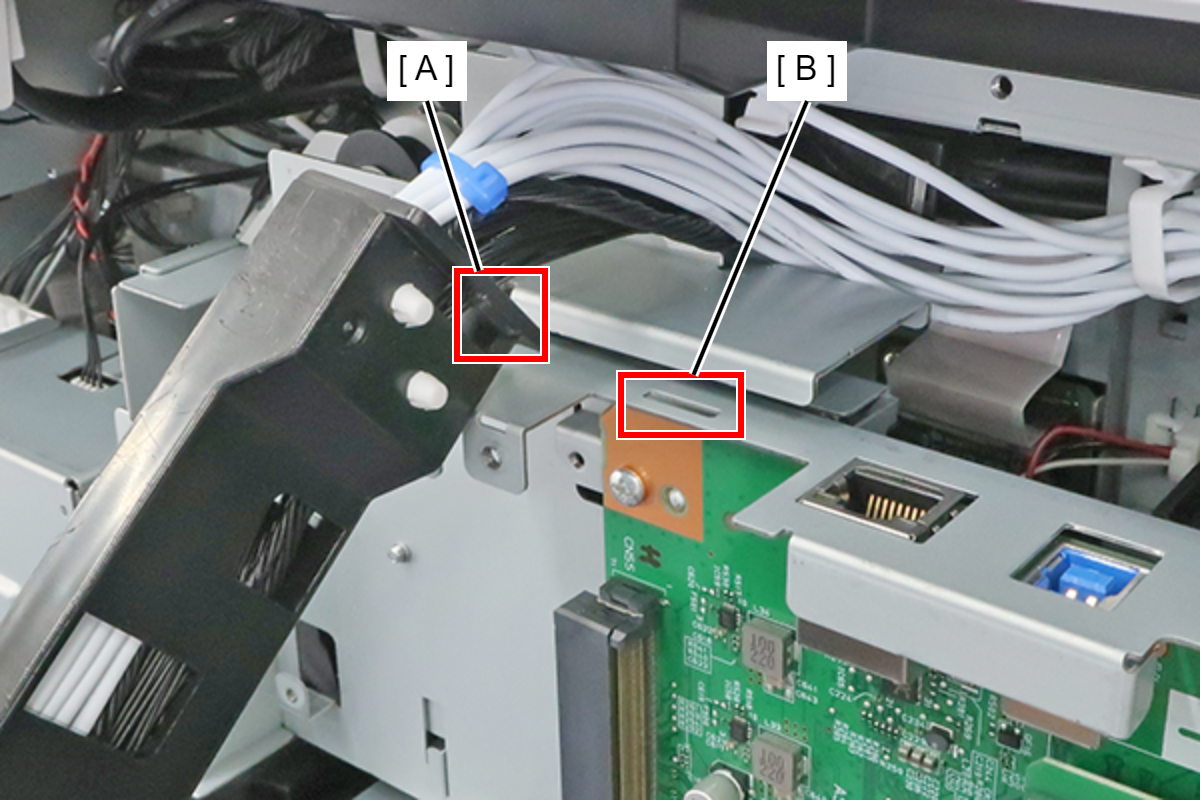
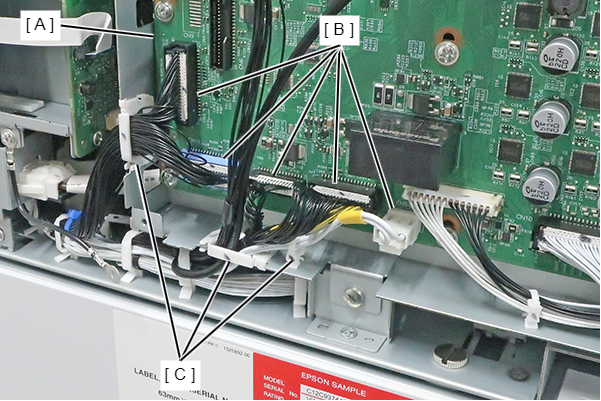
- Disconnect the cables from the main board connector (A), the MCU board connectors (B) and release from clamp (C).
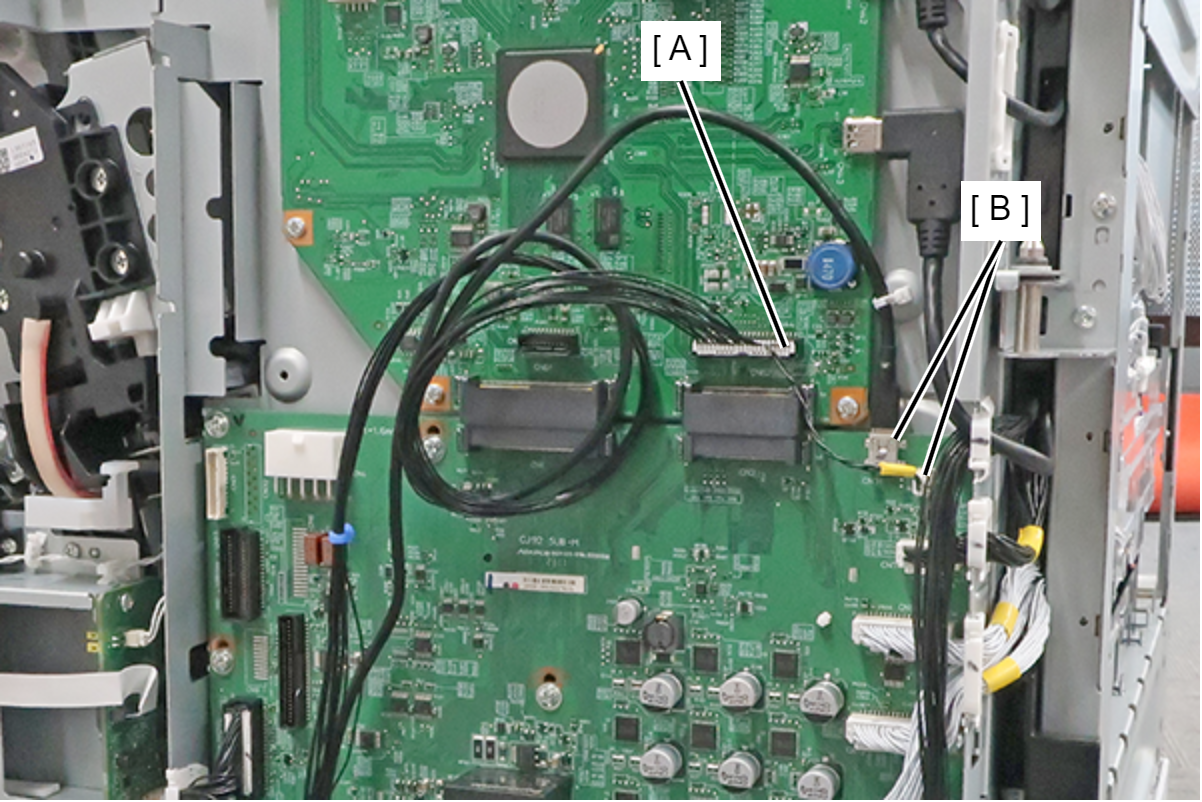
- Disconnect the cables (CN5/CN10/CN11/CN12/CN504) from the connector (B) of the MCU Board (A), and release the from the 3 clamps (C).
- Remove the 2 screws, slightly lift the board box (A) to release the hook.
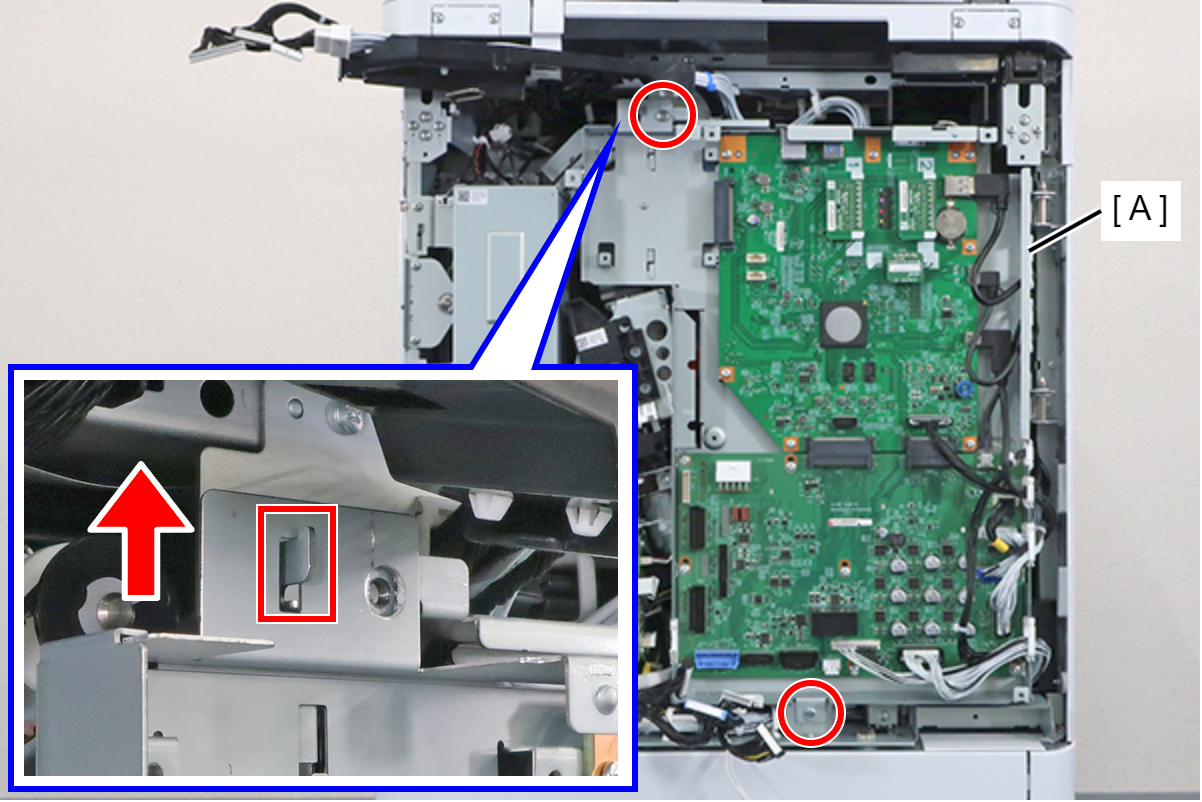
- : 4x8D
- Open the Board Box (A), and fix with the Wire Hook (B).
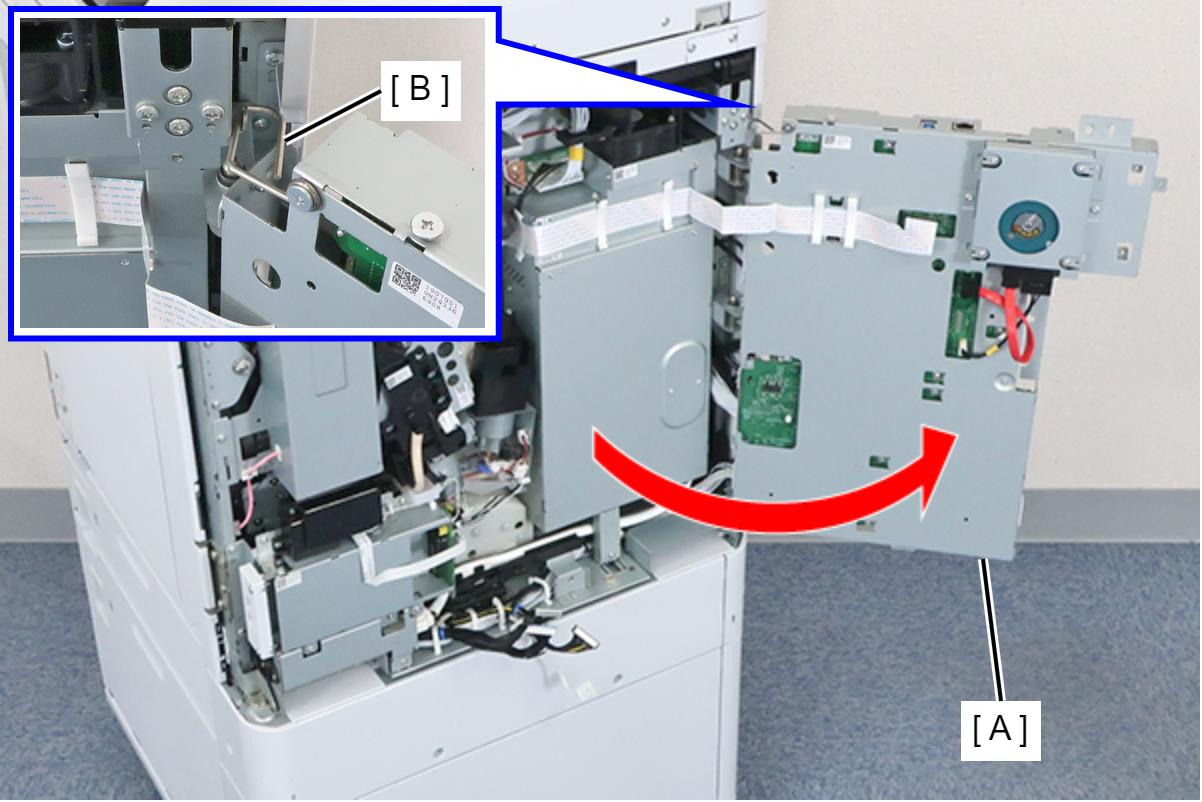 Caution / 注意
Be careful not to close the Board Box with the Wire Hook fixed in place.
- Remove the harness (A) from the clamp (B), remove one screw securing the metal plate (C), and remove the metal plate (C).
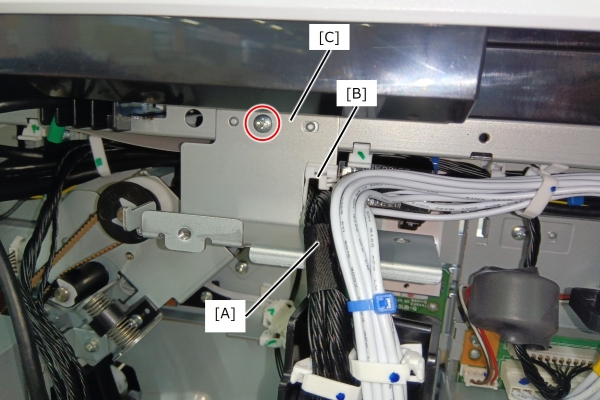 : 3x8D 1pcs
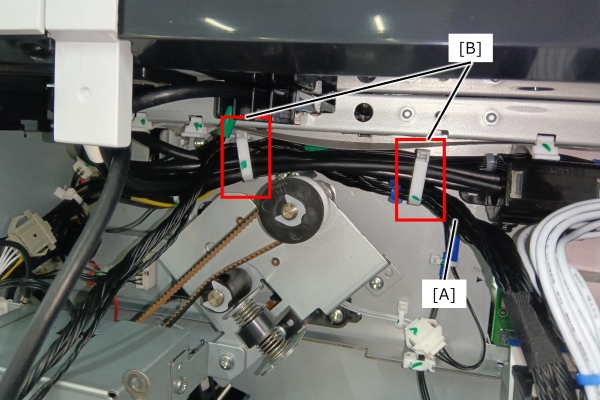
 - Release the harness from the clamp (B).
- Peel off the tapes (A) and (B) that are bundling the harness.
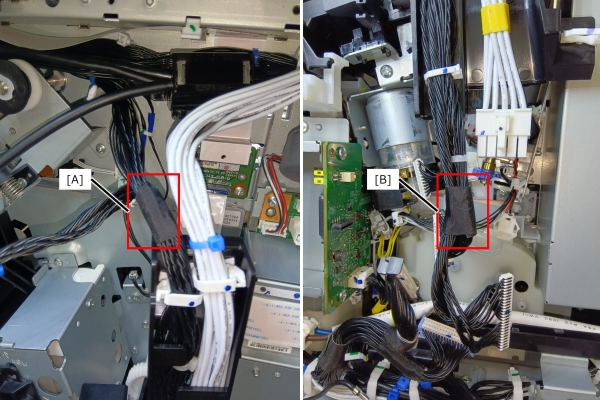
- Open the clamp (B) and remove the harness.