
Wiper Unit
 Check Point / チェックポイント Check Point / チェックポイント |
When replacing this part, you need to run the menu from the service support mode before replacing it. |
- Remove the 3 screws and remove the Right Cover (A).
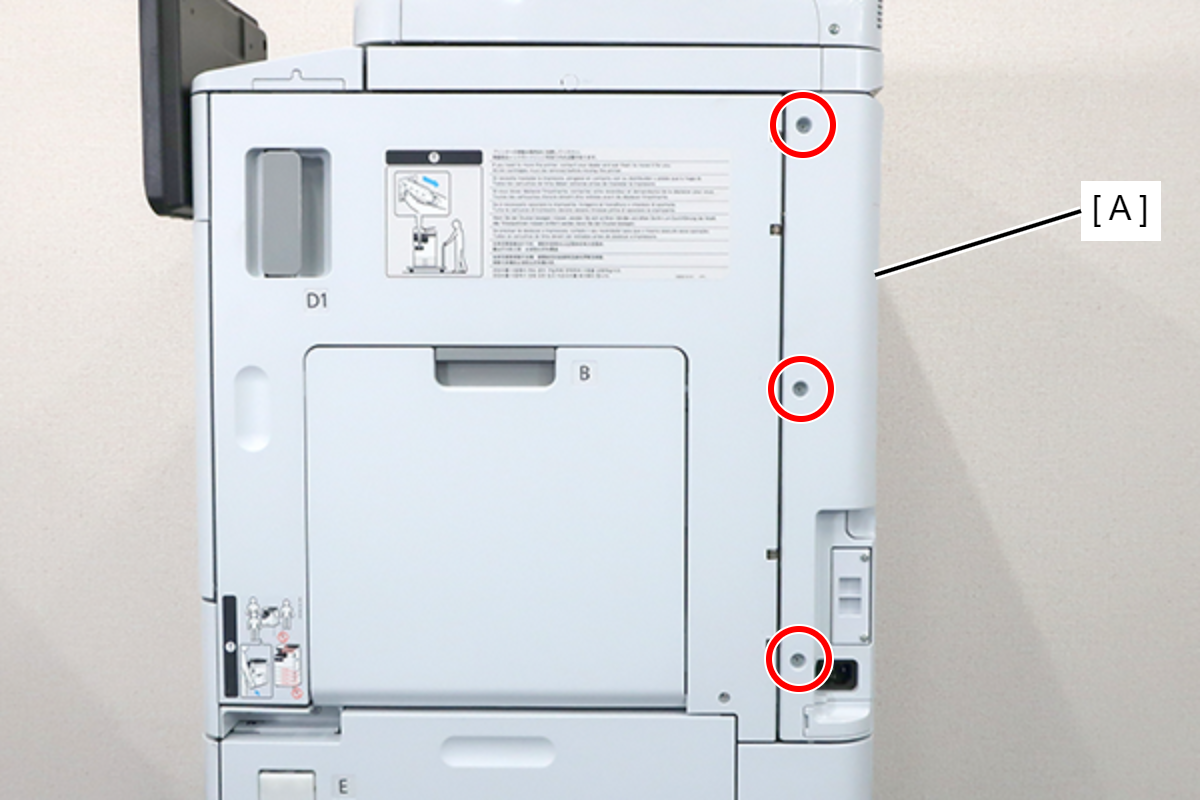
 : 3x8D
- Remove the 5 screws and pull the rear cover (A) toward to remove it.
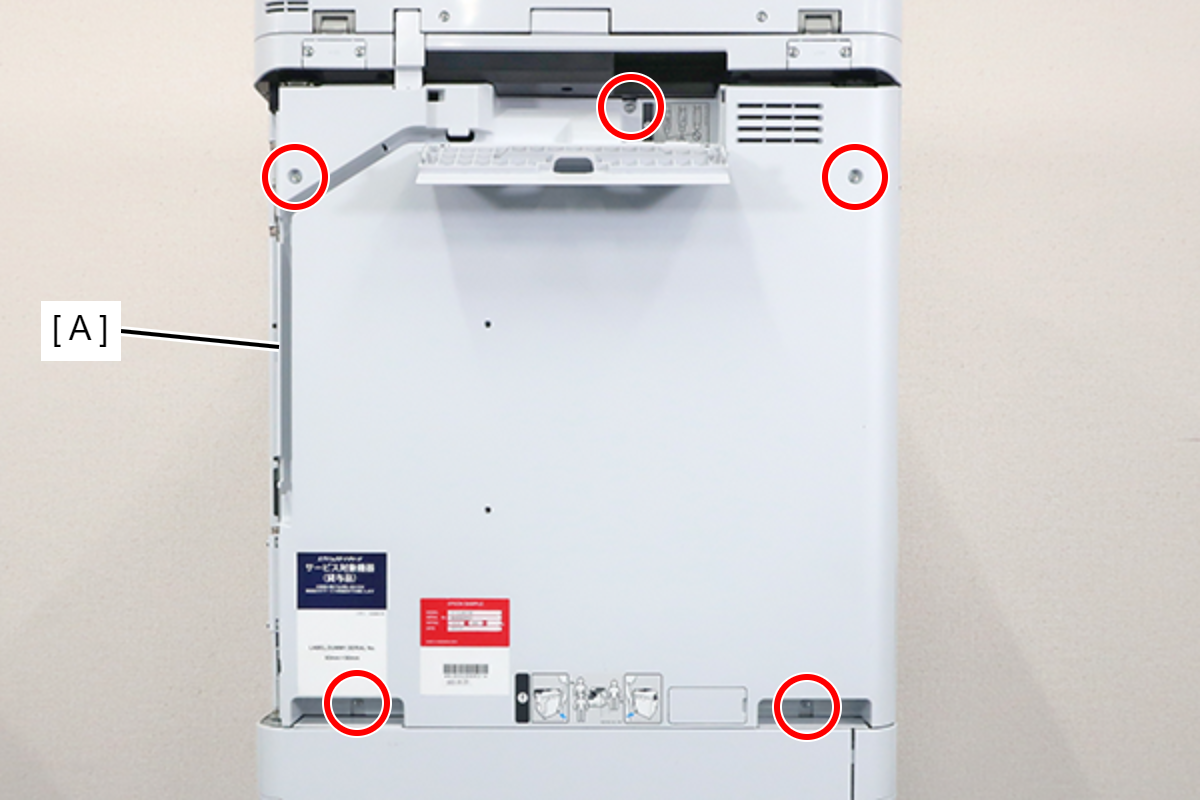
 : 3x8D
 Assembly / 組み立て
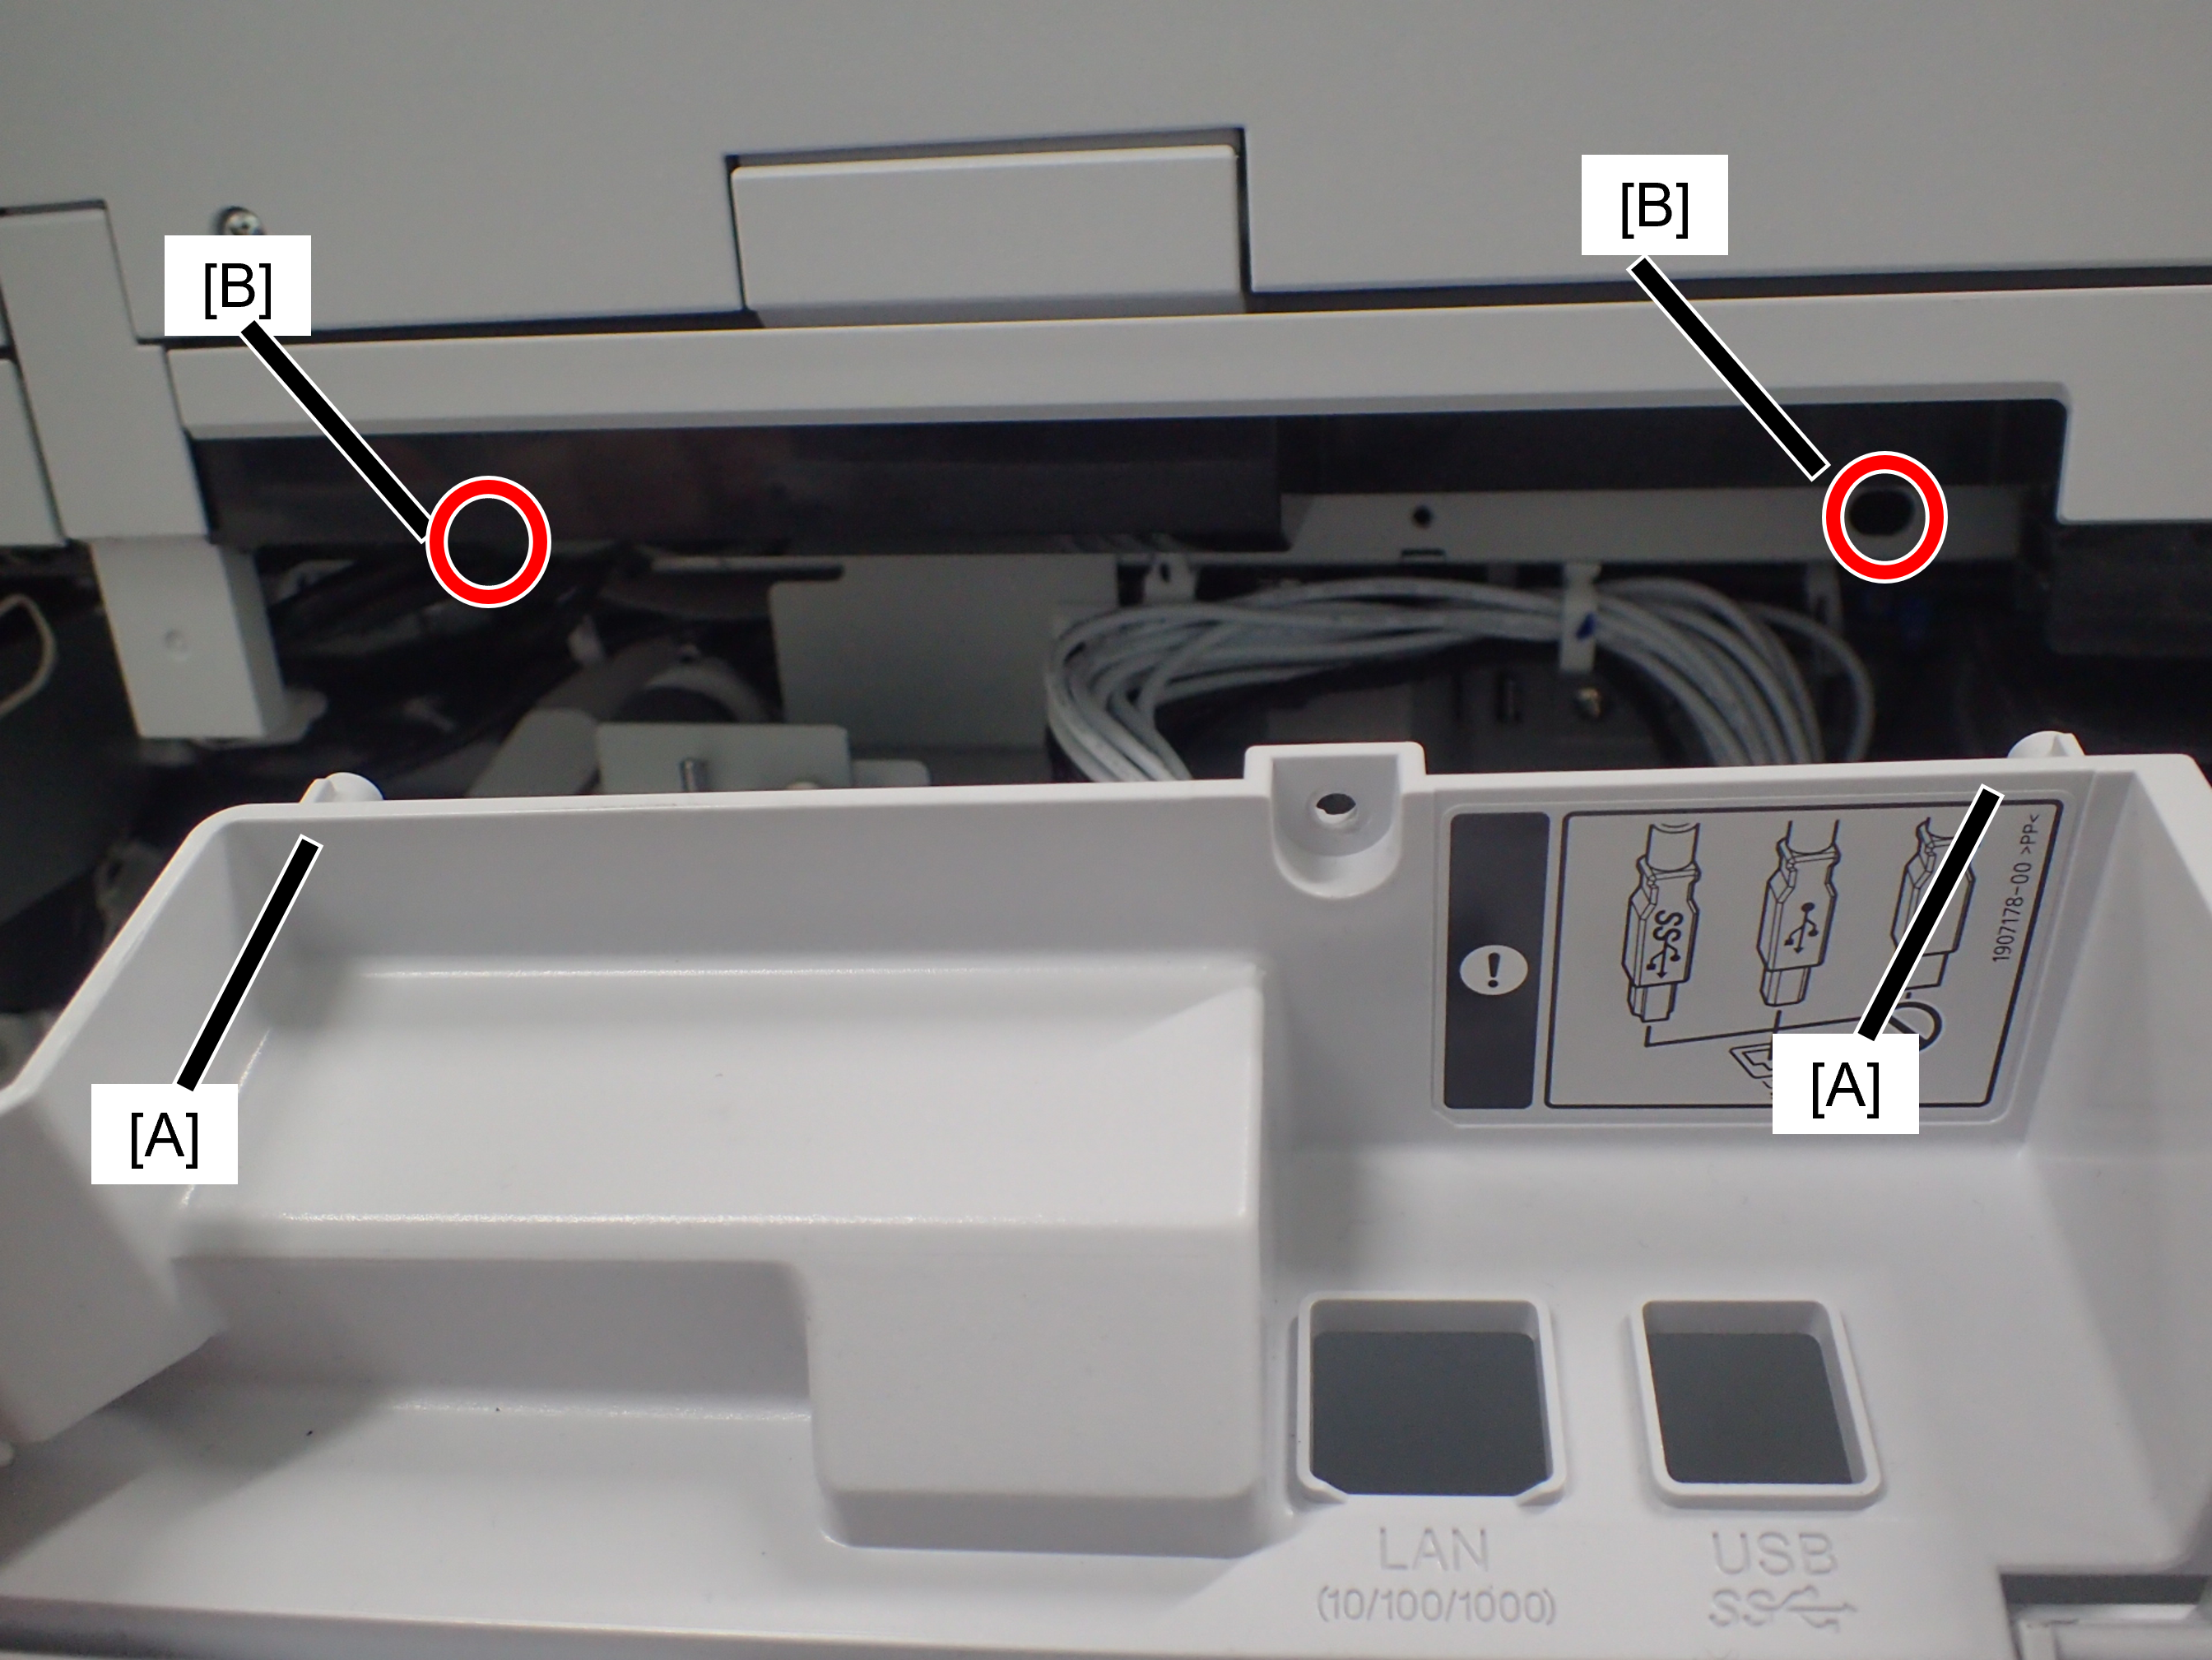
Confirm that the rear cover is not floating. The positioning pin (A) may not fit into the hole (B).
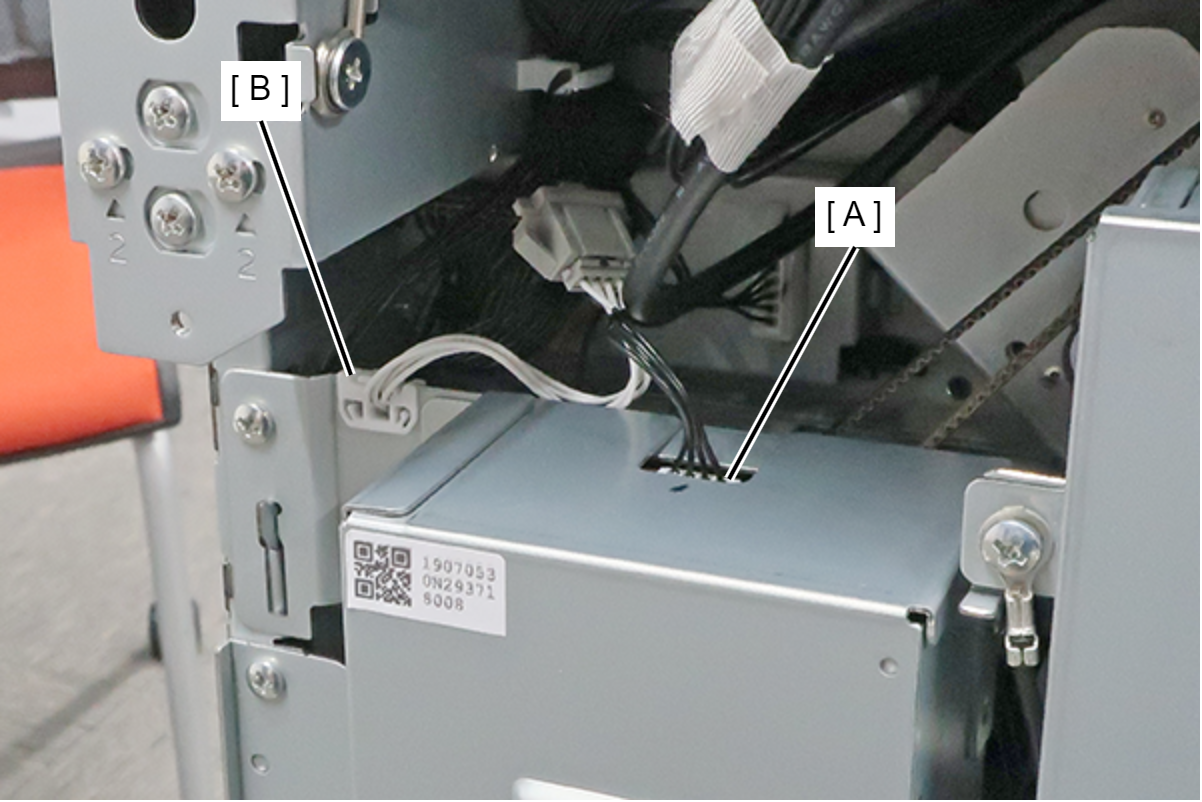
- Disconnect the cables from the connector (A) of the High Voltage Board Box and release the cables from the clamp (B).
- Remove the 5 screws fixing the High Voltage Board Box (A).
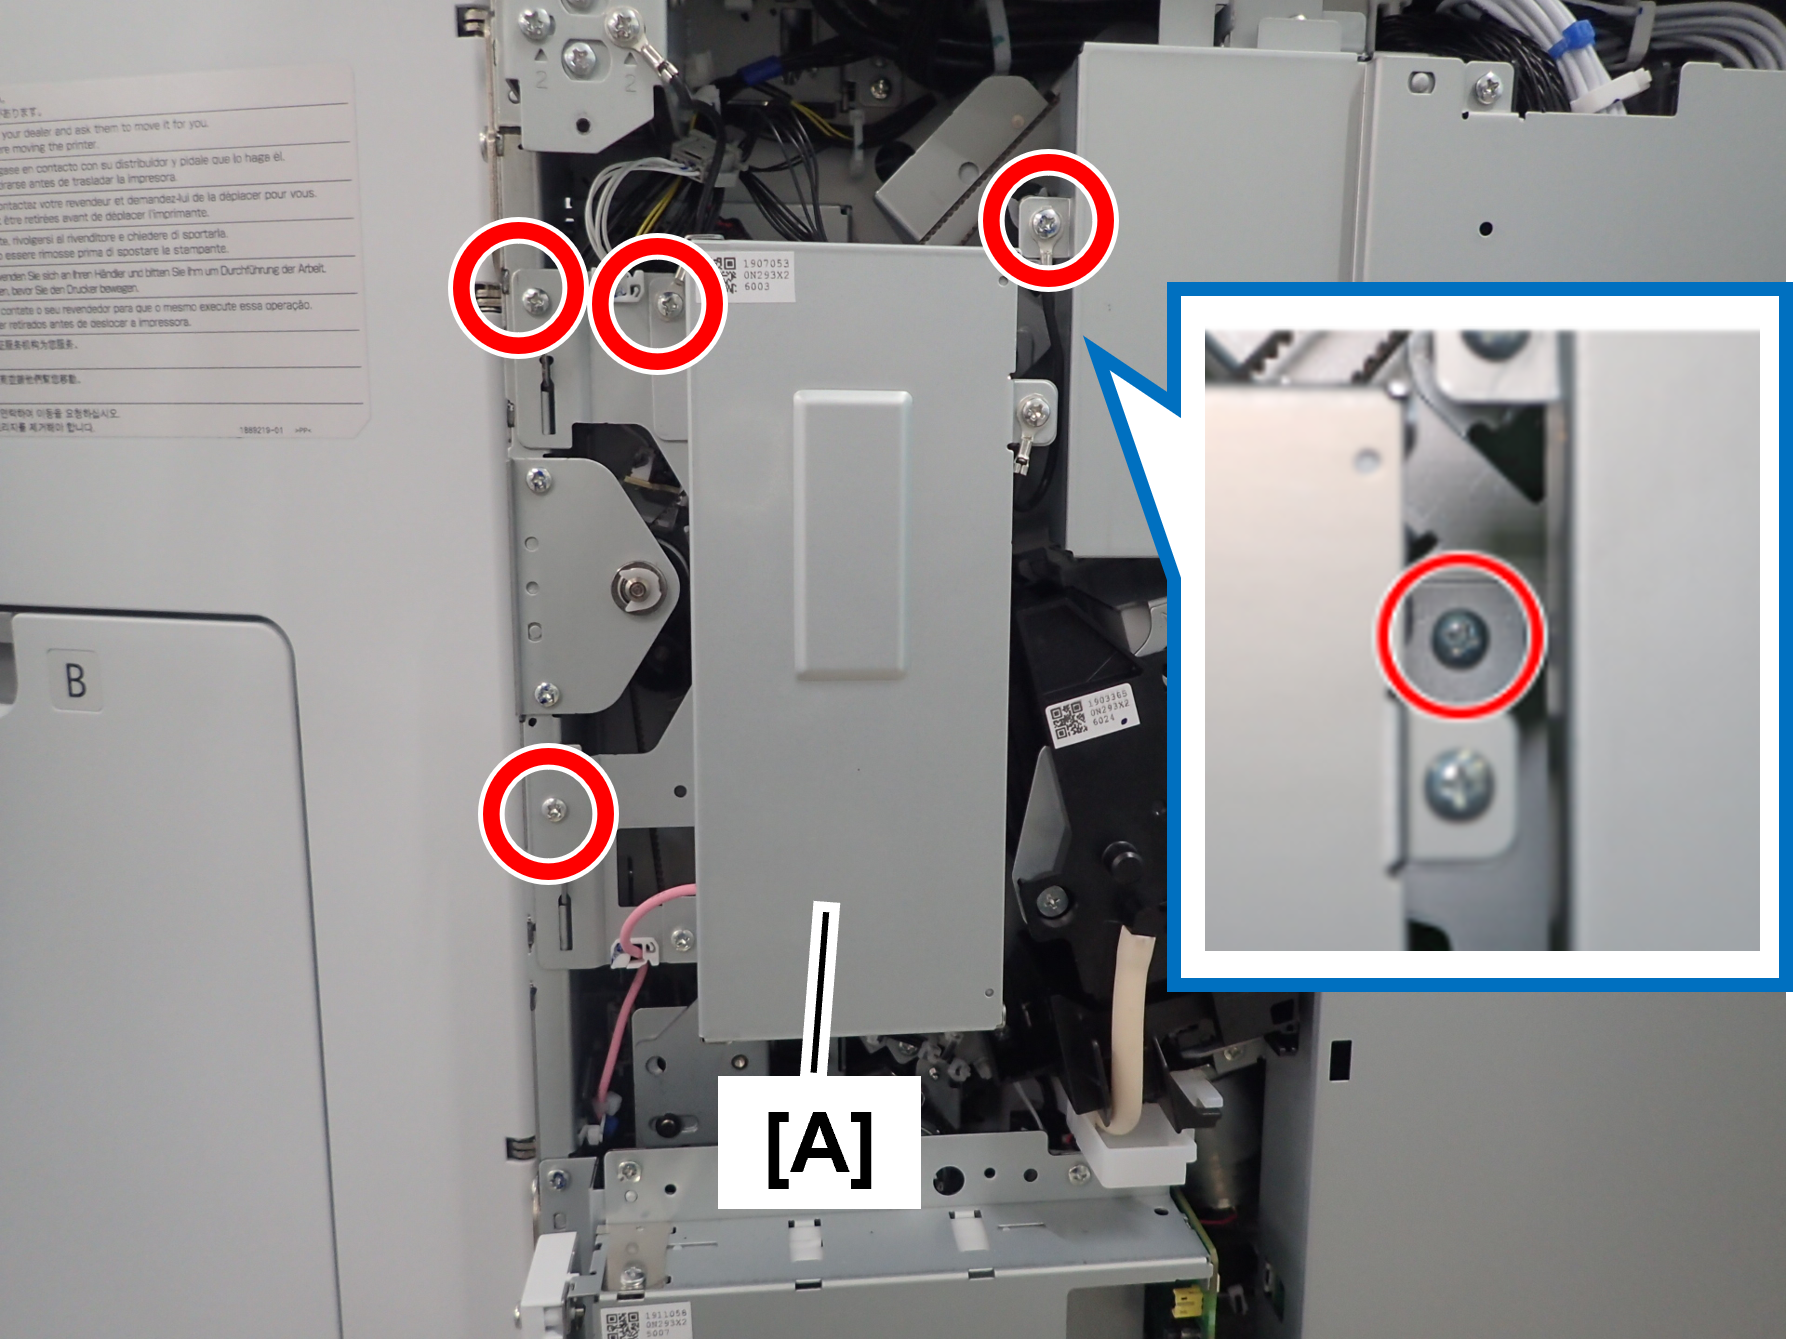
- : 3x8D
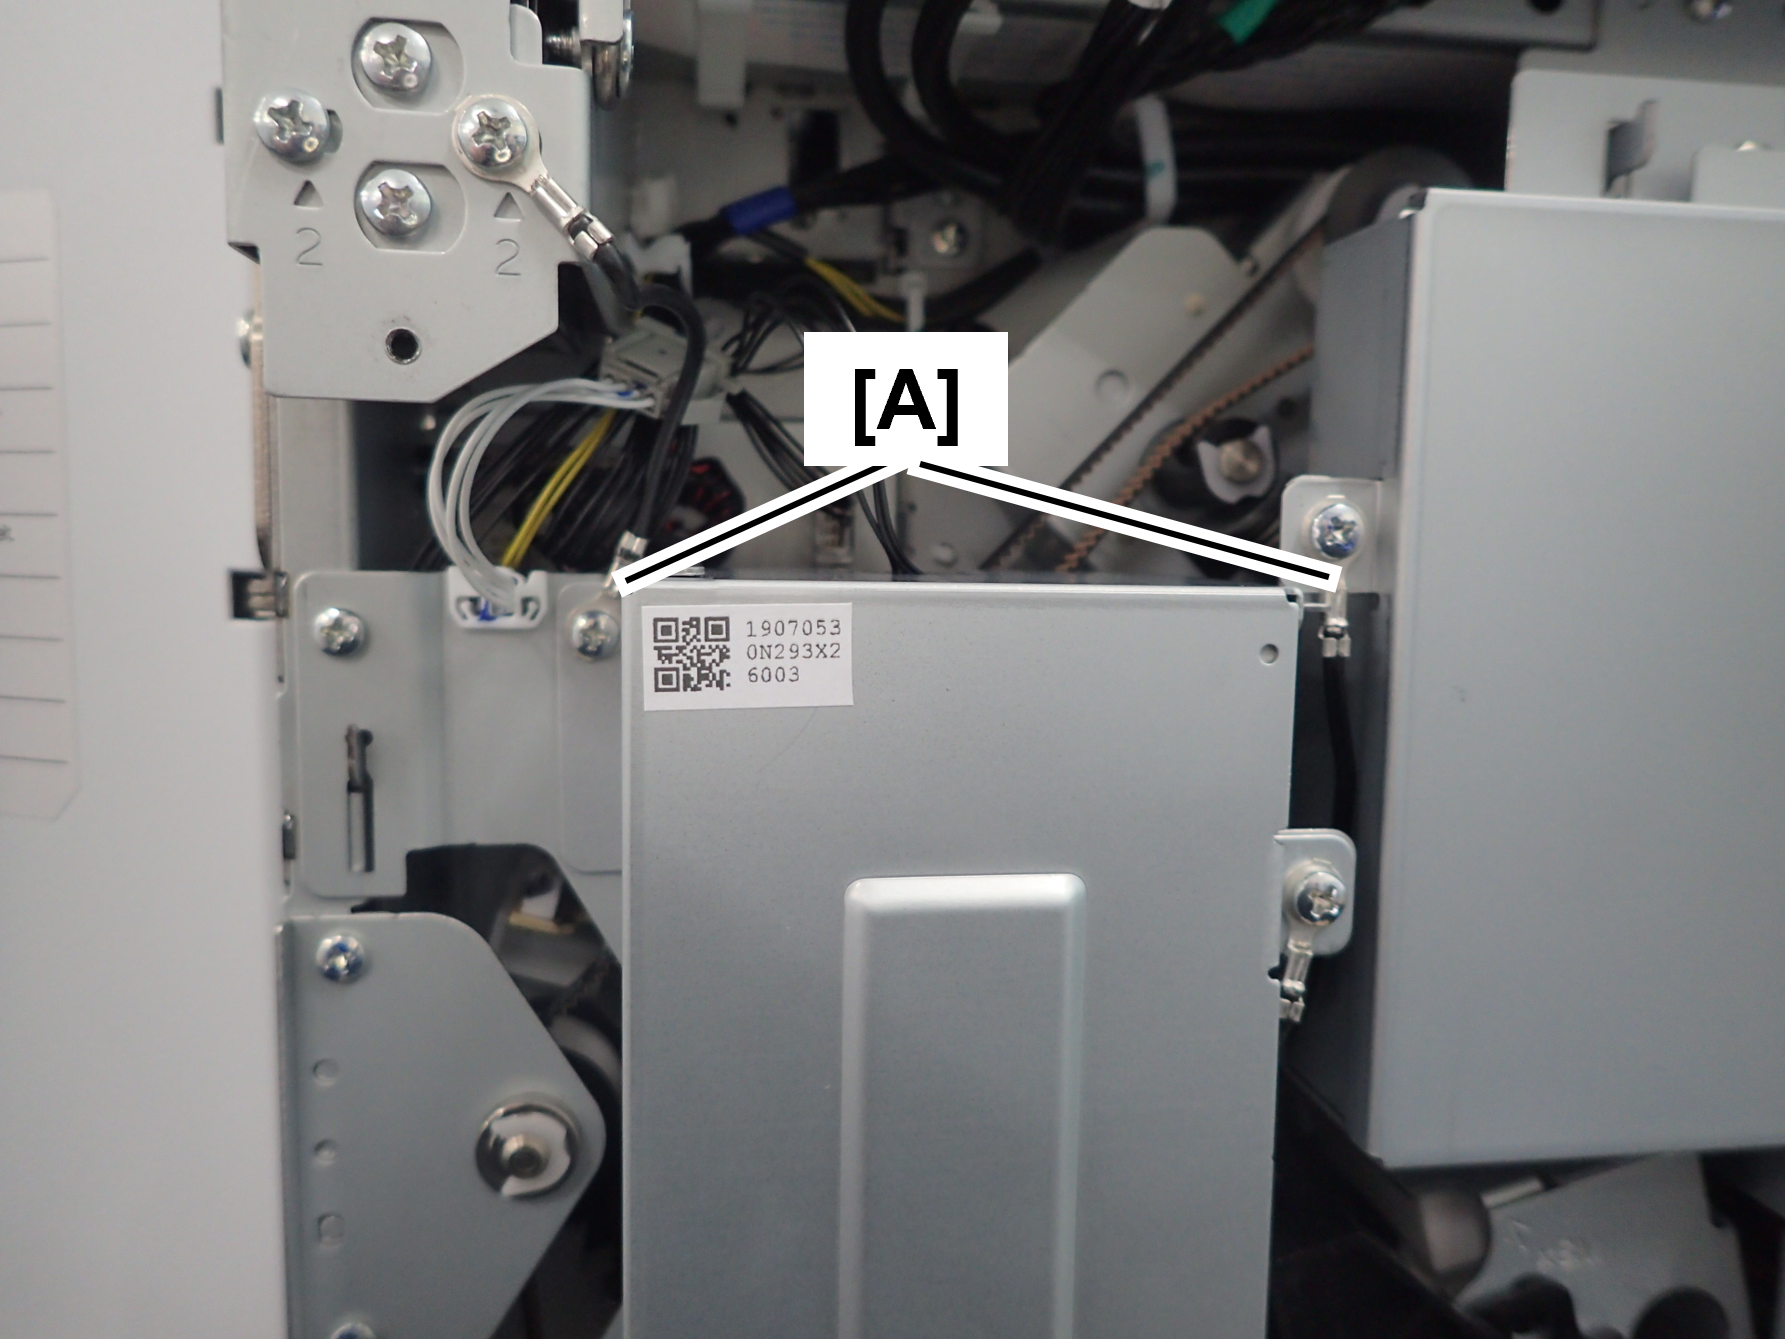
Assembly / 組み立てThe screw shown in the figure must be fastened together with the ground wire (A).
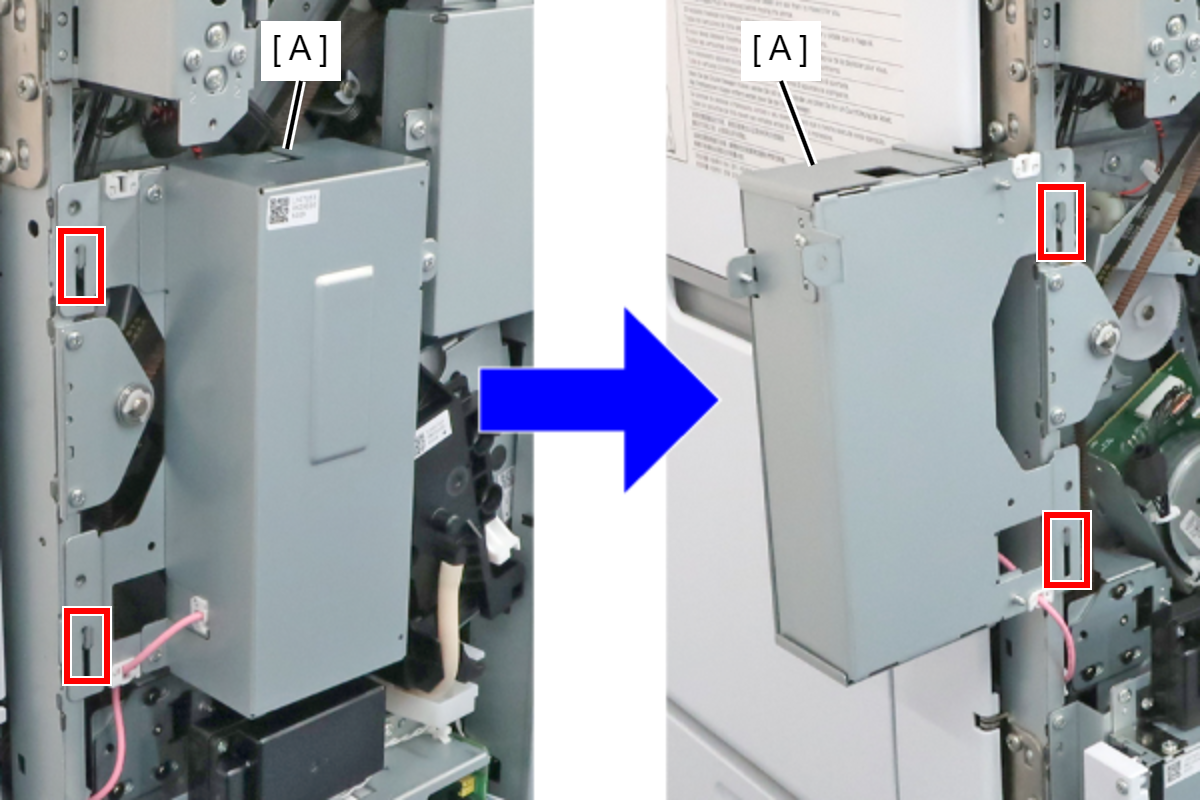
- Remove the 2 hooks to remove the High Voltage Board Box (A), and then rotate it so as to switch the front and rear sides and hang it on the hooks again.
- Remove the 3 screws and remove the Wiper Ink Collector Assy (A).
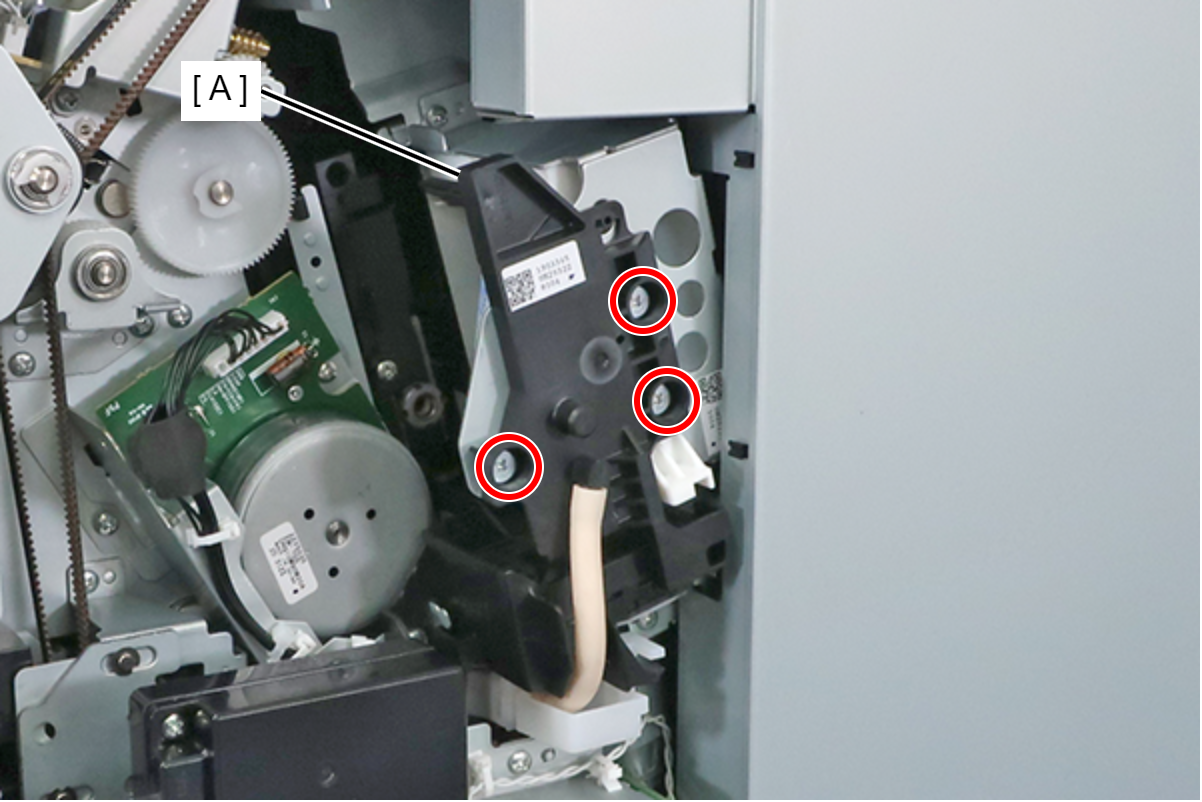
- : 3x5D
- Engage the hook of the Wiper Ink Collector Assy (A) with the Wiper Waste Ink Pad (B).
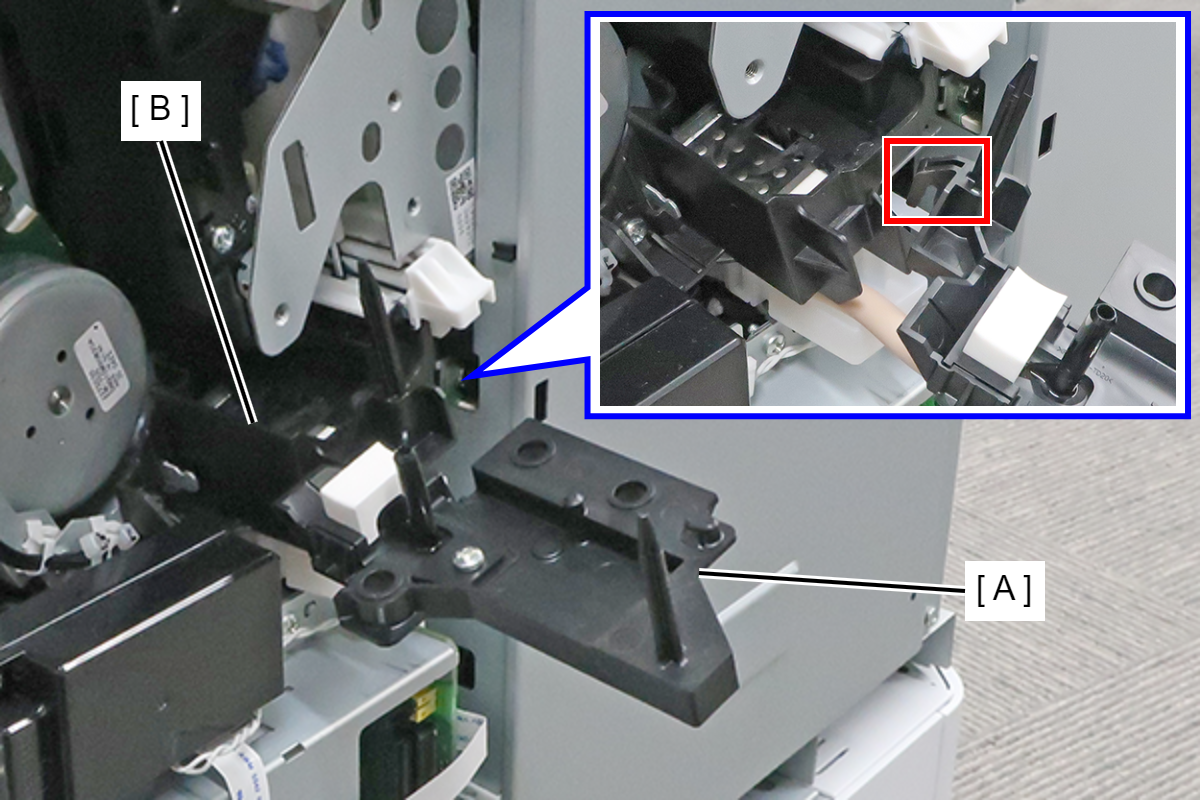
- Remove 1 screw of the Wiper Waste Ink Pad (A).
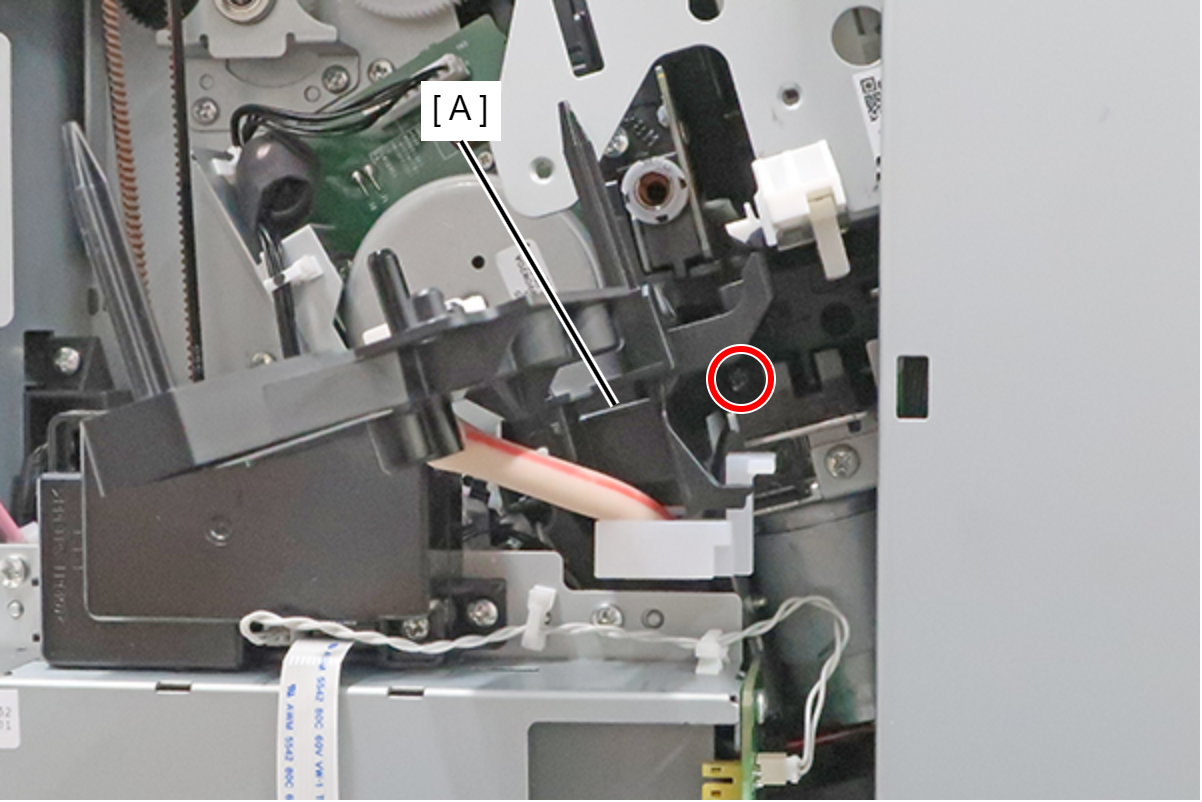
- : 3x8M
Check Point / チェックポイントThe screws are provided with a stopper, so they cannot be completely removed.
- Engage the Wiper Ink Collector Assy (A) with the hole in the Main Board Cover, and then remove the 1 screw to remove the Wiper Waste Ink Pad (B).
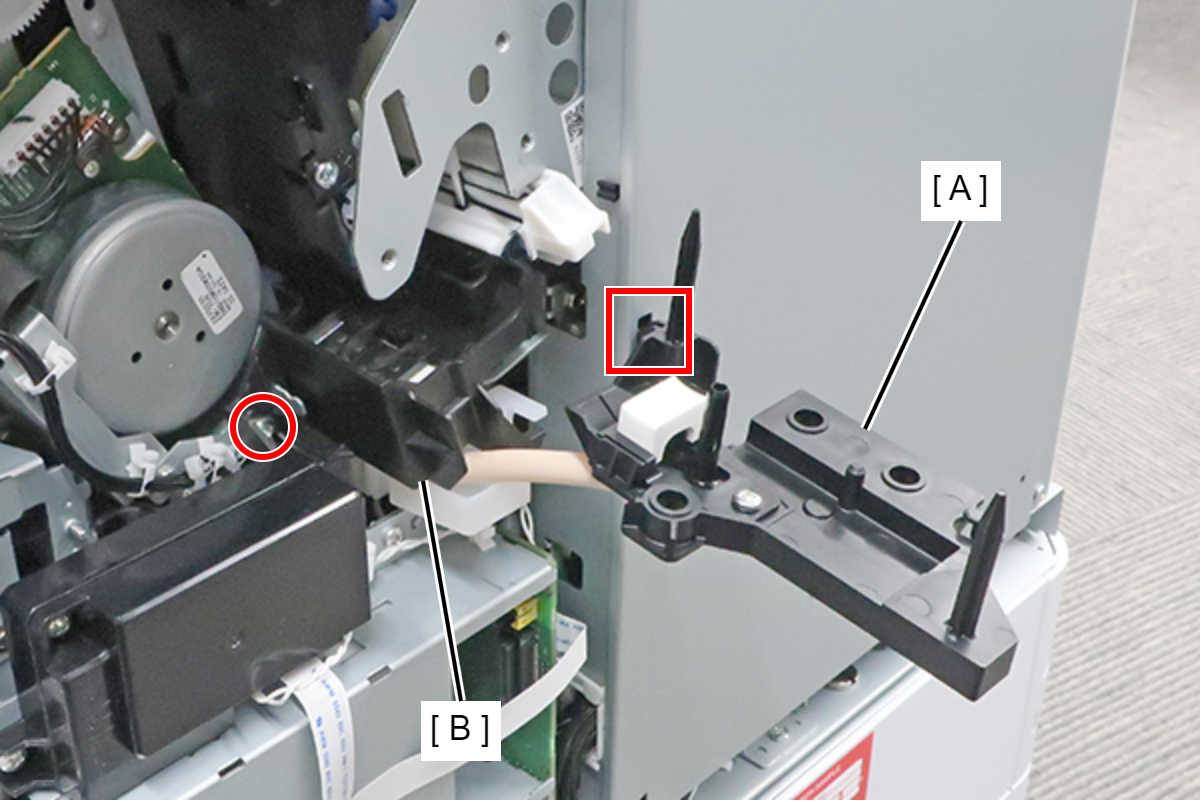
 : 3x8M
Check Point / チェックポイントThe screws are provided with a stopper, so they cannot be completely removed.
- Remove the 2 screws and remove the Wiper Cleaner Assy (A).
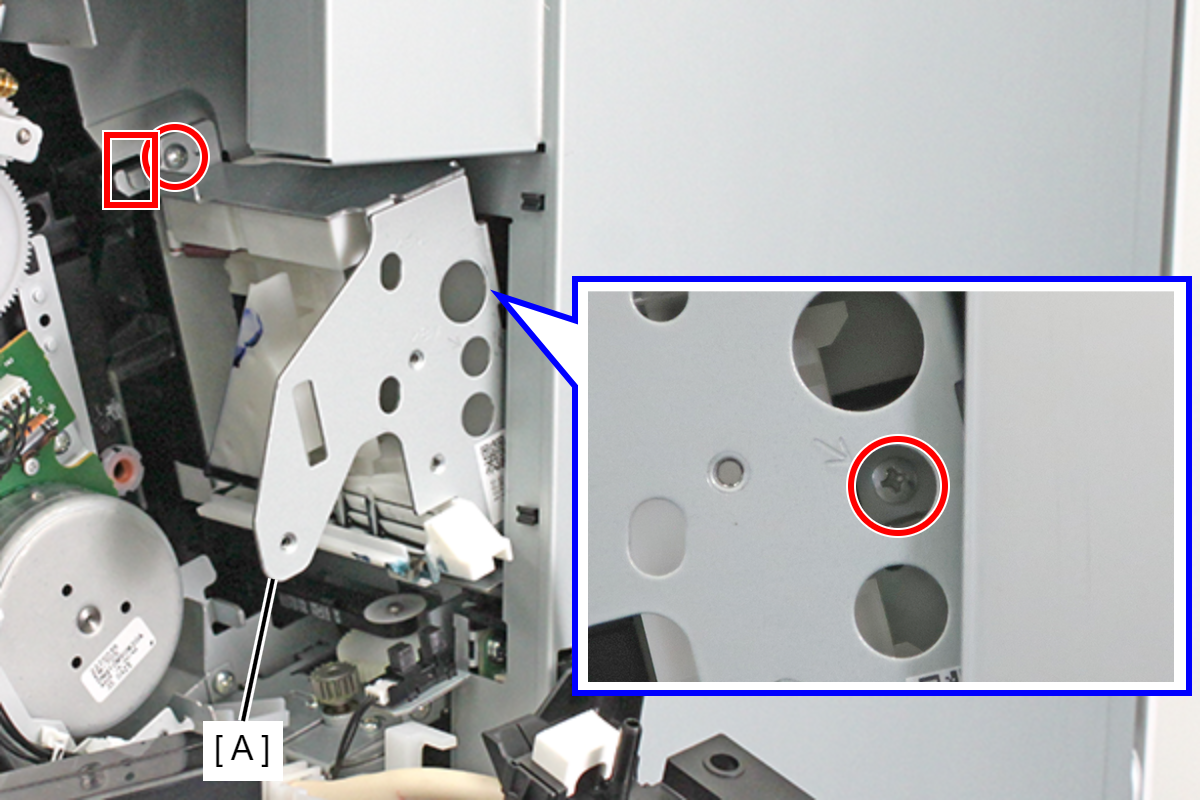
- : 3x8M
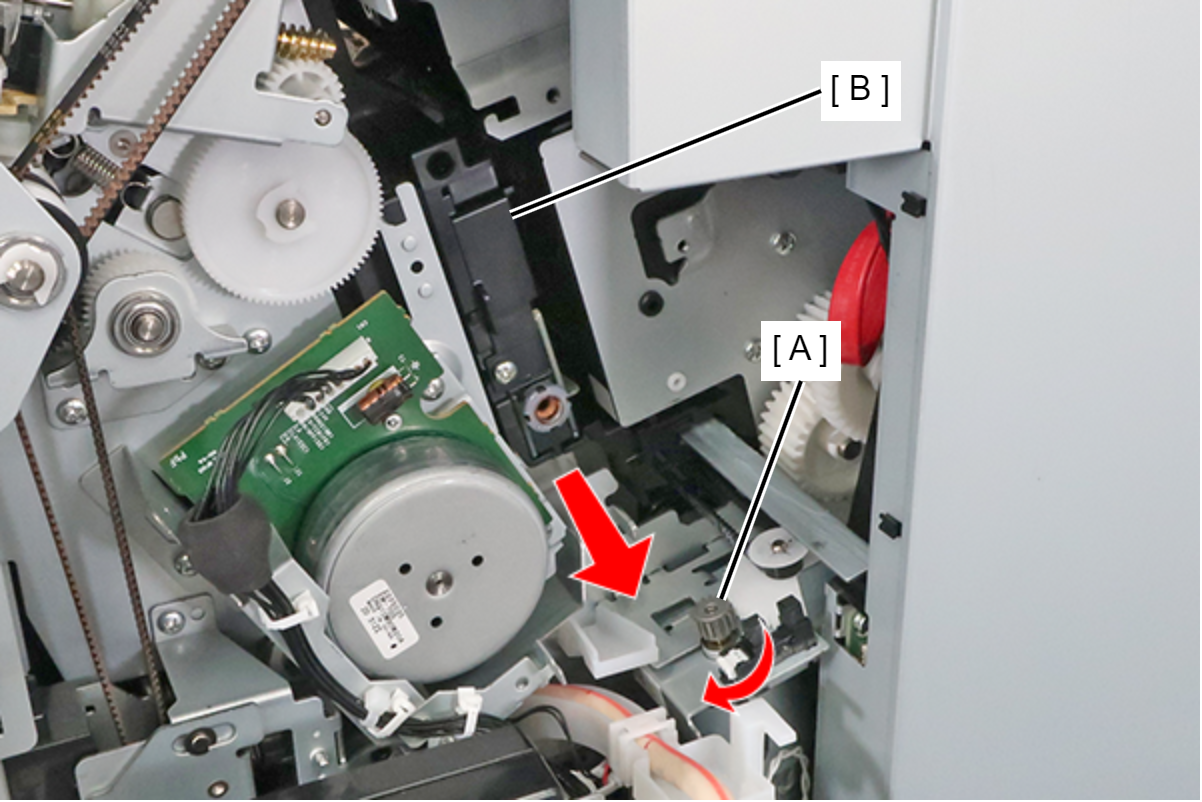
- Rotate the Gear (A), and move the Wiper Unit (B) forward.
- Remove one screw and remove the Wiper unit (A).
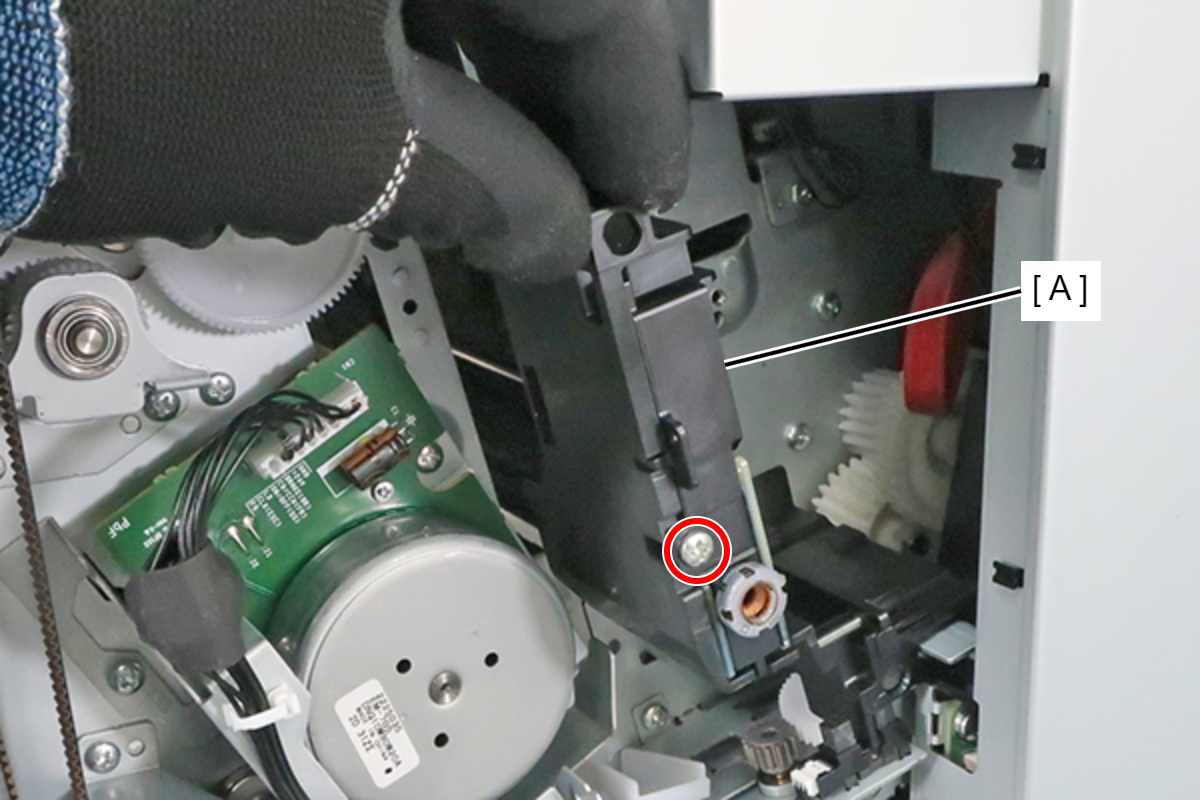
- : 3x8M
Check Point / チェックポイント- The Wiper Unit (A) can be moved by even a slight exertion of force, so hold it down with your hand when removing the screw.
- Replace the Wiper Unit, Wiper Cleaner Assy, and Wiper Waste Ink Pad with a new set.
 Caution / 注意
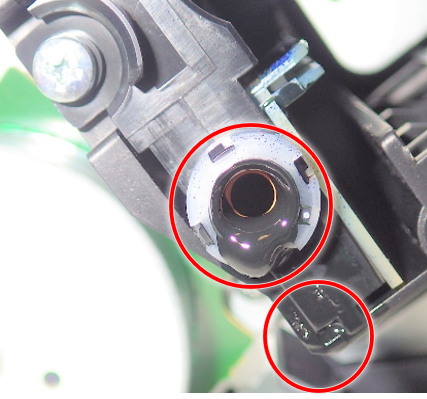
Waste ink may be accumulated in the 2 parts shown in the figure below. Check for waste ink before removing, and wipe off if necessary.
| Check Point / チェックポイント |
After replacing this part, you need to run the menu from the service support mode. (If you ran the Before-replacement menu before replacing the part, it will start automatically when you turn the power on.) |