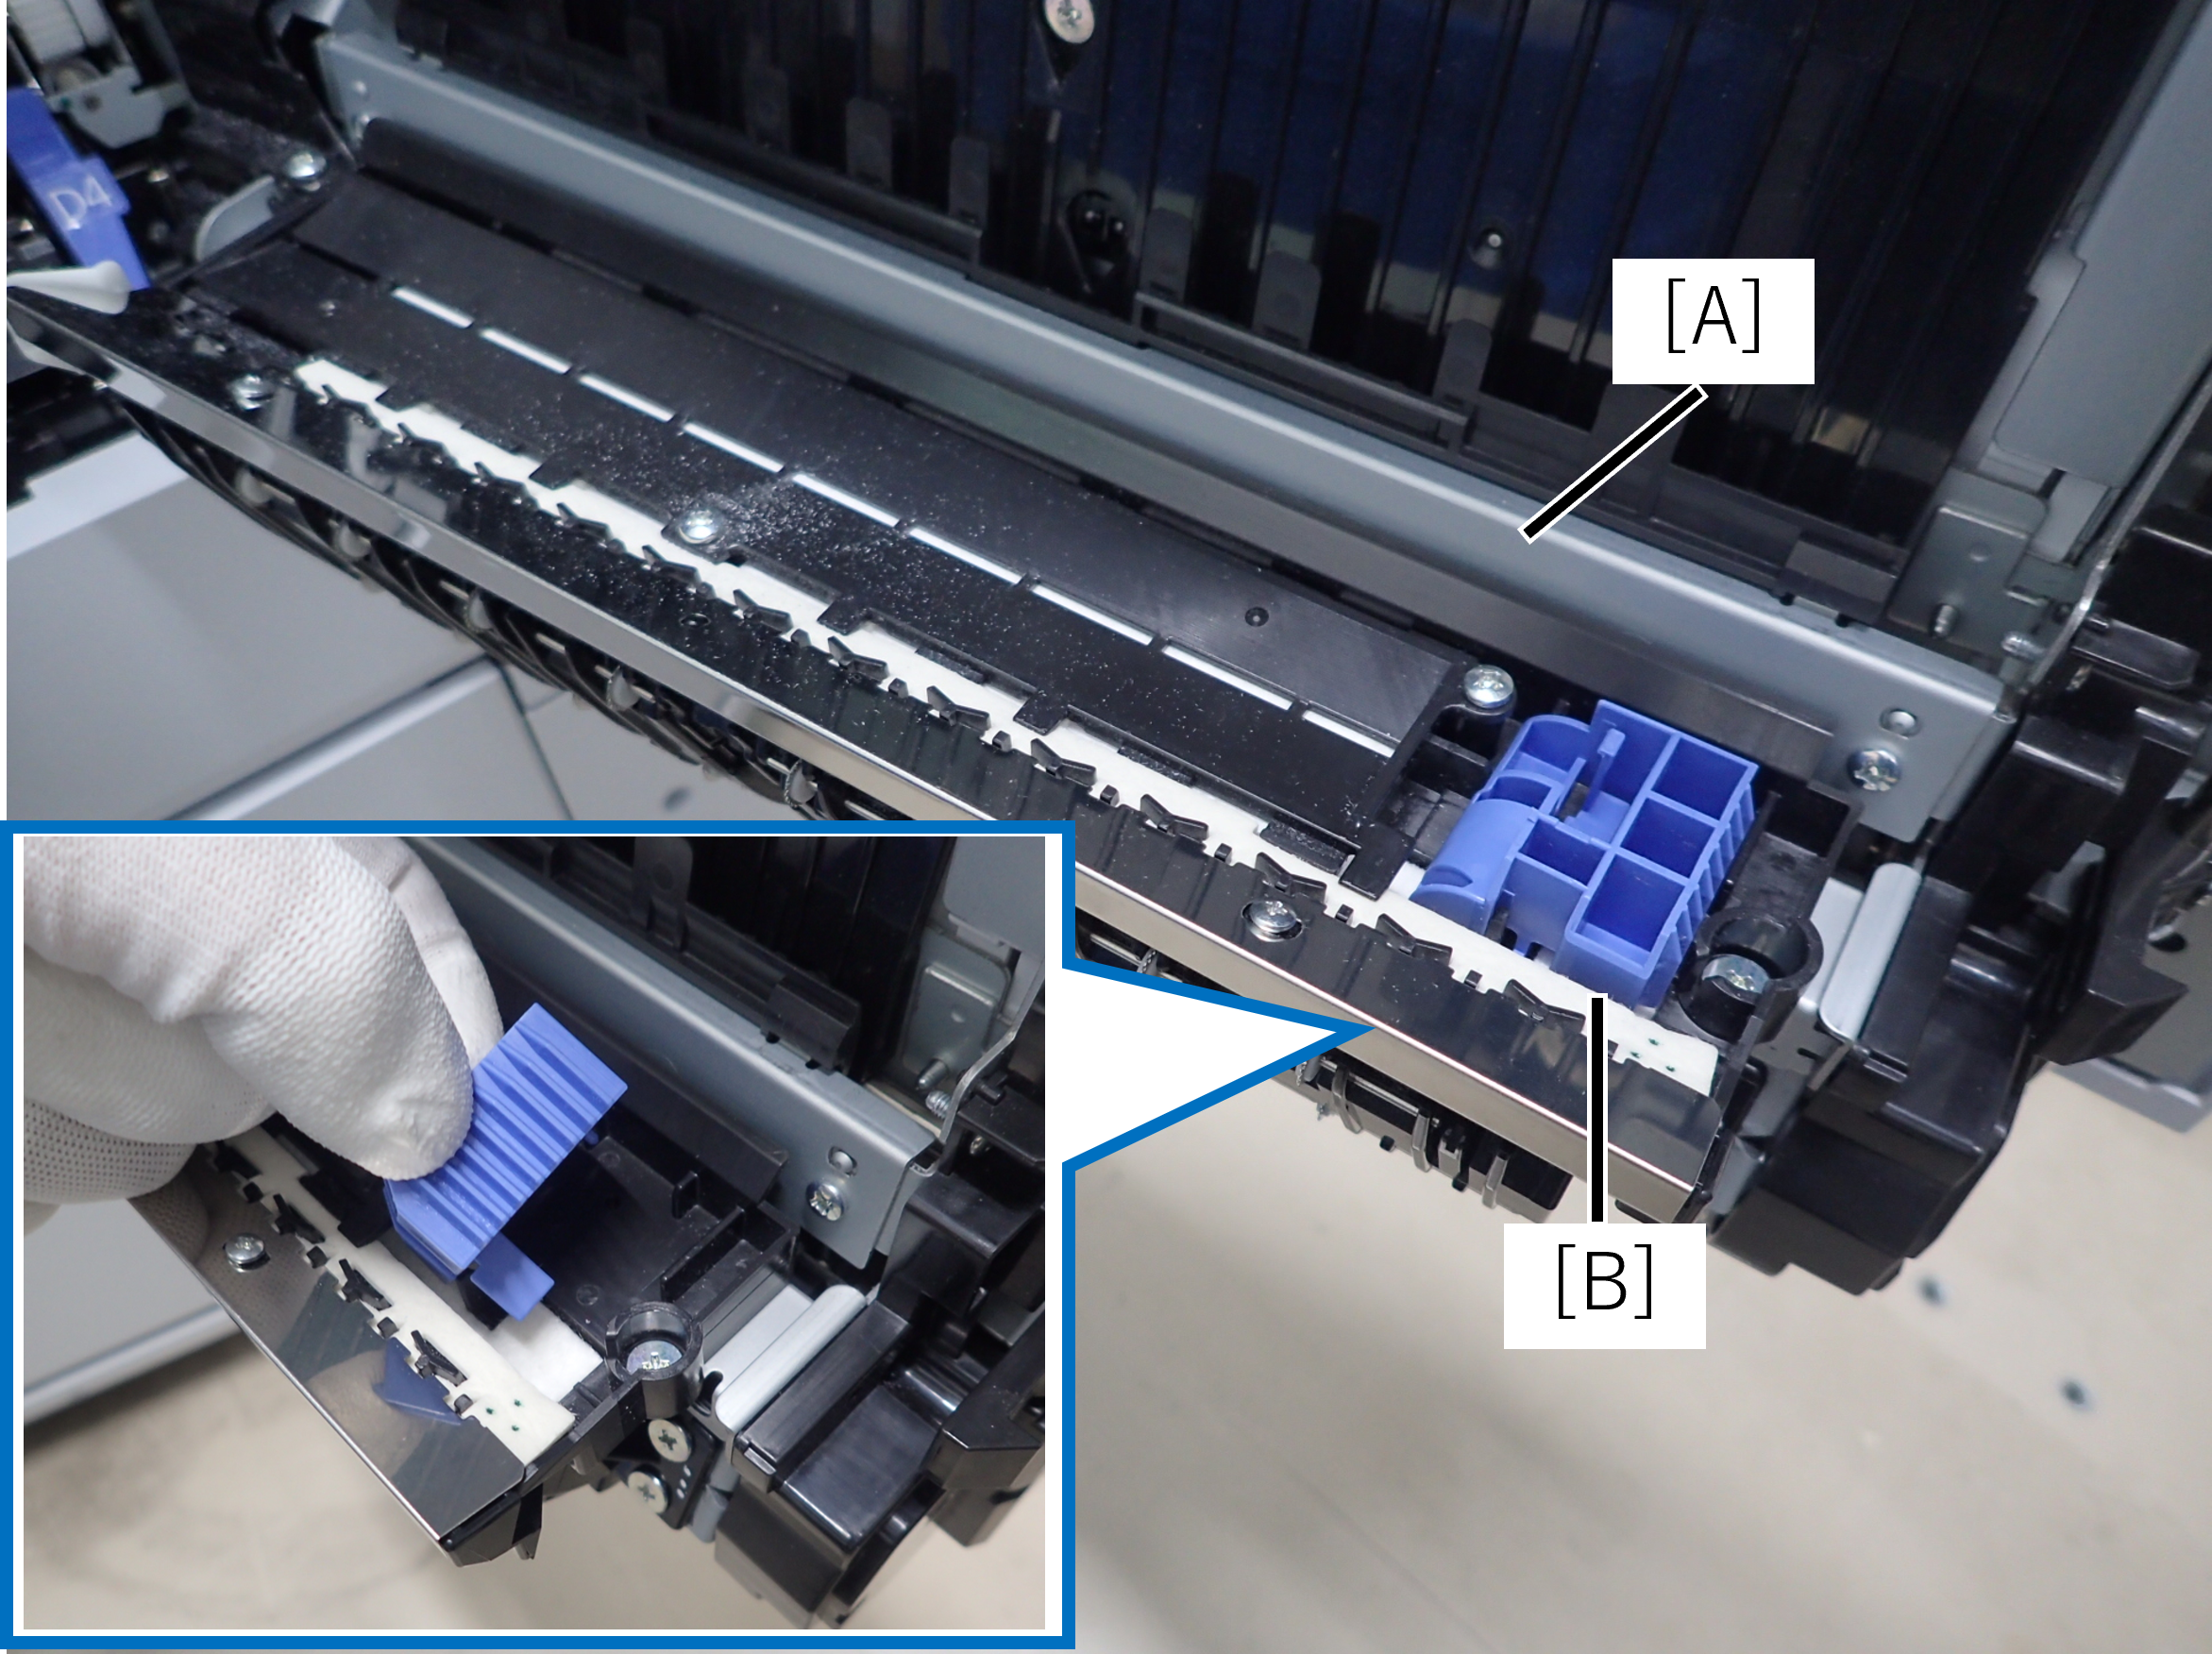
Right Door Unit
 Check Point / チェックポイント Check Point / チェックポイント |
When replacing this part, you need to run the menu from the service support mode before replacing it. |
- Remove the 3 screws and remove the Right Cover (A).
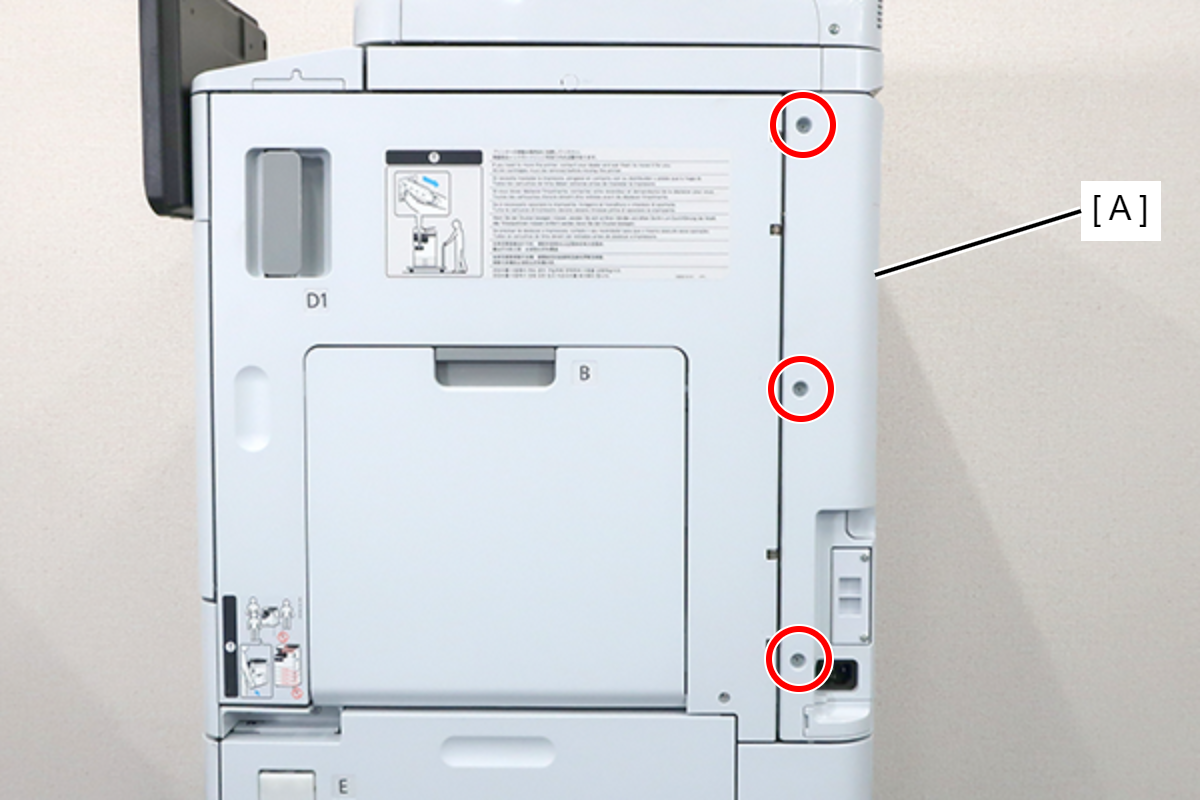
 : 3x8D
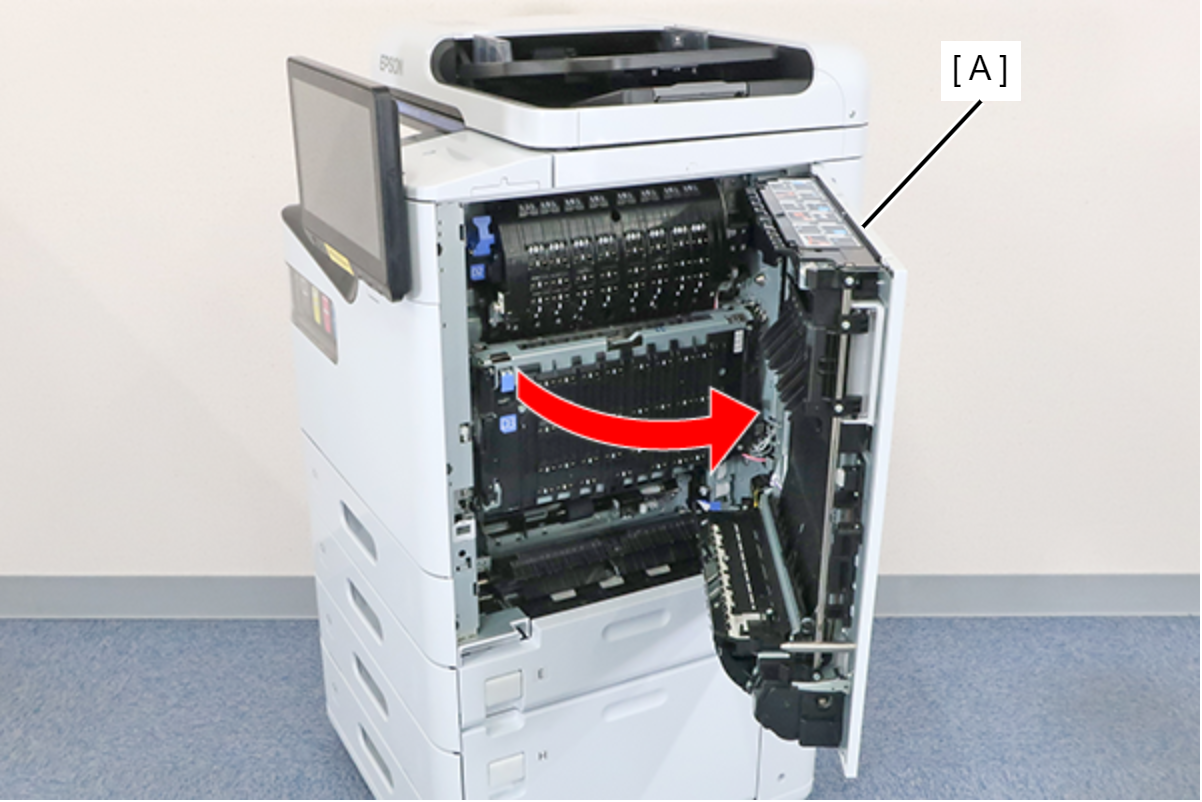
- Open the right door unit (A).
 Assembly / 組み立て
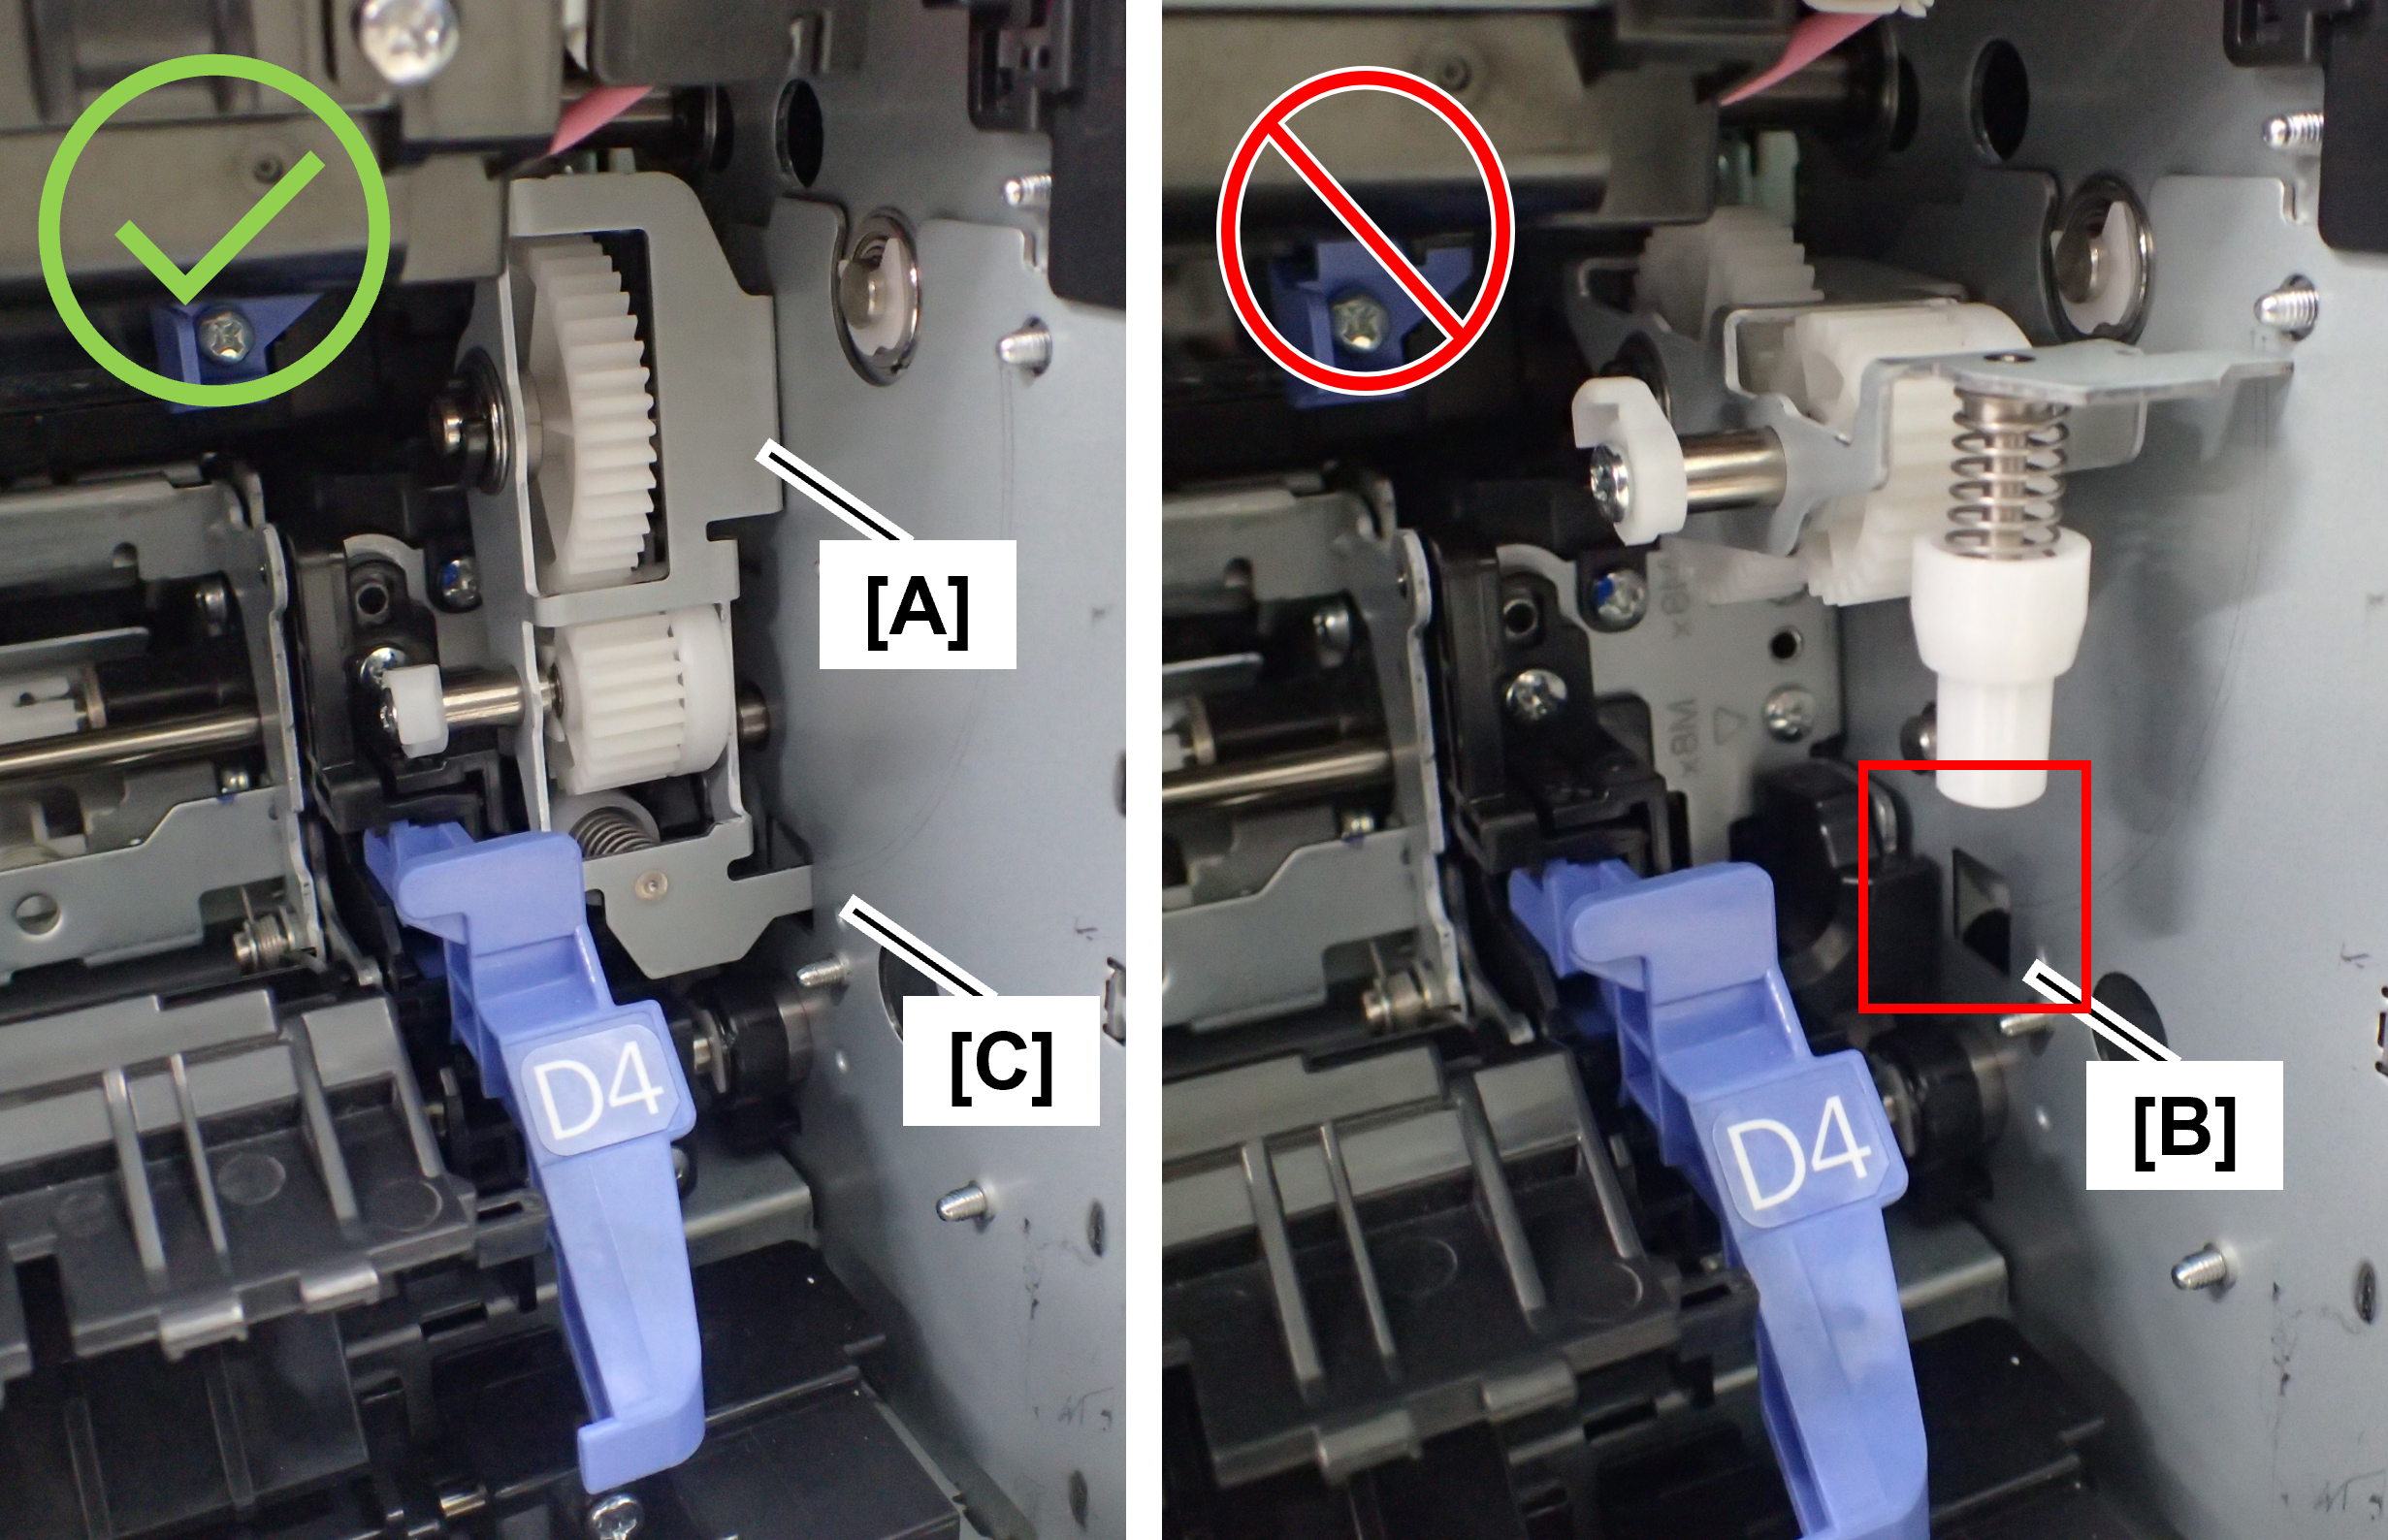
When closing the right door unit, it may not close due to interference with the tumbler (A) that was tilted toward the front when other parts were repaired.
If the right door unit does not close, check the position of the tumbler, and if it is protruding toward the front, fit the tip of the tumbler plate (C) into the hole (B) in the main unit.
- Remove the screw and remove the Right Door Cable Cover Upper (A).
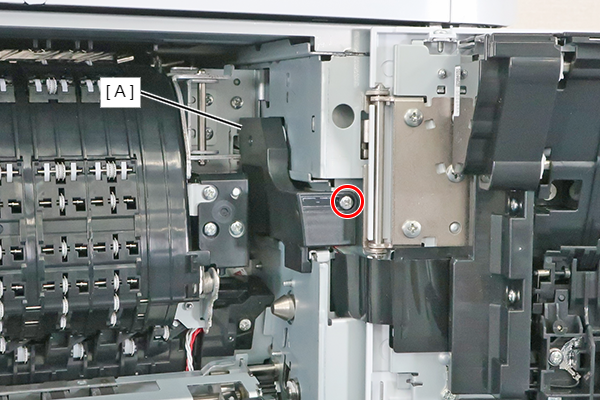
- : 3x8M
- Remove the screw, release the hook, and remove the Right Door Cable Cover Lower (A).
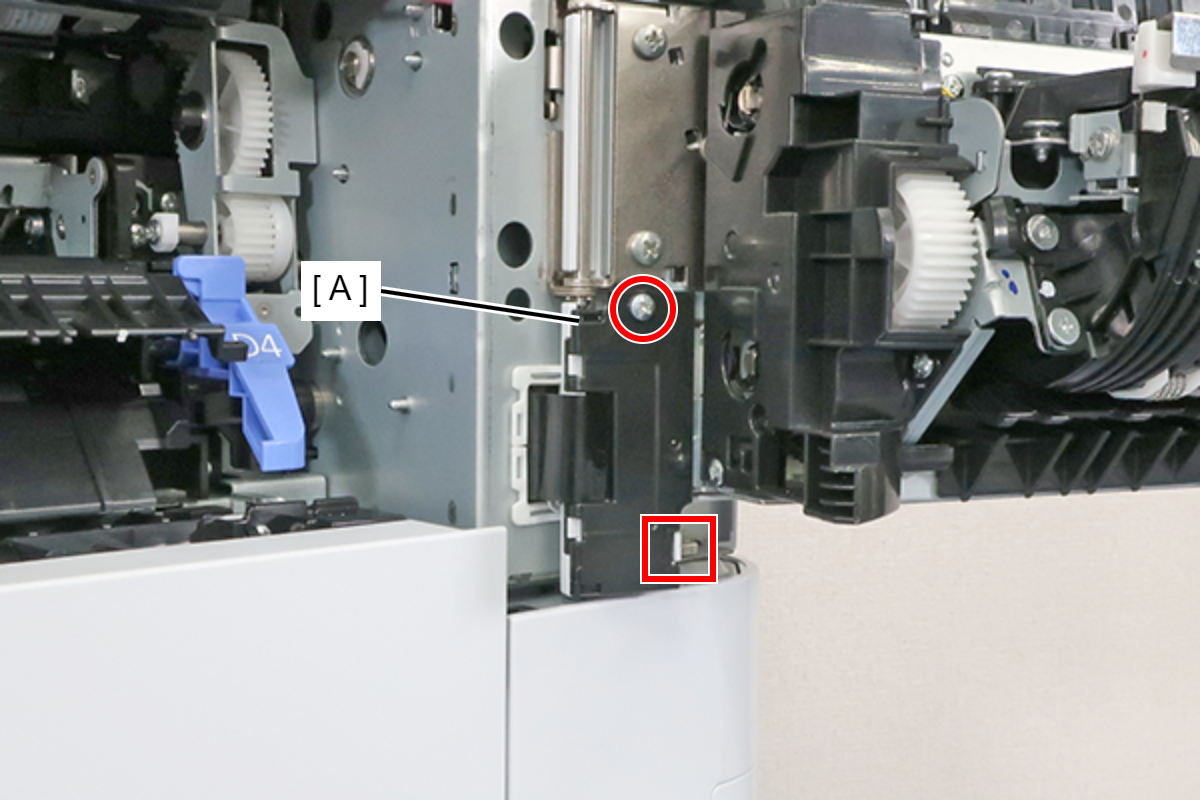
- : 3x8D
- Disconnect the cables from the 2 relay connectors (A).
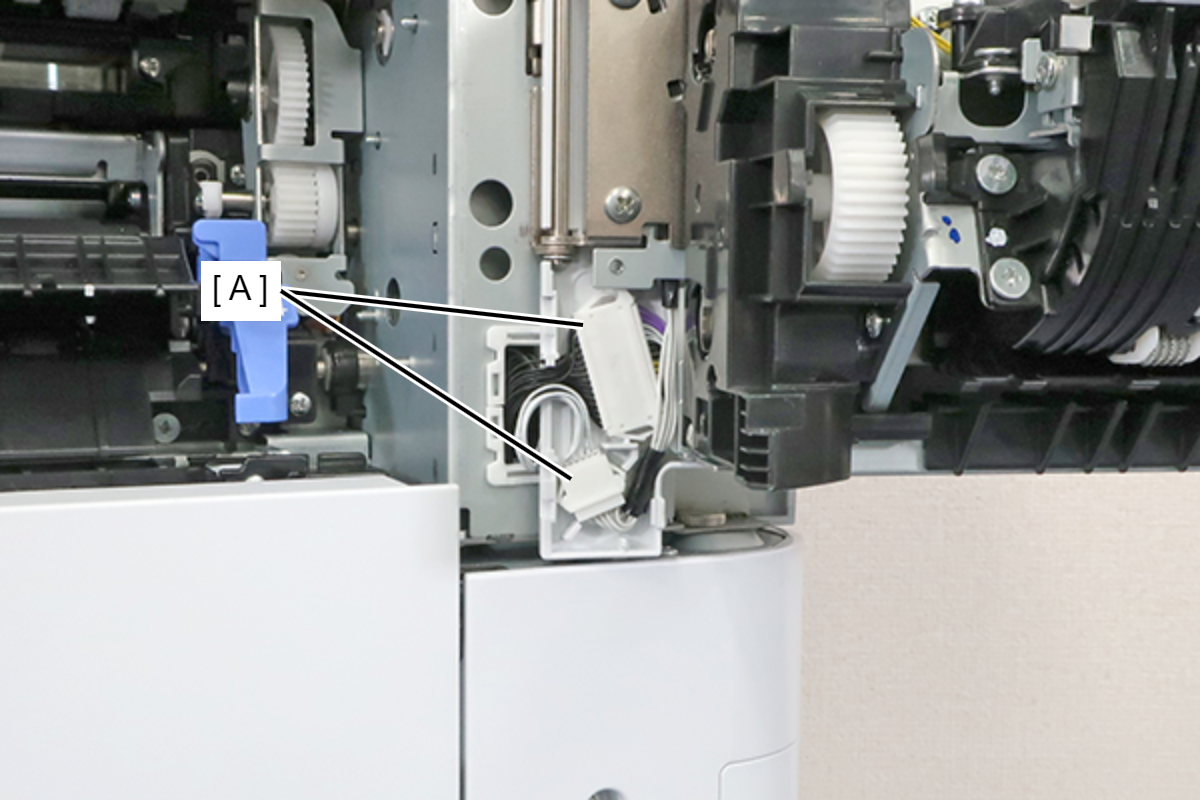
- Disconnect the cable from the connector (A) and release from the clamp (B).
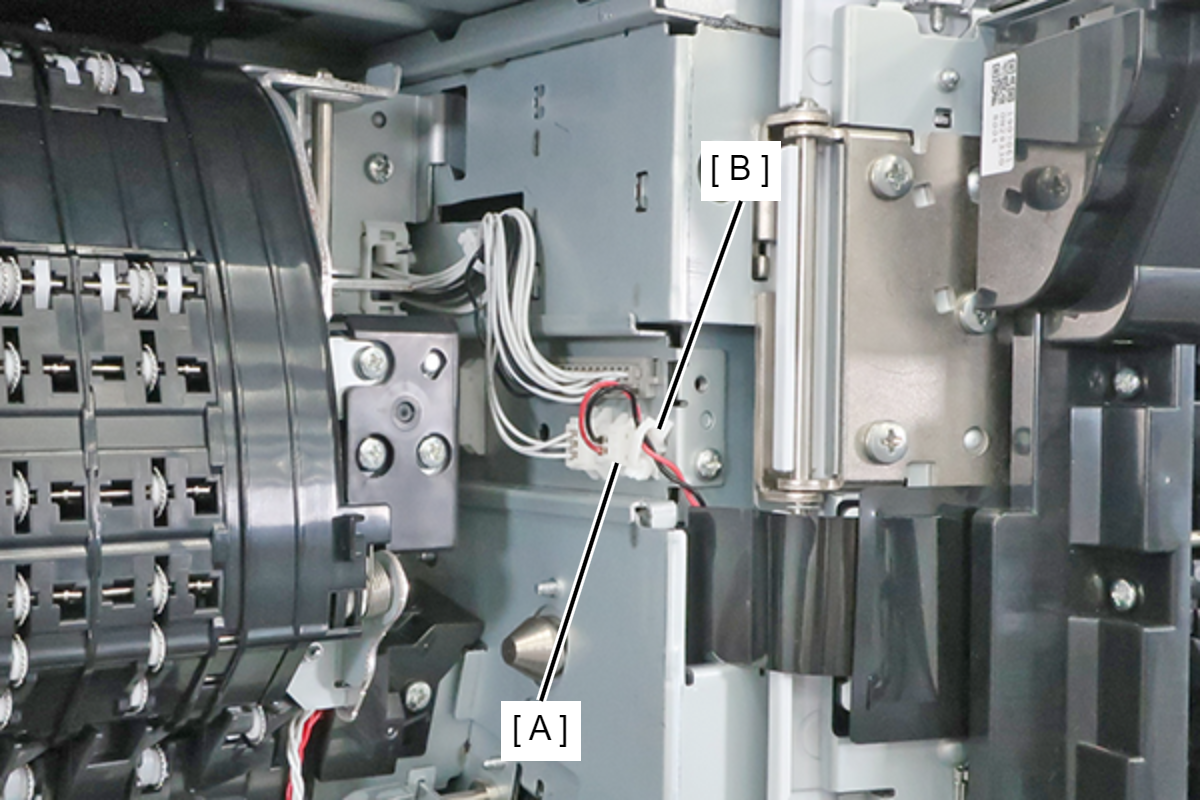
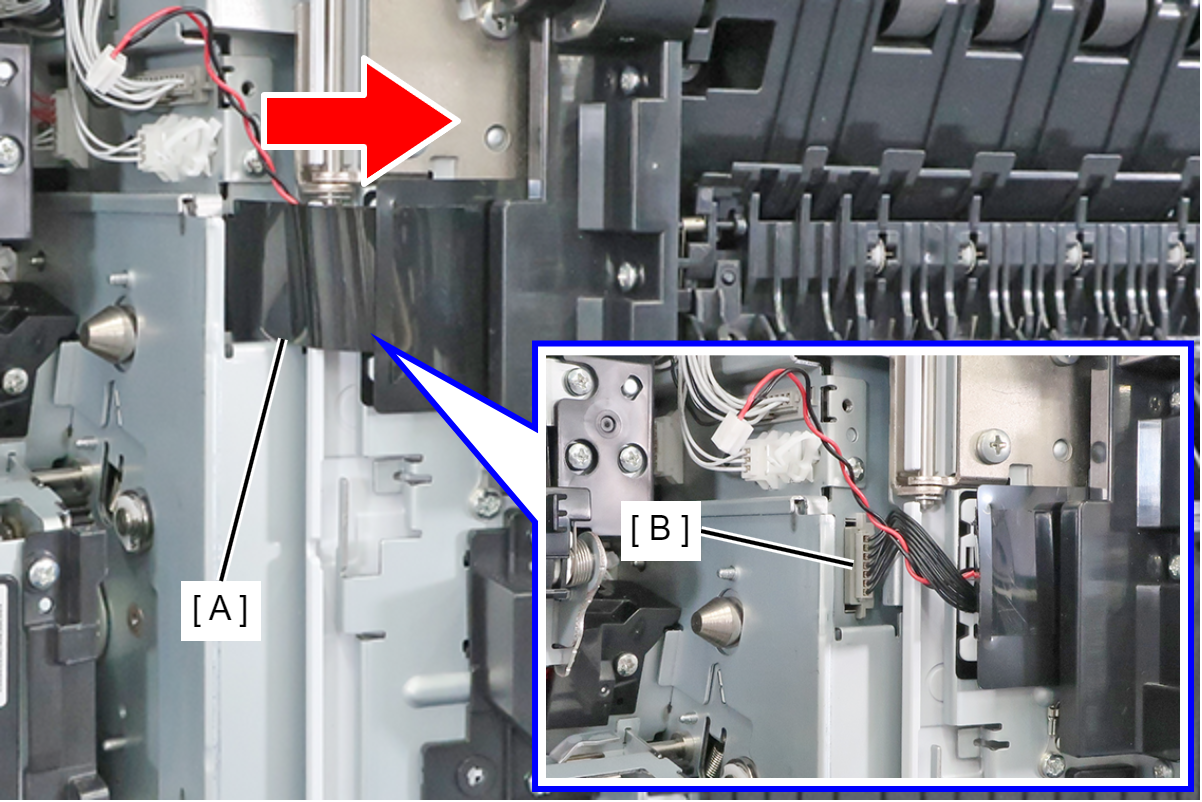
- Remove the cable protective sheet (A), and remove the cable from the connector (B).
- Remove 2 screws and remove the support plate (A).
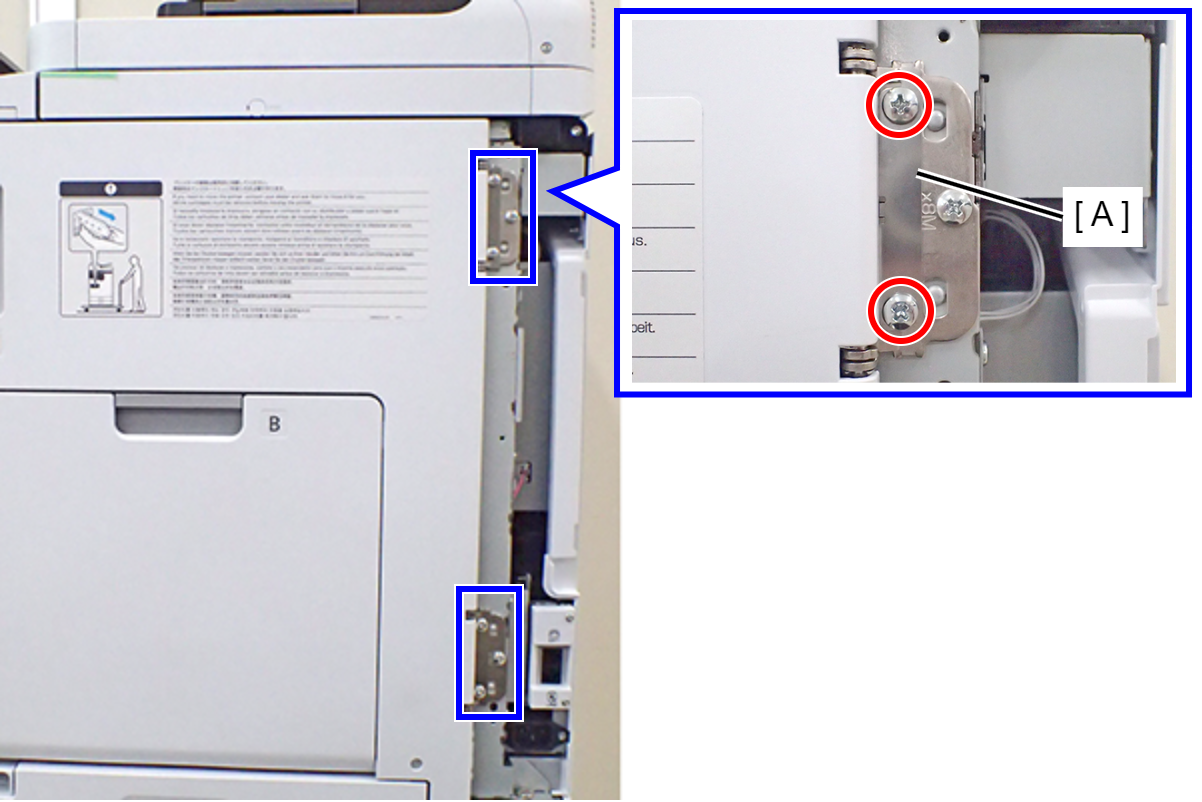
 : 4x8D
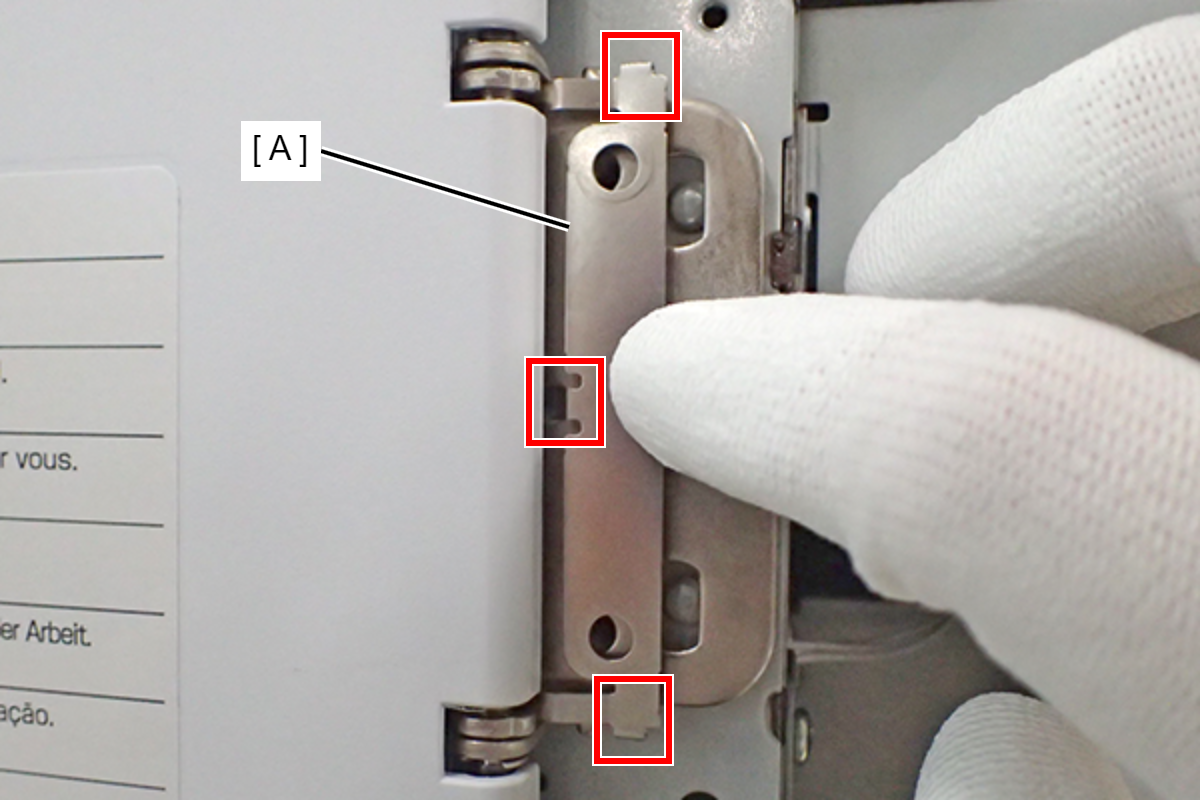
Assembly / 組み立てInsert the 3 hooks to install the support plate (A).
- Remove the 2 screws fixing the Right Door Unit (A).
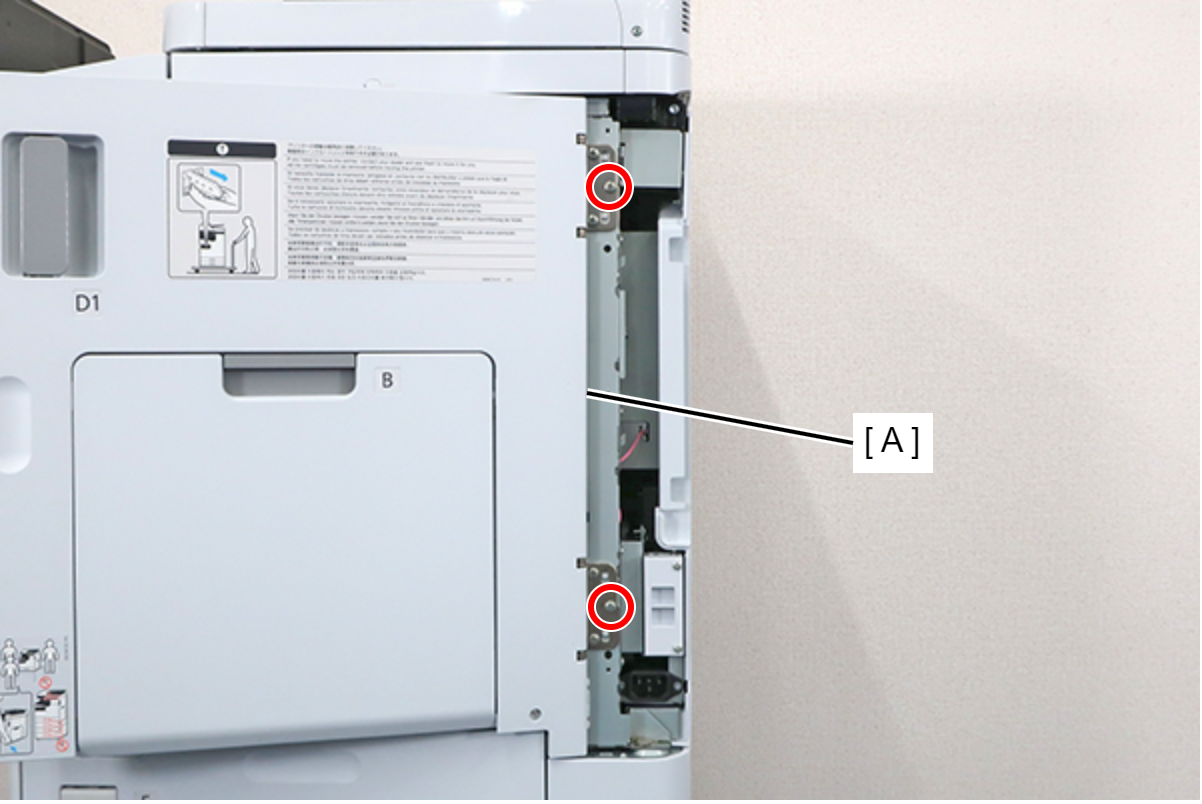
- : 4x8D
- Support the bottom of the Right Door Unit (A) and lift it to release the 2 hooks and remove the Right Door Unit (A).
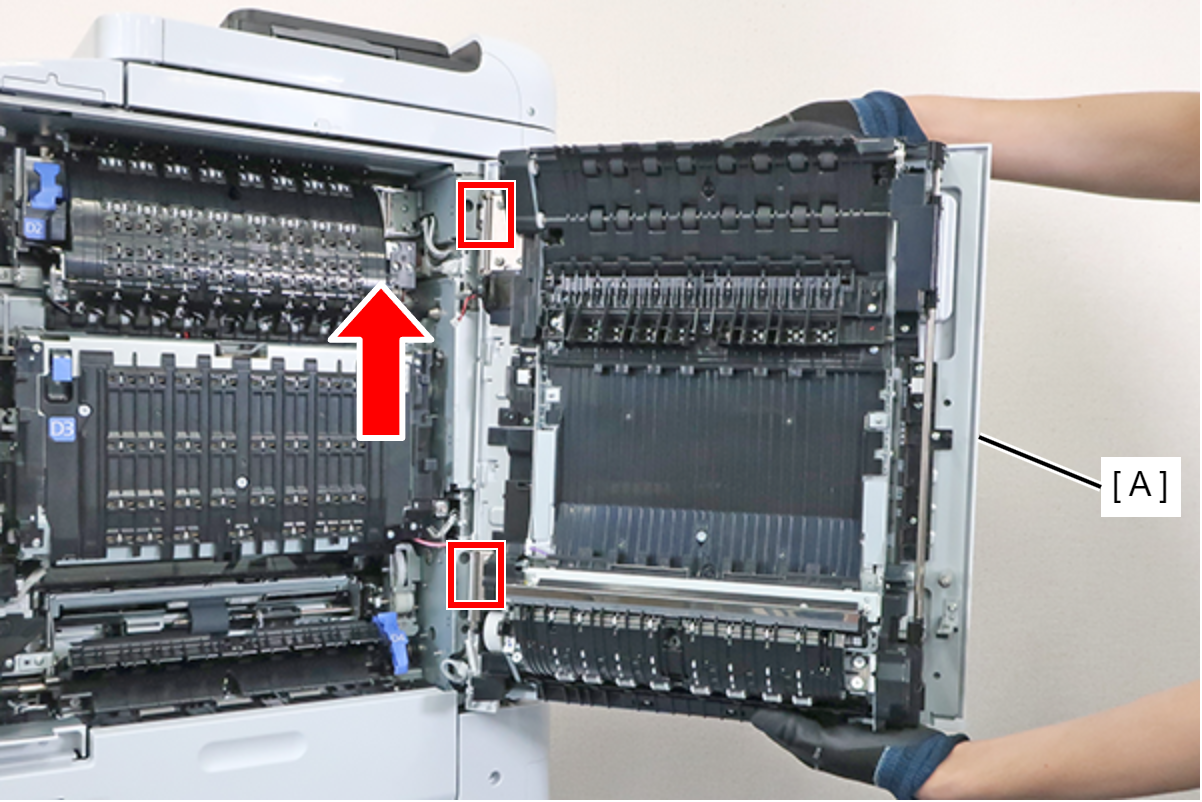
| Check Point / チェックポイント |
|