
Belt Drive Motor
- Remove the 3 screws and remove the Right Cover (A).
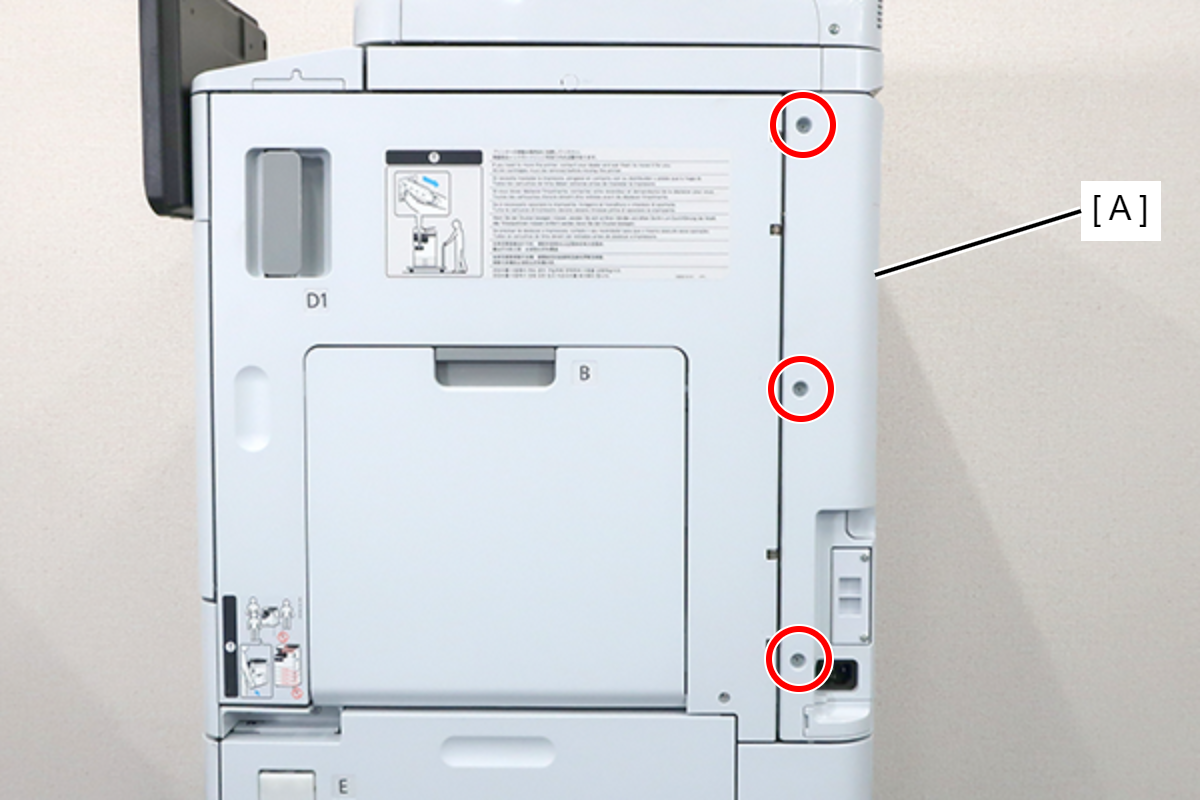
 : 3x8D
- Remove the 5 screws and pull the rear cover (A) toward to remove it.
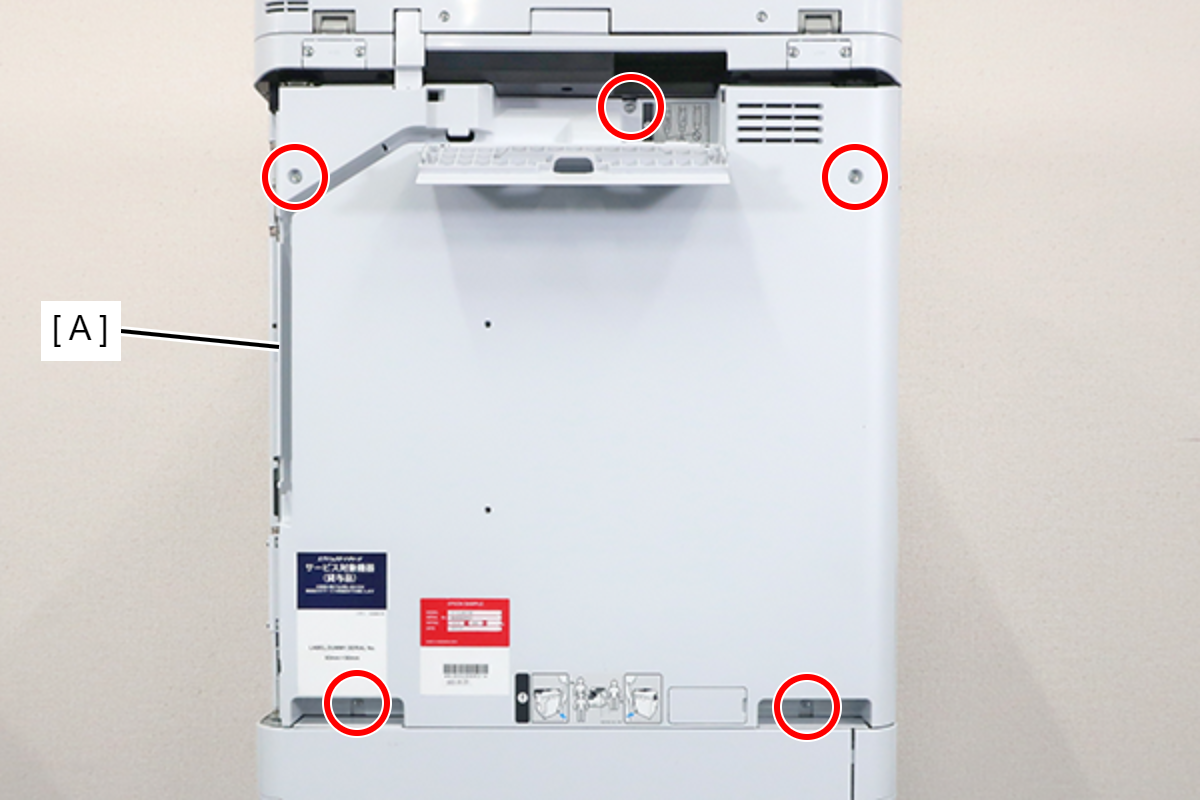
 : 3x8D
 Assembly / 組み立て
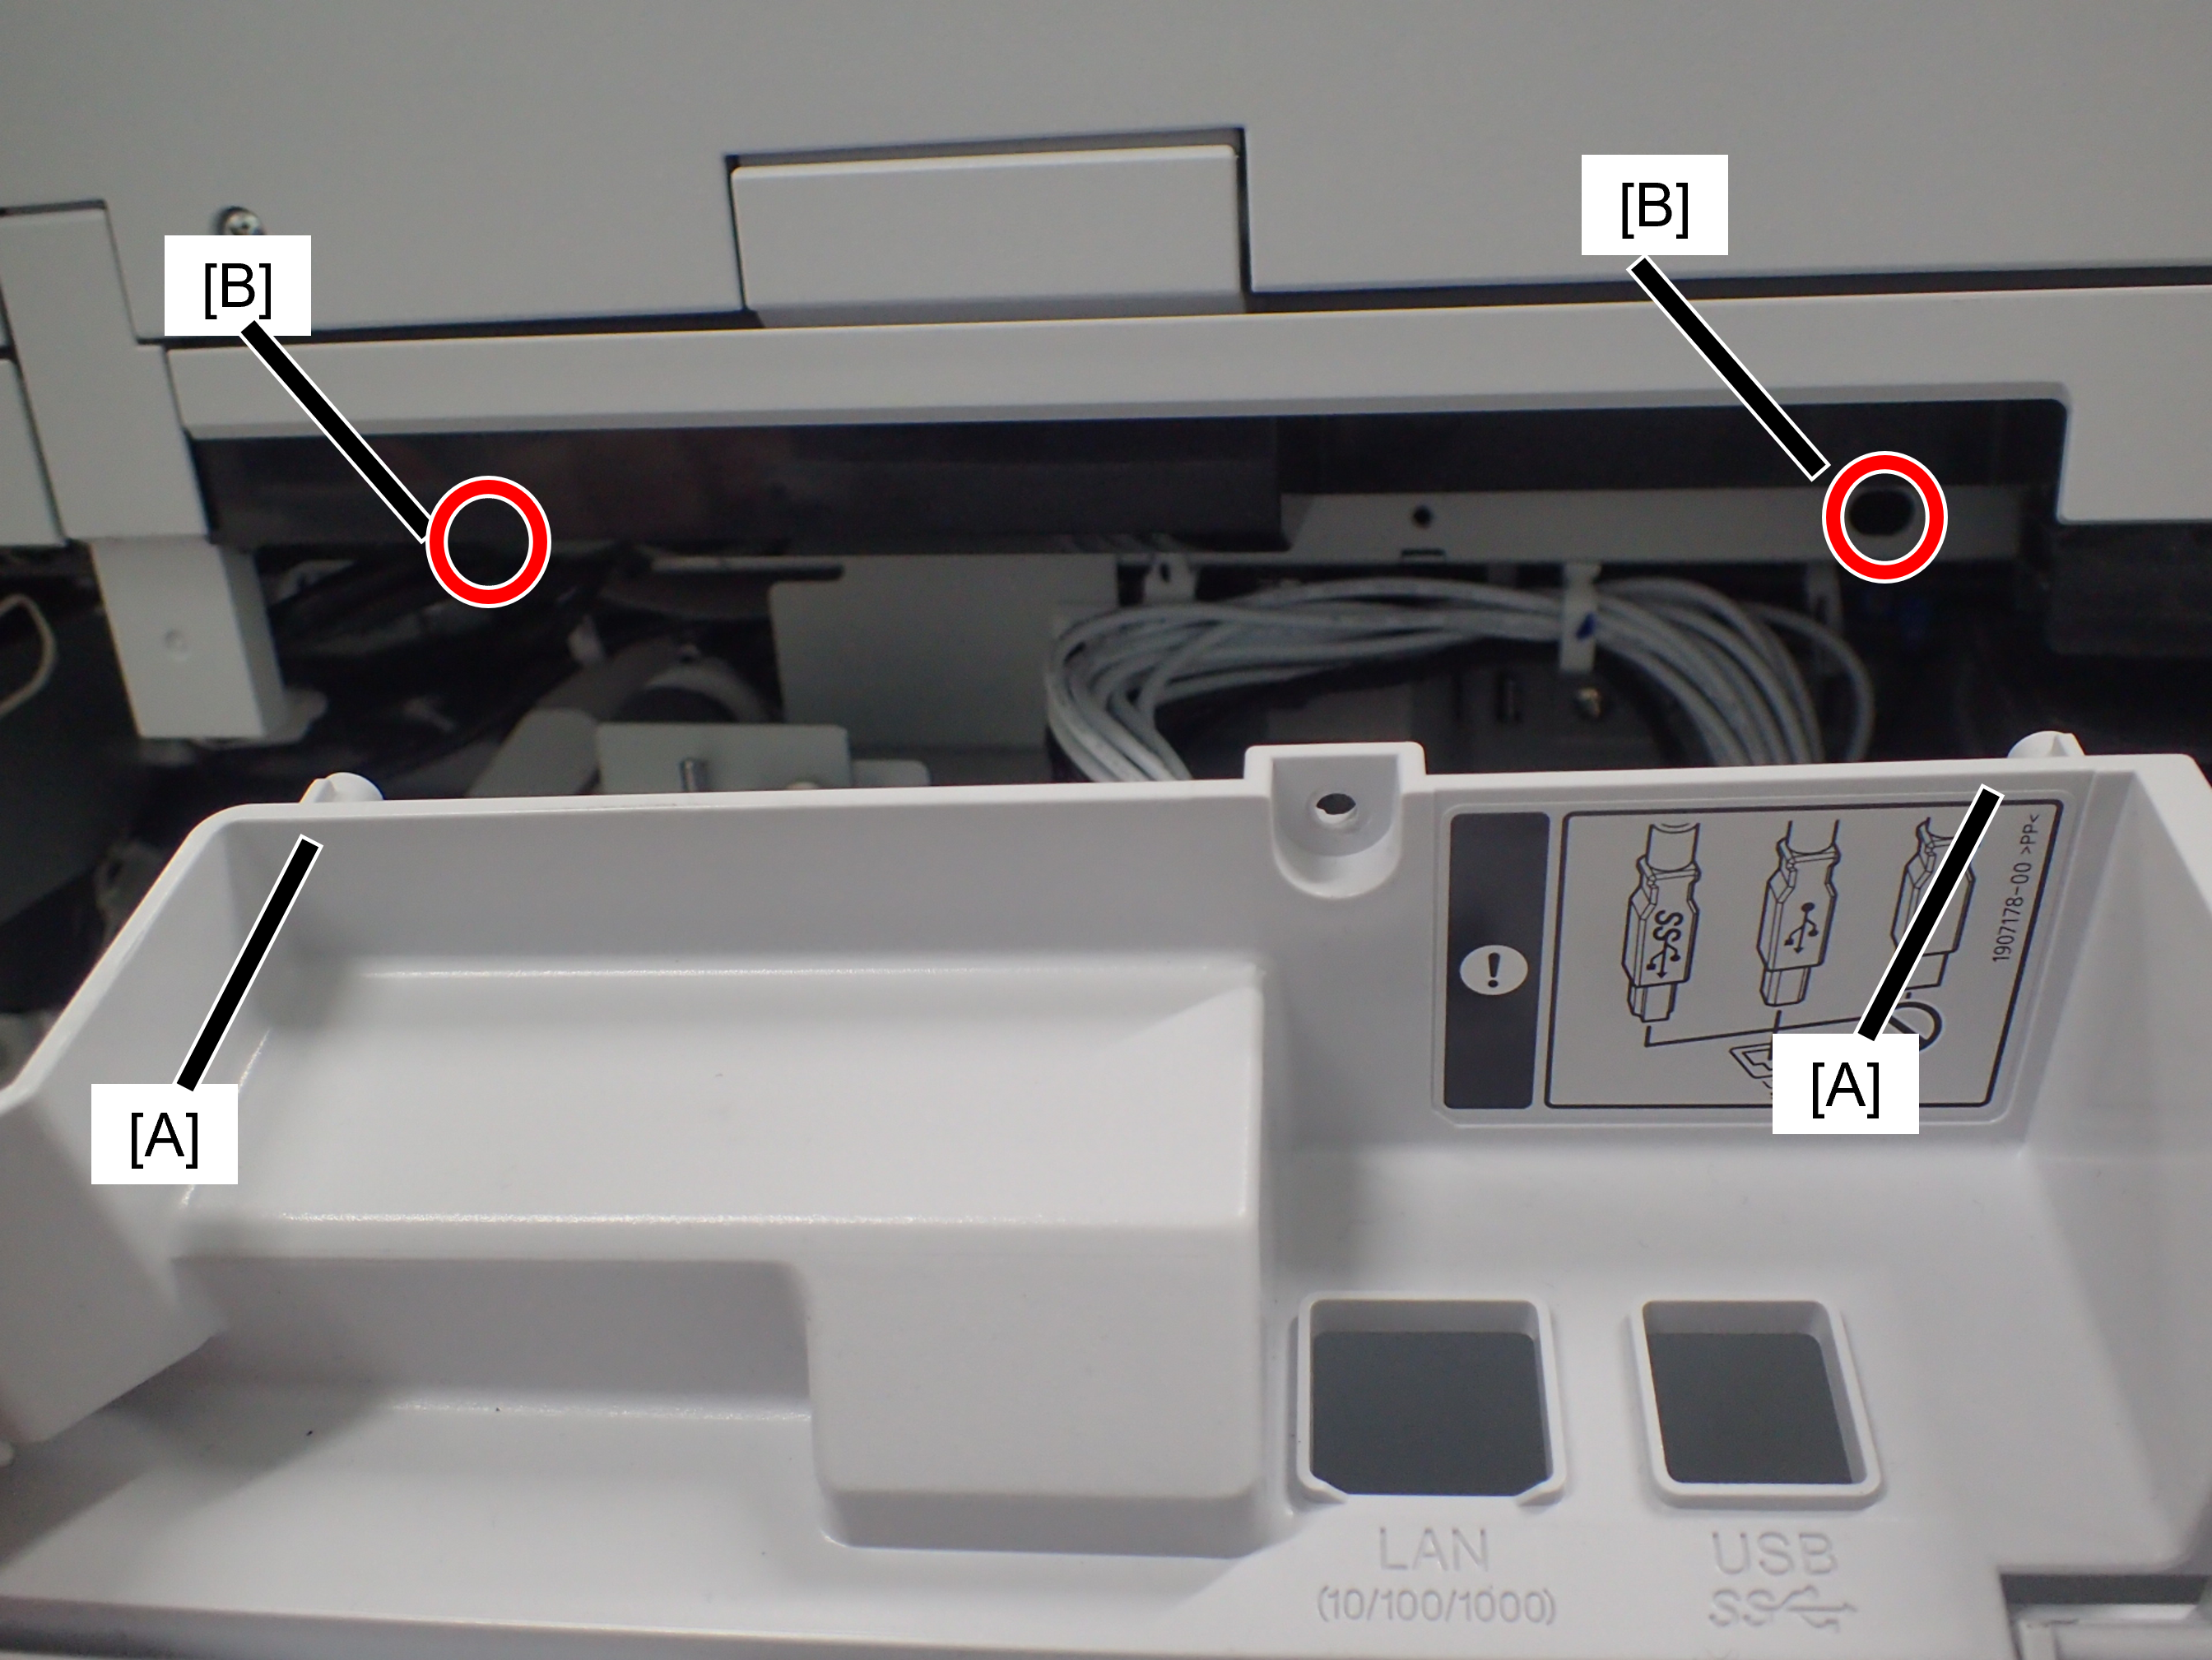
Confirm that the rear cover is not floating. The positioning pin (A) may not fit into the hole (B).
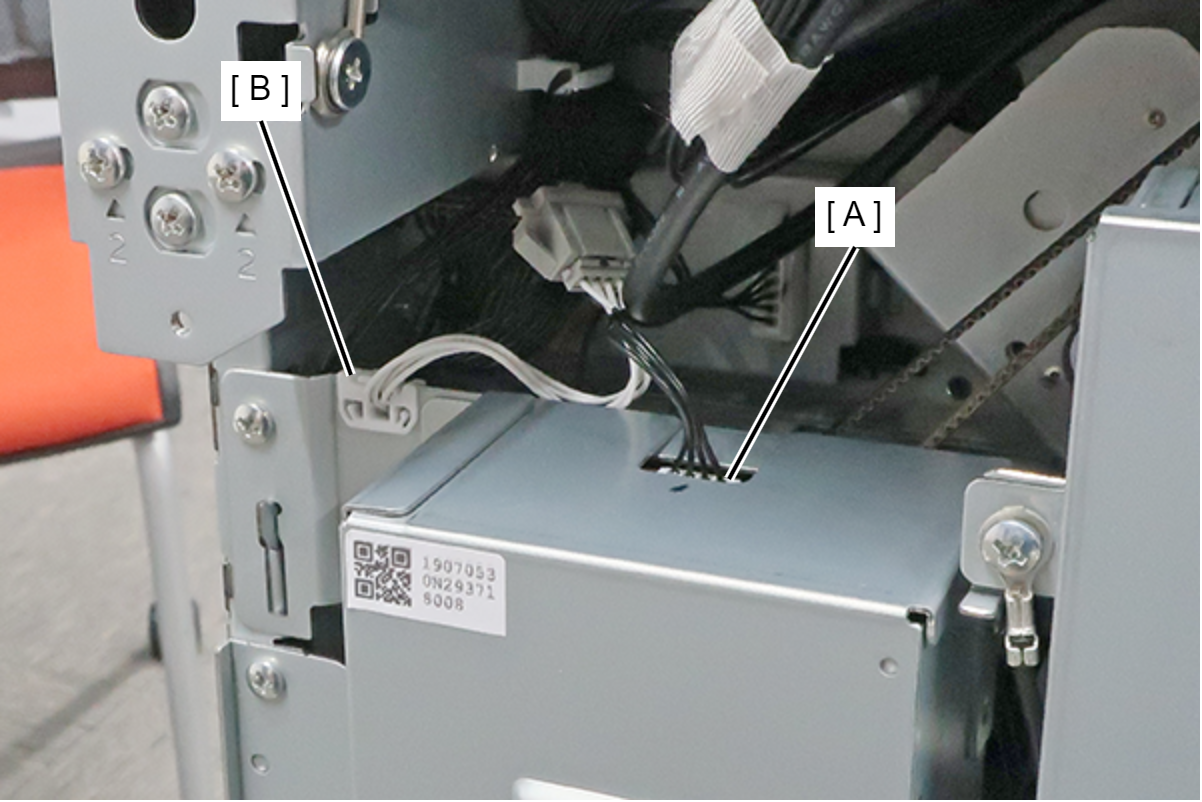
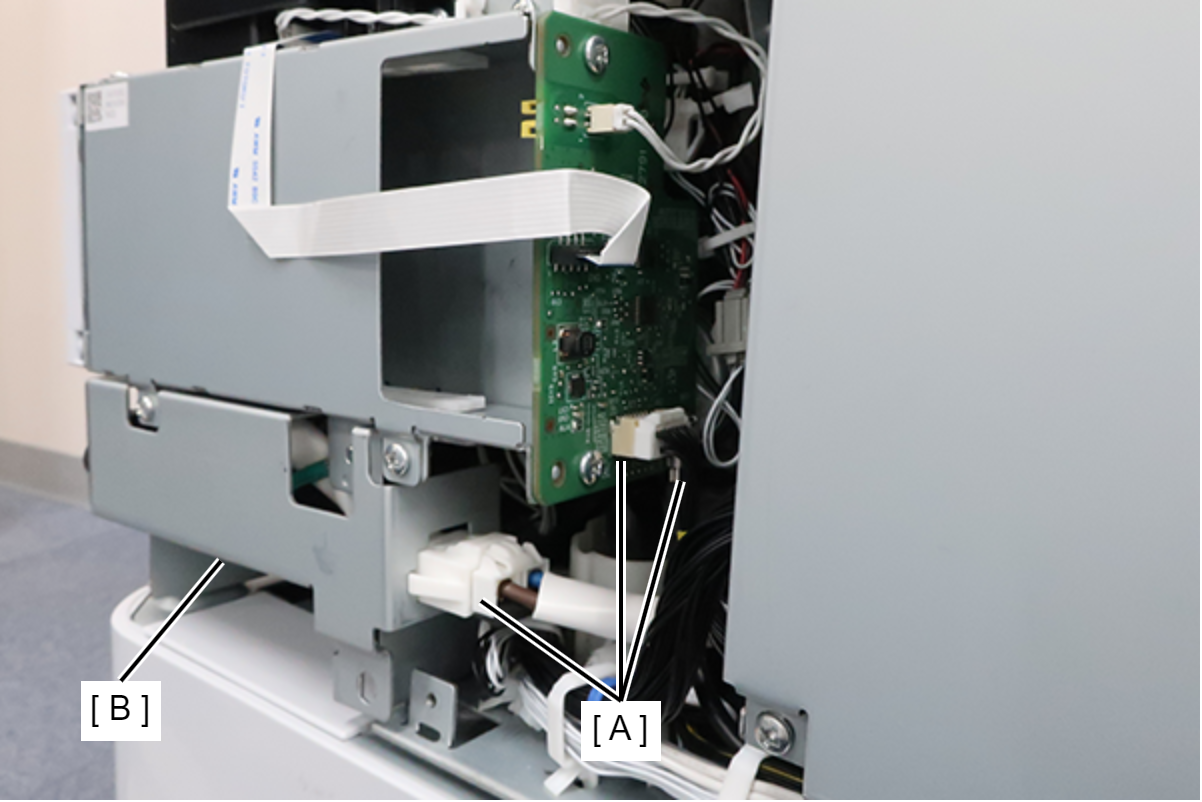
- Disconnect the cables from the connector (A) of the High Voltage Board Box and release the cables from the clamp (B).
- Remove the 5 screws fixing the High Voltage Board Box (A).
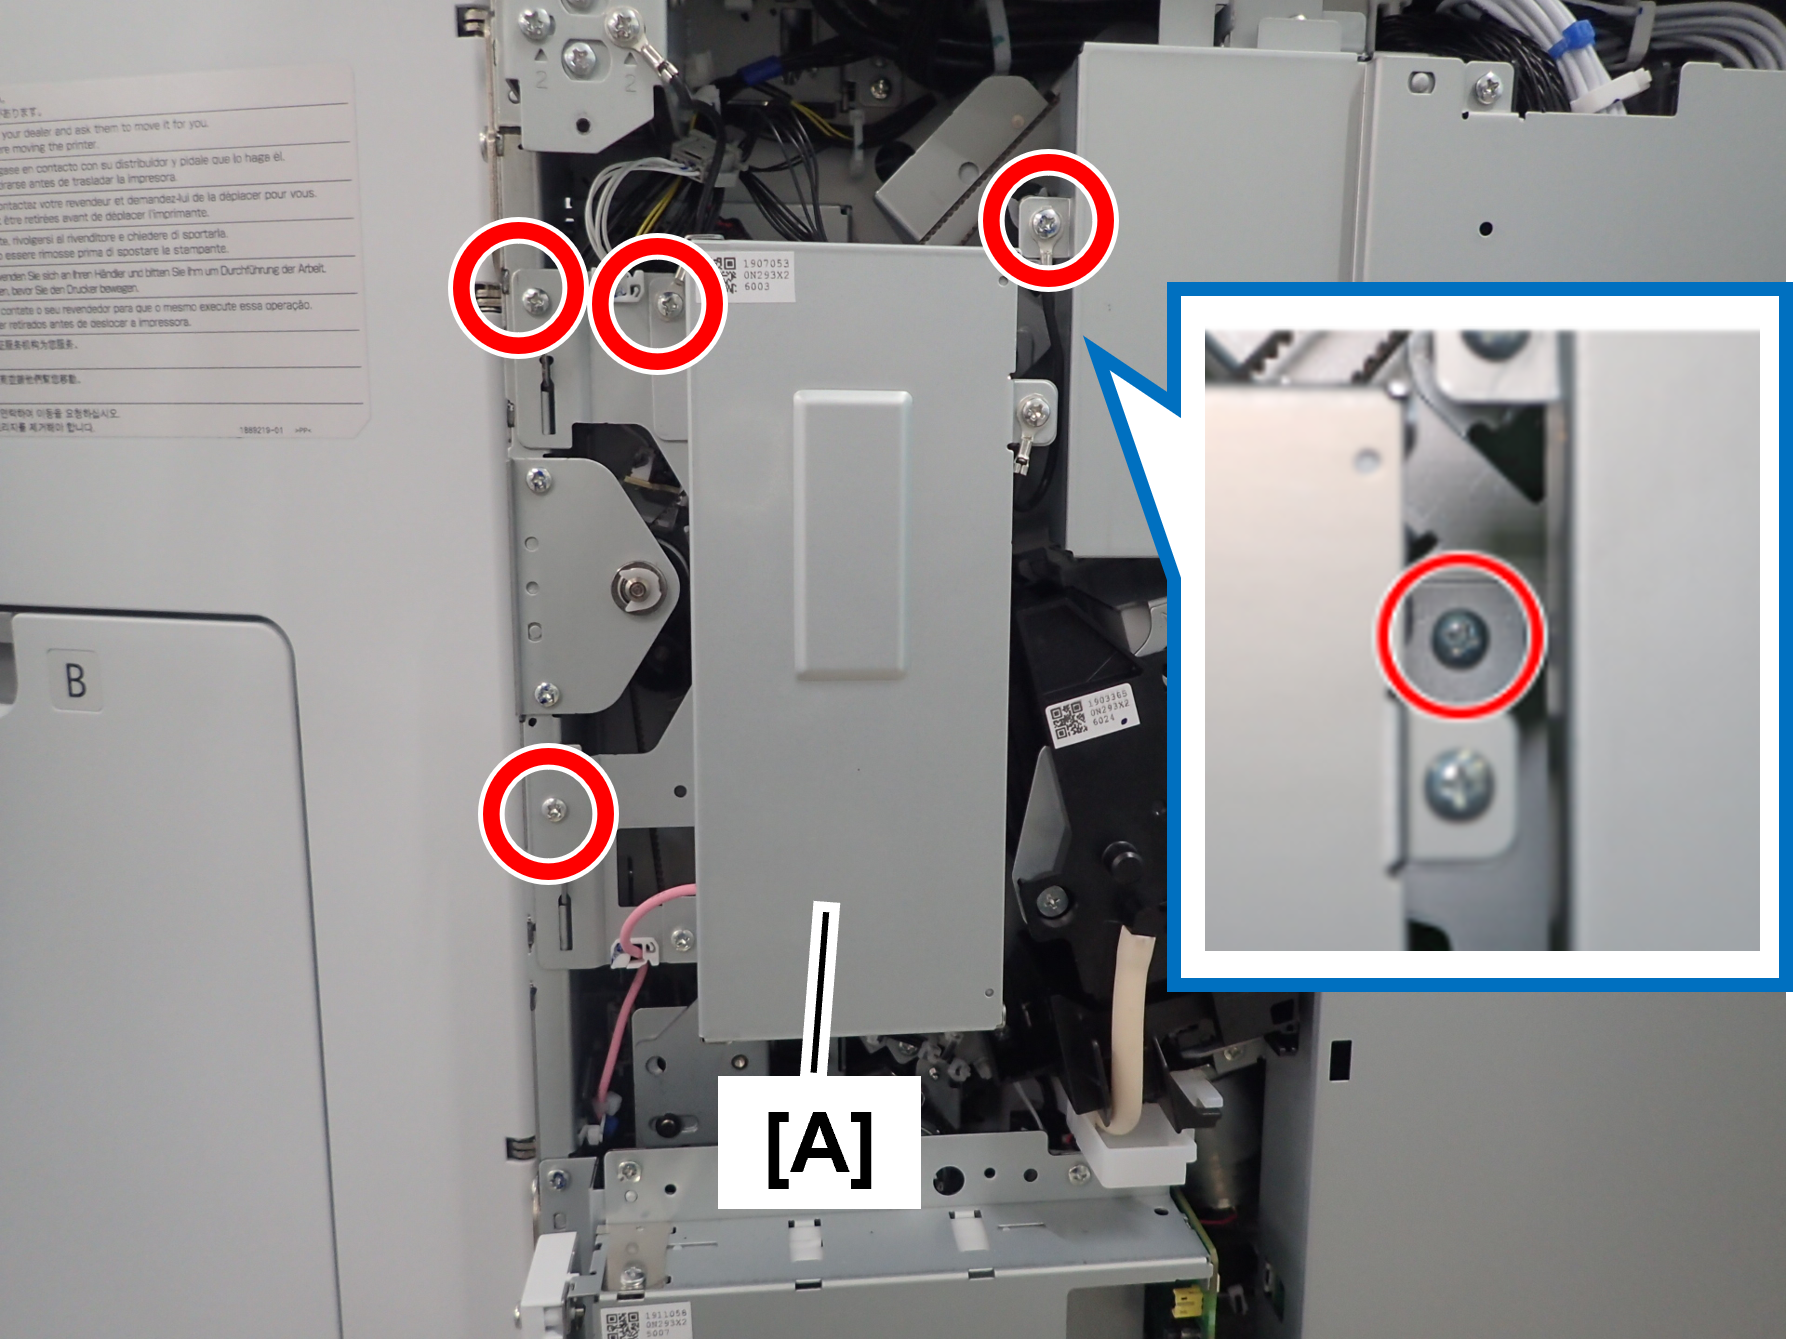
- : 3x8D
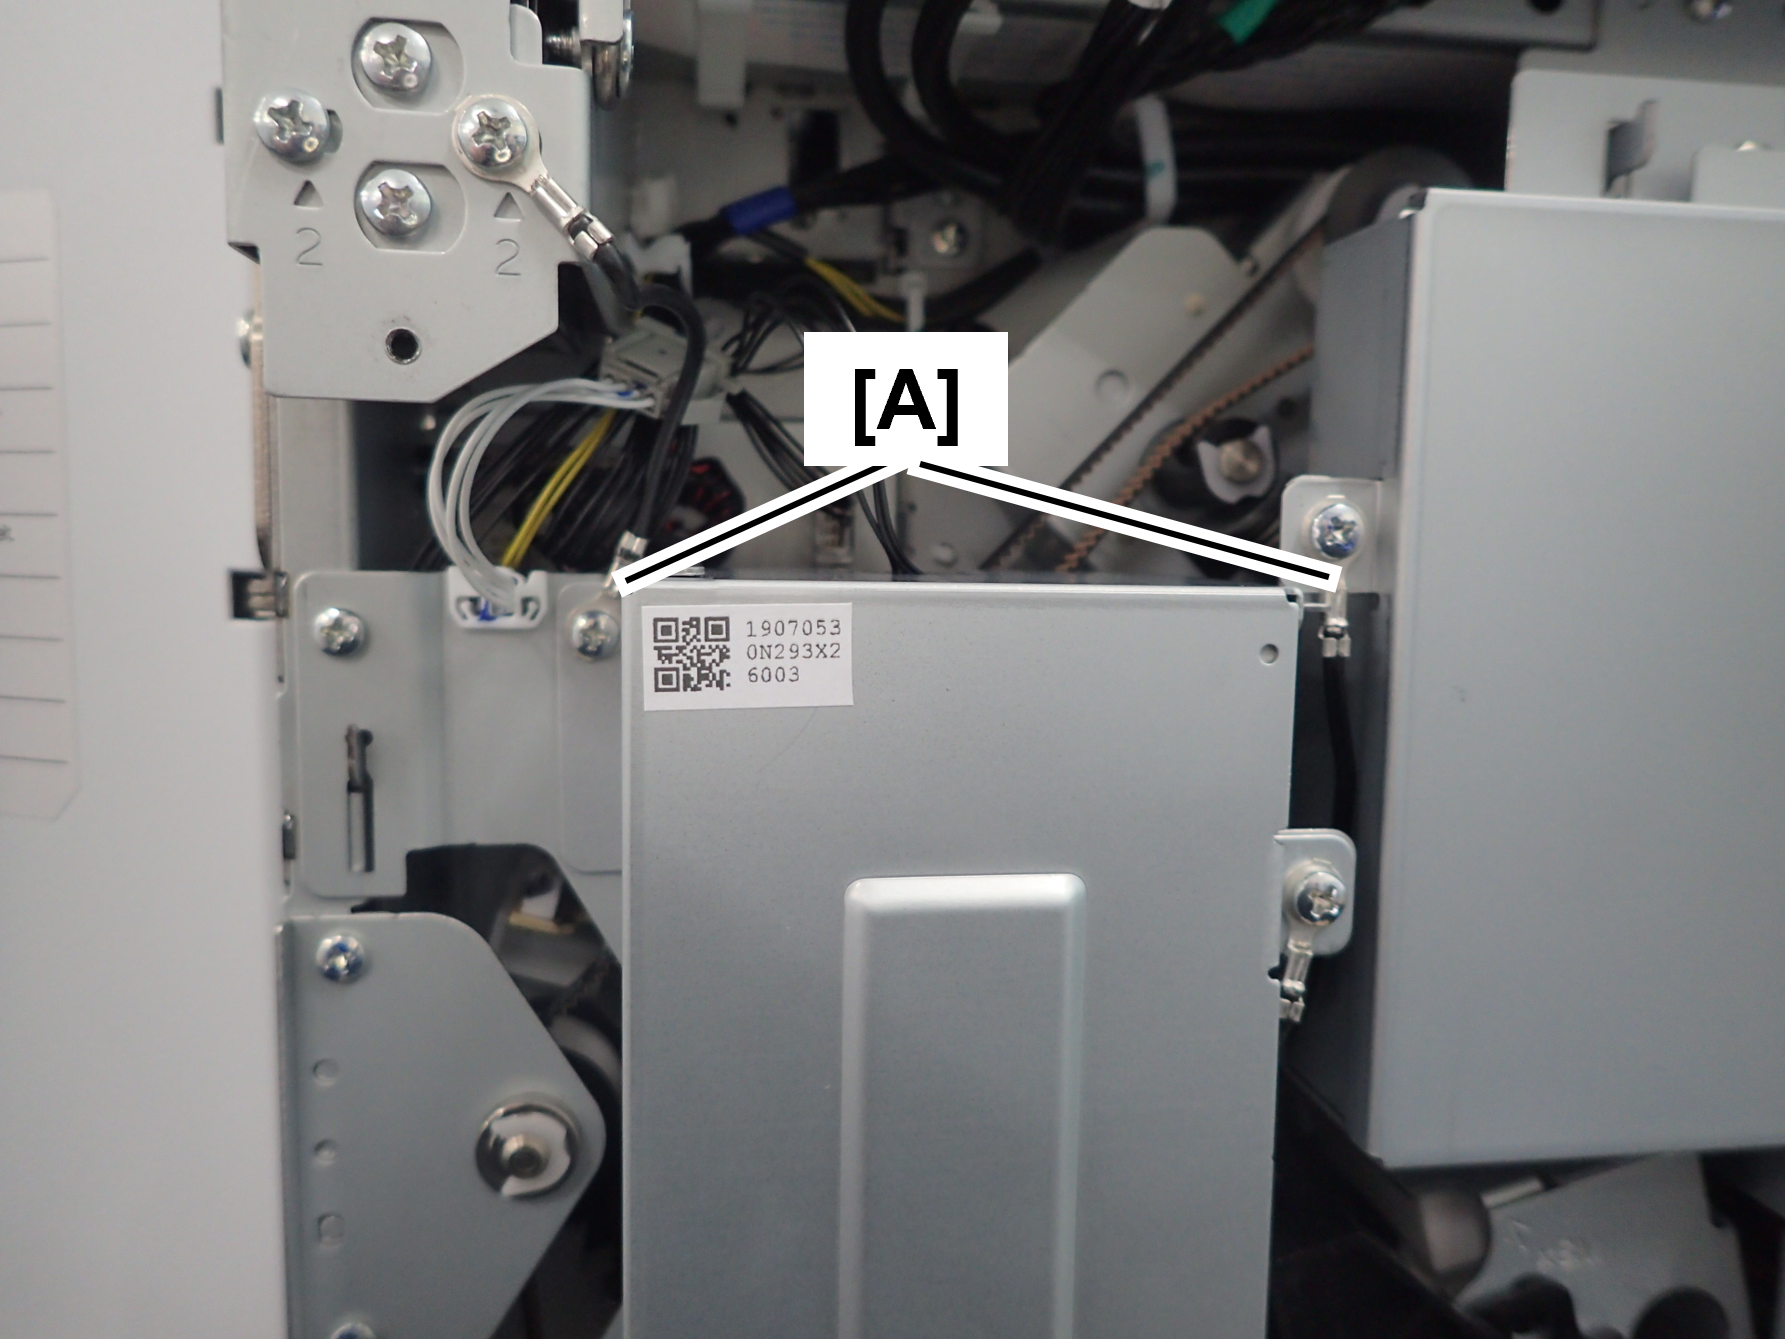
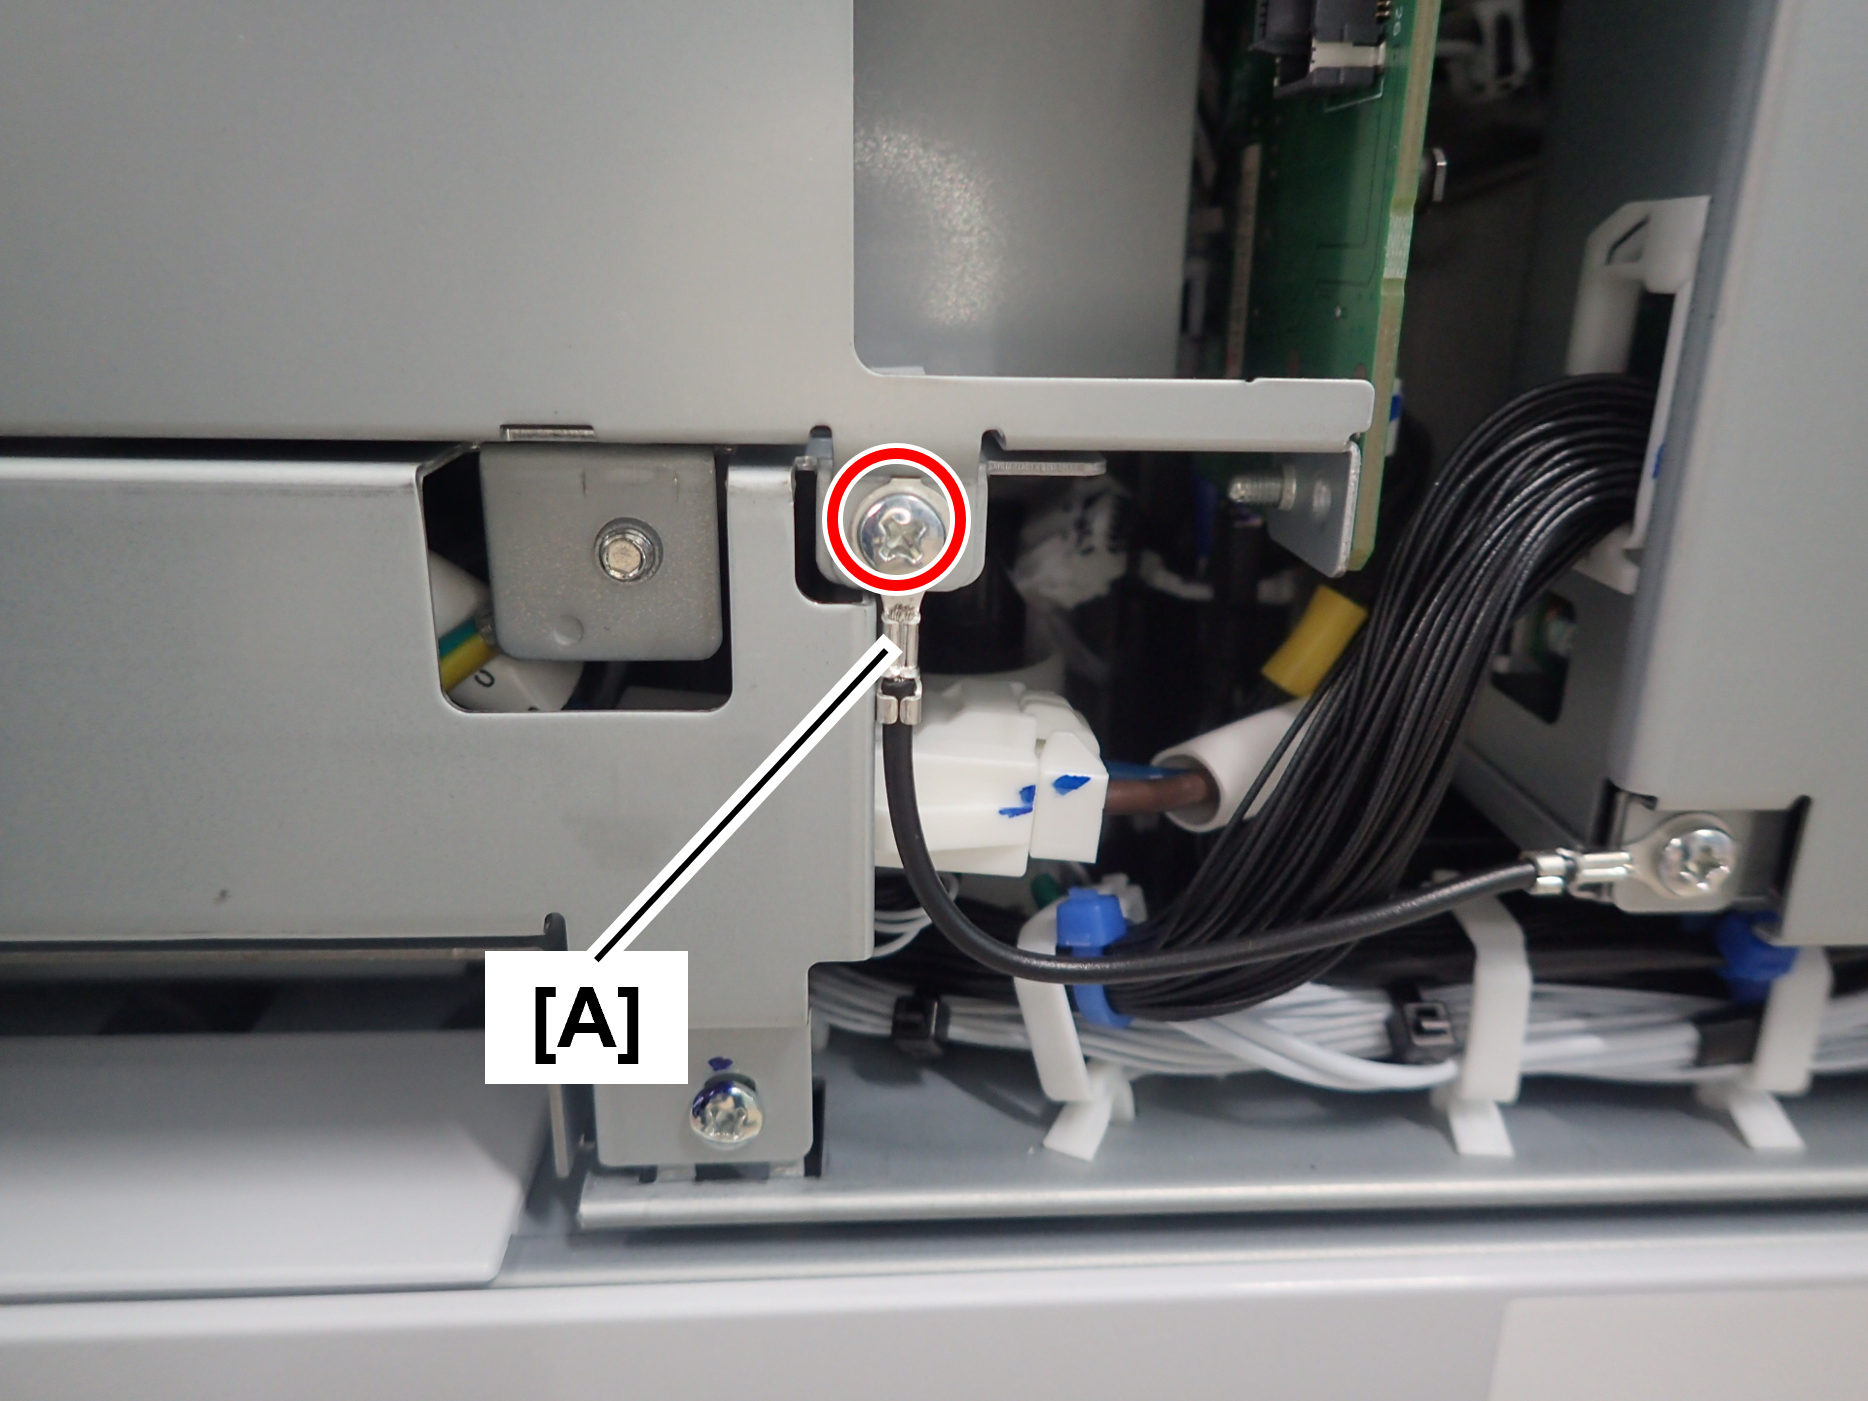
Assembly / 組み立てThe screw shown in the figure must be fastened together with the ground wire (A).
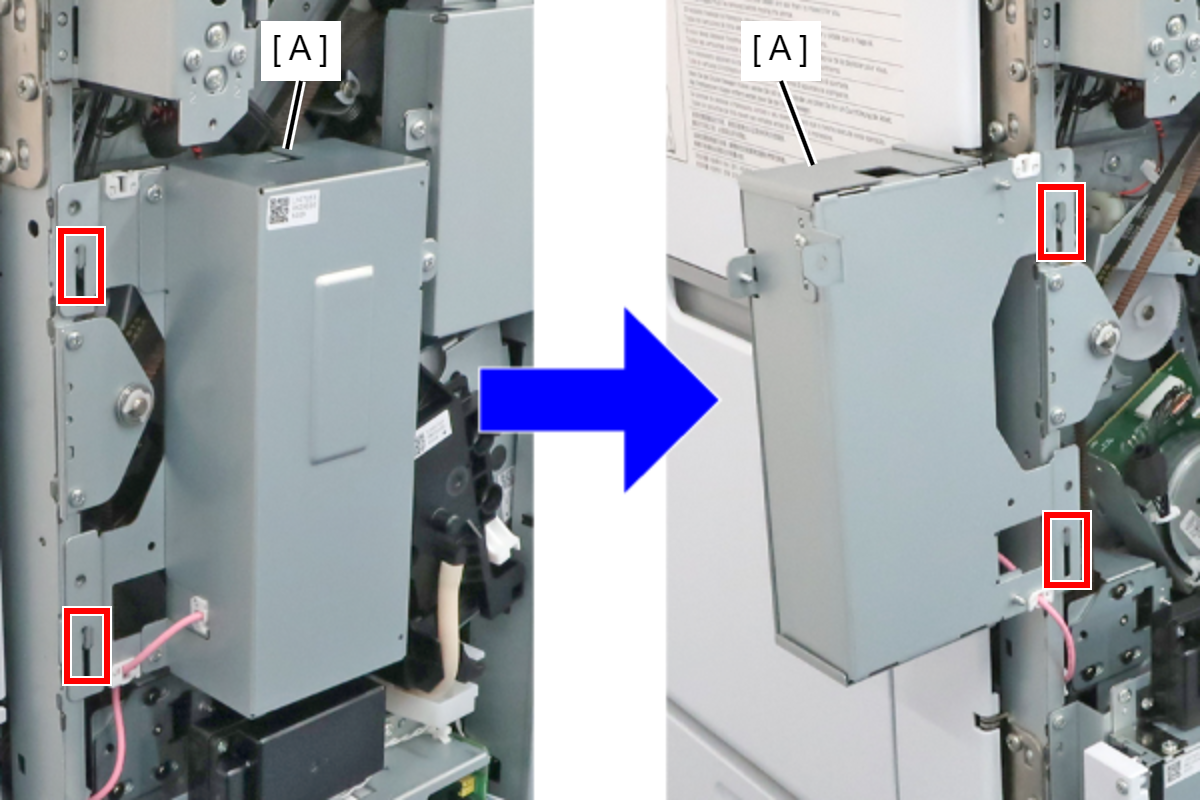
- Remove the 2 hooks to remove the High Voltage Board Box (A), and then rotate it so as to switch the front and rear sides and hang it on the hooks again.
- Remove 3 screws and remove the I/F Slot Inlet Assy (A).
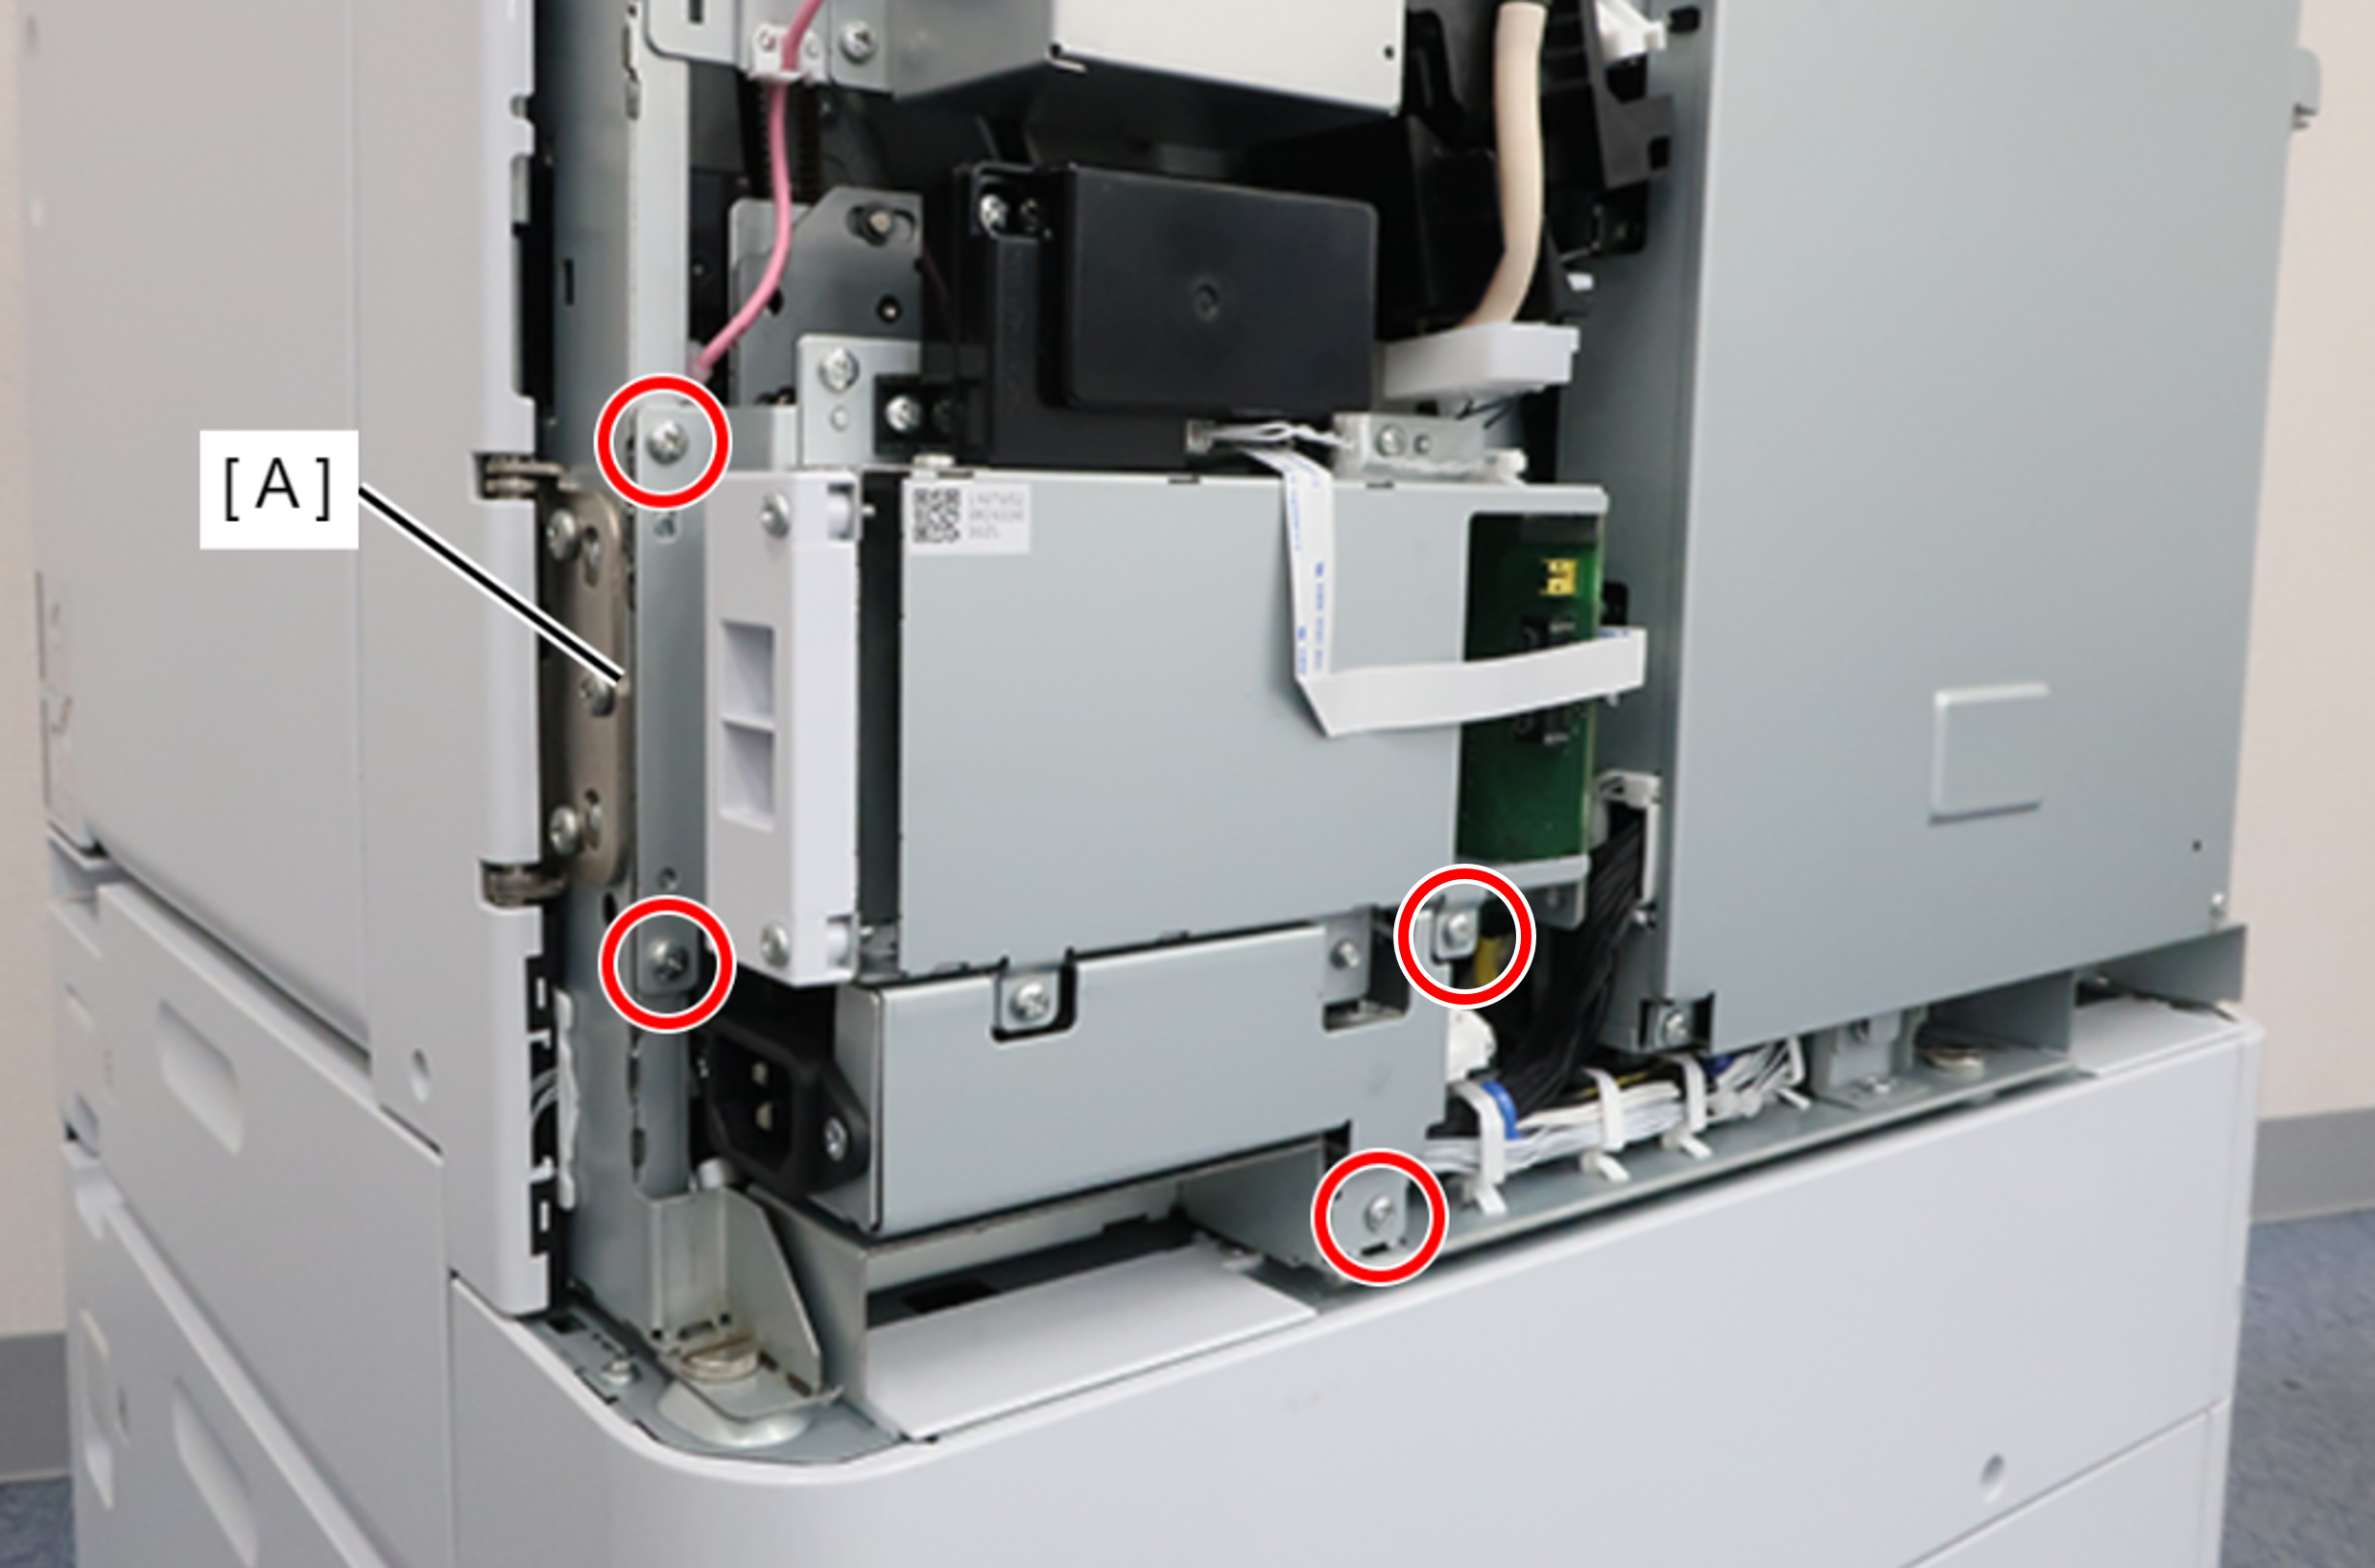
 : 3x8D
Assembly / 組み立てThe screw shown in the figure must be fastened together with the ground wire (A).
- Remove the cable from the connector (A) and remove the I/F Slot Inlet Assy (B).
- Remove the 3 screws and remove the Wiper Ink Collector Assy (A).
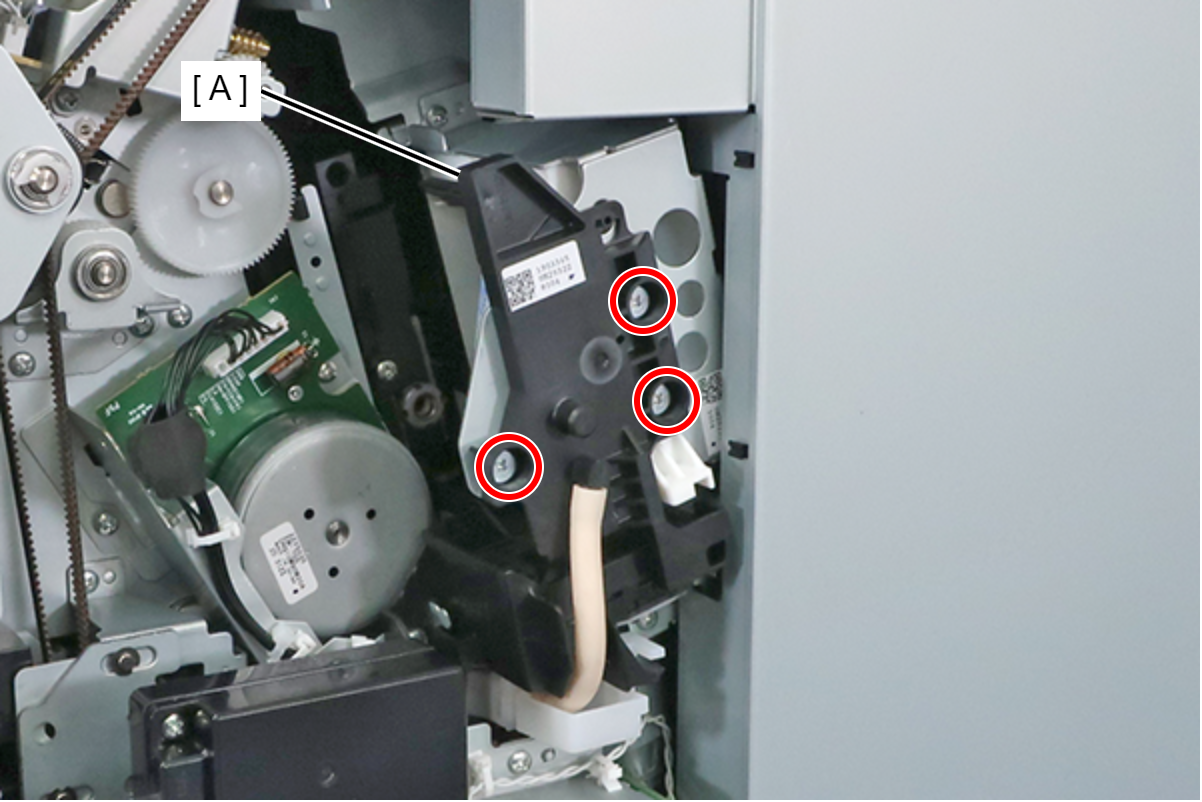
- : 3x5D
- Engage the hook of the Wiper Ink Collector Assy (A) with the Wiper Waste Ink Pad (B).
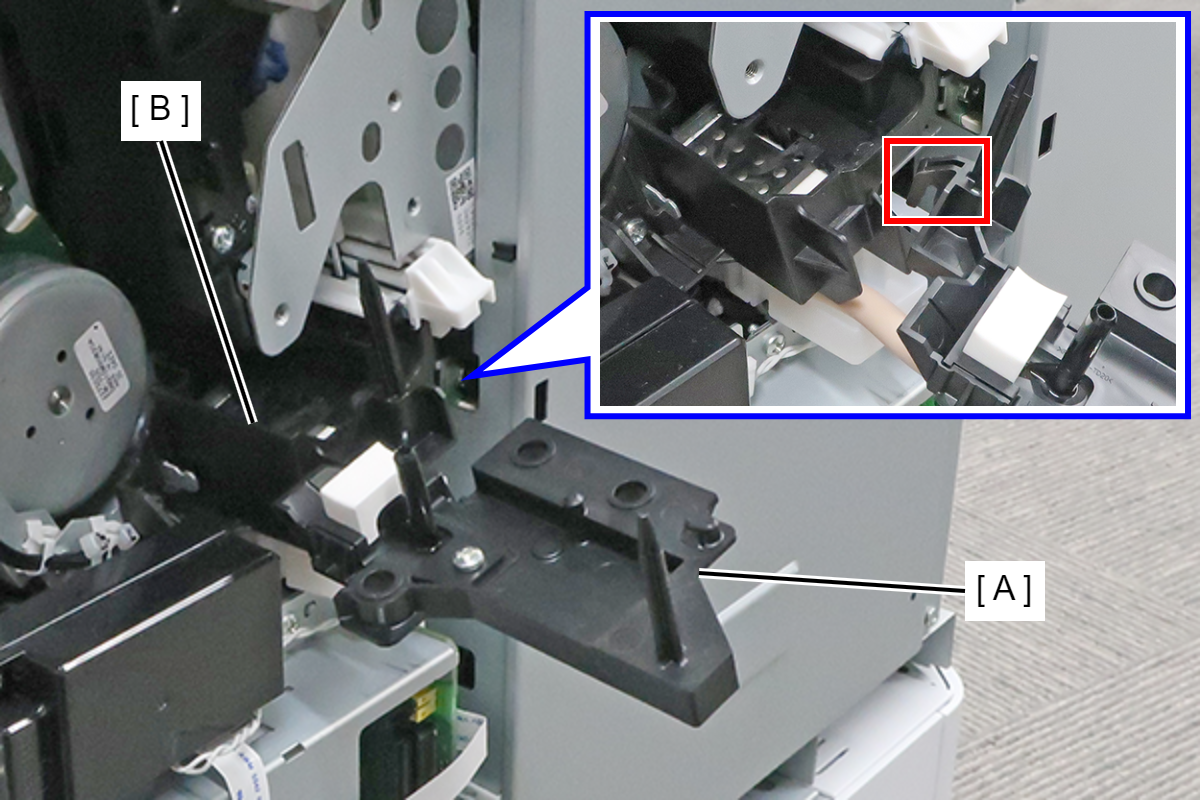
- Remove 1 screw of the Wiper Waste Ink Pad (A).
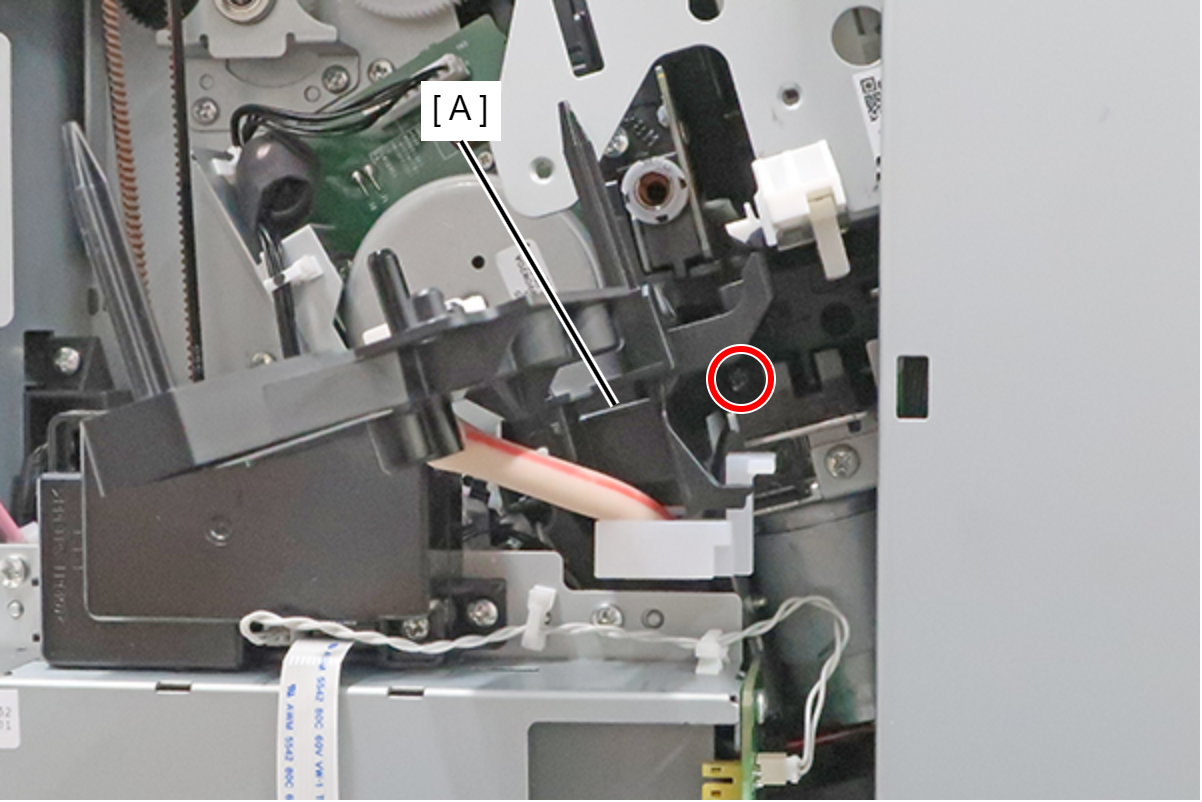
- : 3x8M
 Check Point / チェックポイント
The screws are provided with a stopper, so they cannot be completely removed.
- Engage the Wiper Ink Collector Assy (A) with the hole in the Main Board Cover, and then remove the 1 screw to remove the Wiper Waste Ink Pad (B).
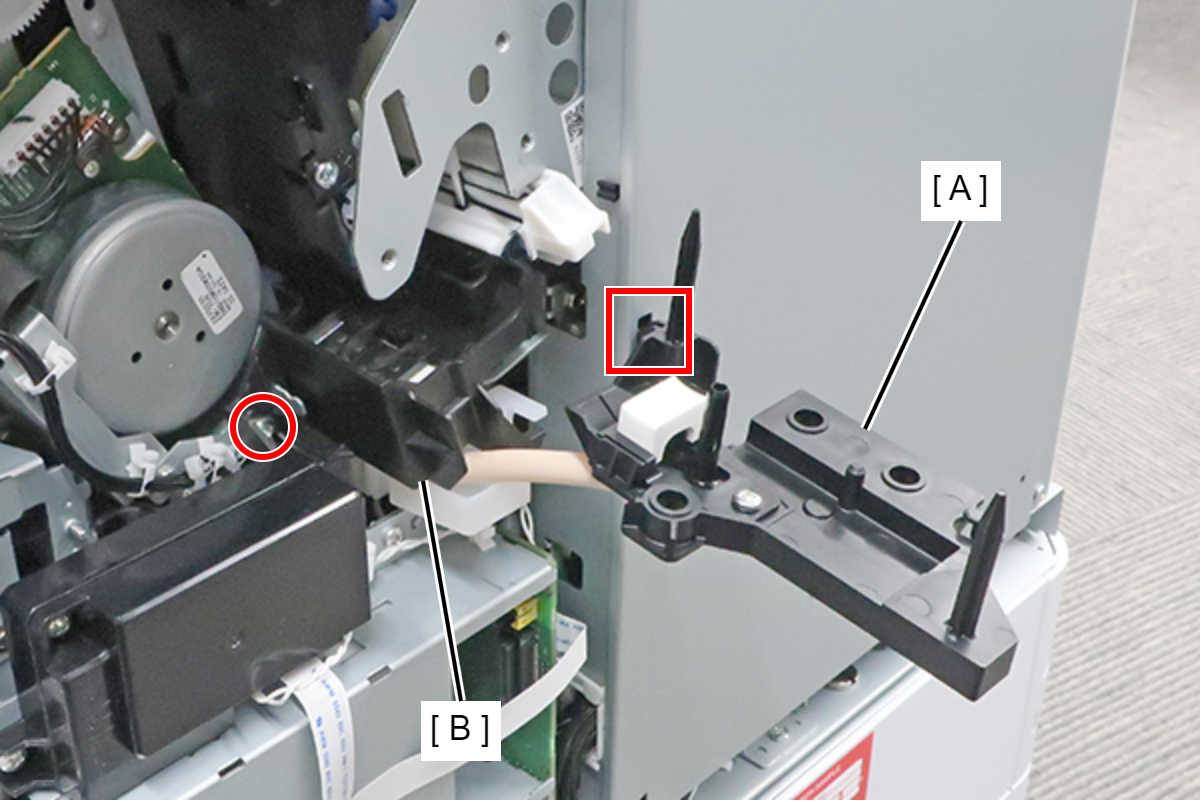
 : 3x8M
Check Point / チェックポイントThe screws are provided with a stopper, so they cannot be completely removed.
- Release the cable from the 3 clamps (A) and disconnect the cable from the connector (B).
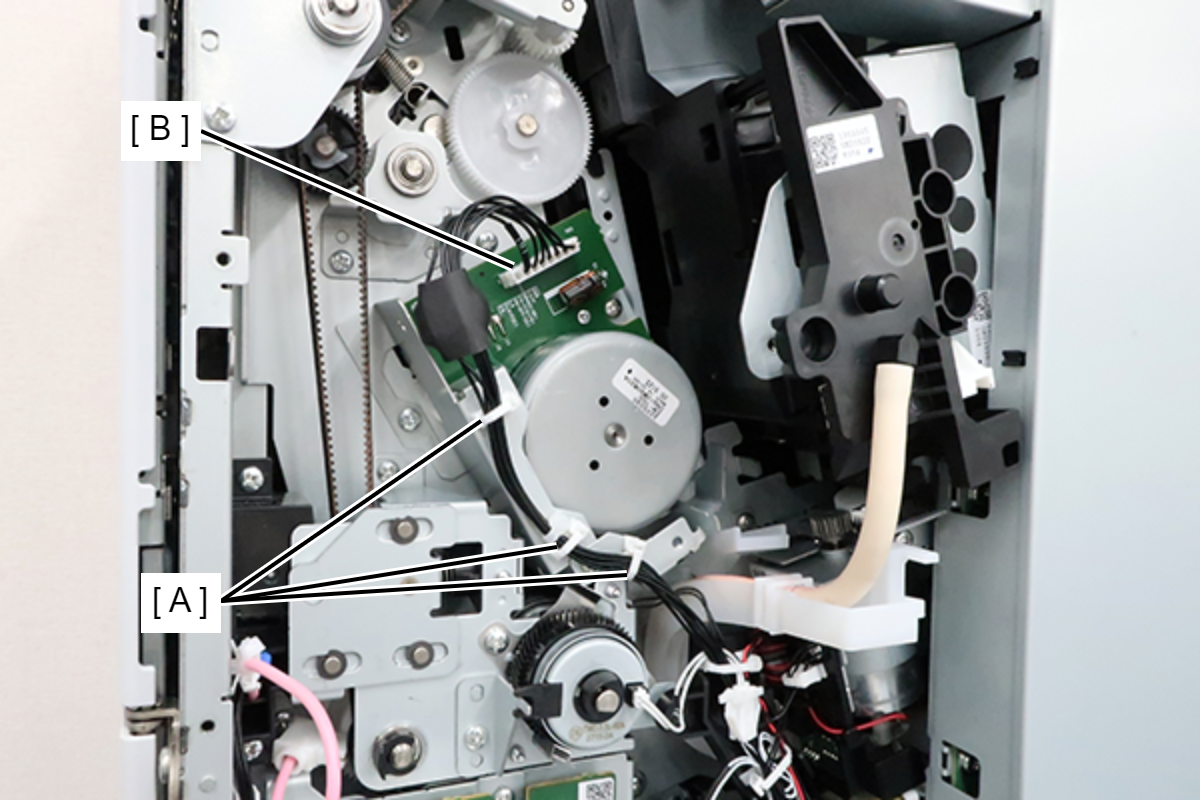
- Remove 2 screws, then remove the Cable Guide Plate (A).
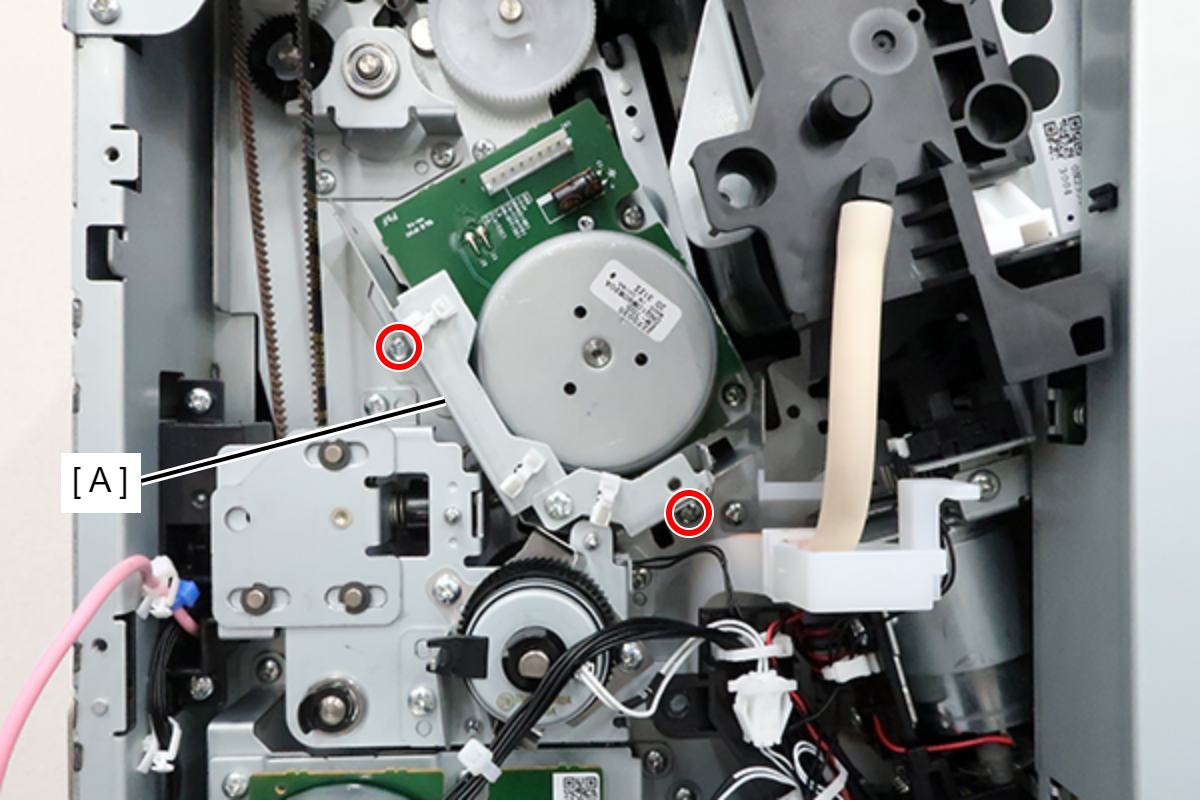
- : 3x8D
- Remove the 4 screws and remove the Belt Drive Motor (A).
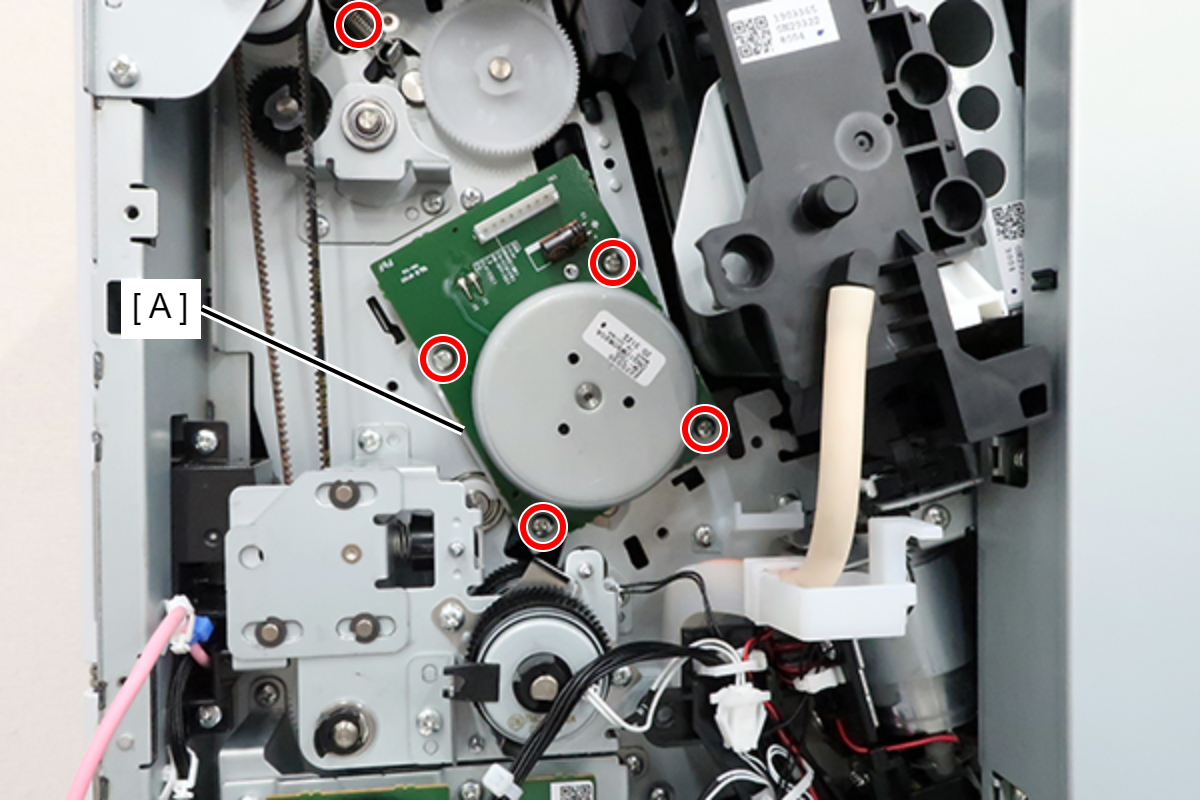
- : 3x8D