EJ Unit Assy
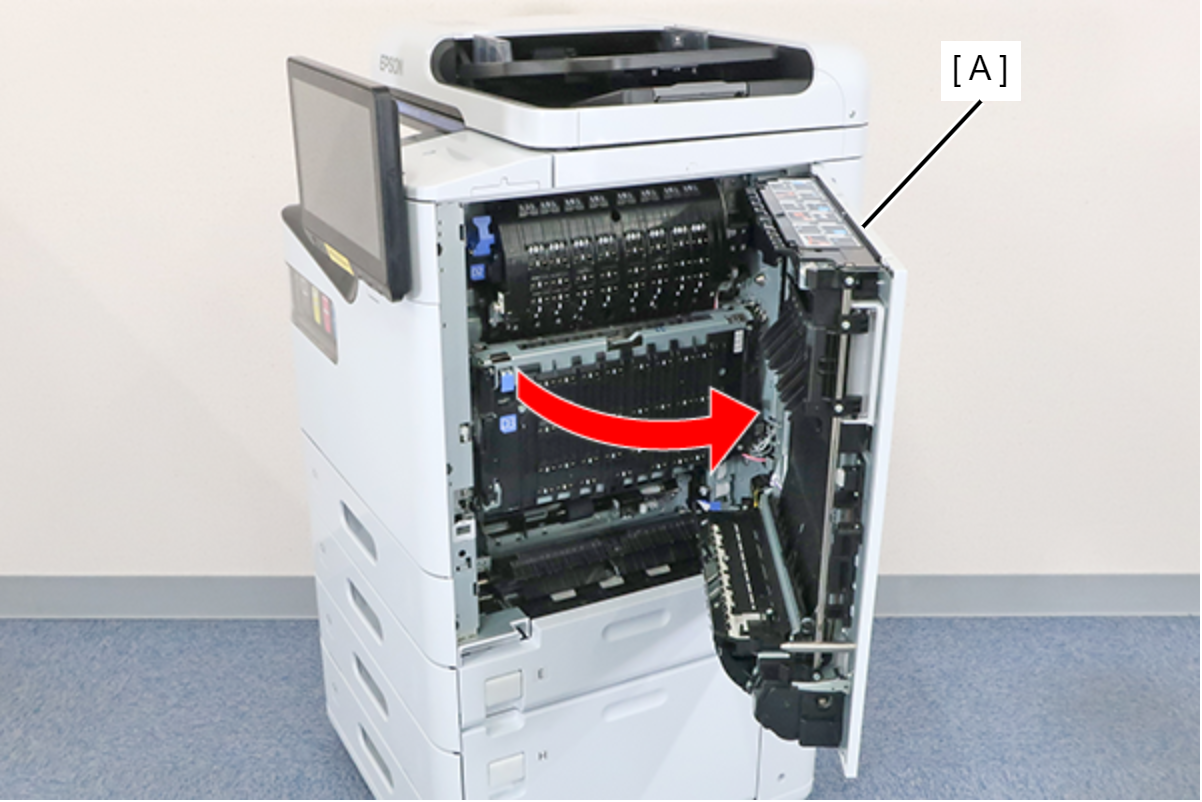
- Open the right door unit (A).
 Assembly / 組み立て
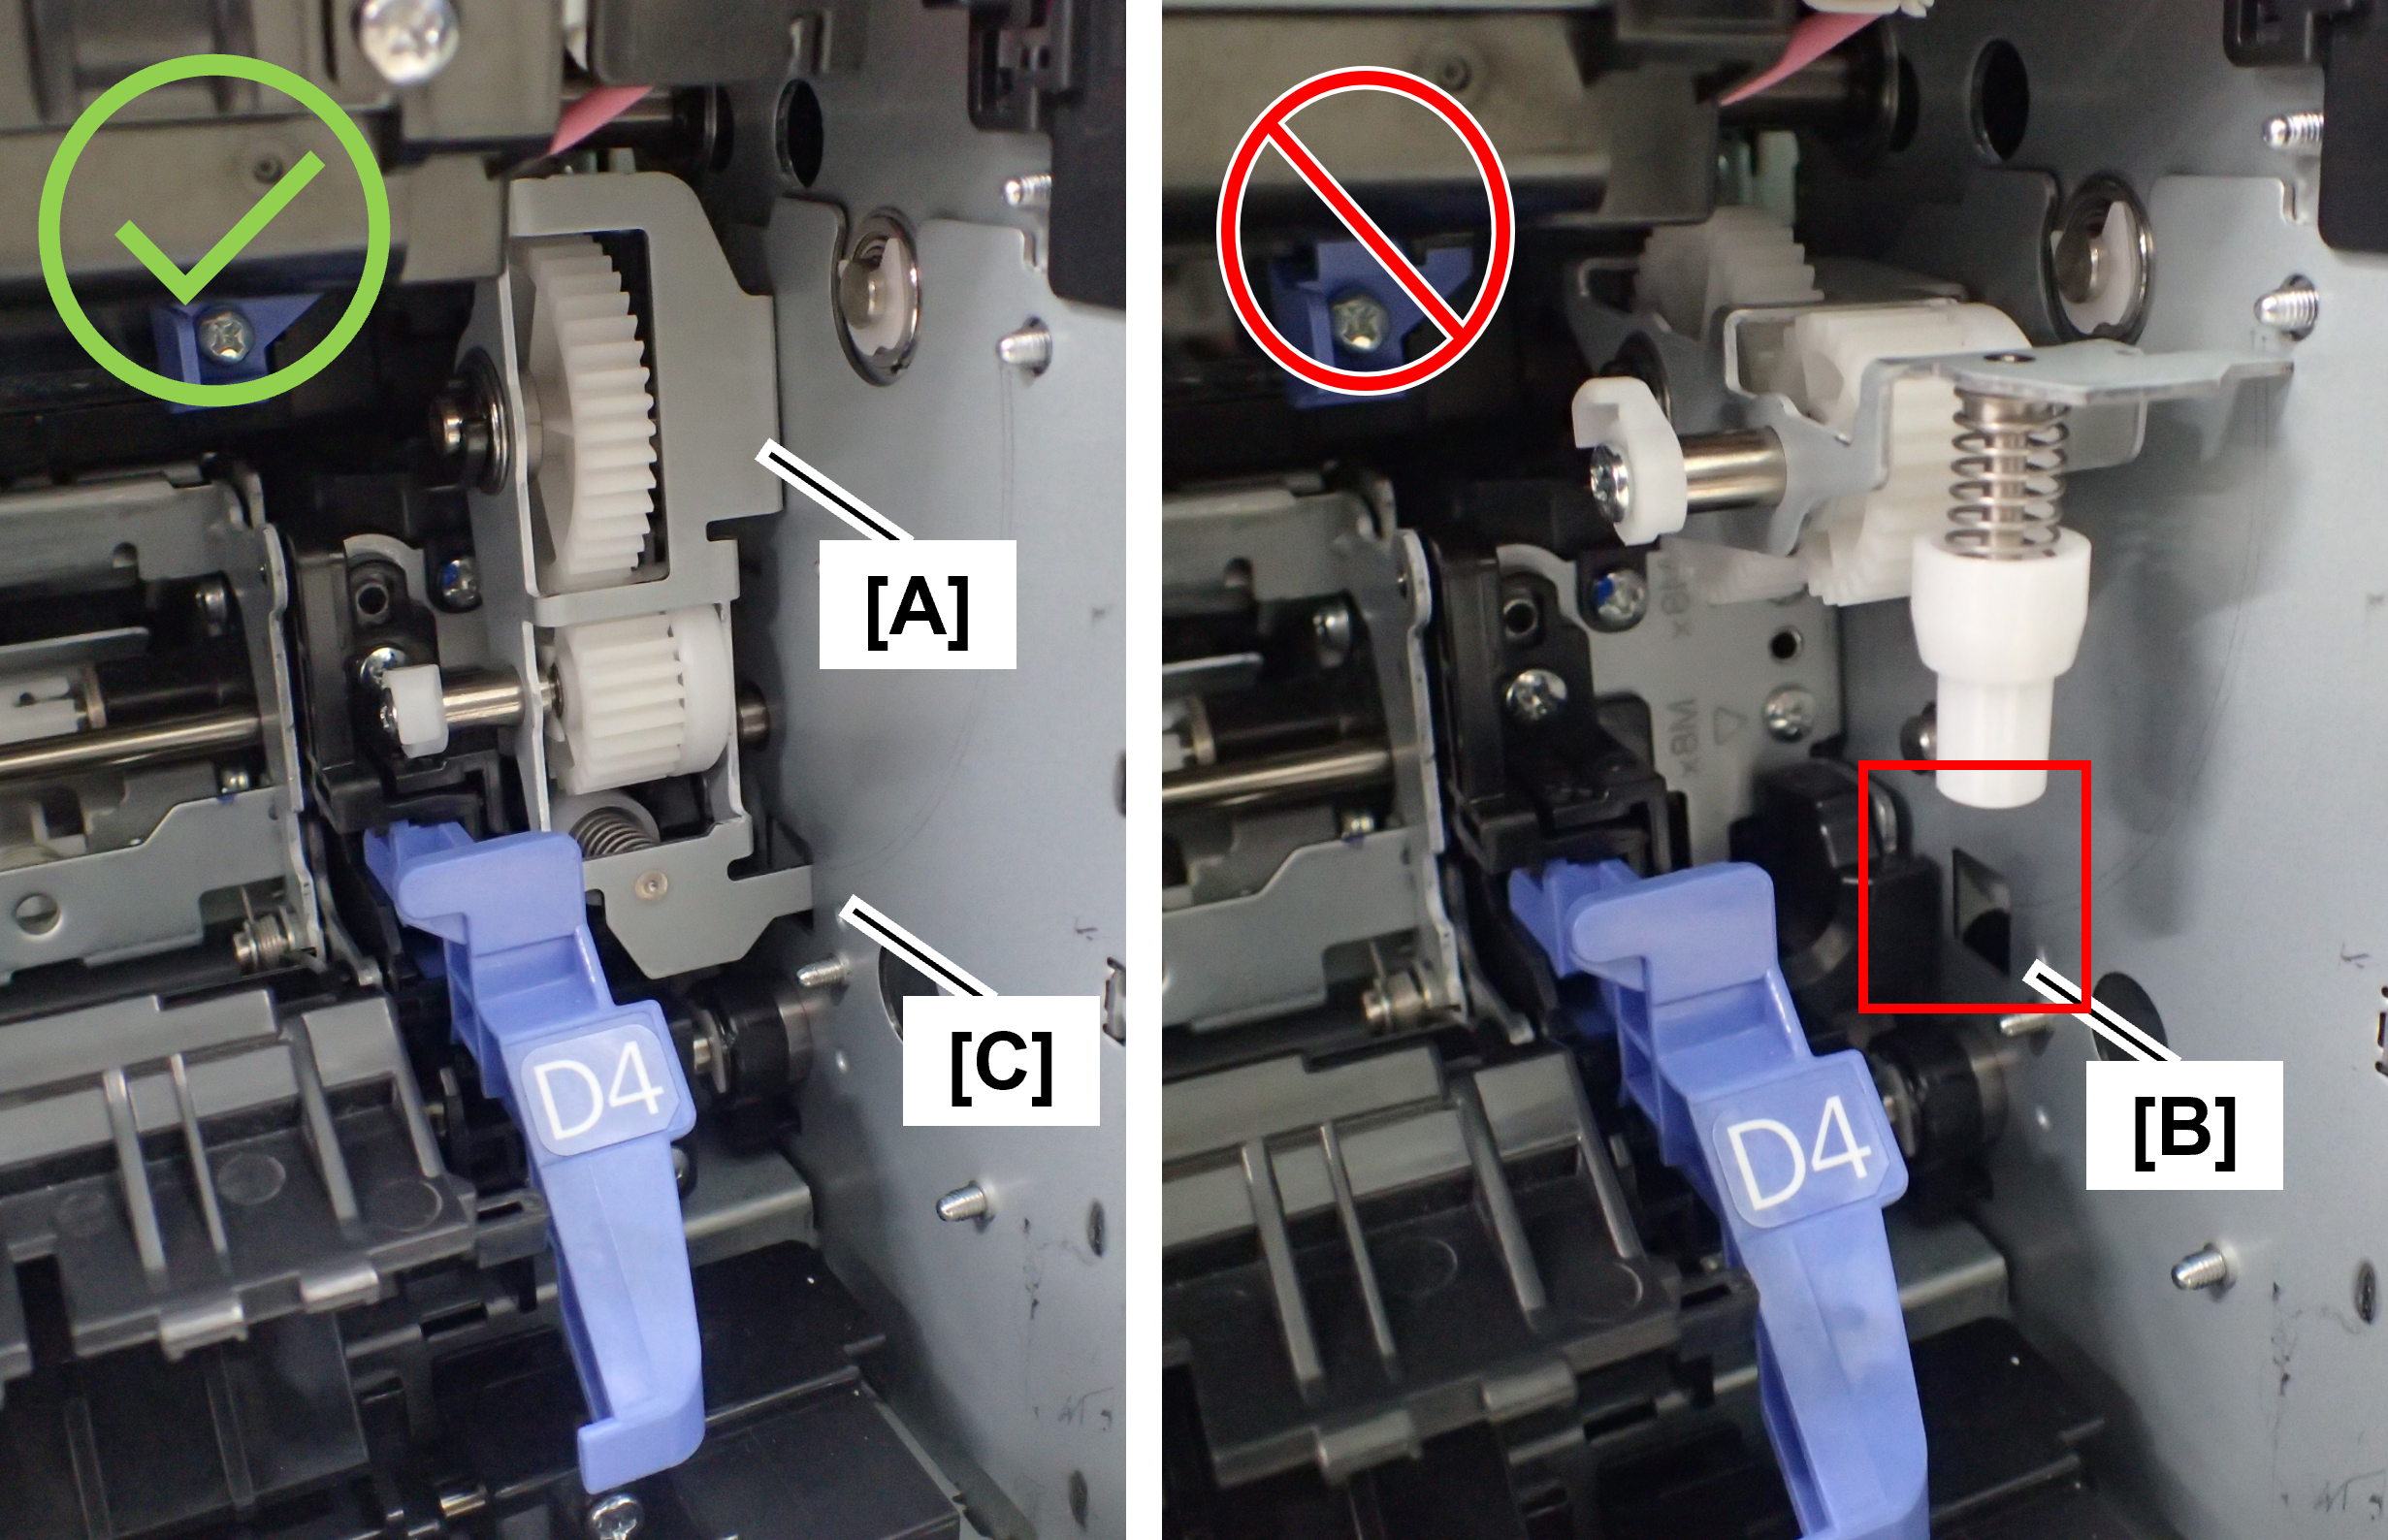
When closing the right door unit, it may not close due to interference with the tumbler (A) that was tilted toward the front when other parts were repaired.
If the right door unit does not close, check the position of the tumbler, and if it is protruding toward the front, fit the tip of the tumbler plate (C) into the hole (B) in the main unit.
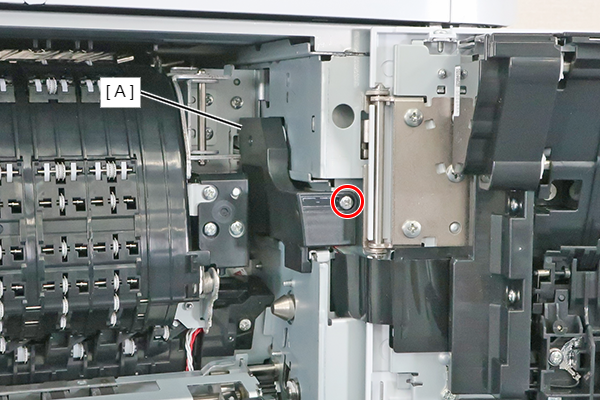
- Remove the screw and remove the Right Door Cable Cover Upper (A).
 : 3x8M
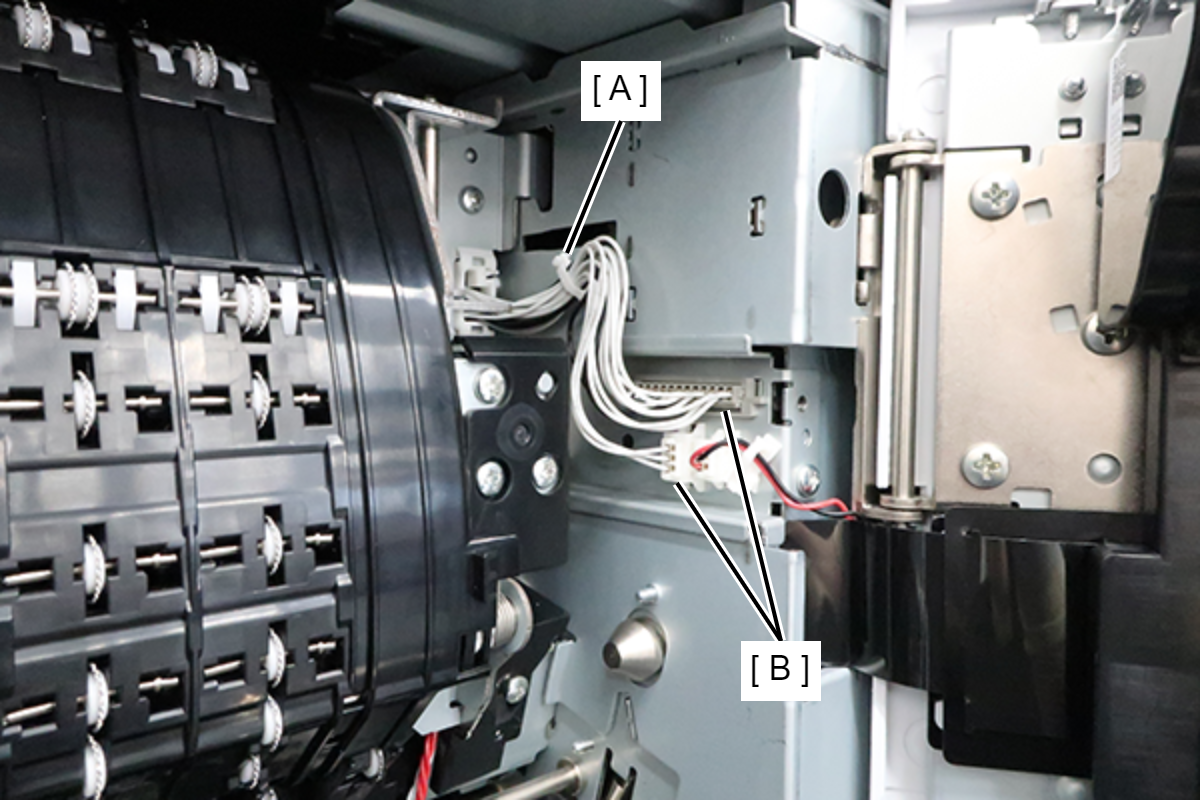
- Release the cable from the clamp (A) and disconnect the cable from the 2 connectors (B).
- Remove the 4 screws, lift the left side of the EJ unit Assy (A) slightly to release the hook, and remove it by rotating it toward you.
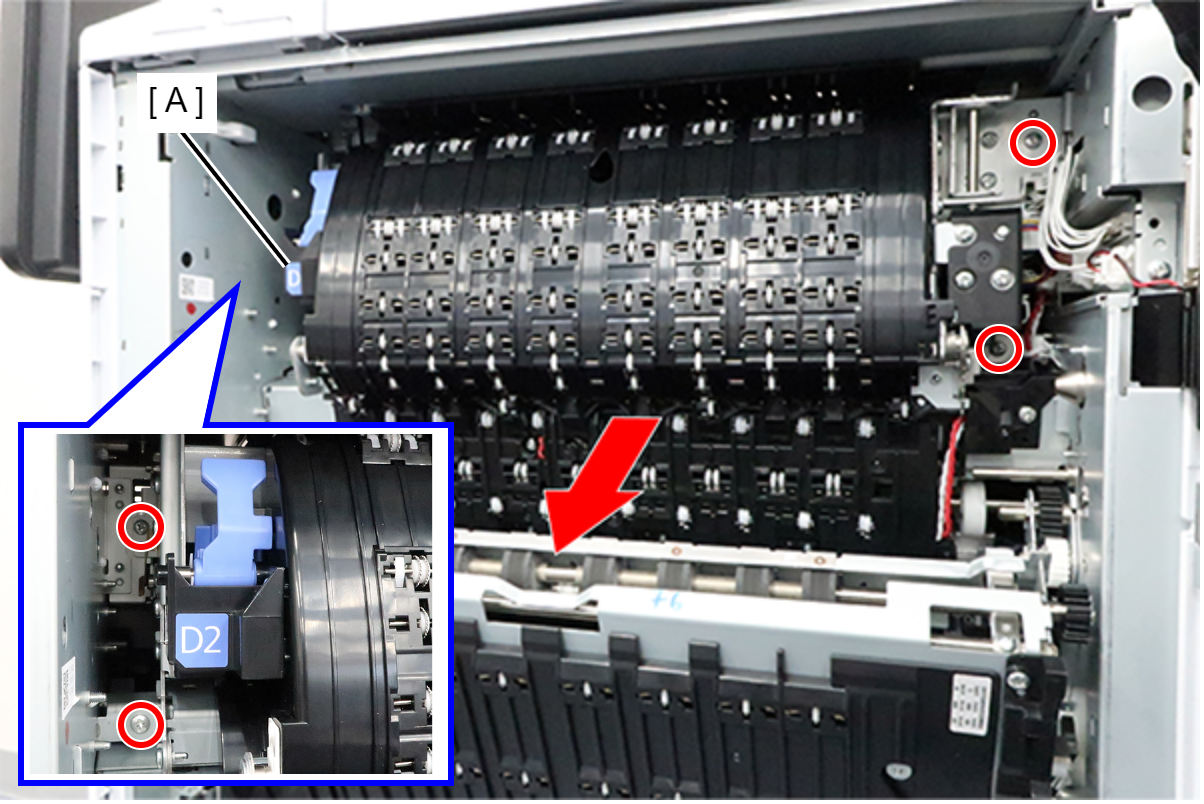
 : 3x8MAssembly / 組み立て
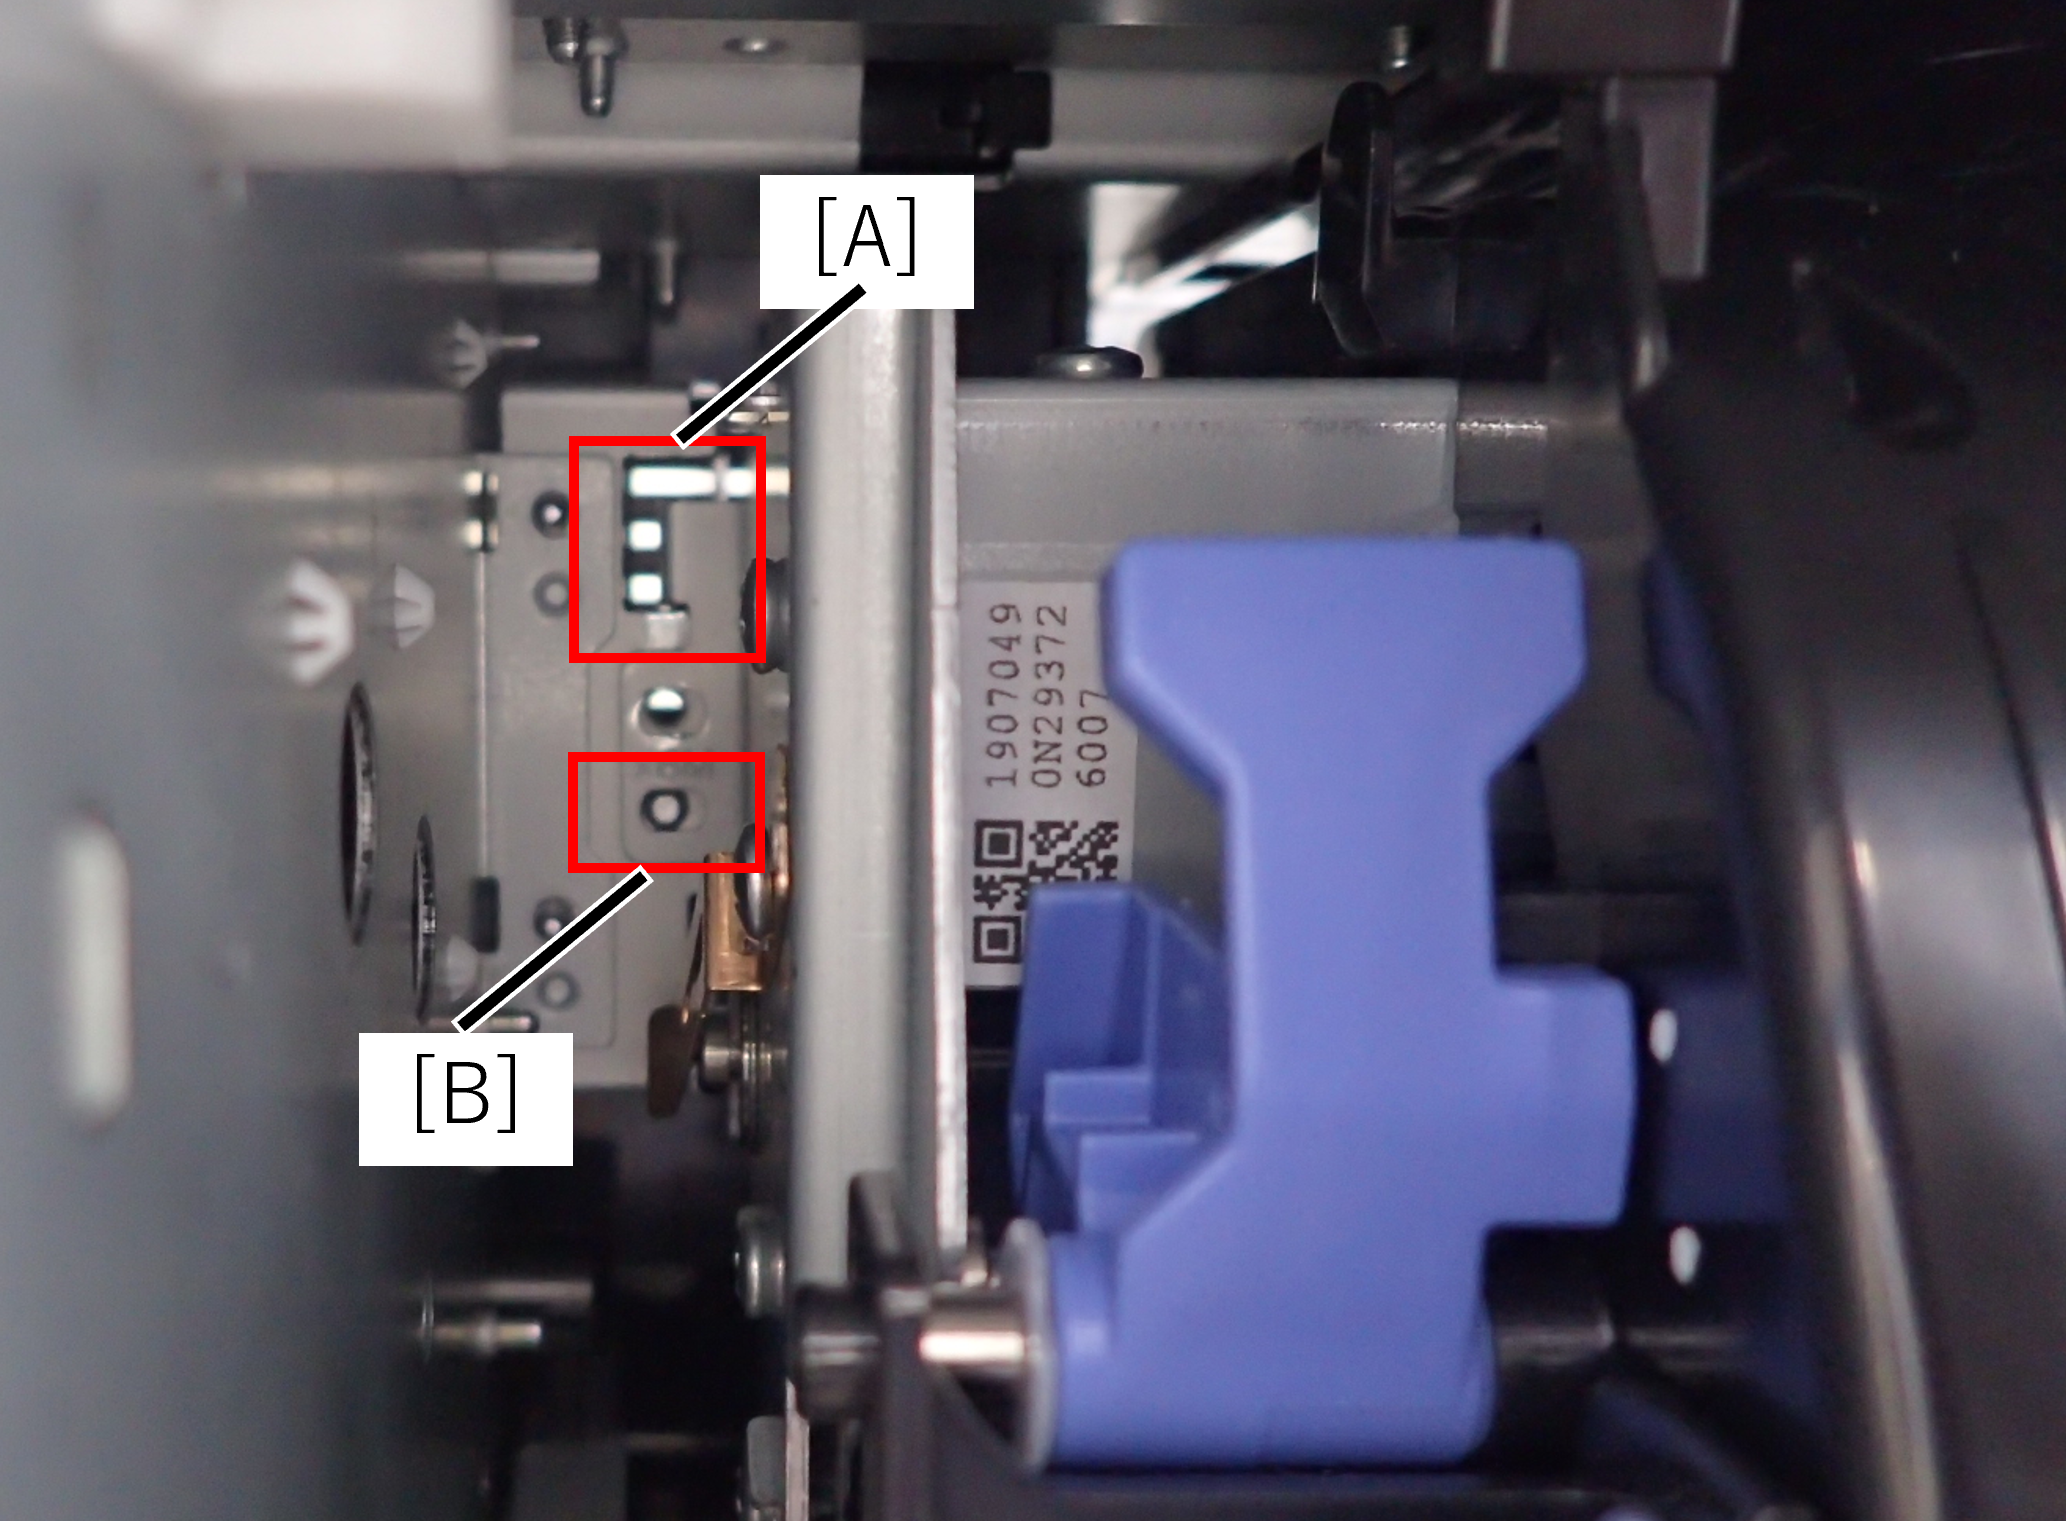
Make sure that the hook (A) on the left side of the EJ unit is hooked onto the metal plate on the main unit and that the dowel (B) is in the correct position.
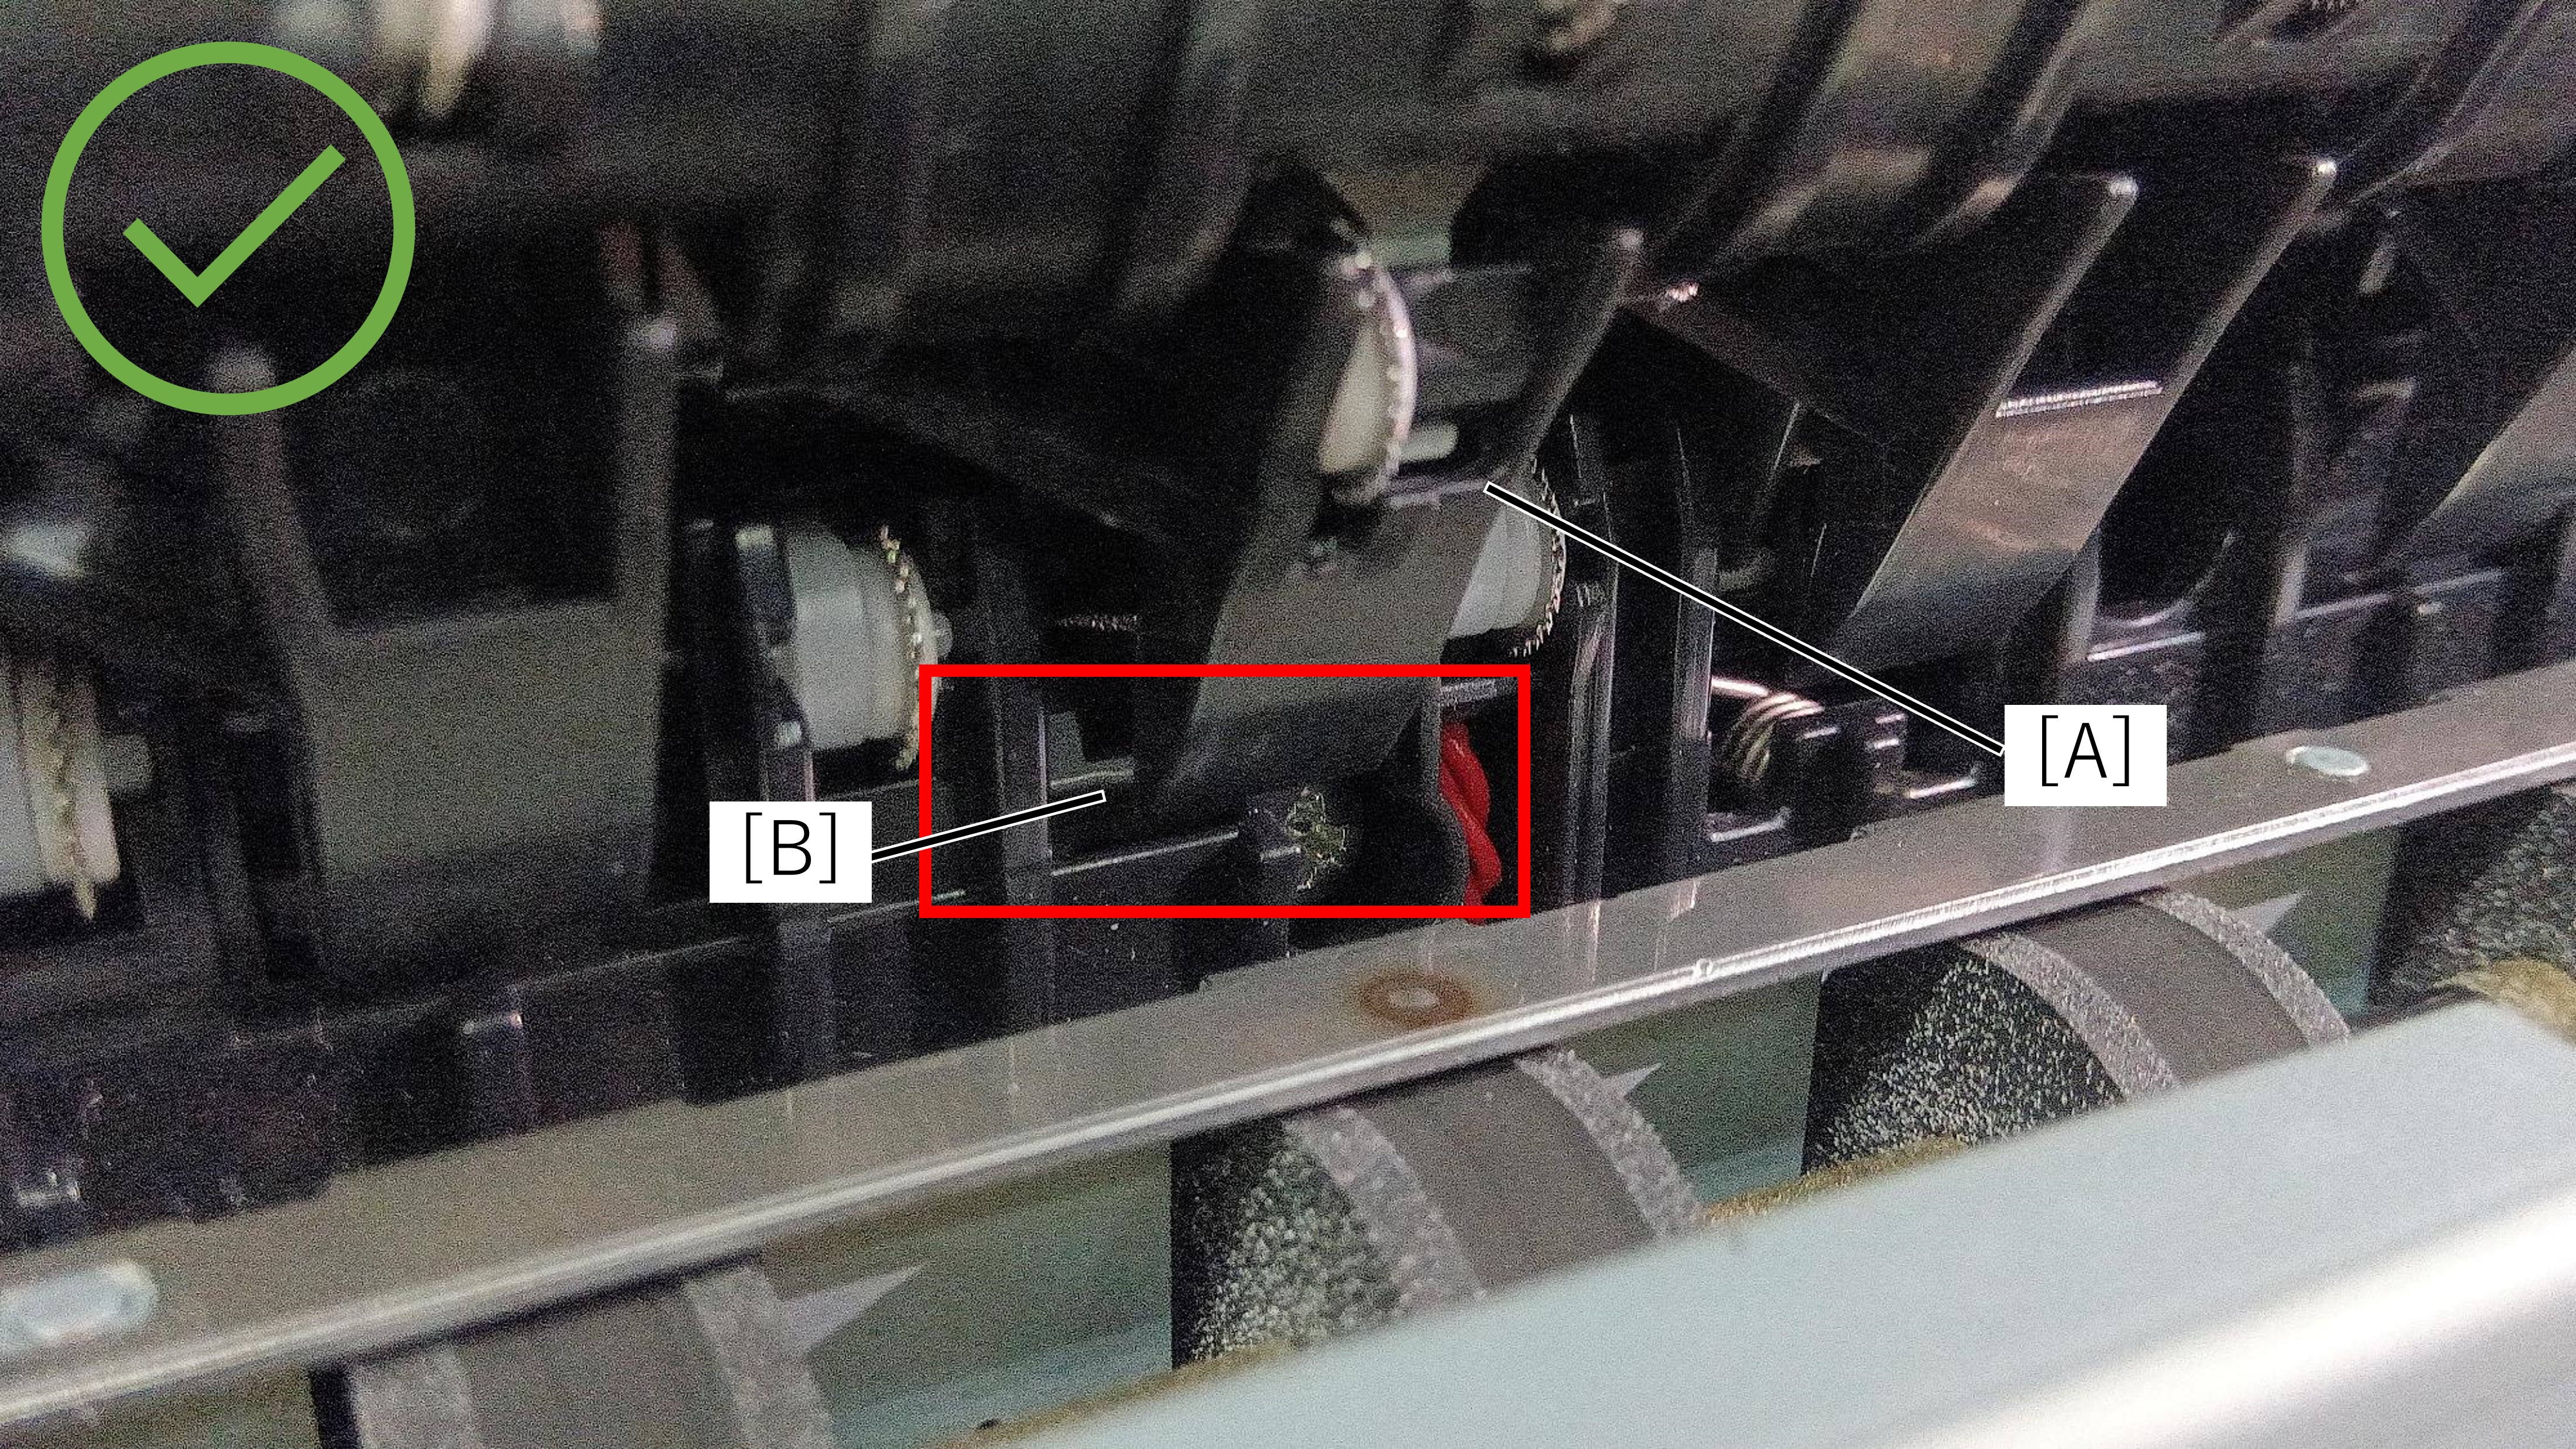
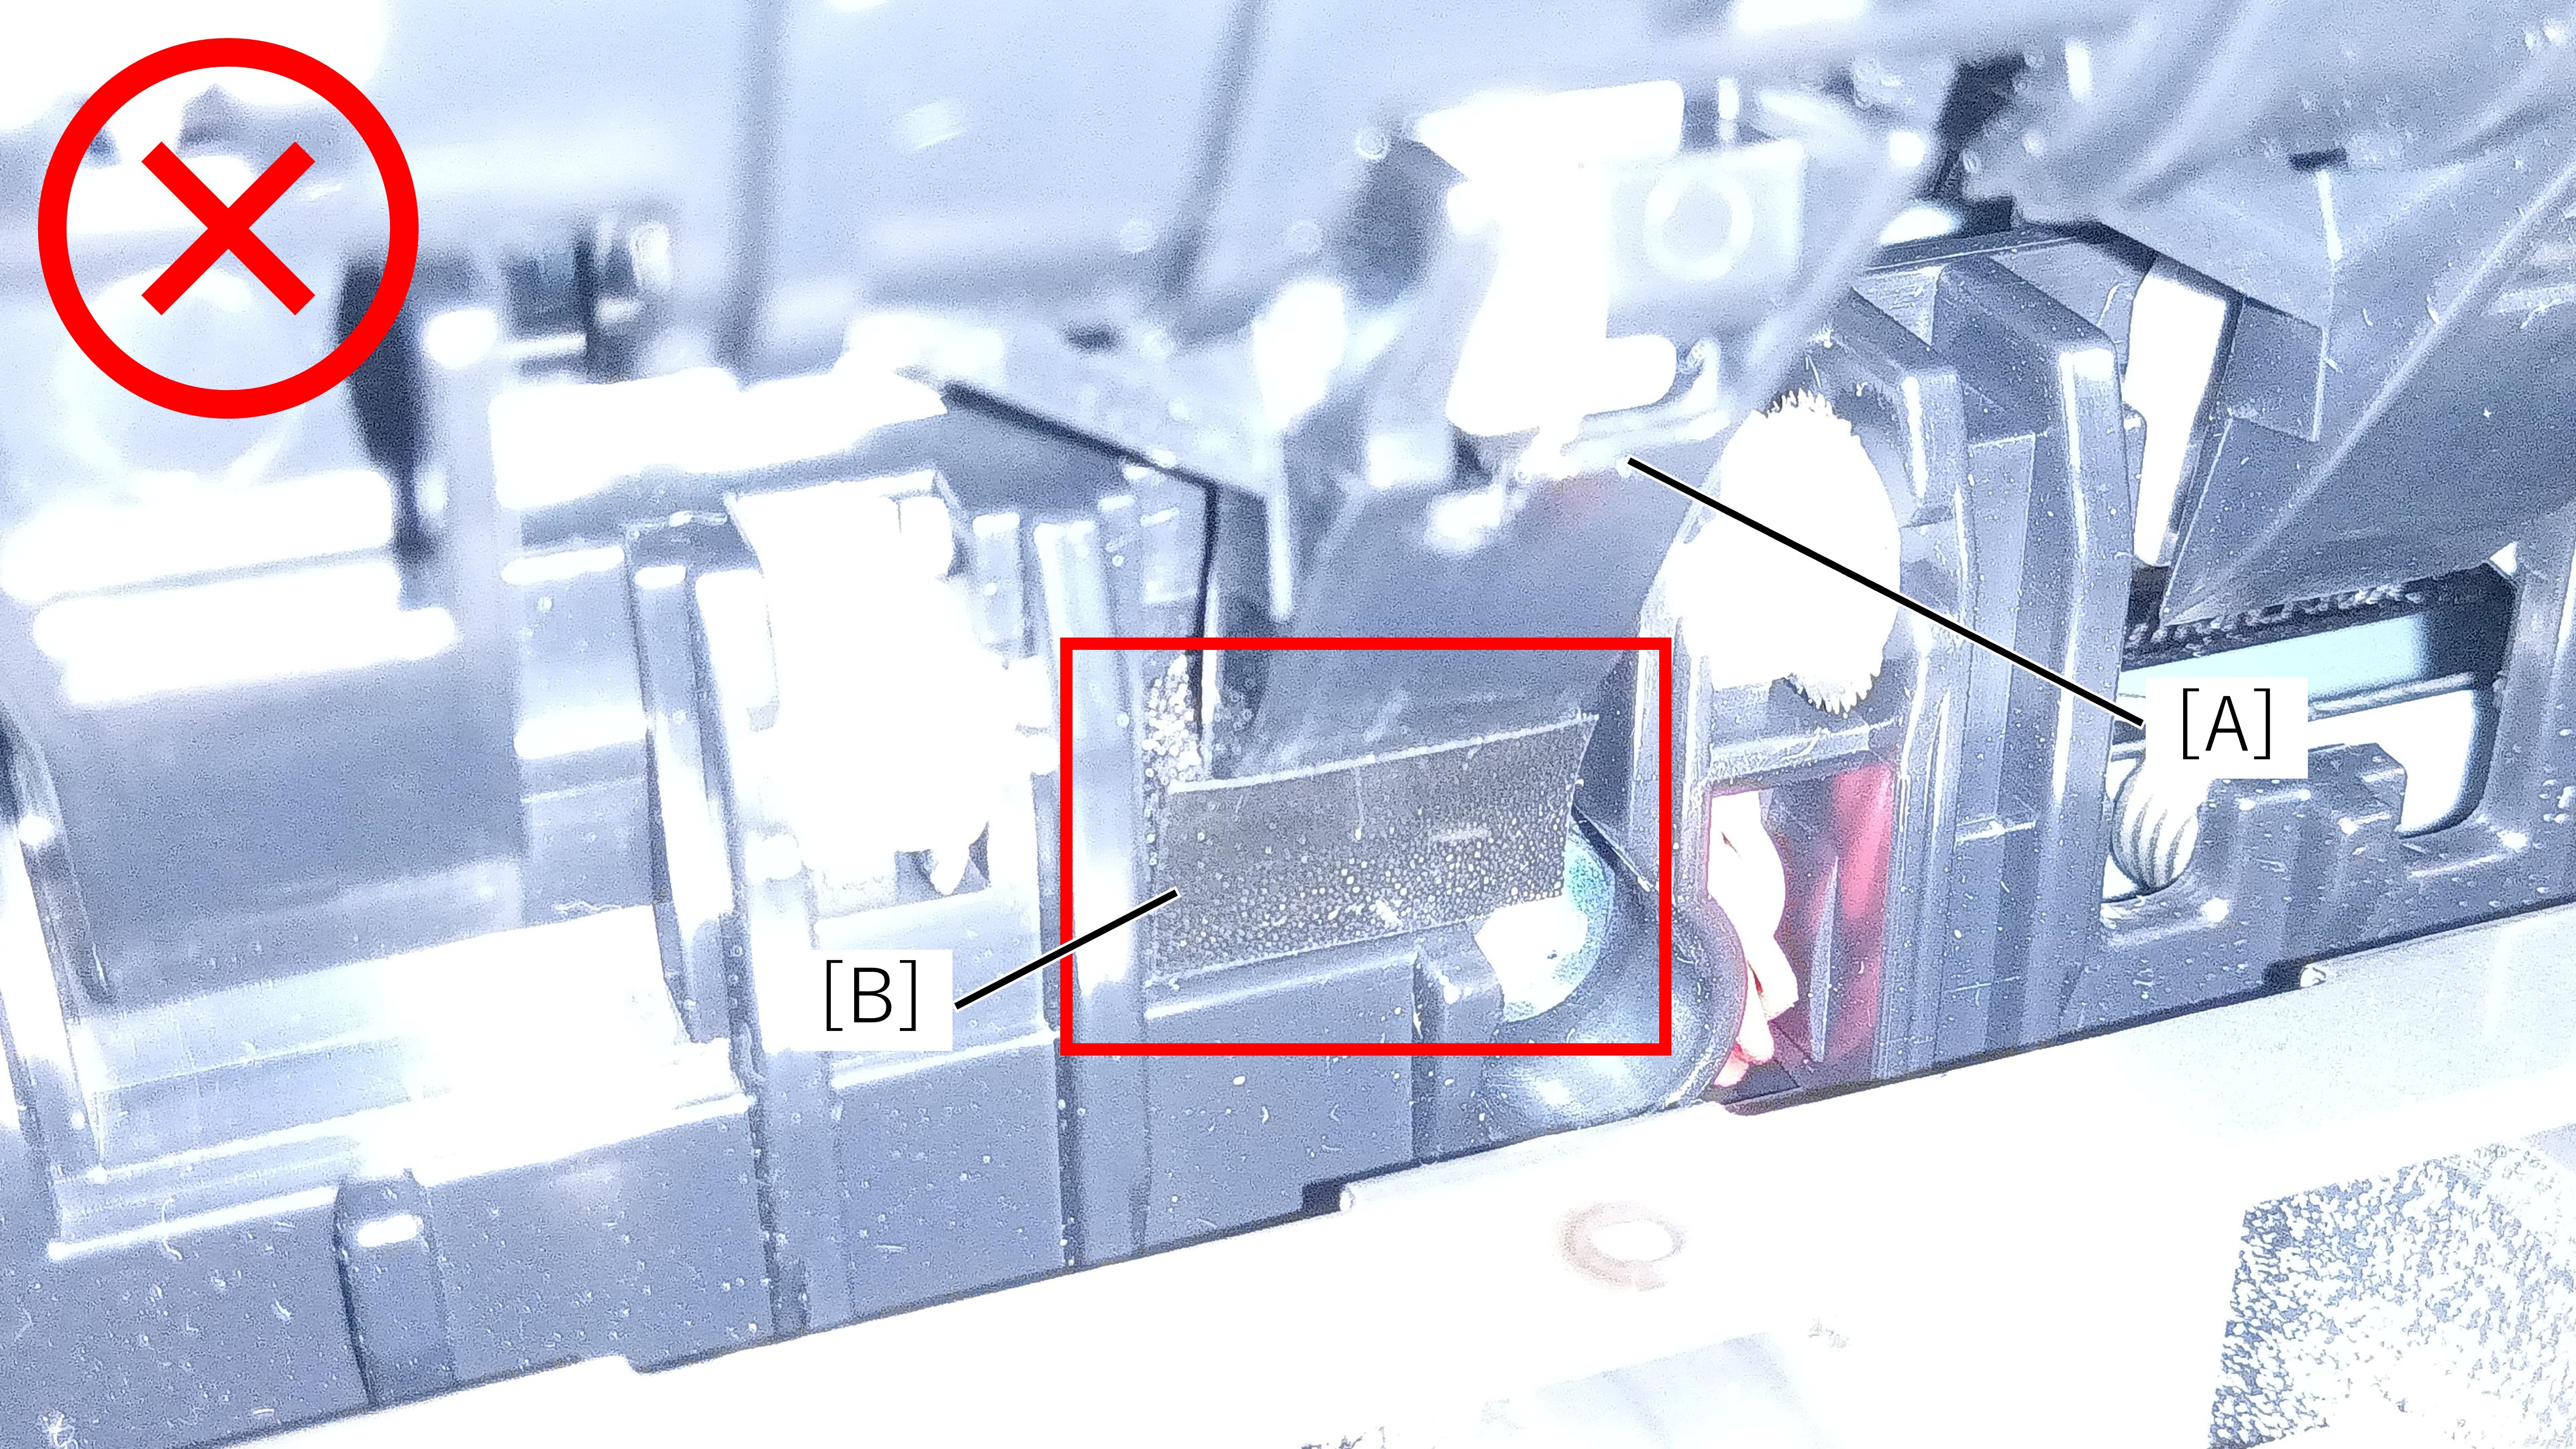
Make sure that the unit's simplex/duplex printing switching mechanism (A) is not stuck in the sponge (B).
 Note / 補足
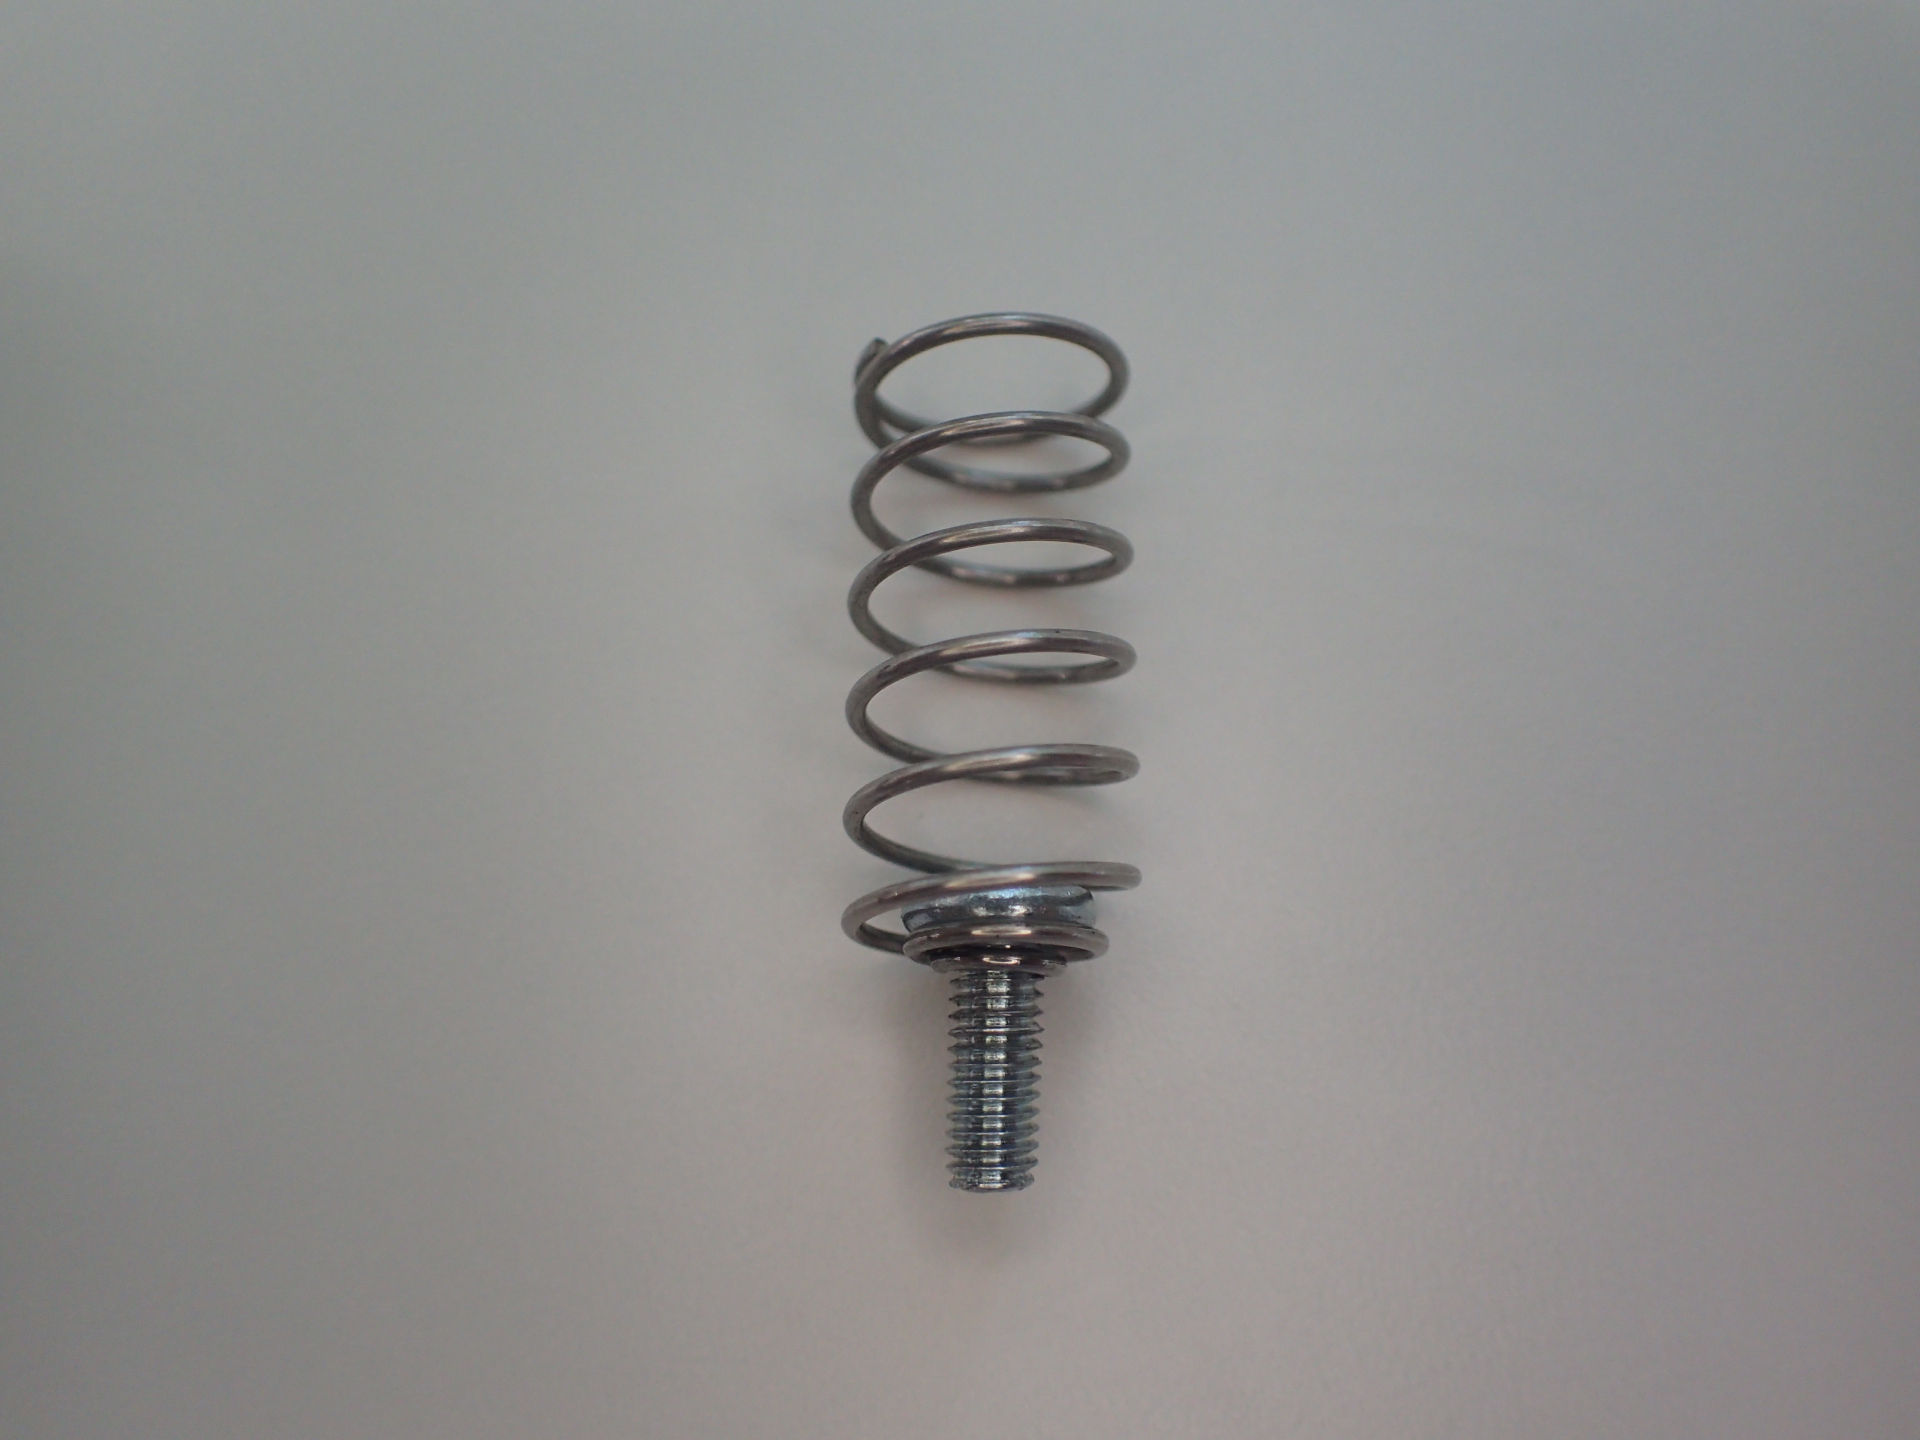
- The 4 screws holding the EJ unit Assy are tightened together with a spring to prevent it from falling into the printer.