
Cap Drive Motor Encoder
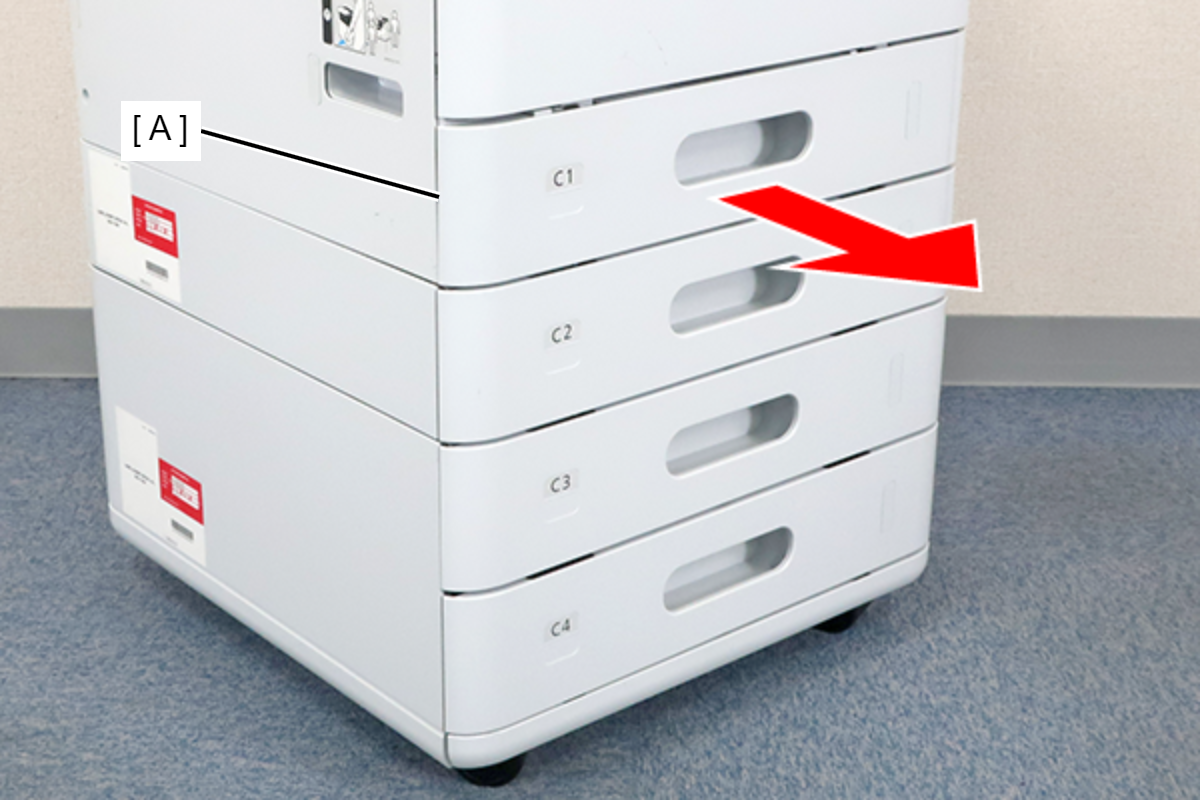
- Remove the C1 cassette (A).
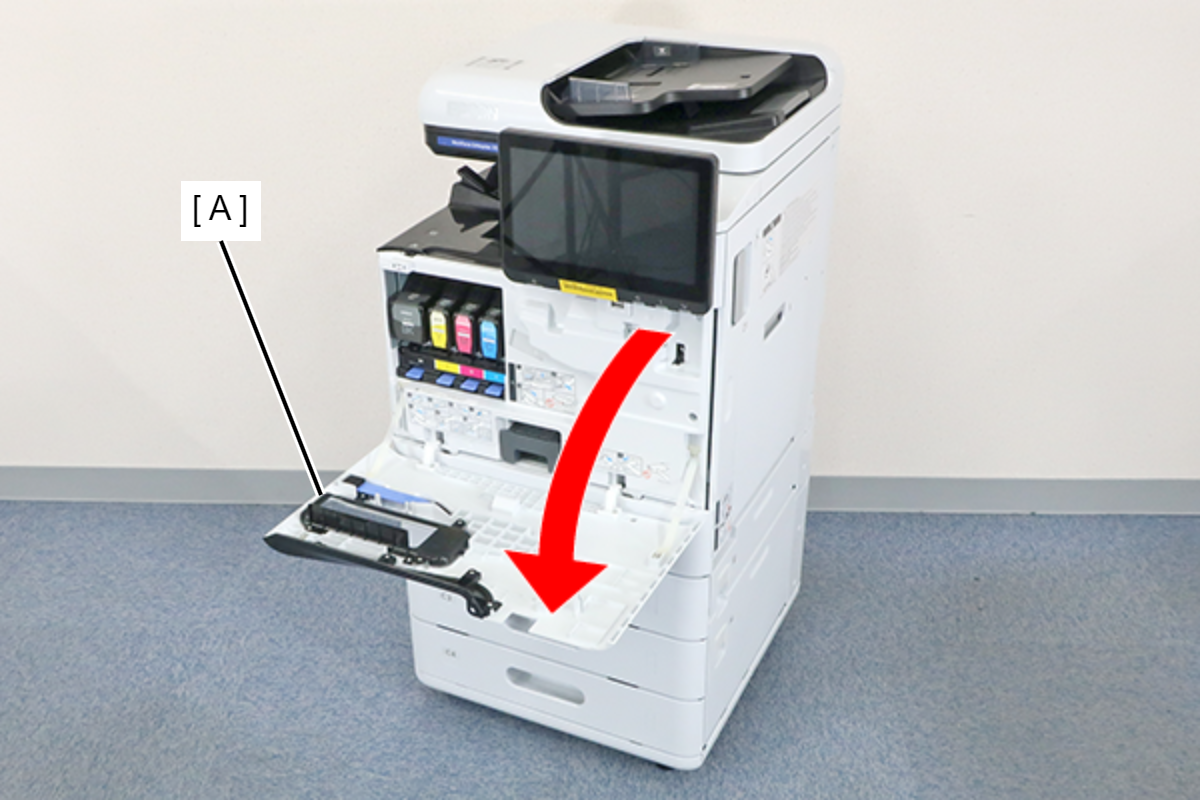
- Open the Front Cover (A).
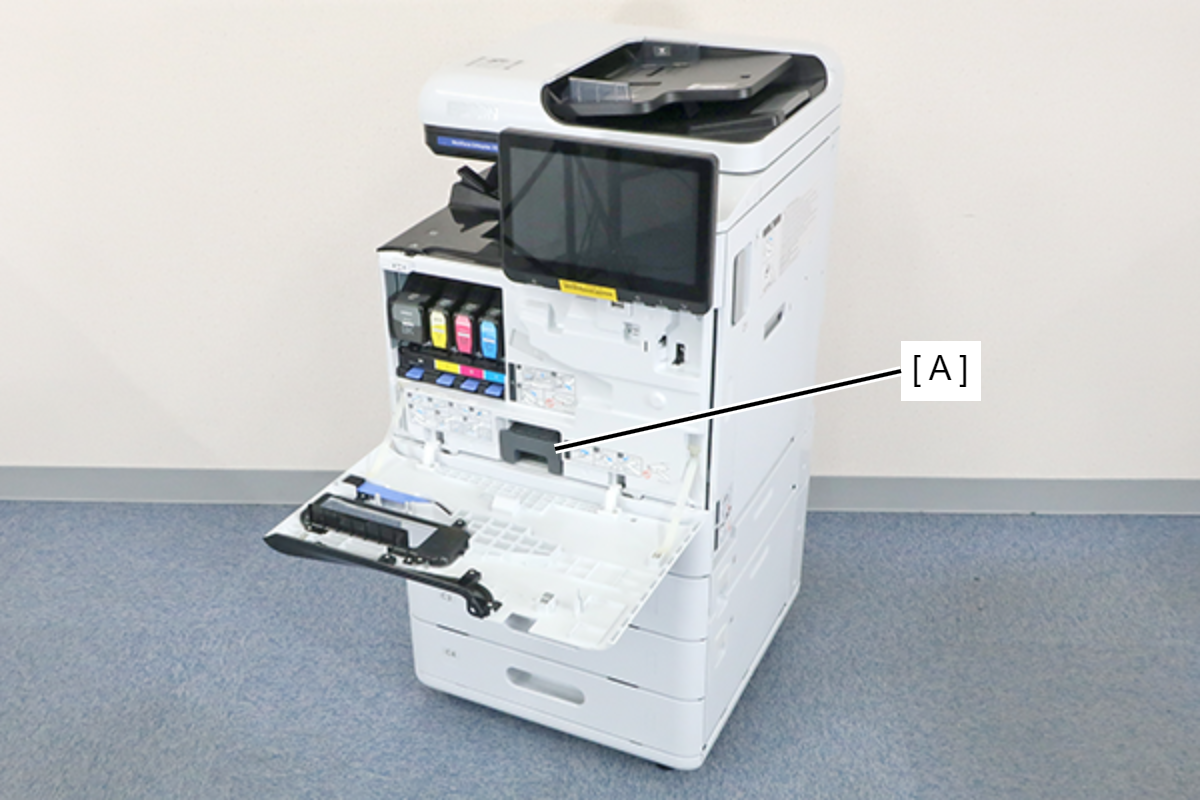
- Remove the Maintenance Box (A).
- Remove the 7 screws and remove the Front Inner Cover (A).
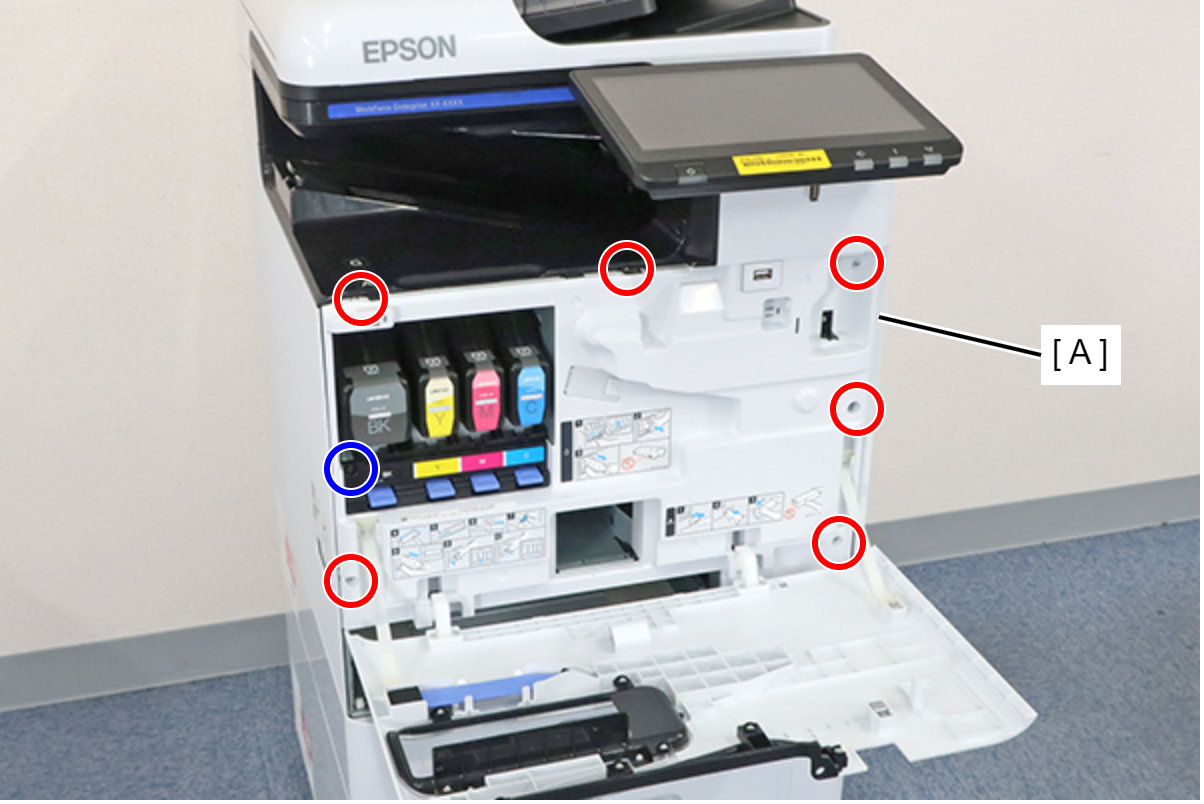
 : 3x8D
 : 3x8D/BK
 Assembly / 組み立て
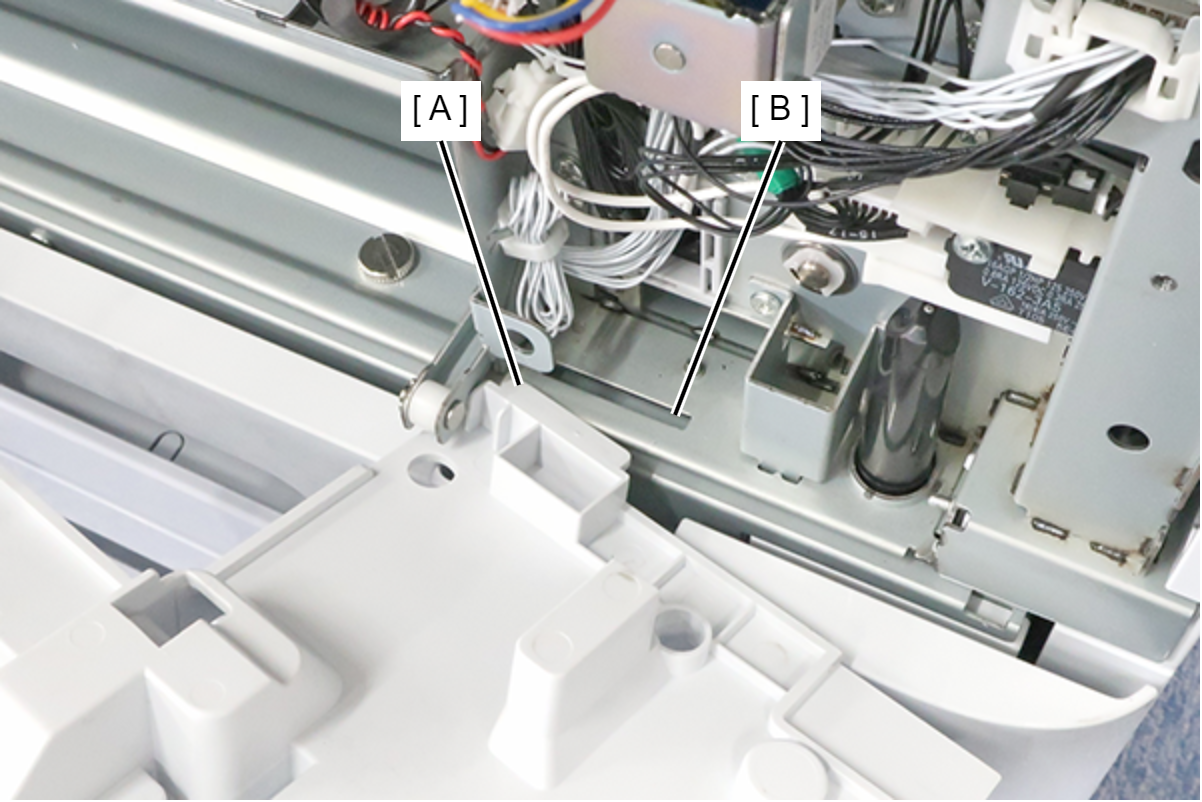
Insert the protrusion (A) of the Front Inner Cover into the hole (B) of the main unit and install.
 Note / 補足
If the wireless LAN unit (A) is installed, remove it.

- Remove the cap transport parts (B) attached to the right door unit (A).
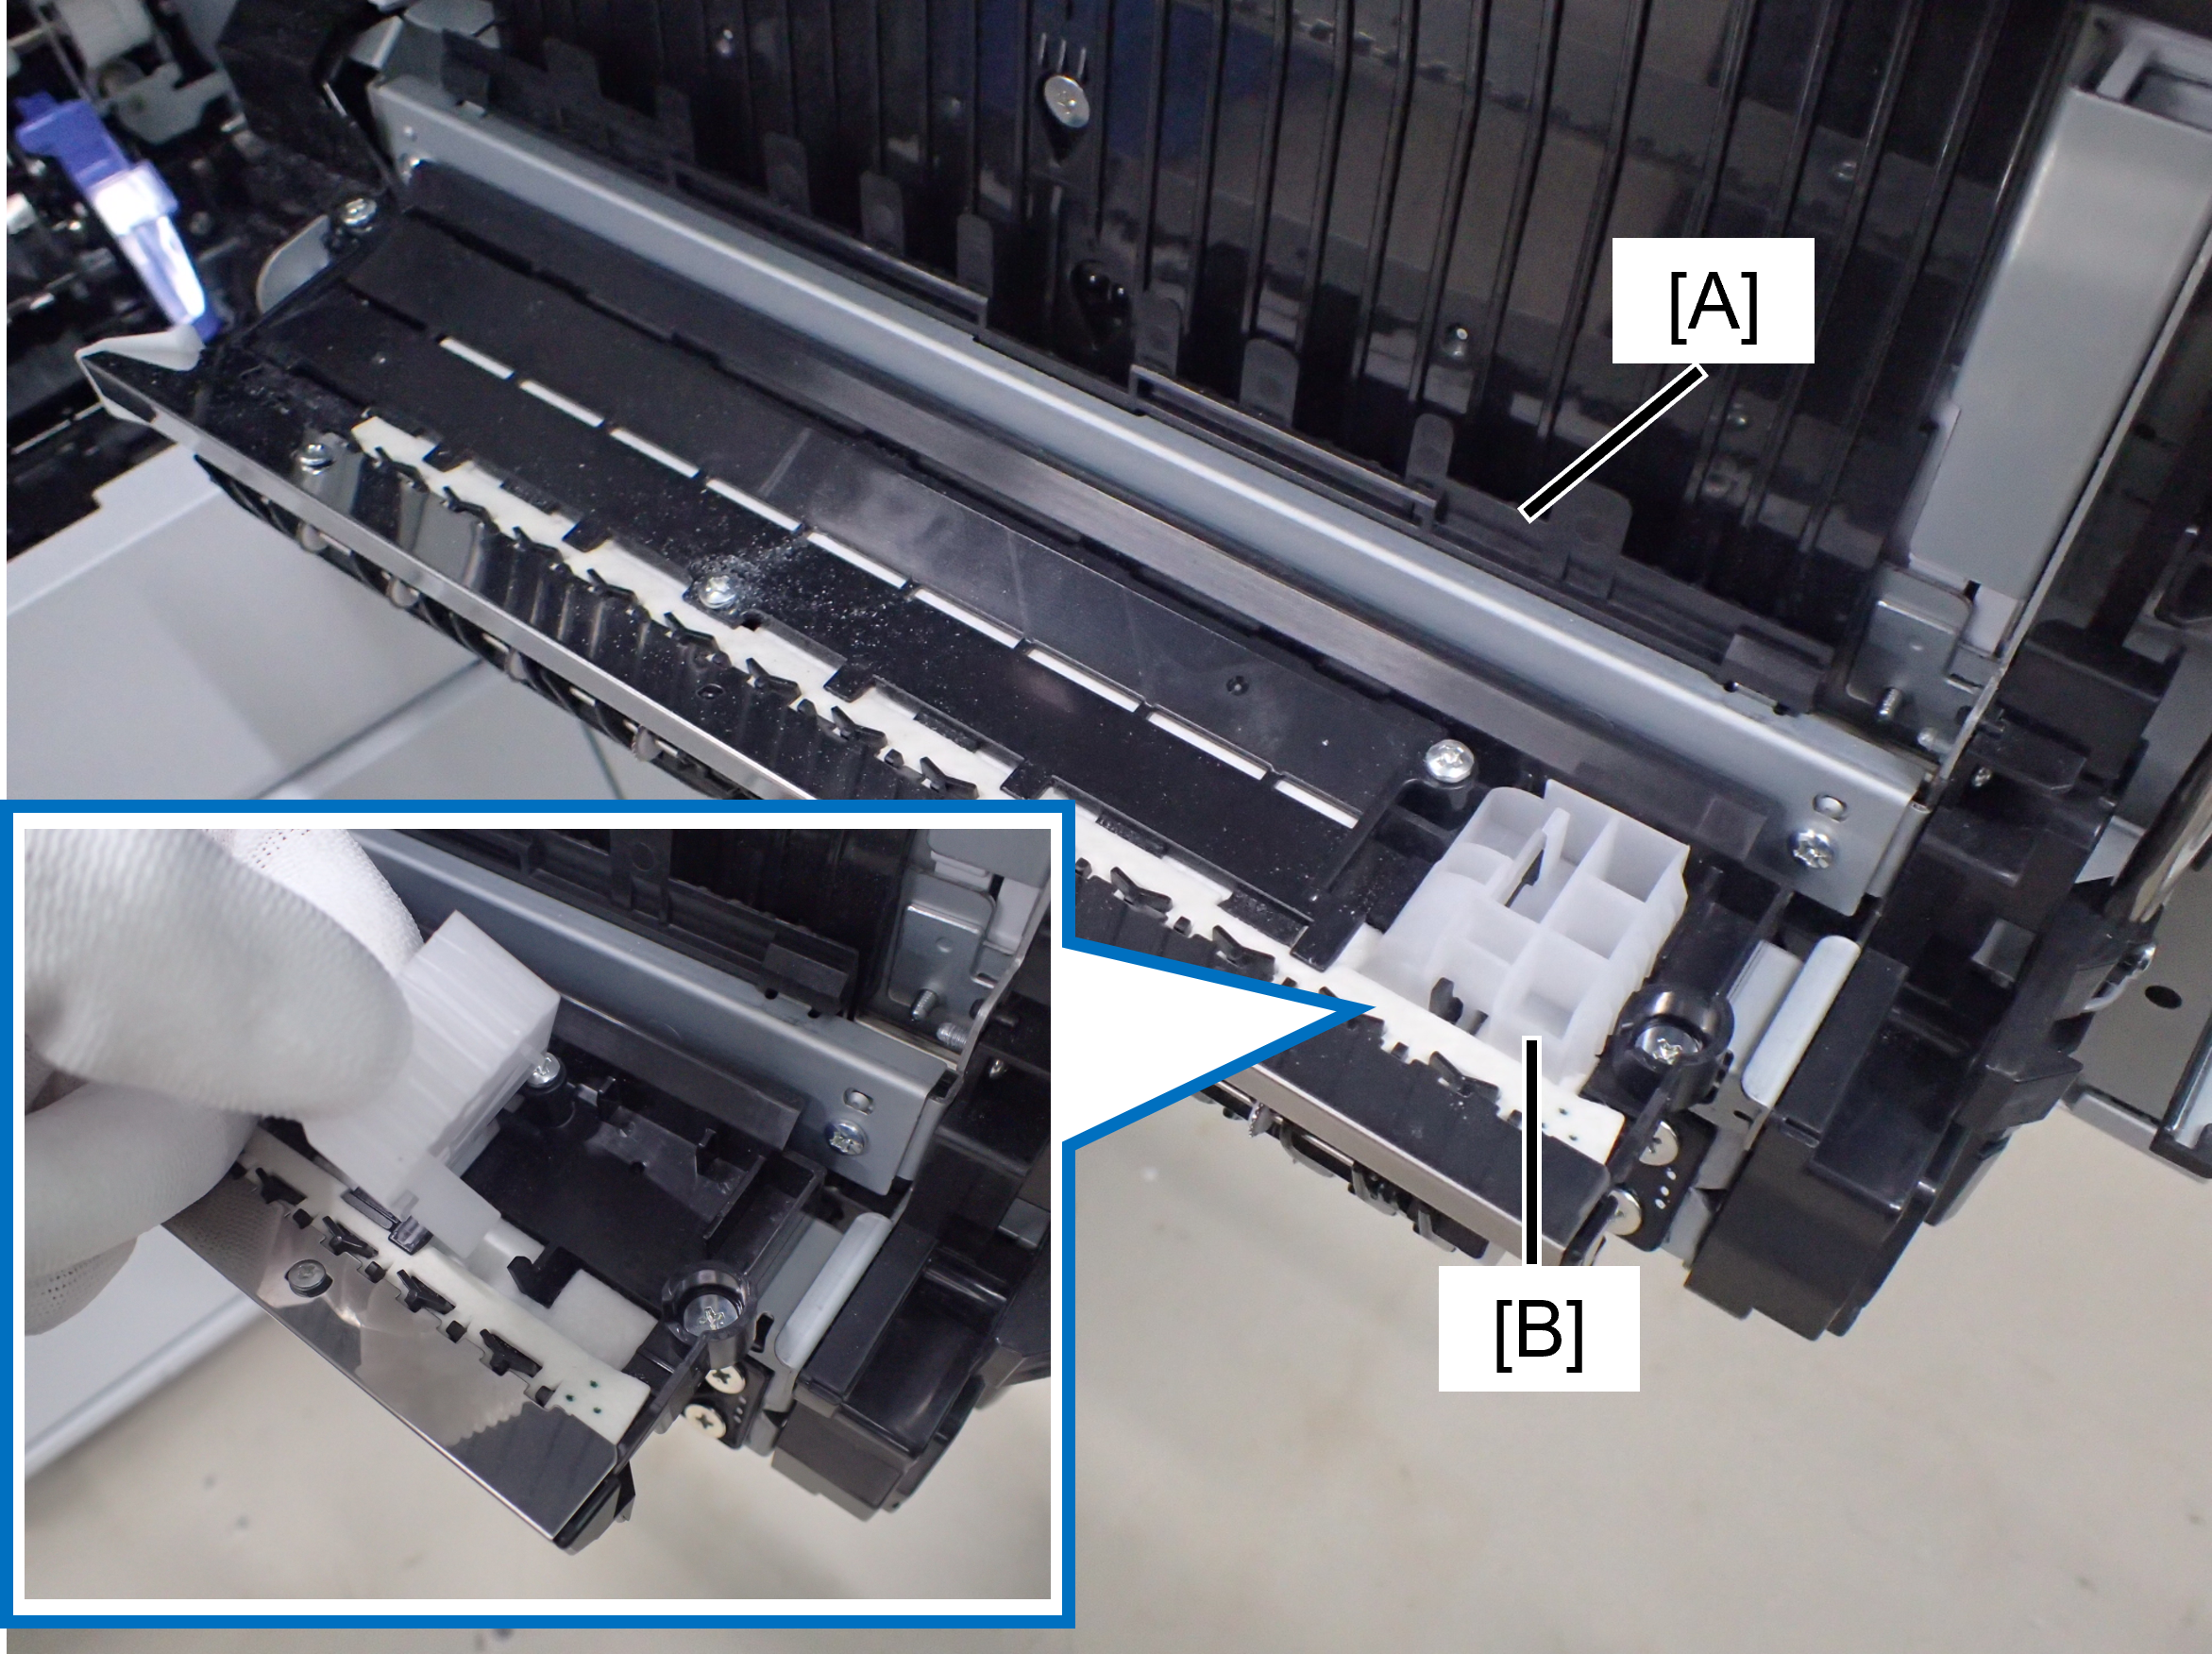
- Open the belt unit, insert the cap transportation part (B) into position.
Refer to Protecting the products to avoid damages while transporting for the insertion method.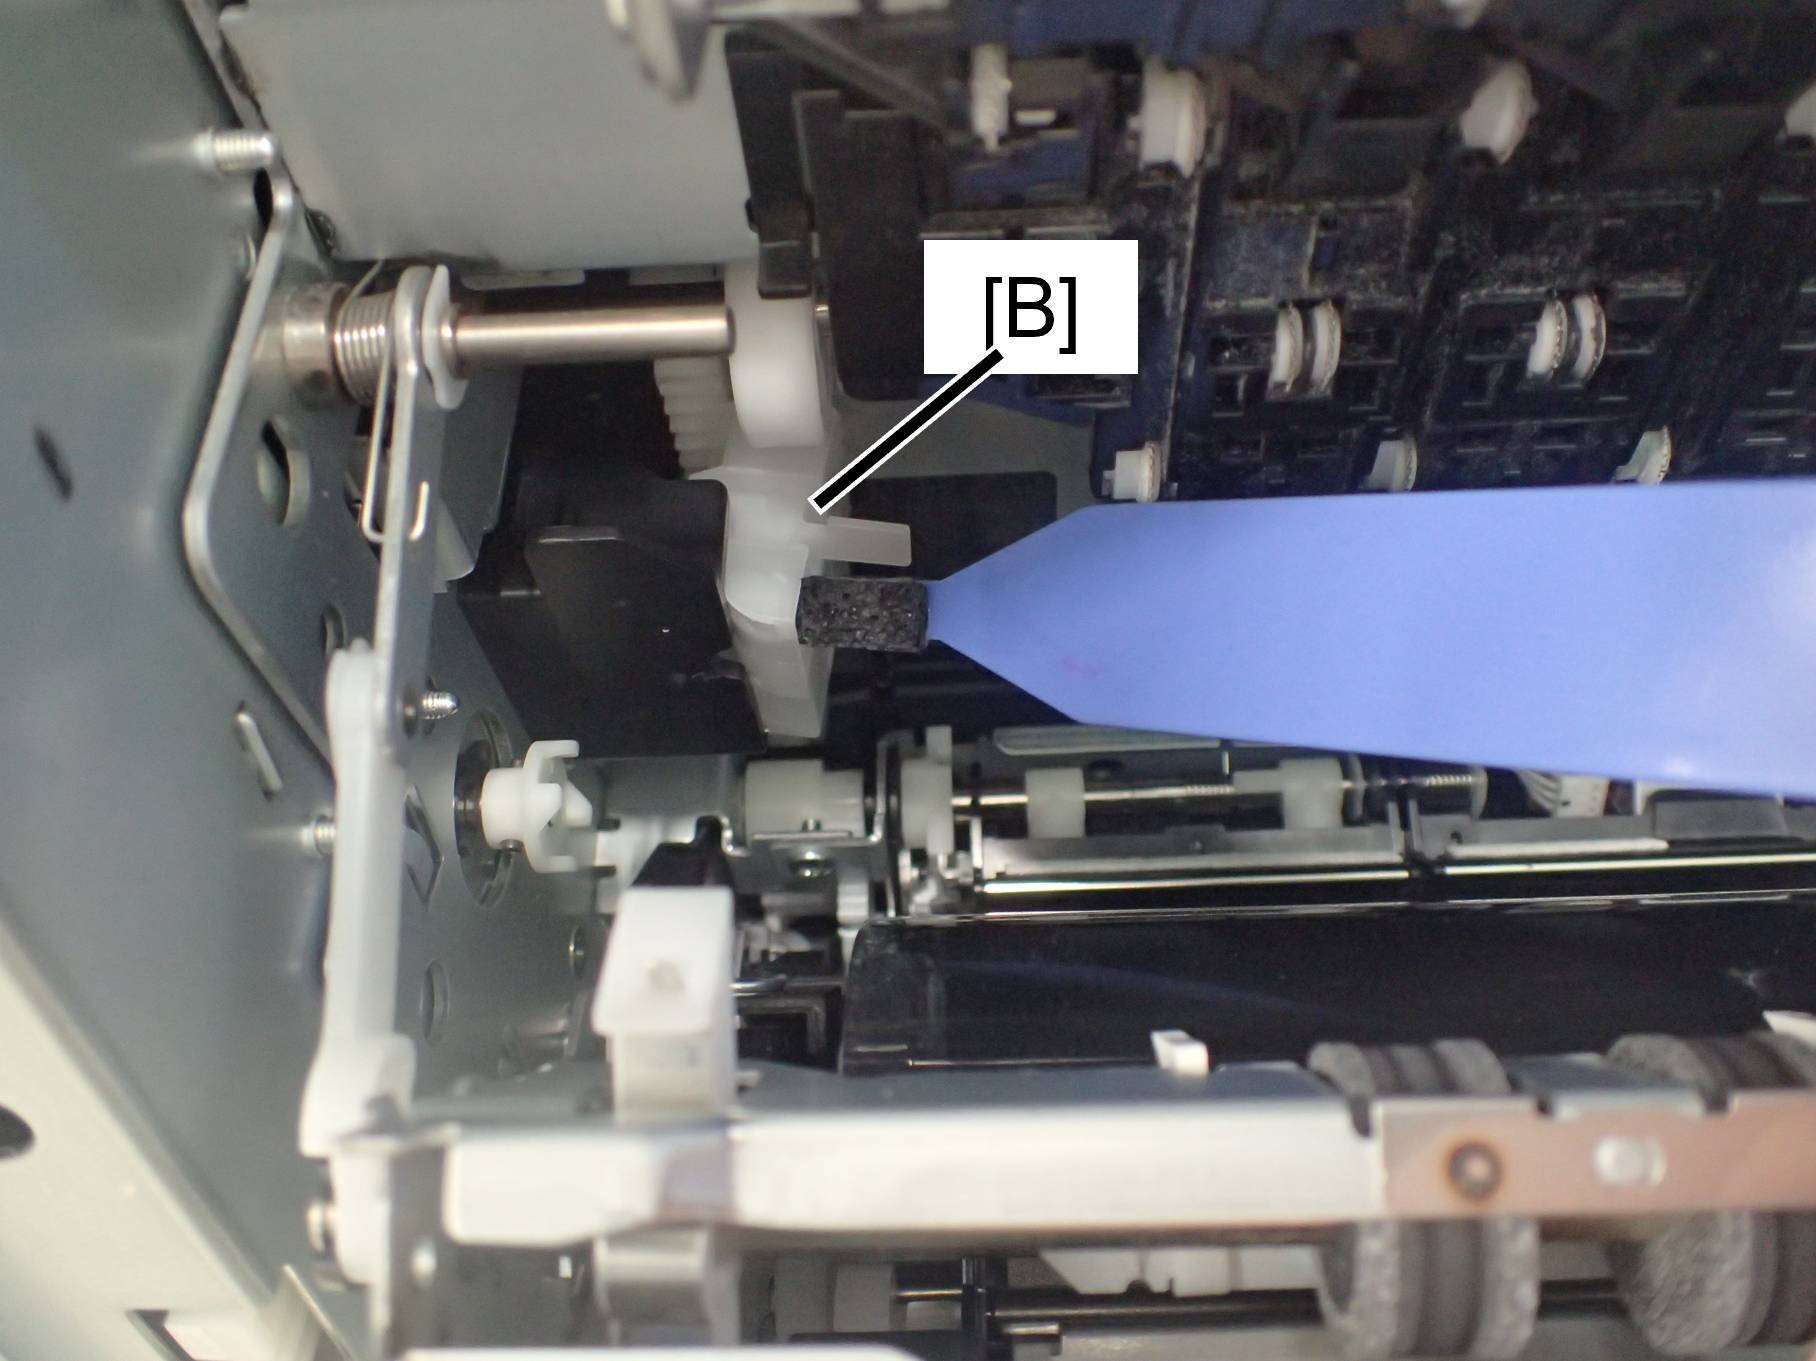
 Caution / 注意
- If you remove the cap lifting motor without attaching the cap transportation parts, the cap motion may fall and be damaged, so be sure to attach it.
- Remove the 3 screws for secure the cap lifting motor Assy (B).
- Remove the cable from the relay connector (A), and remove the 3 screws fixing the Cap Lifting Motor Assy (B).
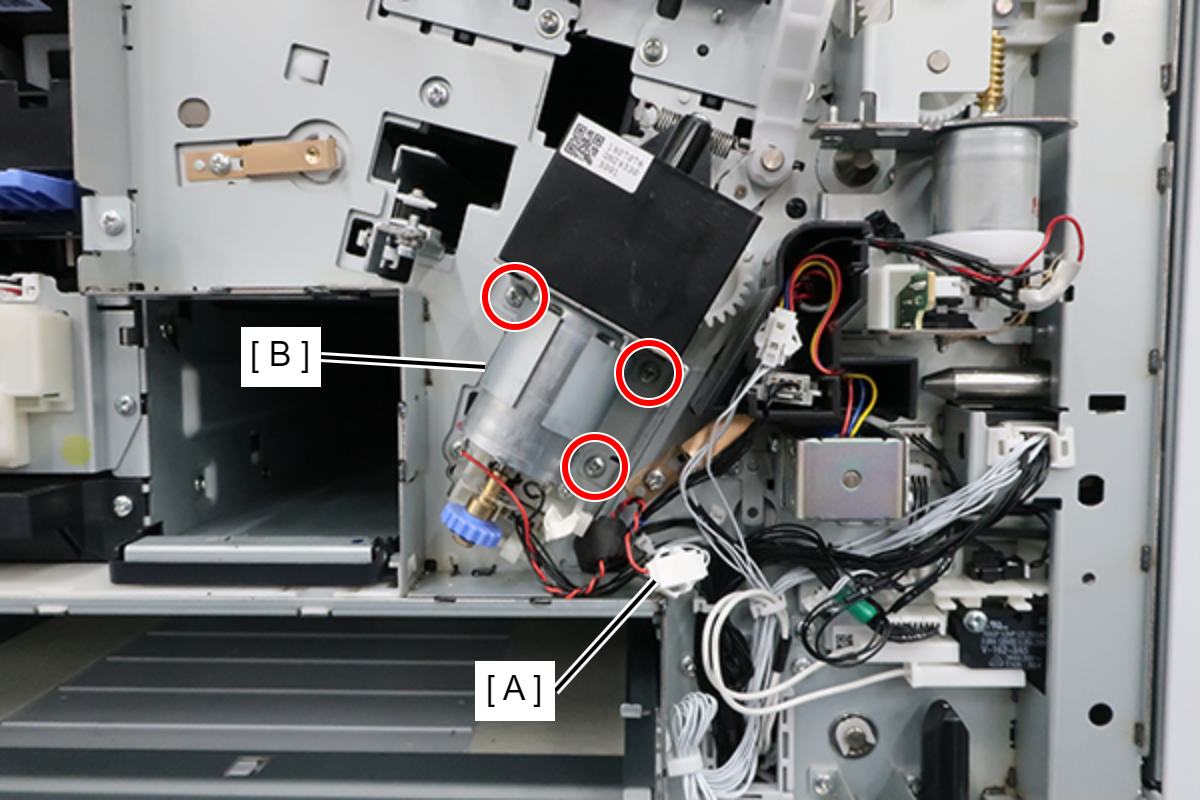
 : 3x8D
Pull the Cap Lifting Motor Assy (A) forward.
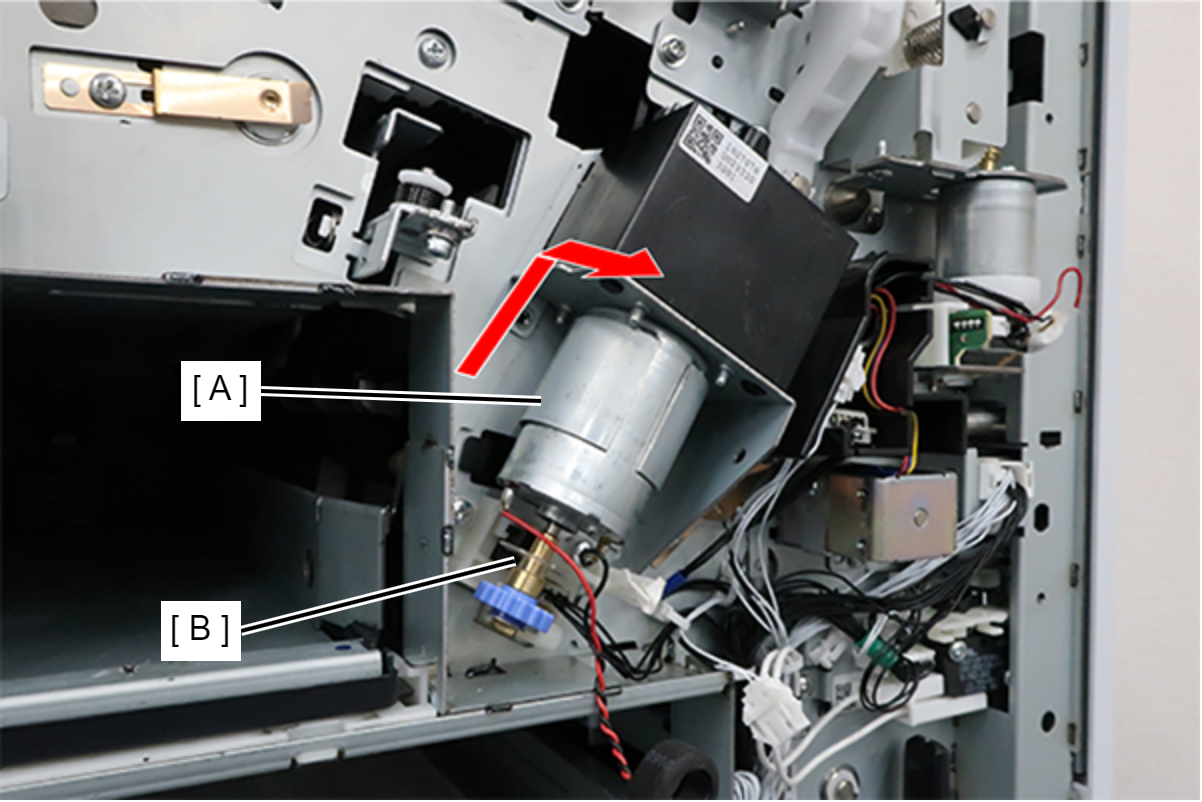
- Remove the Cap Lifting Motor Assy (A) in the direction of the arrow while avoiding the sensor so as not to damage the scale (B).
 Assembly / 組み立て
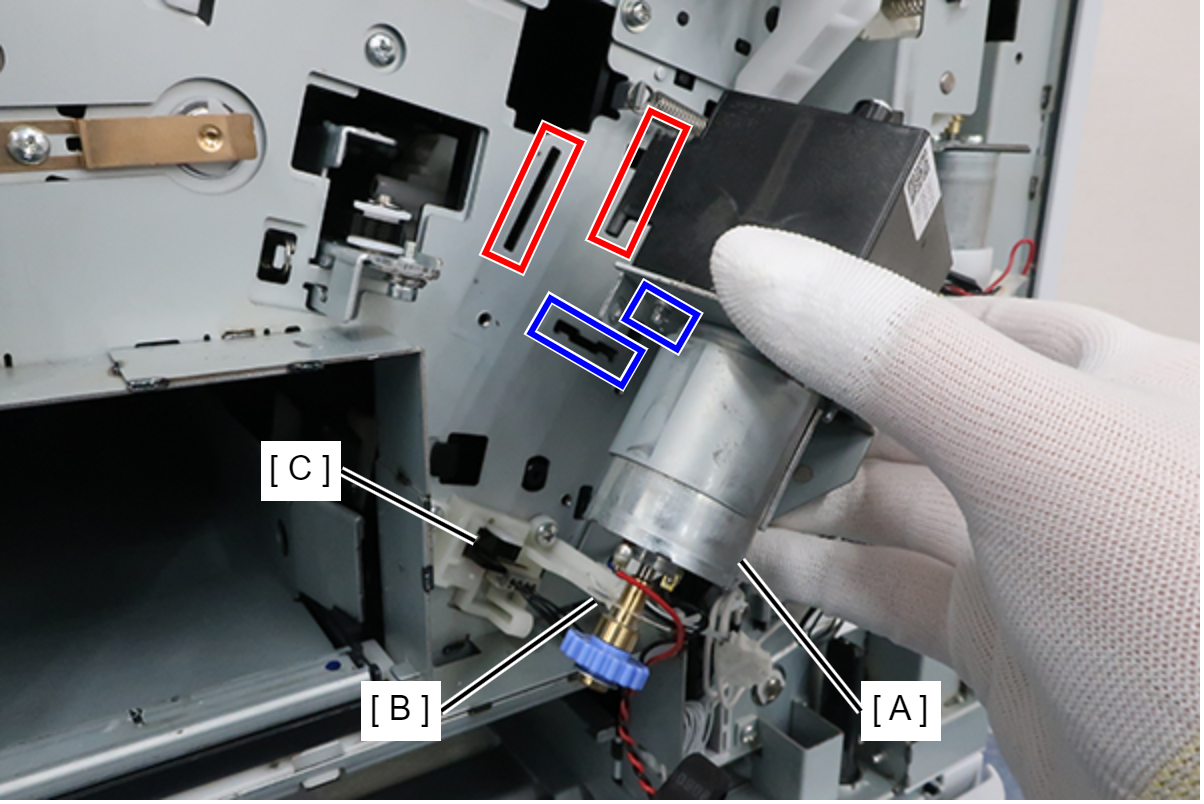
- When installing the Cap Lifting Motor Assy (A), align the hooks with the cutouts on the main unit, and install so that the scale (B) does not contact the sensor (C).
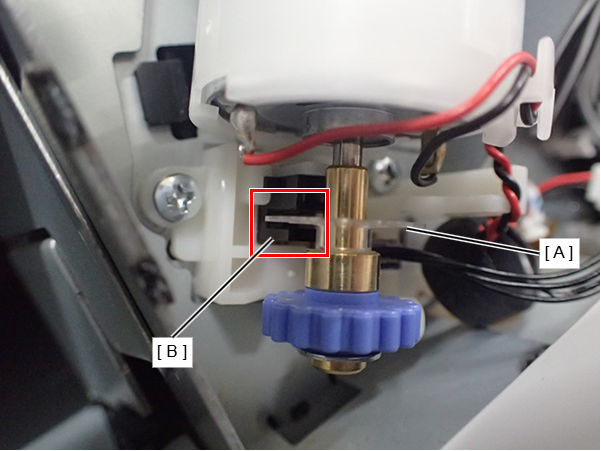
- After installing the Cap Lifting Motor Assy, make sure that the scale (A) does not interfere with the sensor part (B) of the encoder.
- When installing the Cap Lifting Motor Assy (A), align the hooks with the cutouts on the main unit, and install so that the scale (B) does not contact the sensor (C).
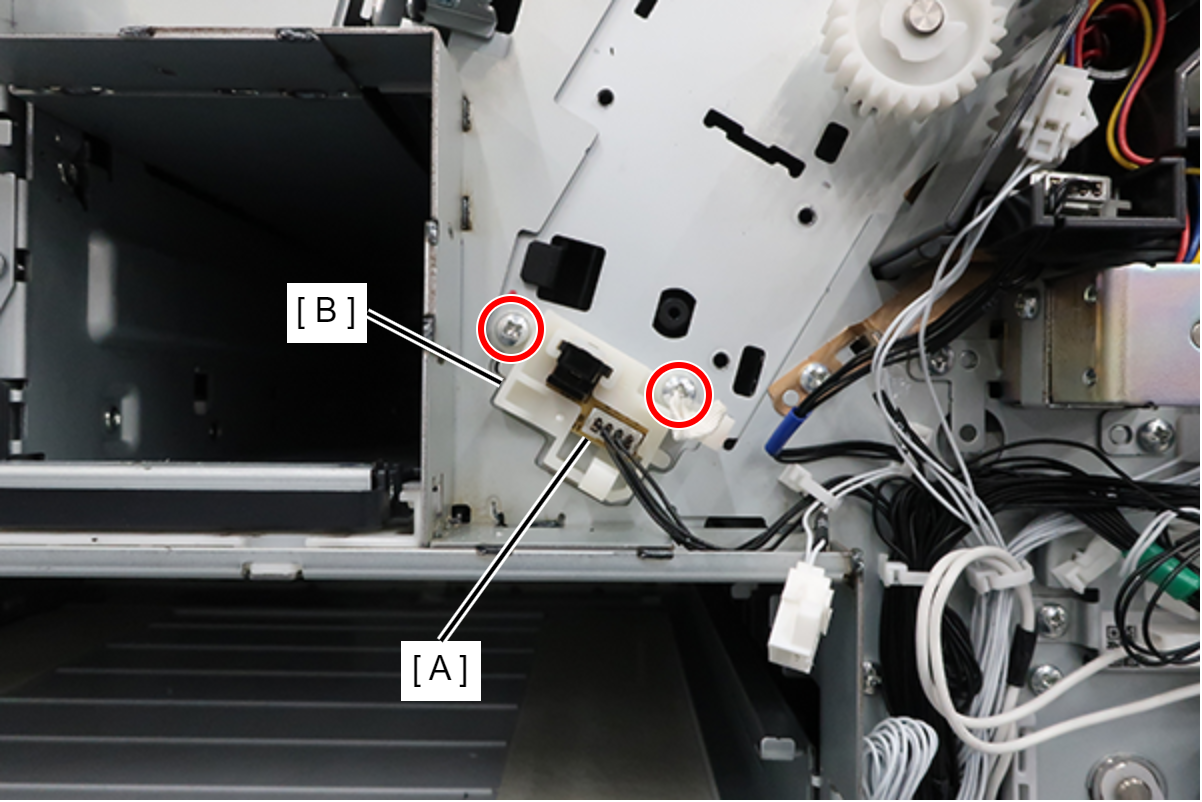
- Remove 2 screws and remove the Cap Drive Motor Encoder (A).
- Remove the cable from the connector (B), remove the Cap Drive Motor Encoder (A).
 : 3x8D
Assembly / 組み立て- When connecting the cable, hold the Encoder by hand as shown below to prevent it from coming off.
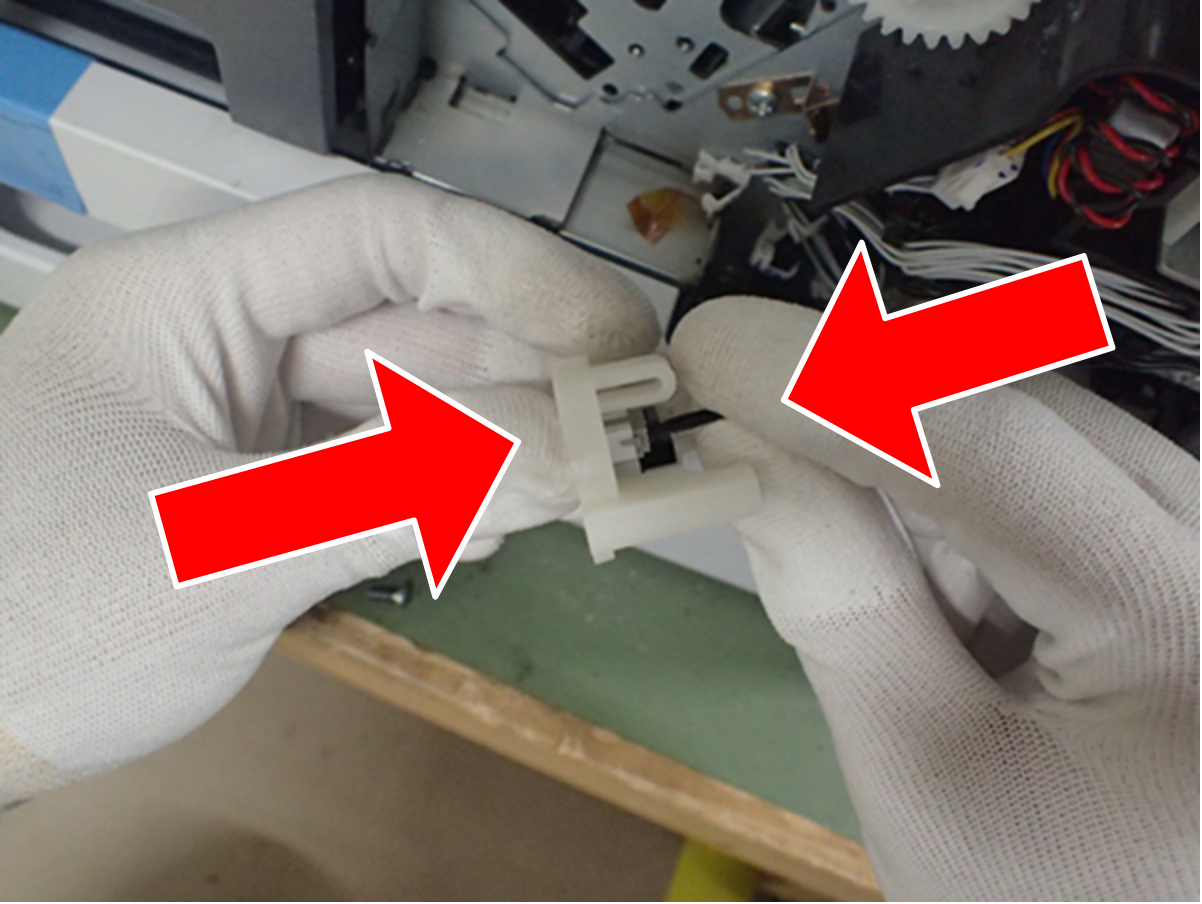
- After connecting the cable, check that the Encoder (A) is secured with the hook of the holder, referring to the figures below.
- OK
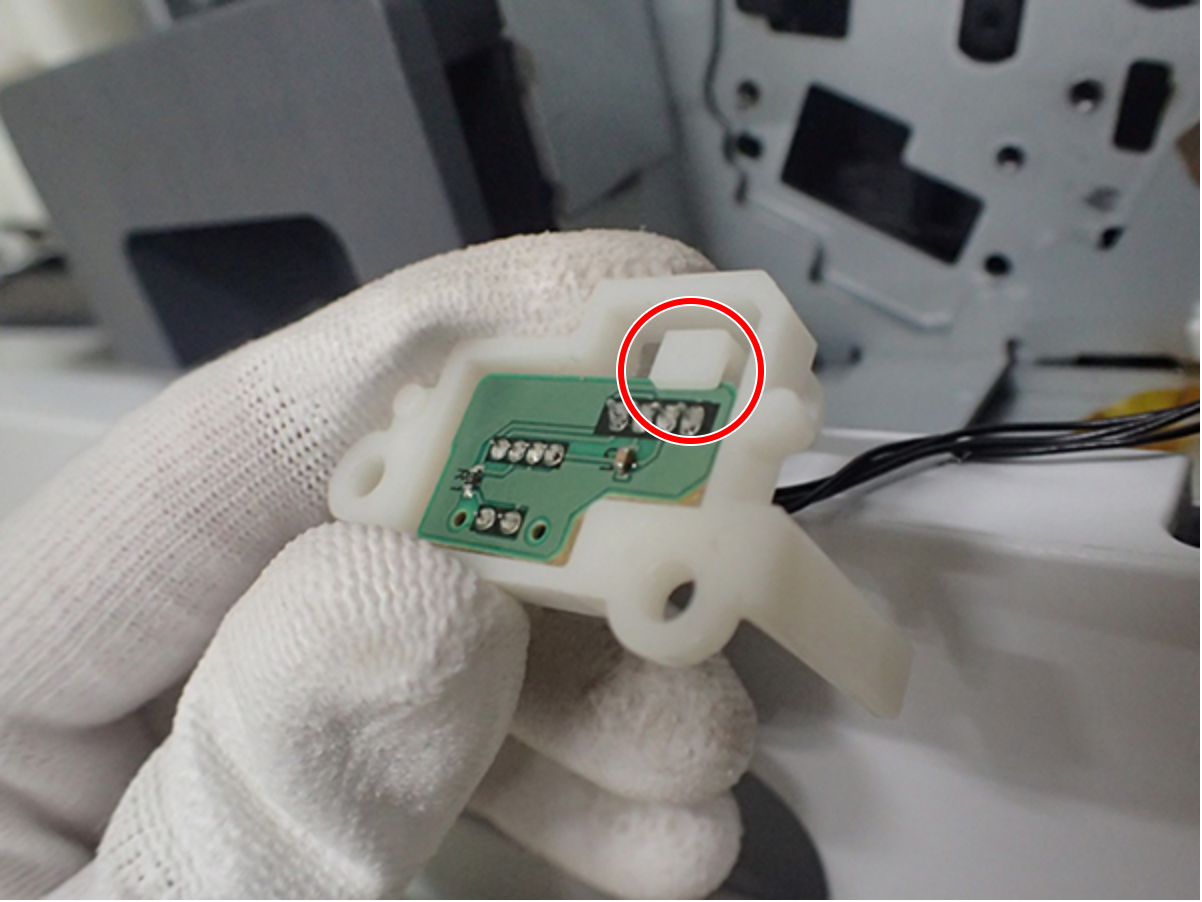
- NG
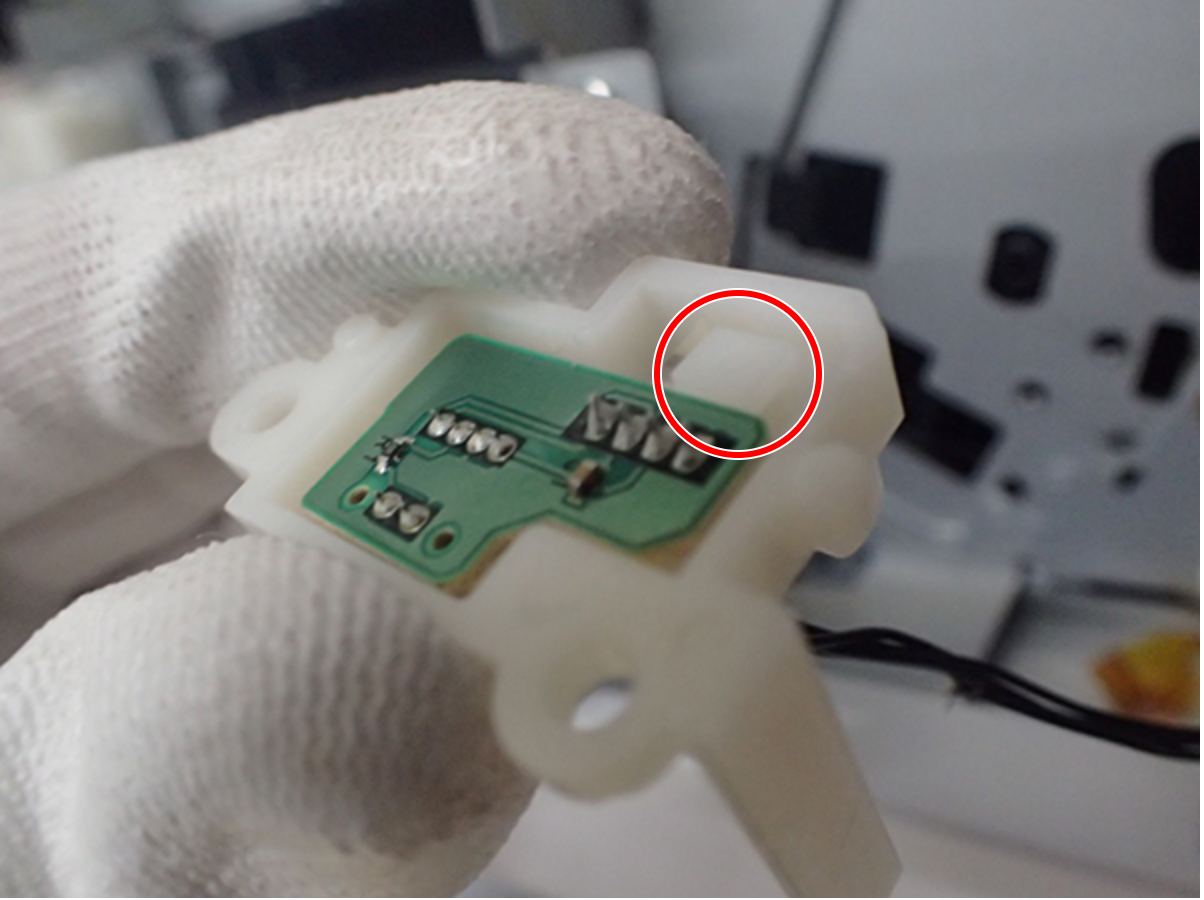
- OK