
MCU Board
 Check Point / チェックポイント Check Point / チェックポイント |
Be sure to perform a FW update after replacing parts. |
- Remove the 3 screws and remove the Right Cover (A).
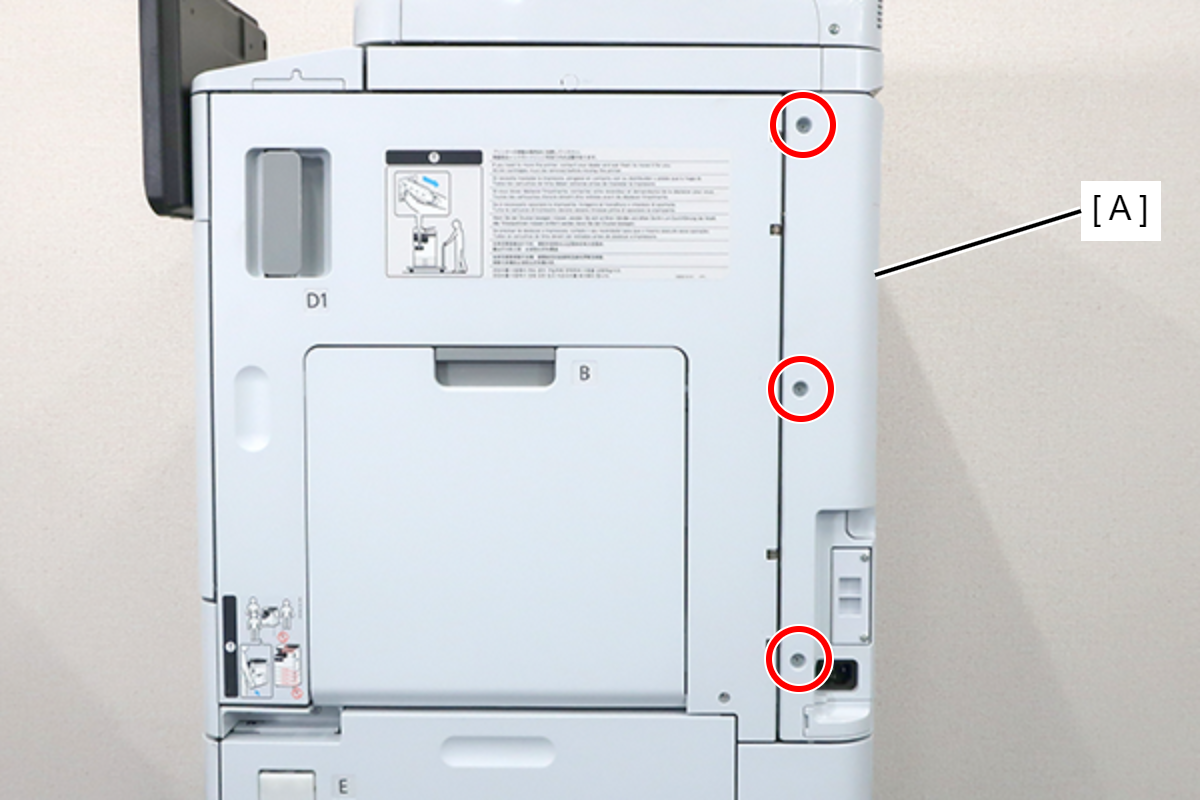
 : 3x8D
- Remove the 5 screws and pull the rear cover (A) toward to remove it.
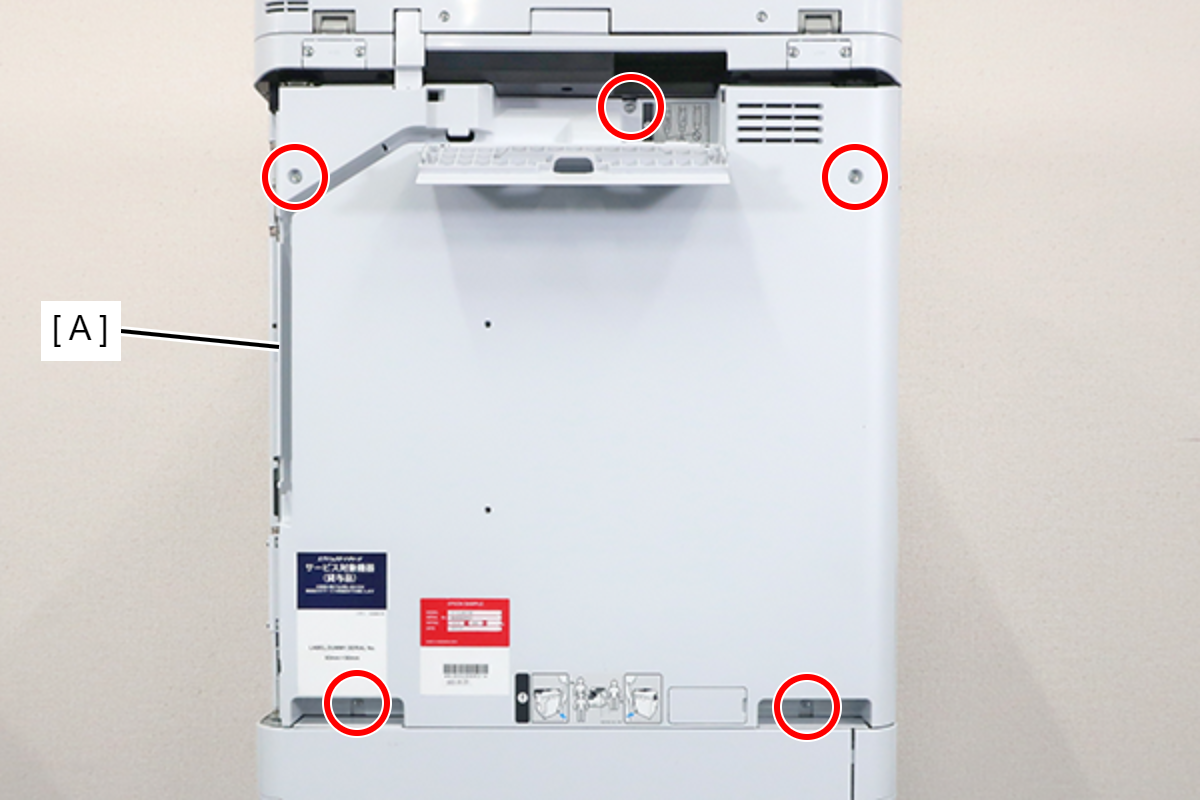
 : 3x8D
 Assembly / 組み立て
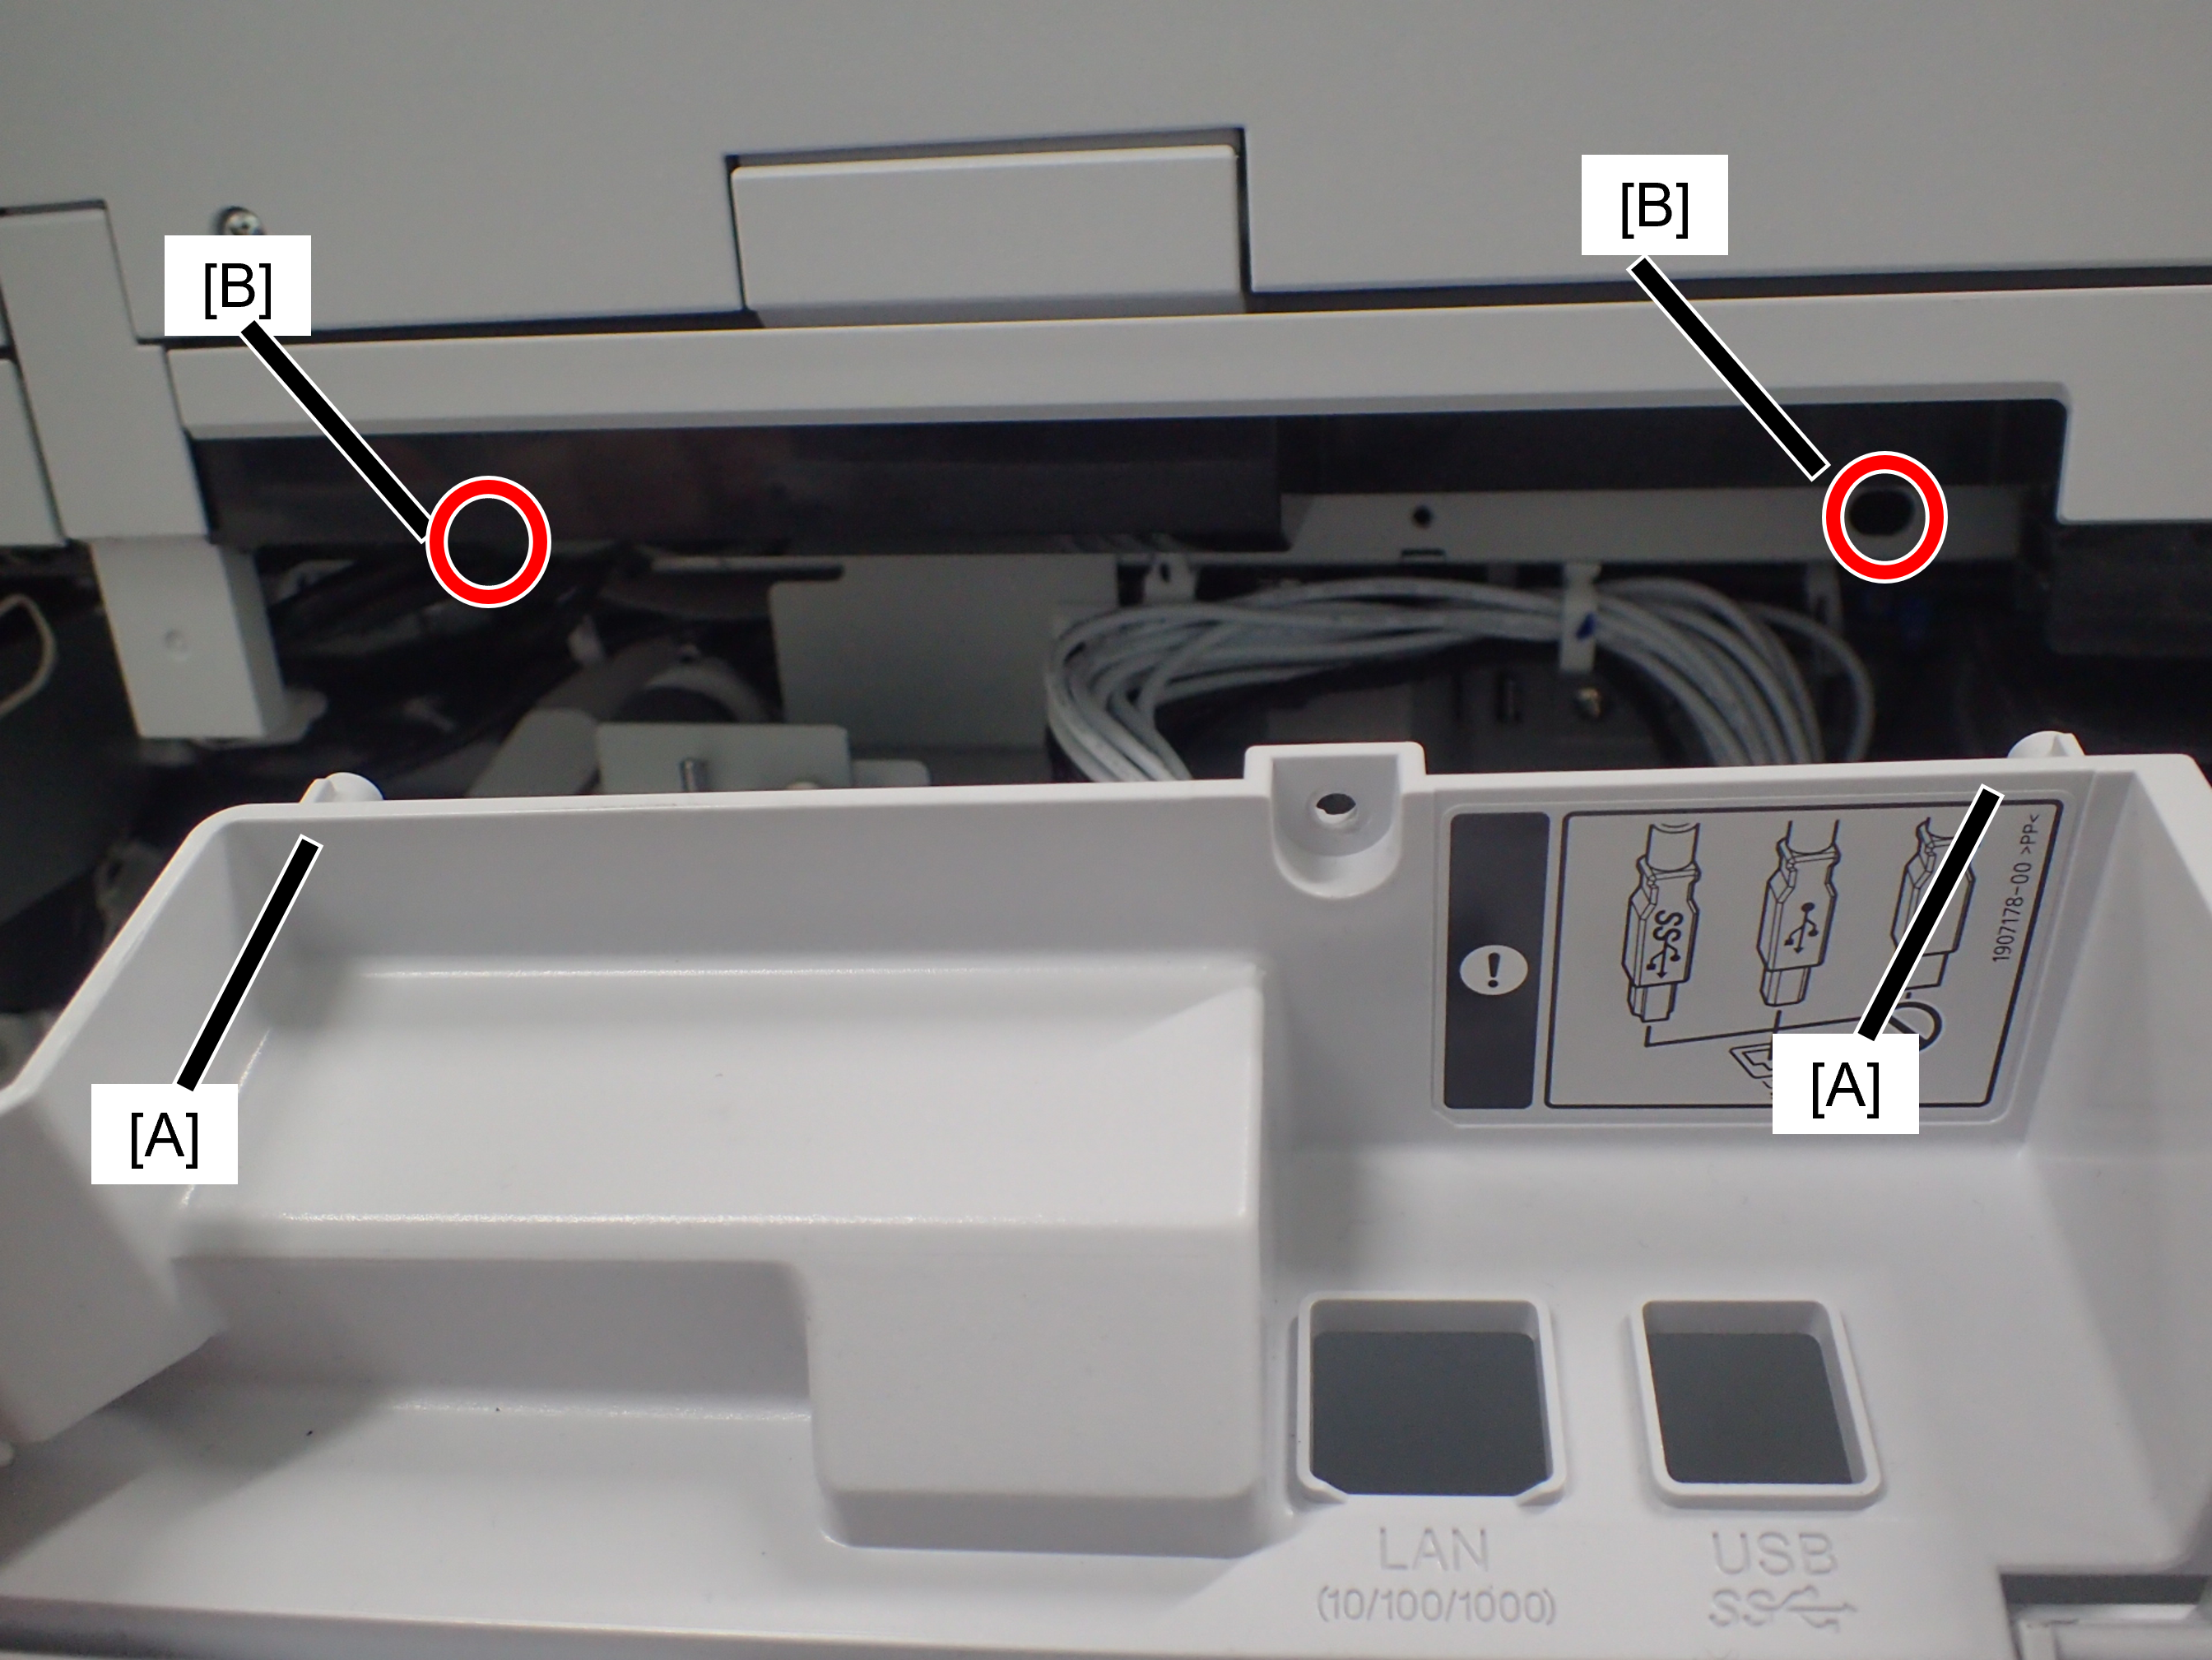
Confirm that the rear cover is not floating. The positioning pin (A) may not fit into the hole (B).
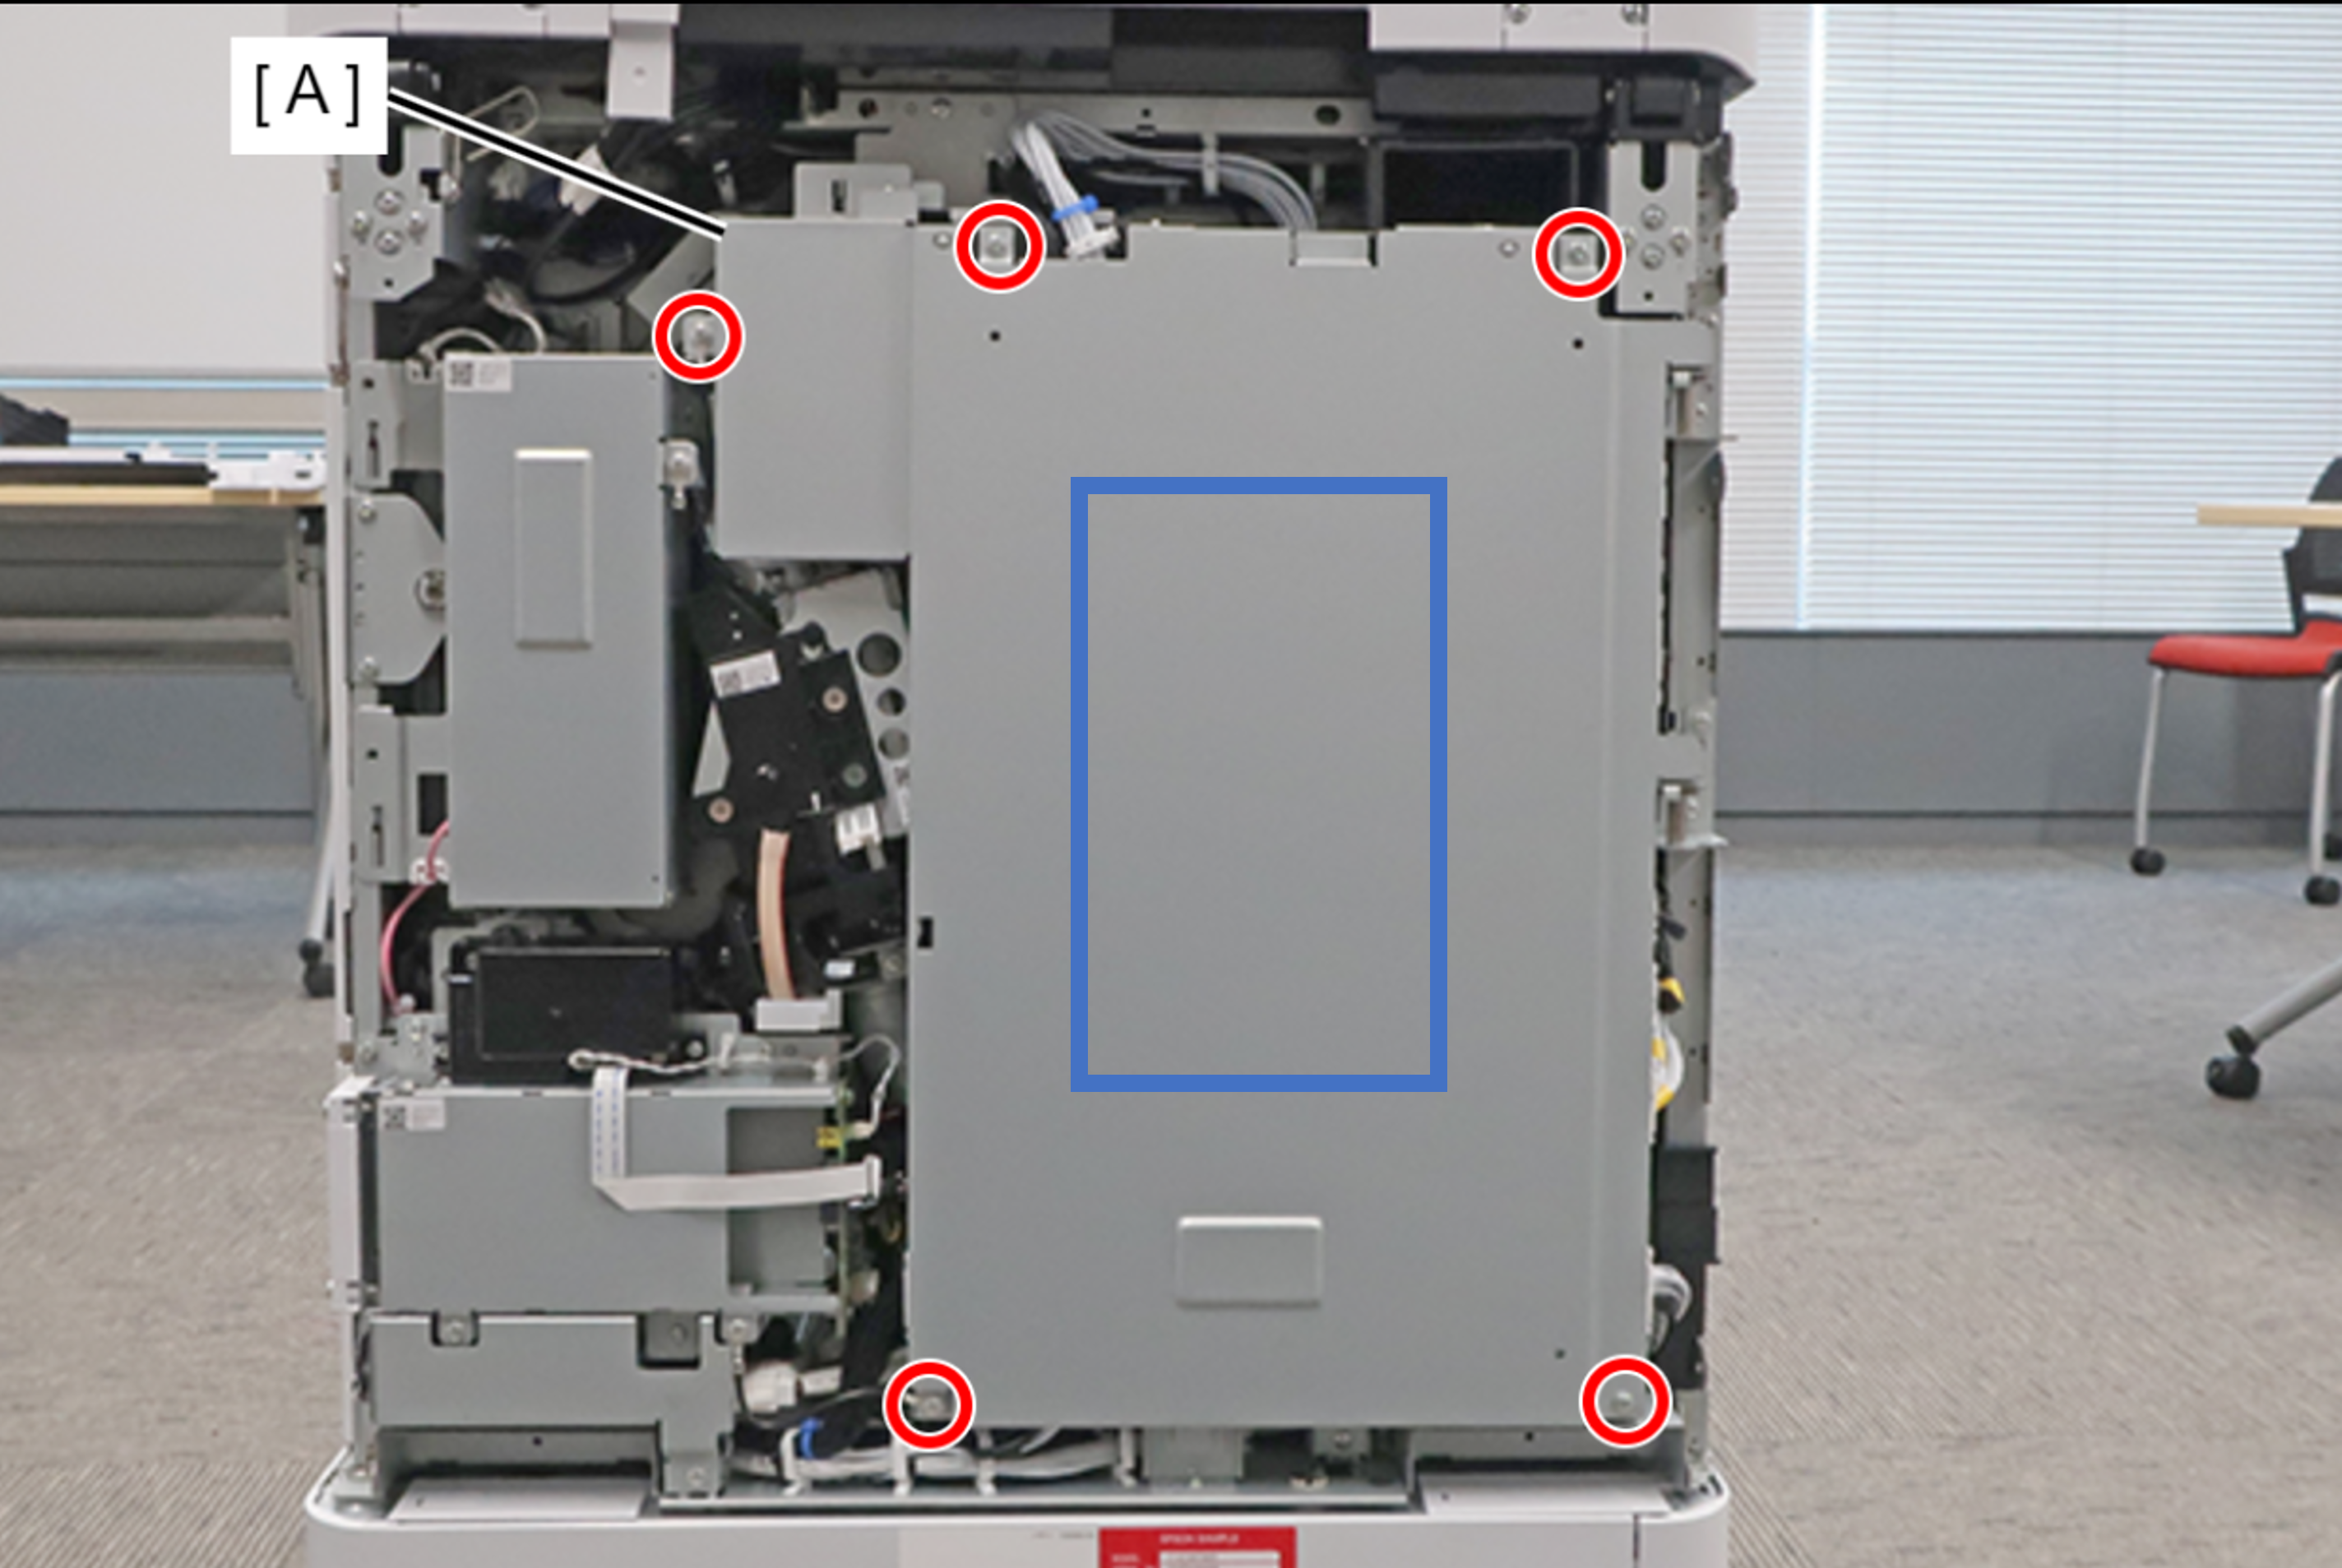
- Remove the 5 screws fixing the Main Board Cover (A).
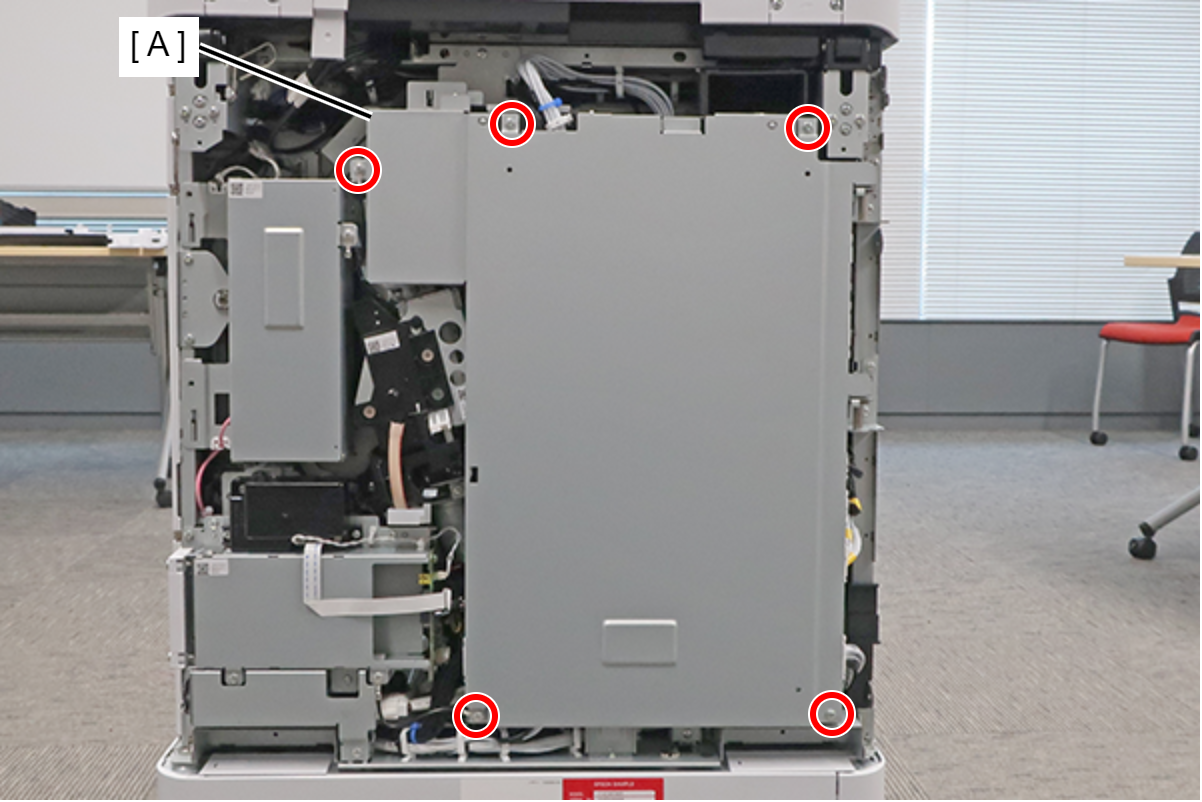
- : 3x8D
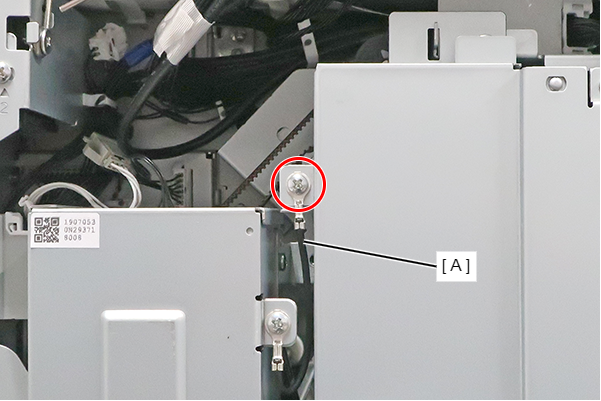
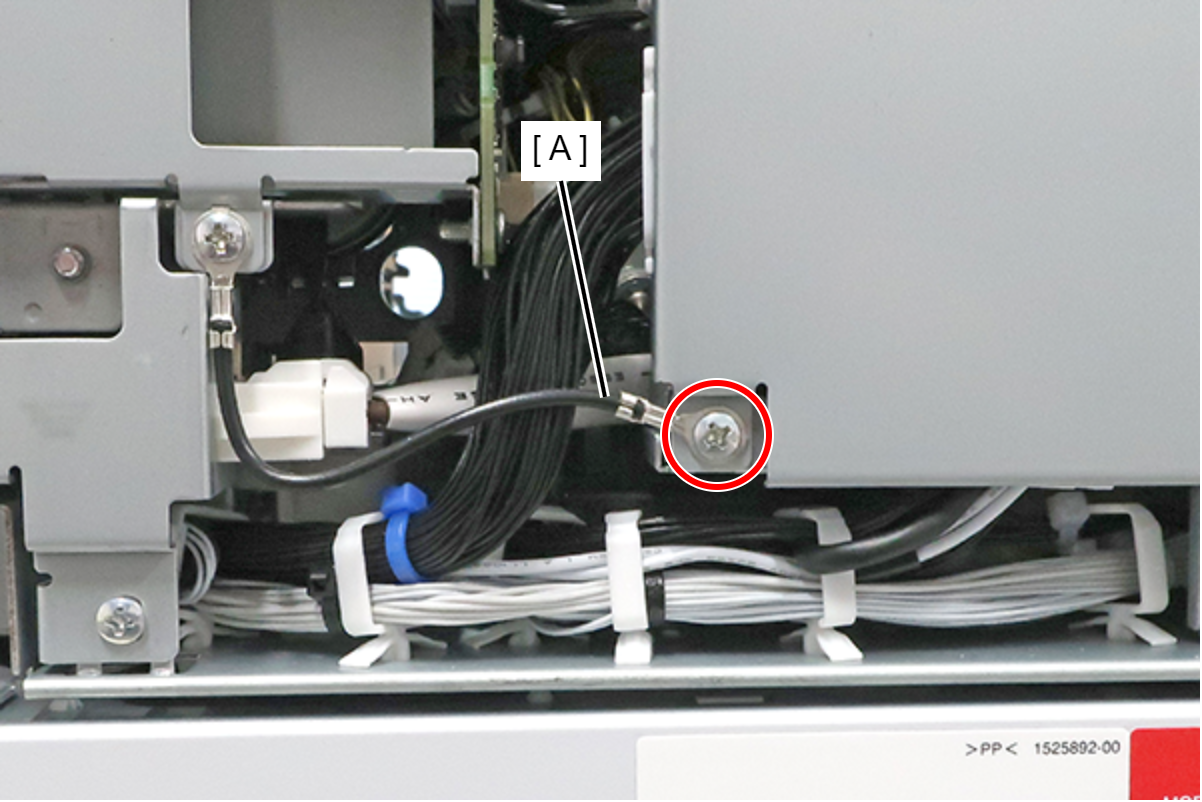
Assembly / 組み立てThe screw shown in the figure must be fastened together with the ground wire (A).
When installing the Main Board Cover, hold the center part with your hand while tightening the screws to prevent the cover from lifting.
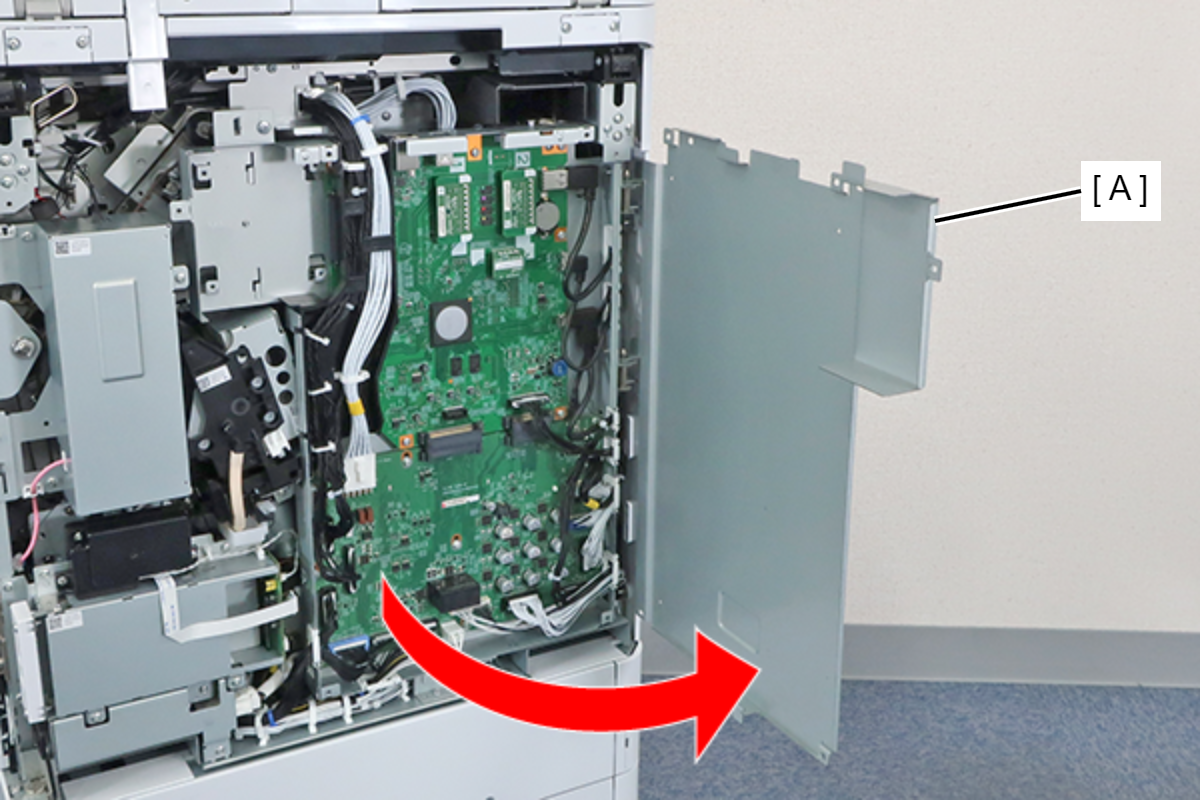
- Lift the main board cover (A) slightly to release the dowel (B) and open the main board cover (A).
 Note / 補足
The Main Board Cover (A) can be completely removed by lifting it in the open position shown above.
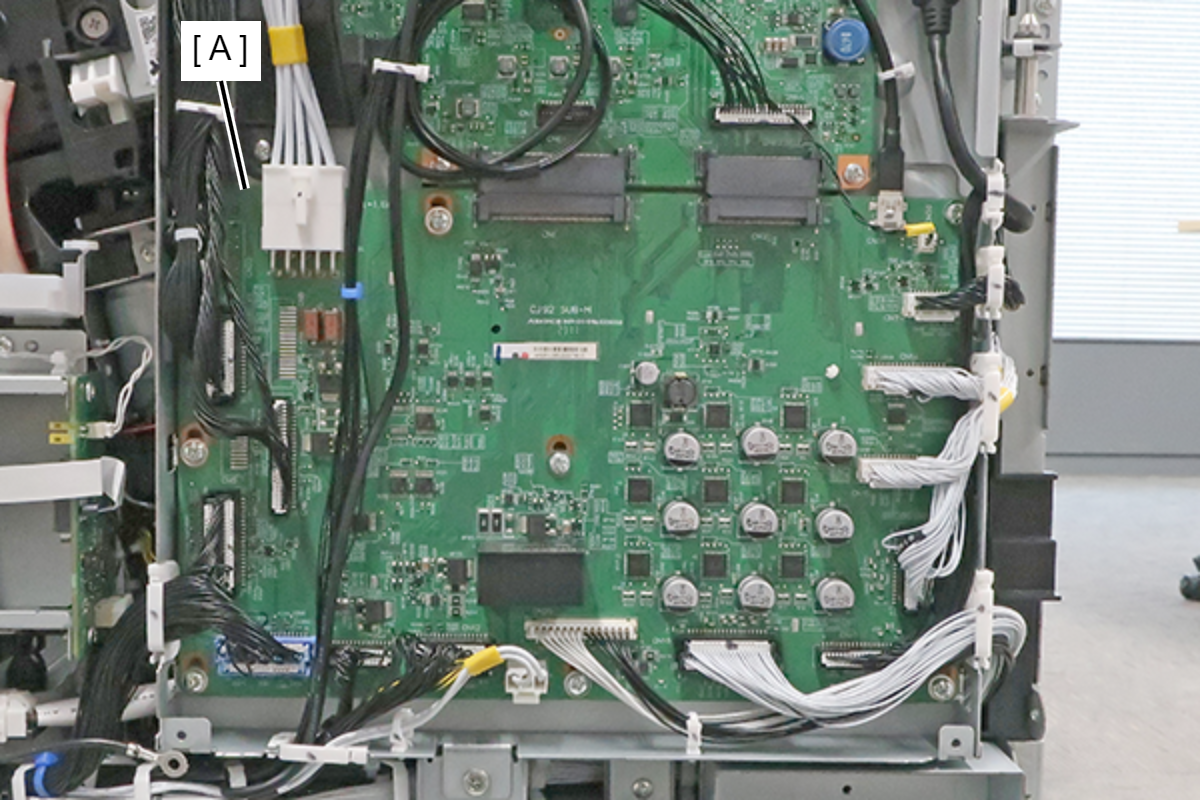
- Remove all cables connected to the MCU Board (A).
- Remove the 9 screws, and slide the MCU Board (B) in the direction of the arrow to disengage the 2 connectors (A), then remove the board.
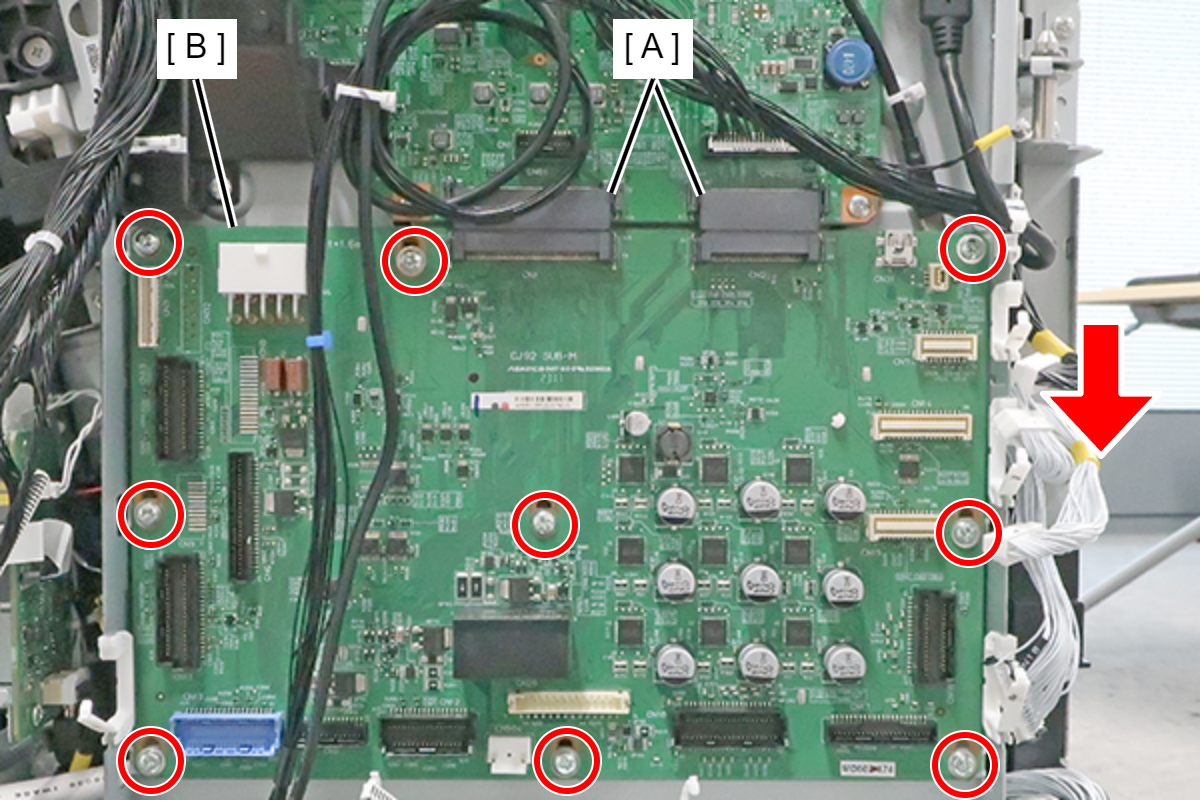
- : 3x6MW