
Cap Unit
 Check Point / チェックポイント Check Point / チェックポイント |
When replacing this part, you need to run the menu from the service support mode before replacing it. |
- Remove the screw and remove the Left Cover Upper (A) in the direction of the arrow.
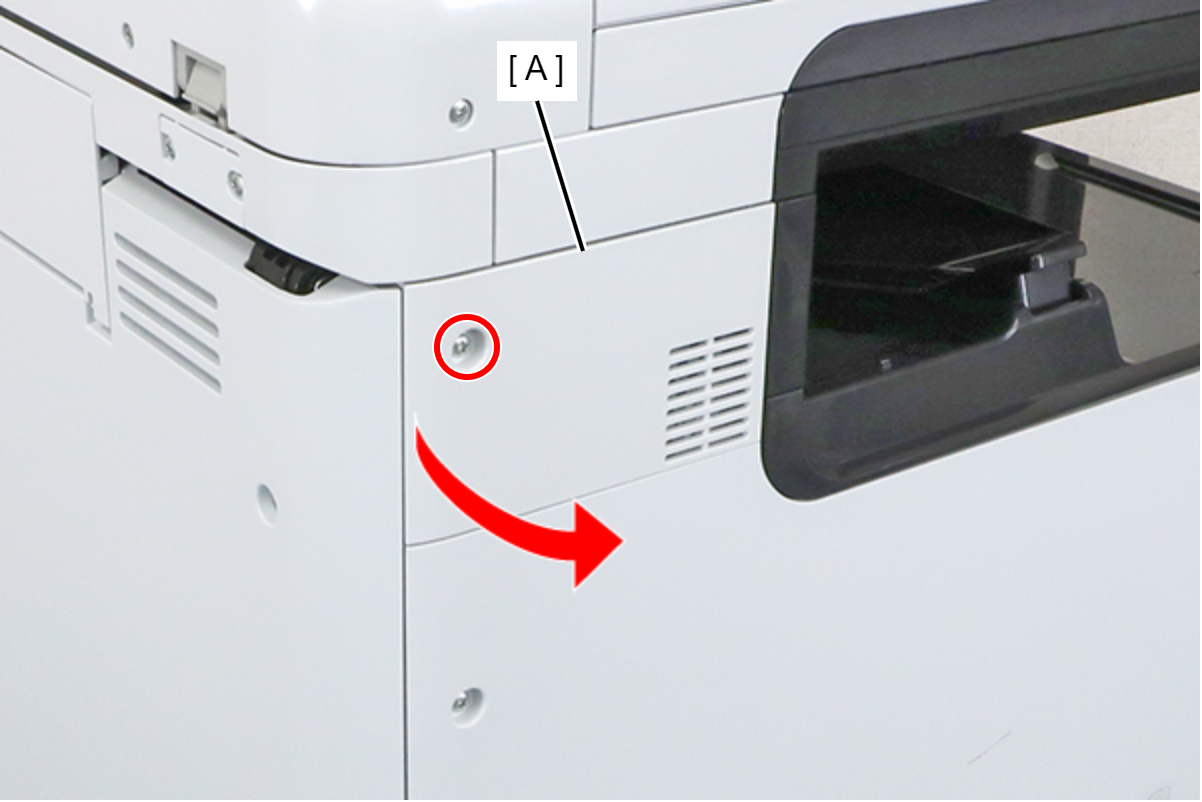
 : 3x8D
- Remove the 4 screws and remove the SCN Fixing Plate (A).
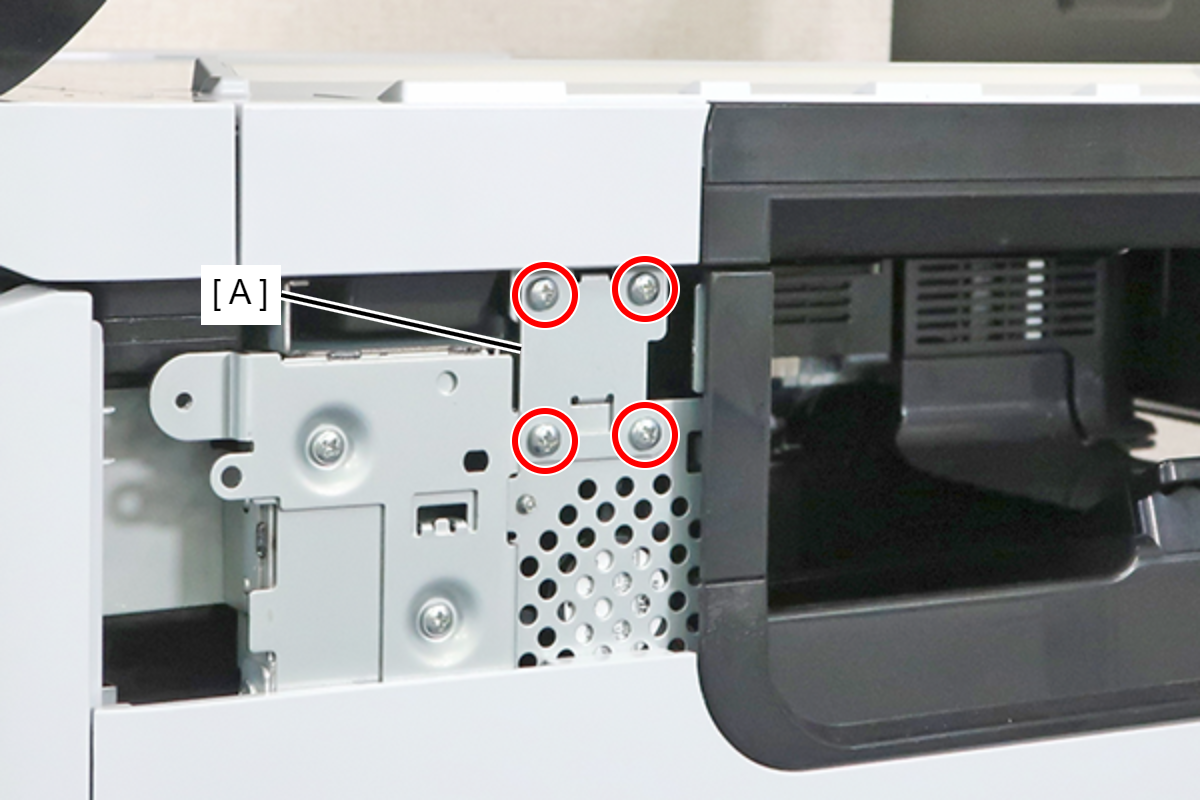
- : 3x8M
 Caution / 注意
Be sure to completely remove the SCN Fixing Plate.
If you attempt to carry out the operation without completely removing the screws and leaving the lower 2 screws removed, there is a risk of an accident, such as pinching your finger, when opening or closing the SCN.
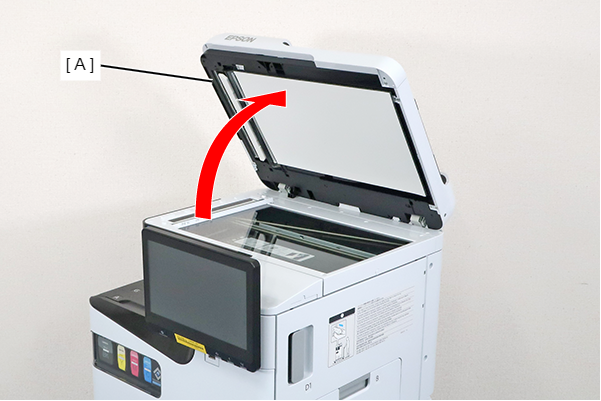
- Open the ADF (A).
- Remove the screw and slide the Panel Upper Cover (A) in the direction of the arrow to remove it.
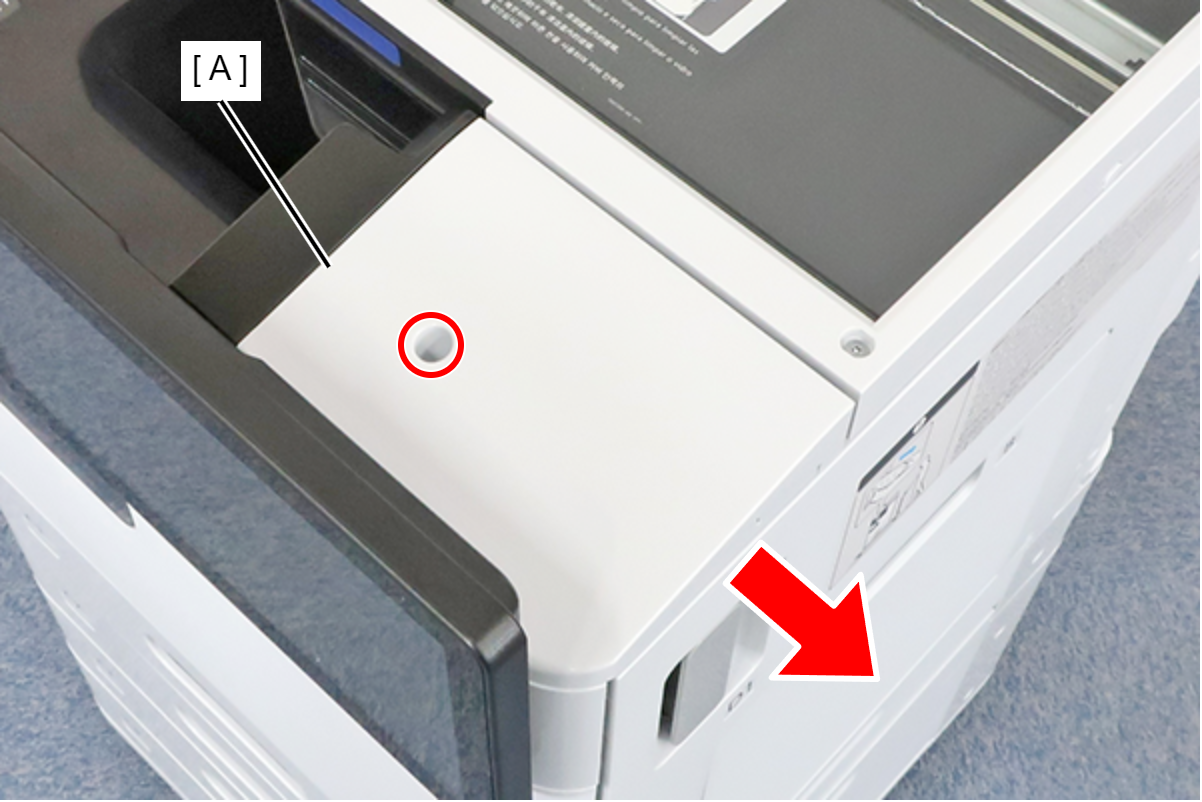
- : 3x8D
- Remove the 2 screws and the spacer.
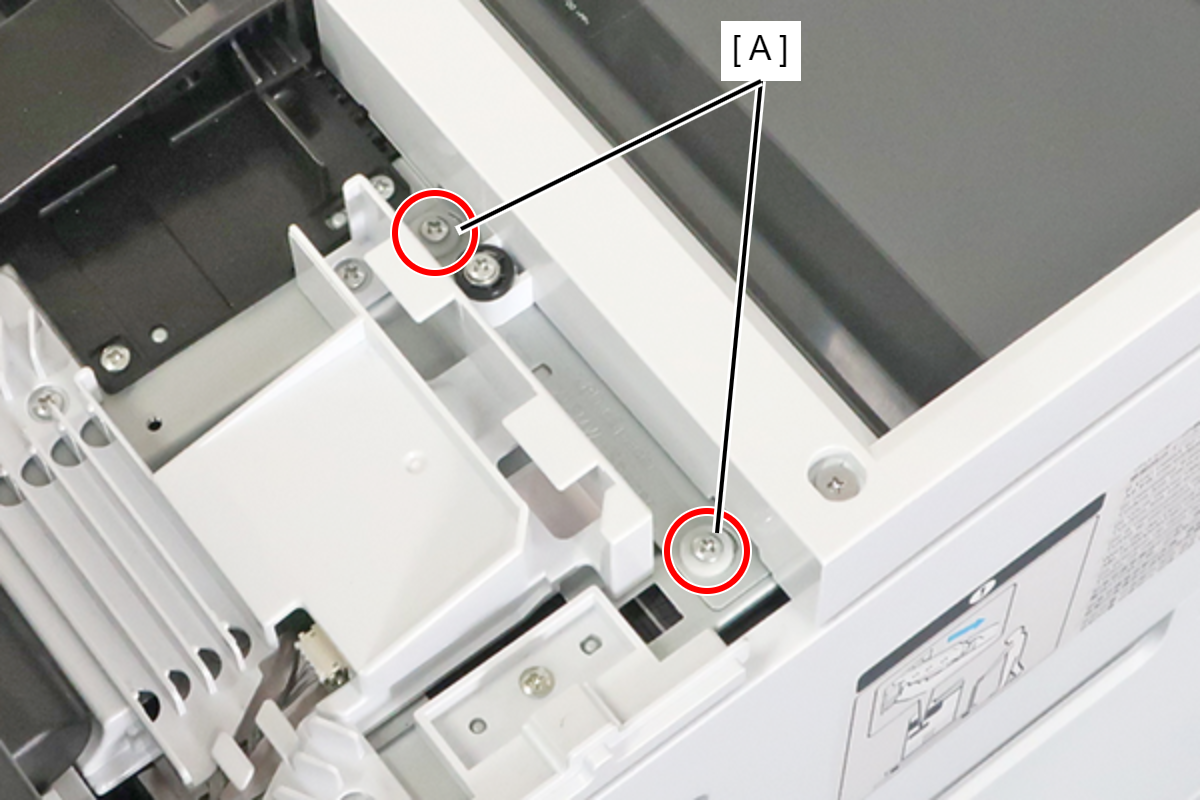
- : 3x8D
- Remove the screw and remove the spacer (A).
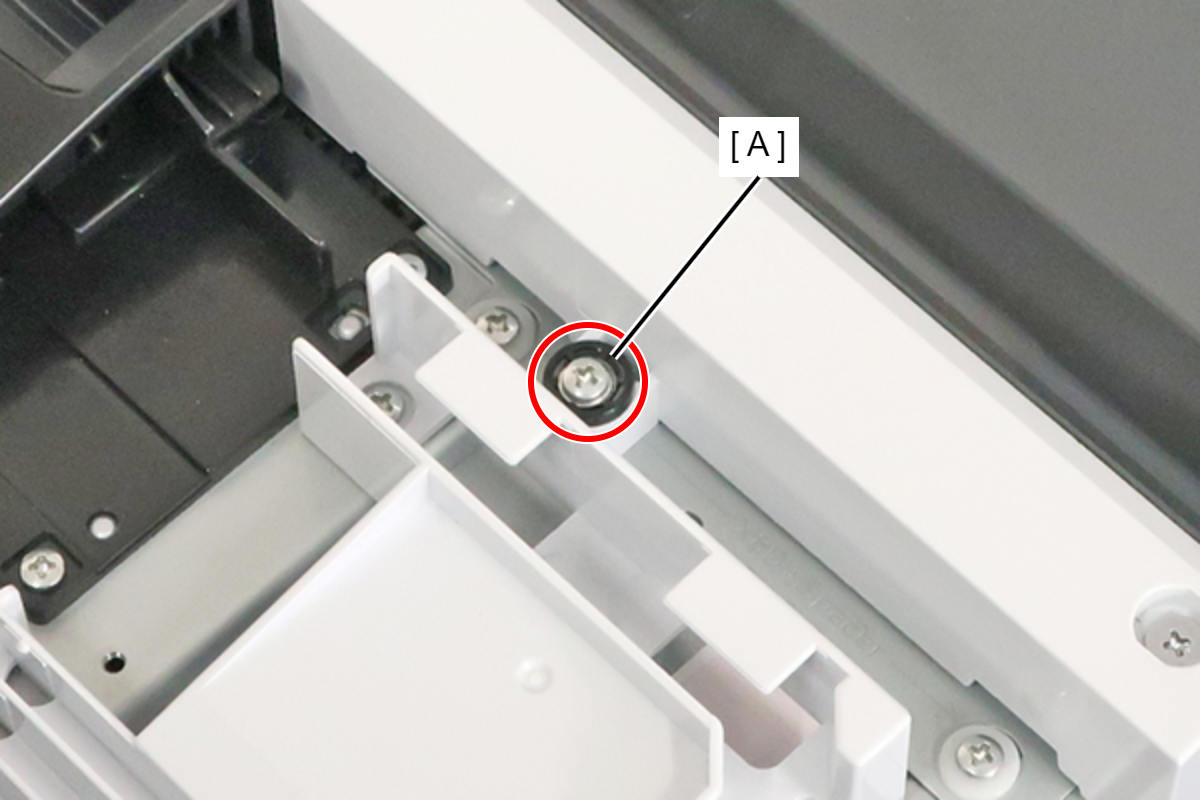
 : 3x18MW
- Remove the screw, and attach the spacer (A) removed in the preceding step.
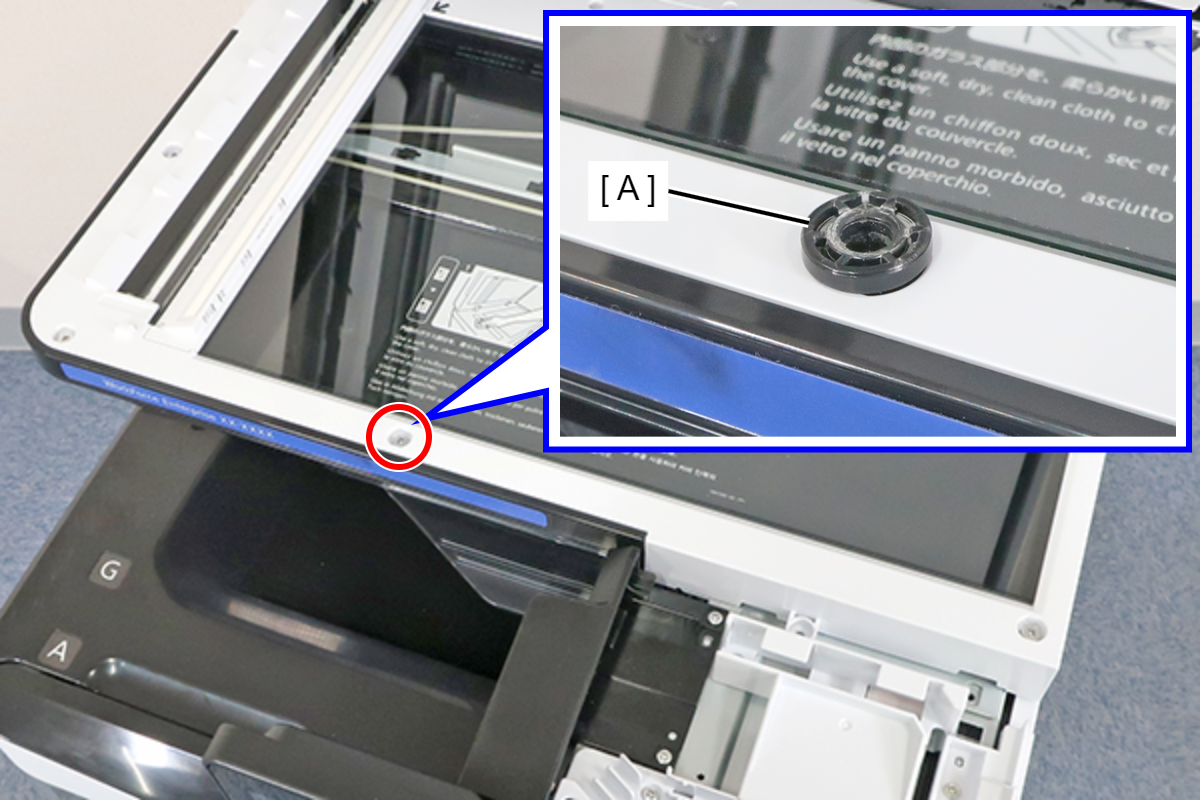
- : 3x5D
- Close the ADF (A), and fix the ADF and SCN Unit (B) with the screw that had been fixing the spacer in place.
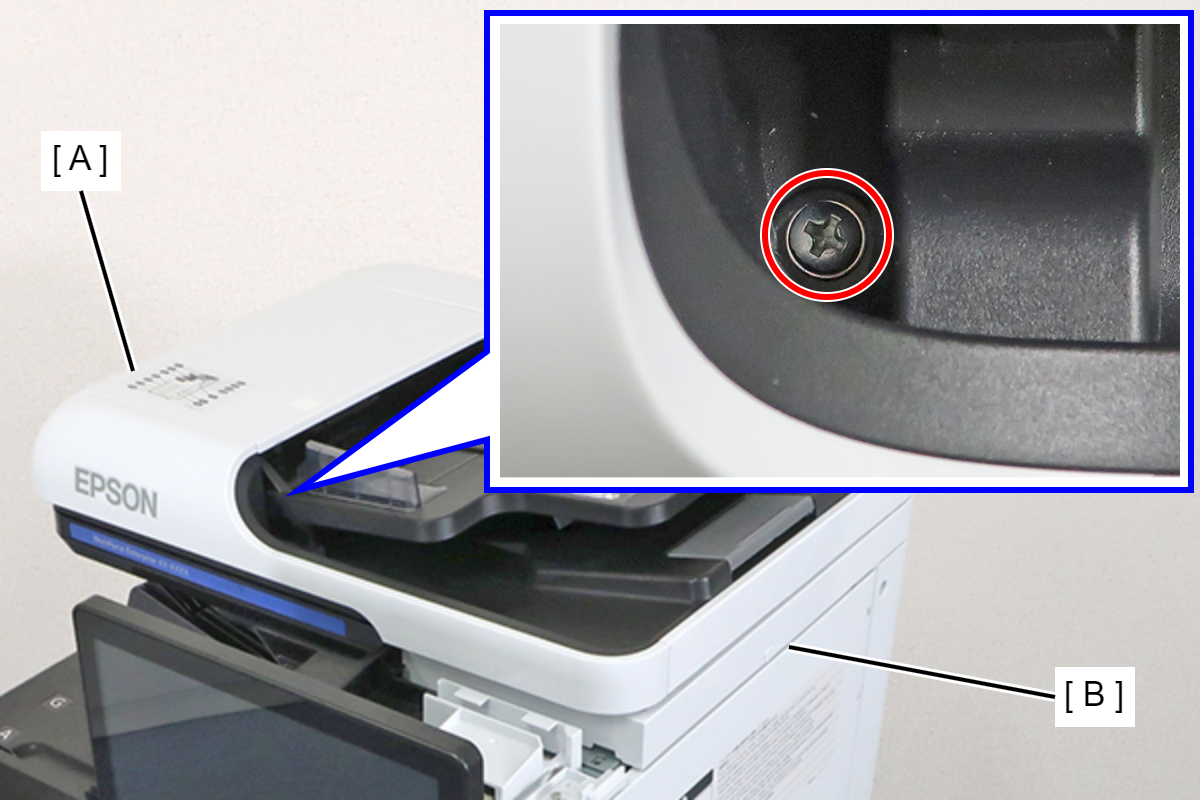
- : 3x18MW
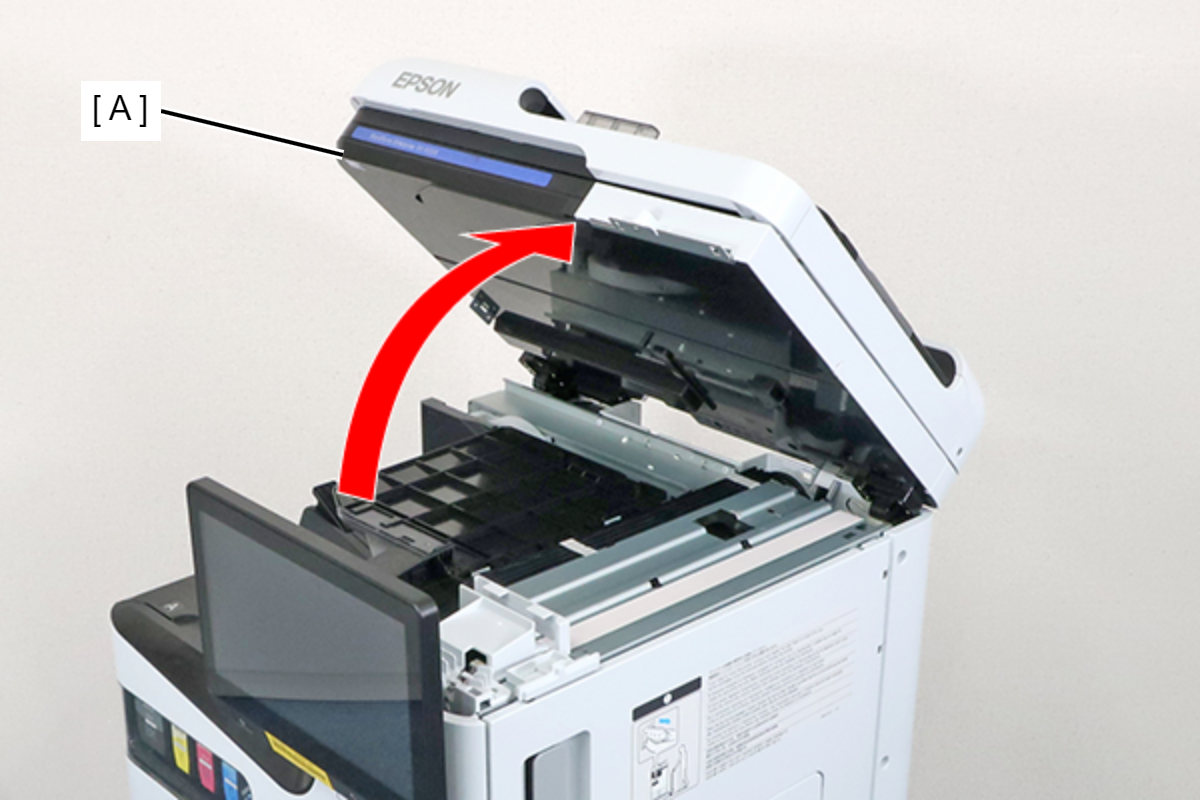
- Raise the ADF/SCN Unit (A).
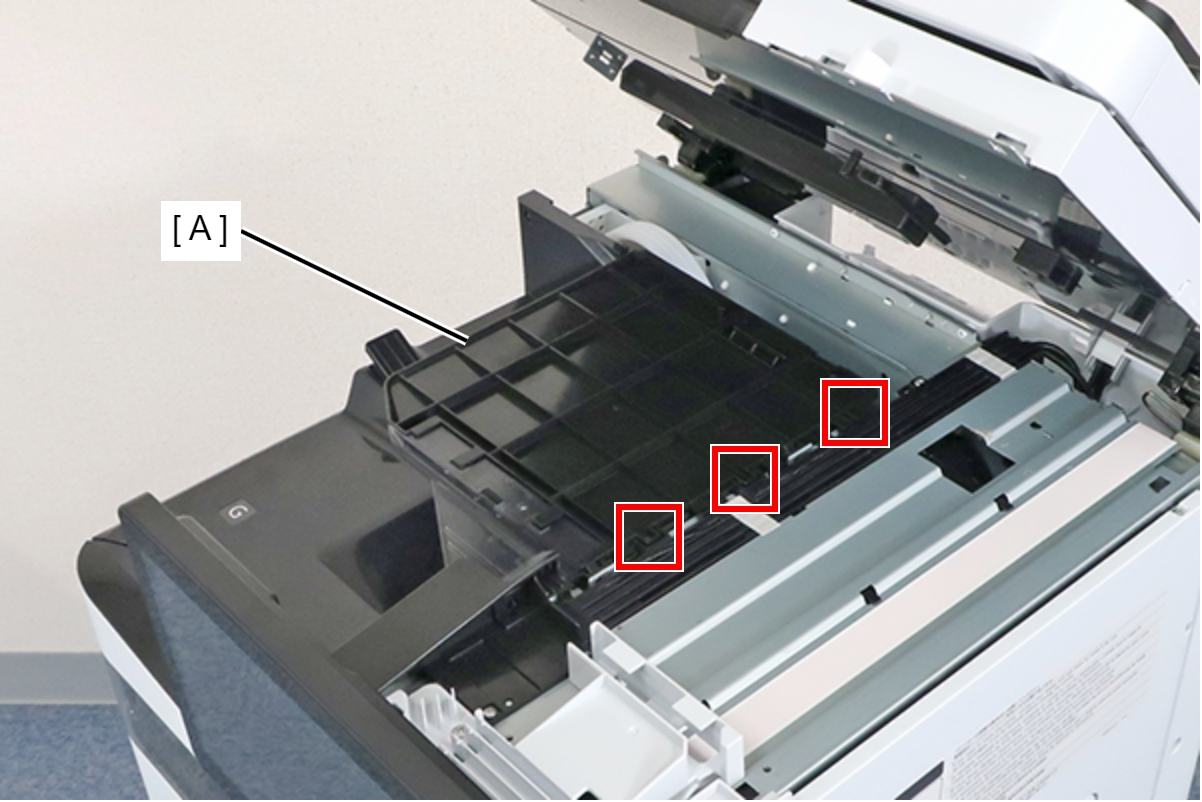
- Lift the duplex tray Assy (A), remove the 3 hooks, and remove the duplex tray Assy (A).
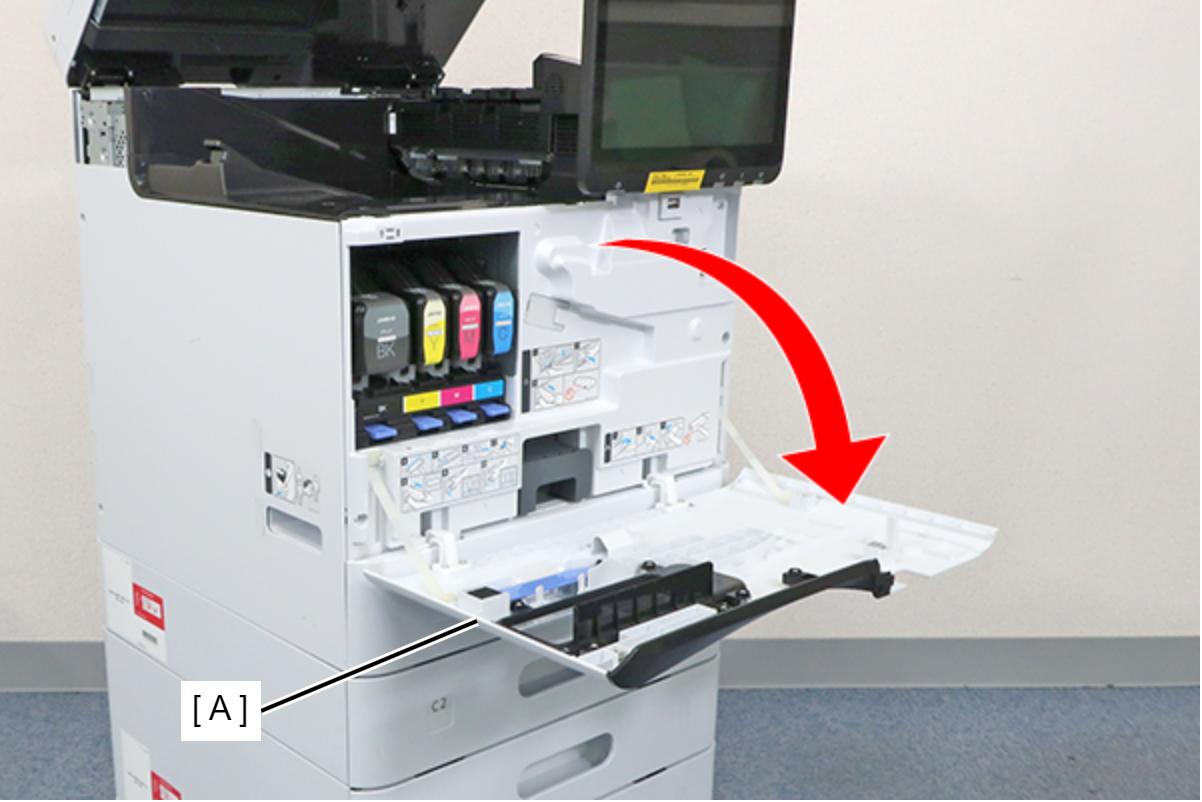
- Open the Front cover (A).
- Remove 4 screws and remove the FD Stacker Assy (A).
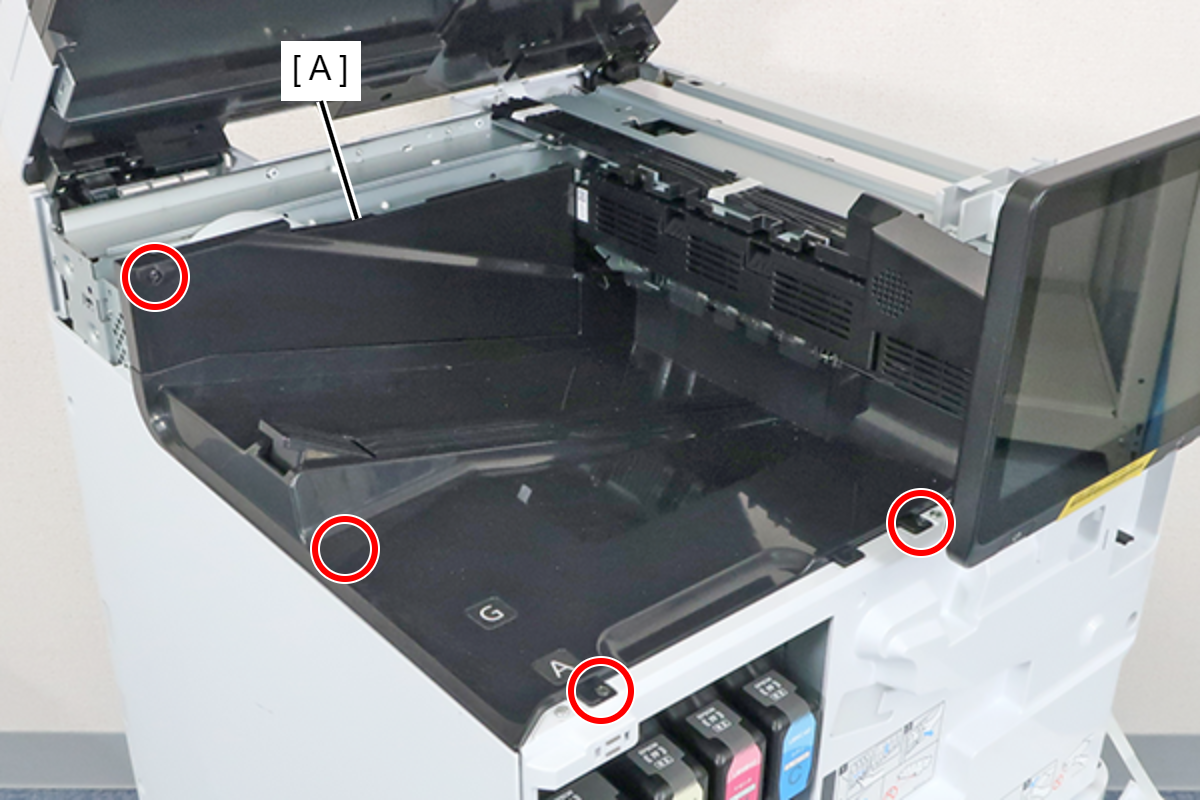
- : 3x8D/BK
- Remove the screw and remove the Frame Assy (A).
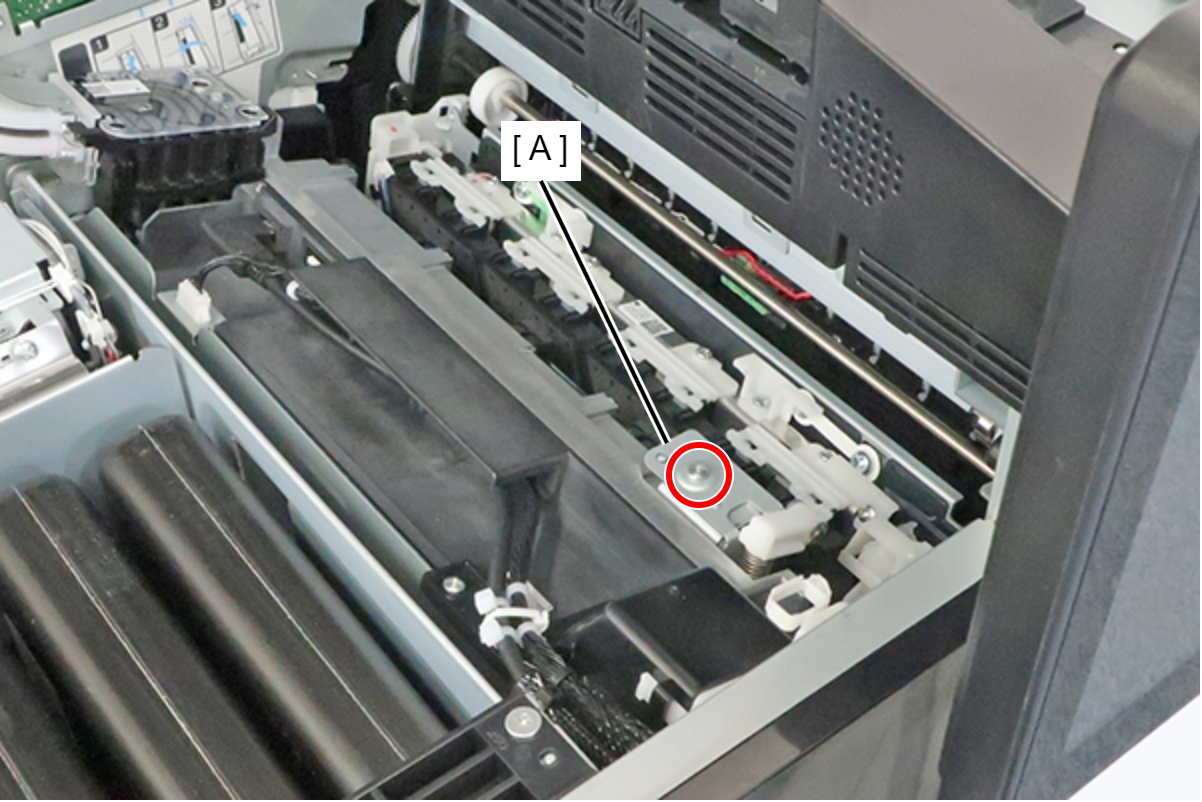
- : 3x6M
Check Point / チェックポイントThe screws are provided with a stopper, so they cannot be completely removed.
- Remove the 2 screws, and remove the Cap Cover (A).
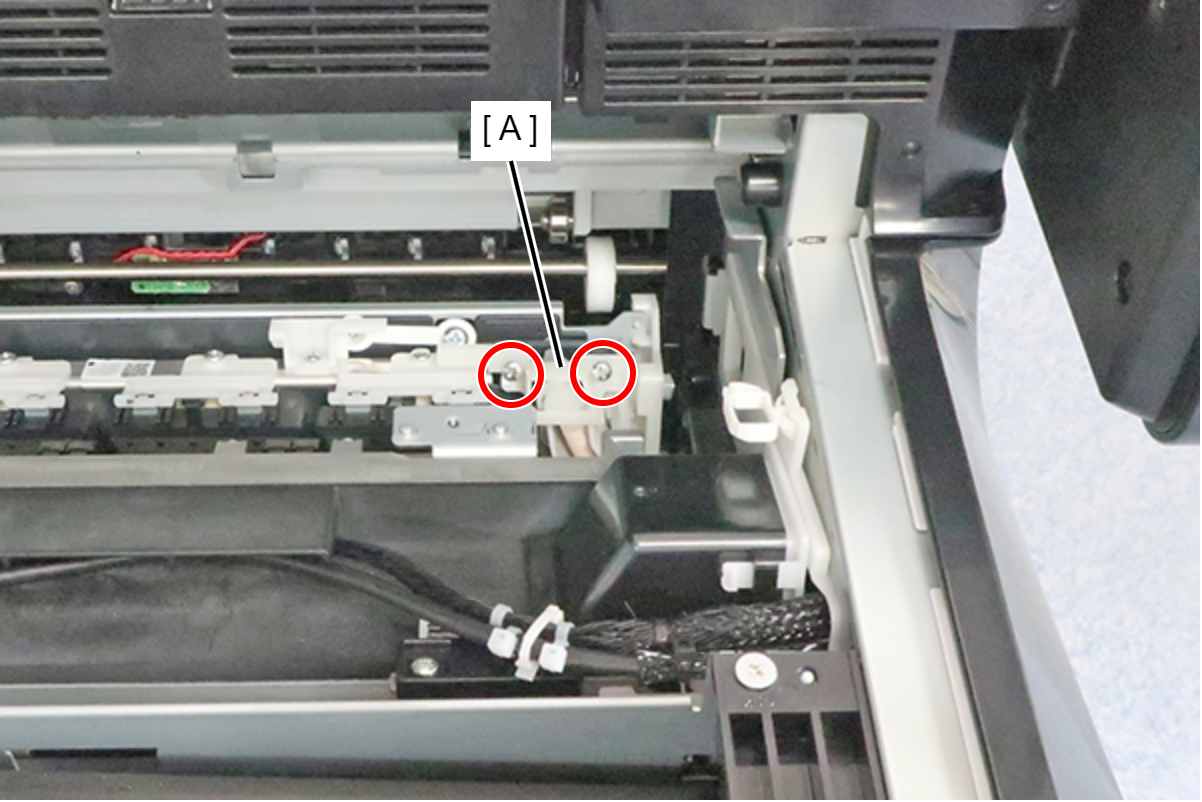
- : 3x12M
Check Point / チェックポイントThe screws are provided with a stopper, so they cannot be completely removed.
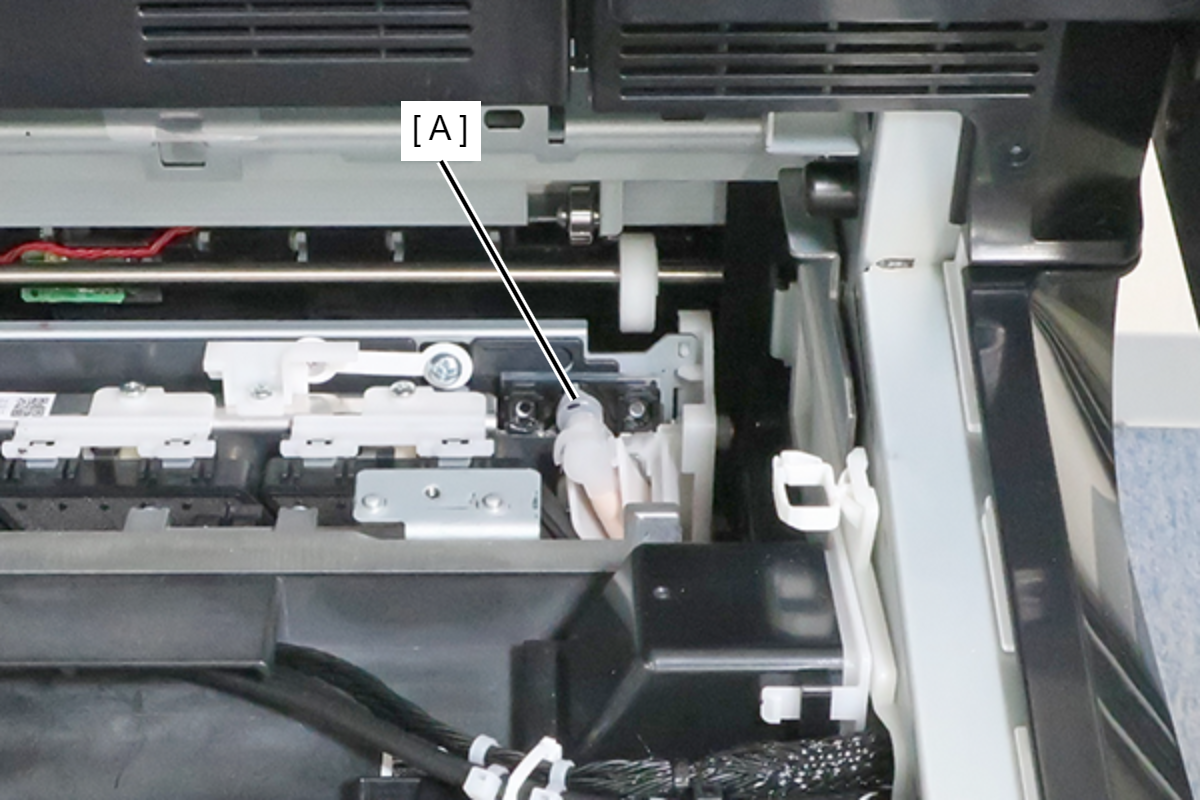
- Remove the waste ink tube (A).
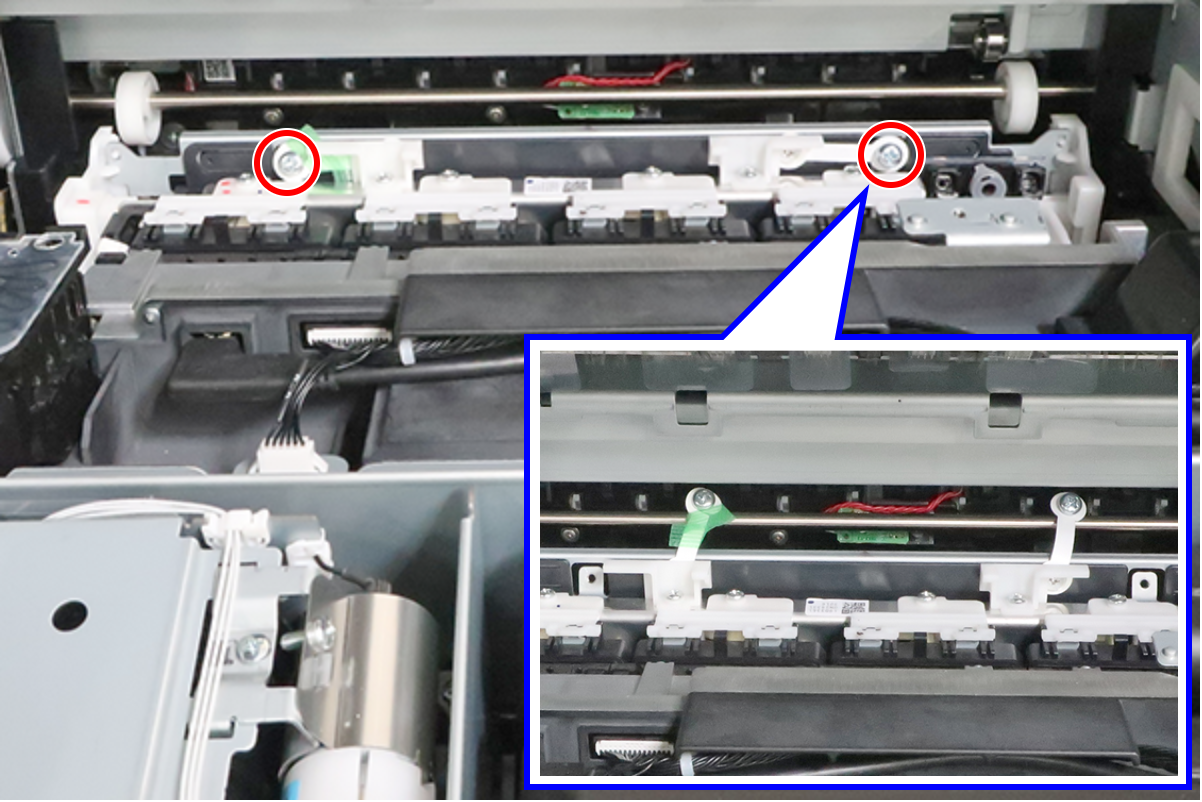
- Remove the 2 screws, and withdraw to the position shown in the figure.
- Place your fingers under the handles (A) to lift the Cap Unit (B), and engage the hooks in the 2 holes (C) on the frame.
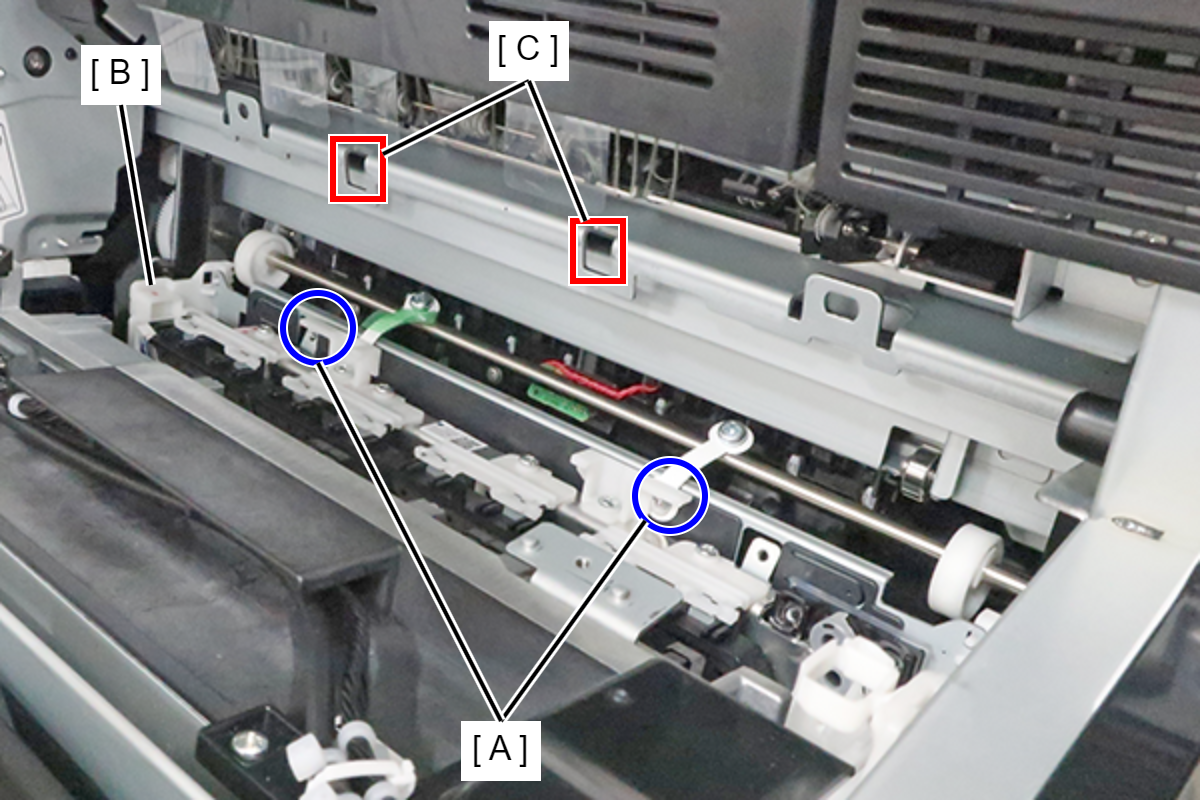
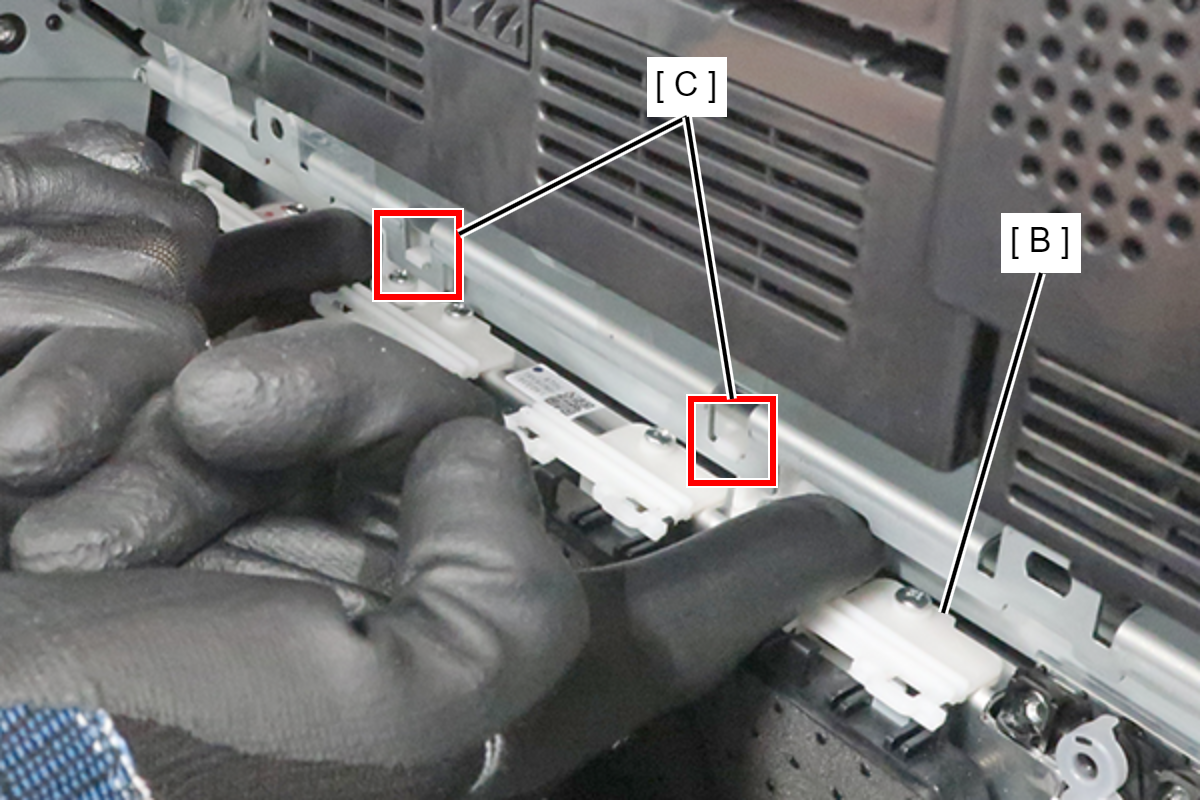
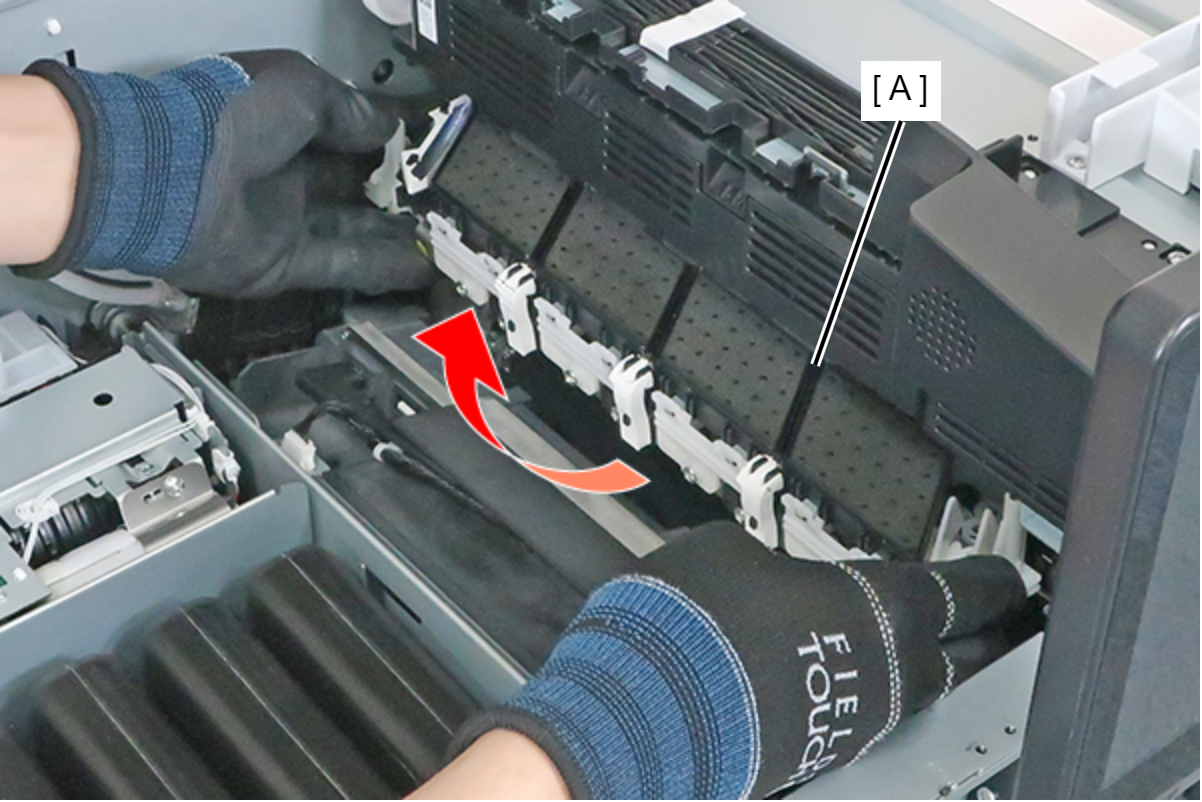
- Hold both ends of the Cap Unit (A), and rotate it in the direction of the arrow to remove it.
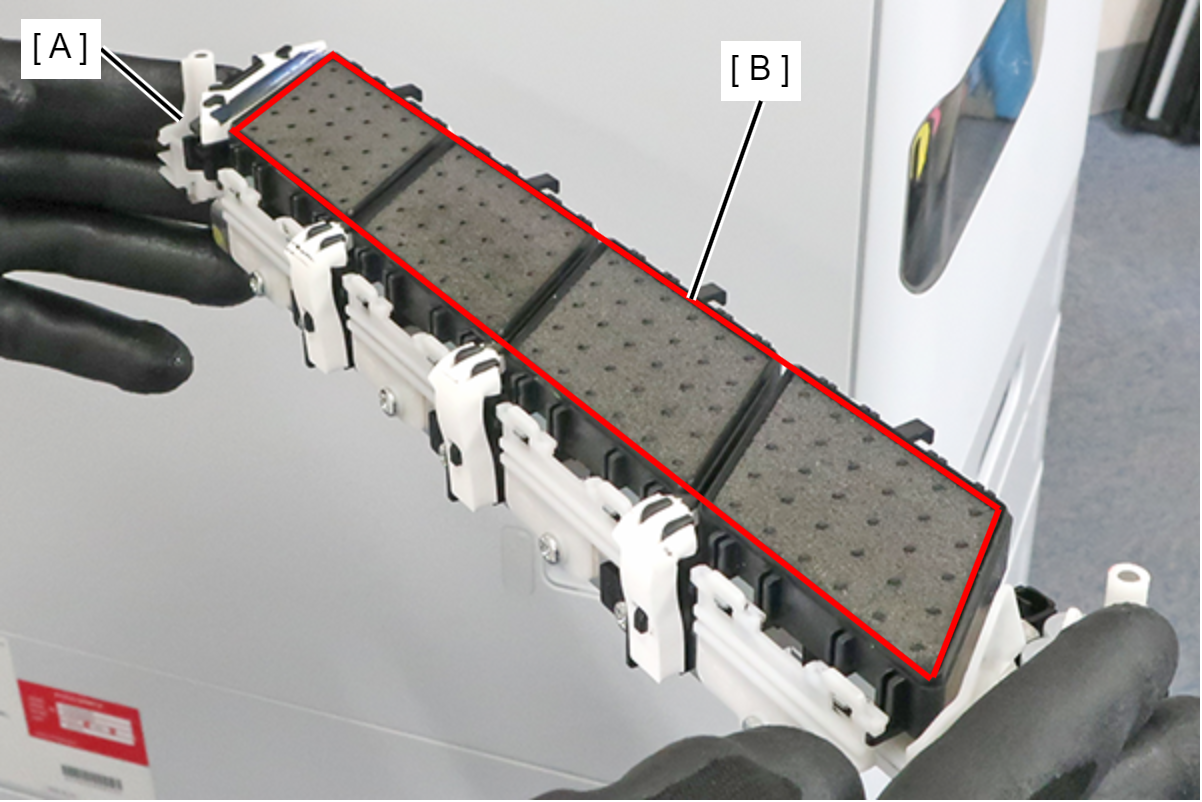
 Caution / 注意
Do not turn the cap surface (B) of the Cap unit (A) downward or tilt the Cap unit, as ink may drip.
| Check Point / チェックポイント |
After replacing this part, you need to run the menu from the service support mode. (If you ran the Before-replacement menu before replacing the part, it will start automatically when you turn the power on.) |