
ADF CIS Module
 Check Point / チェックポイント Check Point / チェックポイント |
When replacing this part, you need to run the menu from the service support mode before replacing it. CIS Module(ADF/ SCN) / SCN Upper Case / CISM Spacer - Before replacement |
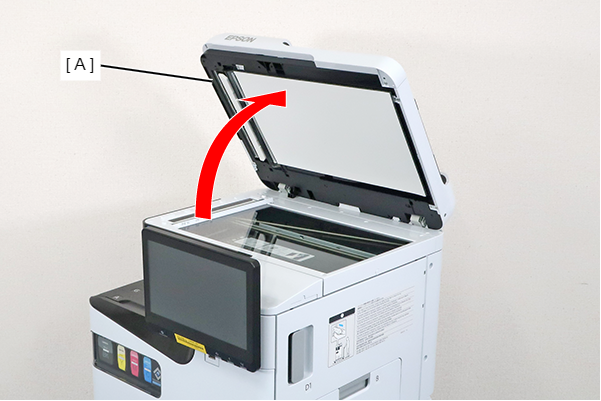
- Open the ADF (A).
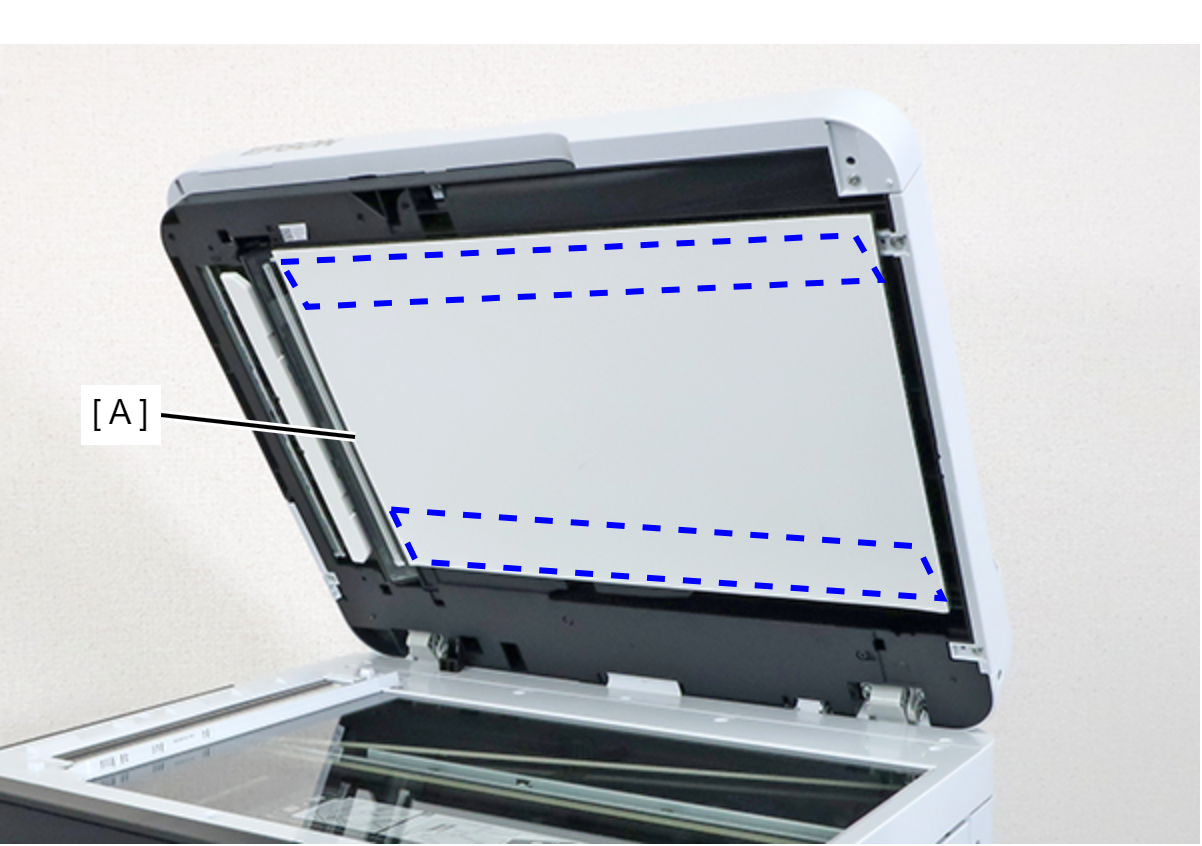
- Peel off the double-sided tape, and remove the Document Mat Assy (A).
 Caution / 注意
The adhesive strength of the adhesive tape on the Document Mat Assy may decrease with removal. If there is not sufficient adhesive strength, replace the Document Mat.
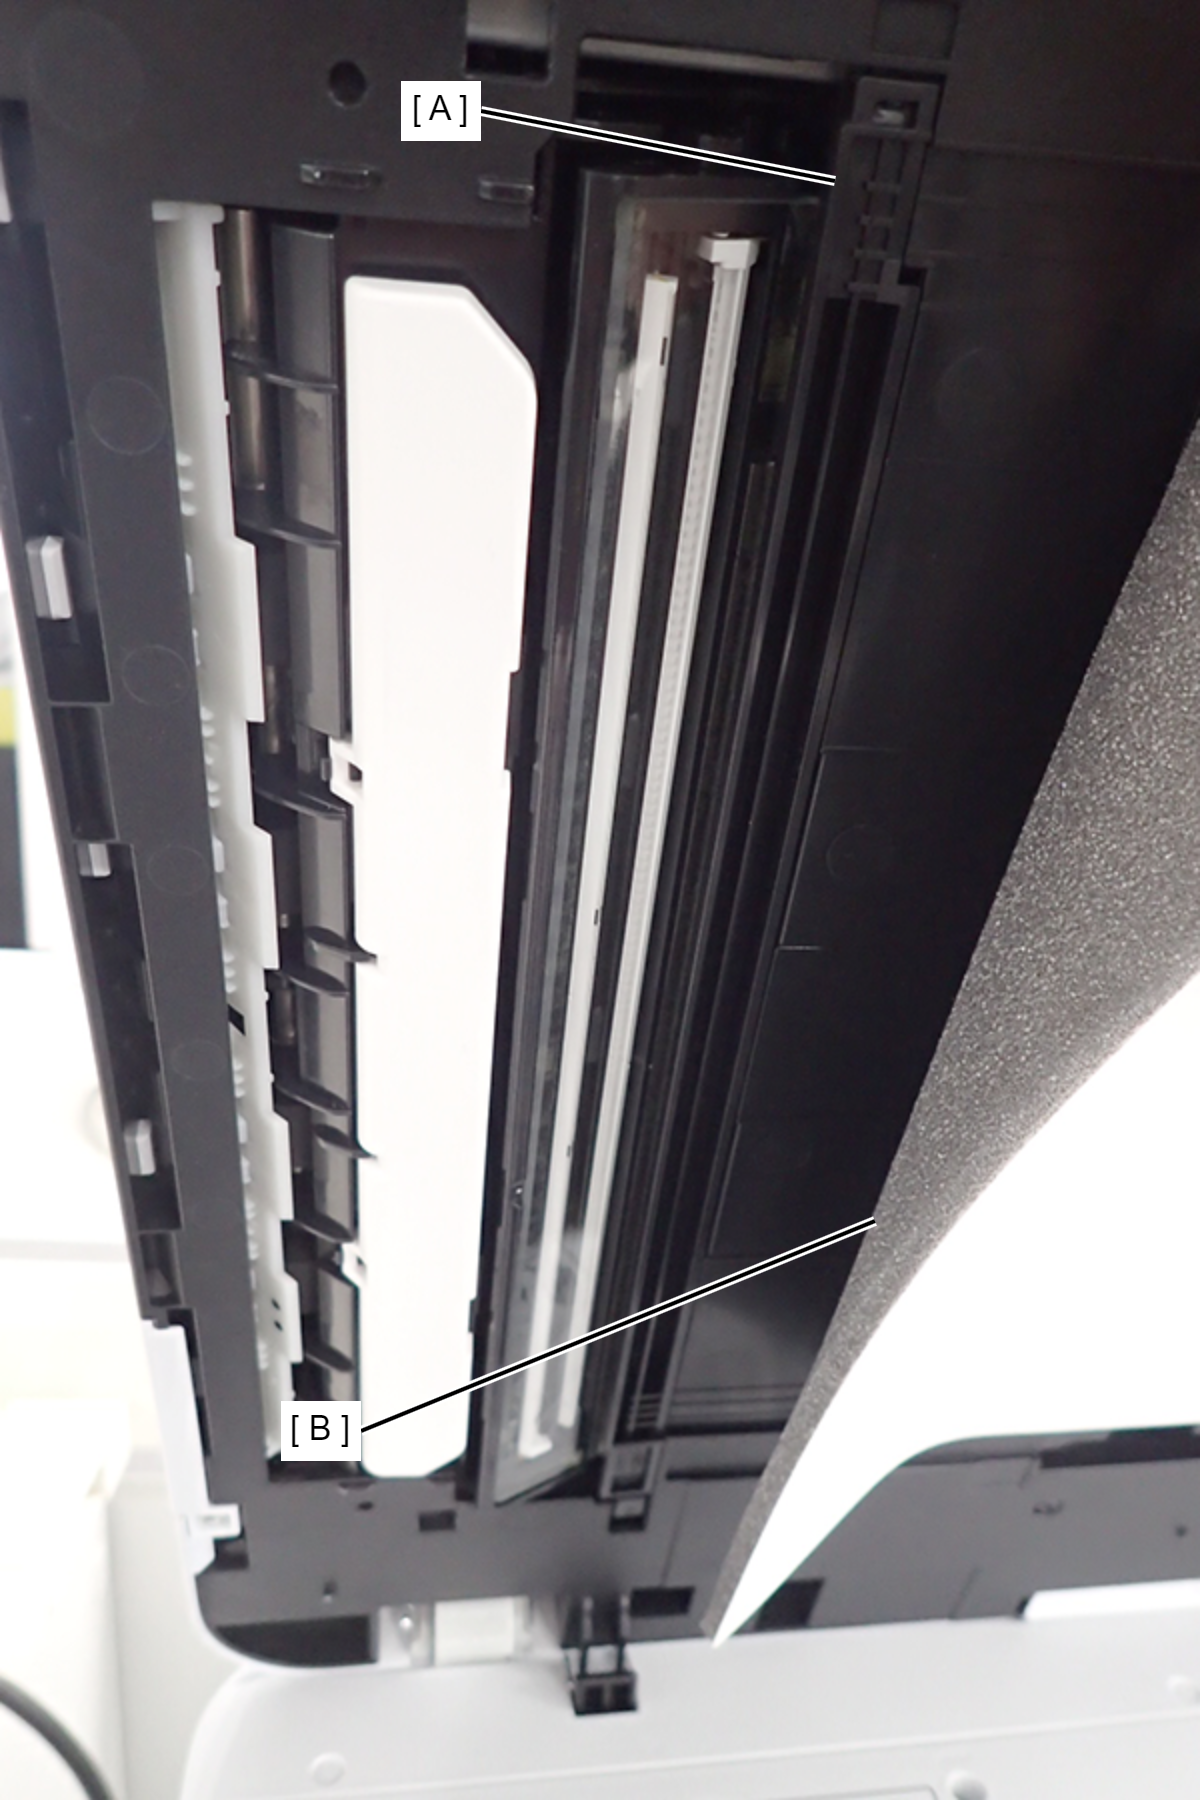
For the purpose of accessing the CIS module cover (A), the ADFCIS module can be accessed by peeling off the Document Mat Assy (B) to the extent shown in the figure.
Even if you do not completely peel the Document Mat Assy, be sure to check the Document Mat for adhesive strength and creases.
 Assembly / 組み立て
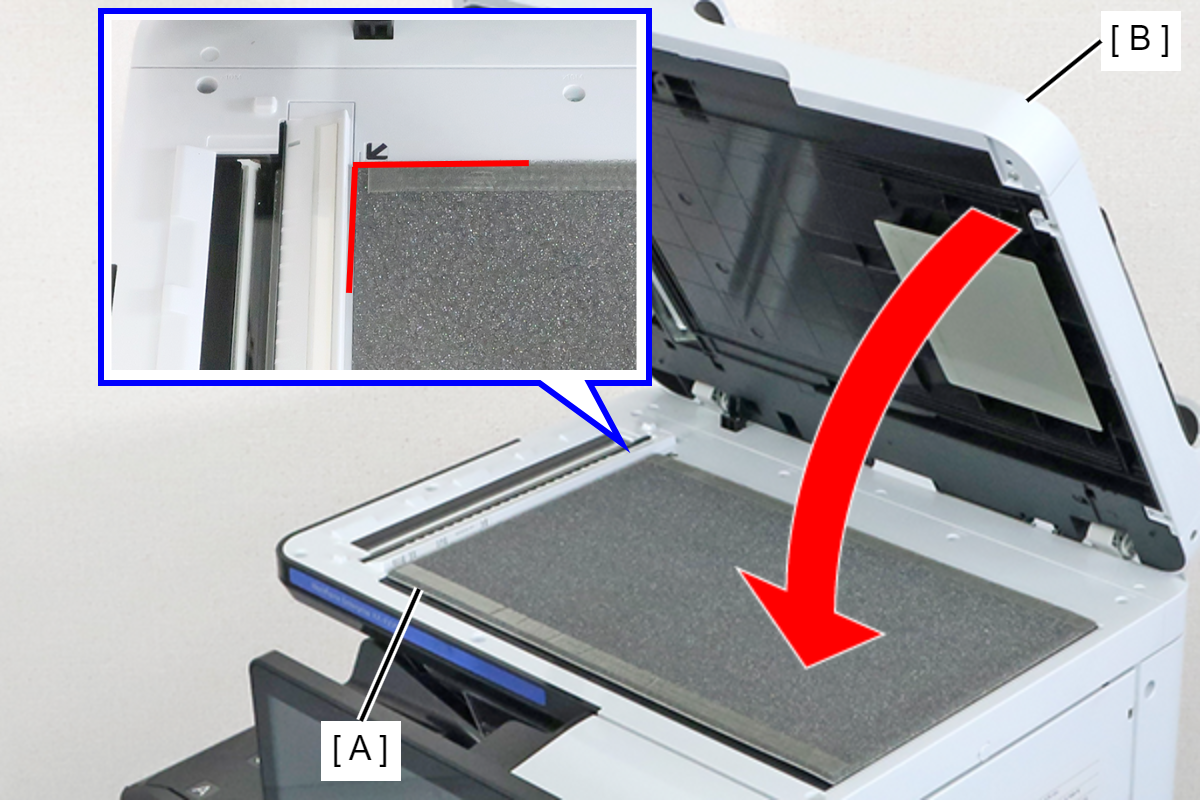
Position the Document Mat Assy (A) from which the release paper of the double-sided tape has been peeled off on the upper left corner of the scanner glass, and attach it by closing the ADF (B).
- Press the tab (A) in the direction of the arrow to disengage the hook, and remove the ADF CIS Module Cover (B).
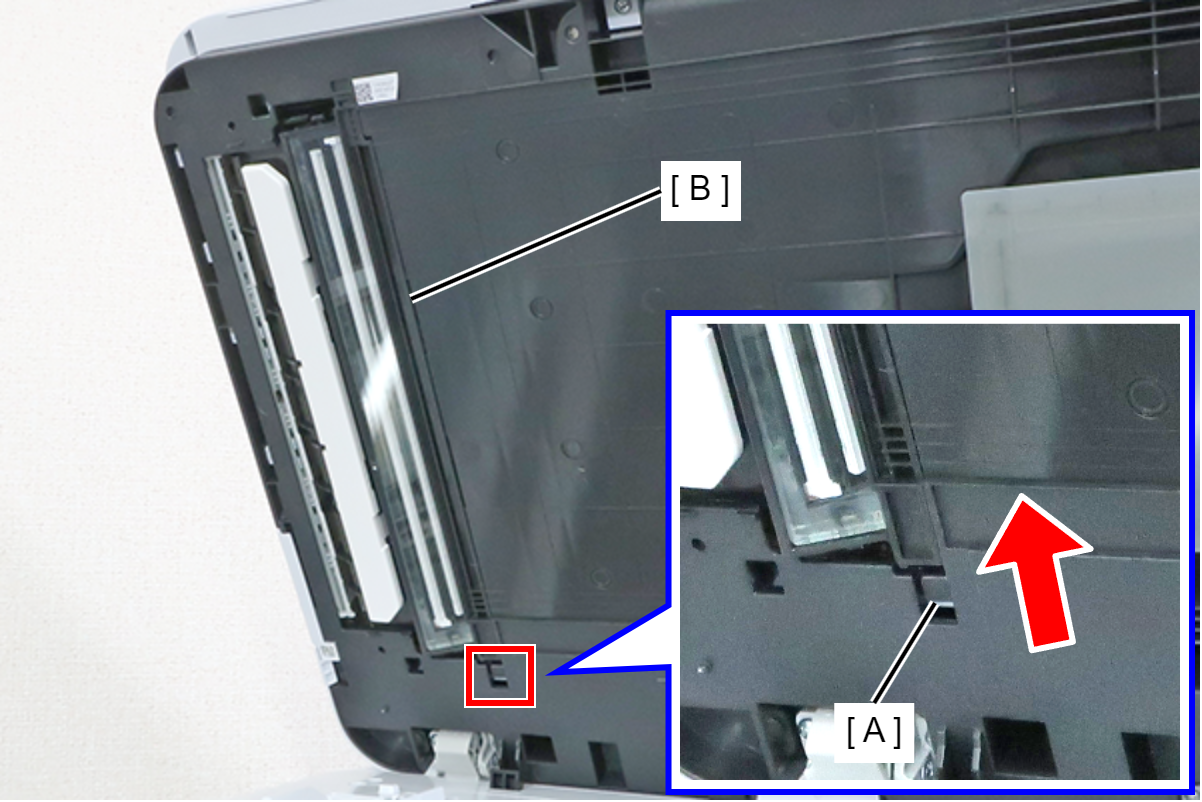
- After releasing the upper dowel (B) of the ADF CIS module (A), release the lower dowel (C) and remove the ADF CIS module (A).
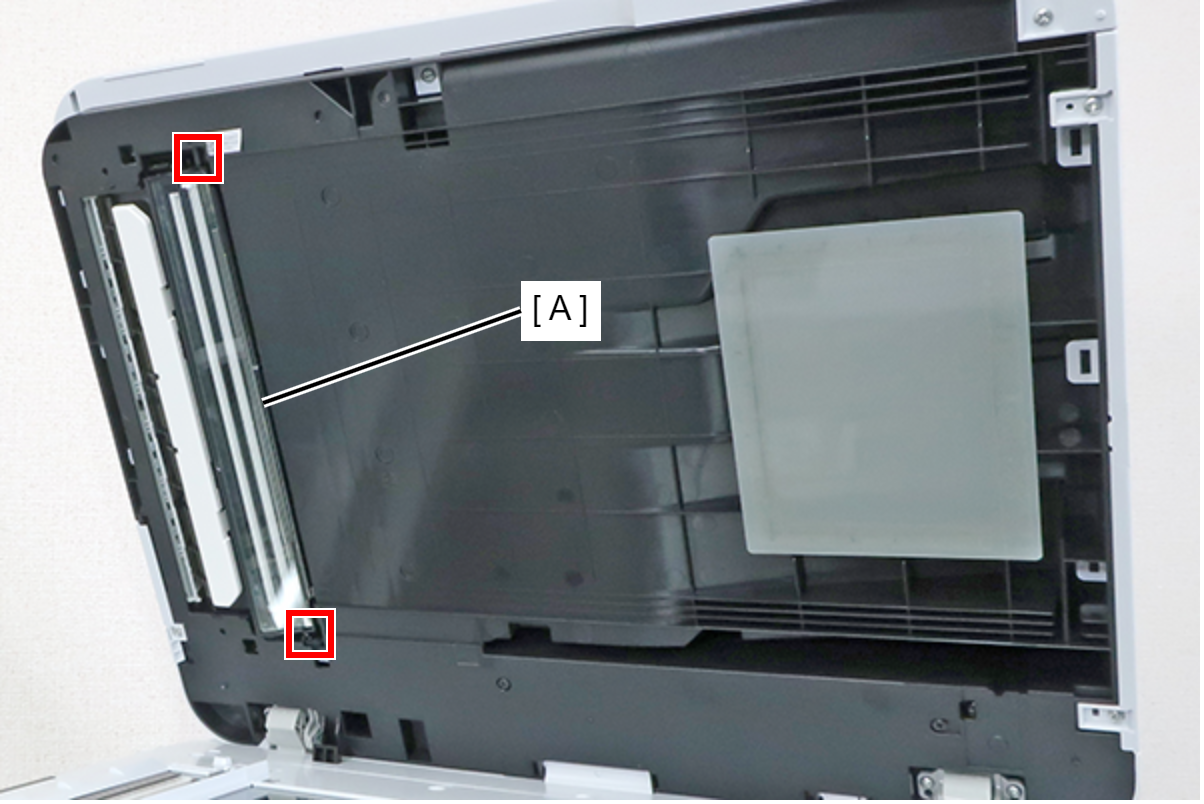 Caution / 注意
The FFC is connected to the ADF CIS Module on the inside, so do not pull on the ADF Module forcefully during removal.
- Release the connector lock (A) and remove the FFC (B) from the connector, then remove the ADF CIS Module (C).
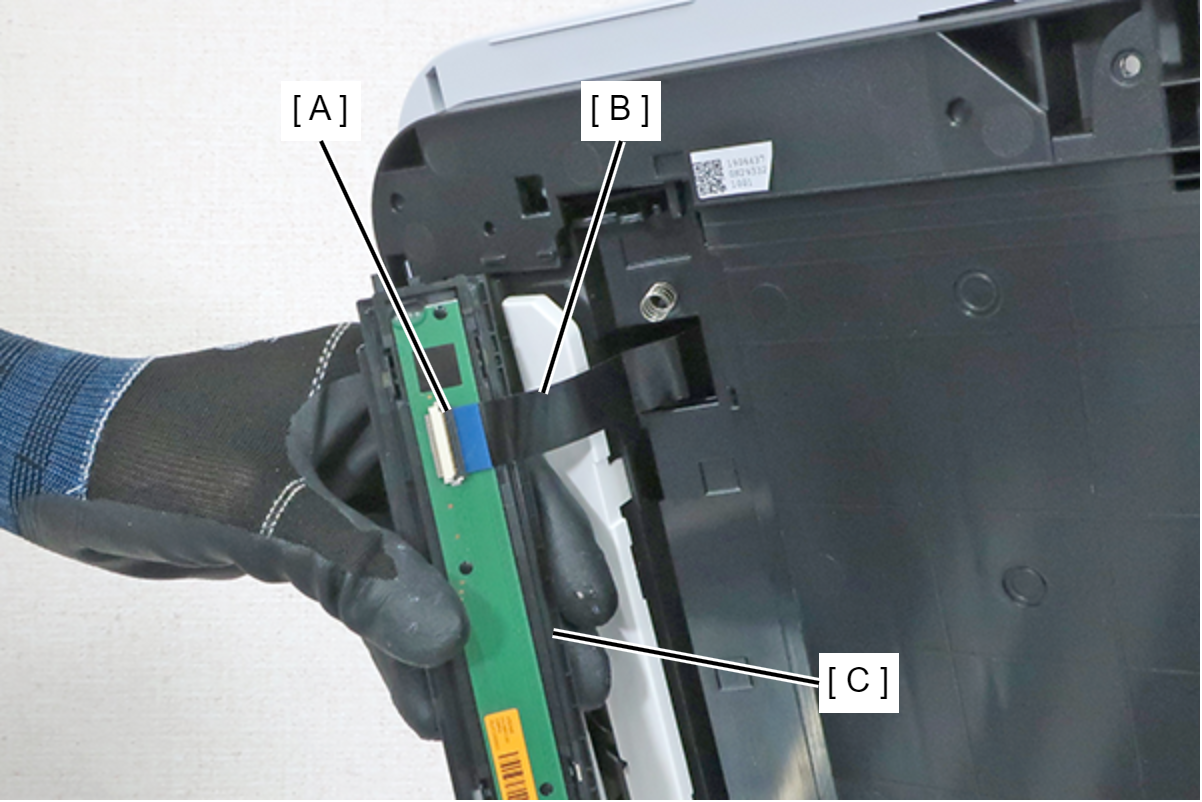
| Check Point / チェックポイント |
After replacing this part, you need to run the menu from the service support mode. (If you ran the Before-replacement menu before replacing the part, it will start automatically when you turn the power on.) CIS Module(ADF/ SCN) / SCN Upper Case / CISM Spacer - After replacement |