Installation
Installation and Attaching Optional Cassette
- Place the optional cassette to the point where installing the printer main unit.
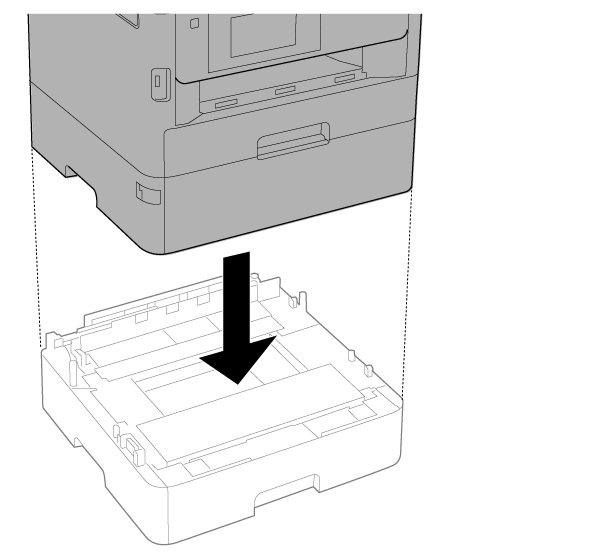
- Place the printer on the optional cassette.
 Check Point / チェックポイント
When attaching the Optional Paper Cassette Unit (C3) to the Optional Paper Cassette Unit (C2), it is necessary to remove the Rear Lower Cover Assy from the Optional Paper Cassette Unit (C2). Remove the Rear Lower Cover Assy by following the steps given below.
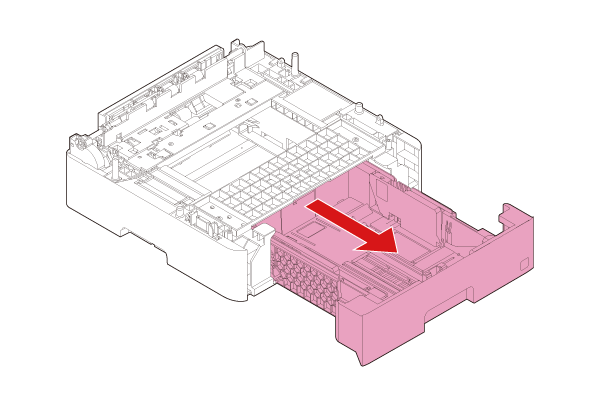
- Pull the Paper Cassette 2 (A), then remove it from the Optional Paper Cassette Unit (C2).
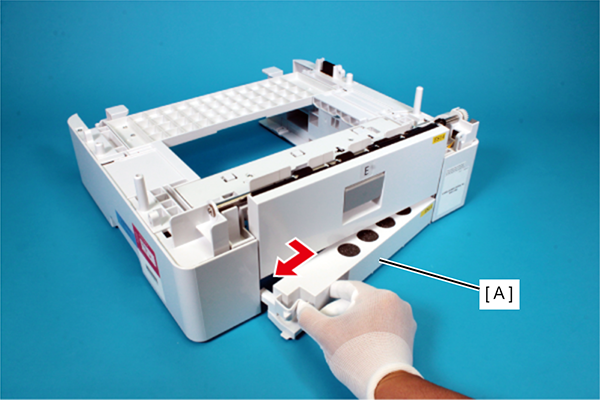
- Remove the Rear Lower Cover Assy (A) in the direction of the arrow by picking up the tab on the Rear Lower Cover Assy (A).
- Attach the Optional Paper Cassette Unit (C2) to the Optional Paper Cassette Unit (C3).
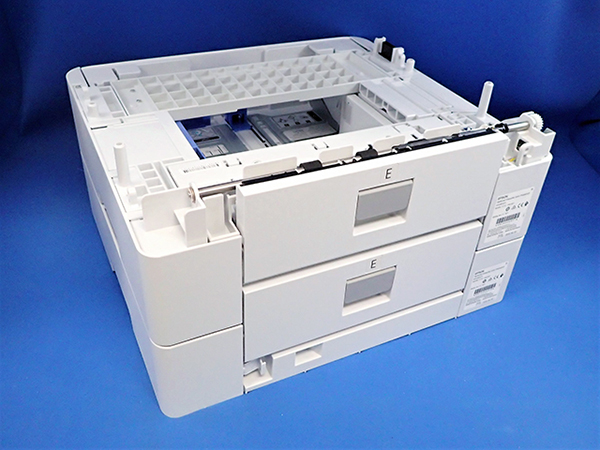
 Caution / 注意
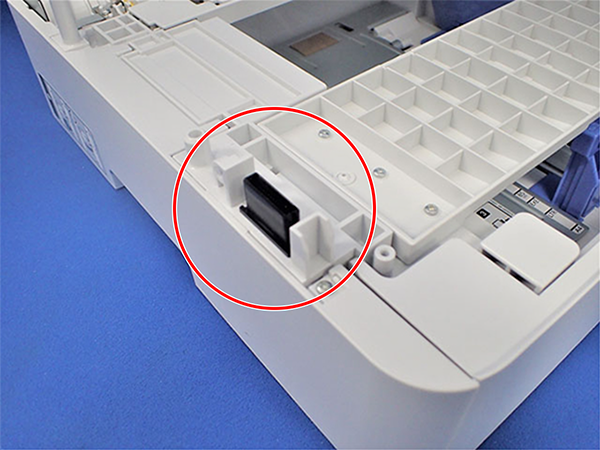
When placing the printer on the Additional Cassette Unit, there is a risk of damaging the connector of the Additional Cassette Unit, so be sure to lower it down vertical while aligning the four corners of the printer and the Additional Cassette Unit.
- Pull the Paper Cassette 2 (A), then remove it from the Optional Paper Cassette Unit (C2).
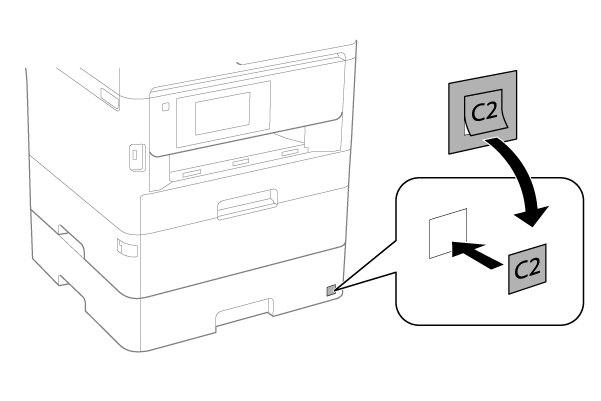
- Paste the cassette number label.
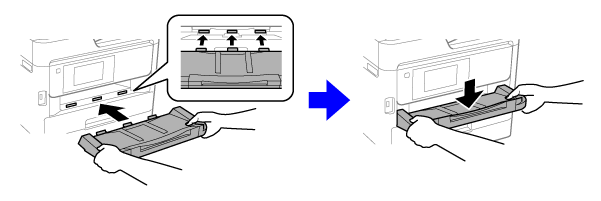
- Attach the Stacker.
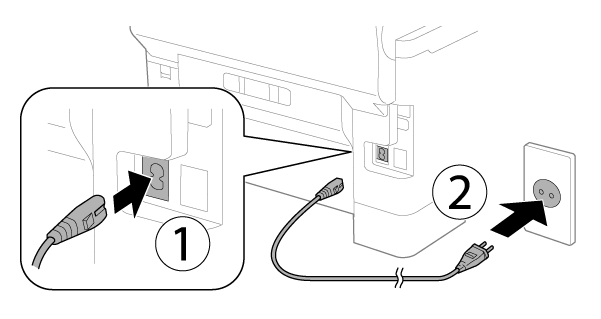
Connecting the Power
- Connect the power cable.