
WF-C529R
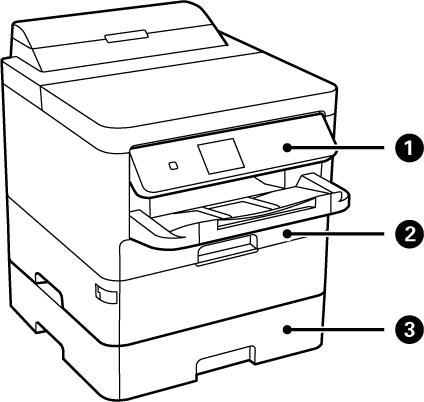
| No. | Name | Explanation |
|---|---|---|
| 1 | Operation Panel | Operates the printer. You can change the angle of the panel. |
| 2 | Paper Cassette1 (C1) |
Loads paper. |
| 3 | Paper cassette 2 (C2) | Loads paper. |
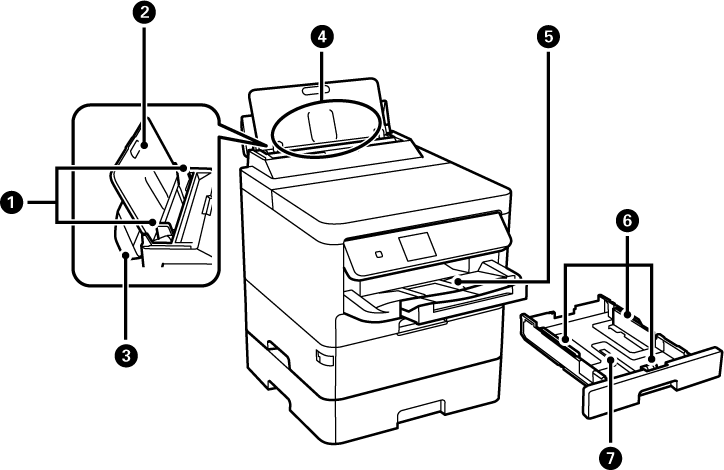
| No. | Name | Explanation |
|---|---|---|
| 1 | Edge guides | Feeds the paper straight into the printer. Slide to the edges of the paper. |
| 2 | Paper support | Supports loaded paper. |
| 3 | Feeder guard | Prevents foreign substance from entering the printer. Usually keep this cover closed. |
| 4 | Rear paper feed (B) | Loads paper. |
| 5 | Output tray | Holds the ejected paper. |
| 6 | Edge guides | Feeds the paper straight into the printer. Slide to the edges of the paper. |
| 7 | Paper cassette | Loads paper. |
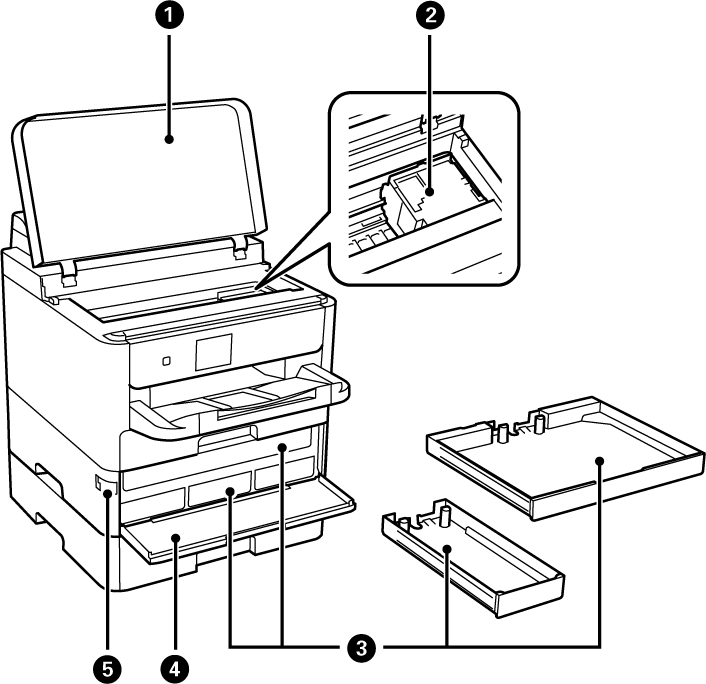
| No. | Name | Explanation |
|---|---|---|
| 1 | Printer cover (J) | Open when removing jammed paper inside the printer. |
| 2 | Printhead | Fires ink. |
| 3 | Ink supply unit tray | Sets an ink supply unit. |
| 4 | Front cover (A) | Open when replacing ink supply units. |
| 5 | Front cover lock | Locks the front cover. |
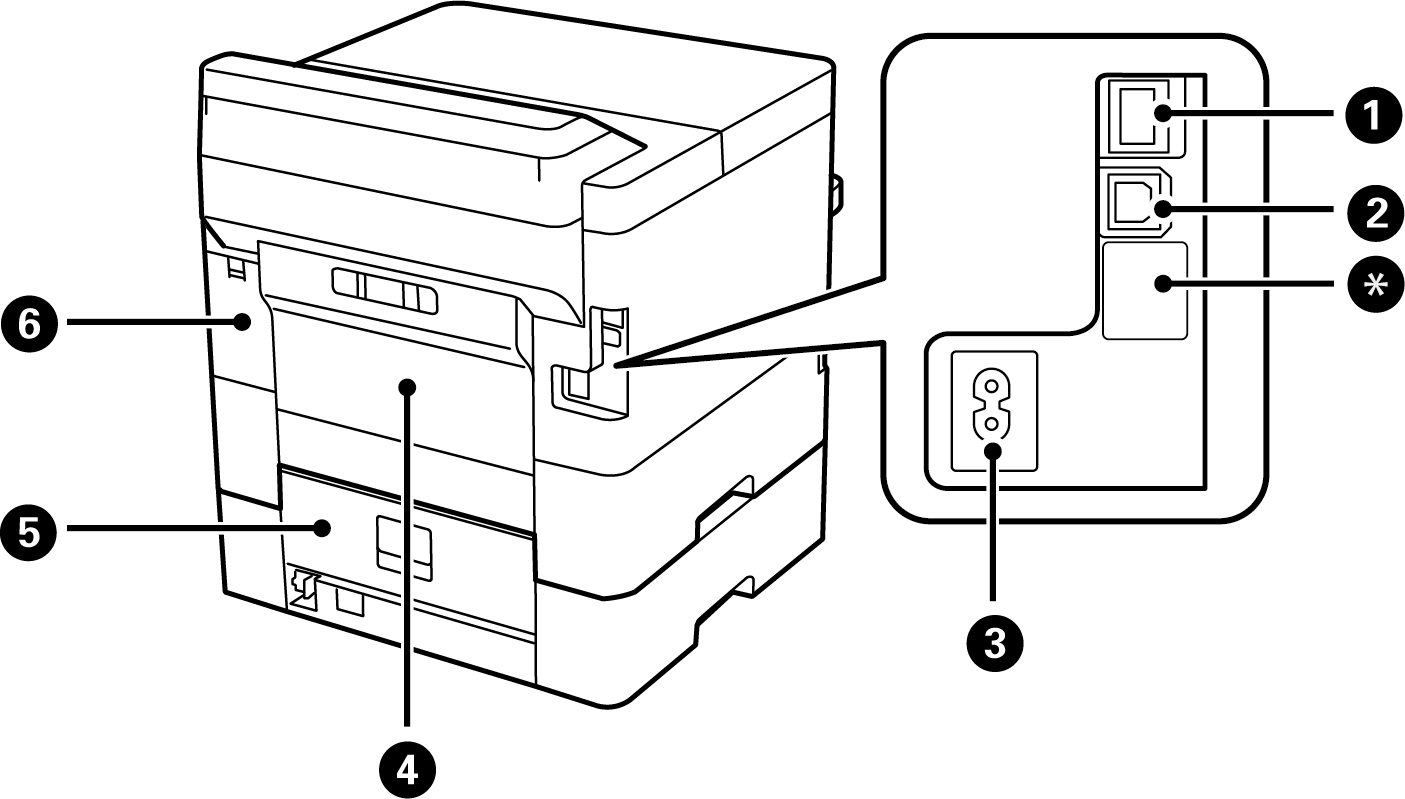
| No. | Name | Explanation |
|---|---|---|
| 1 | LAN port | Connects a LAN cable. |
| 2 | USB port | Connects a USB cable to connect with a computer. |
| * | Service USB port | USB port for future use. Do not remove the sticker. |
| 3 | AC inlet | Connects the power cord. |
| 4 | Rear Cover (D) |
Open when removing jammed paper. |
| 5 | Rear cover (E) | Open when removing jammed paper. |
| 6 | Maintenance box cover (H) | Open when replacing the maintenance box. |

| No. | Explanation |
|---|---|
| 1 | Turns the printer on or off. Unplug the power cord after checking that the power light is off. |
| 2 | Displays the home screen. |
| 3 | Displays the Paper Setting screen. You can select the paper size and paper type settings for each paper source. |
| 4 | Stops the current operation. |
| 5 | Applies to a variety of functions depending on the situation. |
| 6 | Selects the items. Press OK to confirm your selection or run the selected feature. |
| 7 | Returns to the previous screen. |
| 8 | Flashes when the printer is processing data. It turns on when there are queued jobs. |
| 9 | Flashes or turns on when an error occurs. |