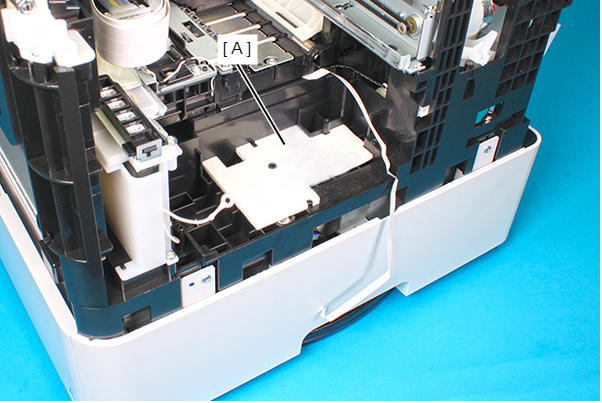
Ink Porous Pad, 1 (WF-C529R Series)
- Remove the Rear Unit (A).
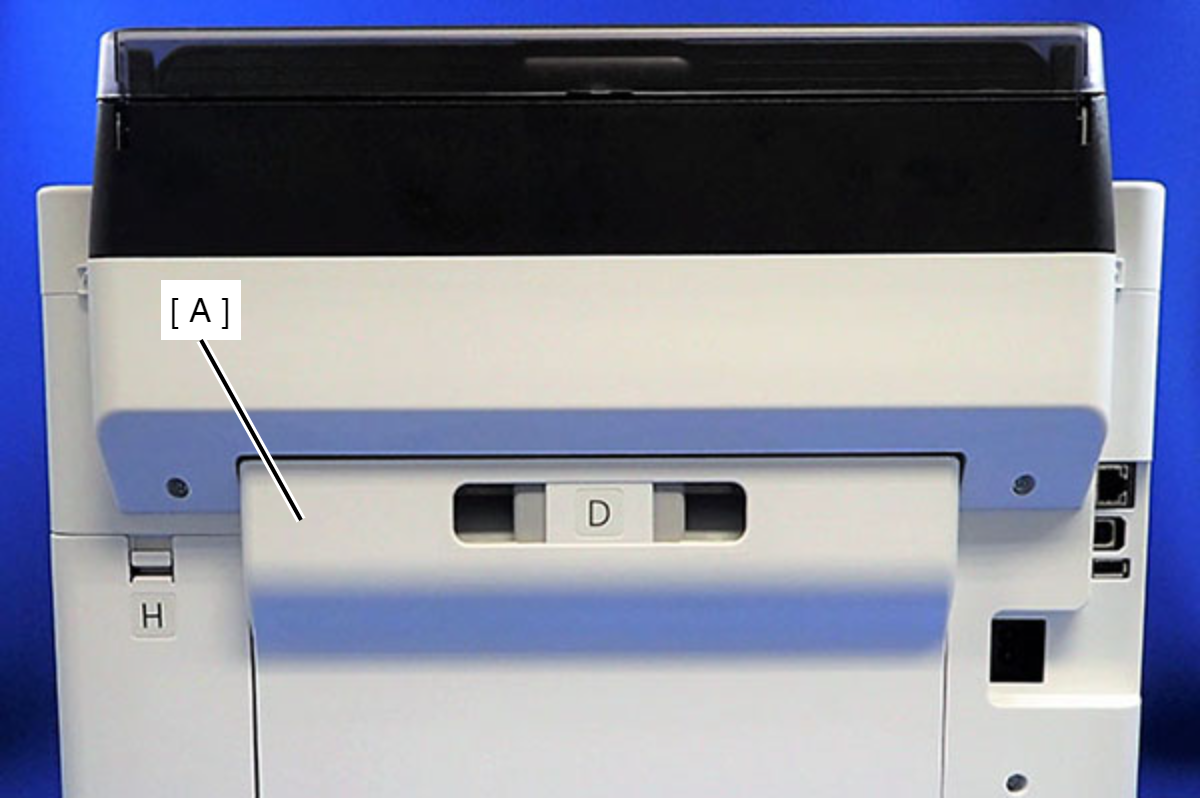
- Remove the two screws that secure the ASF Cover Assy (A).
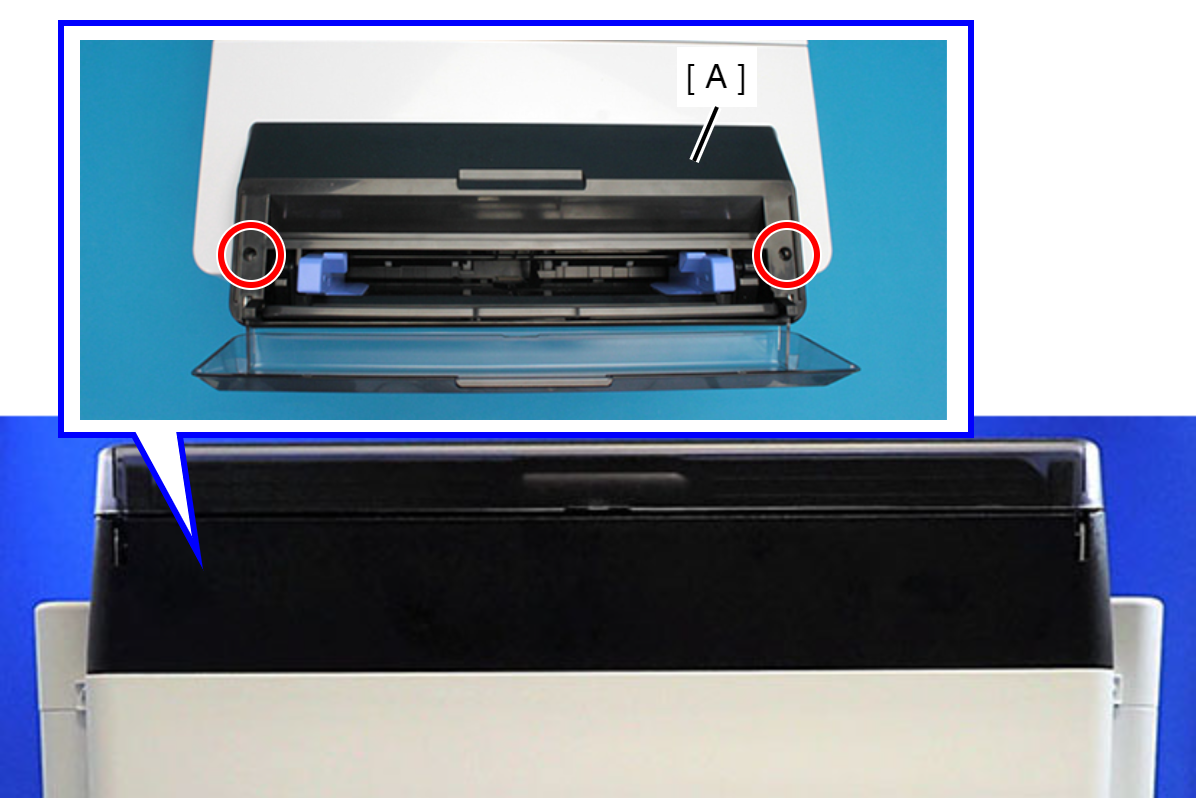
 : C.B.P-TITE-SCREW-3x10-F.ZN-3C
- Remove the four screws that secure the Rear Back Cover (A).
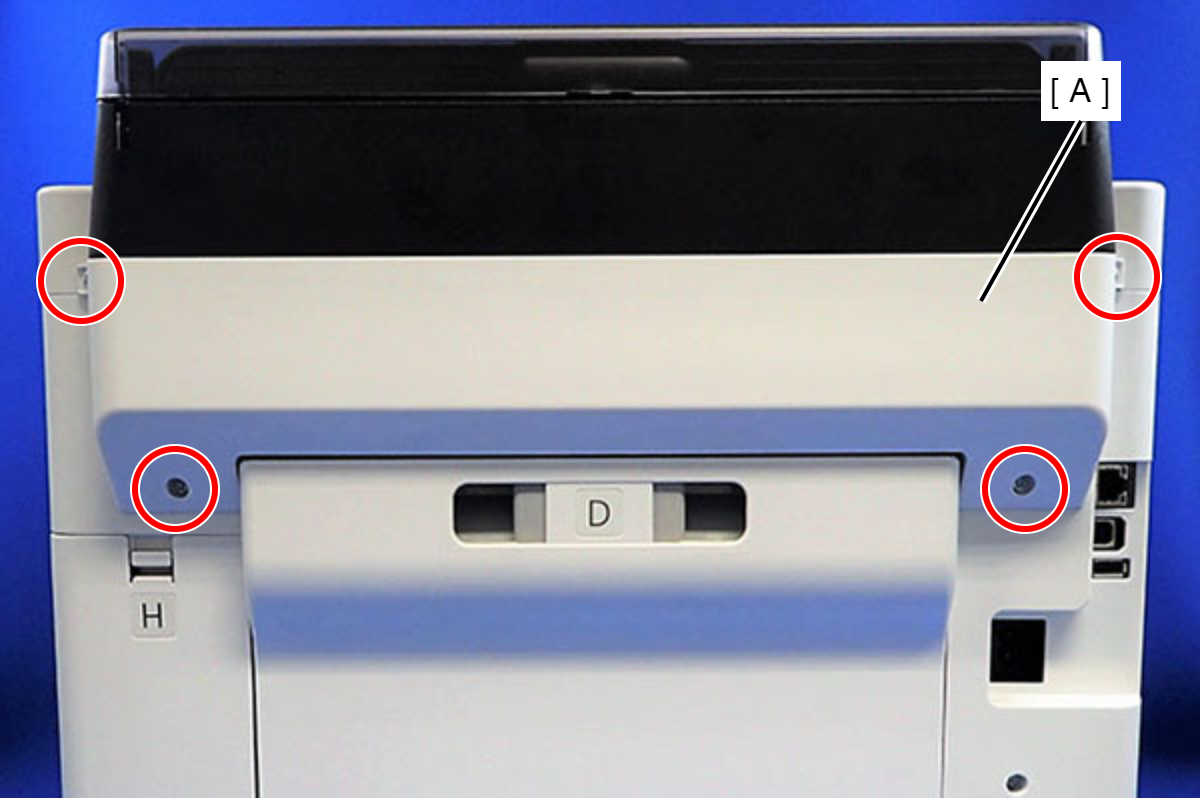
 : C.B.P-TITE-SCREW-3x10-F.ZN-3C
- Remove the Rear Back Cover (A) downward.
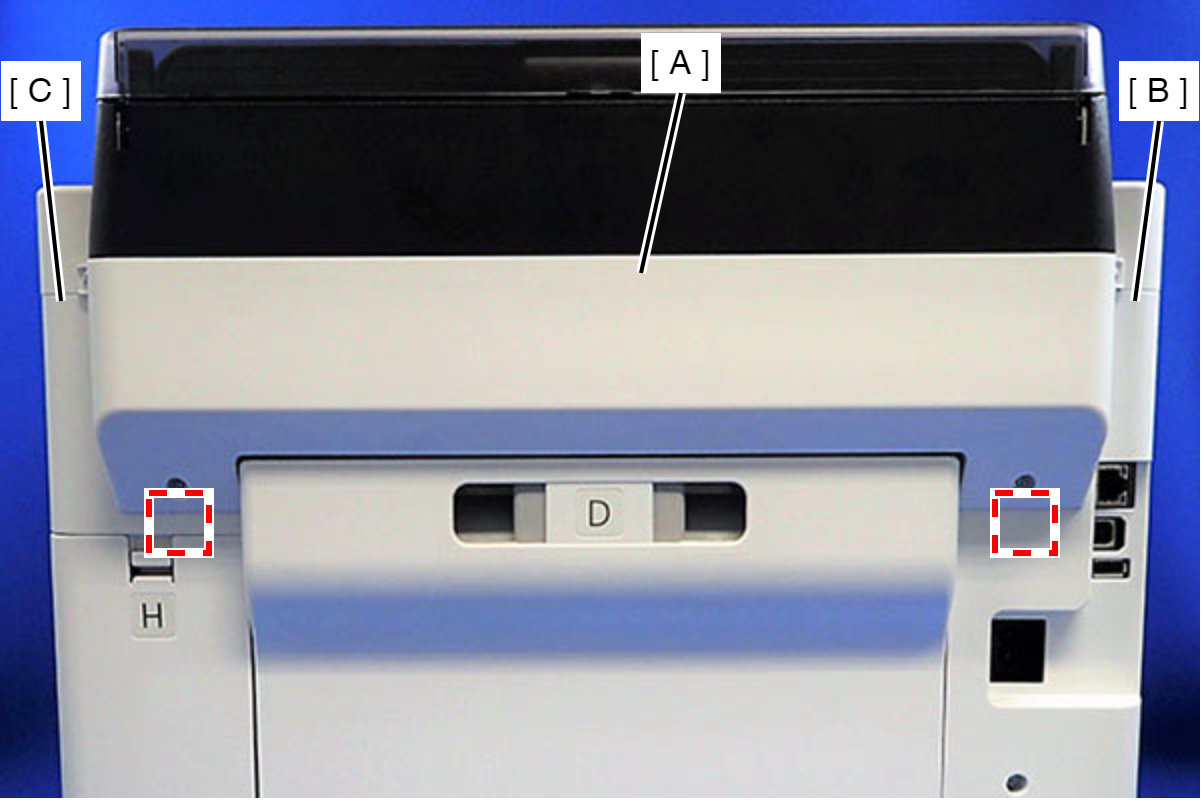
 Assembly / 組み立て
Attach the two dowels of the Rear Back Cover (A) to the positioning holes on the Housing Left (B) and the Housing Right (C).
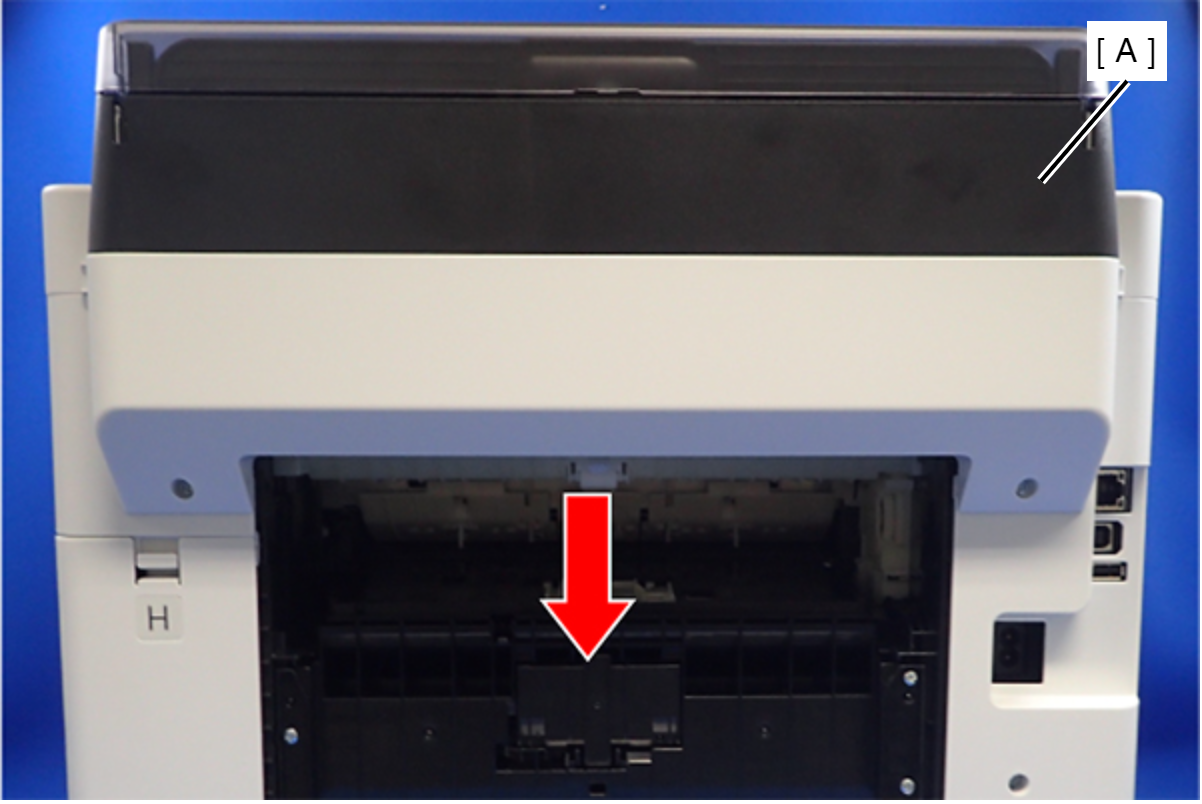
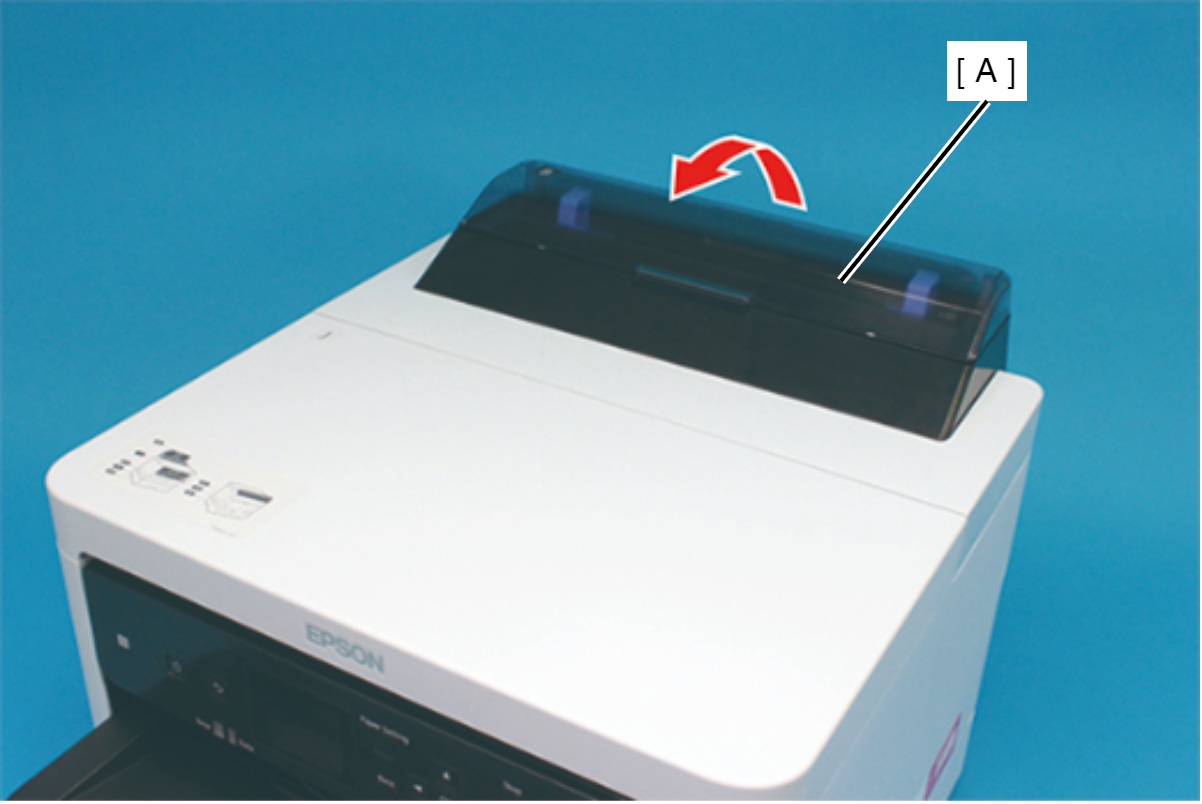
- Remove the ASF Cover Assy (A) in the direction of the arrow.
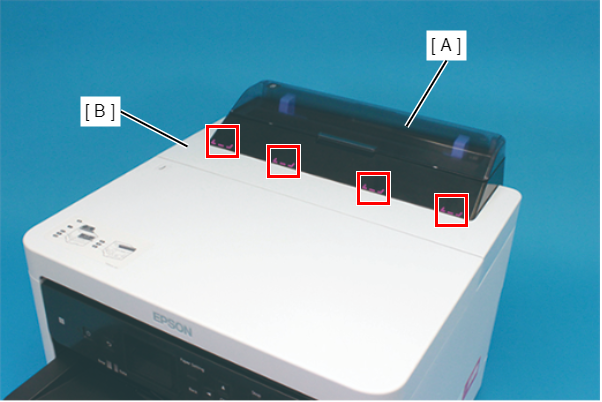
Assembly / 組み立てInsert the four tabs of the ASF Cover Assy (A) to the positioning holes of the Front Cover Retainer Plate.
- Remove the two screws securing the Front Cover Retainer Plate (A).
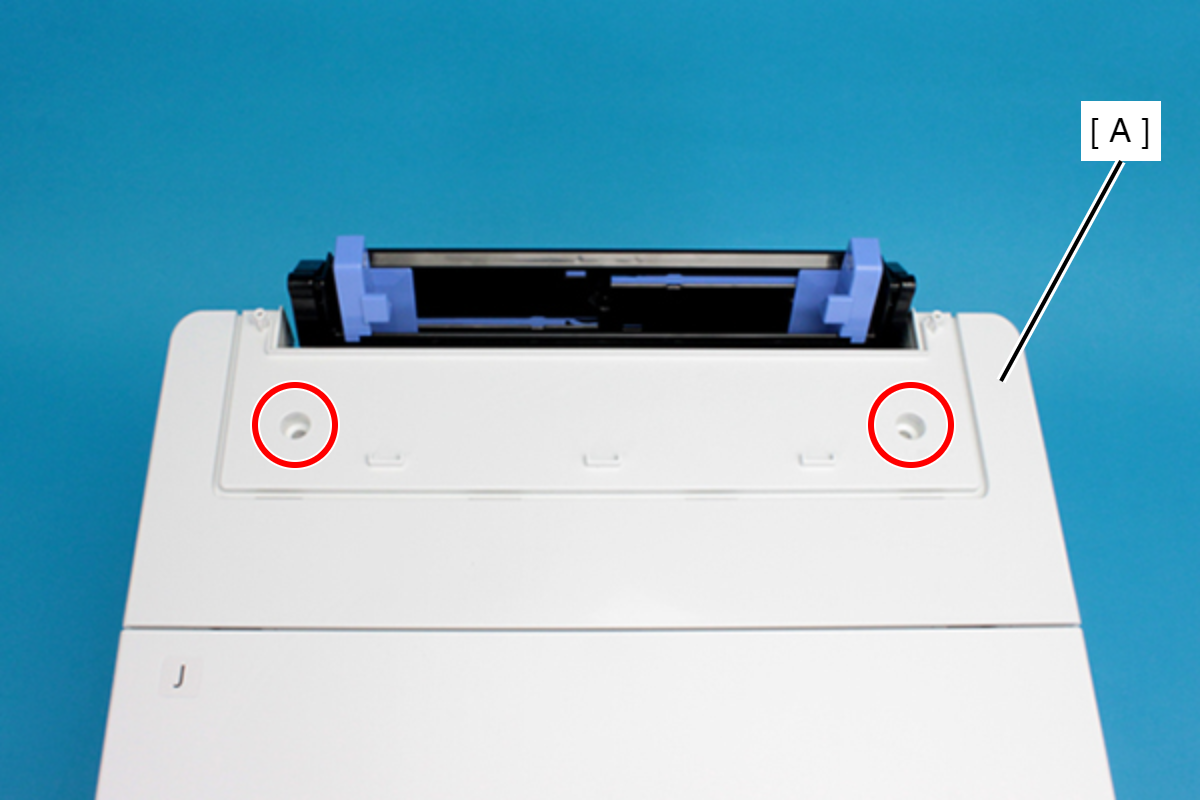
- : C.B.P-TITE-SCREW-3x10-F/ZN-3C
- Open the Printer Cover (A) and remove the four screws, and then remove the Front Cover Retainer Plate (B).
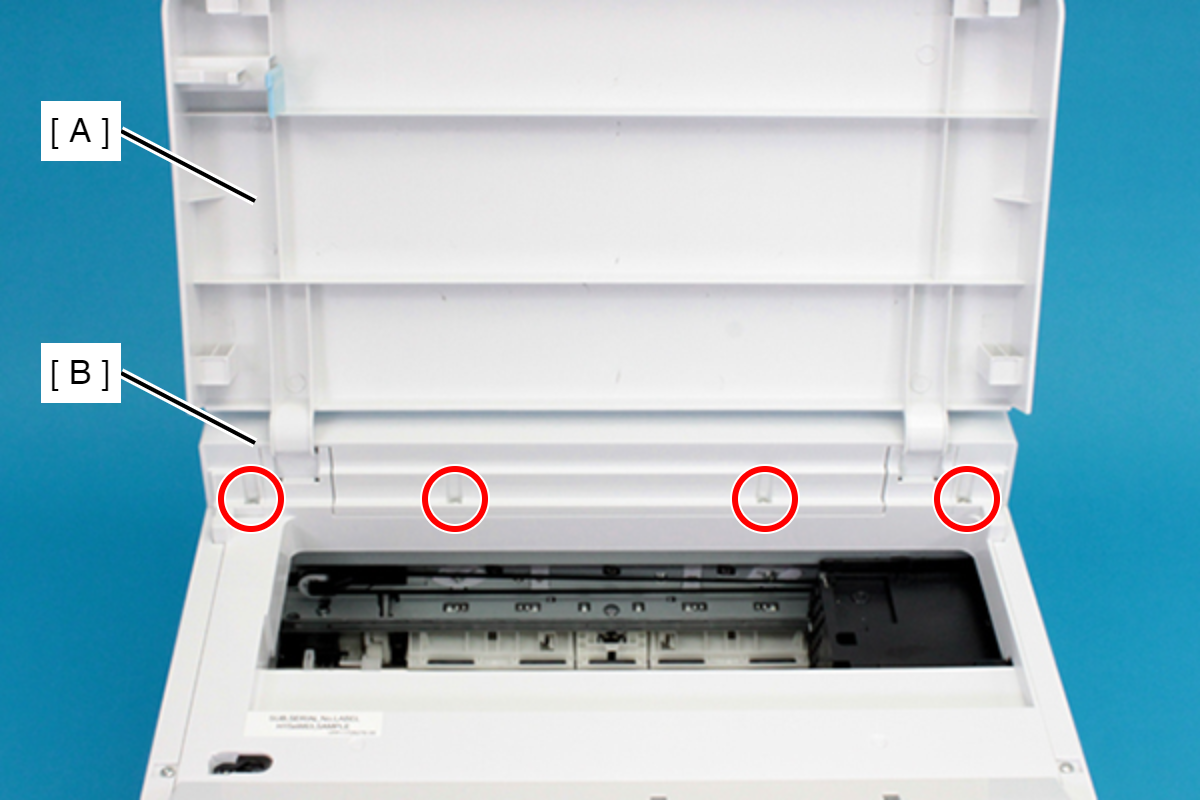
- : C.B.P-TITE-SCREW-3x10-F/ZN-3C
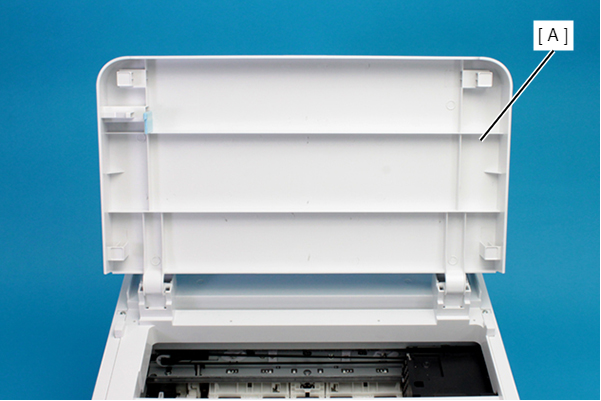
- Remove the Front Cover (A) upward.
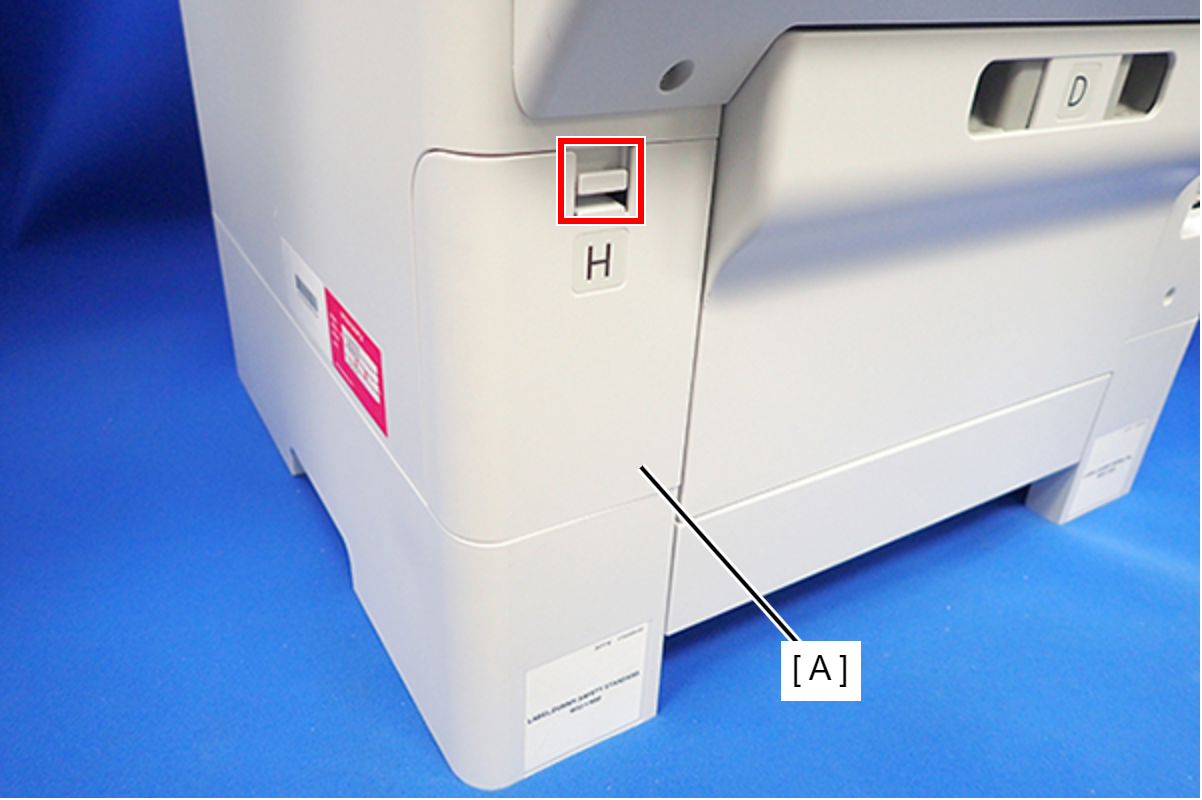
- Disengage the hook, and remove the Maintenance Box Cover (A).
- Remove the three screws that secure the Housing Right (A).
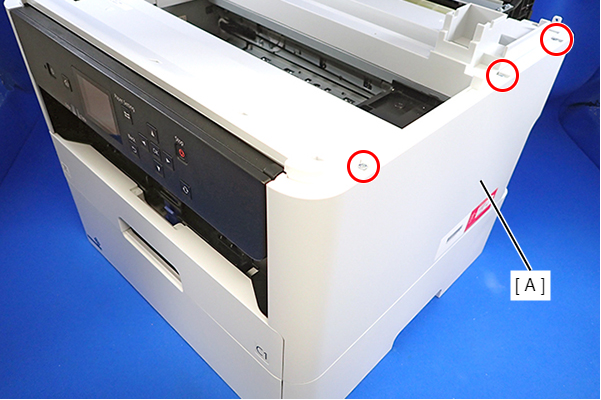
- : C.B.P-TITE-SCREW-3x10-F.ZN-3C
- Remove the two screws that secure the Housing Right (A).
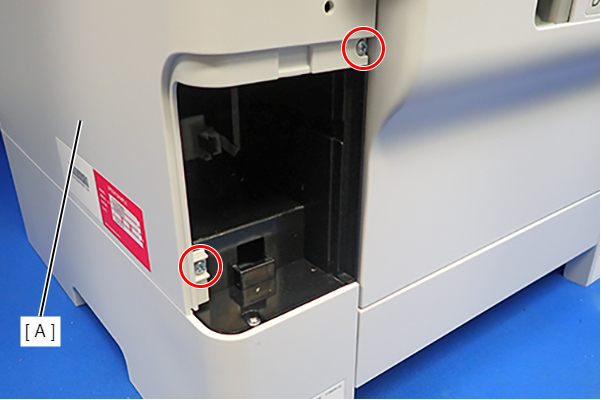
- : C.B.P-TITE-SCREW-3x10-F.ZN-3C
- Lift the Housing Right (A) to release the two hooks on the front side of the Housing Right (A), then remove the Housing Right (A).
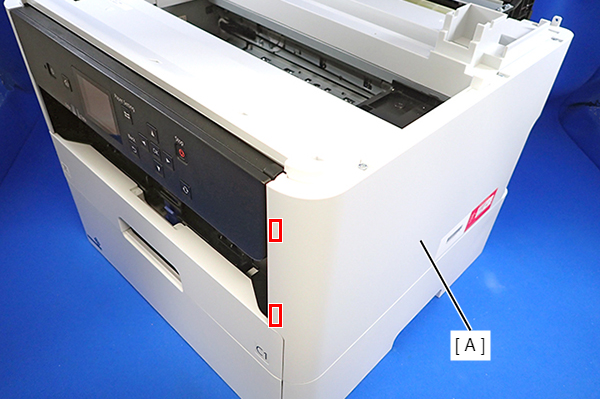 Assembly / 組み立て
Insert the four tabs of the Housing Right (A) to the positioning holes on the Ink Supply Unit (B).
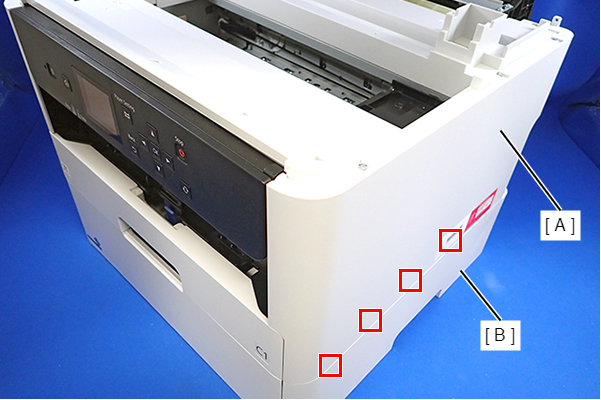
- Remove the three screws that secure the Housing Left (A).
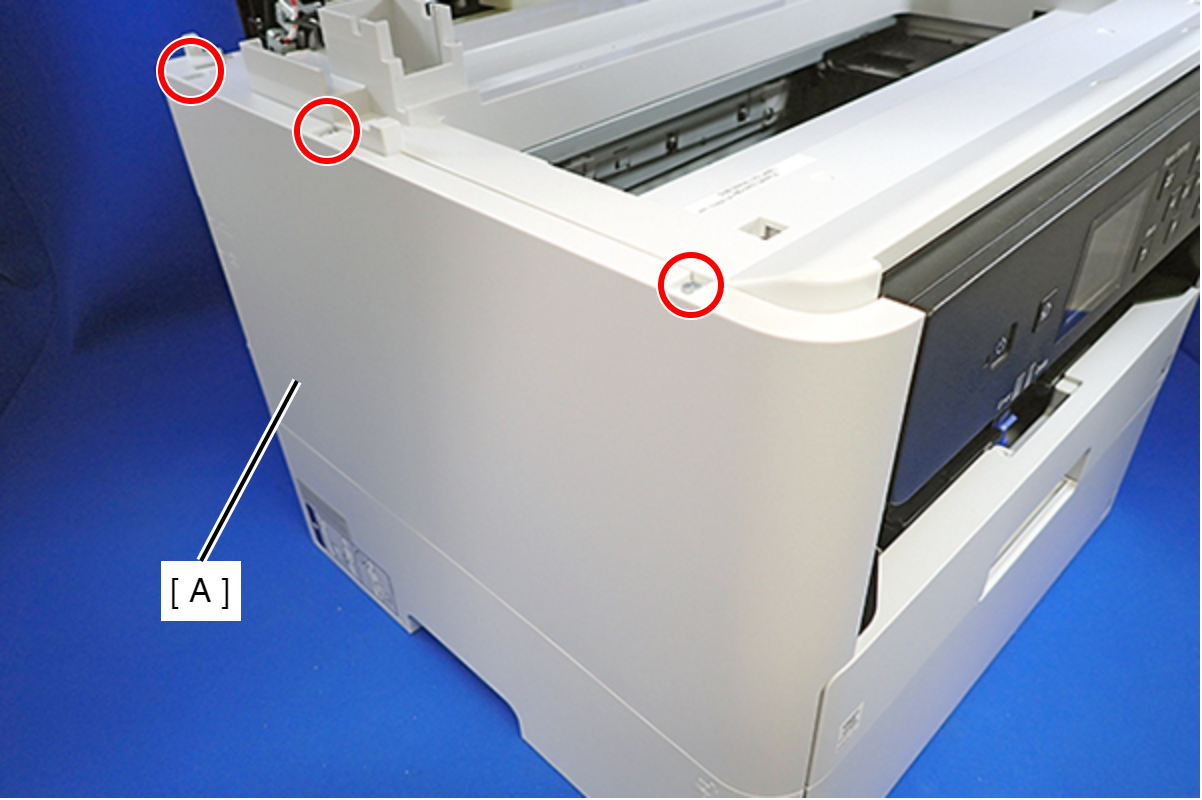
- : C.B.P-TITE-SCREW-3x10-F.ZN-3C
- Remove the two screws that secure the Housing Left (A).
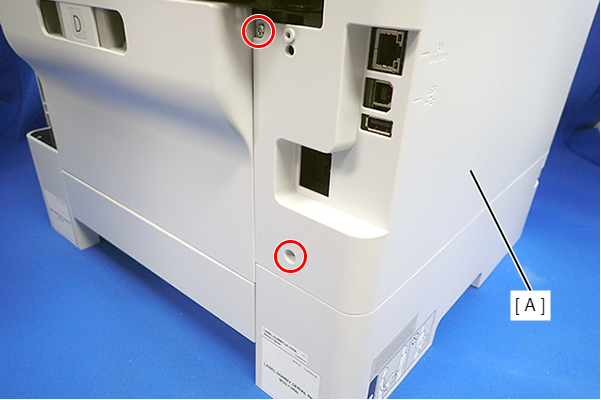
- : C.B.P-TITE-SCREW-3x10-F.ZN-3C
- Lift the Housing Left (A) to release the two hooks each on the front side and rear side of the Housing Left (A), and then remove the Housing Left (A).
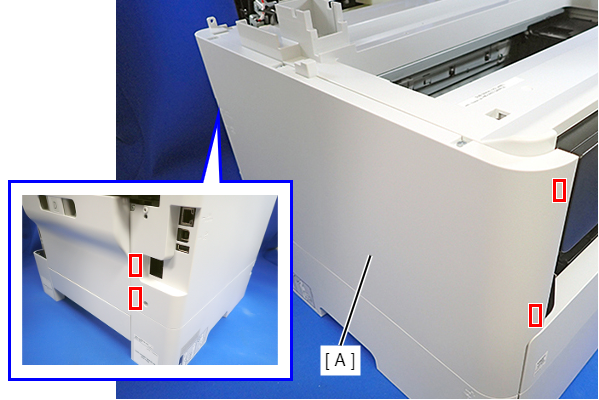 Assembly / 組み立て
Insert the four tabs on the Housing Left (A) to the positioning holes of the Ink Supply Unit (B).
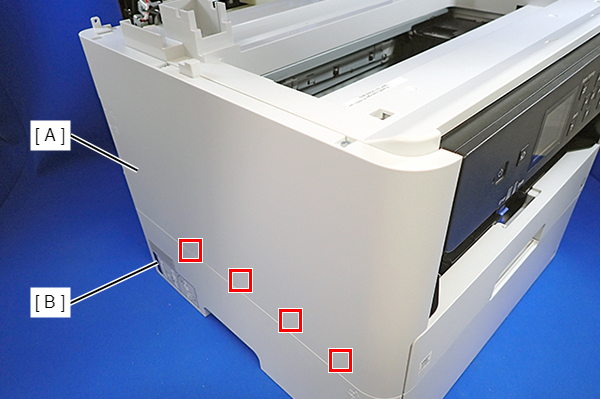
- Remove the six screws, then remove the Housing Upper (A).
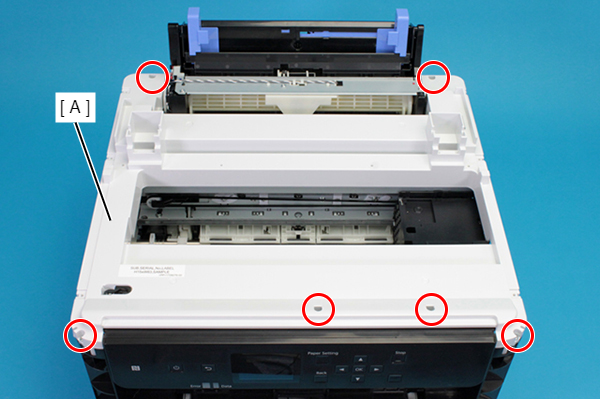
- : C.B.P-TITE-SCREW-3x10-F.ZN-3C
- Remove the screws that secure the Wasted Ink Duct Holder (A).
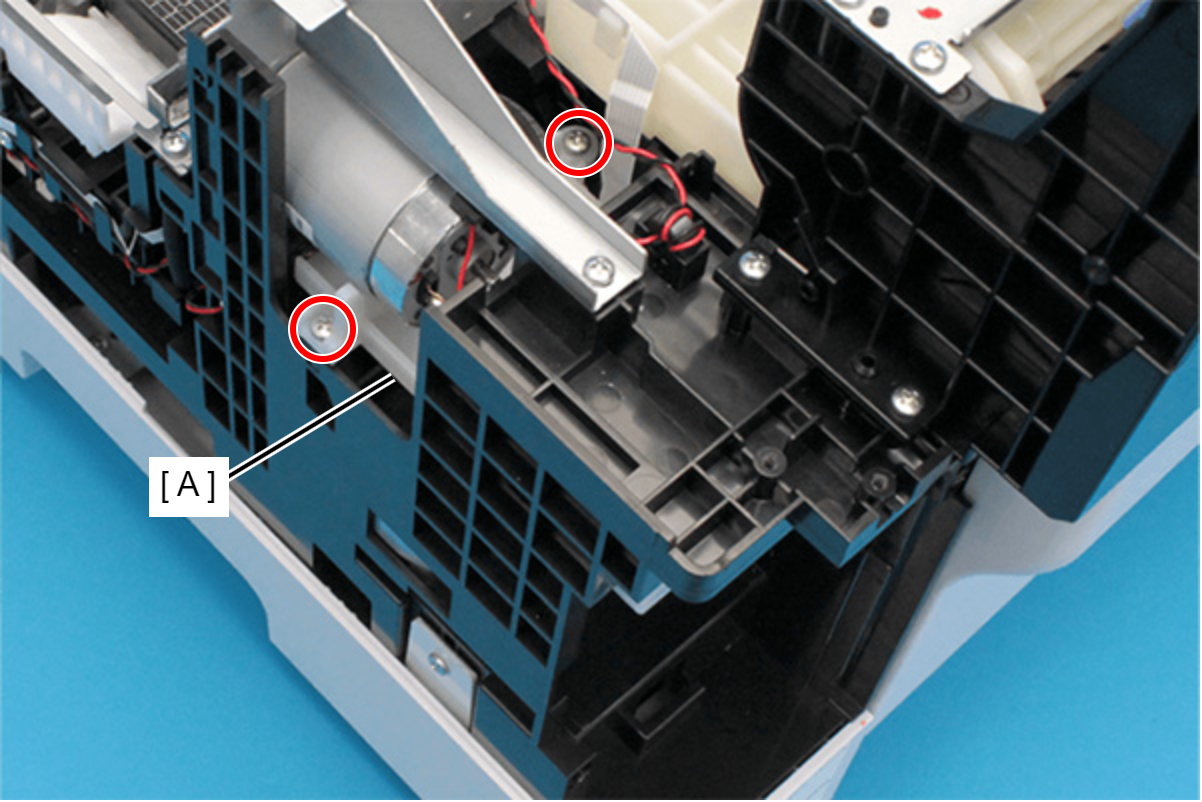
- : C.B.P-TITE-SCREW-3x10-F.ZN-3C
- Disengage the hook, and slide the Wasted Ink Duct Holder (A) to rear.
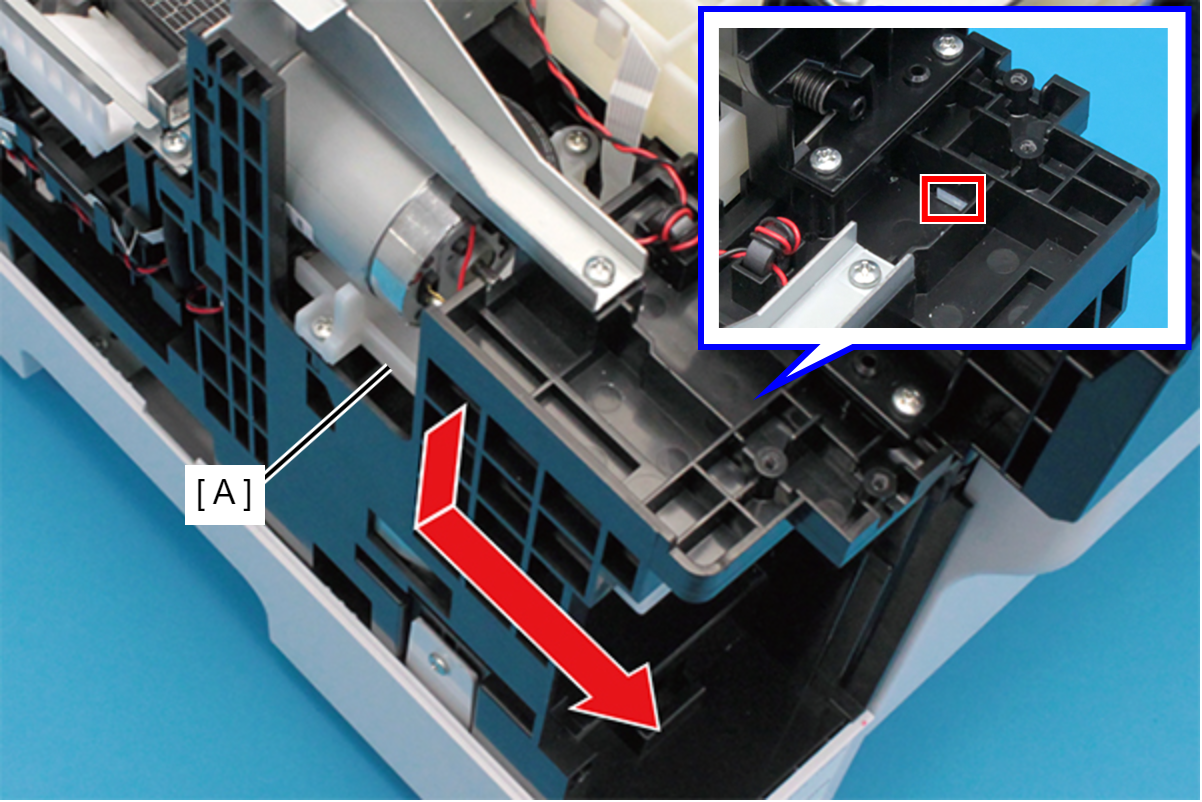
- Slide the tube clamp (A), and remove the Wasted Ink Tube (C) from the Wasted Ink Duct Holder (B).
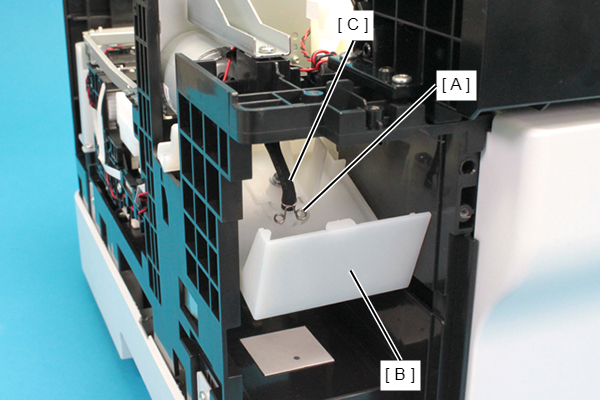
 Check Point / チェックポイント
Before removing the Inksystem Assy, release the carriage lock, and then move the CR Unit to center of the printer.
 Caution / 注意
In the this step, waste ink may spill from the Wasted Ink Tube. Prepare waste cloths or similar in advance.
- Remove the three screws and remove the Upper Cap Frame (A).
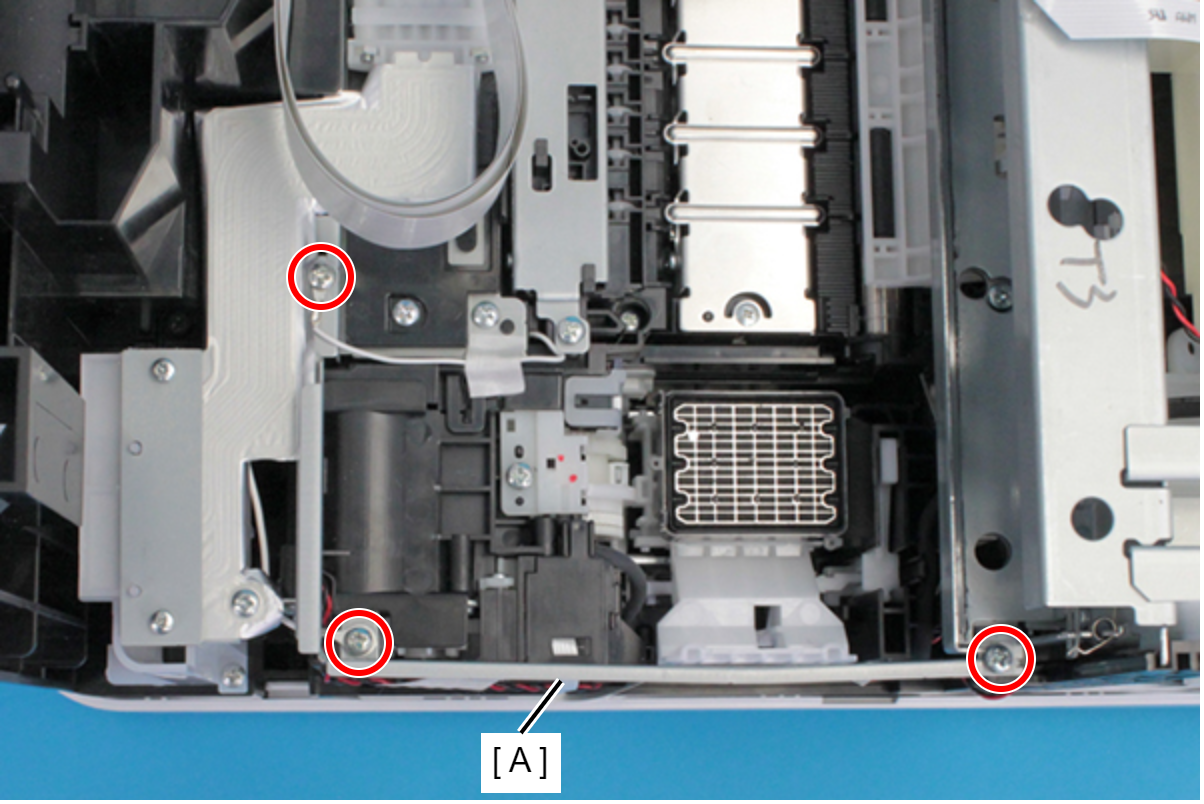
- : C.B.S-TITE-SCREW-3x6-F.ZN-3C
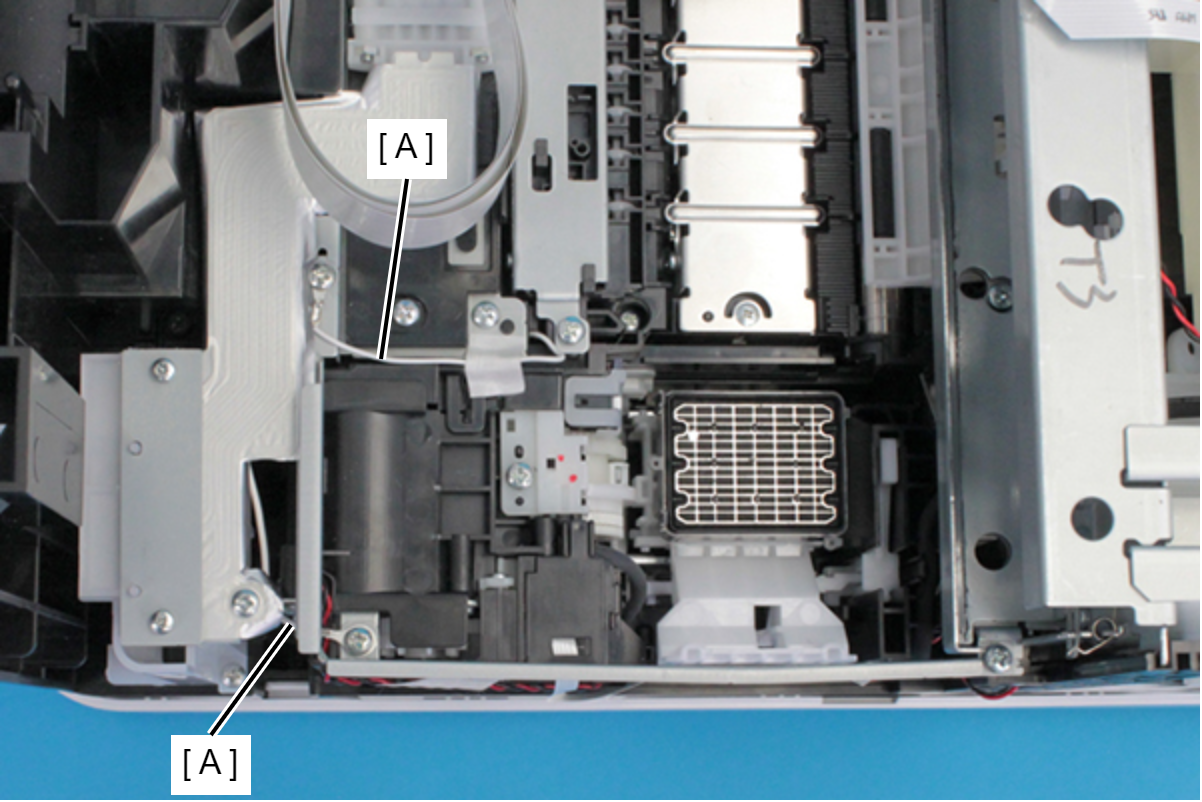
Assembly / 組み立てSecure the grounding cables (A) together with the screws.
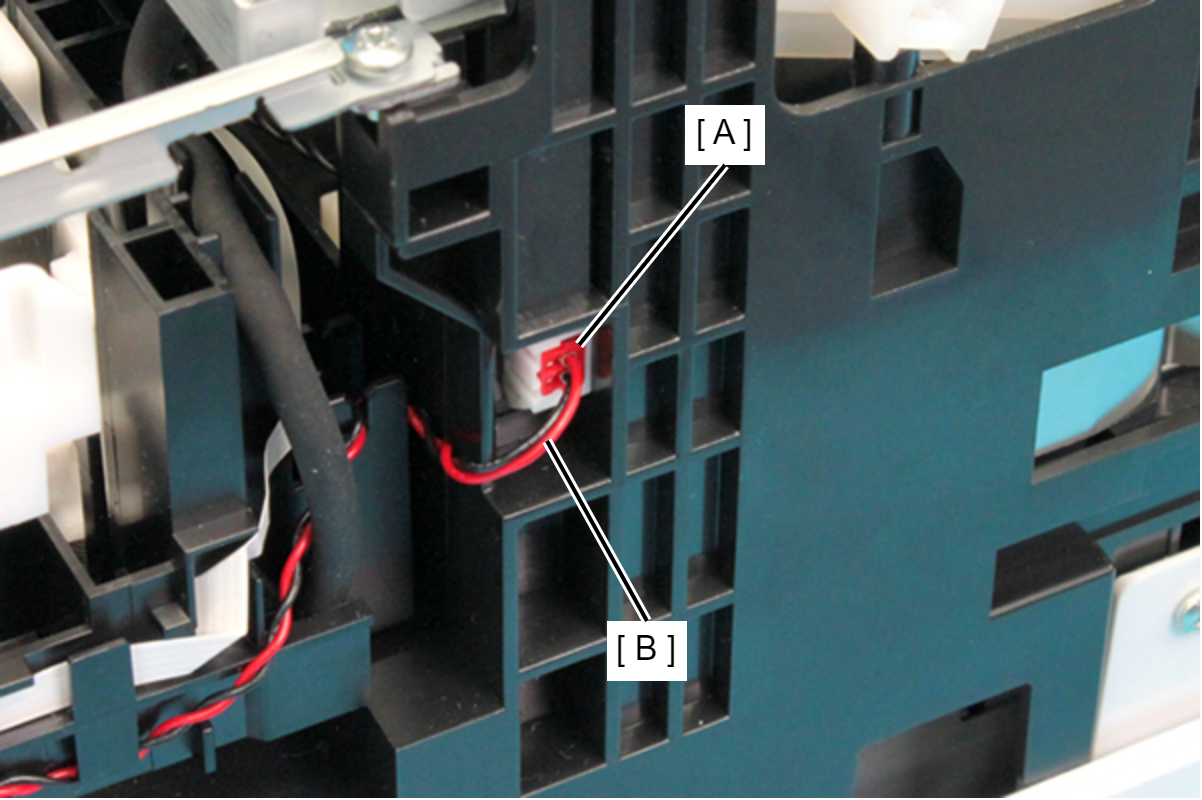
- Disconnect the cable (B) from the relay connector (A).
- Disengage hook (A), then remove the Upper Cap FFC Cover (B).
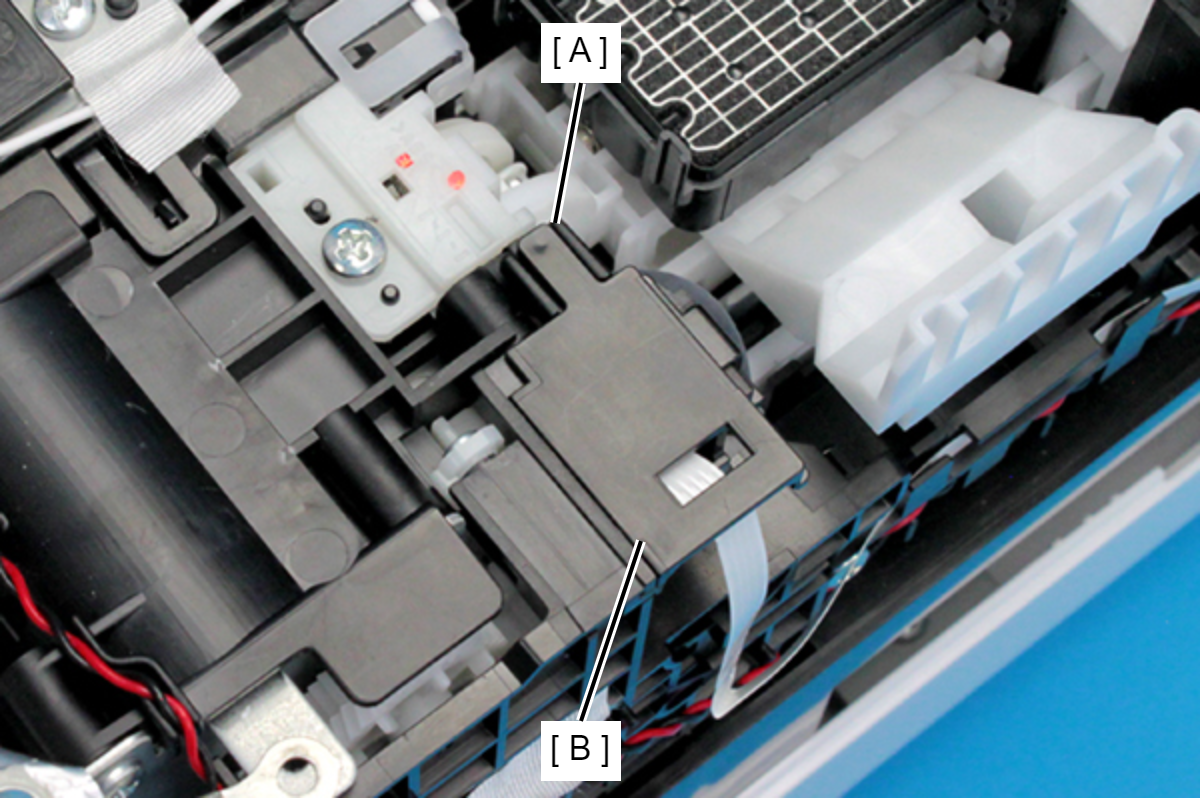 Assembly / 組み立て
Route the FFC (C) through the slit (B) on the Upper Cap FFC Cover (A).
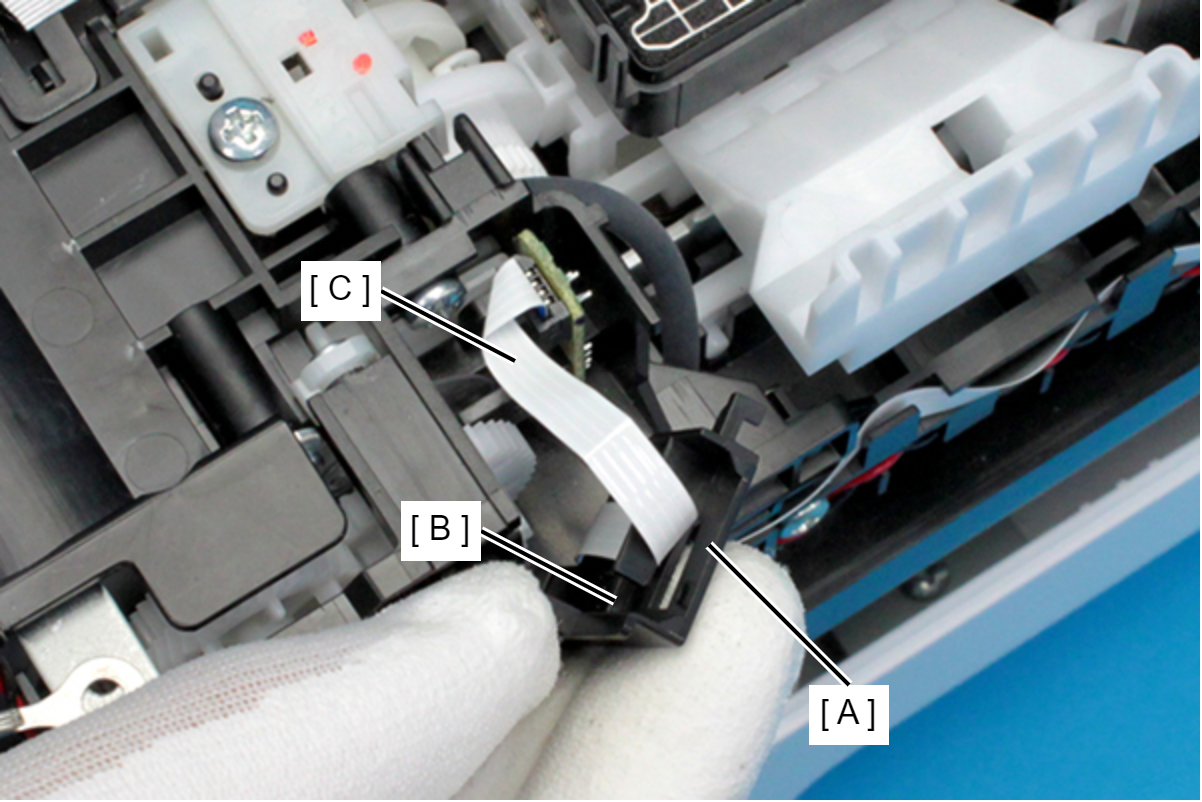
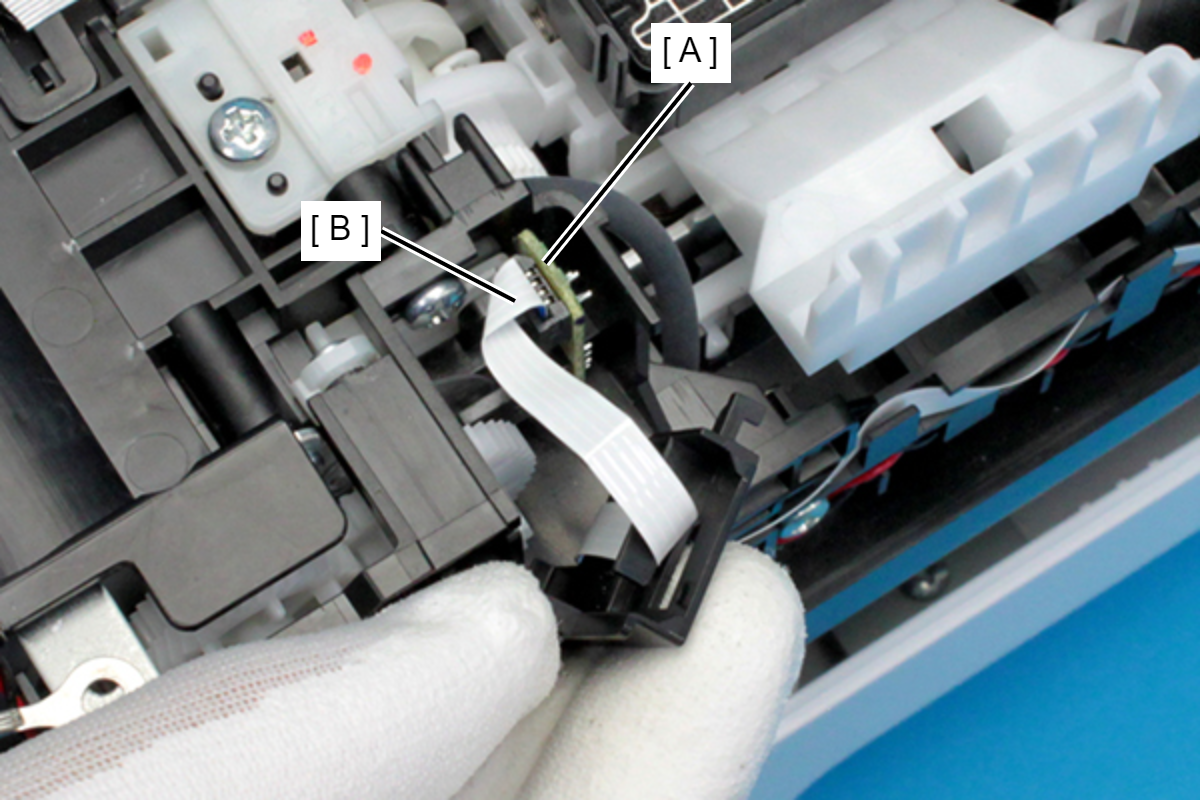
- Disconnect the FFC (B) from the Pump Encoder Sensor (A).
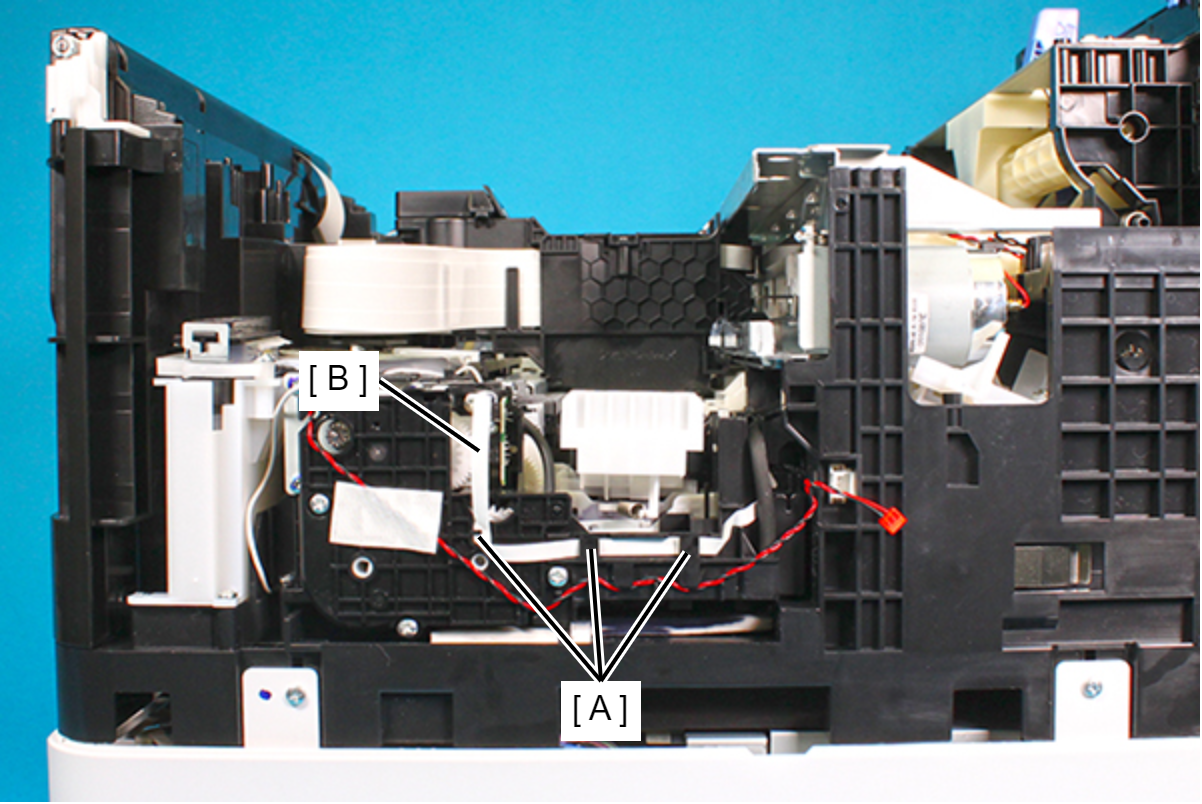
- Release the FFC (B) from the three tabs on the Inksystem Assy (A).
- Remove the four screws, and remove the Inksystem Assy (A).
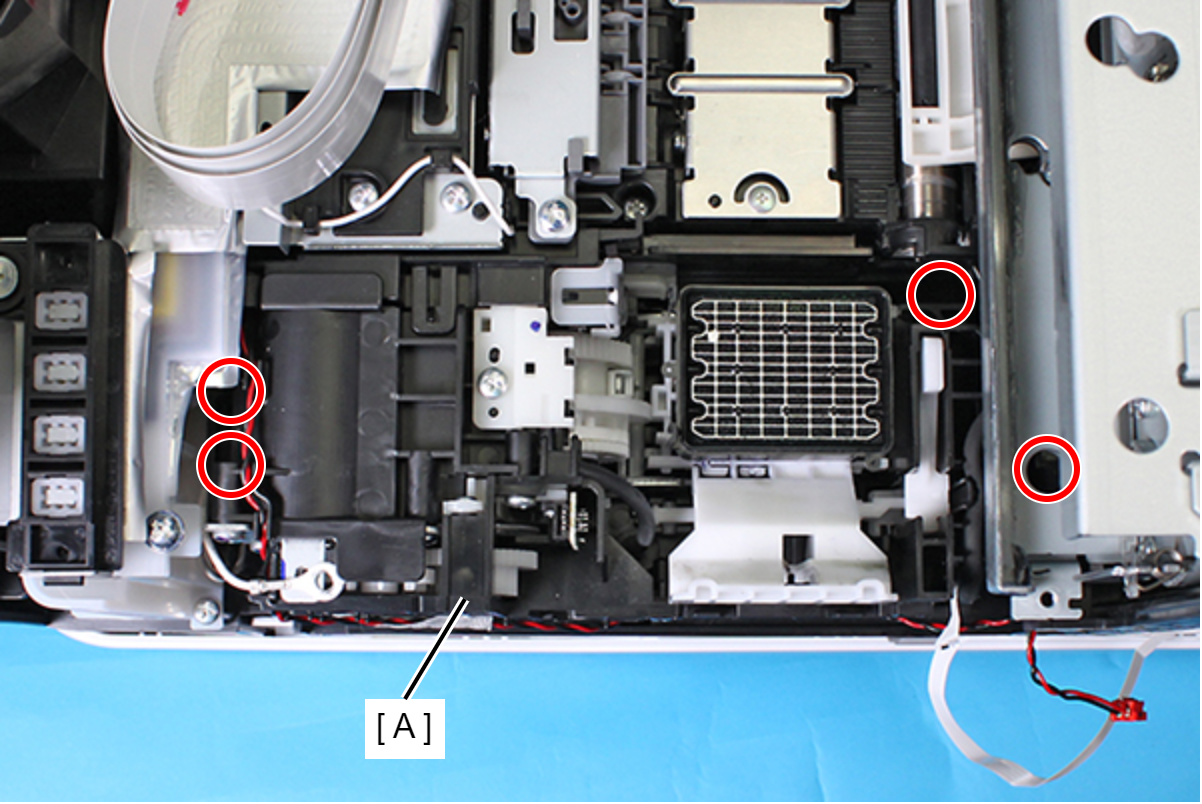
- : C.B.P-TITE-SCREW-3x10-F.ZN-3C
Assembly / 組み立て- Route the Wasted Ink Tube (A) through the guide (C) on the Inksystem Assy (B).
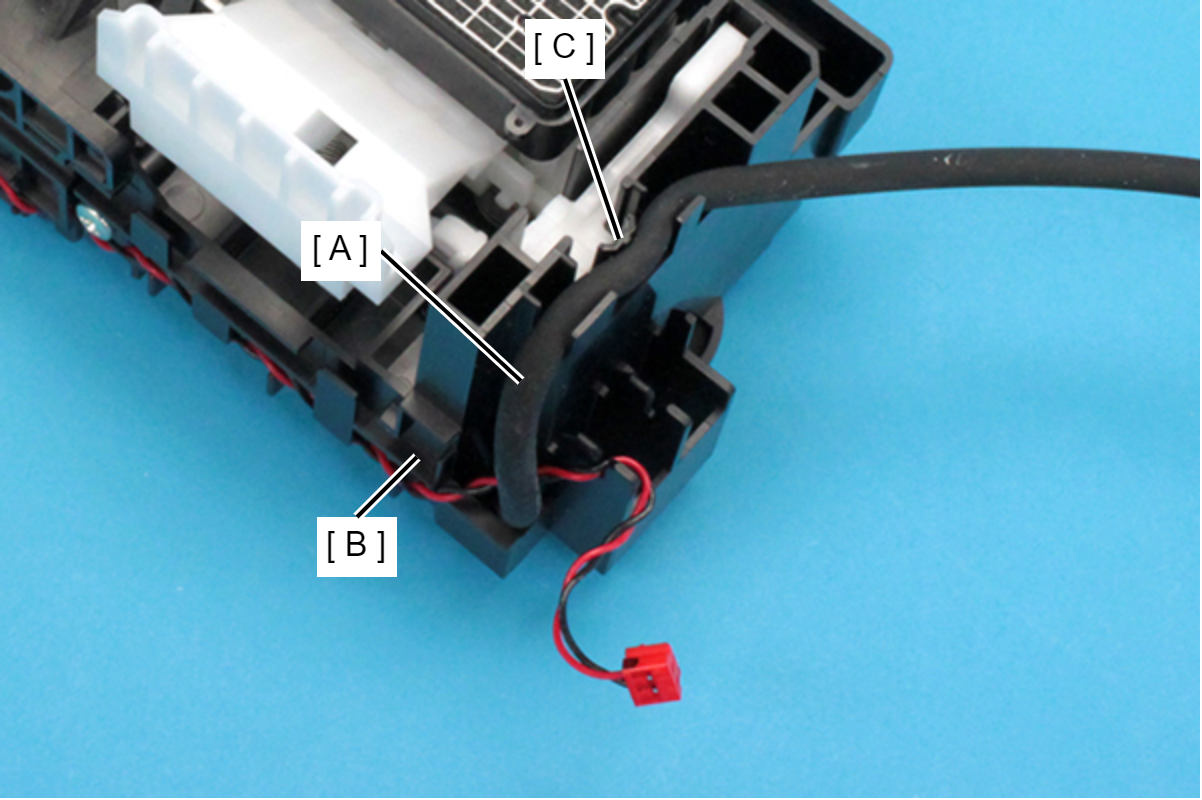
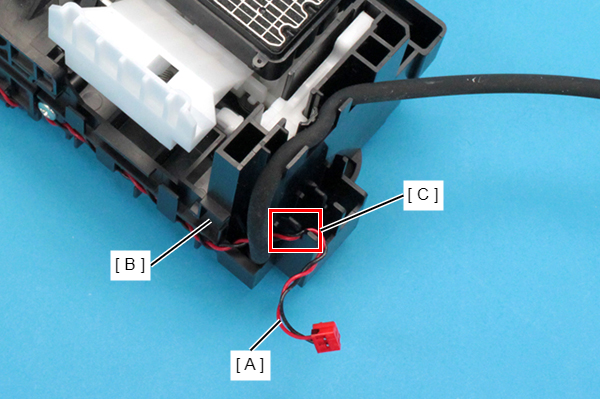
- Route the pump motor cable (A) through the slit (C) on the Inksystem Assy (B).
- Remove the Ink Porous Pad, 1 (A).