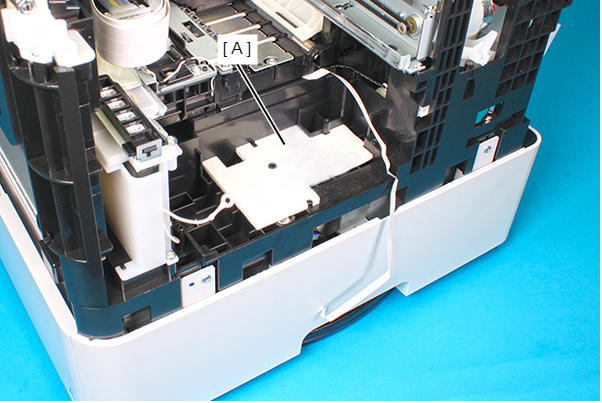
Ink Porous Pad, 1 (WF-C579R Series)
- Remove the four screws, then remove the Rear Cover (Back) (A).
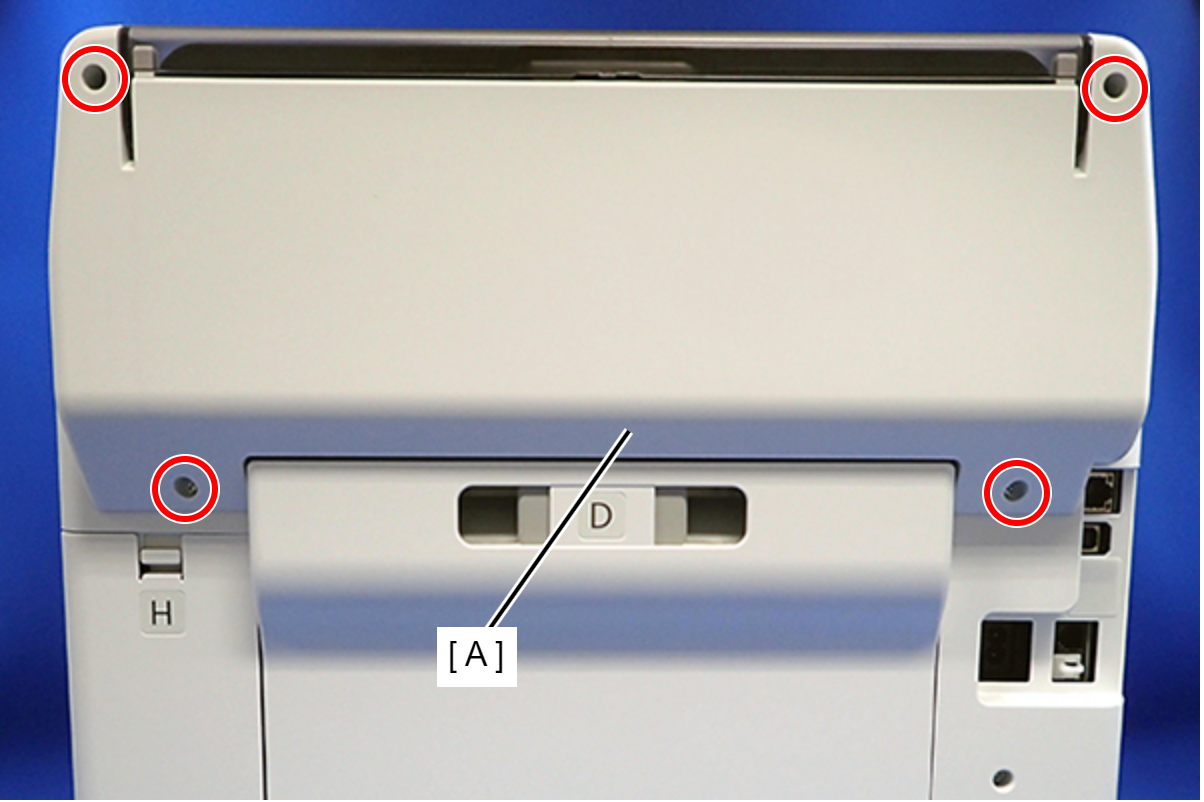
 : C.B.P-TITE-SCREW-3x10-F.ZN-3C
 Assembly / 組み立て
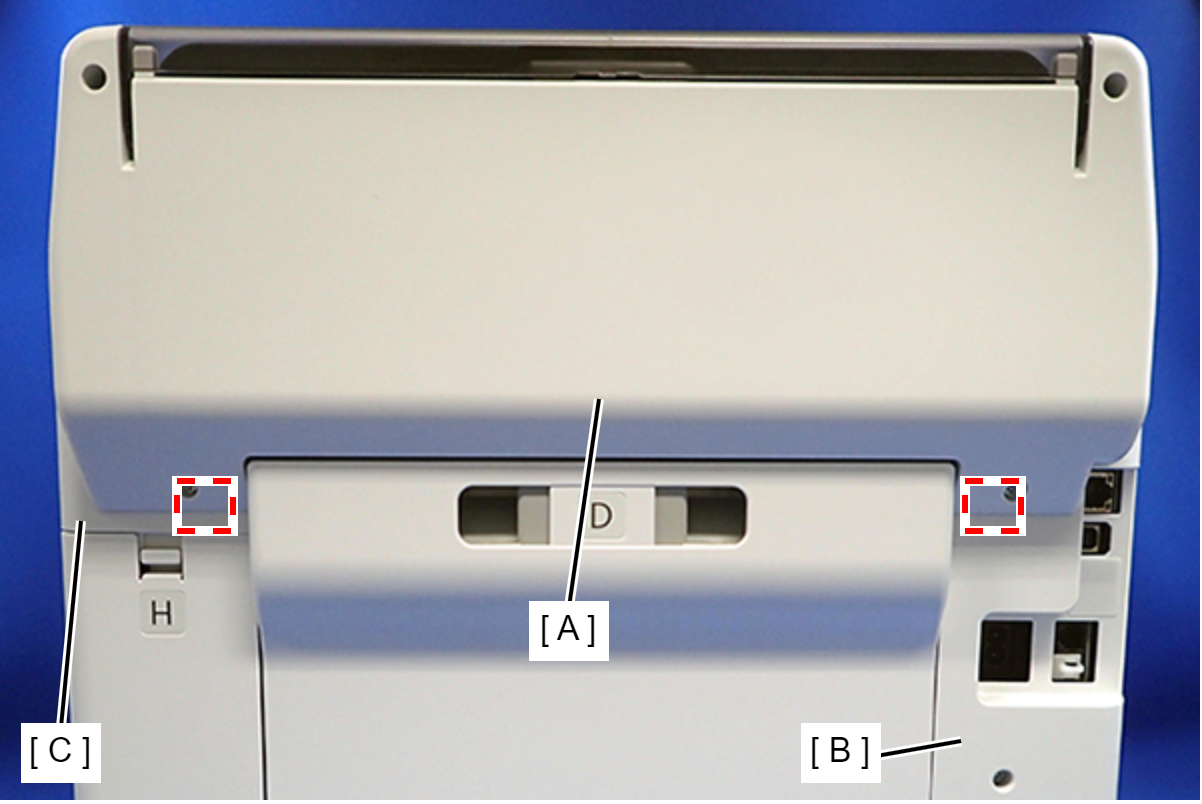
Attach the two dowels of the Rear Cover (Back) (A) to the positioning holes on the Housing Left (B) and Housing Right (C).
- Remove the two screws, then remove the Rear Top Cover (A).
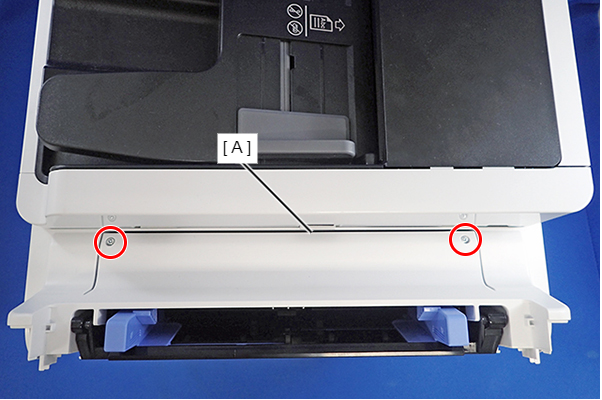
- : C.B.P-TITE-SCREW-3x10-F.ZN-3C
- Open the ADF/SCN Unit (A).
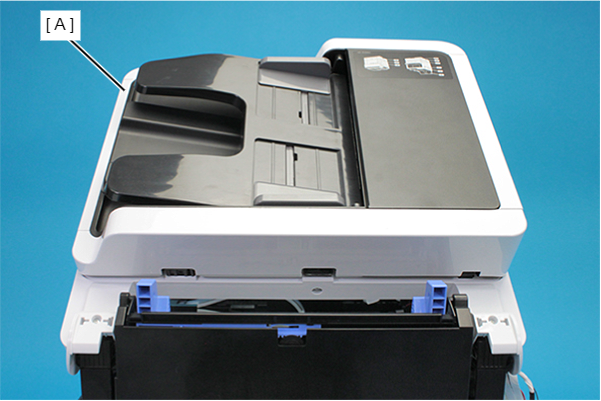
- Remove the three screws that secure the Housing Left (A).
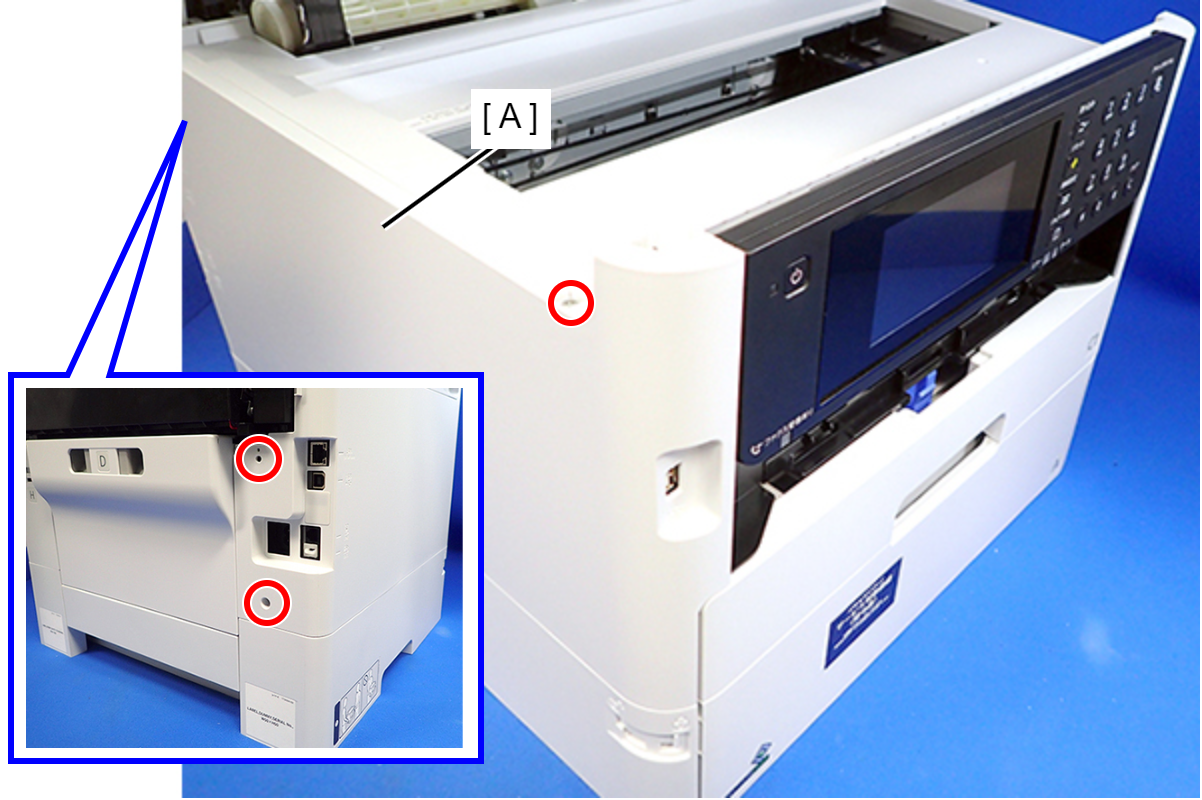
- : C.B.P-TITE-SCREW-3x10-F.ZN-3C
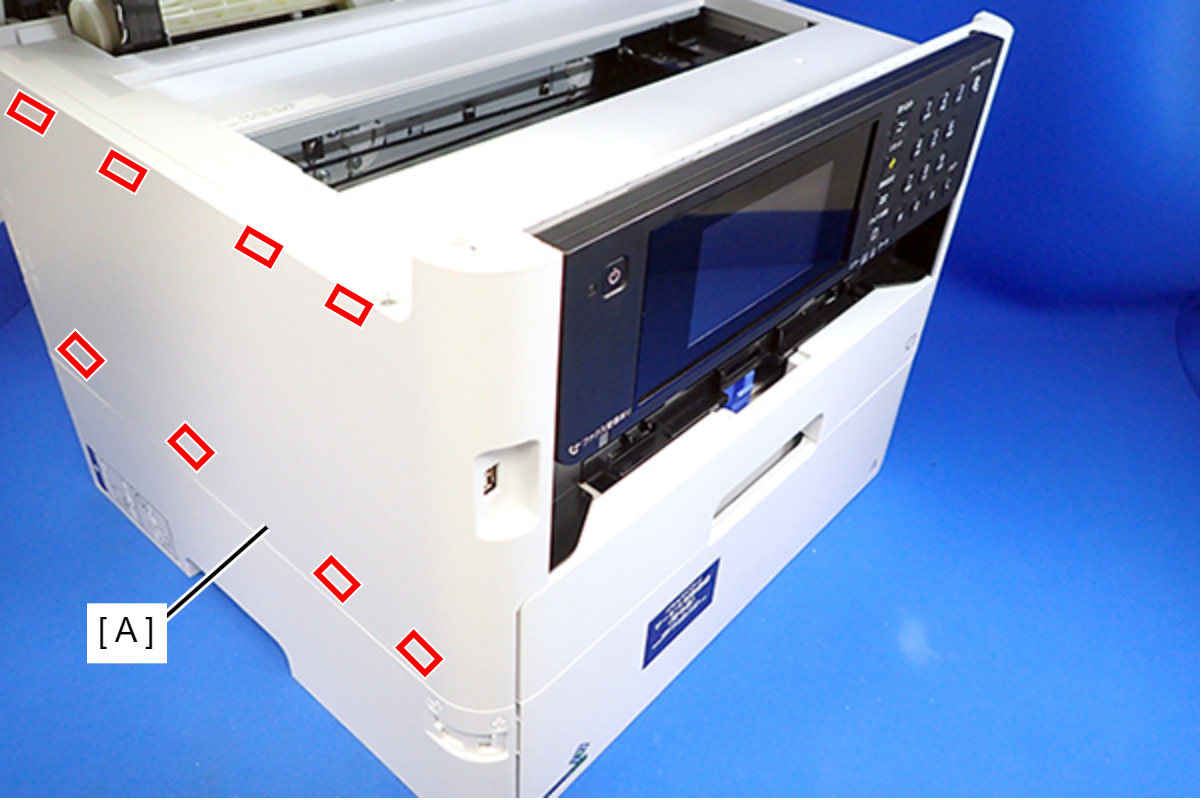
- Lift the Housing Left (A) to release the two hooks on the front side of the Housing Left.
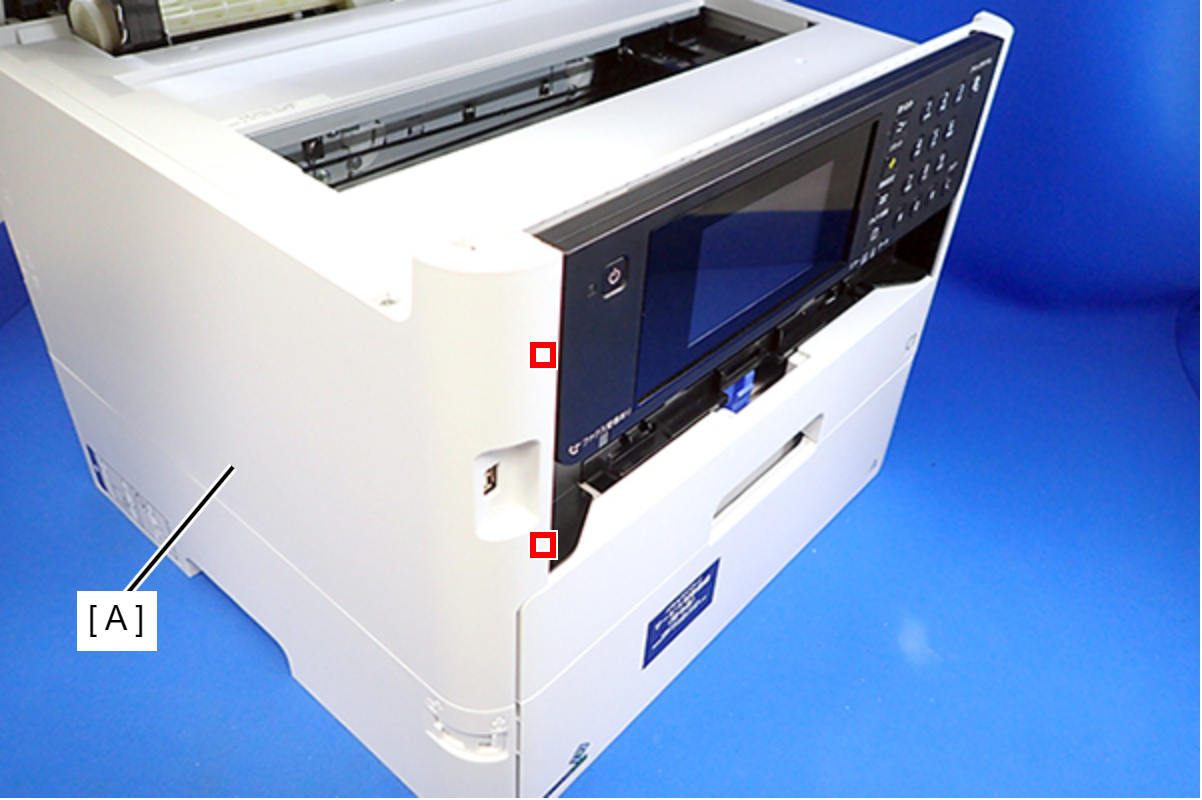
- Disengage two hooks on the rear side of the Housing Left (A), and remove the Housing Left (A).
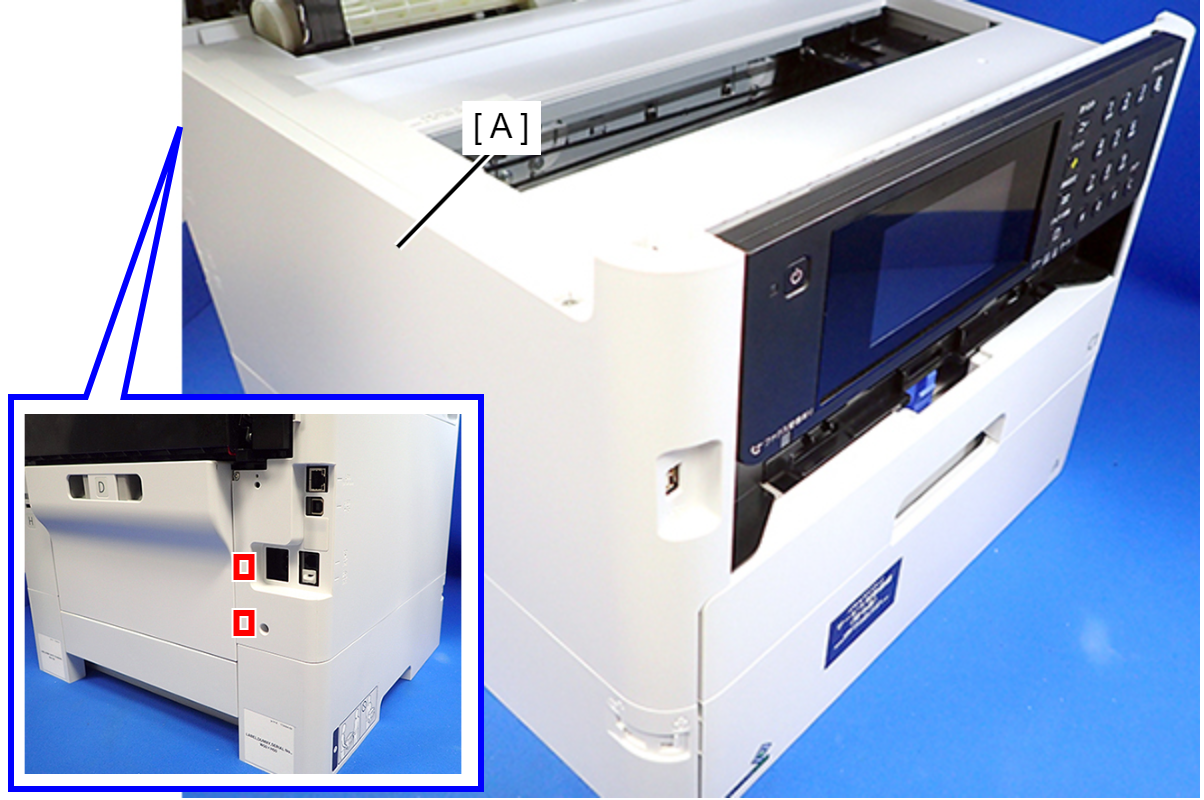 Assembly / 組み立て
Insert the eight tabs on the Housing Left (A) to the positioning holes of the Housing Upper (B) and the RIPS Unit (C).
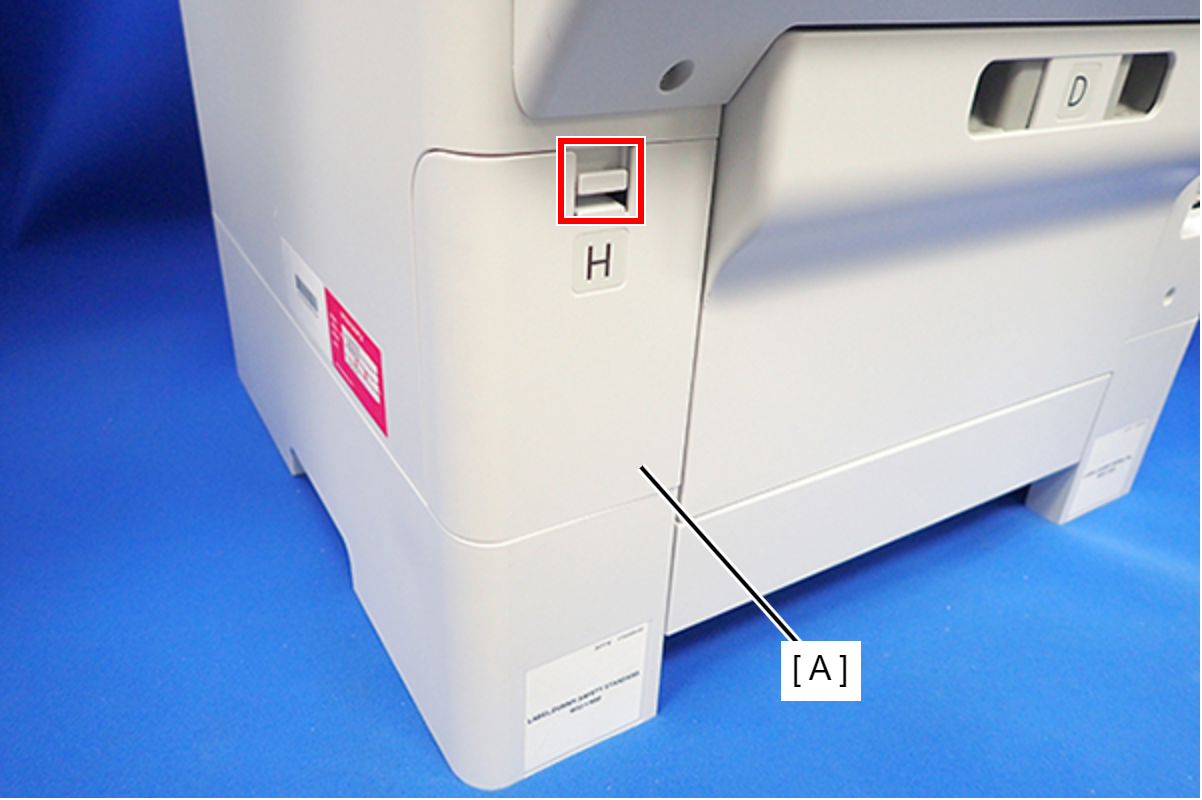
- Disengage the hook, and remove the Maintenance Box Cover (A).
- Open the ADF/SCN Unit (A).
- Remove the four screws that secure the Housing Right (A).
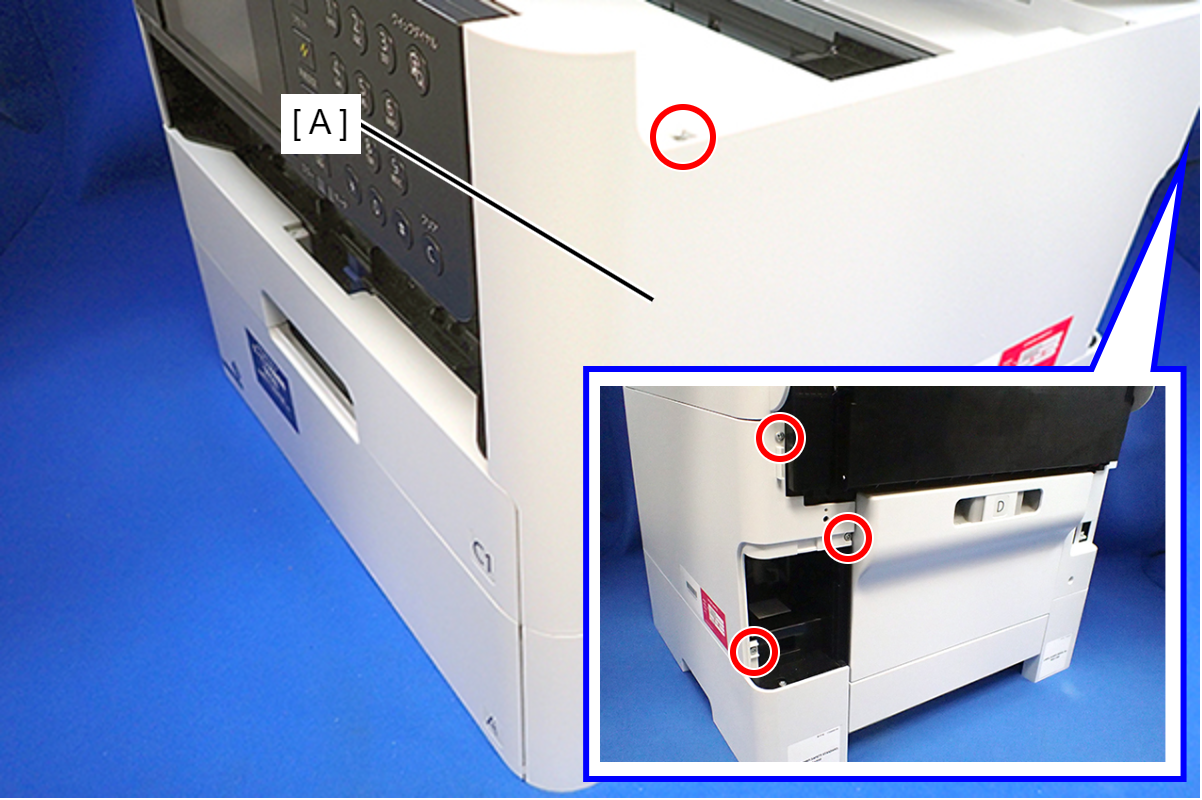
- : C.B.P-TITE-SCREW-3x10-F.ZN-3C
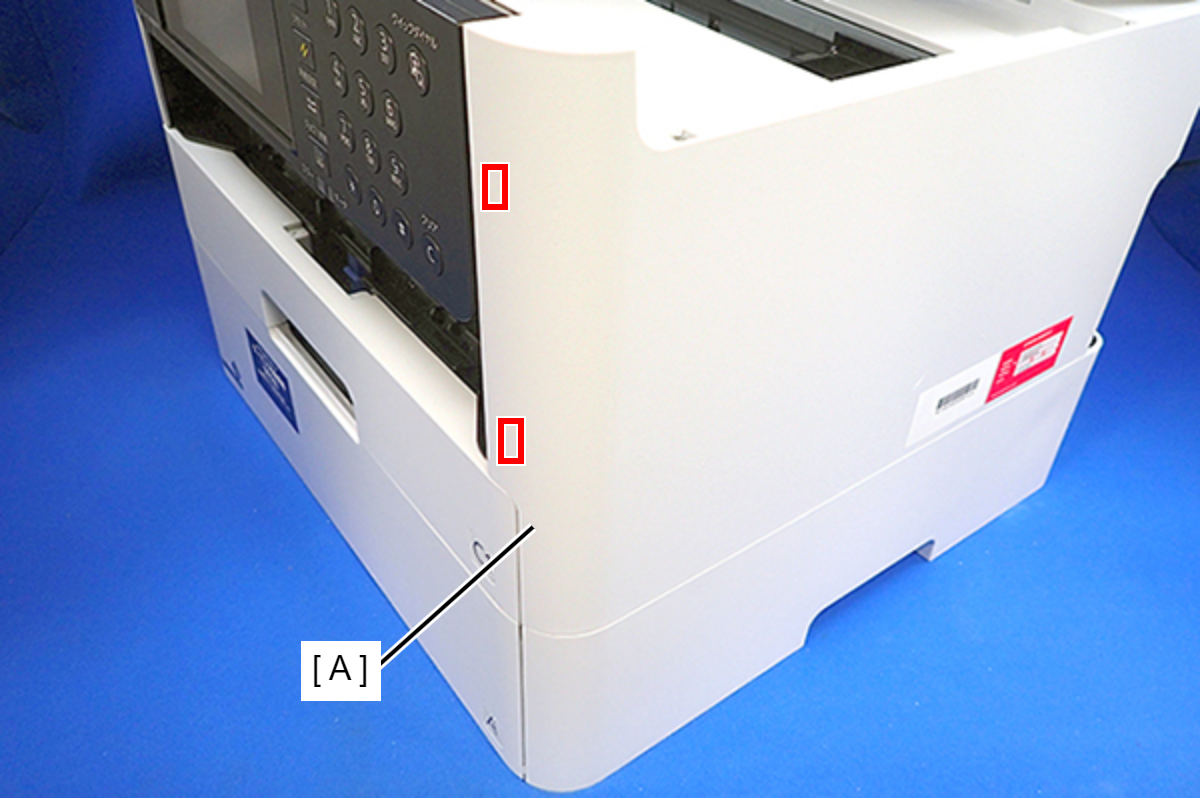
- Lift the Housing Right to release the two hooks on the front side of the Housing Right, then remove the Housing Right.
 Assembly / 組み立て
Insert the four tabs of the Housing Right (A) to the positioning holes on the Ink Supply Unit.
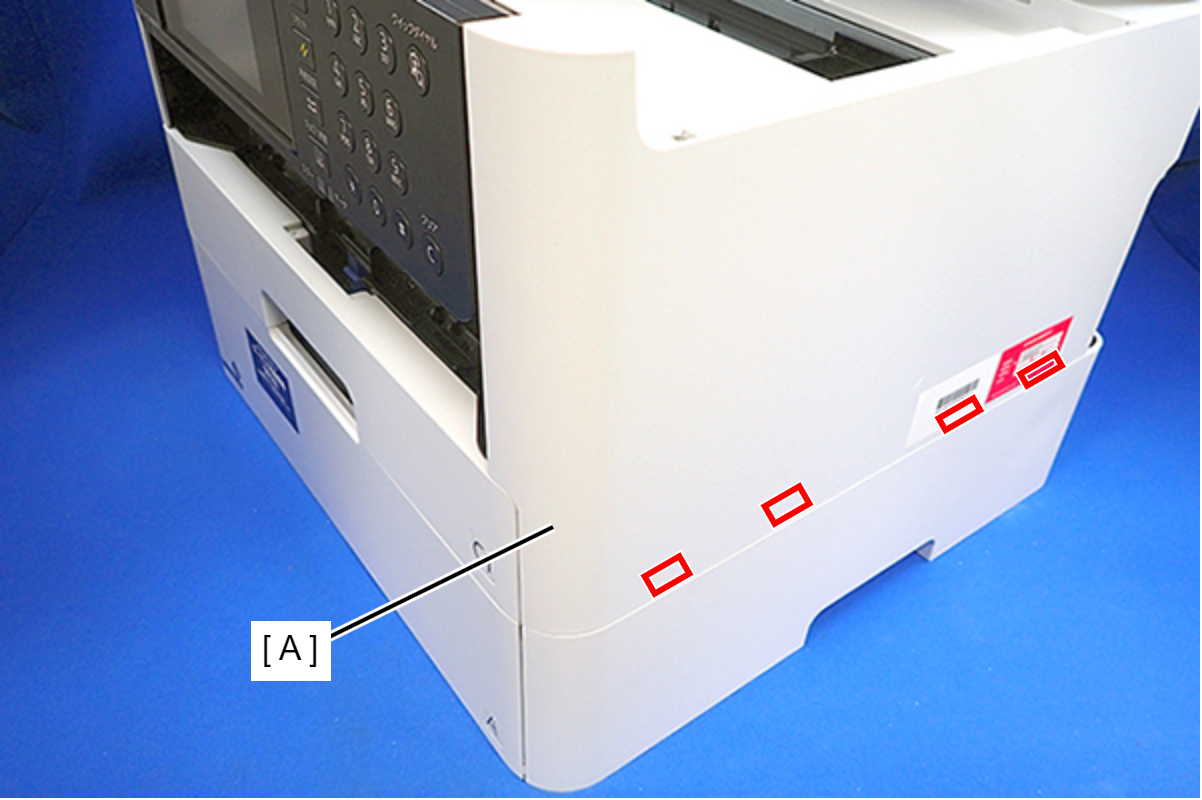
- Remove the six screws, then remove the Housing Upper (A).
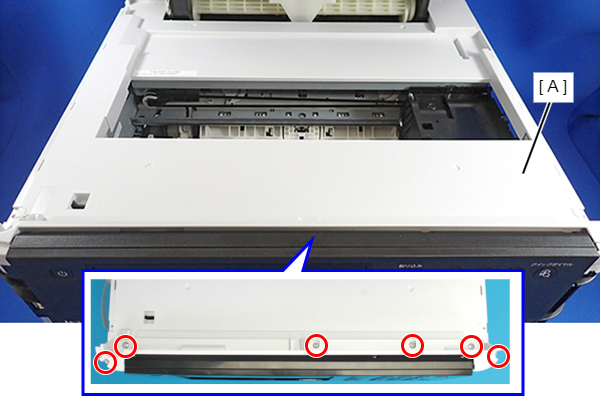
- : C.B.P-TITE-SCREW-3x10-F/ZN-3C
- Disconnect the SCN PS cable (CN799) and the SCN USB cable (CN100) from the Main Board.
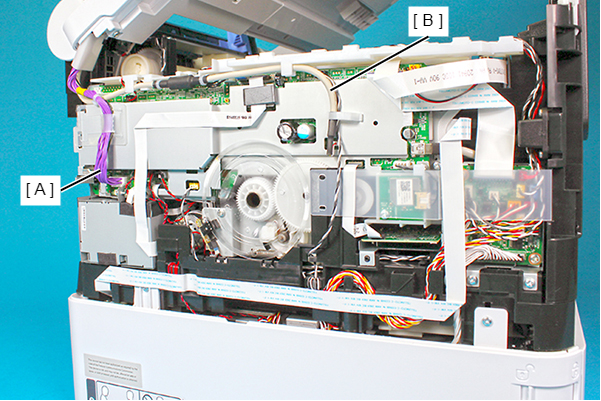
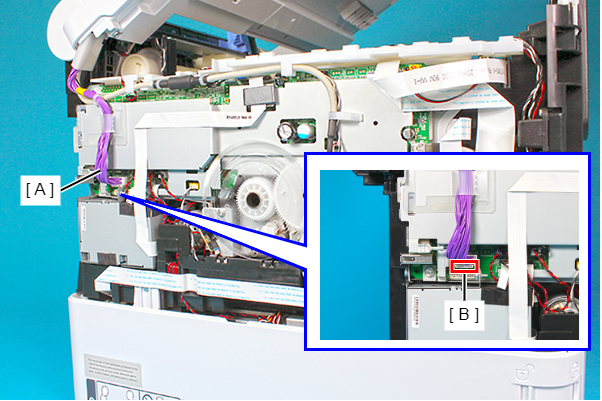
 Check Point / チェックポイント
When disconnecting the SCN PS cable from the connector (CN799) (A), make sure to unlock the connector lock (B) beforehand.
- Remove the terminal of grounding cable (A) from the frame of the Main Board.
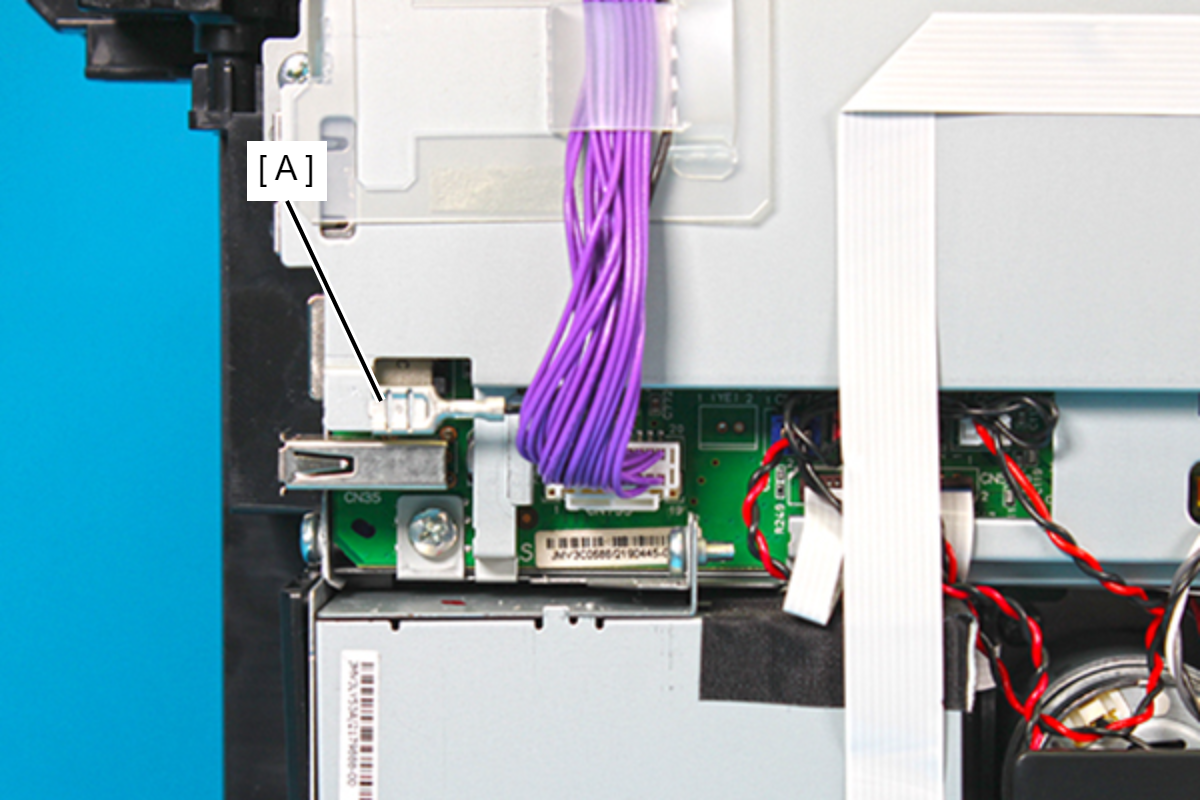 Assembly / 組み立て
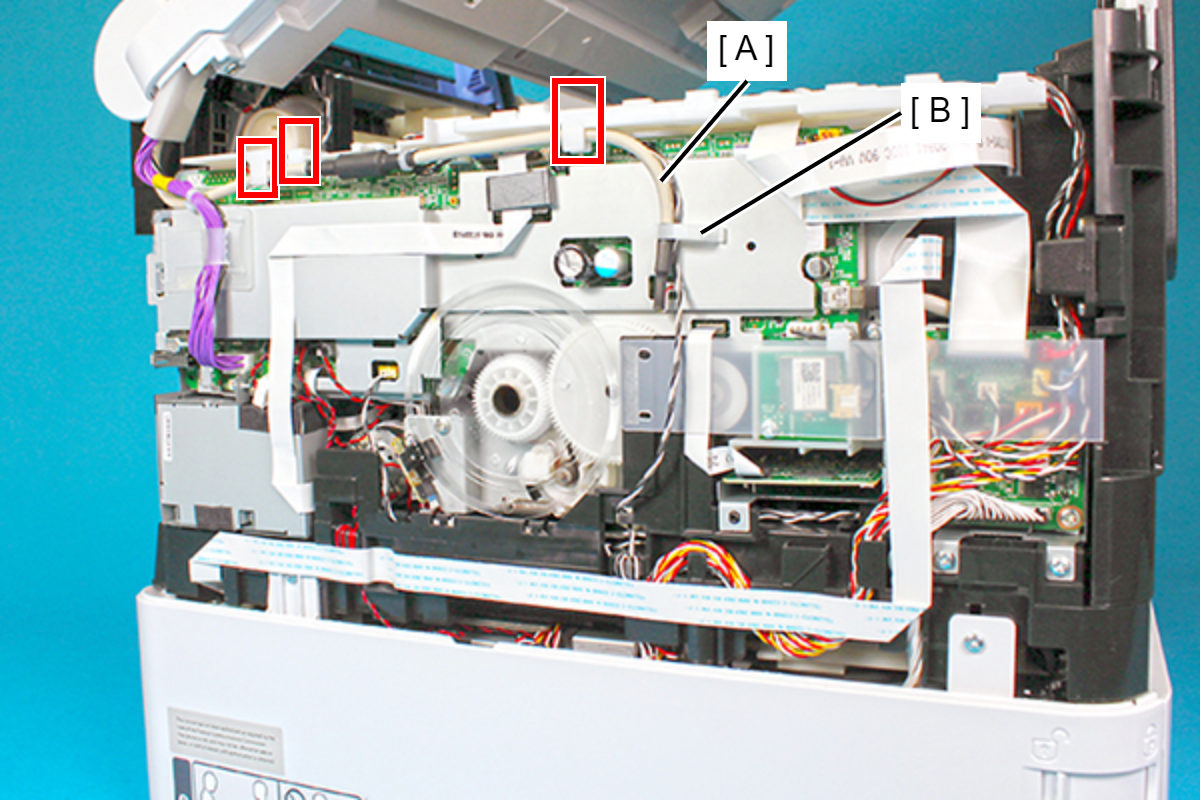
- Route the SCN USB cable (A) through the three hooks and the clamp (B) as shown above.
- Make sure to secure the SCN PS cable (A) and the grounding cable (B) with the Polyester film (C).
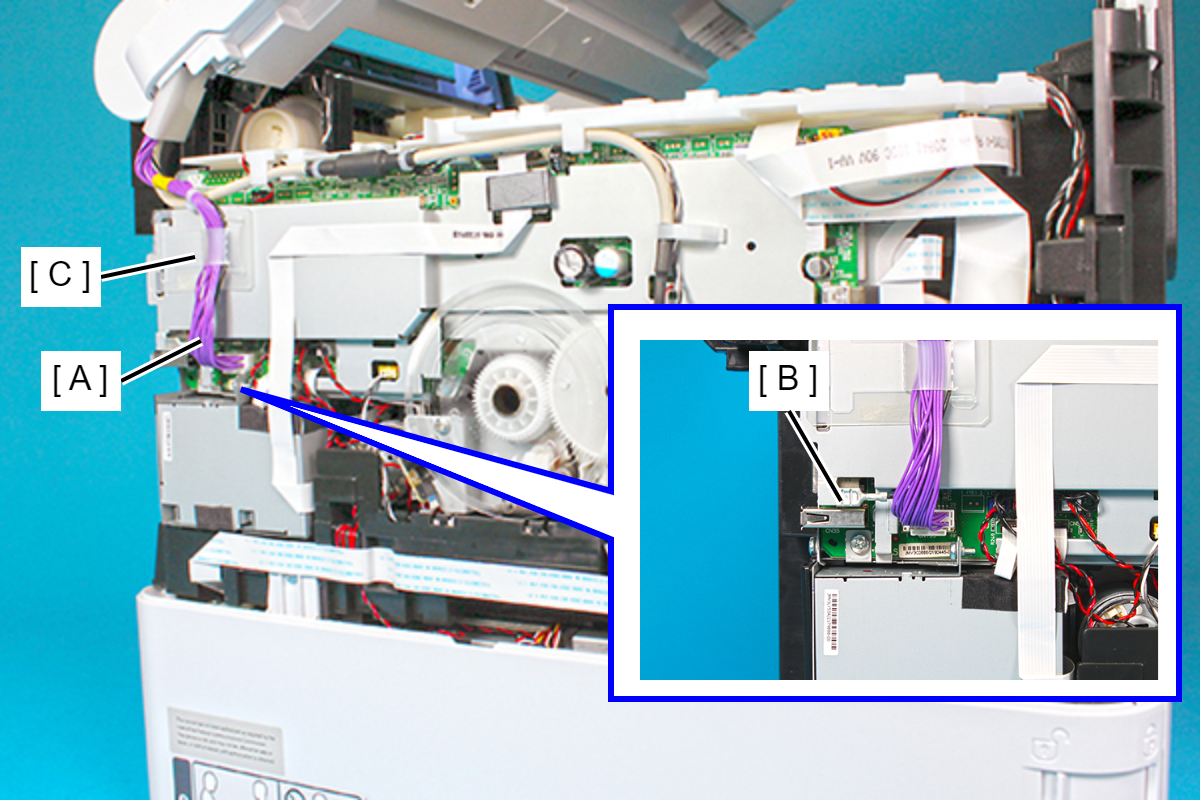
- Route the SCN USB cable (A) through the three hooks and the clamp (B) as shown above.
- Open the ADF/SCN Unit (A).
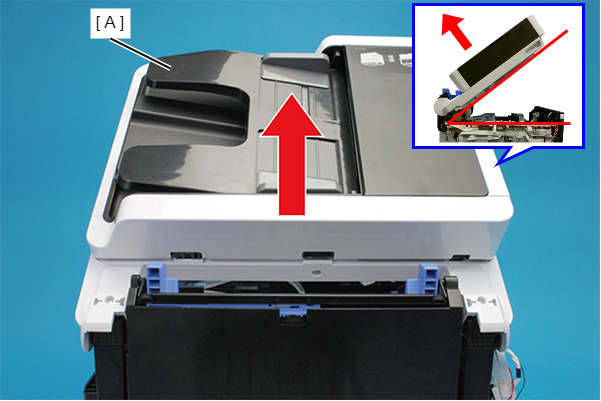
- Remove the two screws and remove the ADF/SCN Unit (A) in the direction of the arrow.
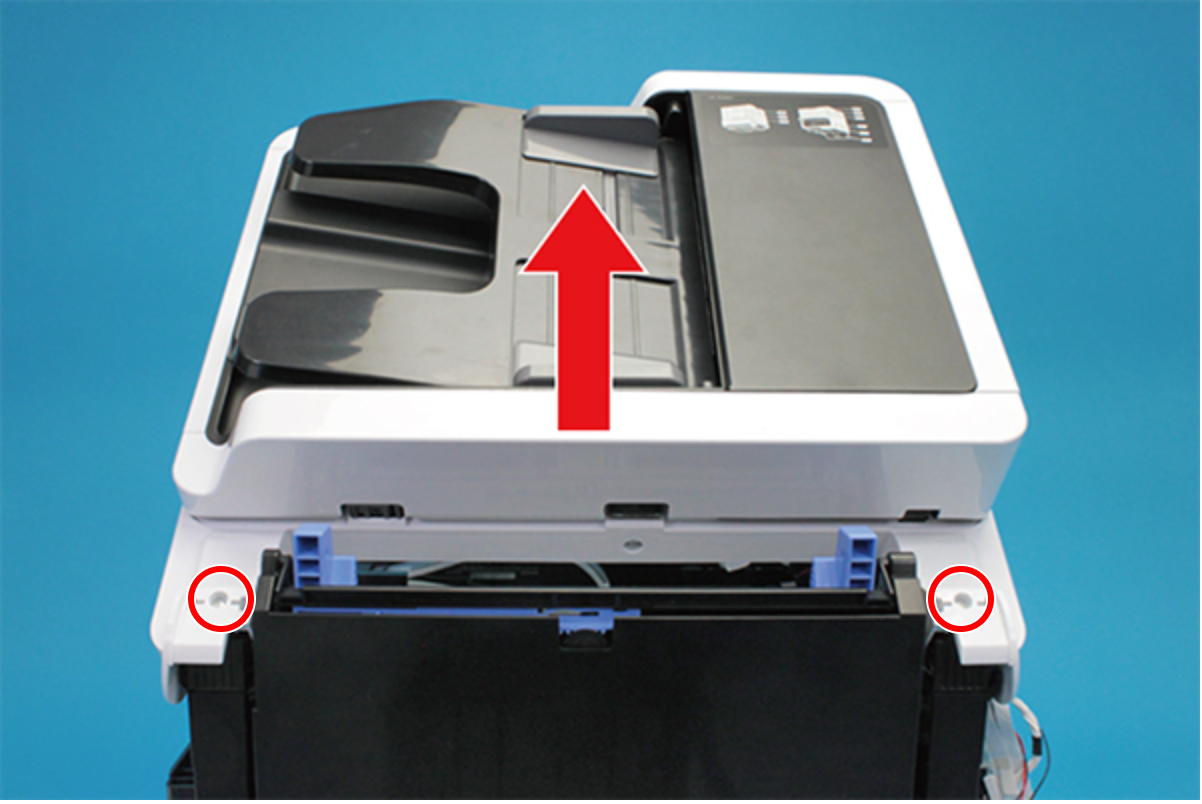
 : C.B.P-TITE-SCREW-3x10-F.ZN-3C
Assembly / 組み立て- Before screwing the ADF/SCN Unit, make sure the hinges are properly attached in place.
- If the ADF/SCN Unit is opened when the hinges are NOT secured, the unit may be damaged.
- Remove the screws that secure the Wasted Ink Duct Holder (A).
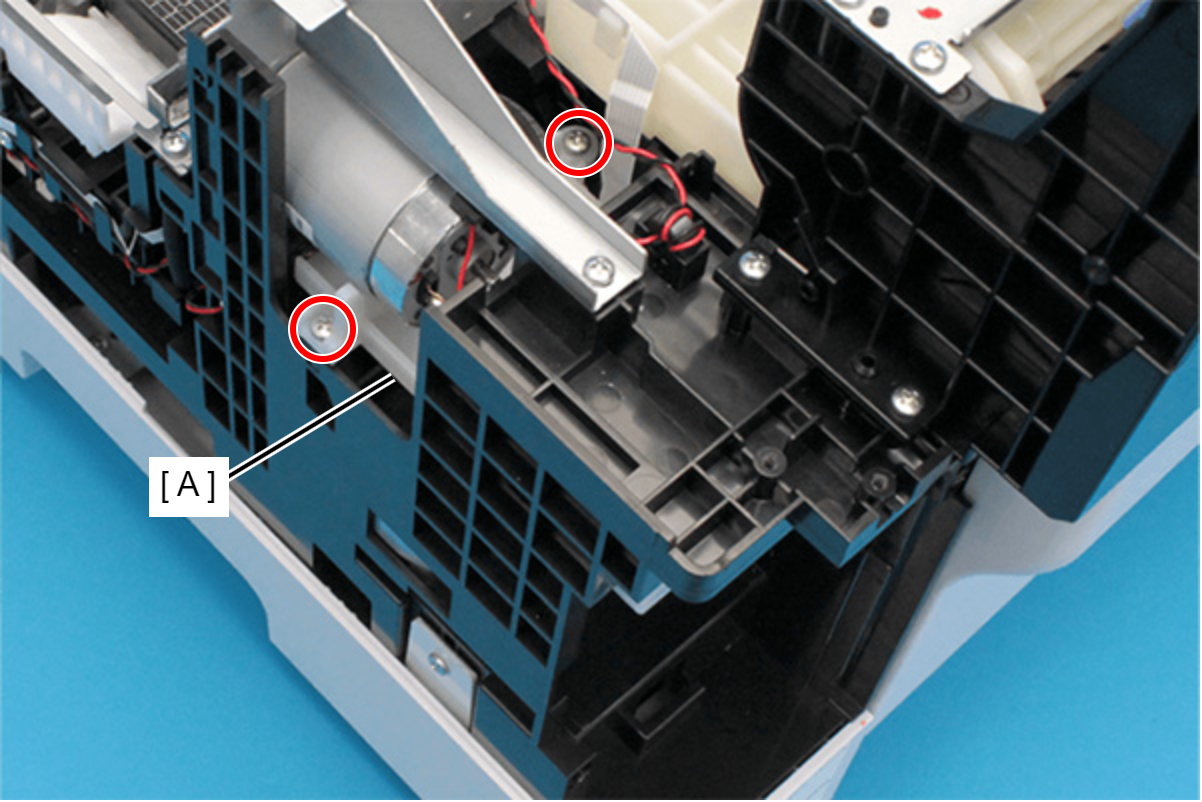
- : C.B.P-TITE-SCREW-3x10-F.ZN-3C
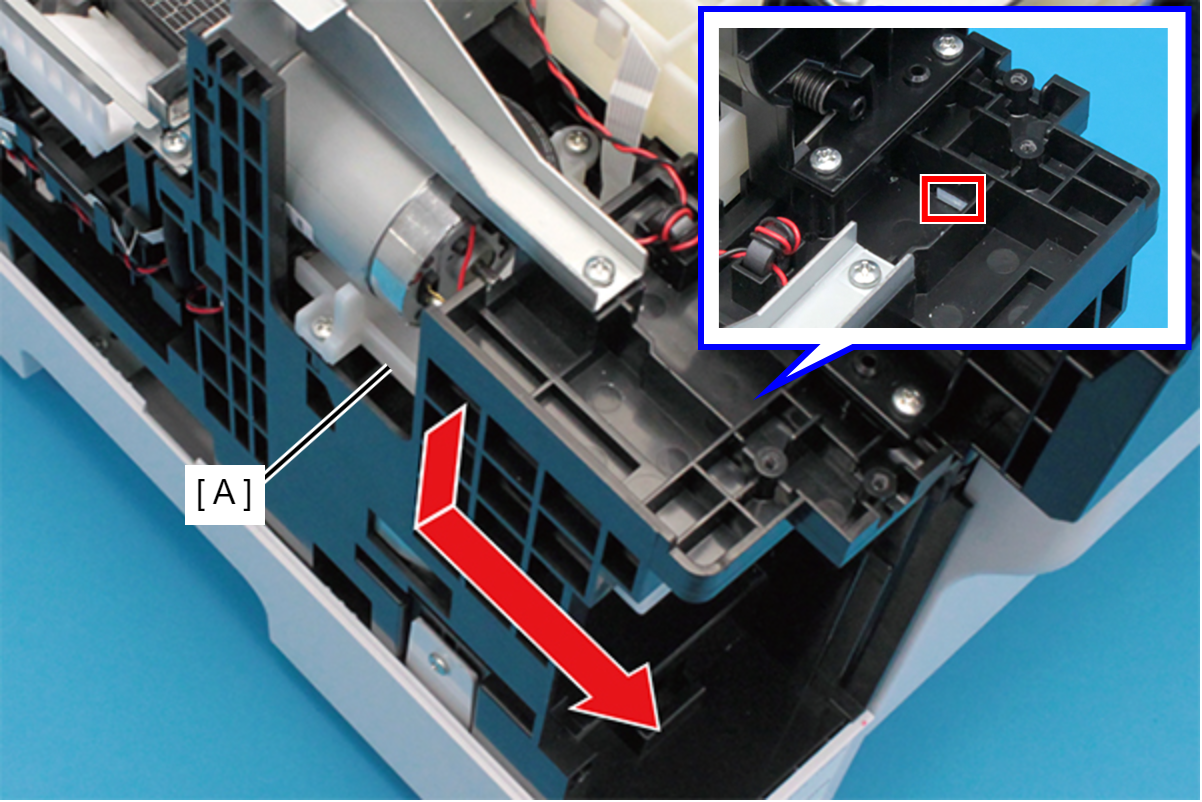
- Disengage the hook, and slide the Wasted Ink Duct Holder (A) to rear.
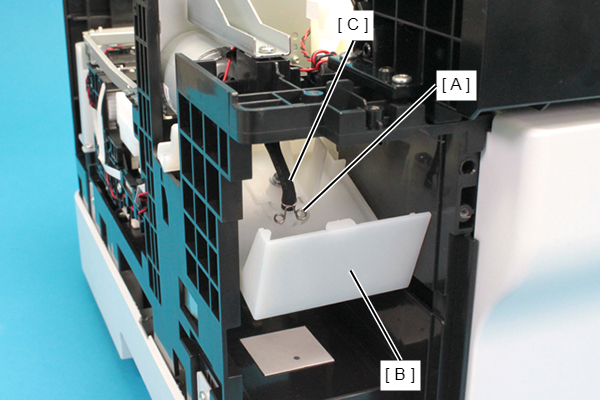
- Slide the tube clamp (A), and remove the Wasted Ink Tube (C) from the Wasted Ink Duct Holder (B).
 Check Point / チェックポイント
Before removing the Inksystem Assy, release the carriage lock, and then move the CR Unit to center of the printer.
 Caution / 注意
In the this step, waste ink may spill from the Wasted Ink Tube. Prepare waste cloths or similar in advance.
- Remove the three screws and remove the Upper Cap Frame (A).
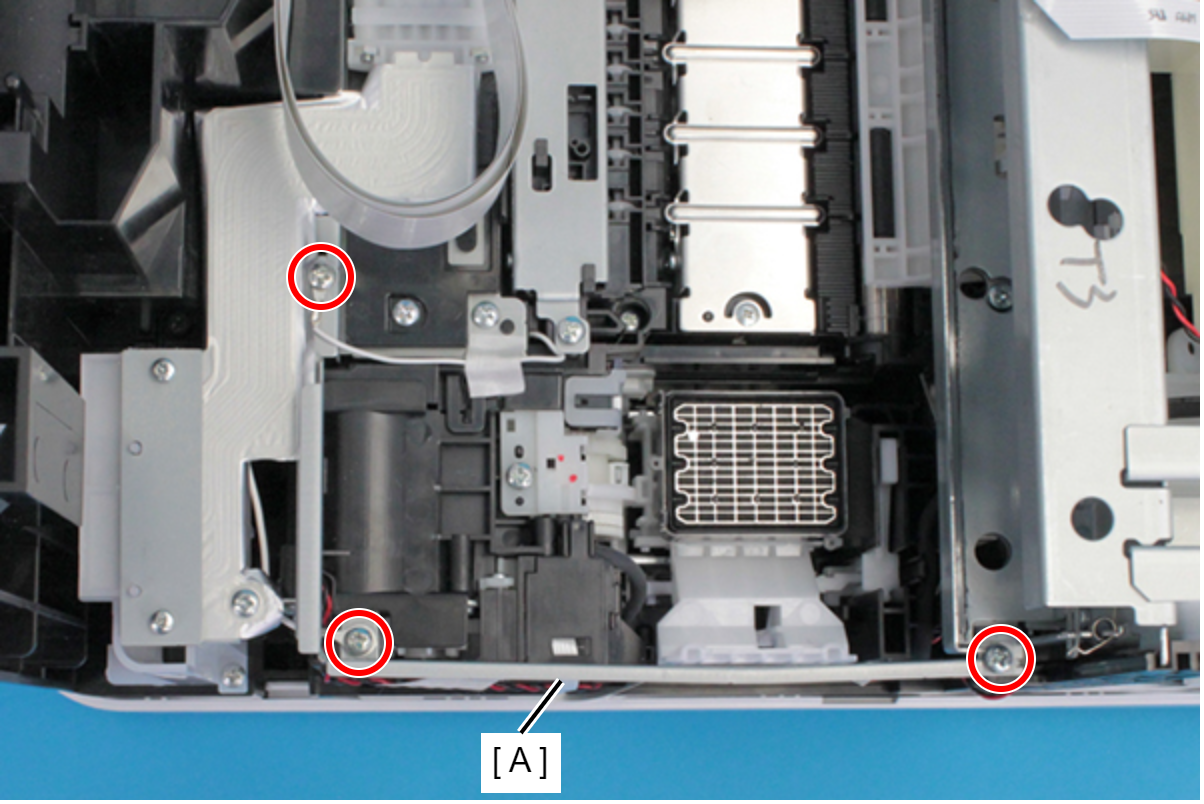
- : C.B.S-TITE-SCREW-3x6-F.ZN-3C
Assembly / 組み立てSecure the grounding cables (A) together with the screws.
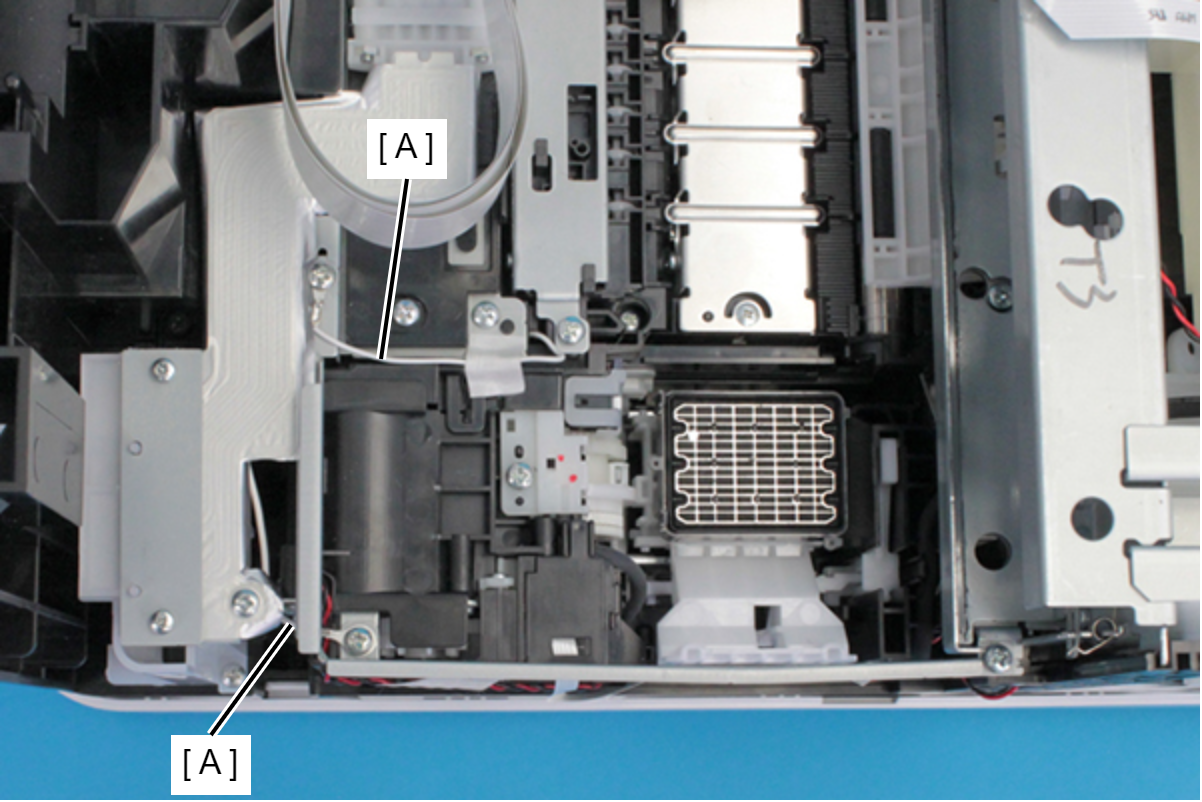
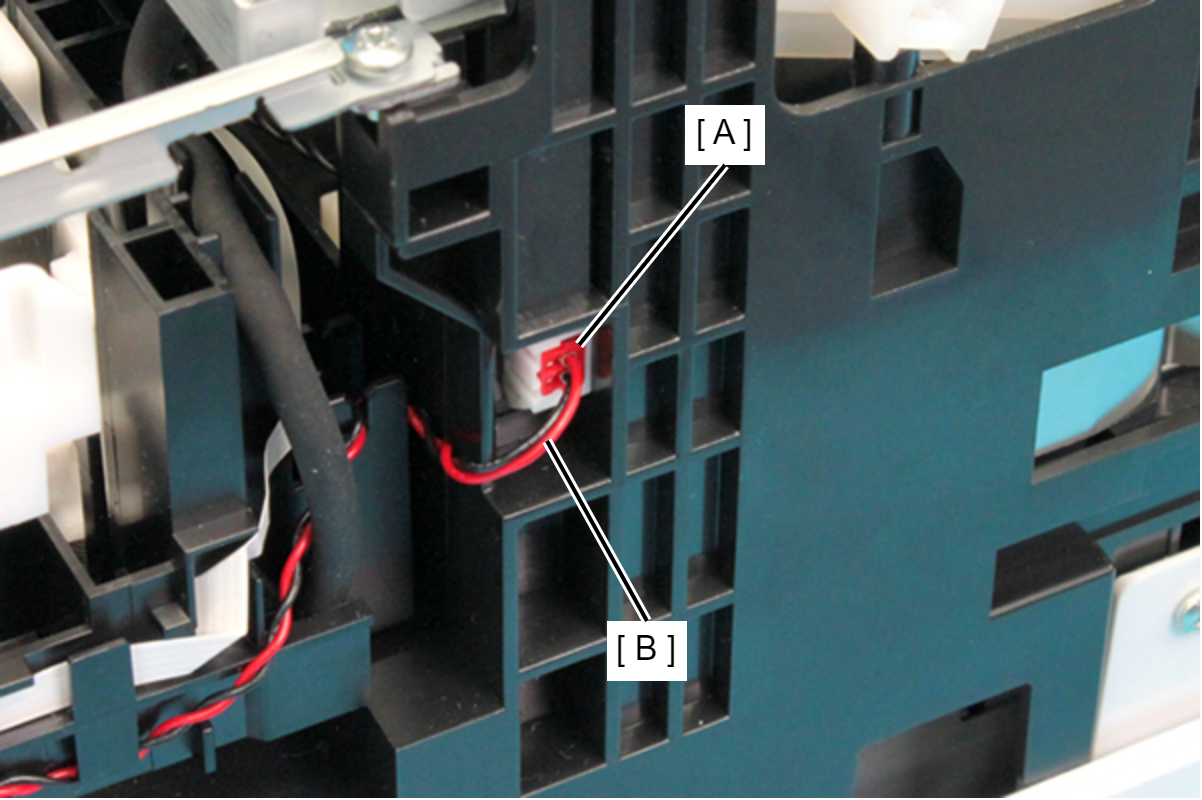
- Disconnect the cable (B) from the relay connector (A).
- Disengage hook (A), then remove the Upper Cap FFC Cover (B).
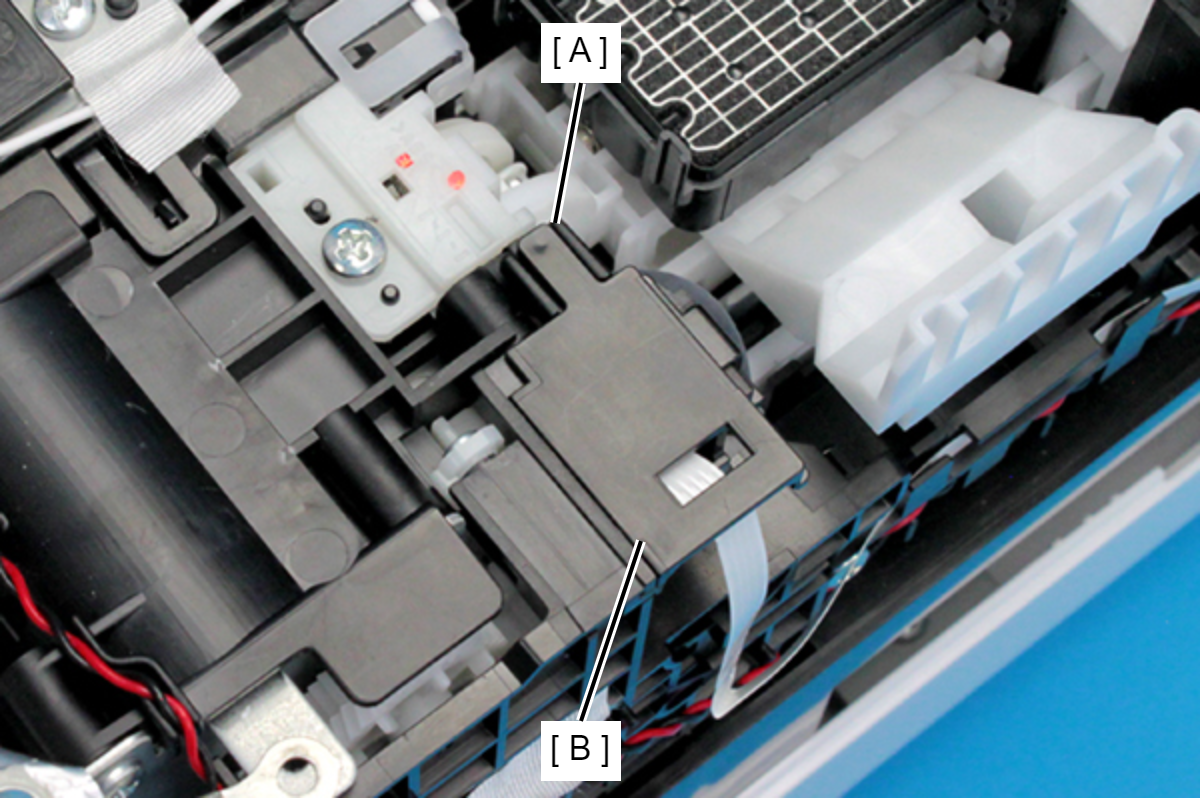 Assembly / 組み立て
Route the FFC (C) through the slit (B) on the Upper Cap FFC Cover (A).
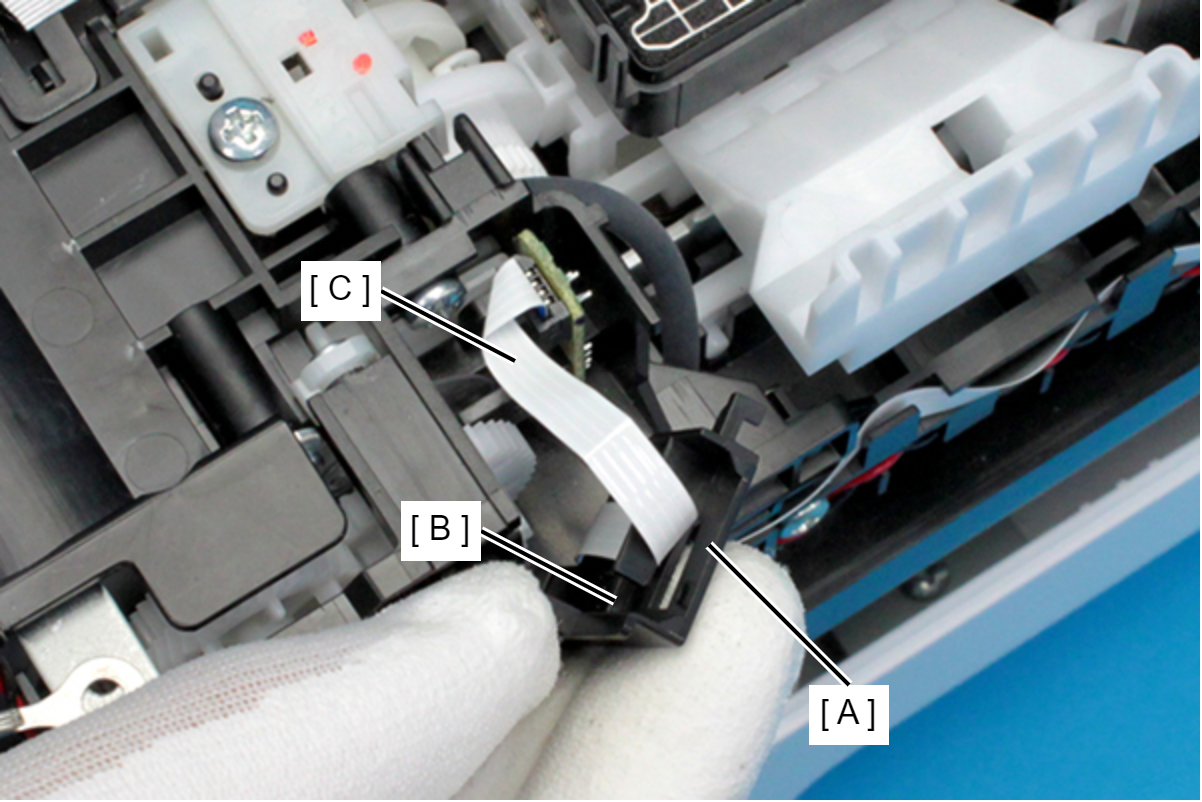
- Disconnect the FFC (B) from the Pump Encoder Sensor (A).
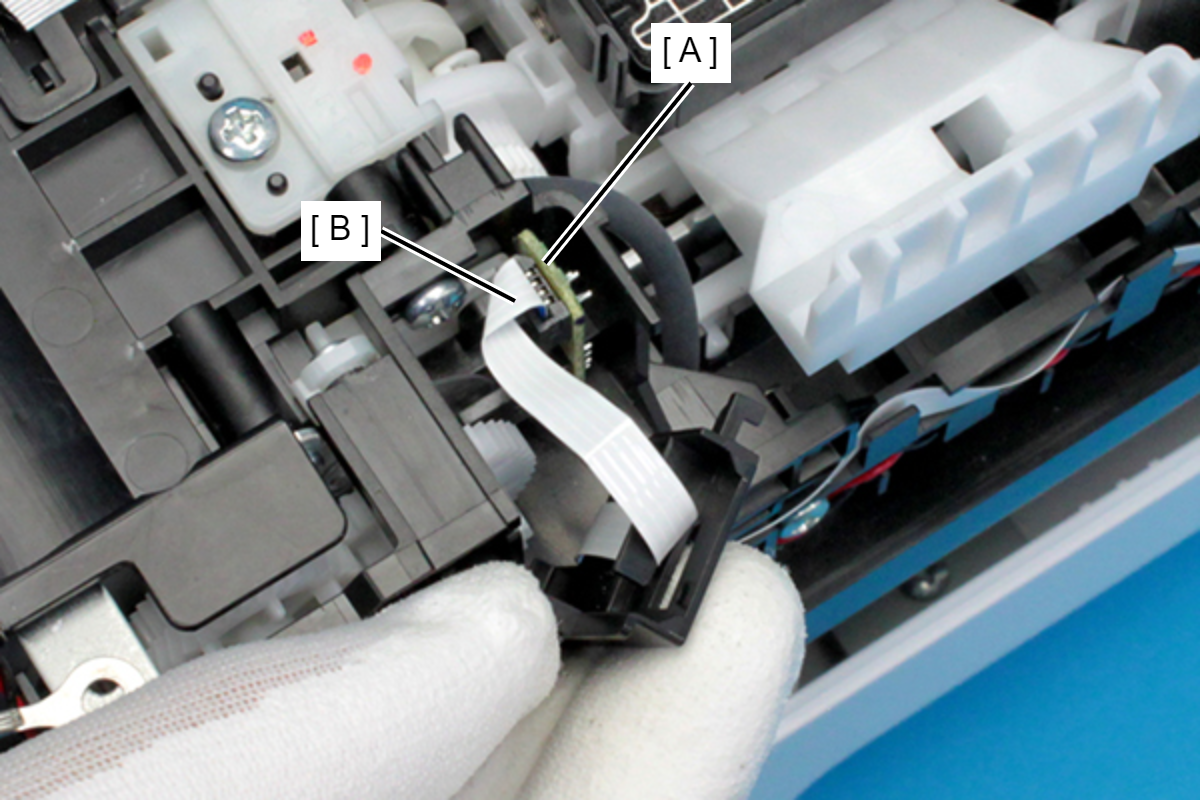
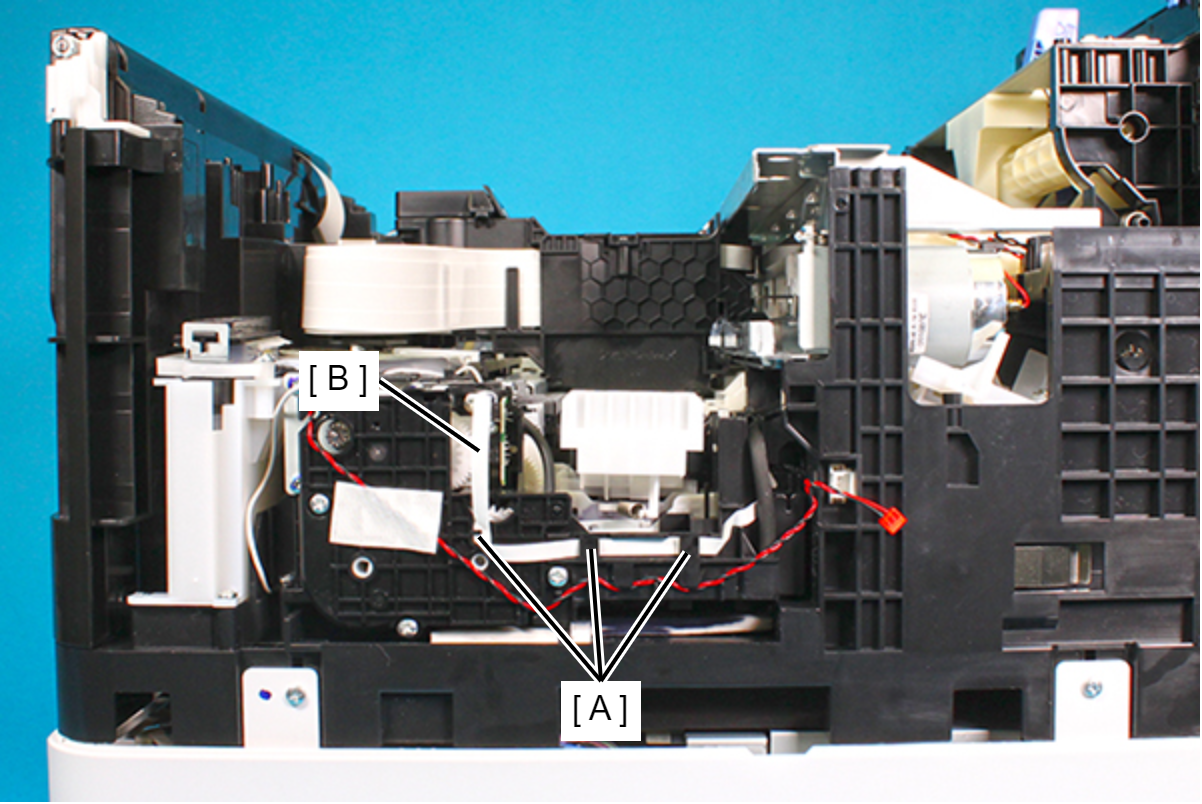
- Release the FFC (B) from the three tabs on the Inksystem Assy (A).
- Remove the four screws, and remove the Inksystem Assy (A).
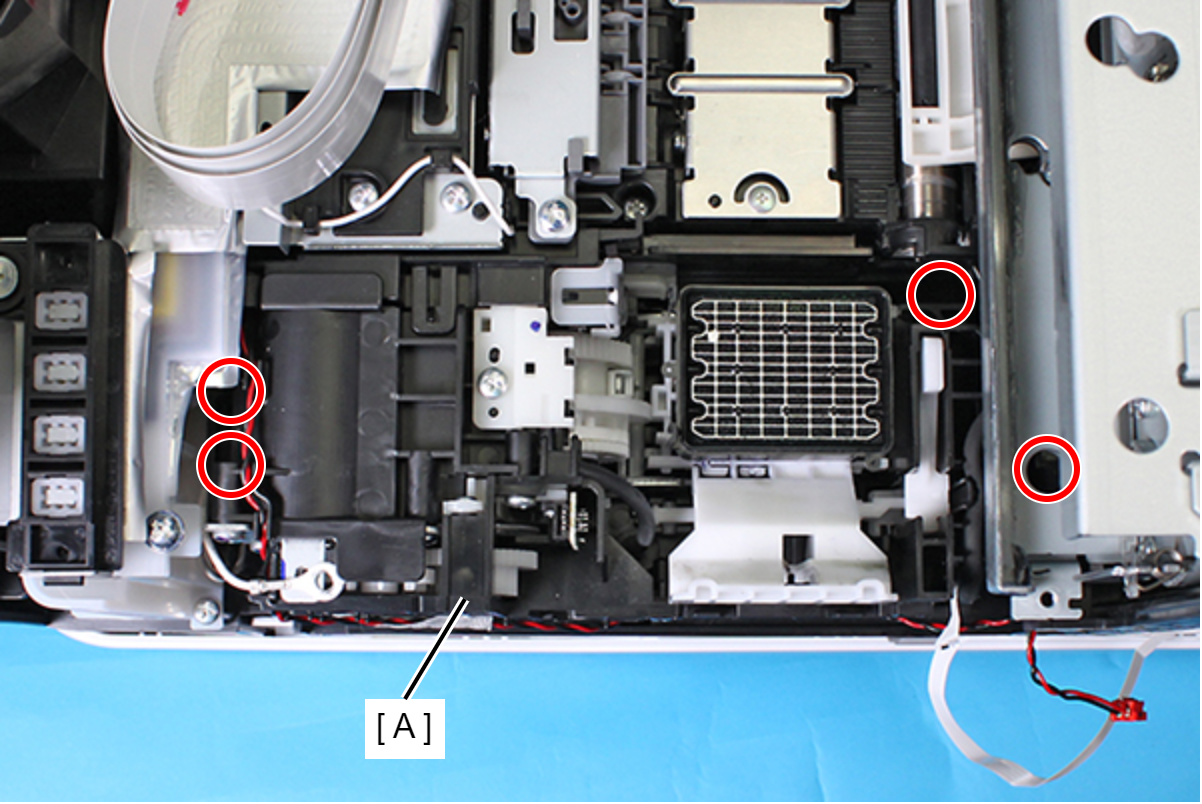
- : C.B.P-TITE-SCREW-3x10-F.ZN-3C
Assembly / 組み立て- Route the Wasted Ink Tube (A) through the guide (C) on the Inksystem Assy (B).
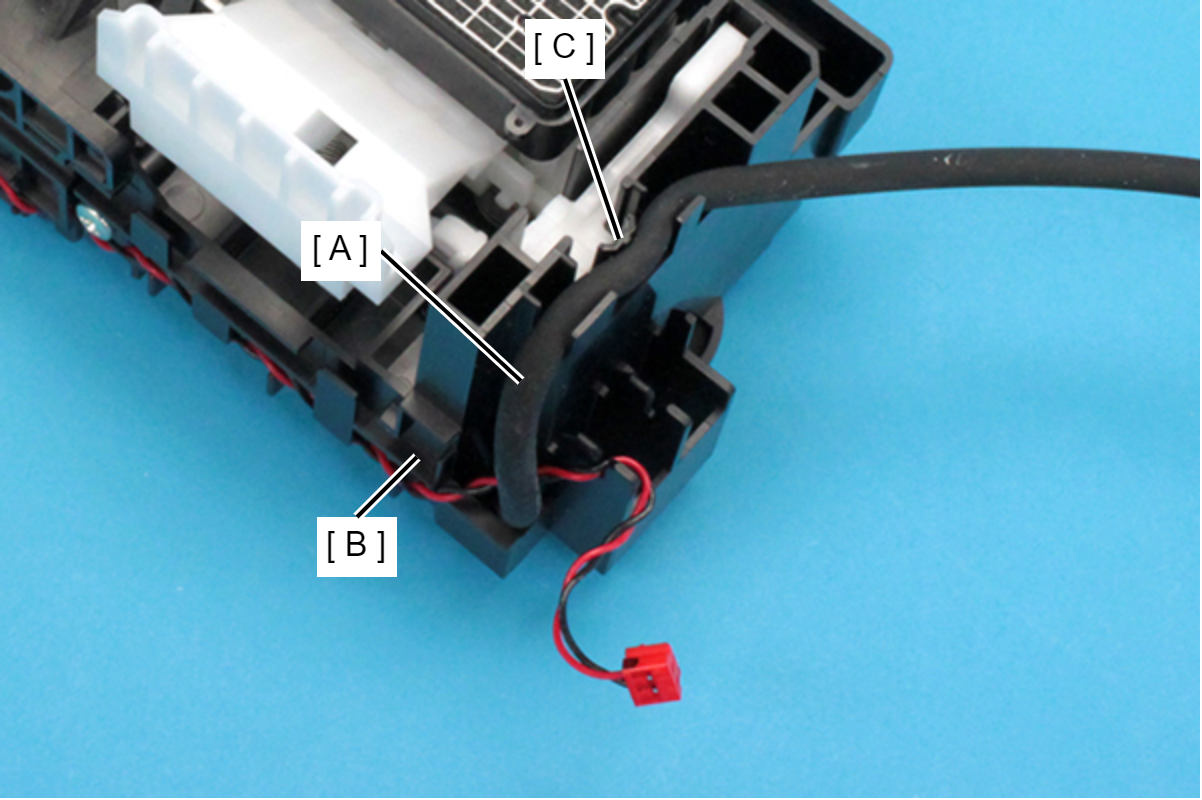
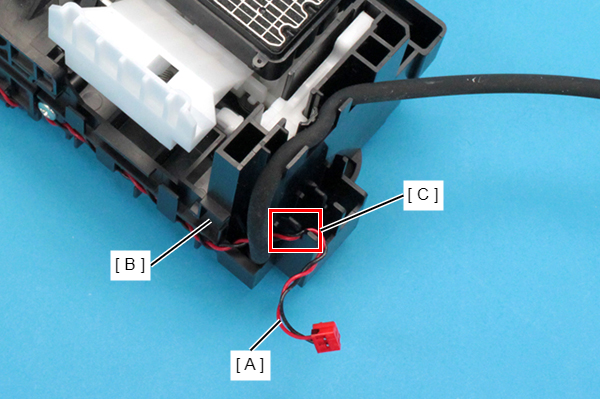
- Route the pump motor cable (A) through the slit (C) on the Inksystem Assy (B).
- Remove the Ink Porous Pad, 1 (A).