
B49 PW SENSOR CORRECT/B50 PRINT START POS. (ASF)/B51 PRINT START POS. (REAR ASF)
Overview
- PW Sensor Correction
Use software to correct the offset due to sensor characteristics and attachment variations.
- Print Start Pos.(ASF/Rear ASF)
Use software to correct the print timing so that the main scanning direction print start position becomes the target value.
Paper and feed tray
- PW Sensor Correction
- Document size: A4
- Paper type: Photo matte paper
- Paper feed tray: Rear ASF Unit
- Print Start Pos. (ASF)
- Paper size: A4, Letter
- Paper type: Plain paper
- Paper feed tray: Paper Cassette1st (C1)
- Print Start Pos.(Rear ASF)
- Paper size: A4, Letter
- Paper type: Plain paper
- Paper feed tray: Rear ASF Unit
Adjustment pattern
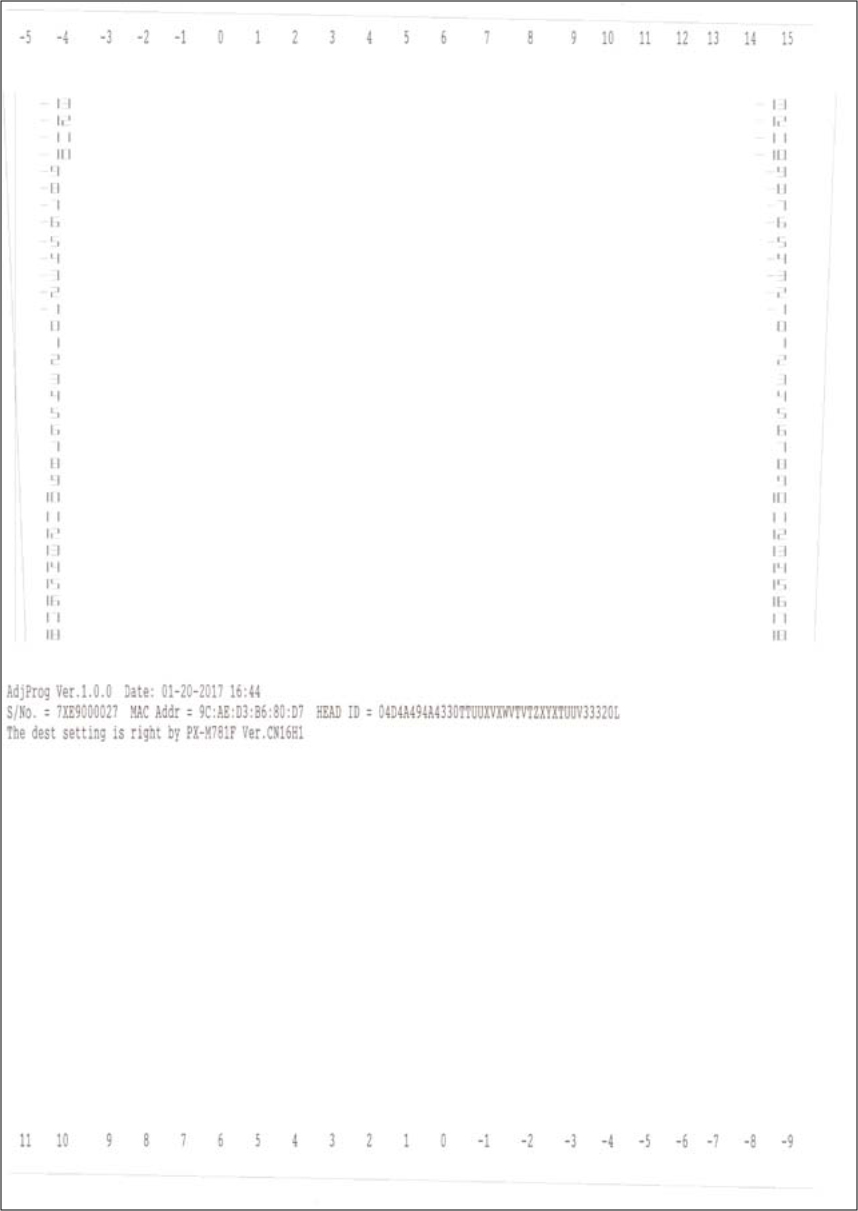
Criteria
- PW Sensor Correction
From the stepped patterns printed on the bottom, top, left, and right edges of the paper, select the numerical value that is 5 mm from the edge of the paper for each of them. - Print Start Pos.
From the stepped patterns printed on the left end of the paper, select the numerical value that is 5 mm from the edge of the paper.
Work Procedure
Start the printer in the service mode.
Select “B49 PW Sensor Correct” or “B50 Print Start Pos. (ASF)” or “B51 Print Start Pos. (Rear ASF)” refer to “ How to select an Adjustment item".
Load paper into the specified paper feed tray.
- Confirm the current setting and print the adjustment pattern.
When changing the print setting, select and change the item following the instruction on the screen.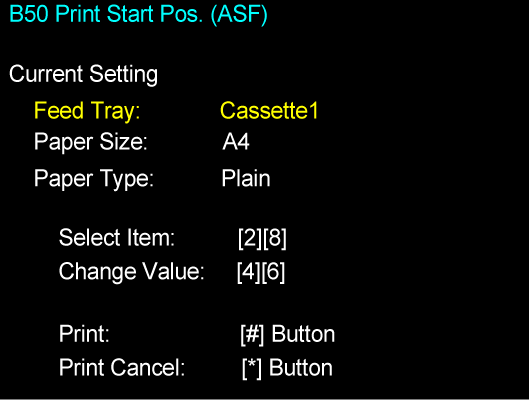
Check the adjustment pattern and determine the adjustment value based on the judgment procedure.
- Enter the adjustment value.
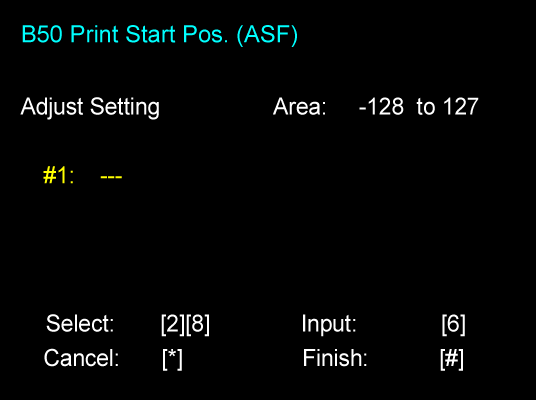
Perform the completion operation to save the adjustment value to the printer.
 Check Point / チェックポイント
If there is no pattern satisfying the judgment method among the adjustment patterns, there is a pattern satisfying the judgment method outside the scope of pattern printing. Therefore, select the best pattern and enter the adjustment value. Following this, again print the adjustment pattern and determine the adjustment value.