CIS Unit (ADF)
- Remove the five screws.
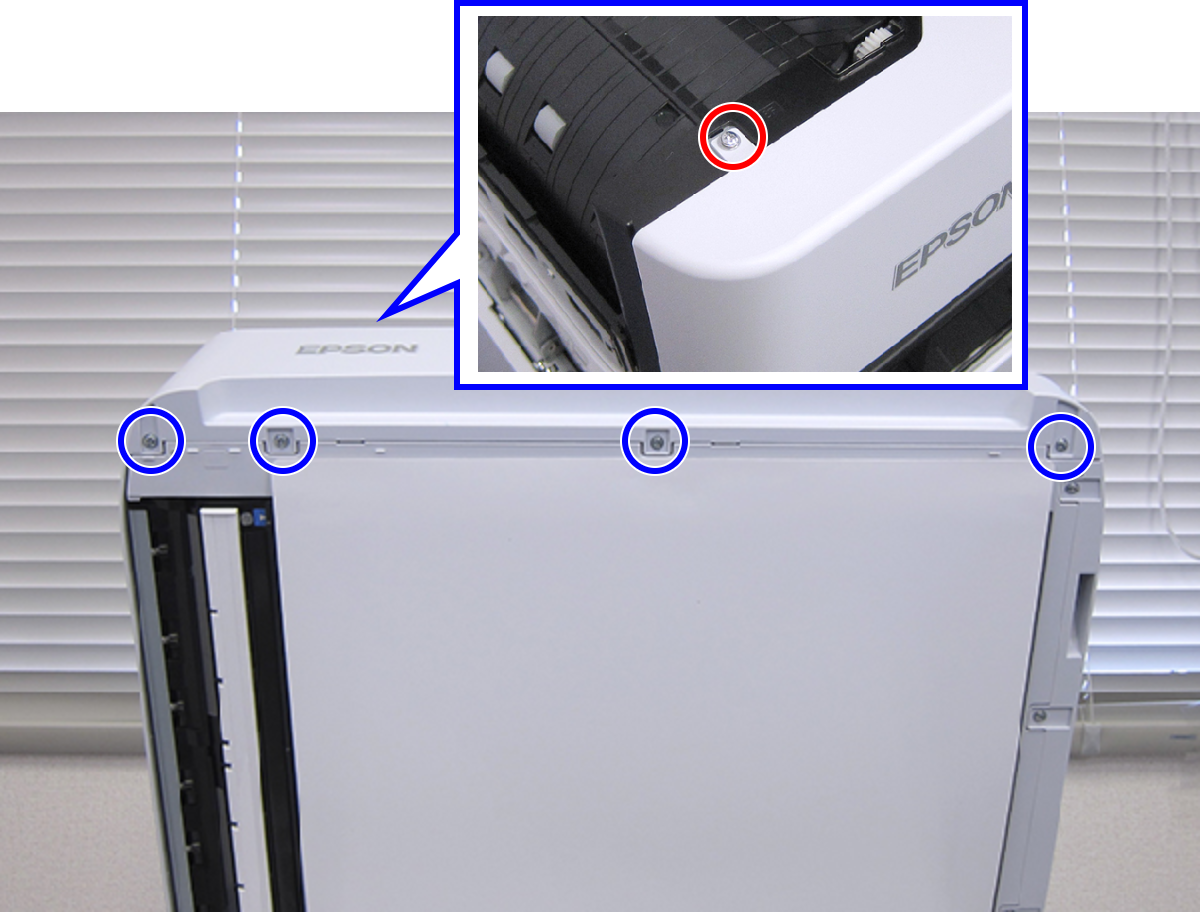
 : C.B.S-TITE.P4.SCREW-3x6-F.ZN-3C
 : C.B.P-TITE.P4.SCREW-3x10-F.ZN-3C
- Disengage the two hooks, and remove the Front ADF Cover Assy (A).
- Remove the 5 screws, then remove the Rear ADF Cover Assy (A).
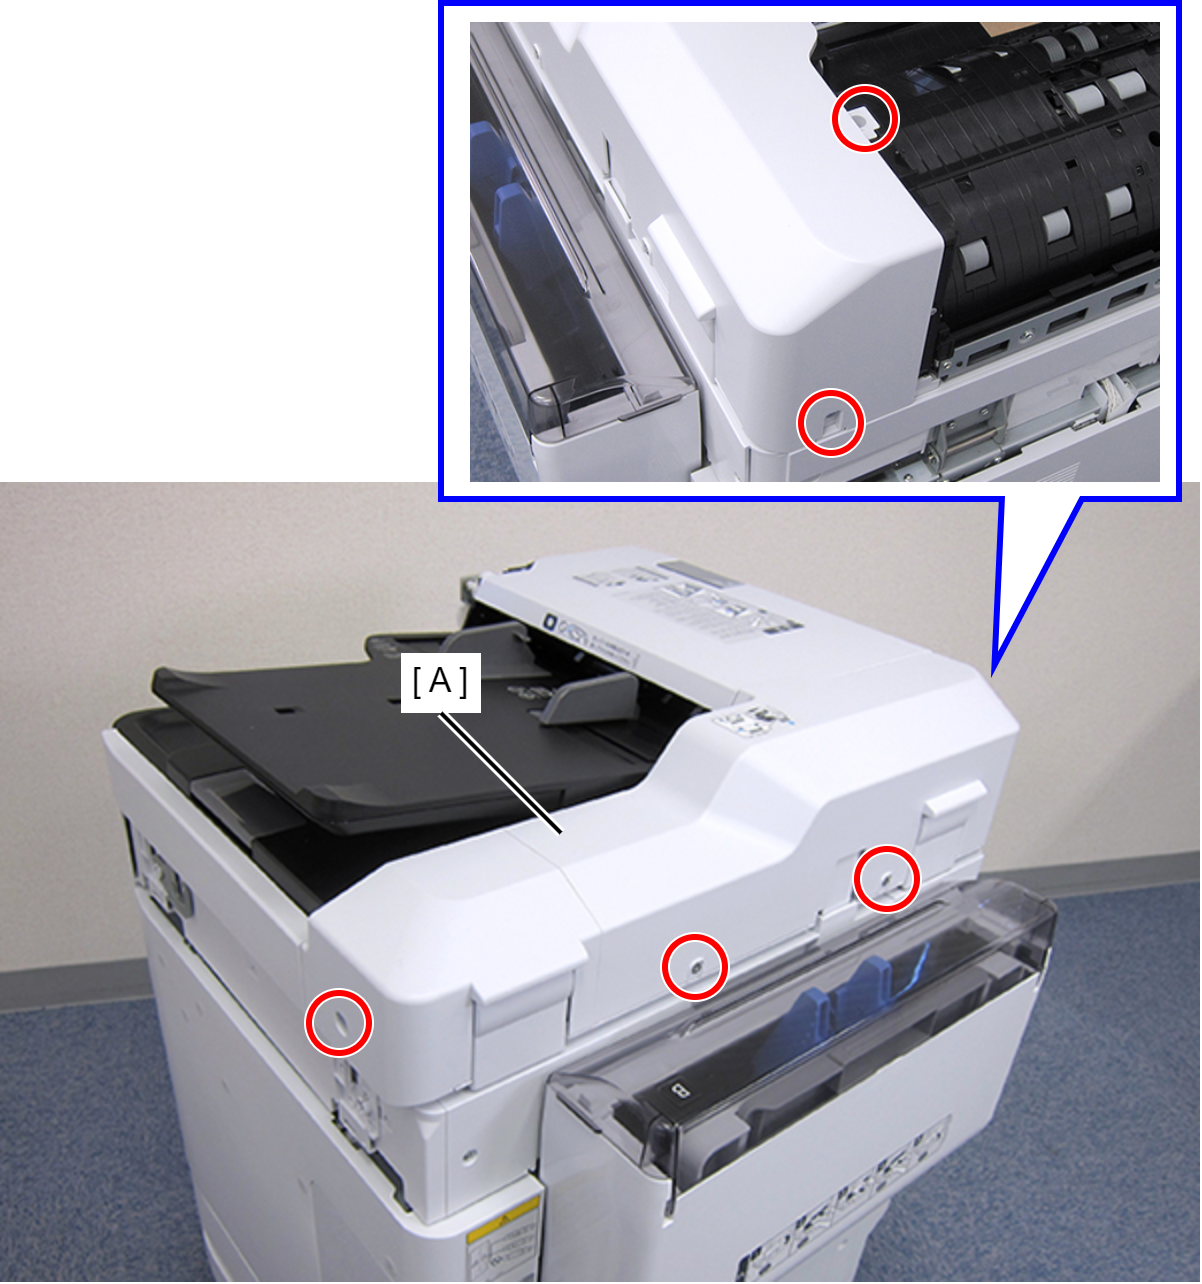
- : C.SHOULDER S-TITE,3X5
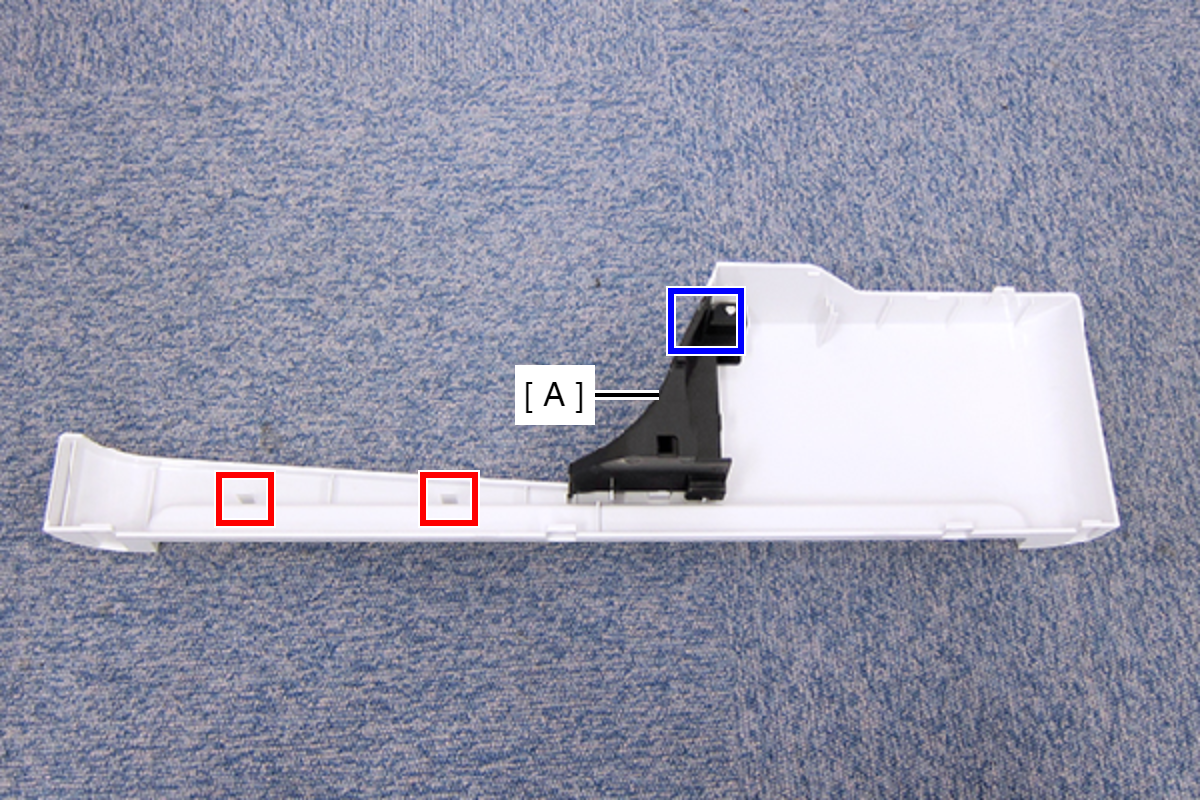
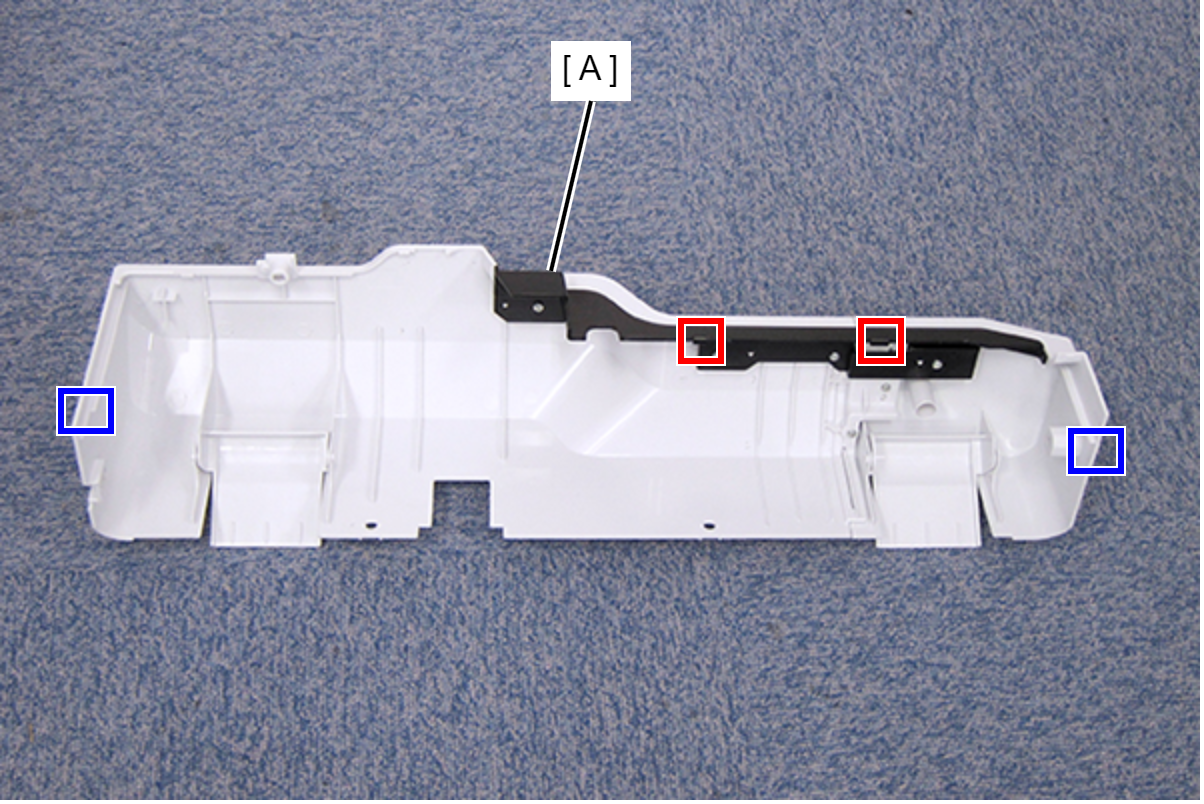
- Disengage the two hooks and the two tabs, then remove the Rear ADF Cover Assy (A).
- Remove the two screws, then slightly pull out the CIS Unit (ADF) (A).
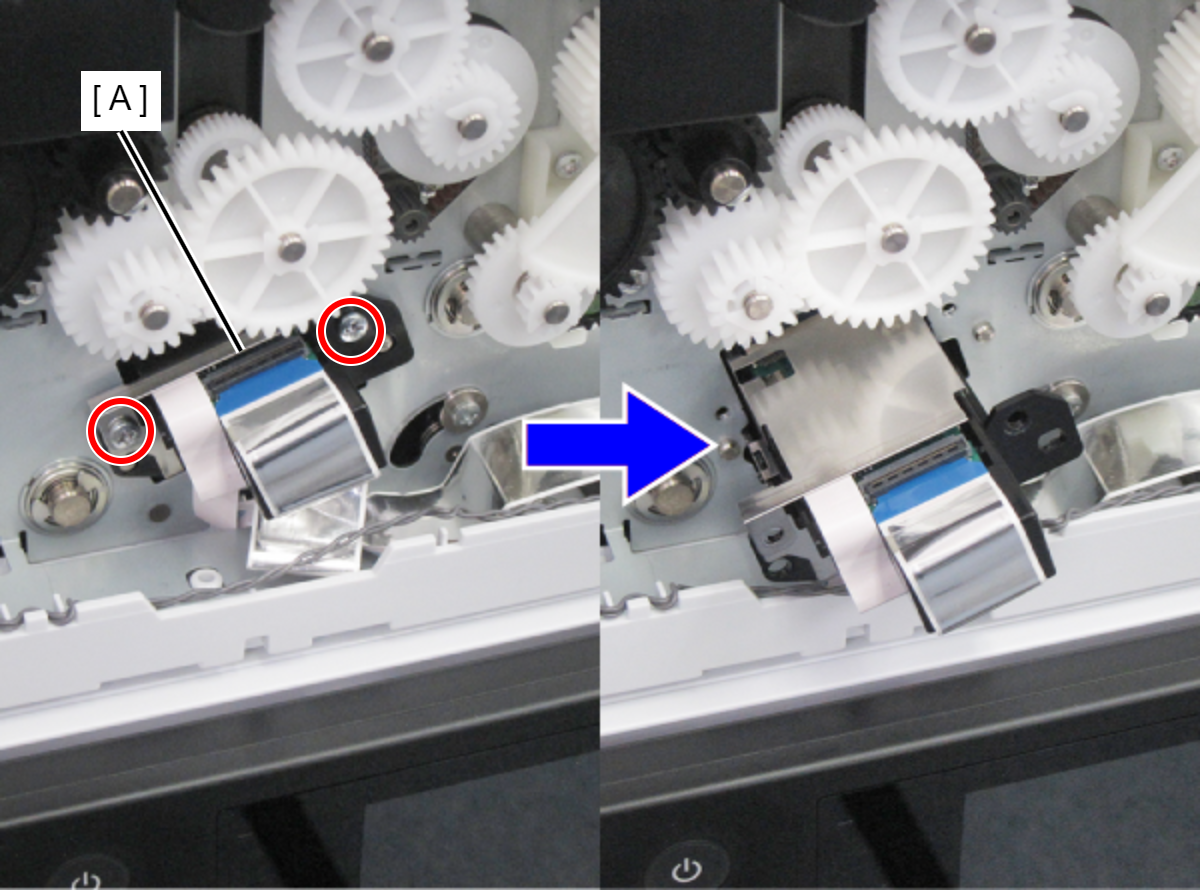
- : C.B.S-TITE-SCREW-3x6-F.ZN-3C
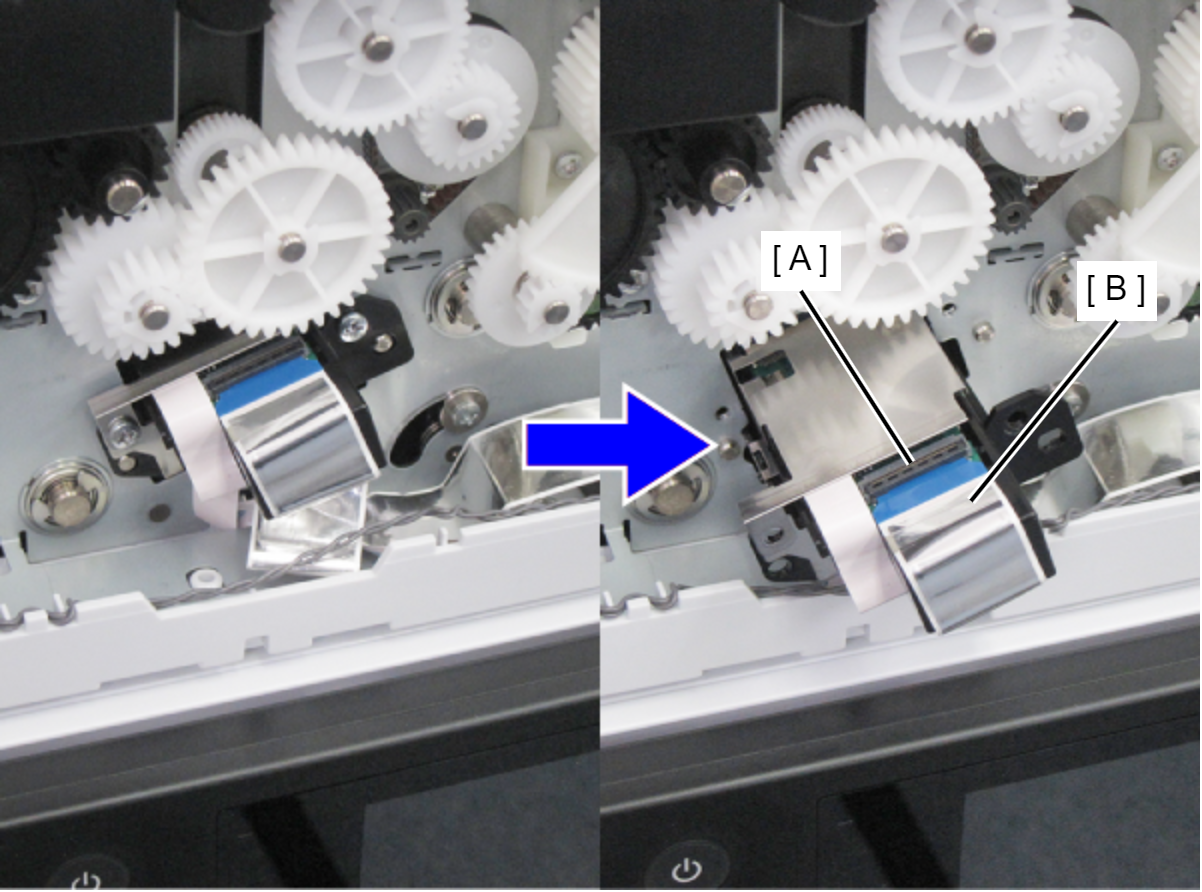
- Raise the connector lock (A), and then disconnect the FFC (B).
- Peel off the FFC (A).
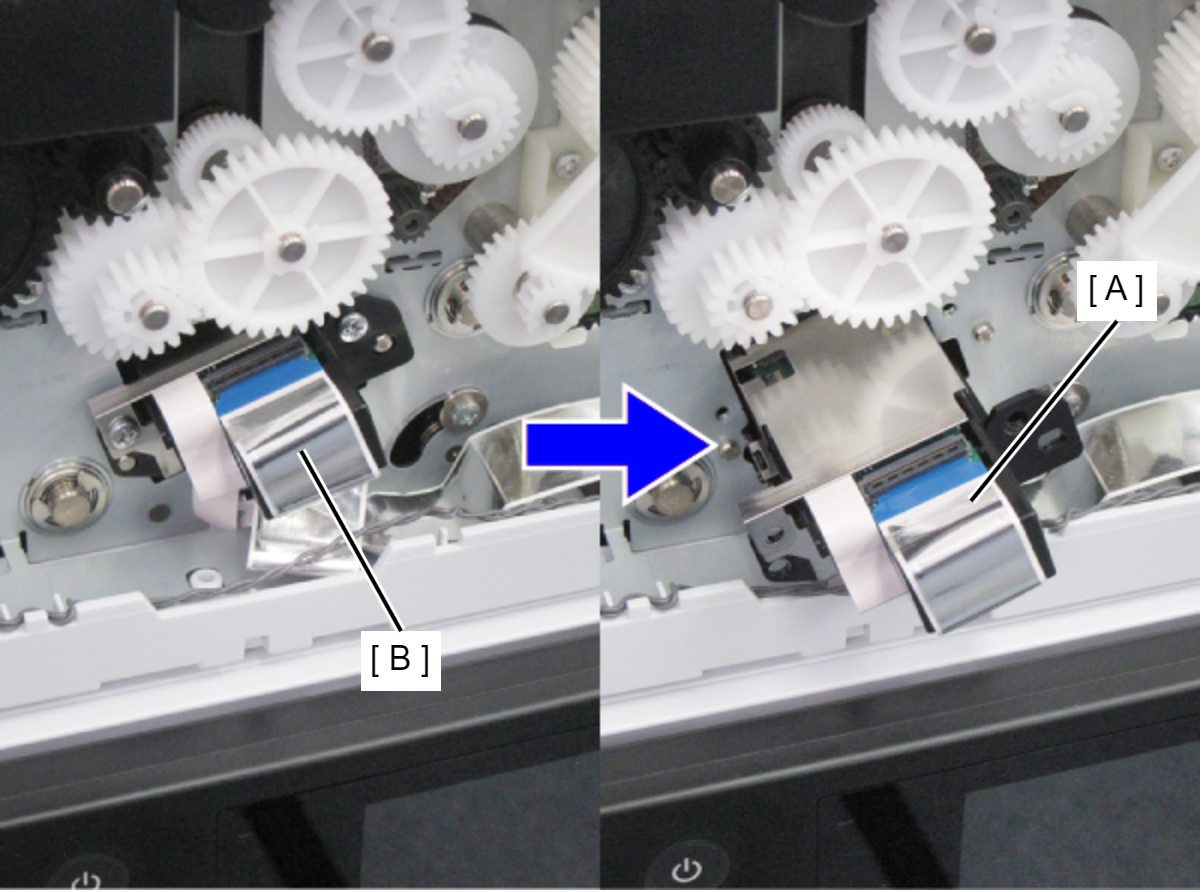
- Peel off the FFC (A).
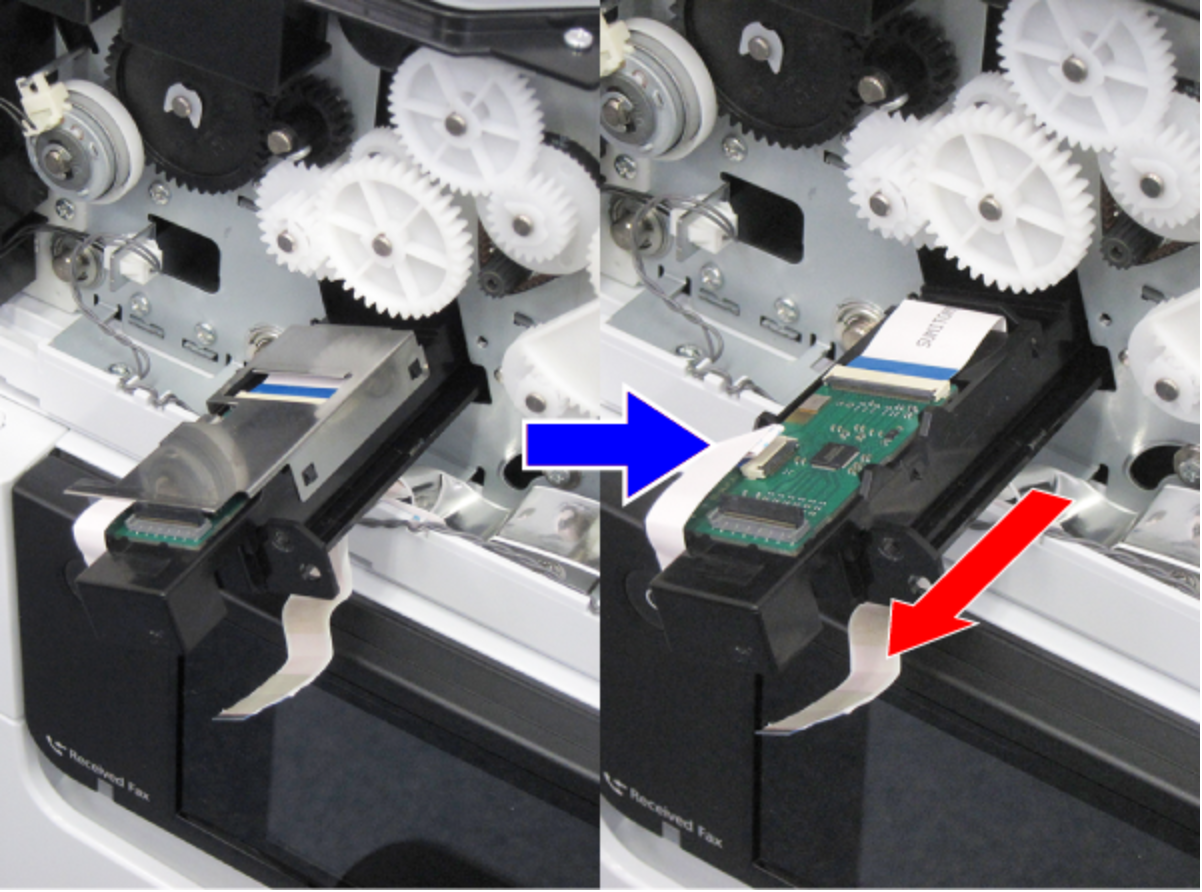
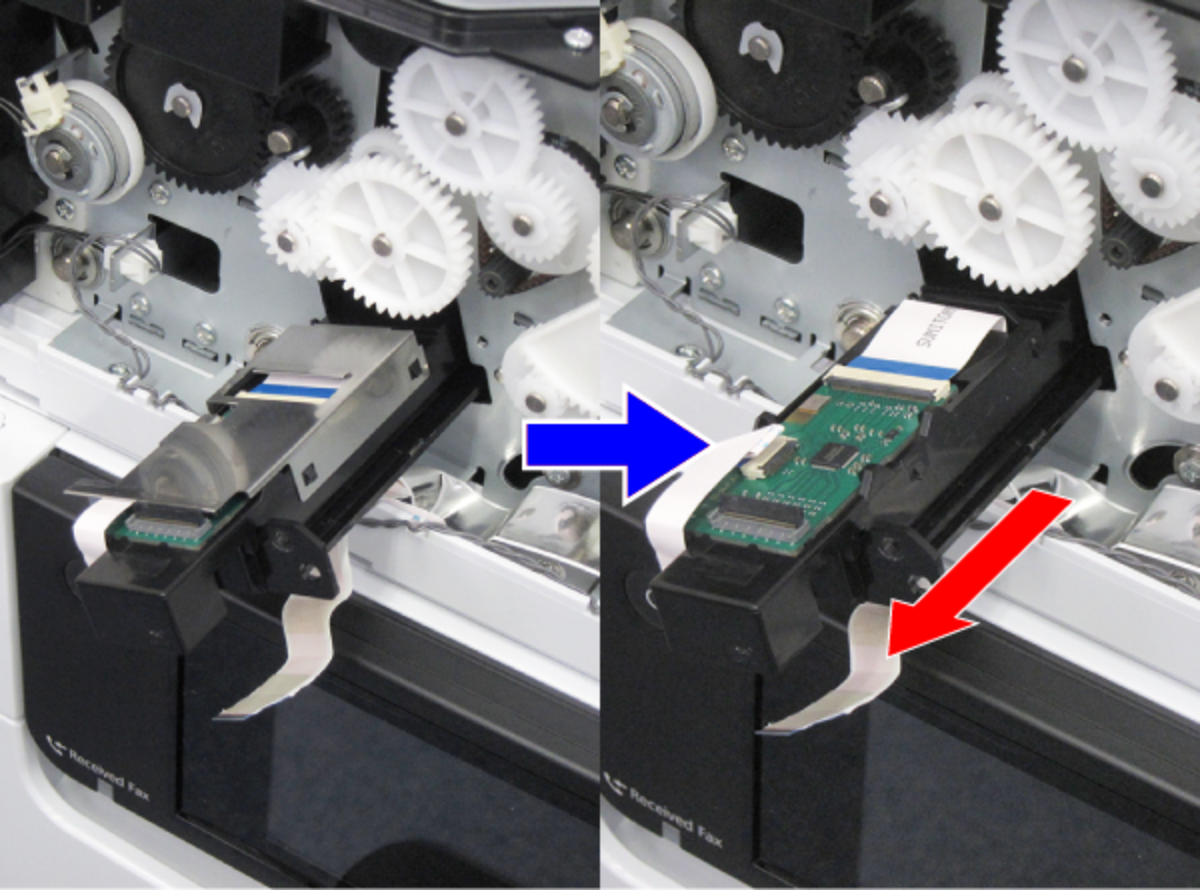
- Pull out the CIS Unit (ADF) to the position shown below.
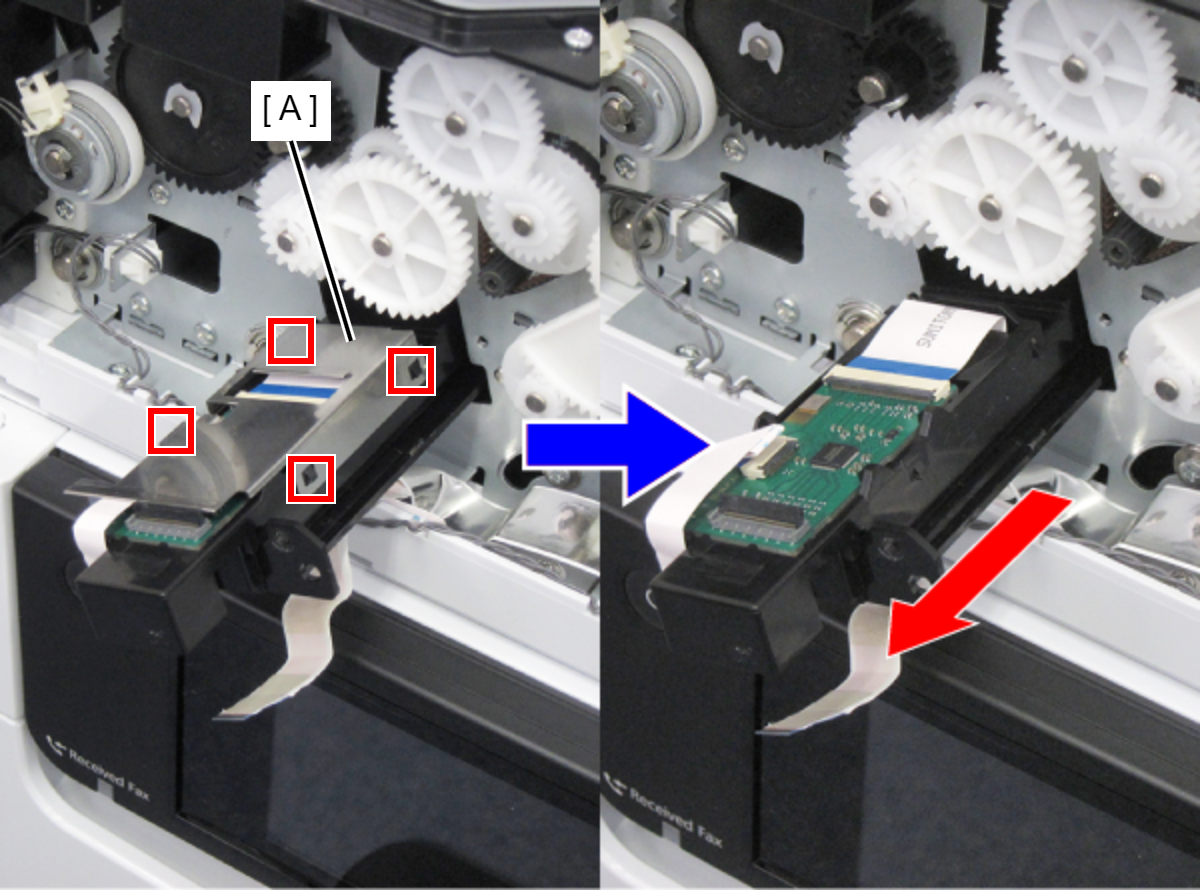
- Disengage the four hooks, and remove the shield plate (A).
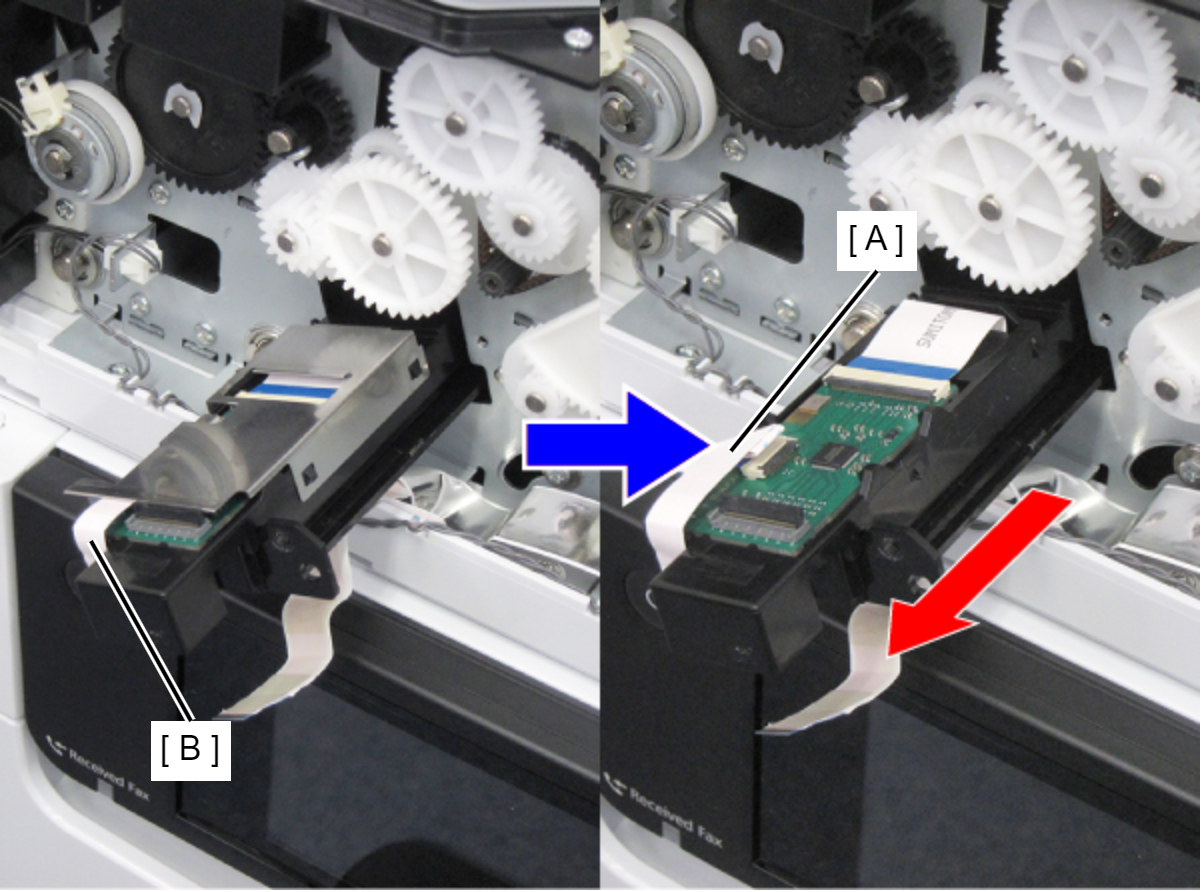
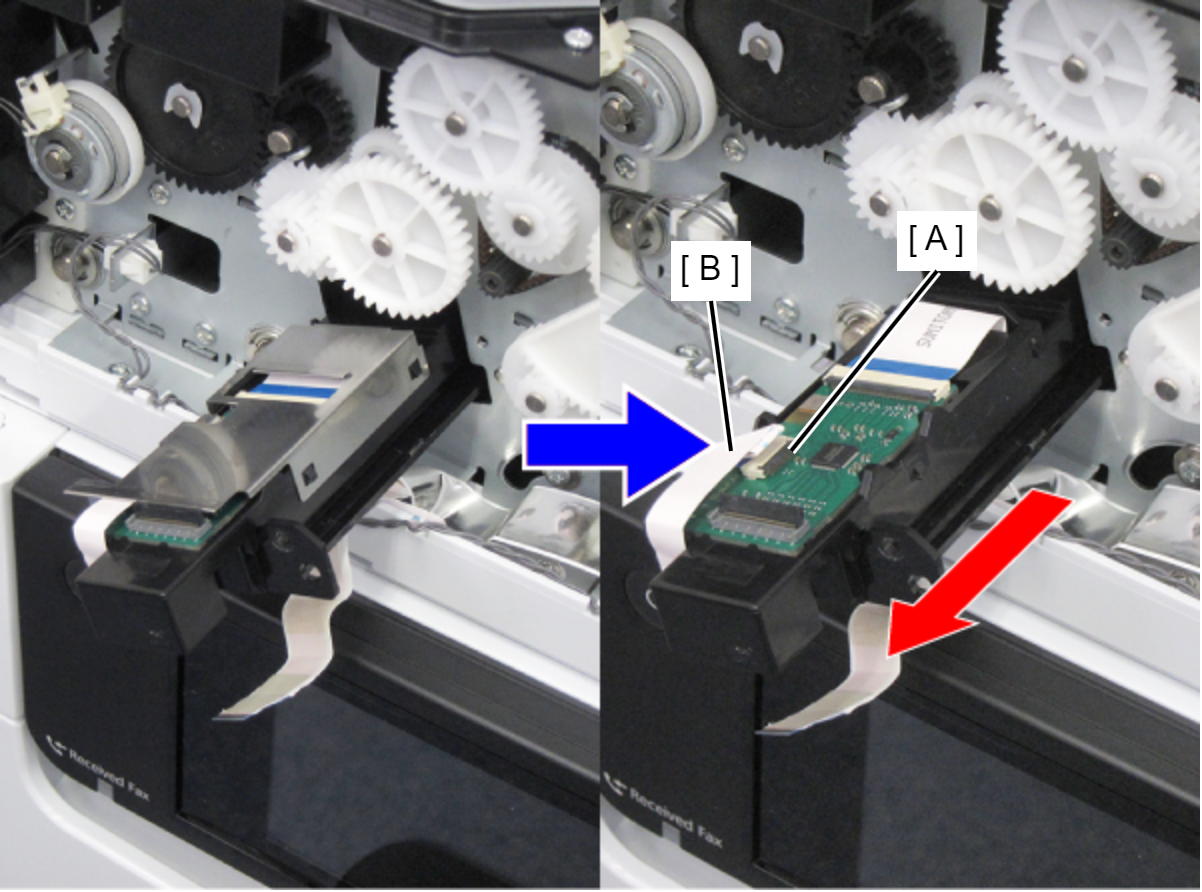
- Raise the connector lock (A), and then disconnect the FFC (B).
- Remove the CIS Unit (ADF) frontward.
 Assembly / 組み立て
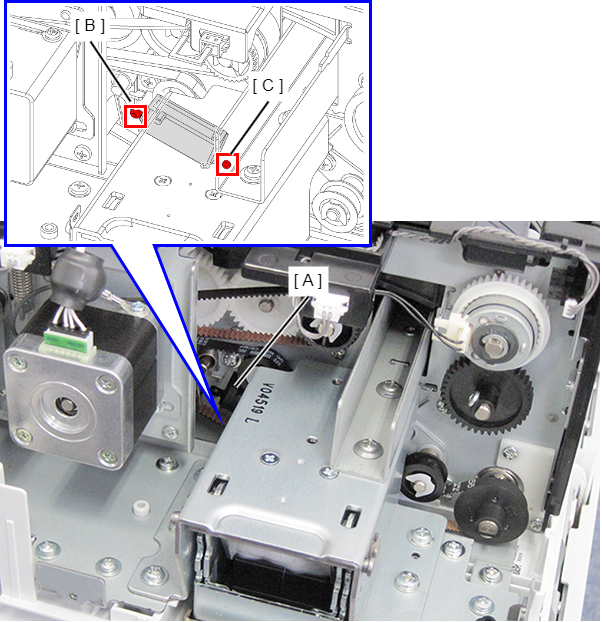
- On the back side, insert the two dowels on the CIS Unit (ADF) (A) into the groove (B) and into the positioning hole (C), respectively.
- When connecting the FFC, be careful not to damage it such as folding it or deforming the terminal. In addition, take care not to connect it diagonally.
- After installing the CIS, make sure to clean the glass surface with a clean cloth such as a dust free cloth. (Refer to Cleaning)
After cleaning the glass, light the scanning area and make sure that the area is clean without any dirt or foreign matters.