
C1 cassette feed roller
 Adjustment / 調整 Adjustment / 調整 |
When replacing this part, you need to run the menu from the service support mode before replacing it. |
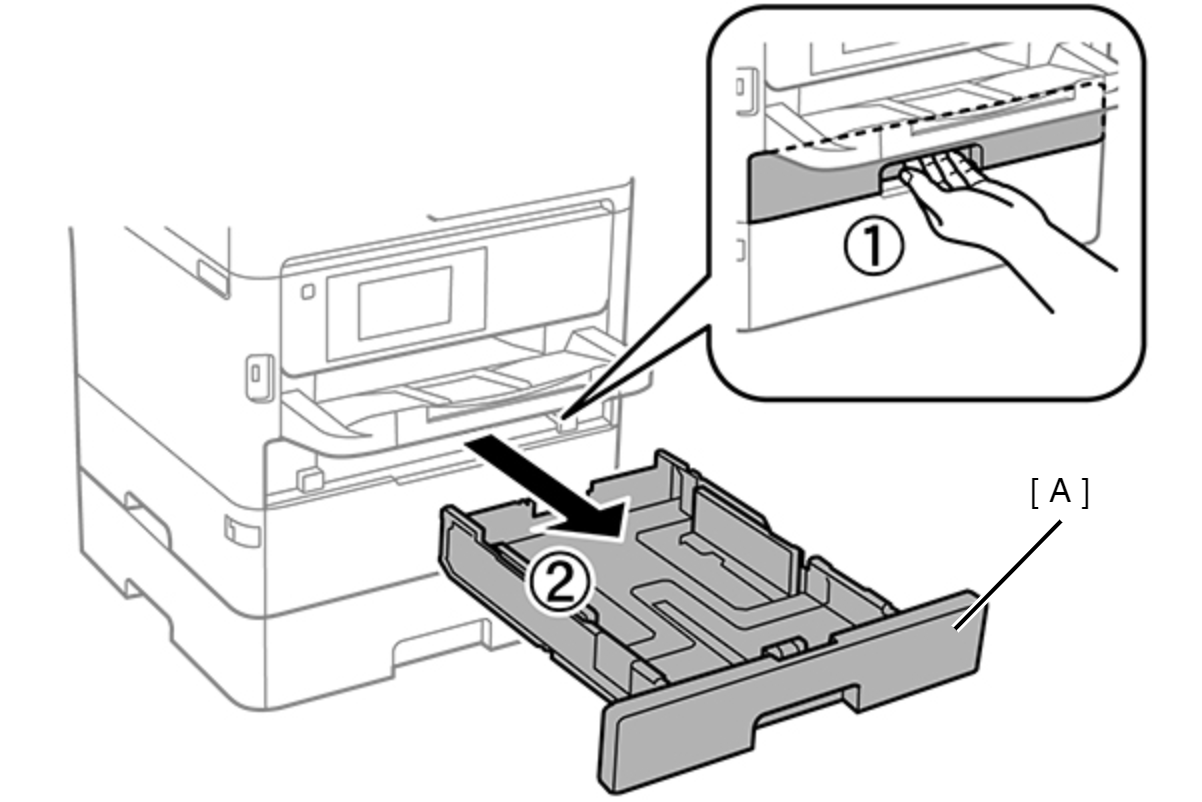
- Pull out the C1 cassette (A).
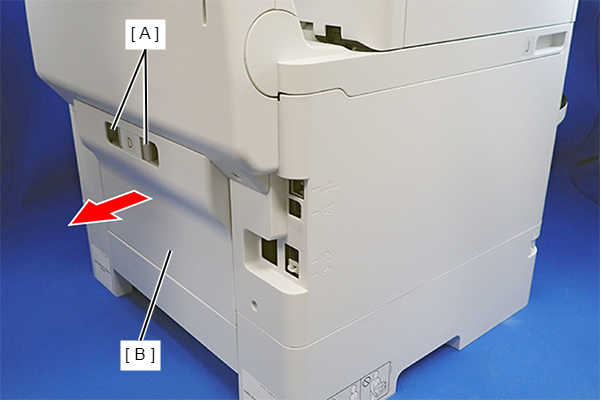
- Remove the Rear Unit (B) in the direction of the arrow while pressing the buttons (A) inward.
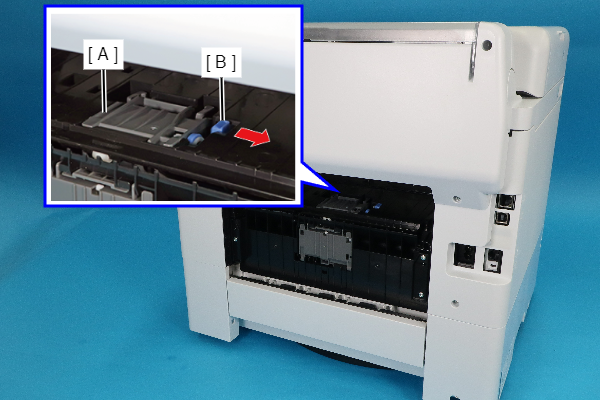
- Unlock the Pickup Roller Assy (A) by sliding the lock (B) in the direction of the arrow.
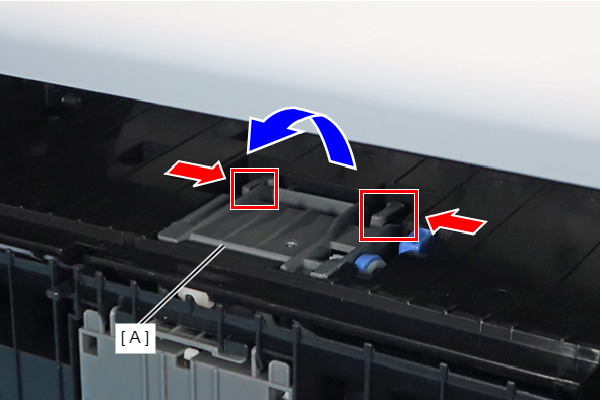
- While disengaging the two hooks by pushing them in the direction of the red arrows, open the Pickup Roller Assy (A) in the direction of the blue arrow.
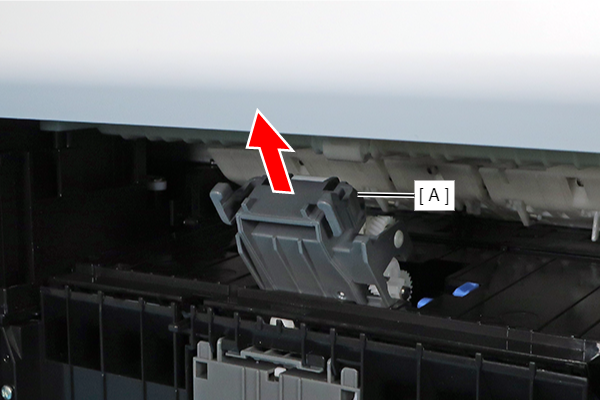
- Remove the Pickup Roller Assy (A) in the direction of the arrow.
 Caution / 注意
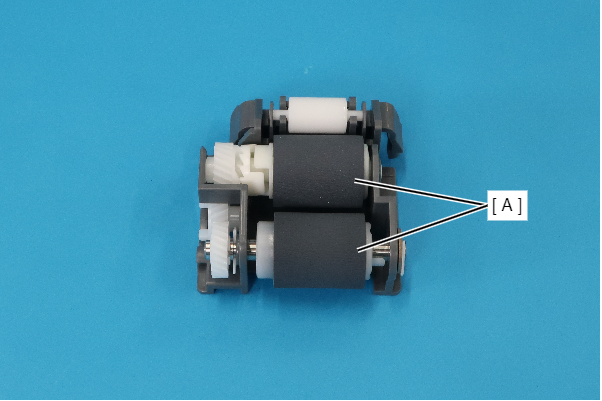
When replacing the Pickup Roller Assy, be careful not to touch the rollers (A) shown in the figure below.
 Assembly / 組み立て
Align the two bearings of the Pickup Roller Assy (A) with the two shafts of the printer.
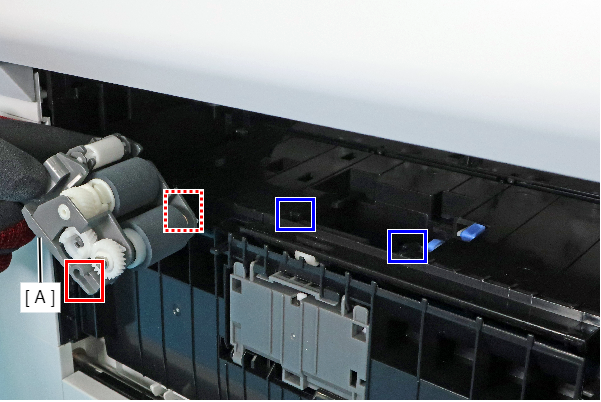
- While disengaging the hook in the direction of the red arrow, open the Retard Roller (A) in the direction of the blue arrow.
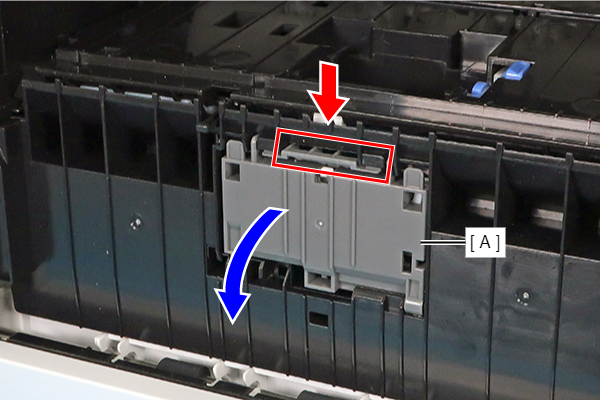
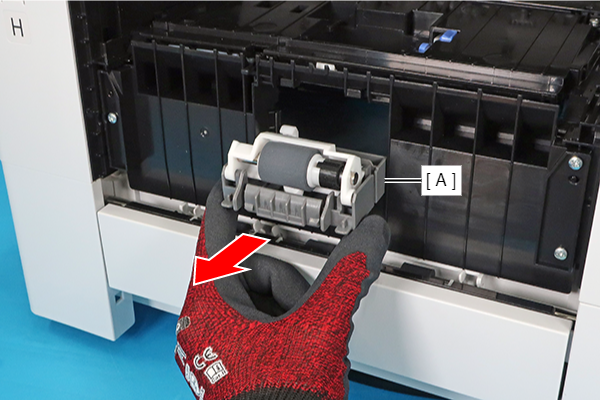
- Remove the Retard Roller (A) in the direction of the arrow.
 Caution / 注意
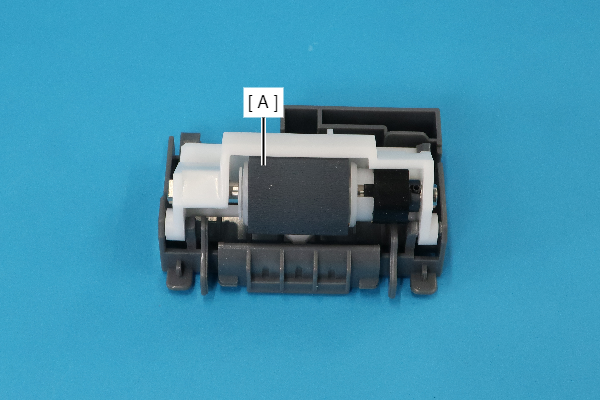
When replacing the Retard Roller, be careful not to touch the roller (A) shown in the figure below.
 Assembly / 組み立て
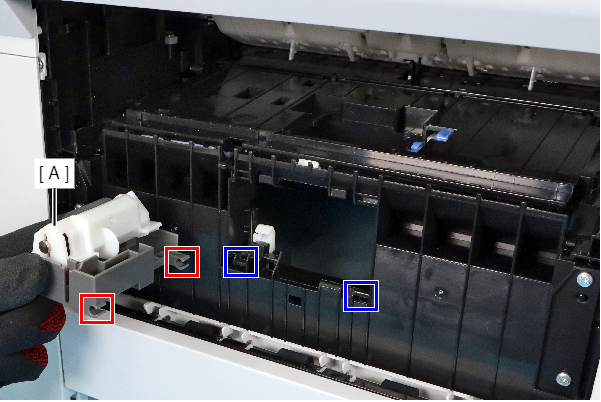
Align the two bearings of the Retard Roller (A) with the two shafts of the printer.
| Adjustment / 調整 |
After replacing this part, you need to run the menu from the service support mode. (If you ran the Before-replacement menu before replacing the part, it will start automatically when you turn the power on.) |