Authentication device stand installation procedure
Bundled Items
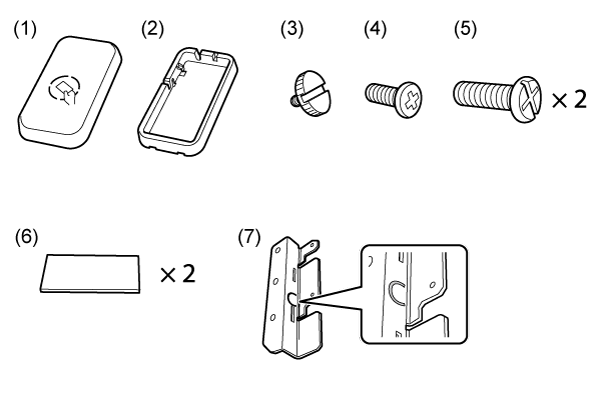
| No. | Bundled Items |
|---|---|
| 1 | Device pedestal upper cover |
| 2 | Device pedestal |
| 3 | Coin screw |
| 4 | Screw A |
| 5 | Screw B |
| 6 | Double-sided tape |
| 7 | Bracket C |
 Check Point / チェックポイント Check Point / チェックポイント |
|
Installation Procedure
Items to Prepare
- Gloves
- Phillips (+) screwdriver
Minimum number of workers
1 person
 Caution / 注意 Caution / 注意 |
|
Installation Procedure
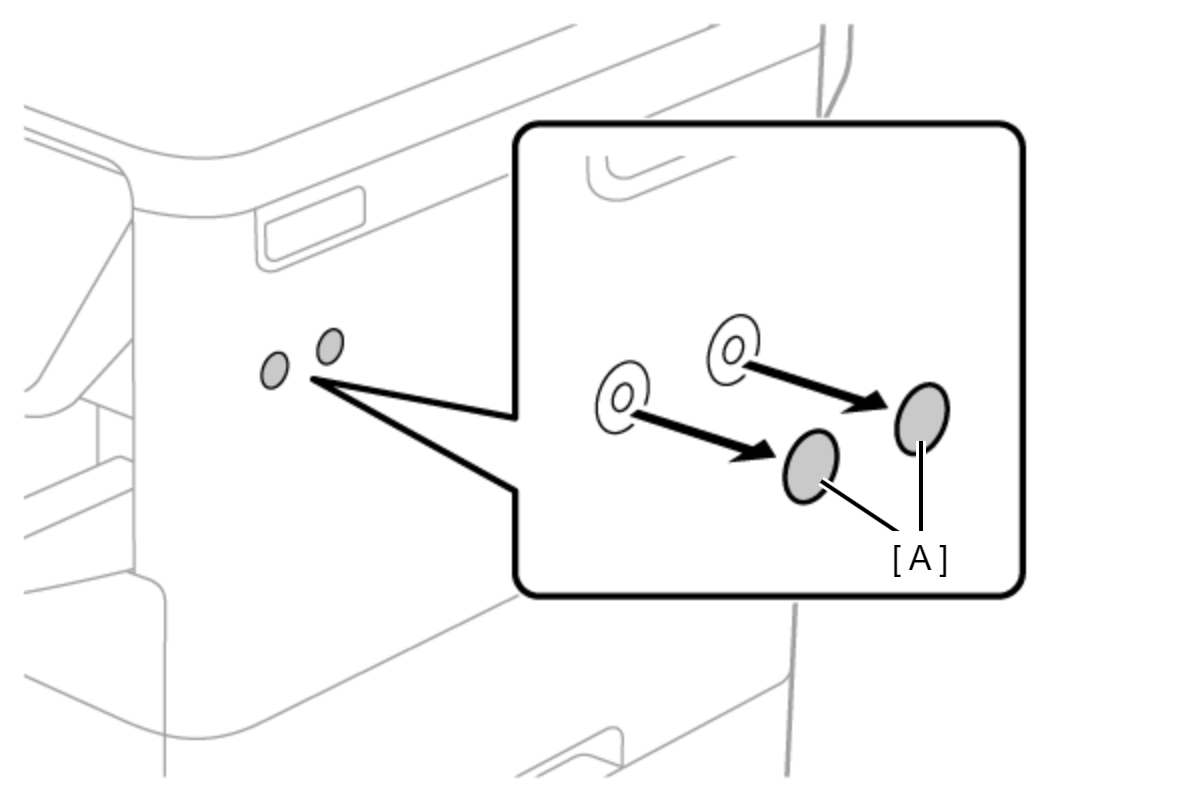
- Peel off the 2 tapes (A) that cover the screw holes on the side of the printer.
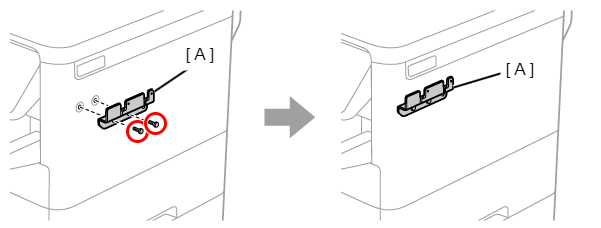
- Secure the Bracket C (A) with 2 screw A.
- Align the hooks on the Device pedestal (A) with the grooves on the Bracket C (B) and attach the Device pedestal (A).
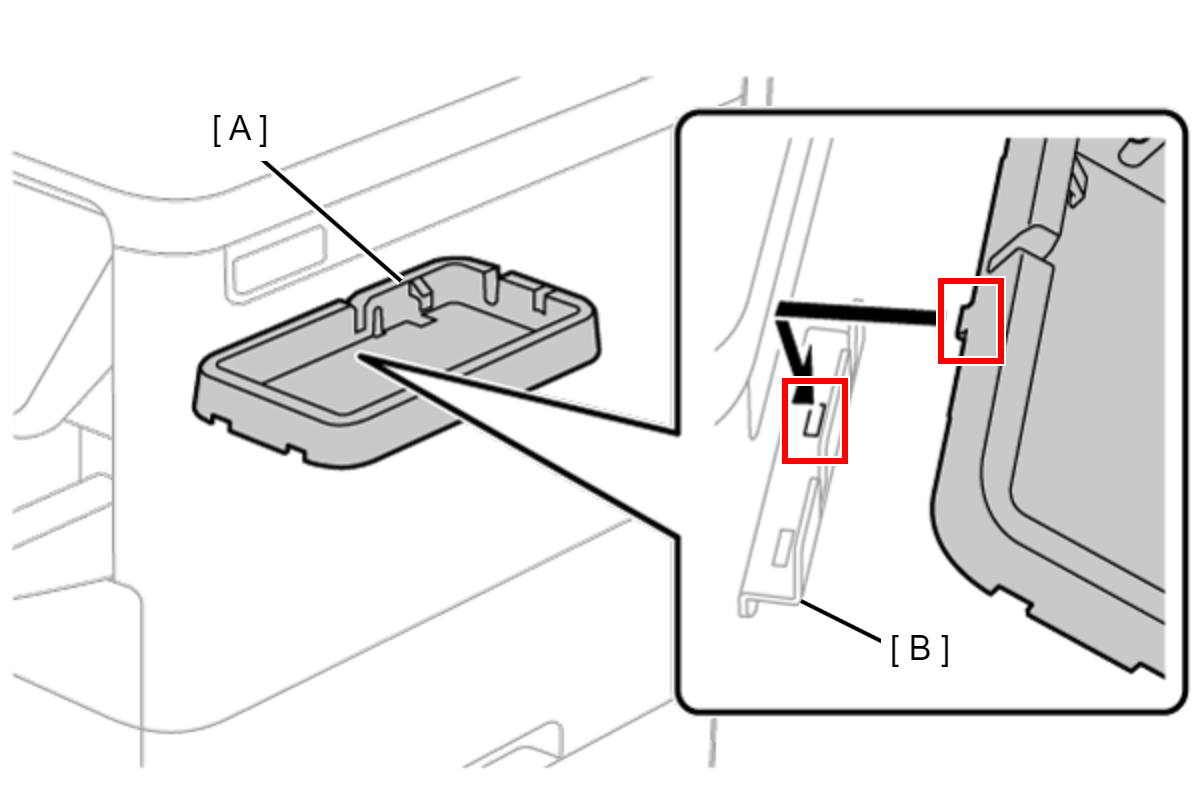
- Secure the Device pedestal (A) with the Coin screw.
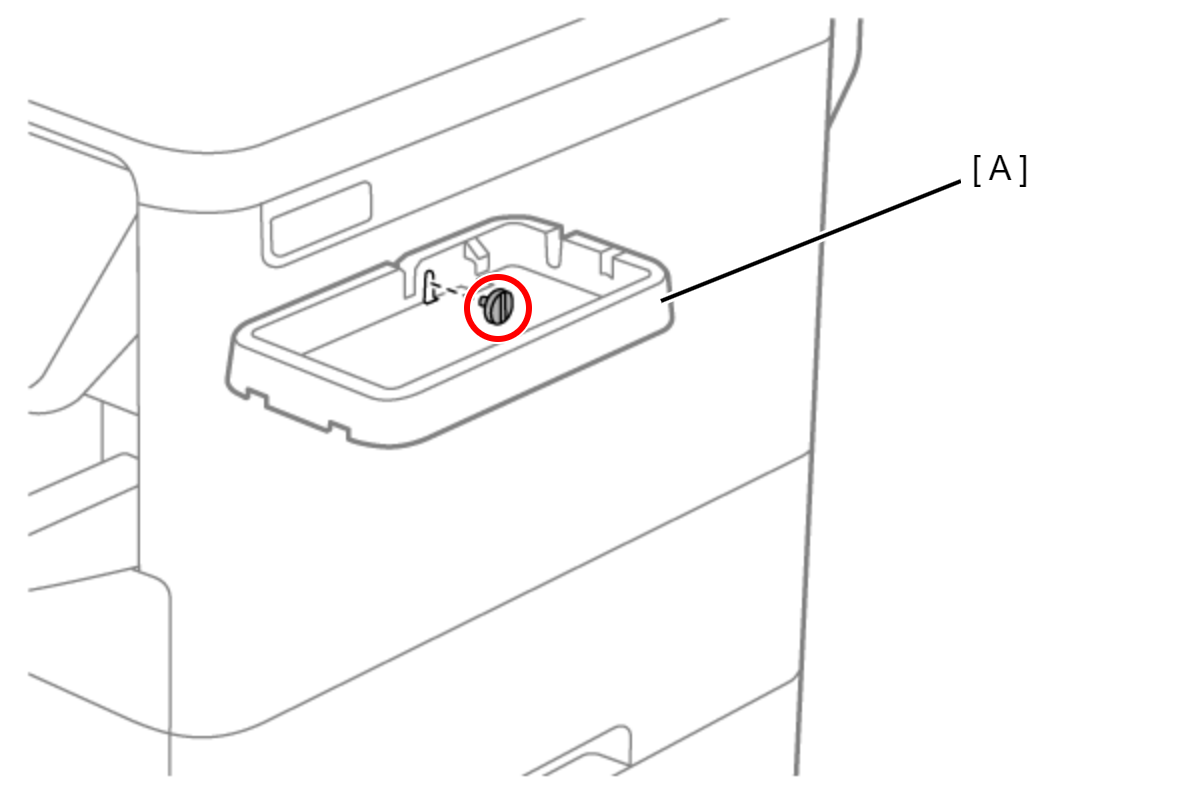
- Set the authentication device (B), and pass the cable (C) through the groove on the Device pedestal to the outside.
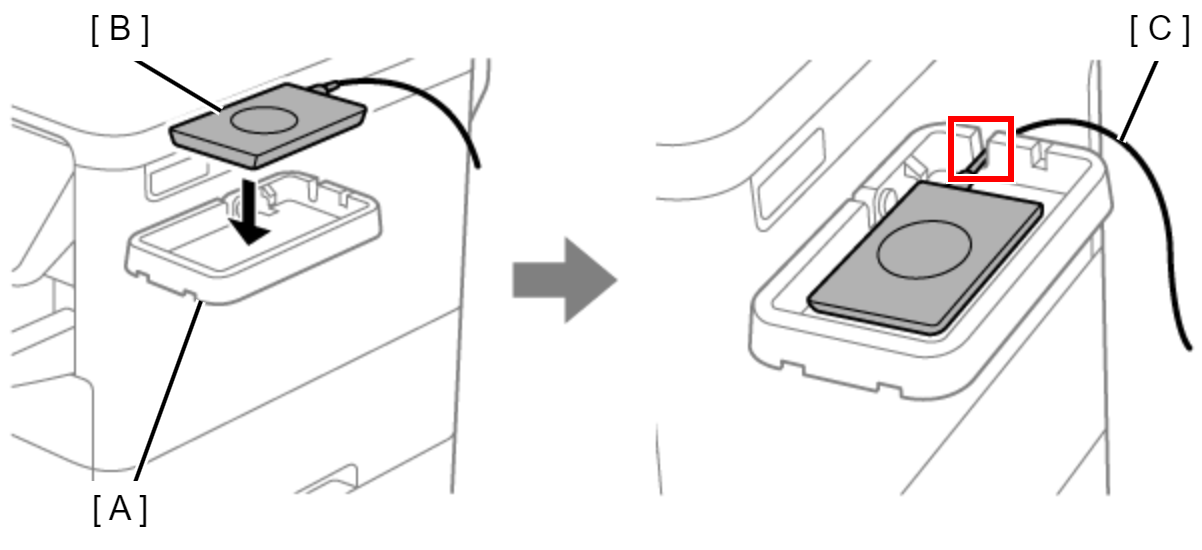
 Note / 補足
When attaching the authentication device, you may use the included duplex tape if necessary.
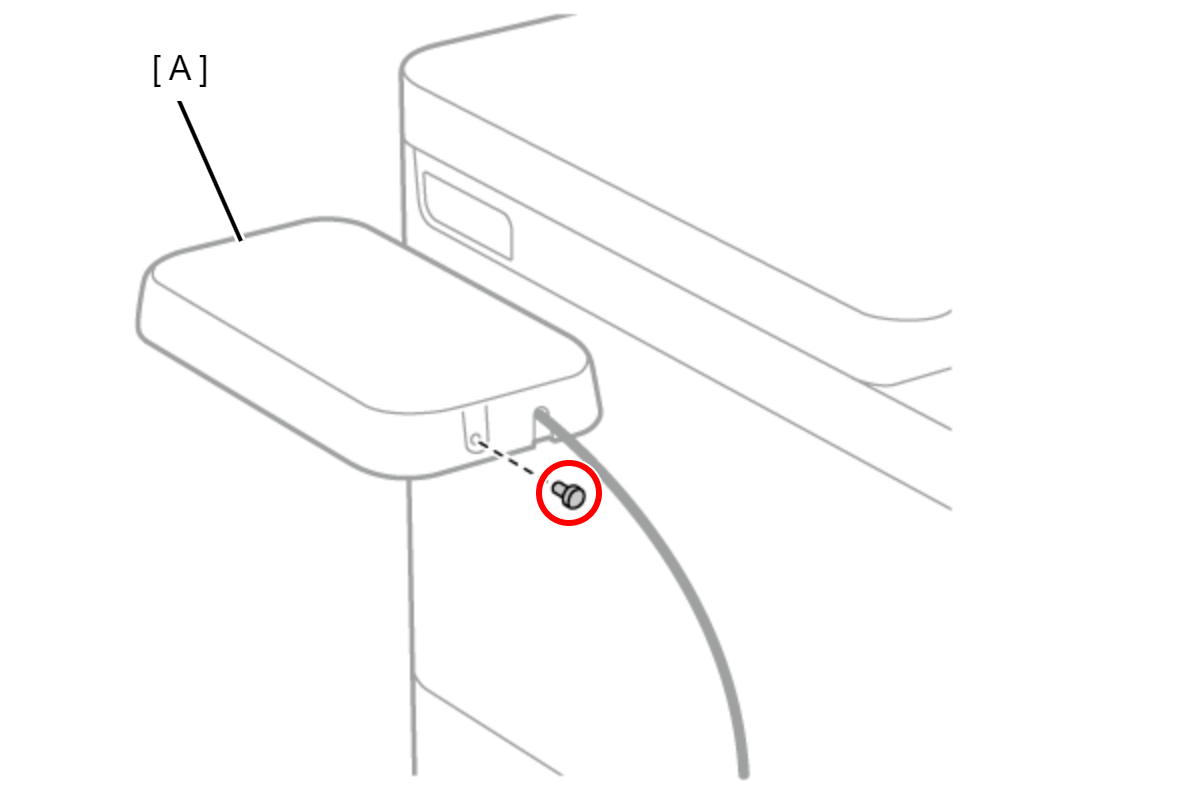
- Attach the Device pedestal upper cover (A).
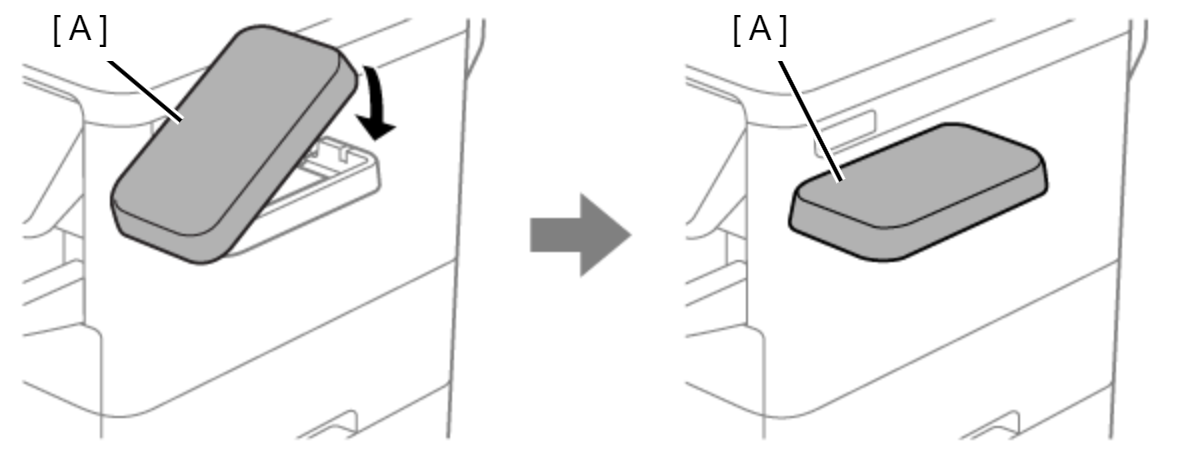
- Secure the Device pedestal upper cover (A) with the Screw A.
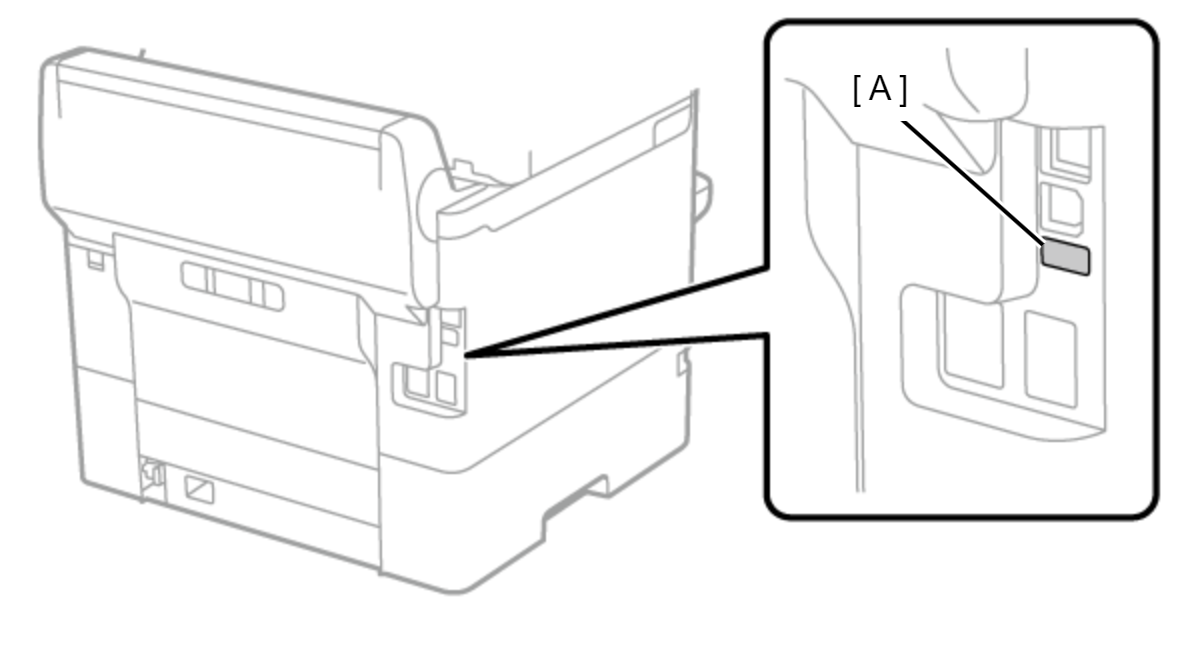
- Peel off the seal (A) from the printer's service port.
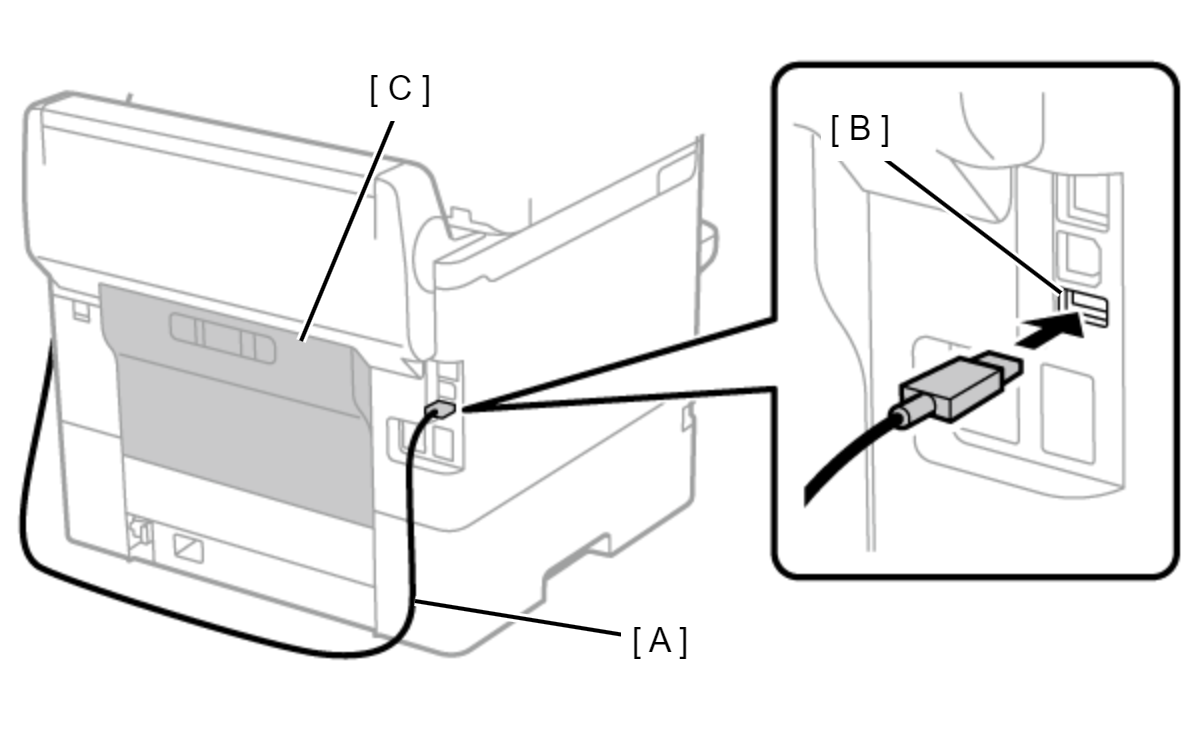
- Connect the cable (A) for the authentication device to the service port (B), and then arrange the cable (A) to avoid the rear unit (C).