
CR Scale (EP-C800 Series)
 Adjustment / 調整 Adjustment / 調整 |
When replacing this part, you need to run the menu from the service support mode before replacing it. Refer to the following to execute. |
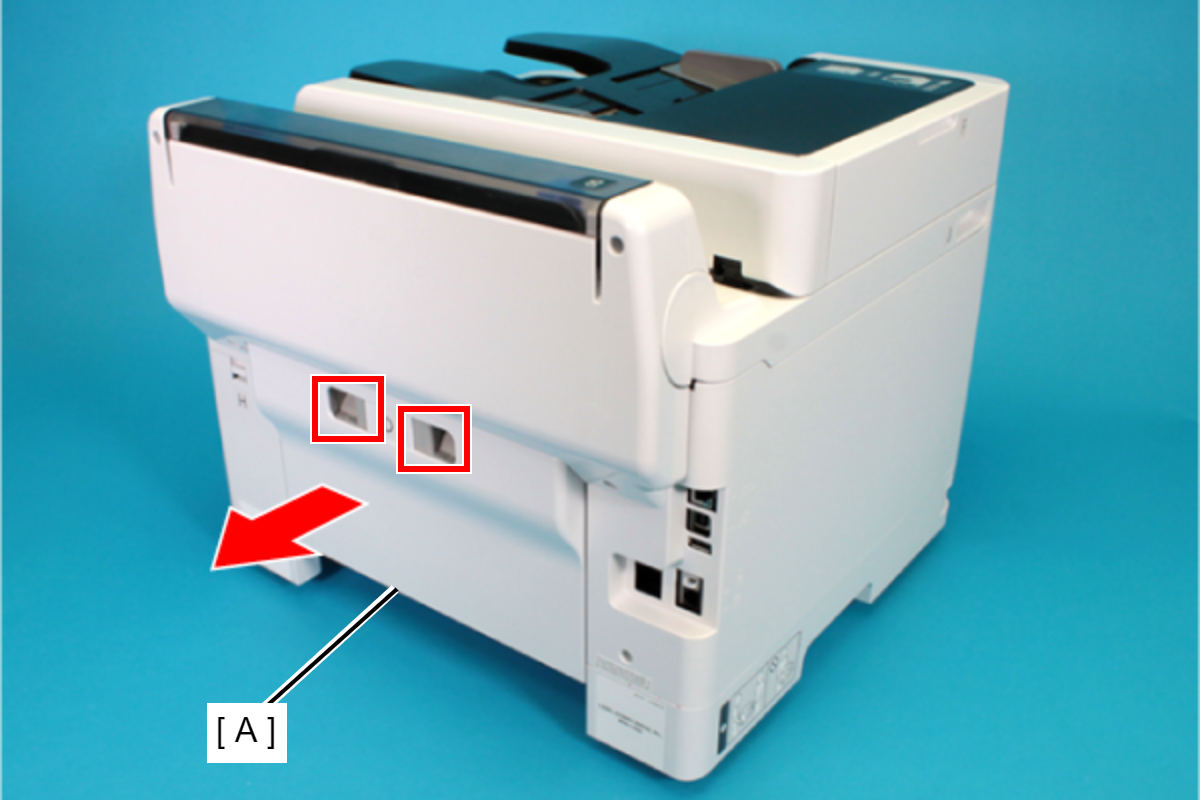
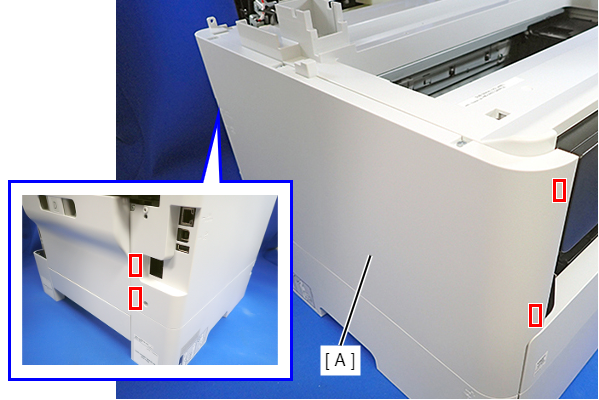
- Remove the Rear Unit (A) in the direction of the arrow while pressing the buttons inward.
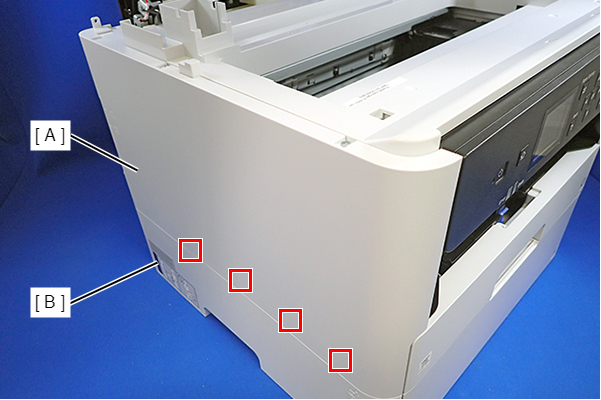
- Open the ASF Cover (A) and remove the two screws securing the Rear Housing Assy (B).
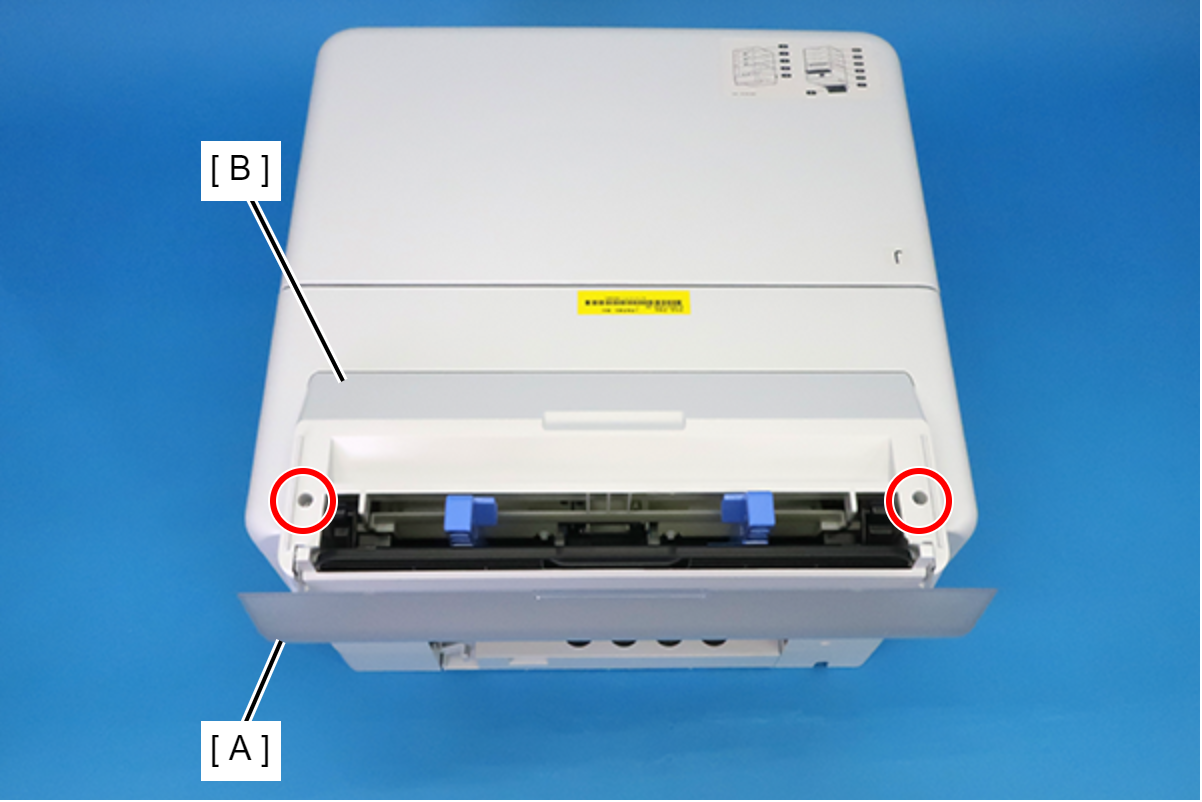
 : C.B.P-TITE-SCREW-3x10-F.ZB-3C
- Remove the four screws that secure the Rear Back Cover (A).
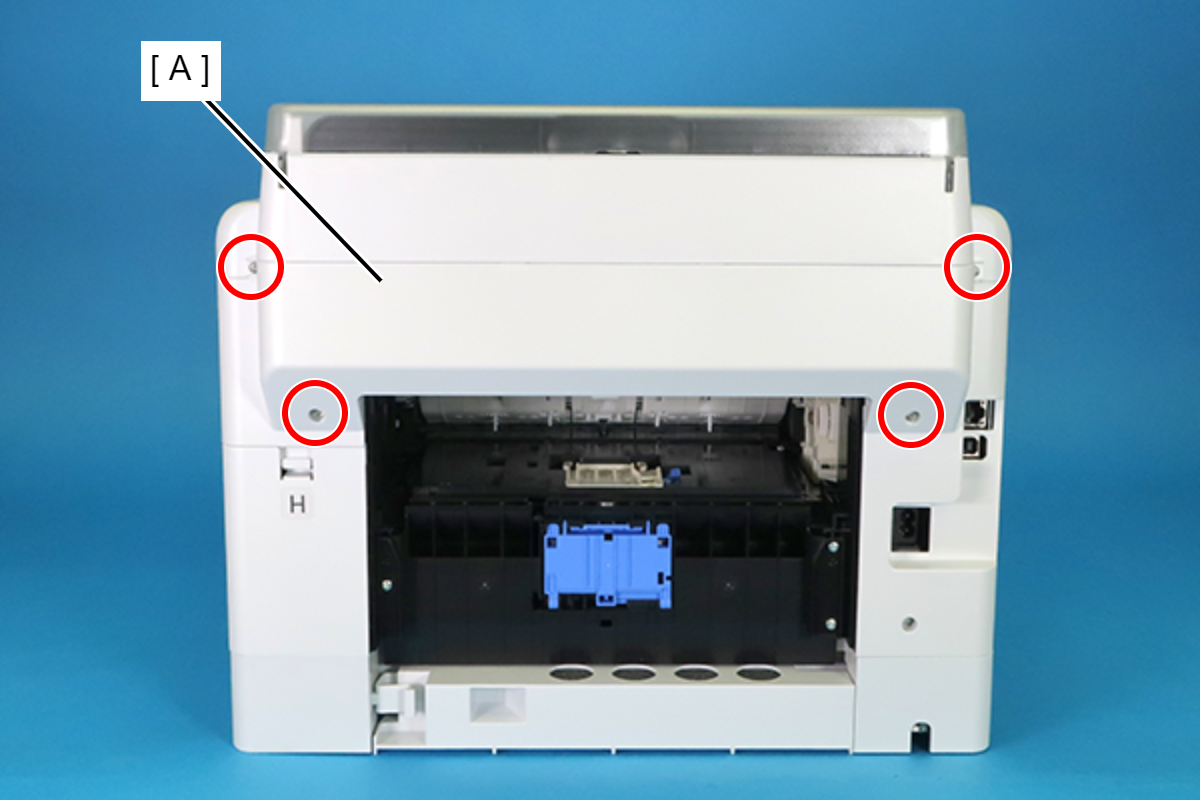
 : C.B.P-TITE-SCREW-3x10-F.ZN-3C
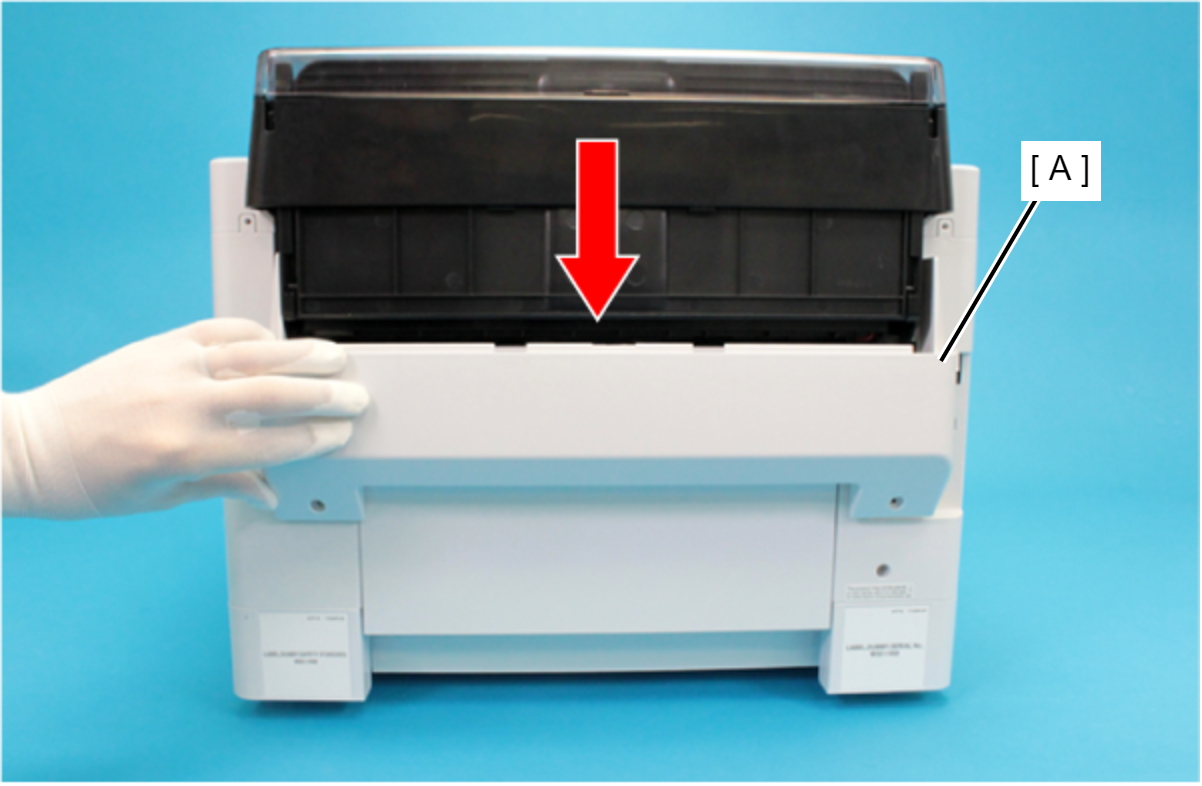
- Remove the Rear Back Cover (A) downward.
 Assembly / 組み立て
Attach the two dowels of the Rear Back Cover (A) to the positioning holes on the Housing Left (B) and the Housing Right (C).
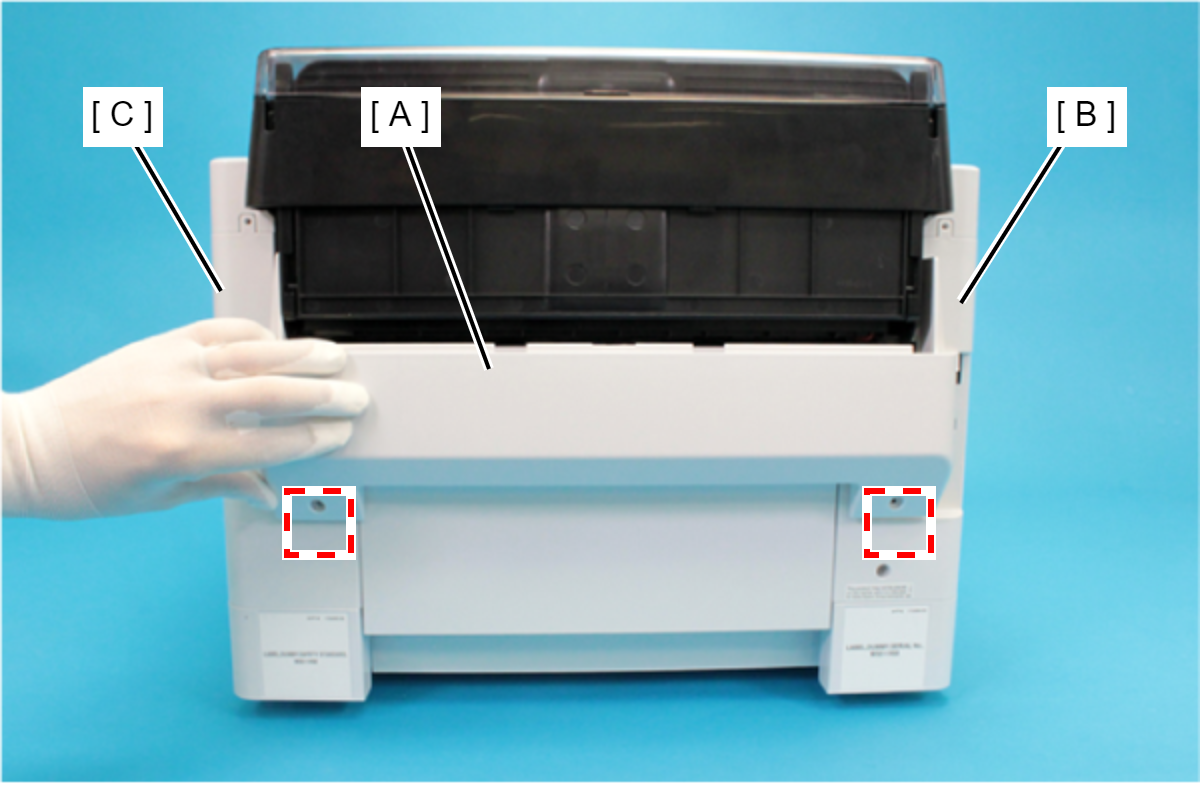
- Remove the Rear Upper Cover Assy (A) in the direction of the arrow.
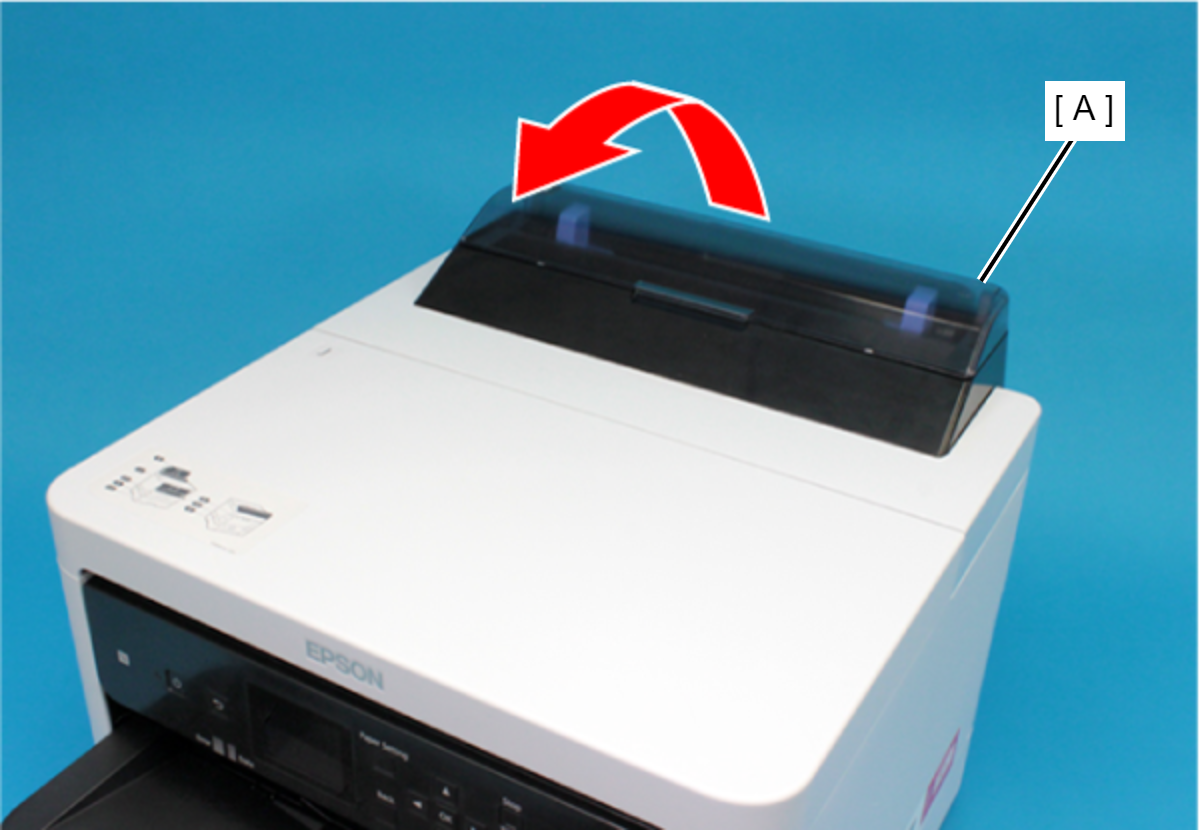 Assembly / 組み立て
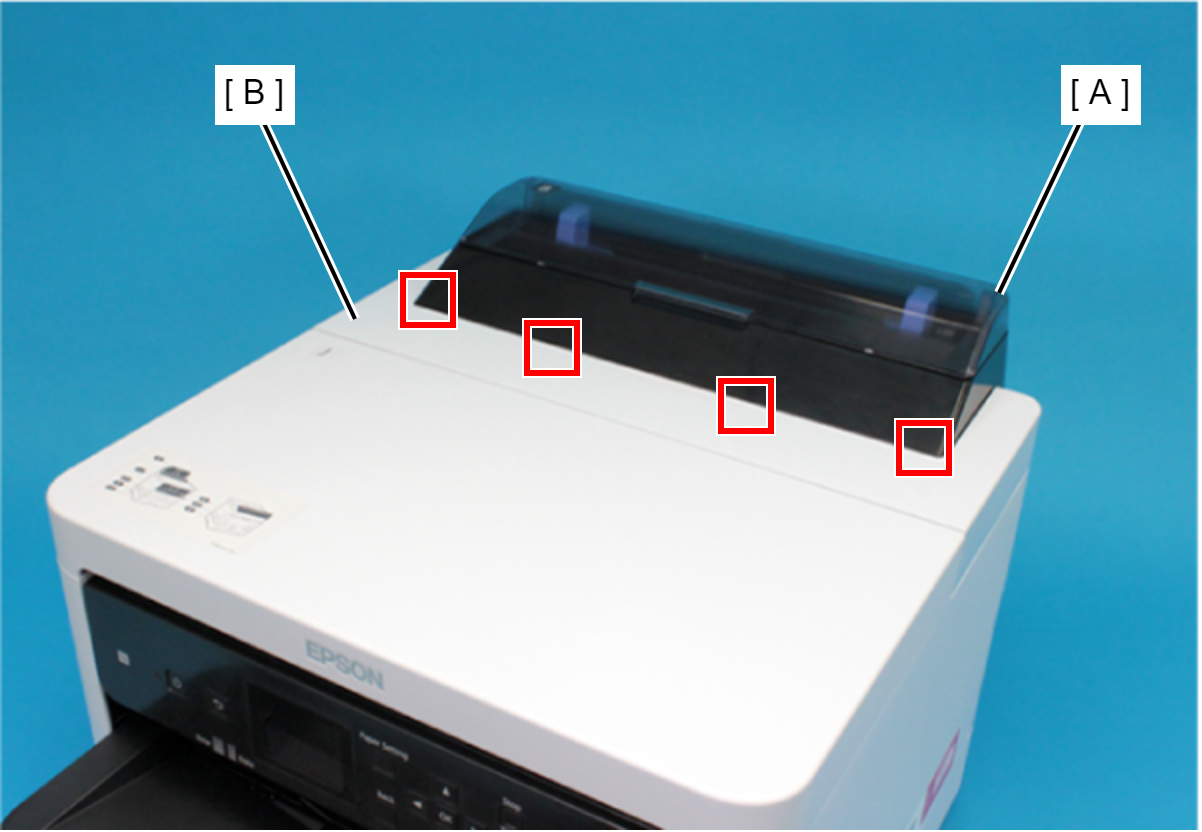
Insert the four tabs of the Rear Upper Cover Assy (A) to the positioning holes of the Housing ASF (B).
- Remove the two screws securing the Housing ASF (A).
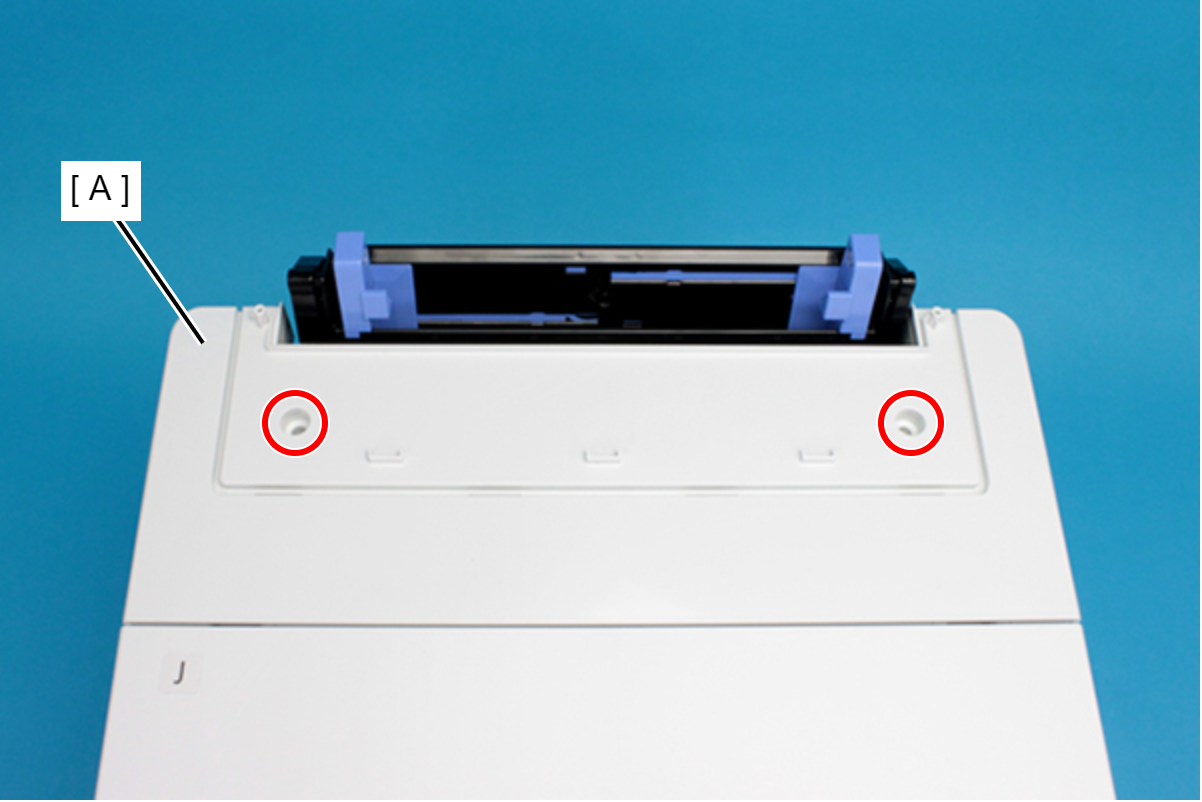
- : C.B.P-TITE-SCREW-3x10-F.ZN-3C
- Open the Printer Cover (A) and remove the four screws, and then remove the Housing ASF (B).
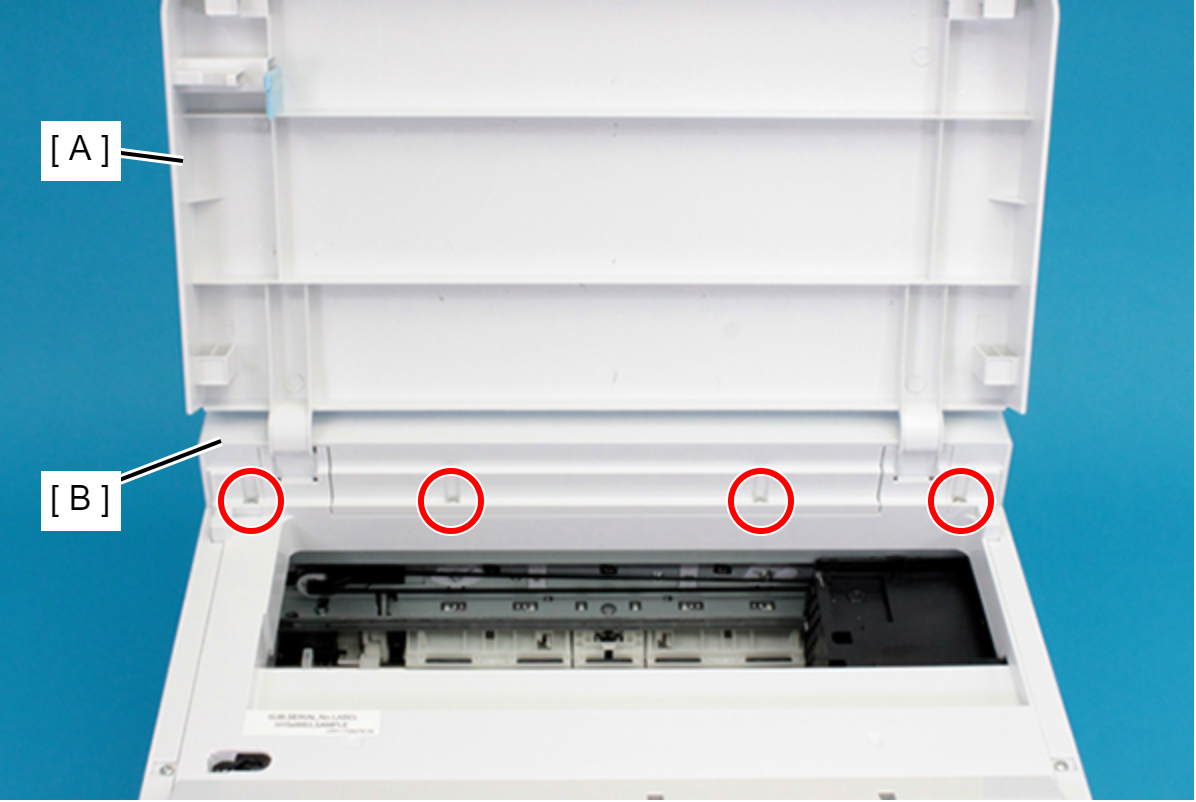
- : C.B.P-TITE-SCREW-3x10-F.ZN-3C
- Remove the Printer Cover (A) upward.
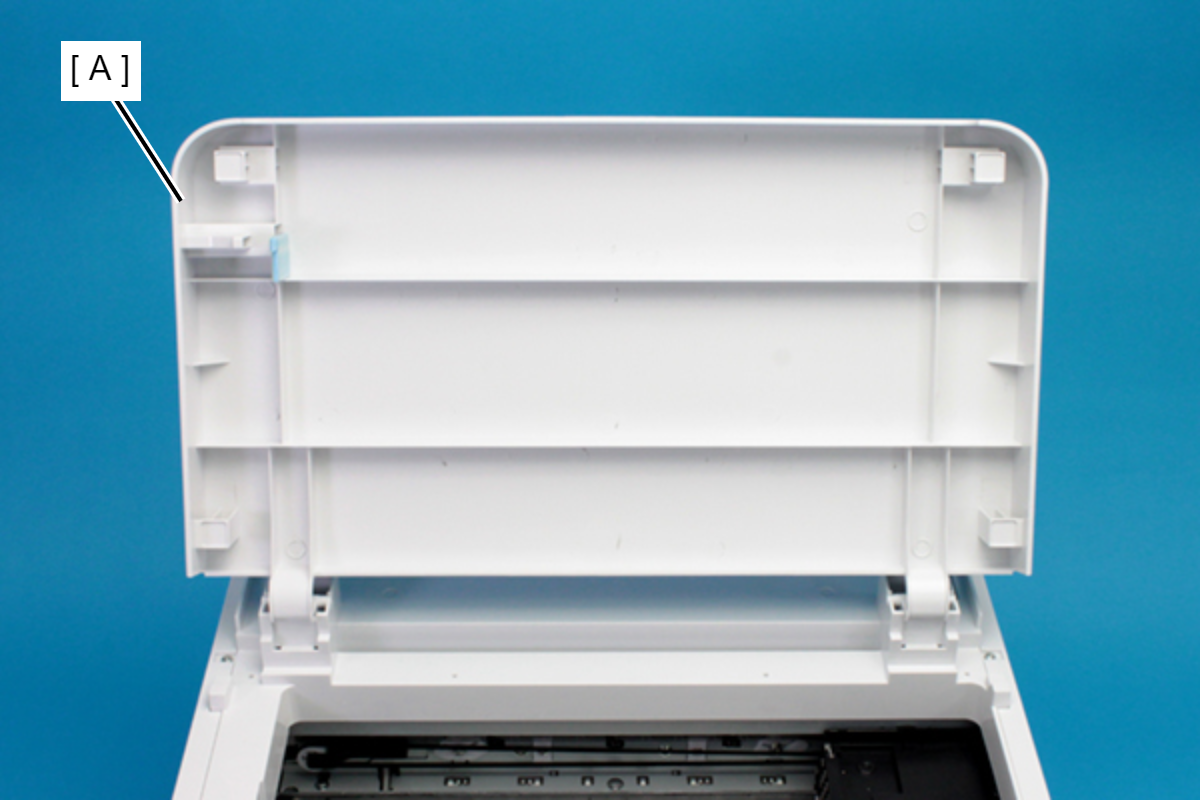
- Remove the three screws that secure the Housing Left (A).
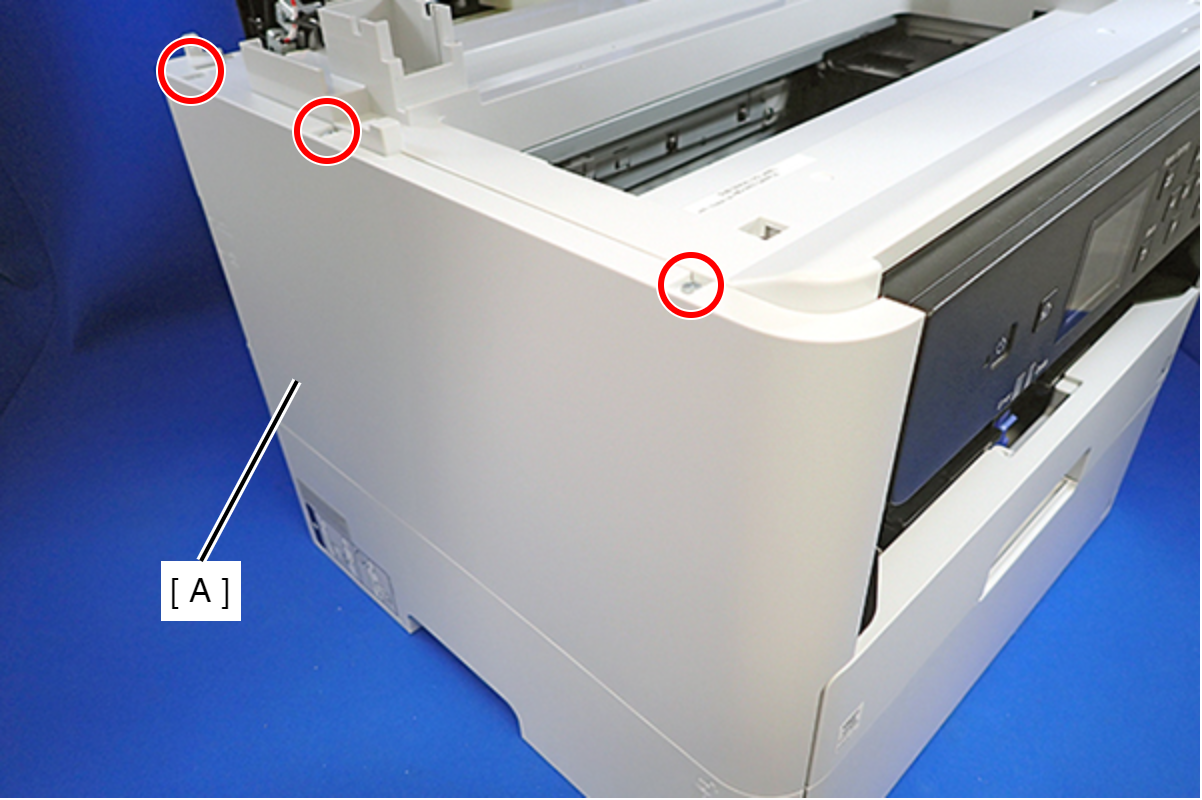
- : C.B.P-TITE-SCREW-3x10-F.ZN-3C
- Remove the two screws that secure the Housing Left (A).
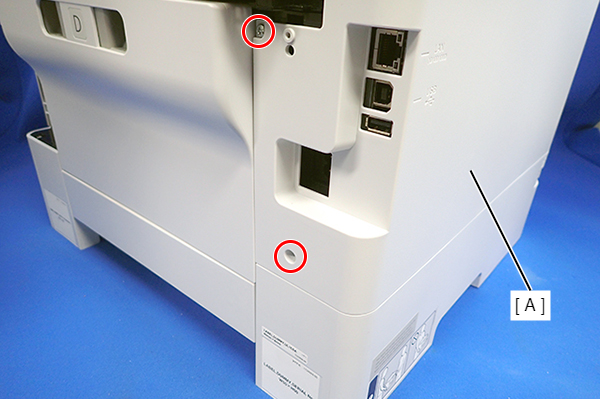
- : C.B.P-TITE-SCREW-3x10-F.ZN-3C
- Lift the Housing Left (A) to release the two hooks each on the front side and rear side of the Housing Left (A), and then remove the Housing Left (A).
Assembly / 組み立てInsert the four tabs on the Housing Left (A) to the positioning holes of the Ink Supply Unit (B).
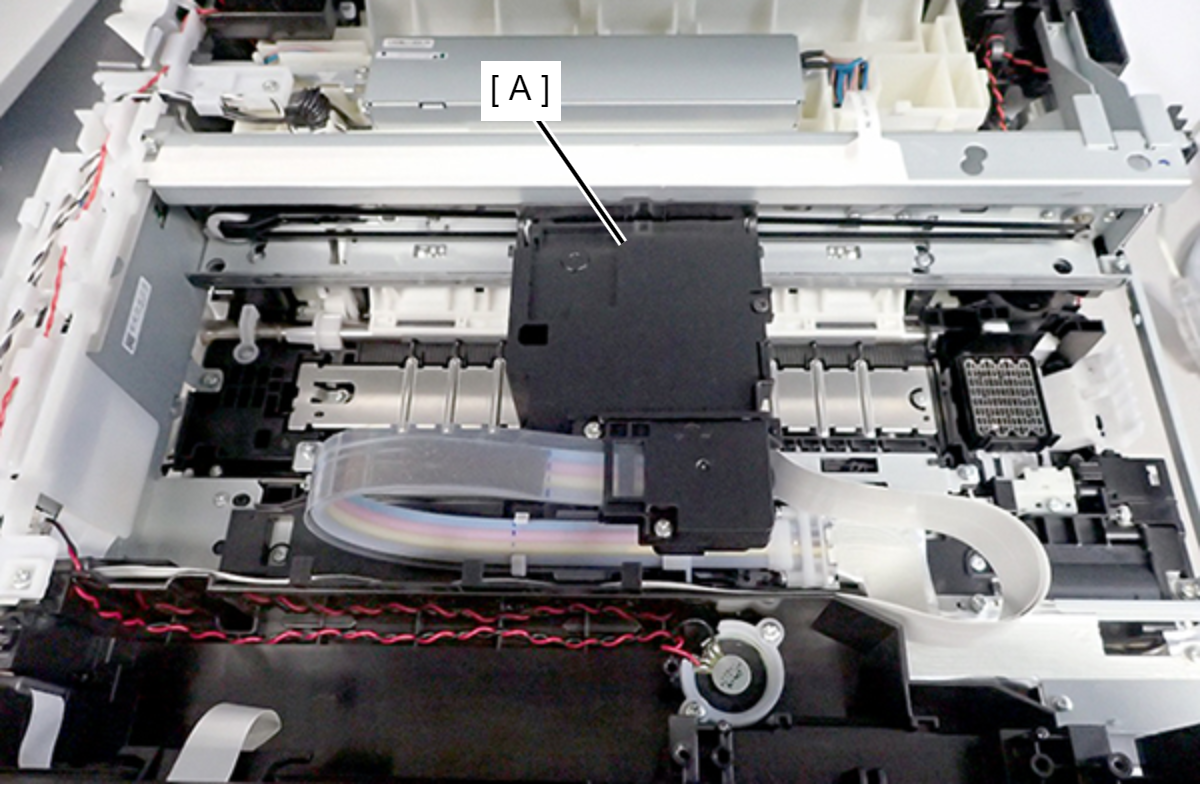
Follow the steps below to unlock the carriage (CR).
 Check Point / チェックポイント
If the carriage is already unlocked and the CR Unit (A) can move freely, as shown below, this step is not necessary.
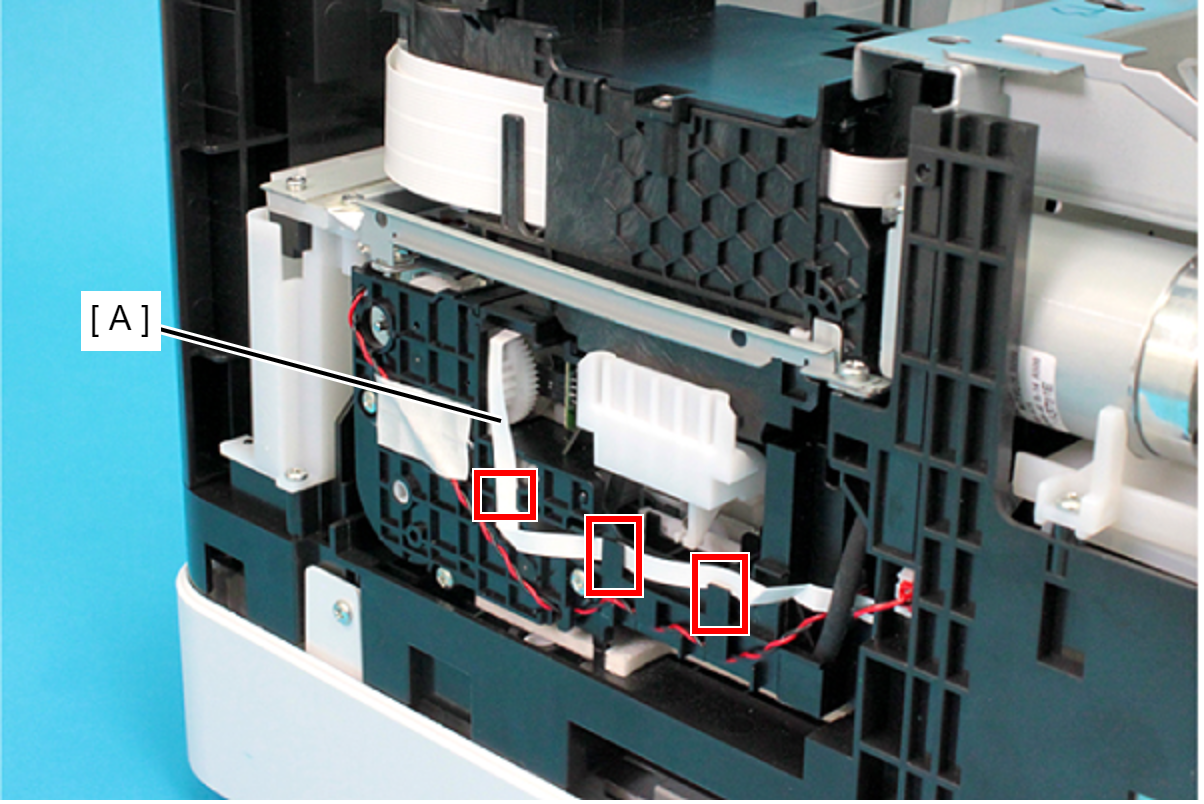
- Release the FFC (A) from the three hooks.
Rotate the gear (B) of the Ink System Unit (A) in the direction of the arrow, and move the CR Unit (C) to the left side.
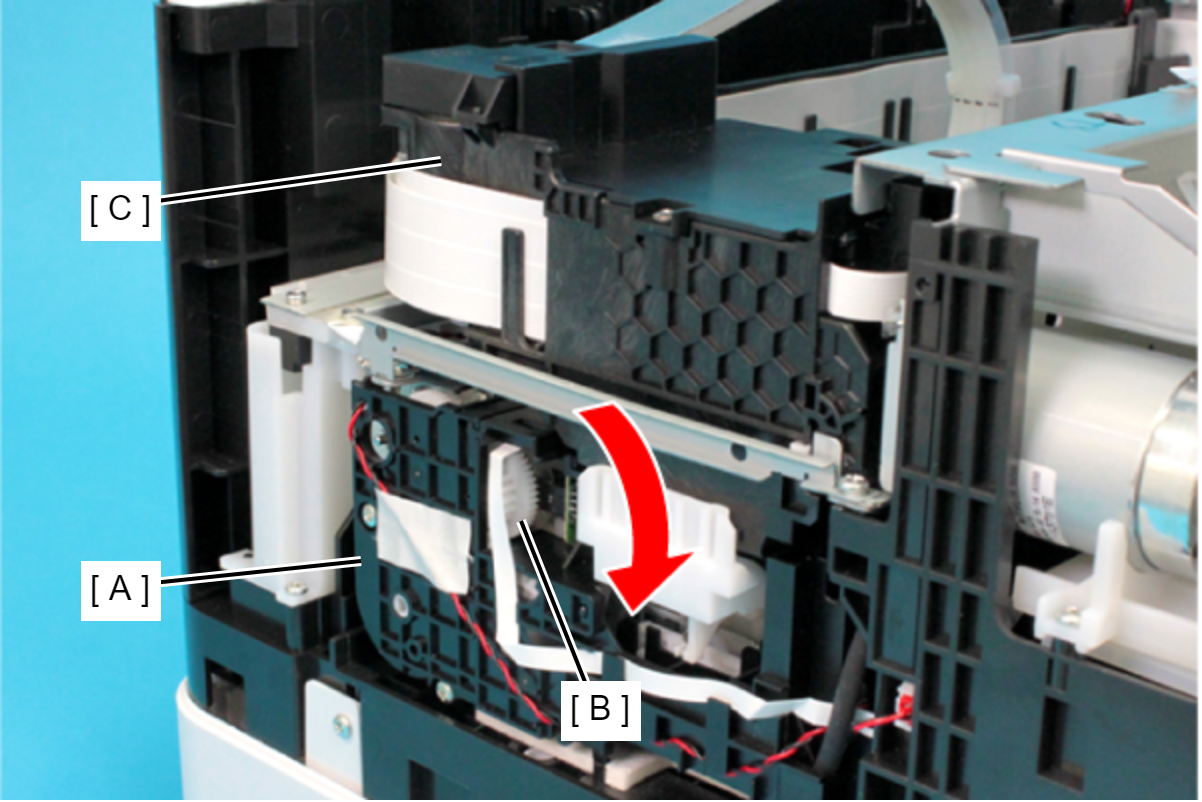
 Caution / 注意
When rotating the gear of the Ink System Unit, take extra care not to damage or disconnect the FFC by touching it.
- Release the FFC (A) from the three hooks.
- Remove the CR Scale Spring (B) first from the CR Scale (A) and then from the Main Frame (C).
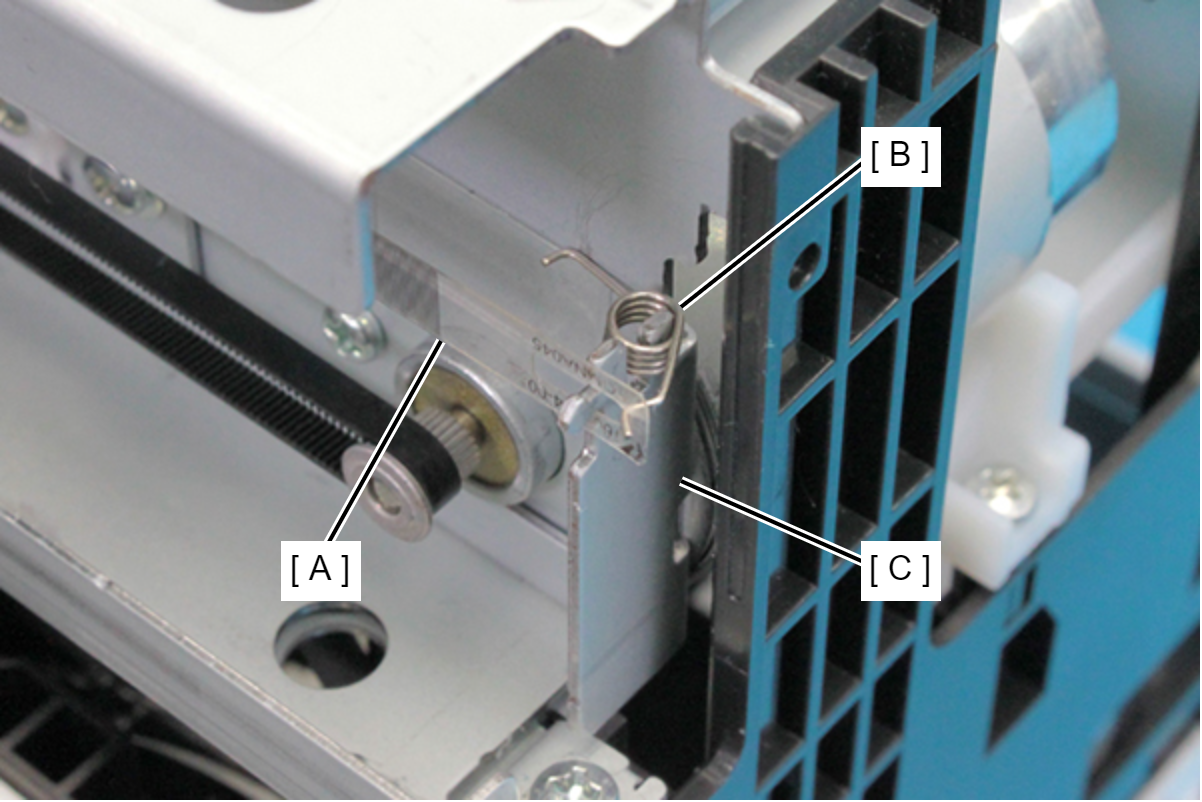 Caution / 注意
If the CR Scale Spring falls inside the printer, it may not be removed. Therefore, when attaching or detaching the CR Scale Spring, be very careful not to drop it.
- On the Full side, disengage the CR Scale (B) from the hook of the plate (A).
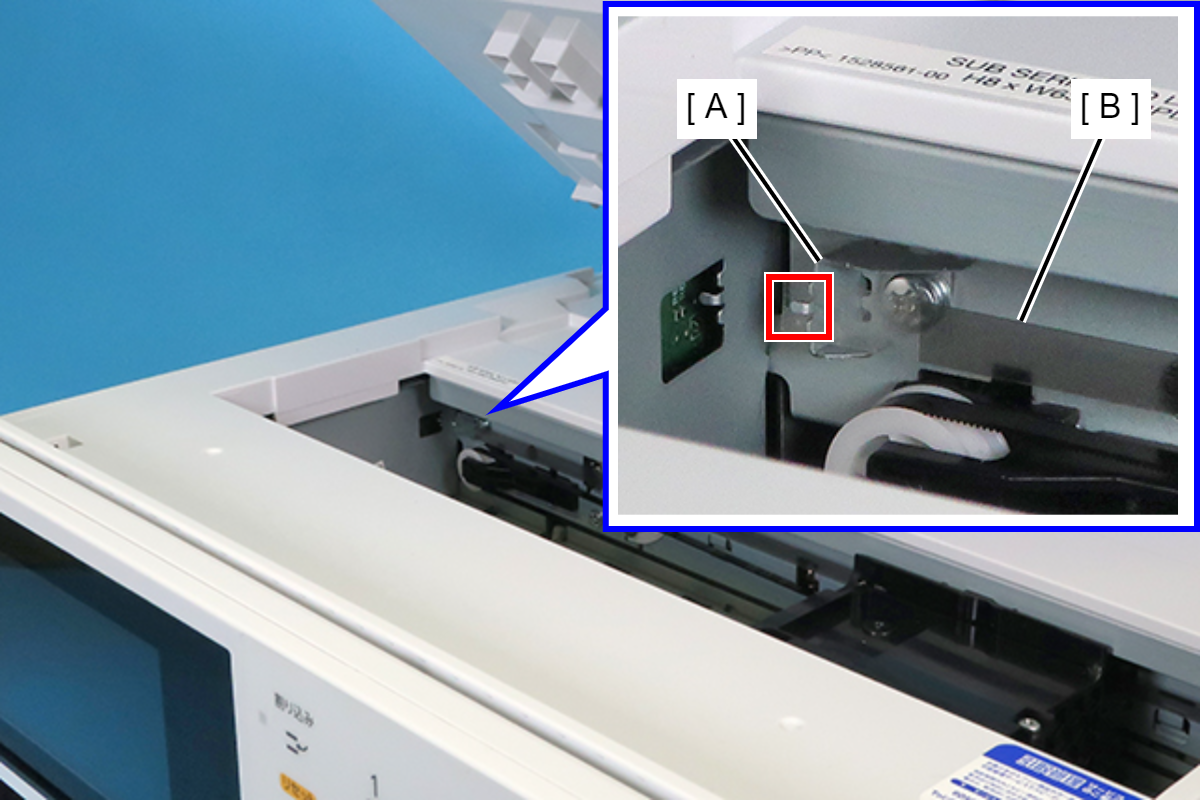
- Pull the CR Scale (B) out from the CR Encoder (A).
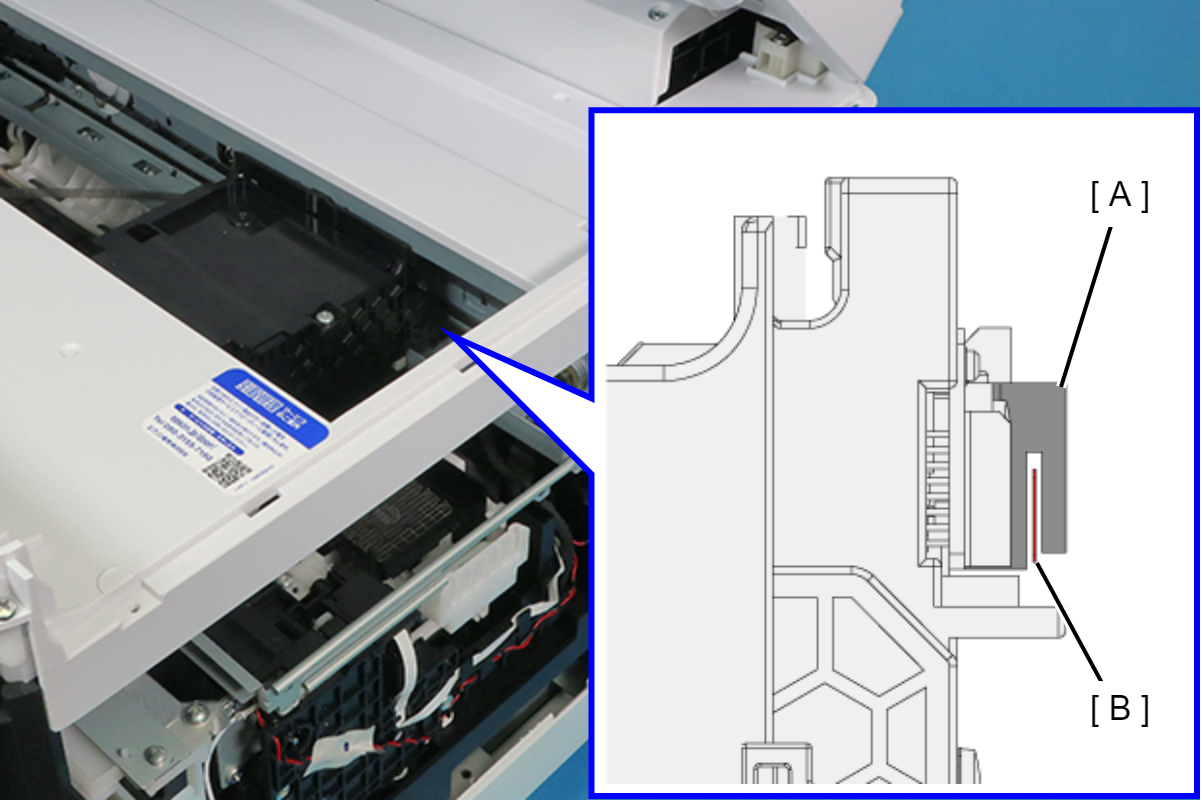
- On the Home side, stand the CR Scale (A) vertically to disengage it from the hook on the frame, and remove the CR Scale (A).
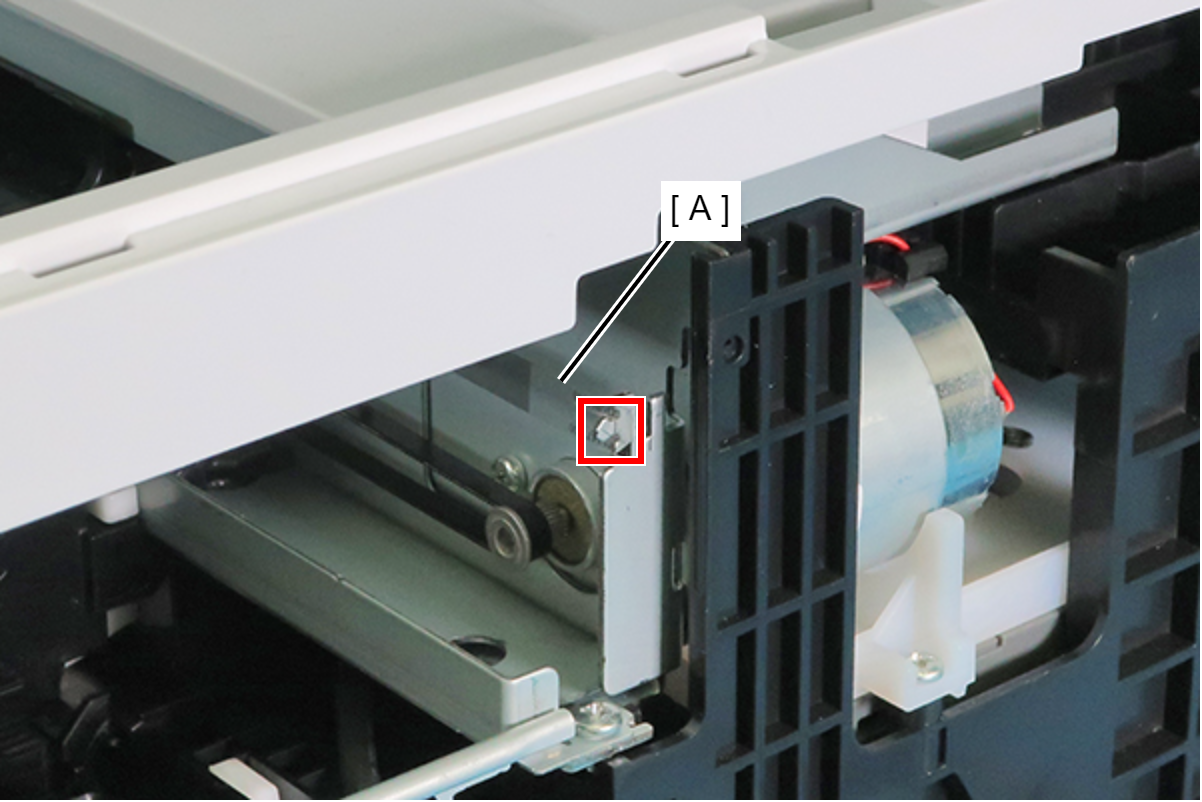 Assembly / 組み立て
- Attach the CR Scale (A) with the marking on the bottom right corner.
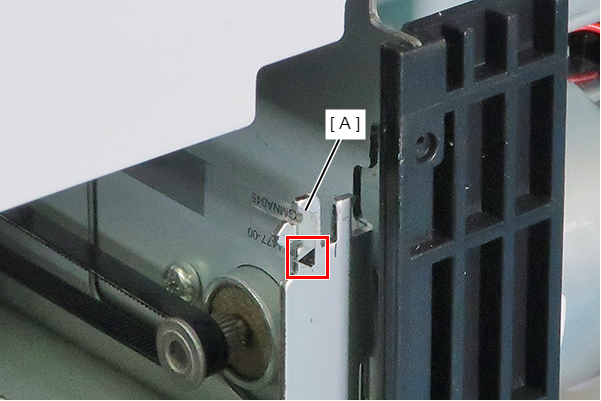
- To improve work efficiency for installing the CR Scale (A), first attach the CR Scale (A) to the hook on the Full side plate (B).
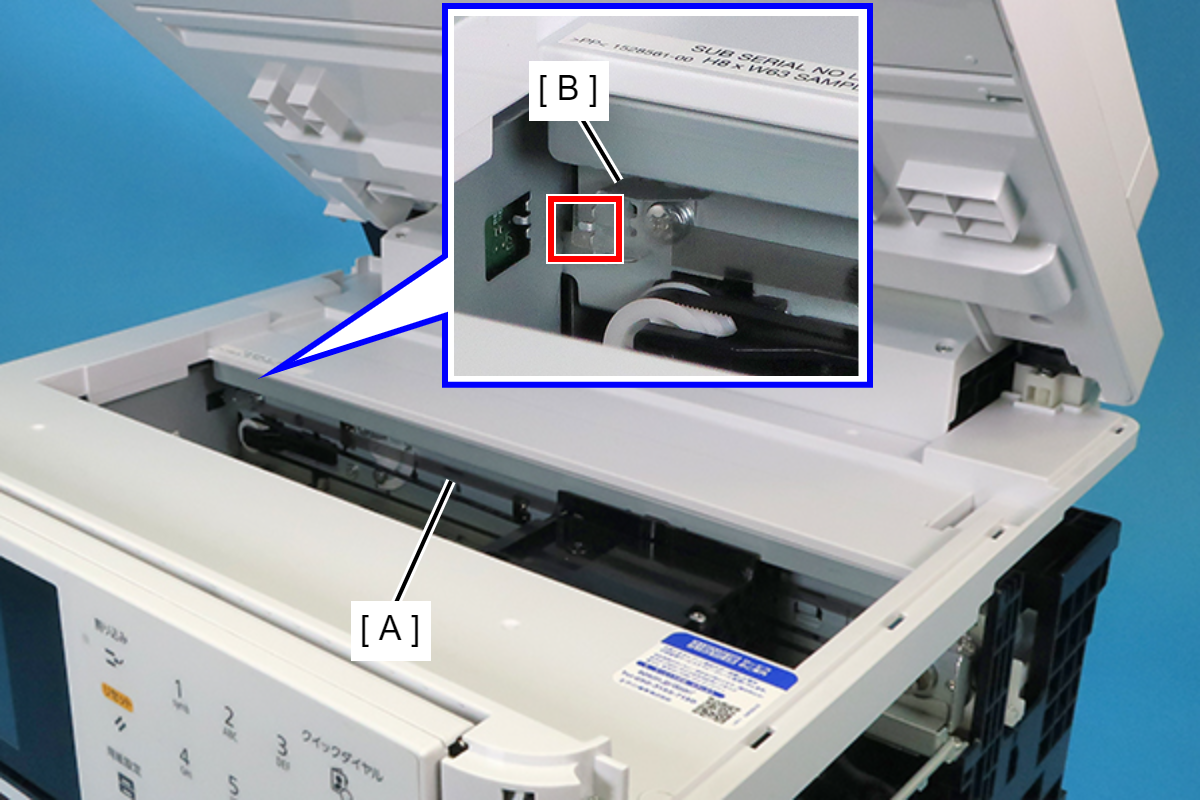
- Attach the CR Scale (A) with the marking on the bottom right corner.
| Adjustment / 調整 |
After replacing this part, a specific menu must be executed from the service support mode. Refer to the following to execute. |