
Additional Cassette Unit Installation
 Caution / 注意 Caution / 注意 |
|
- Press the power button on the product to turn off the power and unplug the power plug from the outlet.
- Remove the cables.
- Remove the Cassette from the Main Unit.
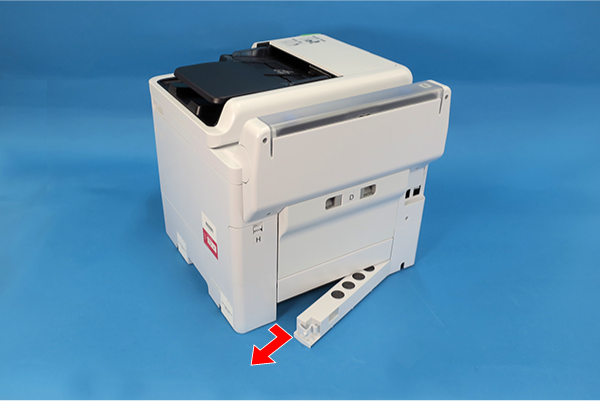
- Remove the Rear Lower Cover Assy (A) in the direction of the arrow by picking up the tab (B) on the Rear Lower Cover Assy (A).
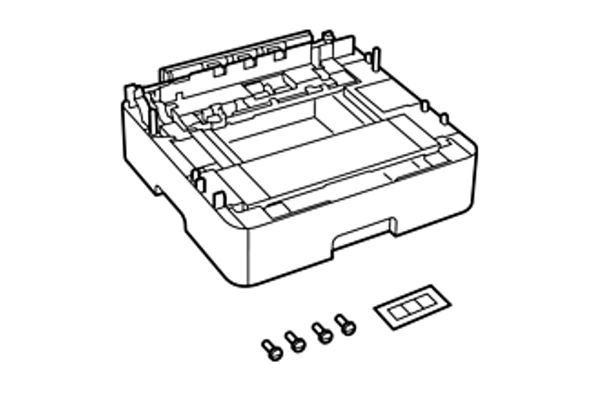
- Remove the Additional Cassette from the box and remove all protective tape and protective materials.
- Check the bundled items.
- Place the Additional Cassette at the installation site.
- If only one Additional Cassette is to be installed, proceed to step 14. If two or three Additional Cassettes are to be installed, proceed to the next step.
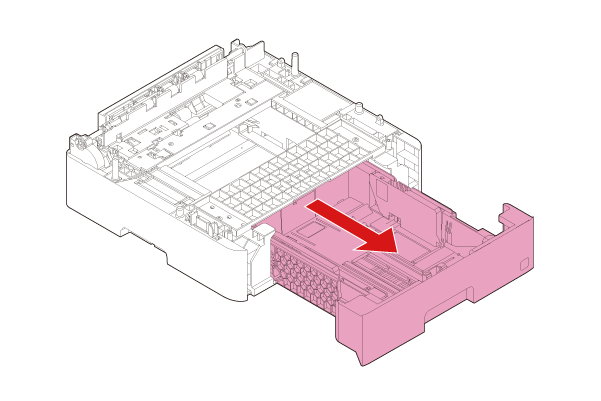
- Remove the Paper Cassette 2nd from the upper Additional Cassette Unit.
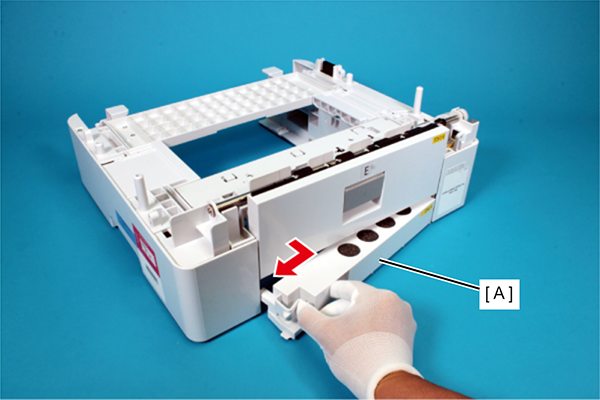
- Remove the Rear Lower Cover Assy (A) in the direction of the arrow by picking up the tab on the Rear Lower Cover Assy (A).
- Install the Additional Cassette Units one on top of the other.
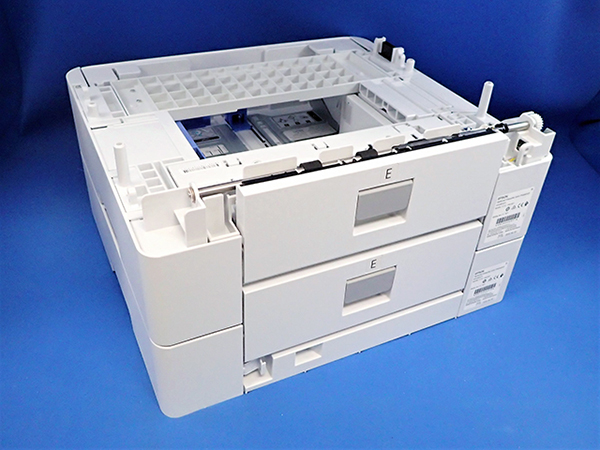 Caution / 注意
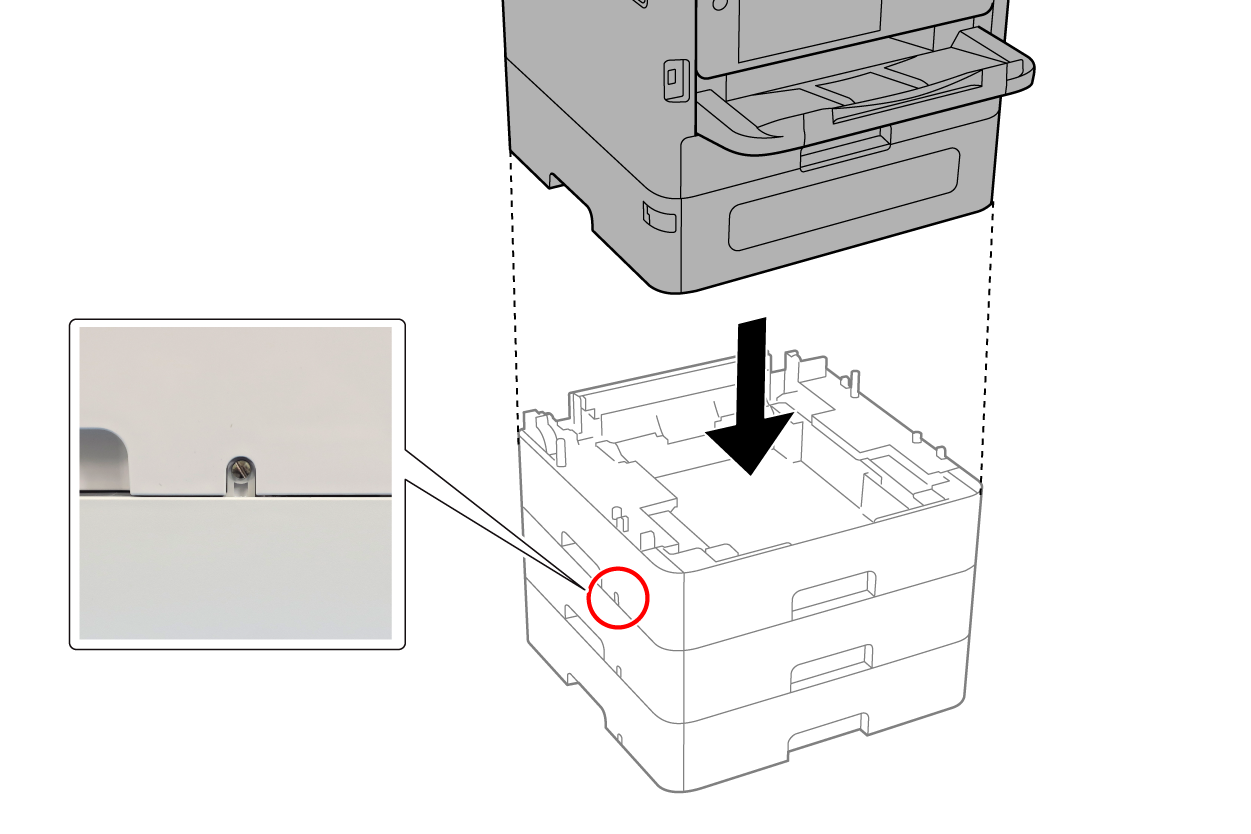
When placing the printer on the Additional Cassette Unit, there is a risk of damaging the connector of the Additional Cassette Unit, so be sure to lower it down vertical while aligning the four corners of the printer and the Additional Cassette Unit.
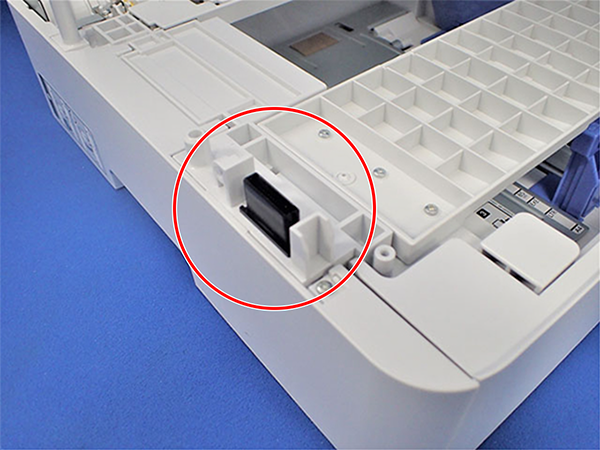
- Secure with screws at four points (A) shown in the figure.
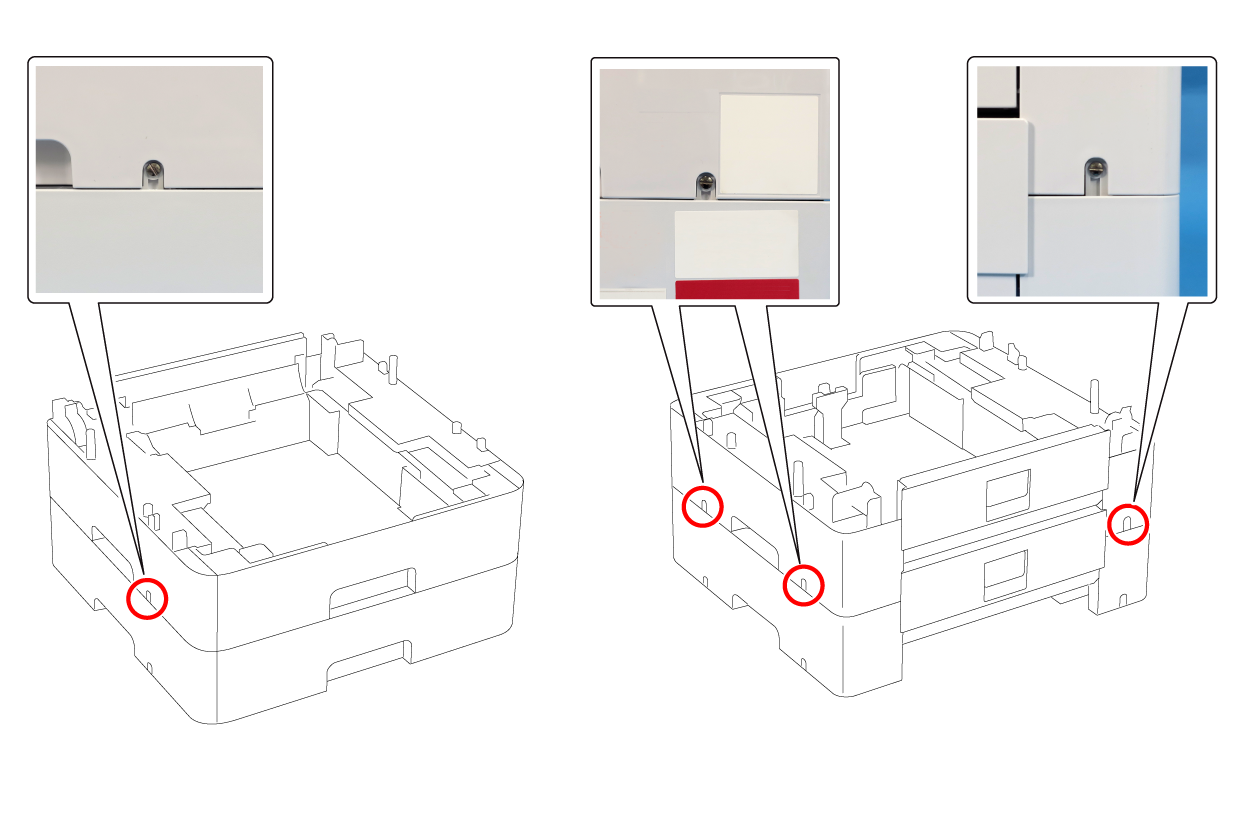
- To add another one, repeat the previous step.
- Gently lower the printer onto the Additional Cassette Unit while aligning its four corners with those of the unit, and attach and tighten a screw at the point (A) shown in the figure.
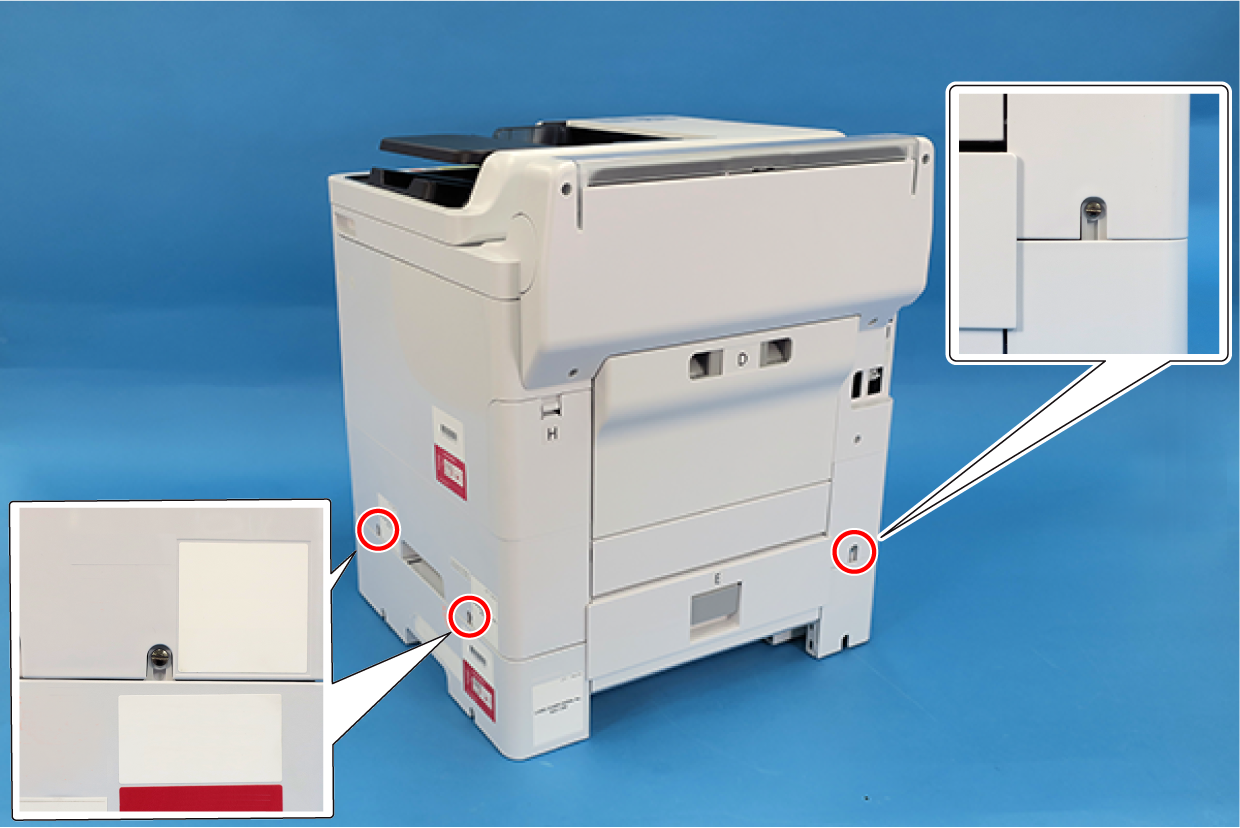
- Secure the Additional Cassette Unit & Printer with screws at the three points (A) on the back and right side.
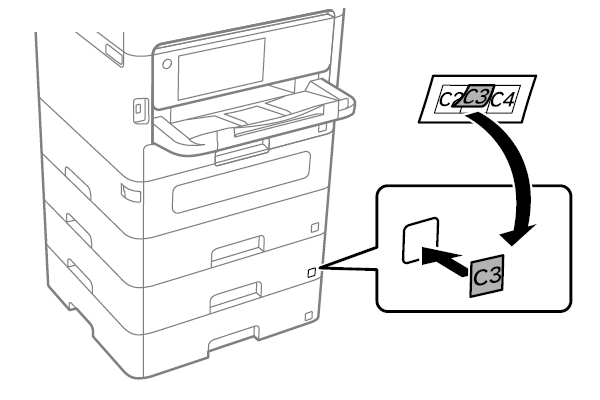
- Paste the cassette number label.
- Connect the disconnected cables and plug the power plug into an outlet.
- Press the power button to turn on the printer.
- Press the Paper Setting button and confirm that the installed Additional Cassette(s) appears on the Paper Setting screen.