Bi-D Band Adjust (S) [B63]
Paper and Feed Tray
- Paper size: A4/Letter
- Paper type: Business plain paper, plain paper. The same paper type as in Bi-d Adjust must be used.
- Paper feed tray: Paper cassette (1) to paper cassette (4)
Adjustment pattern
Same as Bi-D Band Adjust (BI-D BAND ADJUST [B48])
Judgment
From among the printed patterns, select the pattern where the above and below lines are the straightest.
Adjustment procedure
- Start the service support mode. (Service mode startup and operating procedures)
- Select “Adjustment Main Unit: MENU” from the service support mode top menu.
Select “Bi-d Band Adjust (S)”.
 Check Point / チェックポイント
Select and execute the corresponding adjustment item using either procedure below.
Selecting by entering the program number
- Select “Input B No.-Main Unit Adjust” from the Adjustment menu.
- Press the [#] button and software number key is displayed on LCD. Enter programnumber “63”.
- Press the [#] button.
Selecting from menu
- Select “Simple Adjustment: MENU” from the Adjustment menu.
- Select “Bi-d Band Adjust (S)” from the Simple Adjustment menu.
- The following screen will be displayed.
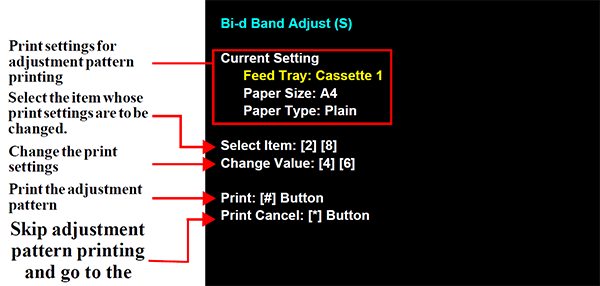
- Load paper into the paper feed tray.
- Press the [#] button to print the adjustment pattern.
- Check the adjustment pattern.
- Check the adjustment pattern and determine the adjustment value based on the judgment procedure.
Input a adjustment value.
Check Point / チェックポイント- Operation method is belows.
- [6] button: Displays the adjustment value input screen
- [2] button, [8] button: Select the number.
- [#] button: Finishes adjustment and inputs the adjustment values.
- In the adjustment value input menu, the software number key is displayed
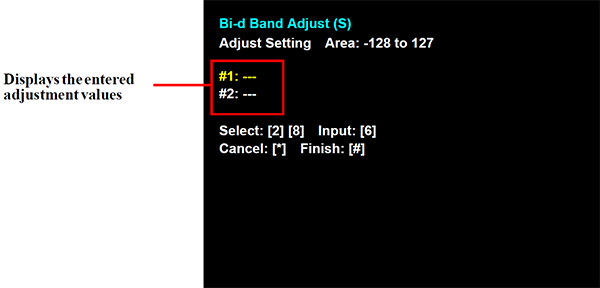
- Operation method is belows.
Check that an adjustment value is entered for all of the adjustment input items and then press the [#] button to end adjustment.
The adjustment end screen appears. Press the [#] button to return to the menu screen.
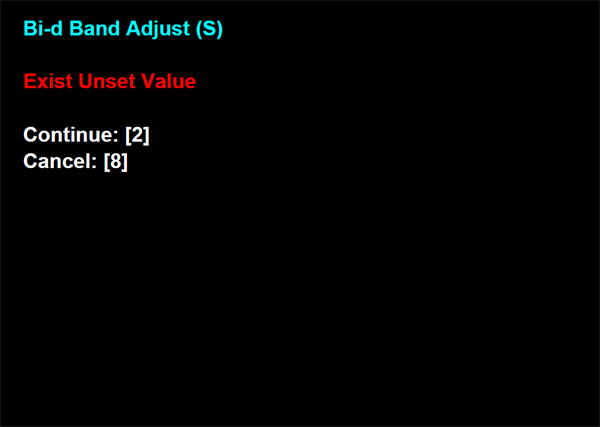
Check Point / チェックポイントTo end adjustment without entering an adjustment value, press the [#] button in the state without an adjustment value entered in the adjustment input screen to display the following screen. If you press the [8] button in the following screen, the adjustment end screen appears and you can end adjustment.(To continue adjustment, press the [2] button.)