
ADF/SCN Unit
- Remove one screw.
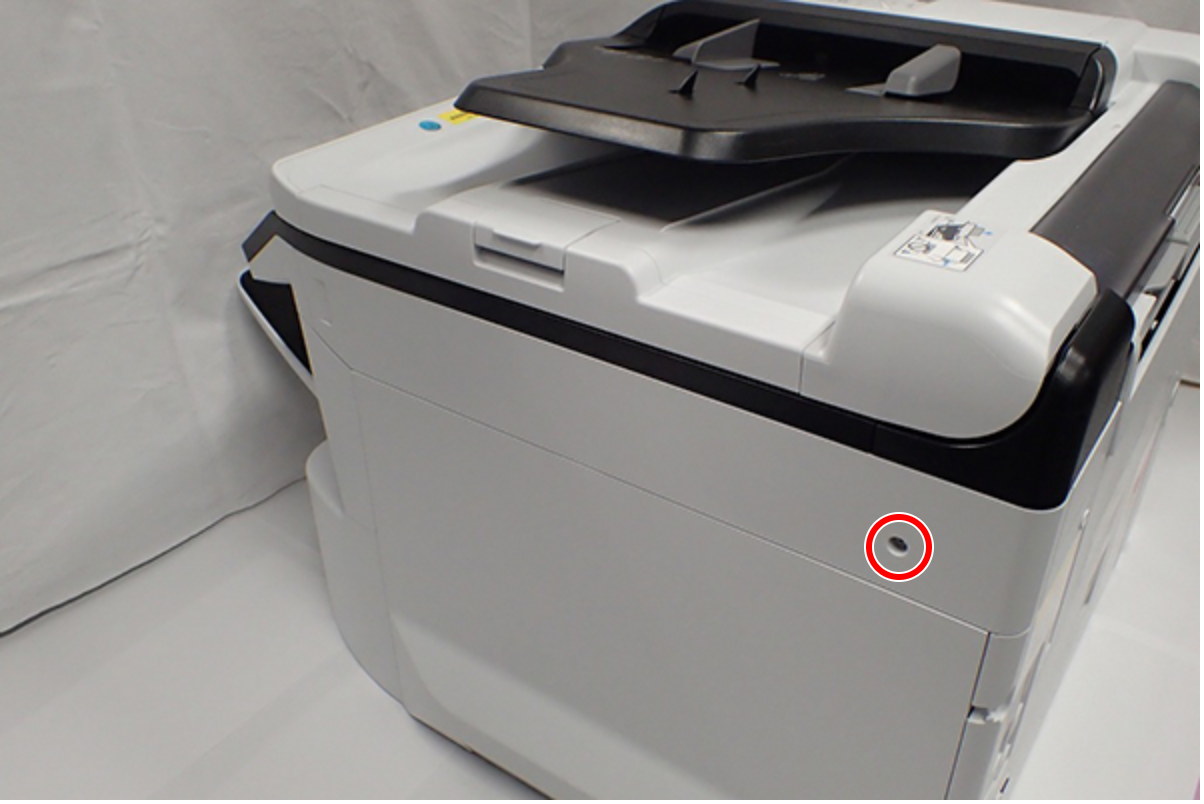
 : C.B.S-TITE-SCREW-3x8-F.ZN-3C
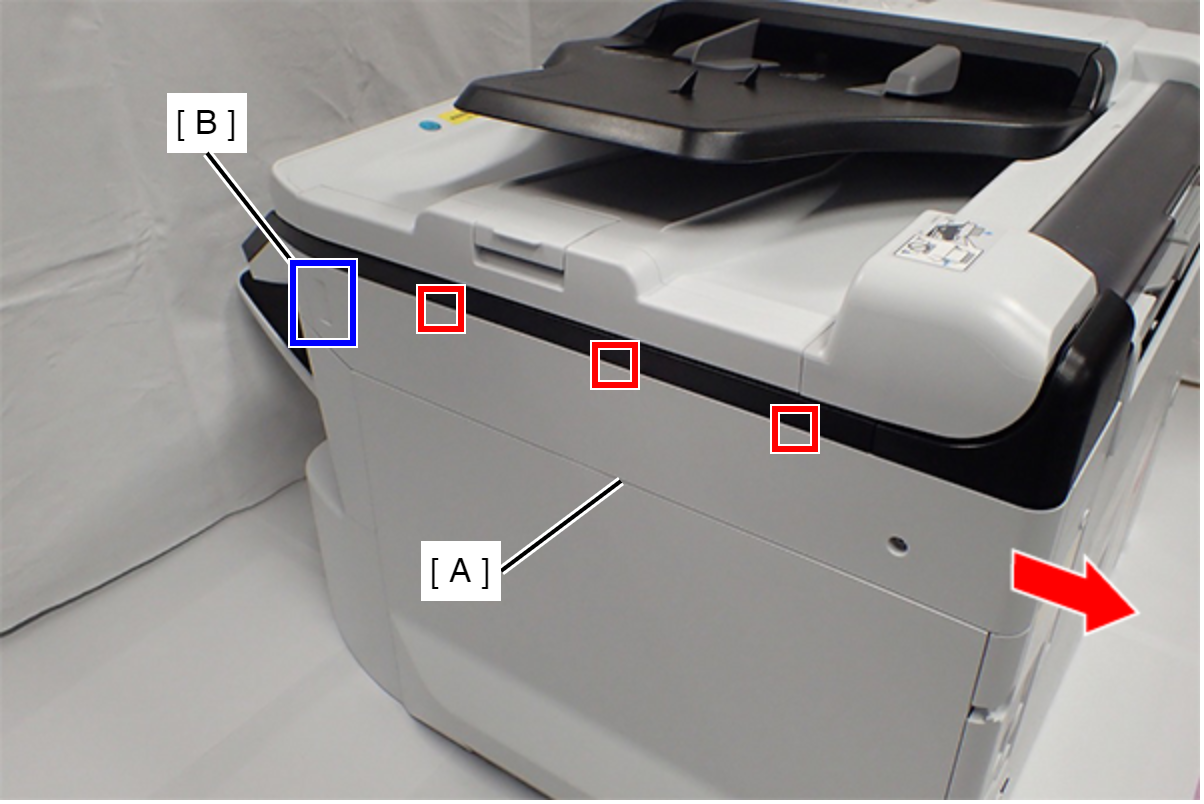
- Slide the Right SC Cover (A) while pushing the dent (B) of Right SC Cover, and release the three tabs. Remove the Right SC Cover (A).
- Remove one screw.
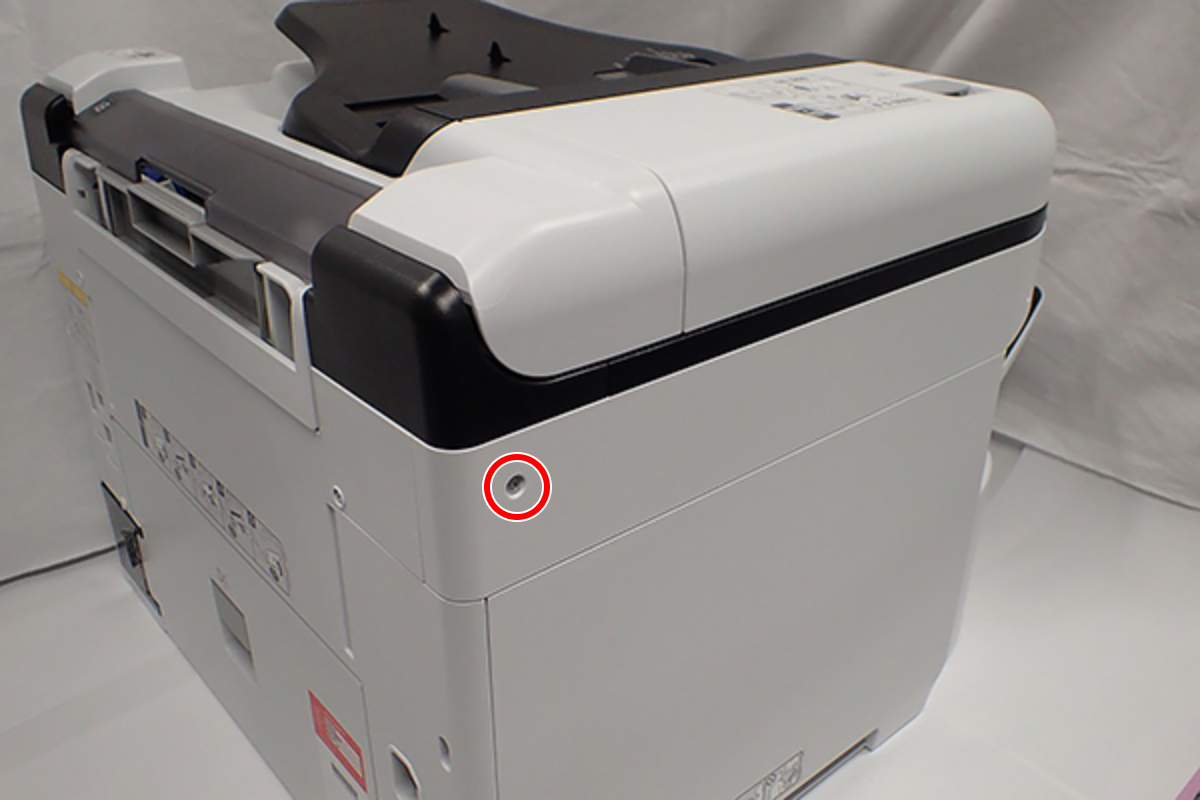
- : C.B.S-TITE-SCREW-3x8-F.ZN-3C
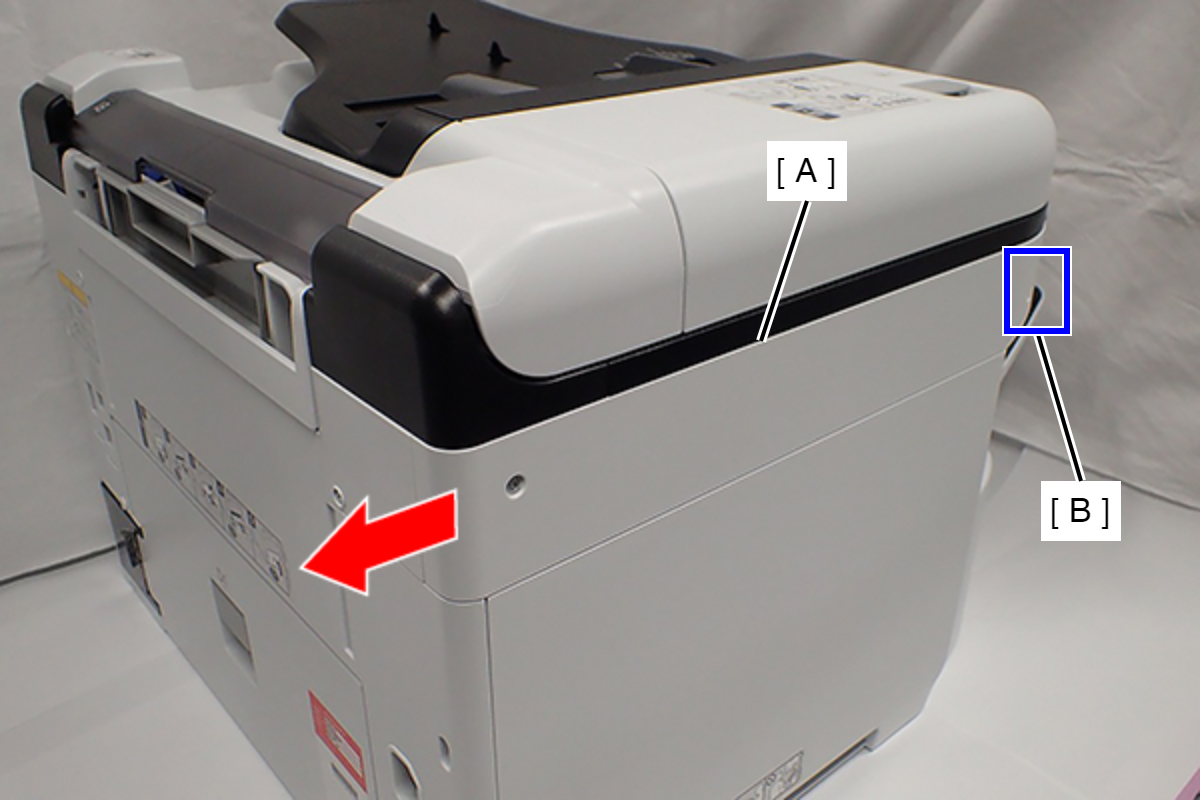
- Slide the Left SC Cover (A) while pushing the dent (B) of Left SC Cover, and remove it.
- Remove one screw, and remove the Lower SC Reinforcing Plate (A).
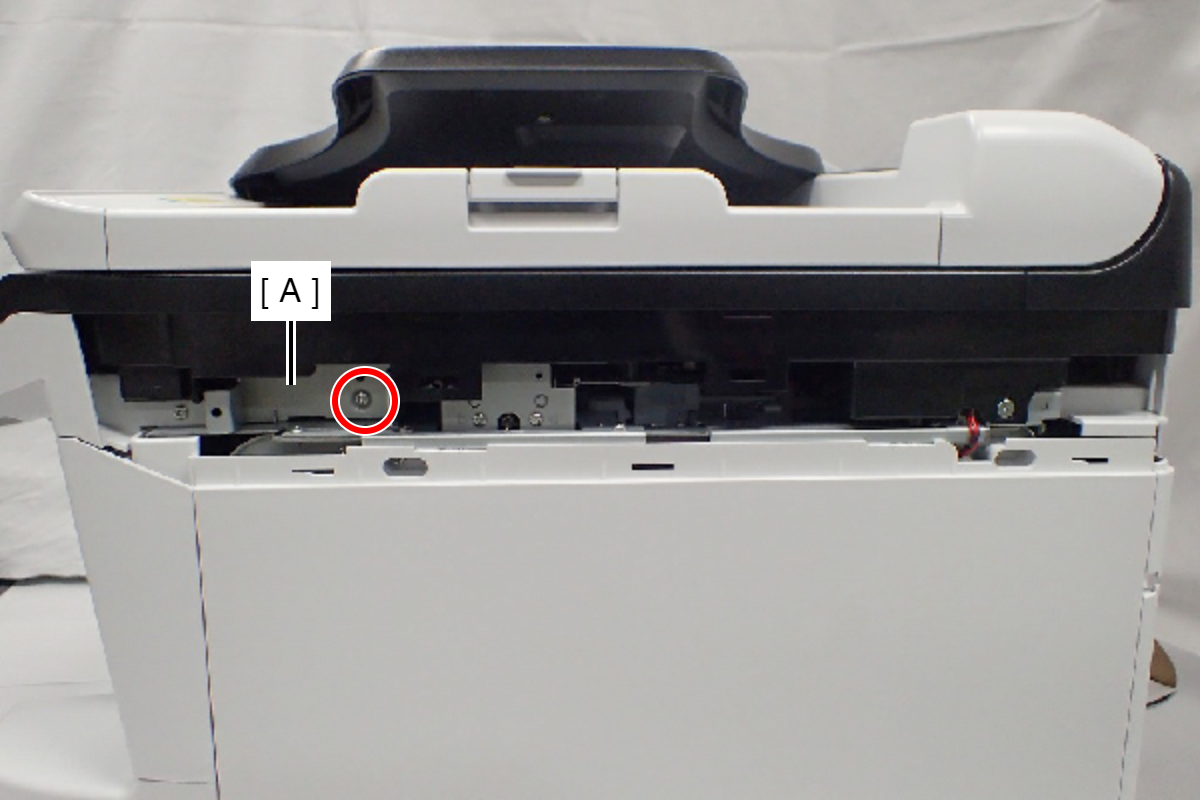
- : C.B.S-TITE-SCREW-3x8-F.ZN-3C
- Reattach the Lower SC Reinforcing Plate (A) in its portrait orientation, then secure it with the screw.
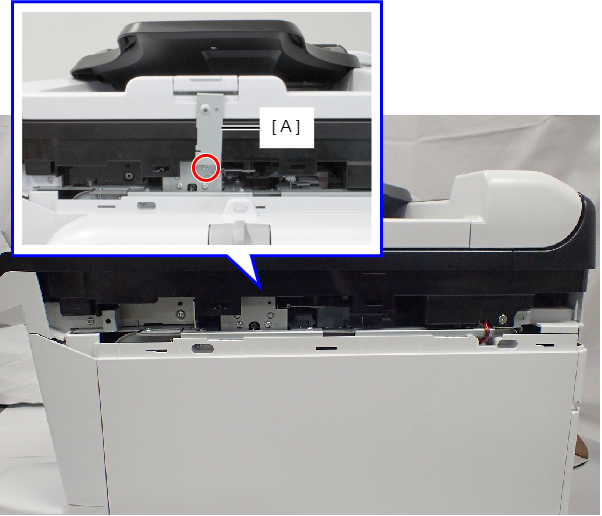
- : C.B.S-TITE-SCREW-3x8-F.ZN-3C
- Remove the screw.
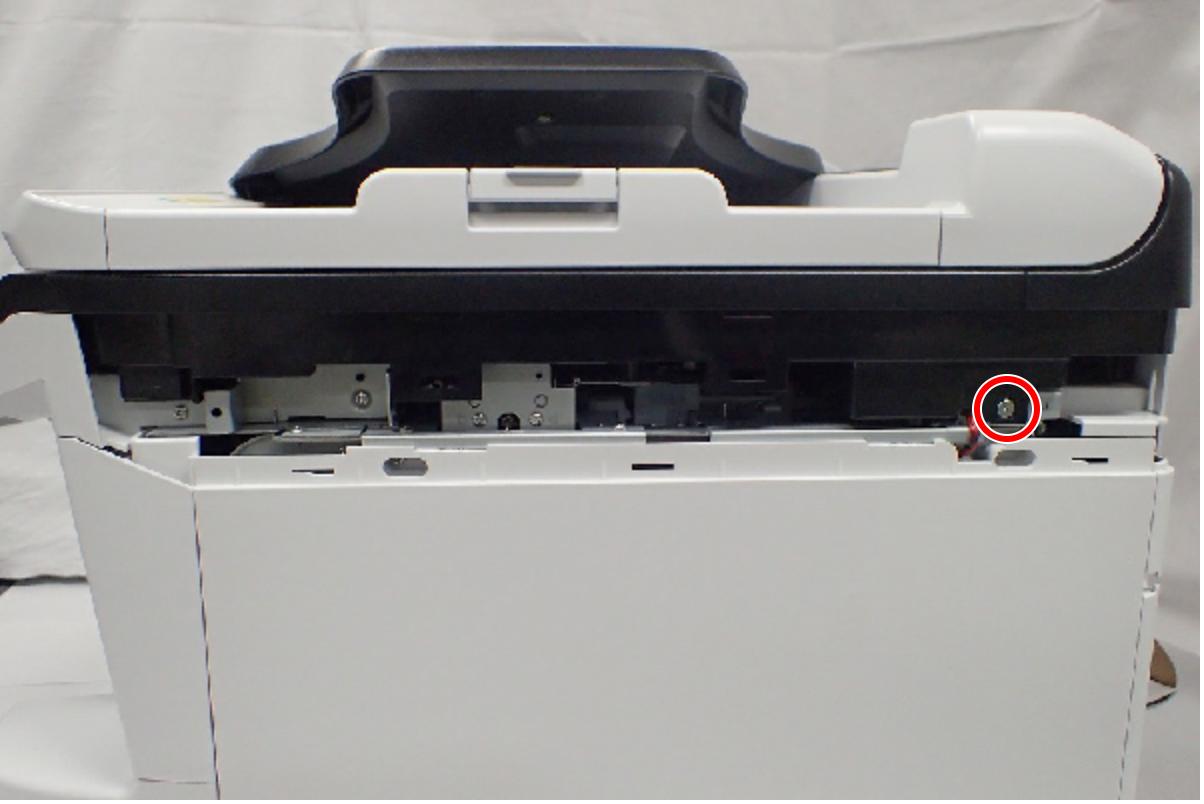
- : C.SHOULDER S-TITE,3X5
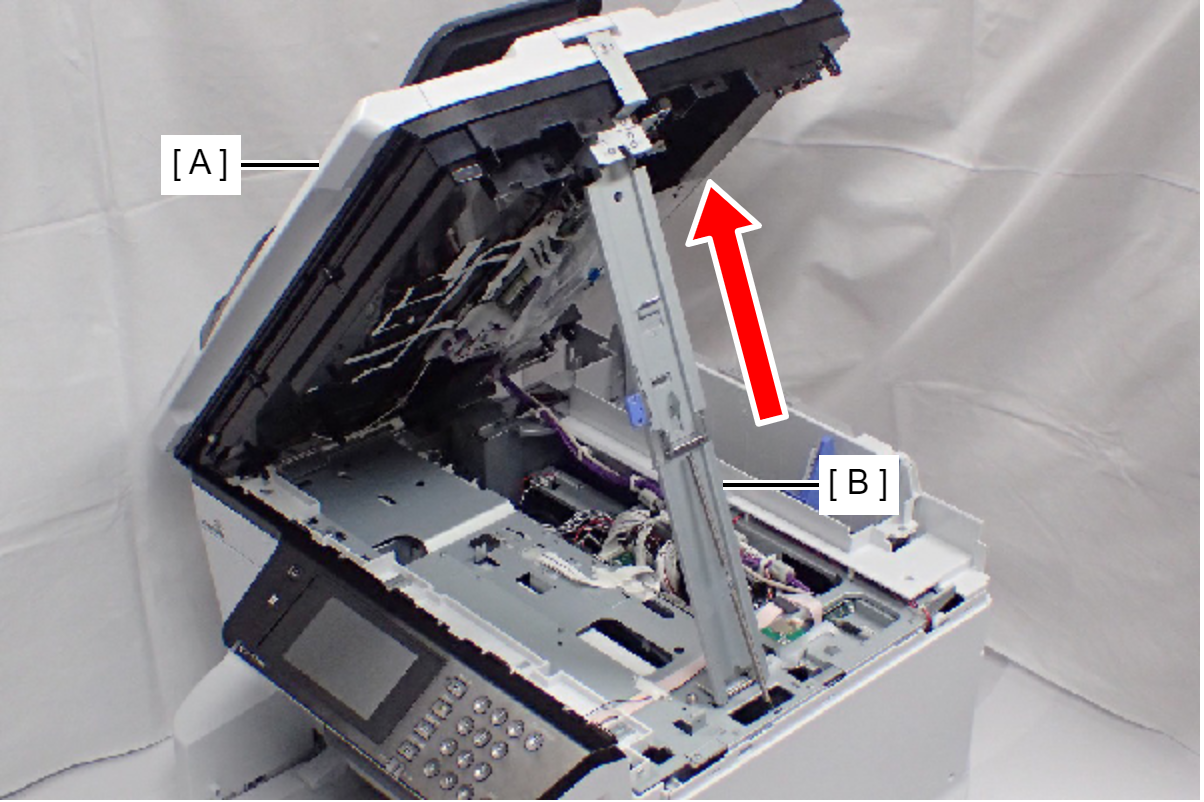
- Open the ADF/SCN Unit (A).
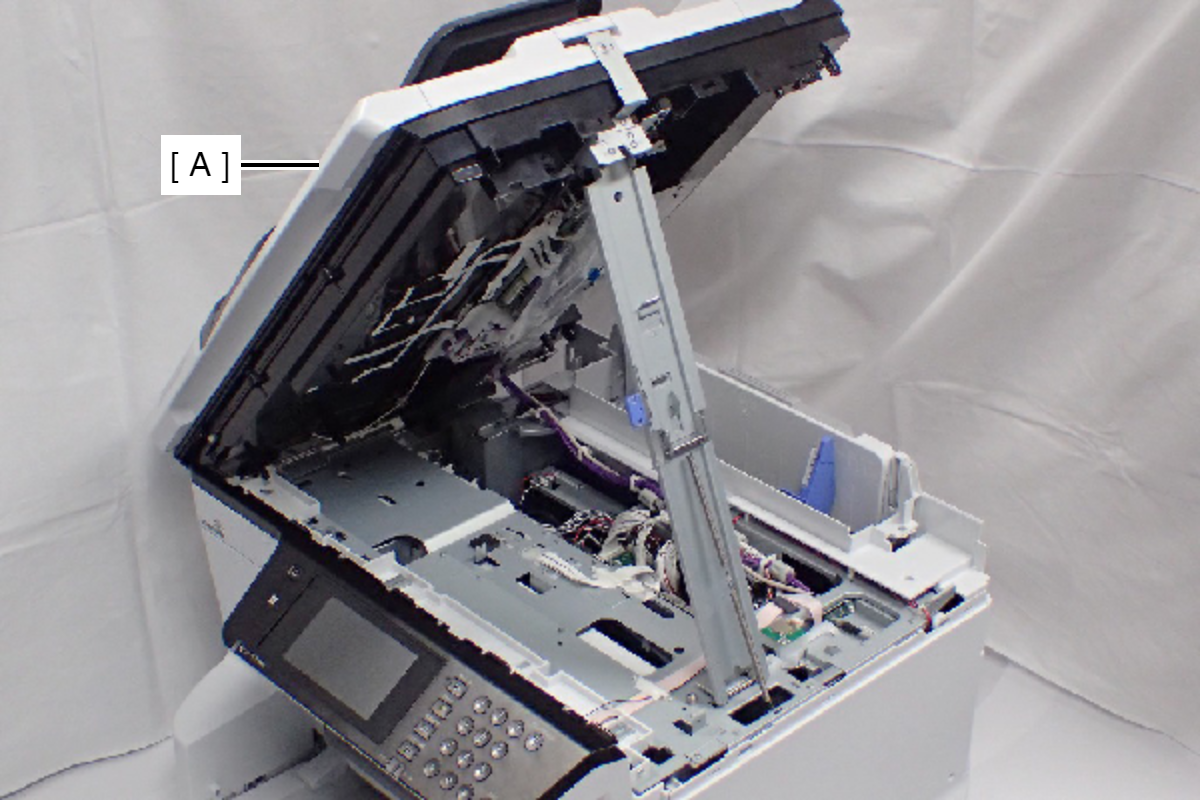
- Open the ADF/SCN Unit (A) and extend the support stand (B) as far as it goes, then support the ADF/SCN Unit with the support stand.
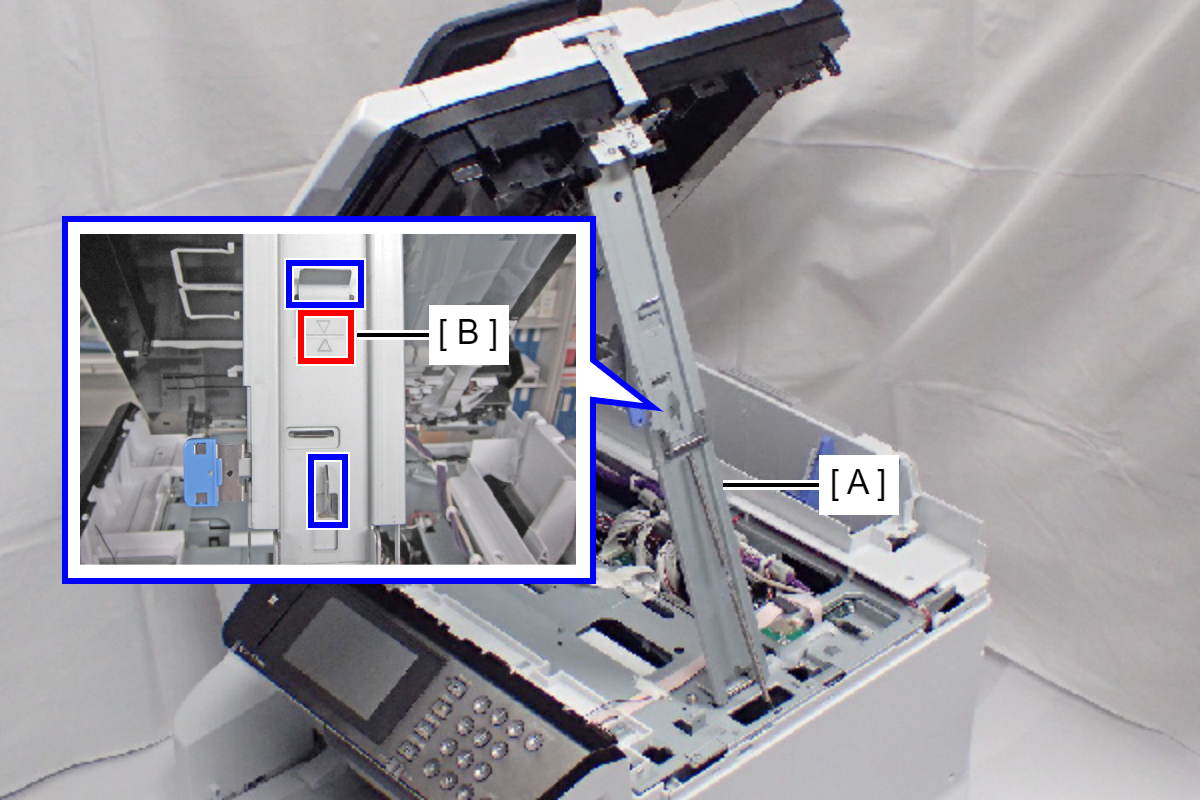
 Caution / 注意
Make sure that the support stand (A) is fixed with the two hooks, and the two triangle marks (B) face to each other.
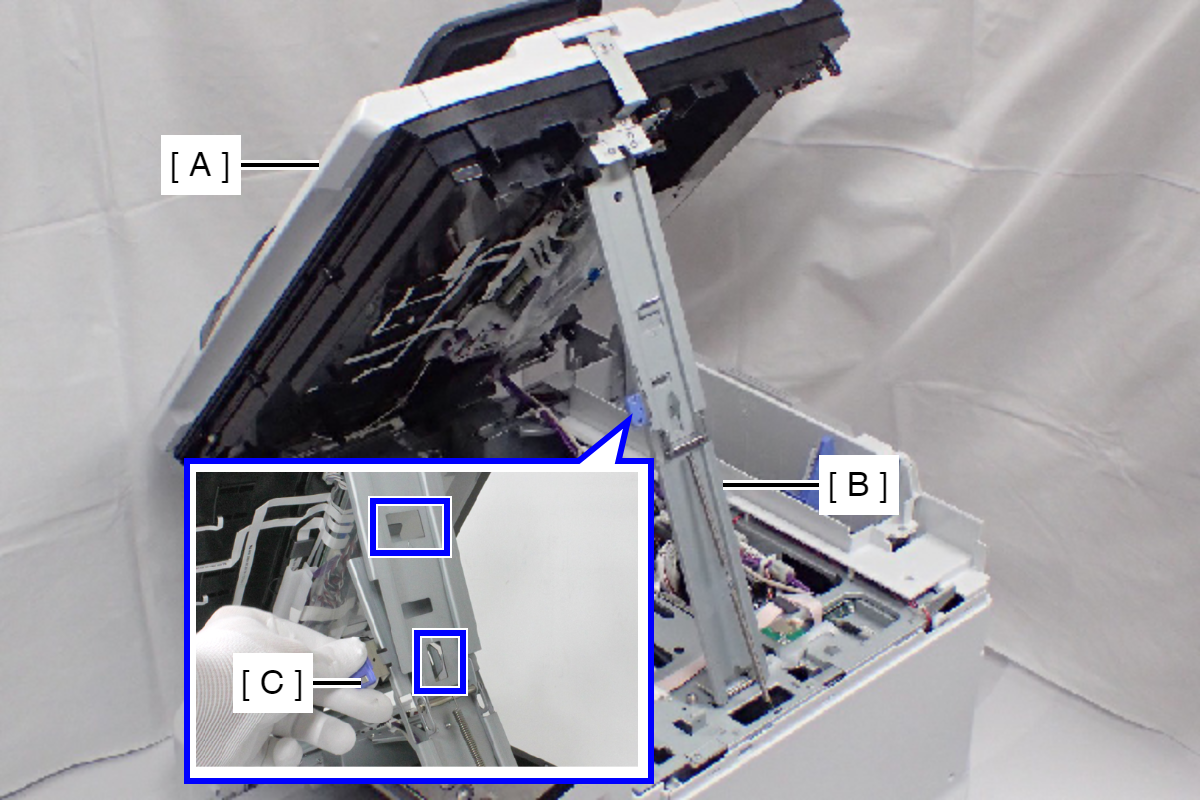
 Check Point / チェックポイント
When closing the ADF/SCN Unit (A), press the switch (C) on the ADF/SCN support stand (B) and hold up the ADF/SCN Unit to disengage the two hooks, then fold the ADF/SCN support stand.
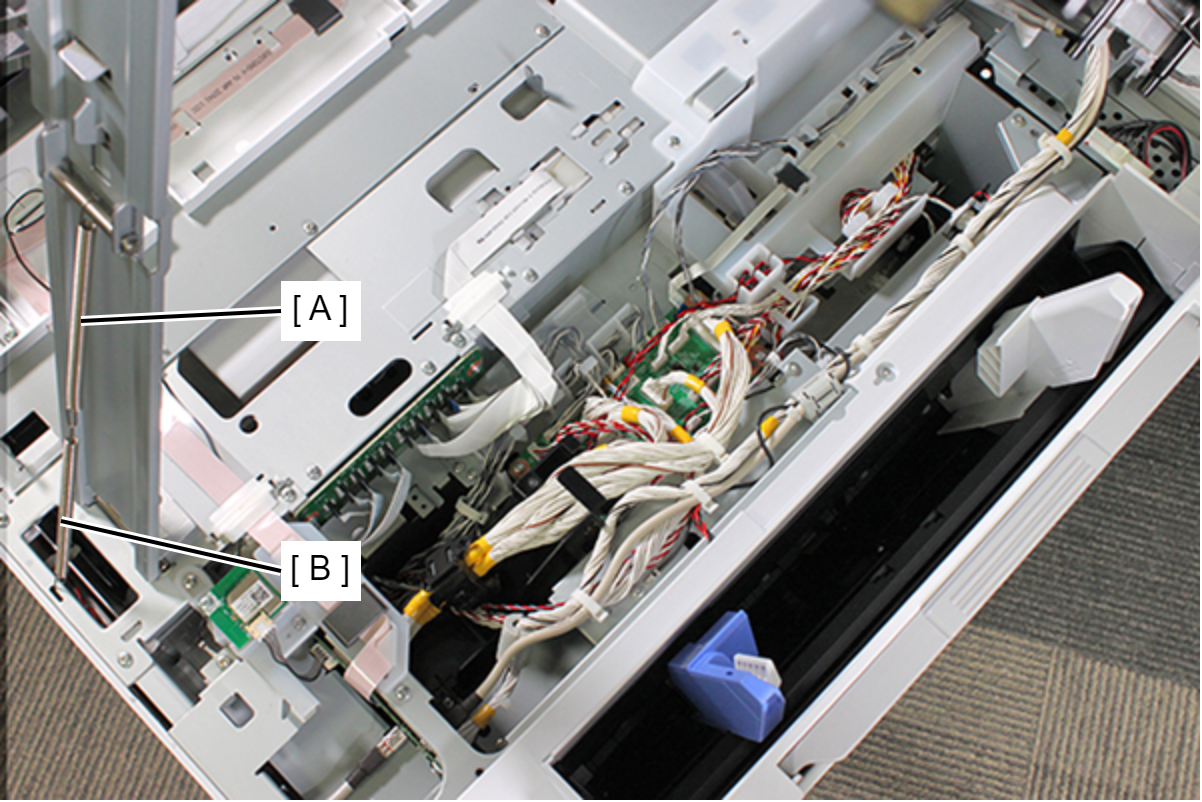
- Separate the upper spring (A) and lower spring (B).
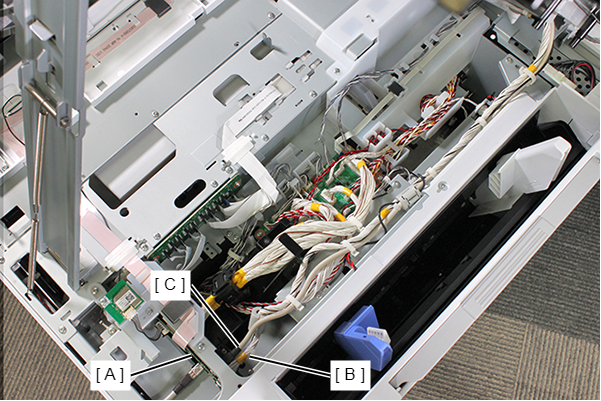
- Disconnect the following cables from the connector of the Main Board (A).
- ADF/SCN cable (USB) (CN104) (B)
- ADF/SCN Cable (CN103) (With hook) (C)
- Remove the screw, and release the ADF/SCN ground cable (A).
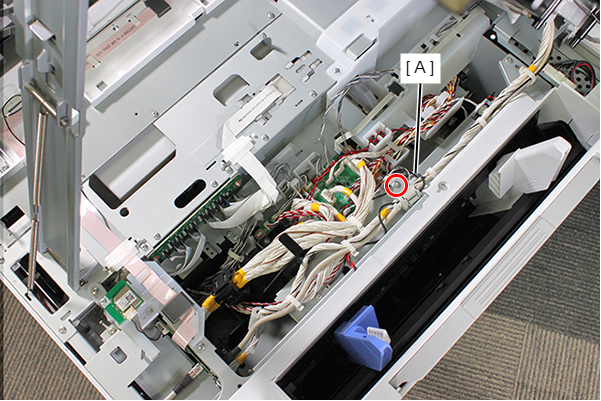
- : C.B.S-TITE-SCREW-3x8-F.ZN-3C
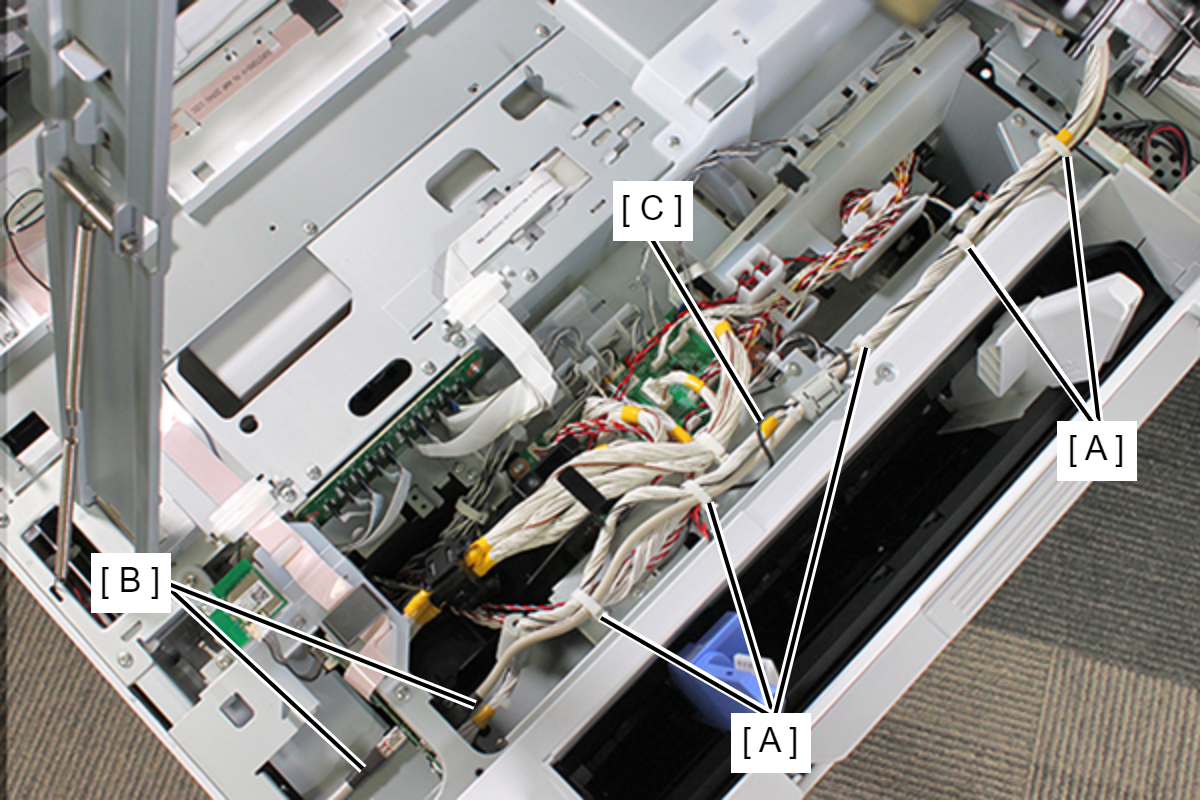
- Release the five clamps (A), and then release the two ADF/SCN cables (B) and the Scanner Grounding Wire (C).
- Release the ADF/SCN cable (A) from the hooks of the center cable cover.
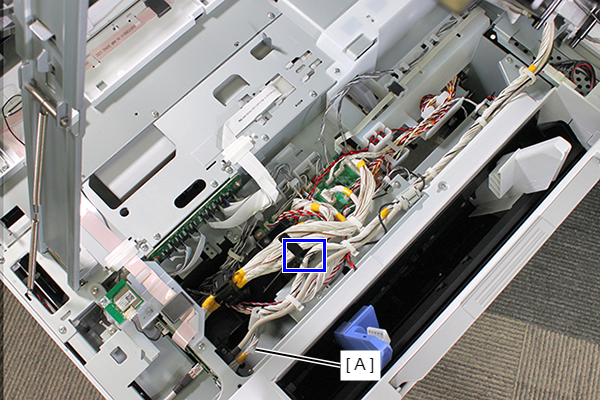
- Wind the Scanner Grounding Wire (A) around the ADF/SCN cable (B), and secure it on the two hooks together with the two ADF/SCN Cables (B).
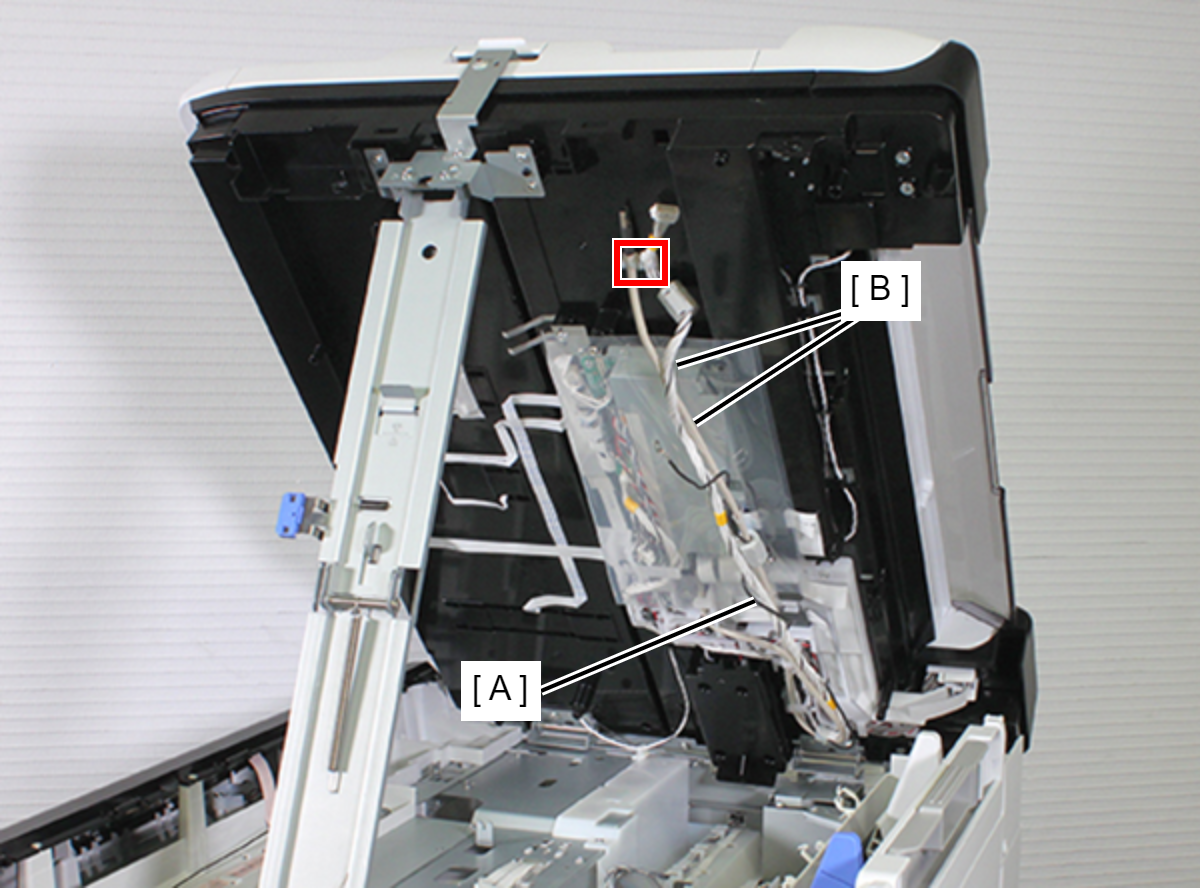
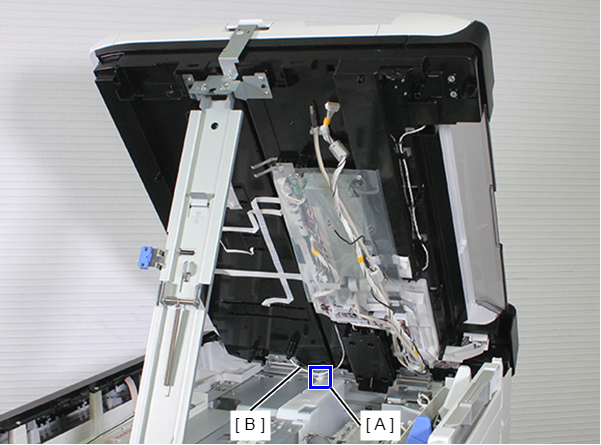
- Release the Grounding Wire (B) and Cable from the clamp (A).
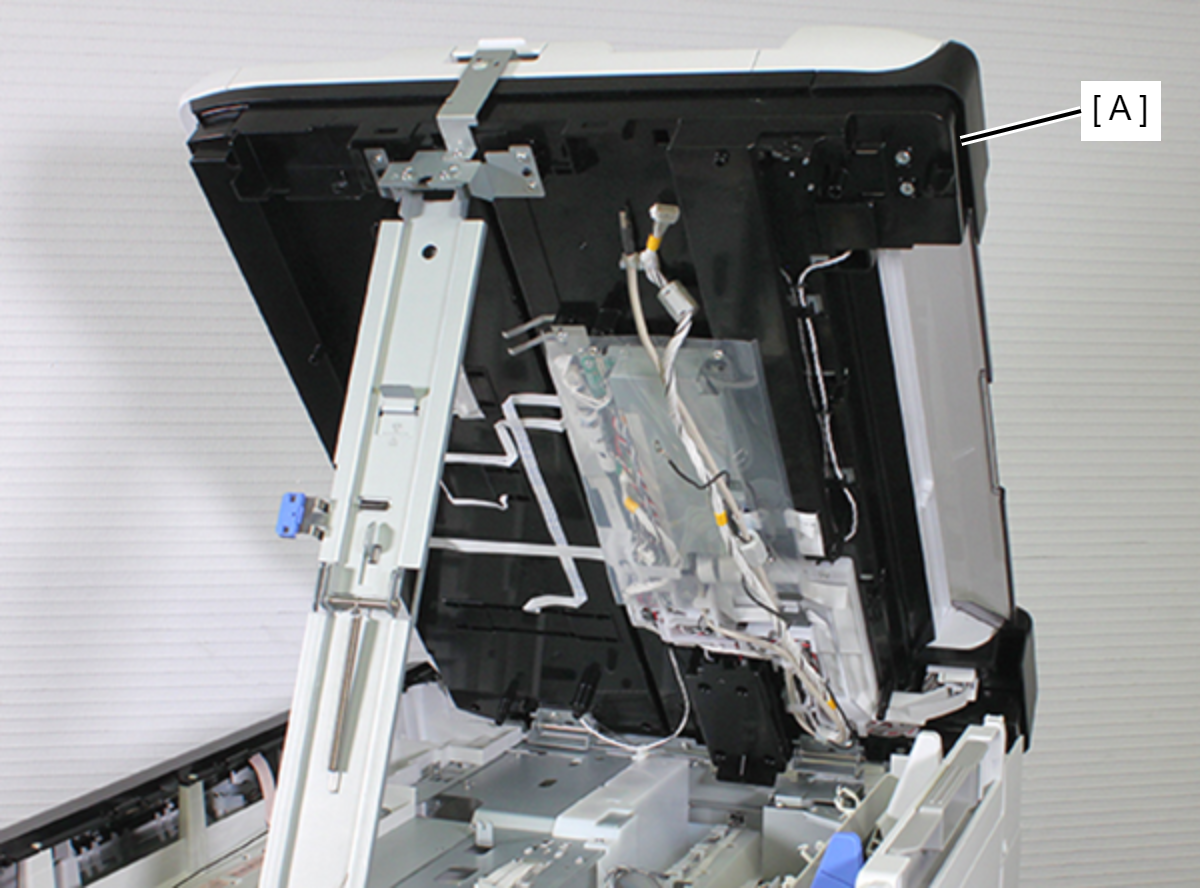
- Close the ADF/SCN Unit (A).
 Assembly / 組み立て
When opening the ADF/SCN Unit, the upper spring and lower spring become separated. Be careful because even if the ADF/SDN Unit is pushed all the way, the Support Stand will not open automatically.
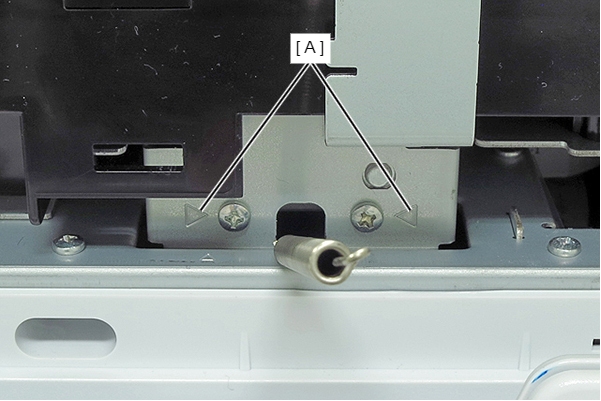
- Remove the six screws.
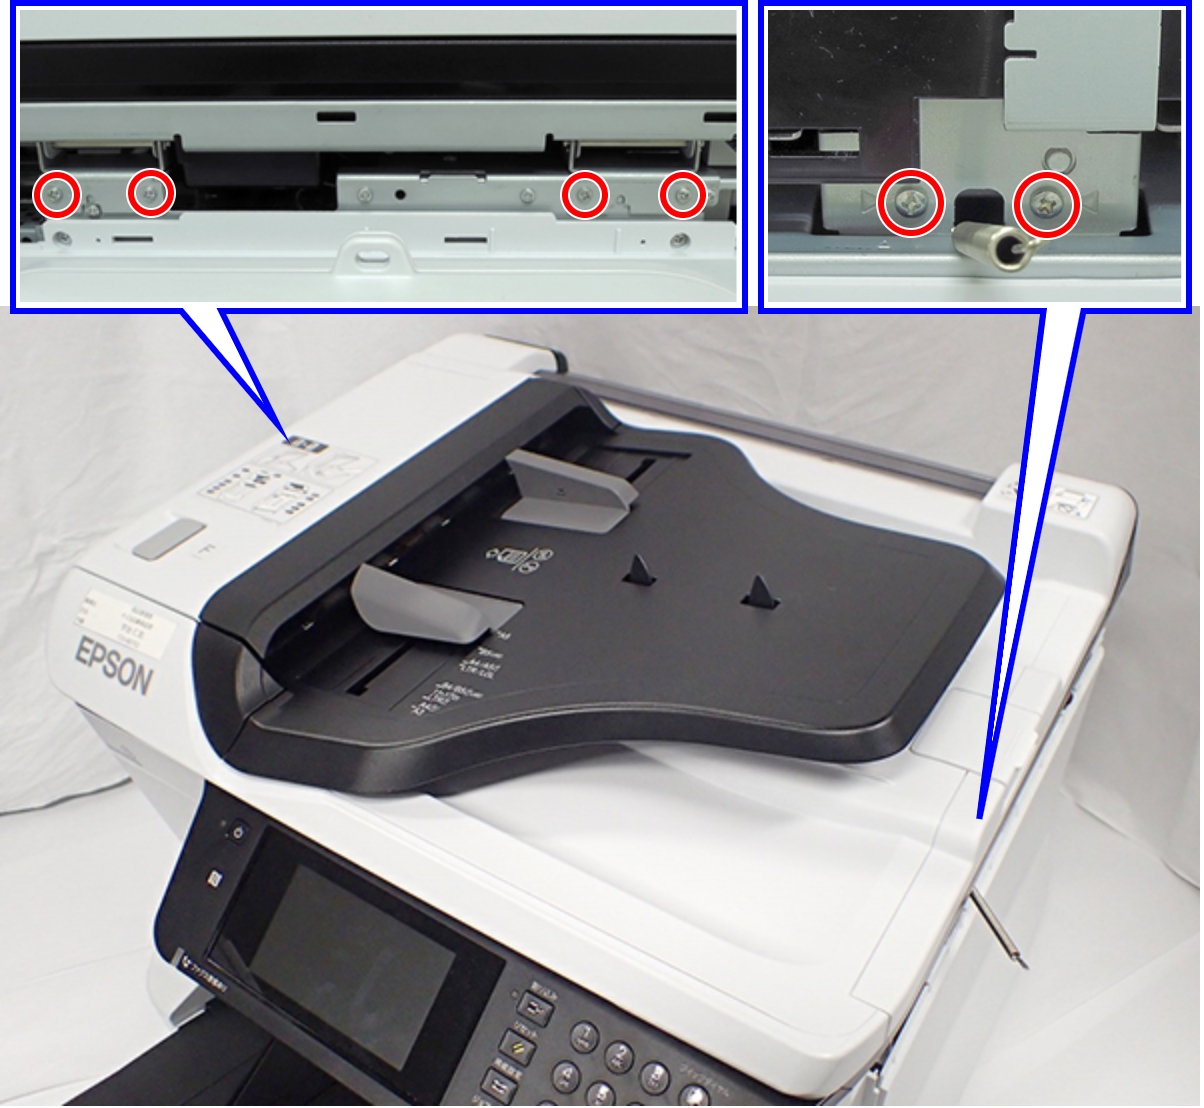
- : C.B.S-TITE-SCREW-3x8-F.ZN-3C
Check Point / チェックポイントThe screw to be removed is indicated by a triangle mark (A).
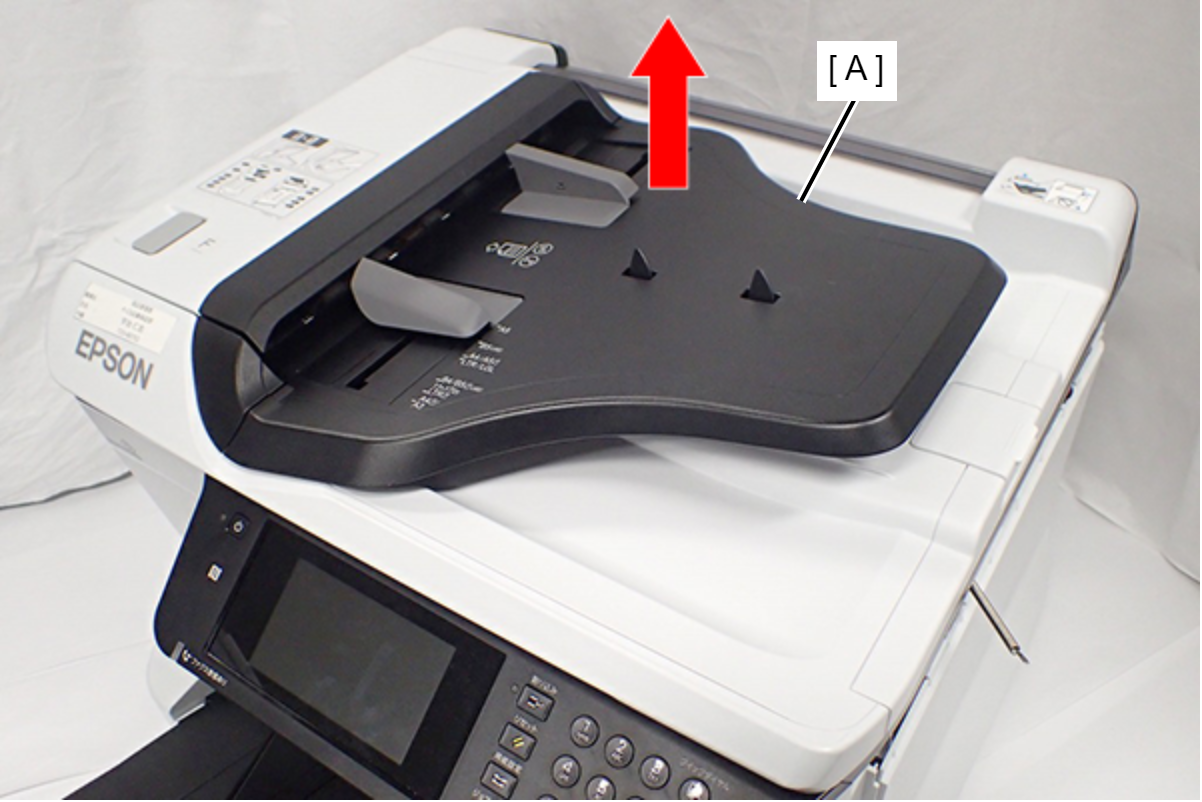
- Pull the ADF/SCN Unit (A) upward to remove it.
 WARNING / 警告
After replacing the ADF/SCN Unit, a fatal error (1000050) may occur due to a difference in version between the printer firmware and the scanner firmware.
Therefore, make sure to update the firmware after replacing the ADF/SCN Unit.