PE Adjust [ASF: B52][Rear ASF: B53]
Paper and Feed Tray
- Document size: A4
- Paper type: Plain paper
- Paper feed tray: Front paper feed: Paper cassette (1) to cassette (4) Rear paper feed: Rear tray
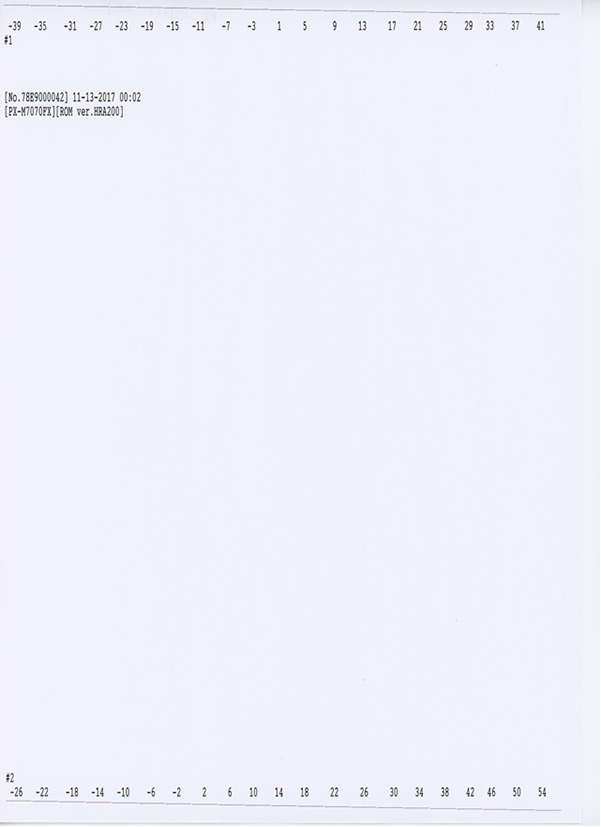
Adjustment pattern
Judgment
From the stepped patterns printed on the top and bottom edges (the bottom edge is for rear paper feeding only) of the paper, select the numerical value that is 5 mm from the edge of the paper for each of them.
Adjustment procedure
- Start the service support mode. (Service mode startup and operating procedures)
- Select “Adjustment Main Unit: MENU” from the service support mode top menu.
Select “PE Adjust”.
 Check Point / チェックポイント
Select and execute the corresponding adjustment item using either procedure below.
Selecting by entering the program number
- Select “Input B No.-Main Unit Adjust” from the Adjustment menu.
- Press the [#] button and software number key is displayed on LCD.
Enter program number.
PE Adjust (ASF): 52
PE Adjust (Rear ASF): 53 - Press the [#] button.
Selecting from menu
- Select “Individual Adjustment: MENU” from the Adjustment menu.
- Select “Printing Adjust:MENU” from the Individual Adjustment menu.
- Select the paper feed direction from the Printing Adjust menu.
B52 PE Adjust (ASF)
- The following screen will be displayed. (Some contents on the screen differ for “PE Adjust (Rear ASF)”)
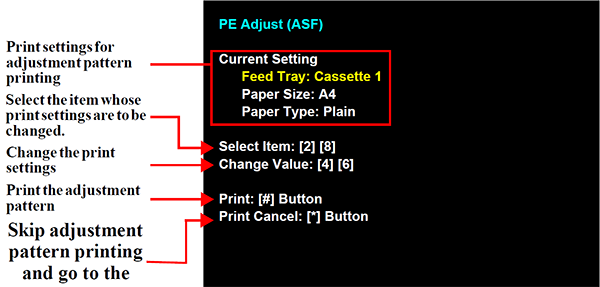
- Load paper into the paper feed tray.
- Press the [#] button to print the adjustment pattern.
- Check the adjustment pattern.
- Check the adjustment pattern and determine the adjustment value based on the judgment procedure.
Input a adjustment value.
Check Point / チェックポイント- Operation method is belows.
- [6] button: Displays the adjustment value input screen
- [2] button, [8] button: Select the number.
- [#] button: Finishes adjustment and inputs the adjustment values.
- In the adjustment value input menu, the software number key is displayed
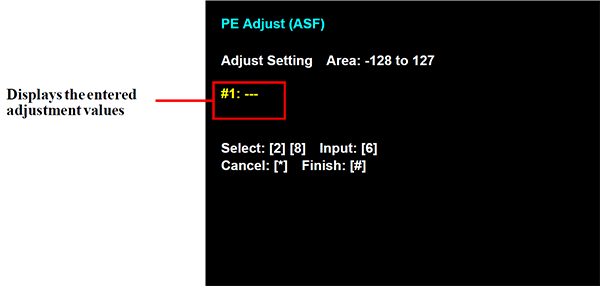
- Operation method is belows.
Check that an adjustment value is entered for all of the adjustment input items and then press the [#] button to end adjustment.
The adjustment end screen appears. Press the [#] button to return to the menu screen.
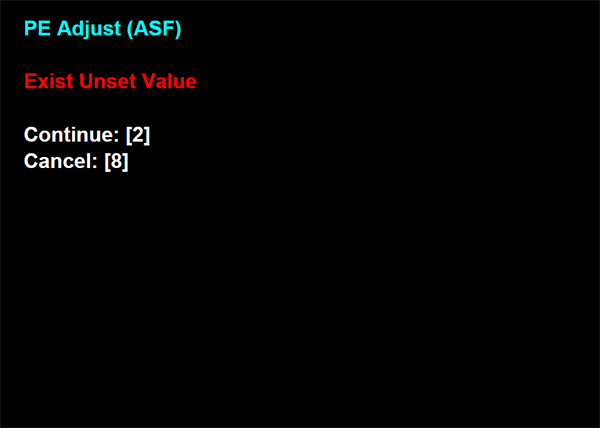
Check Point / チェックポイントTo end adjustment without entering an adjustment value, press the [#] button in the state without an adjustment value entered in the adjustment input screen to display the following screen. If you press the [8] button in the following screen, the adjustment end screen appears and you can end adjustment.(To continue adjustment, press the [2] button.)