
ADF Document Size Sensors
- Remove one screw.
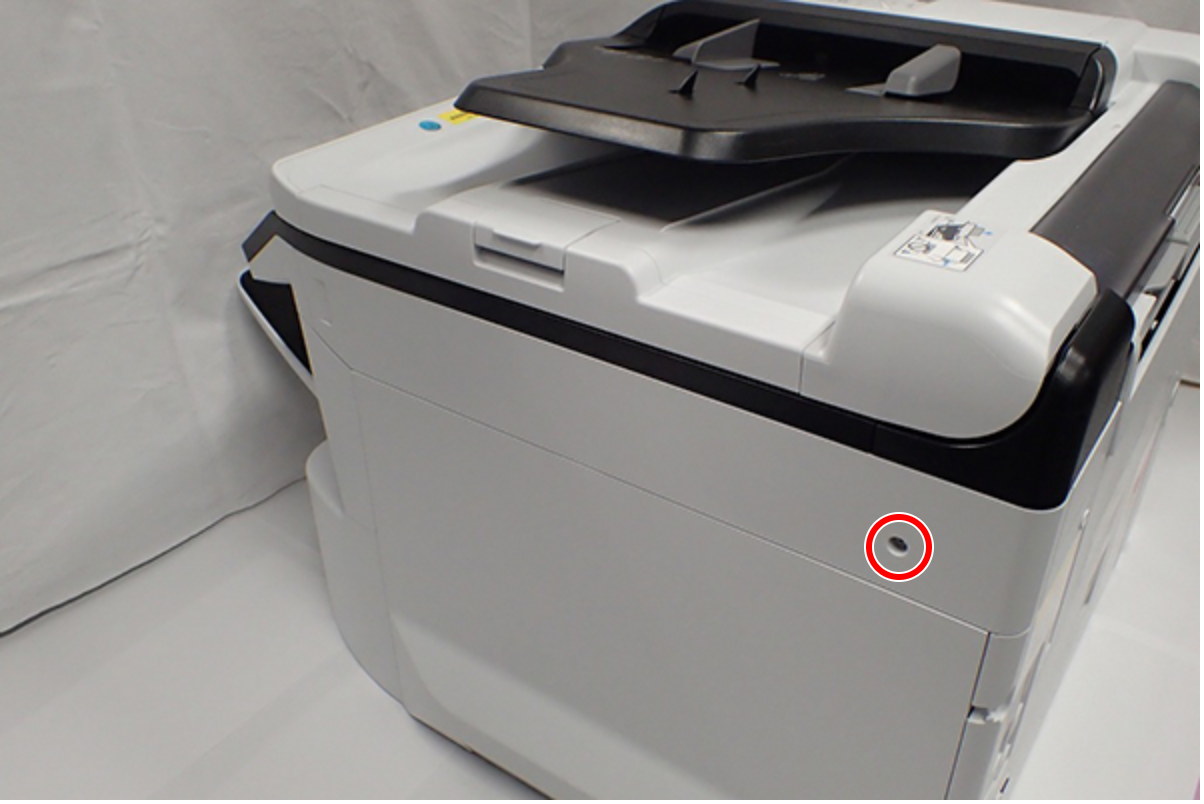
 : C.B.S-TITE-SCREW-3x8-F.ZN-3C
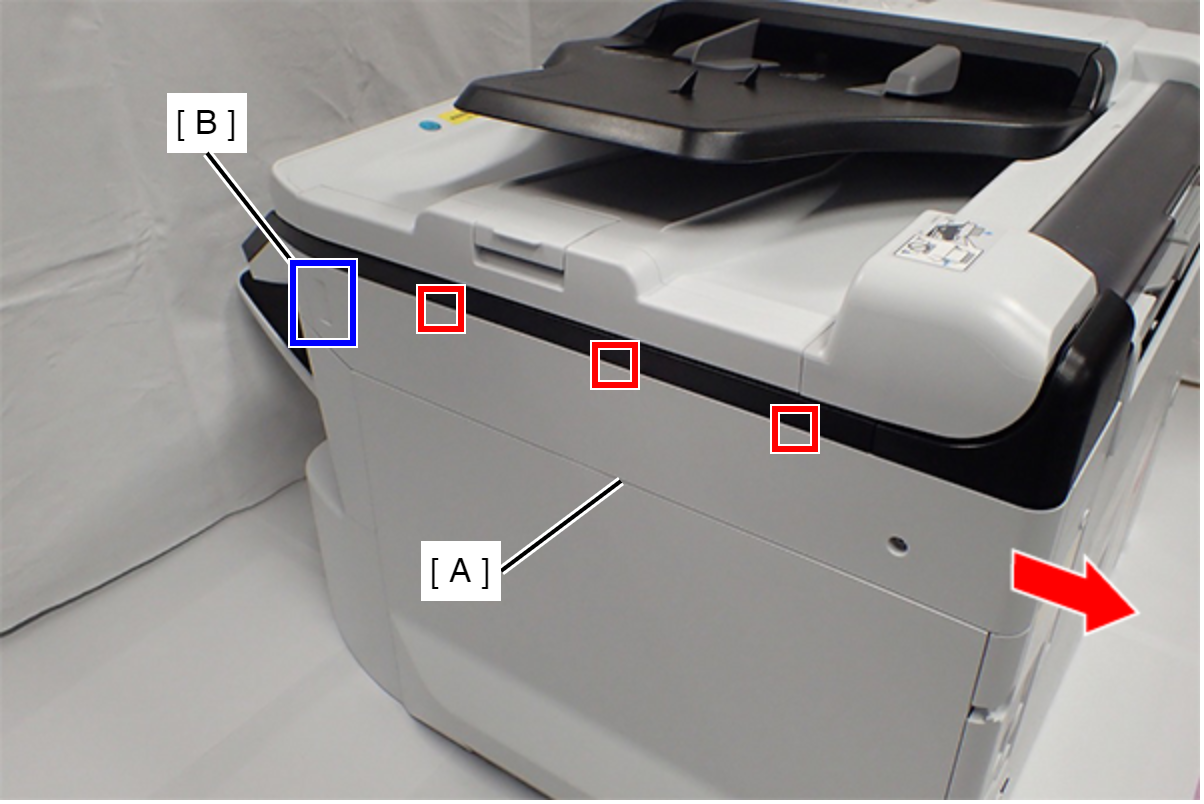
- Slide the Right SC Cover (A) while pushing the dent (B) of Right SC Cover, and release the three tabs. Remove the Right SC Cover (A).
- Remove one screw.
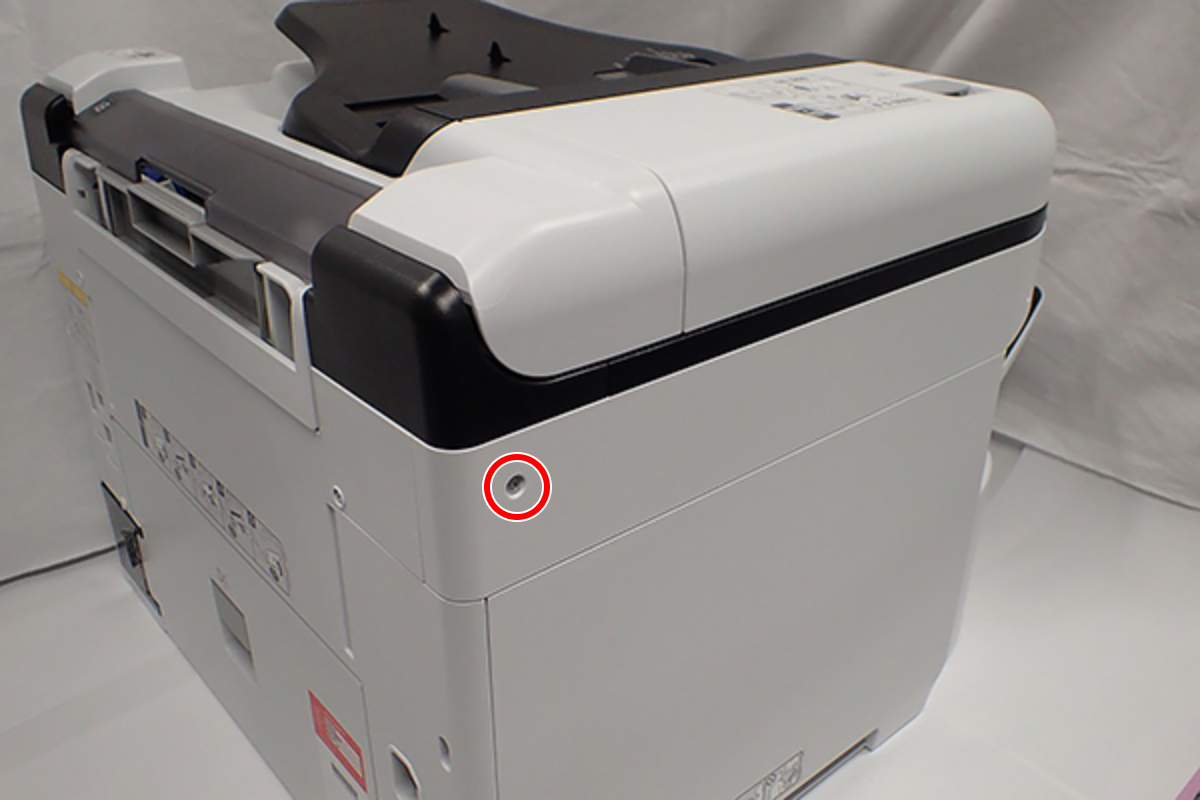
- : C.B.S-TITE-SCREW-3x8-F.ZN-3C
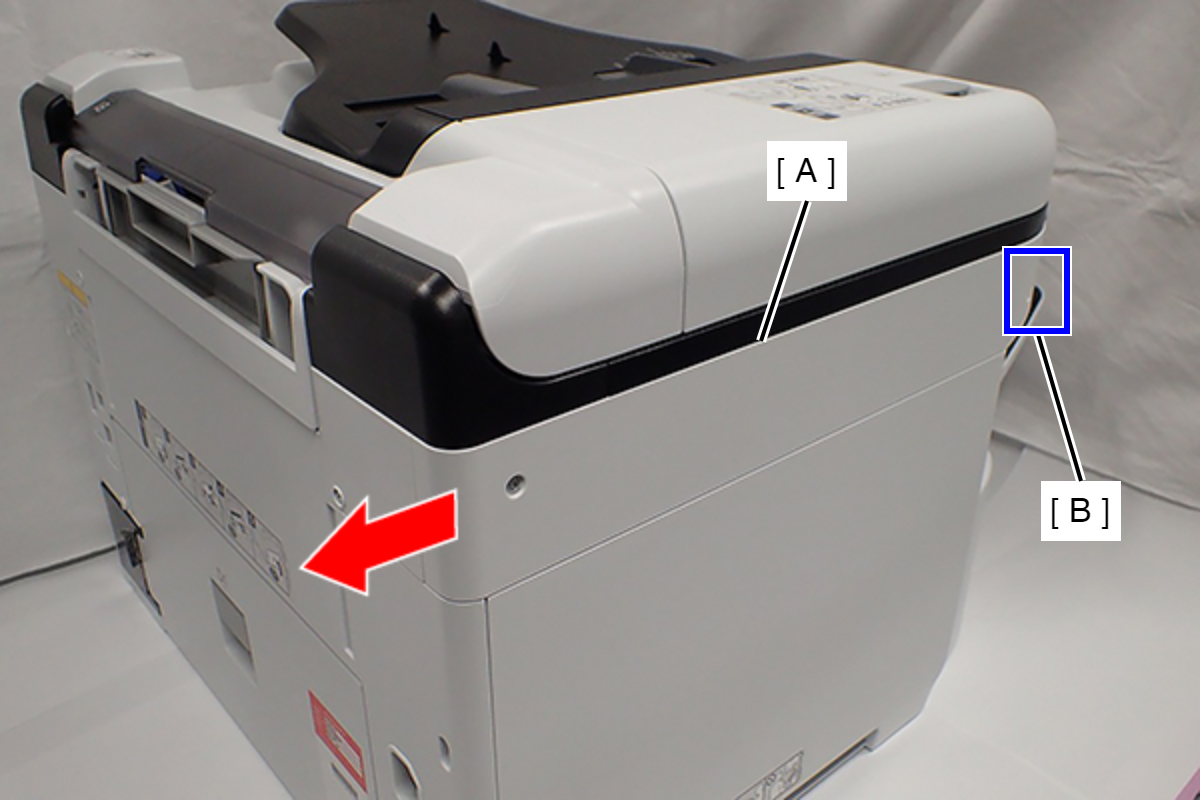
- Slide the Left SC Cover (A) while pushing the dent (B) of Left SC Cover, and remove it.
- Remove one screw, and remove the Lower SC Reinforcing Plate (A).
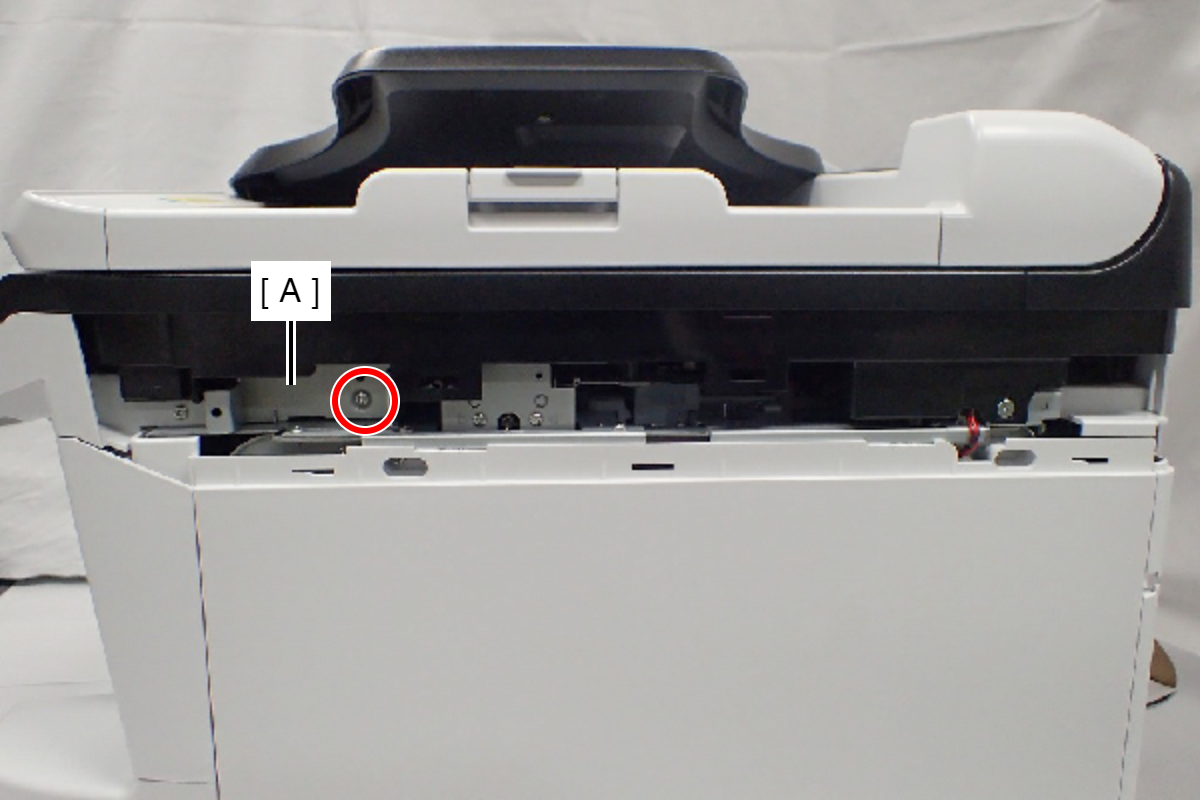
- : C.B.S-TITE-SCREW-3x8-F.ZN-3C
- Reattach the Lower SC Reinforcing Plate (A) in its portrait orientation, then secure it with the screw.
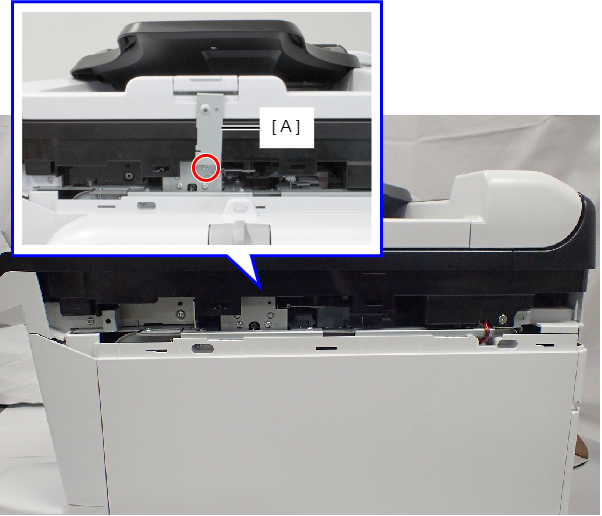
- : C.B.S-TITE-SCREW-3x8-F.ZN-3C
- Remove the screw.
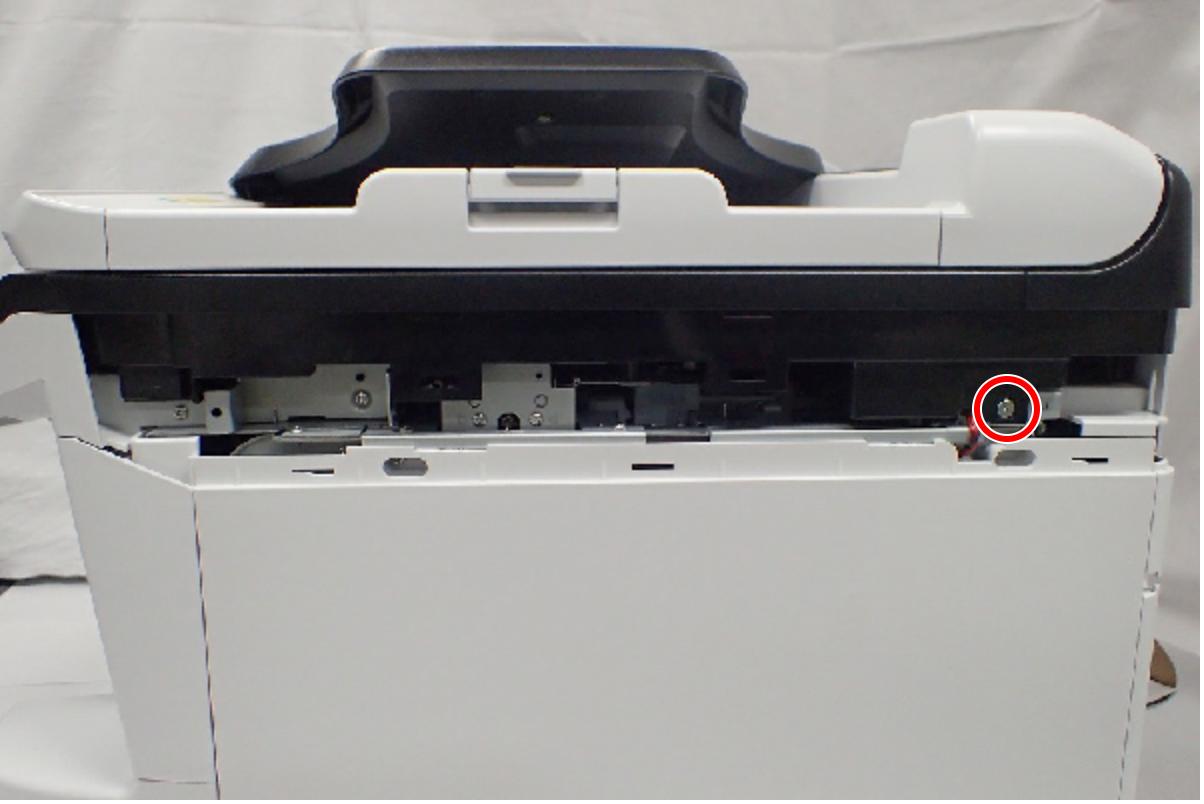
- : C.SHOULDER S-TITE,3X5
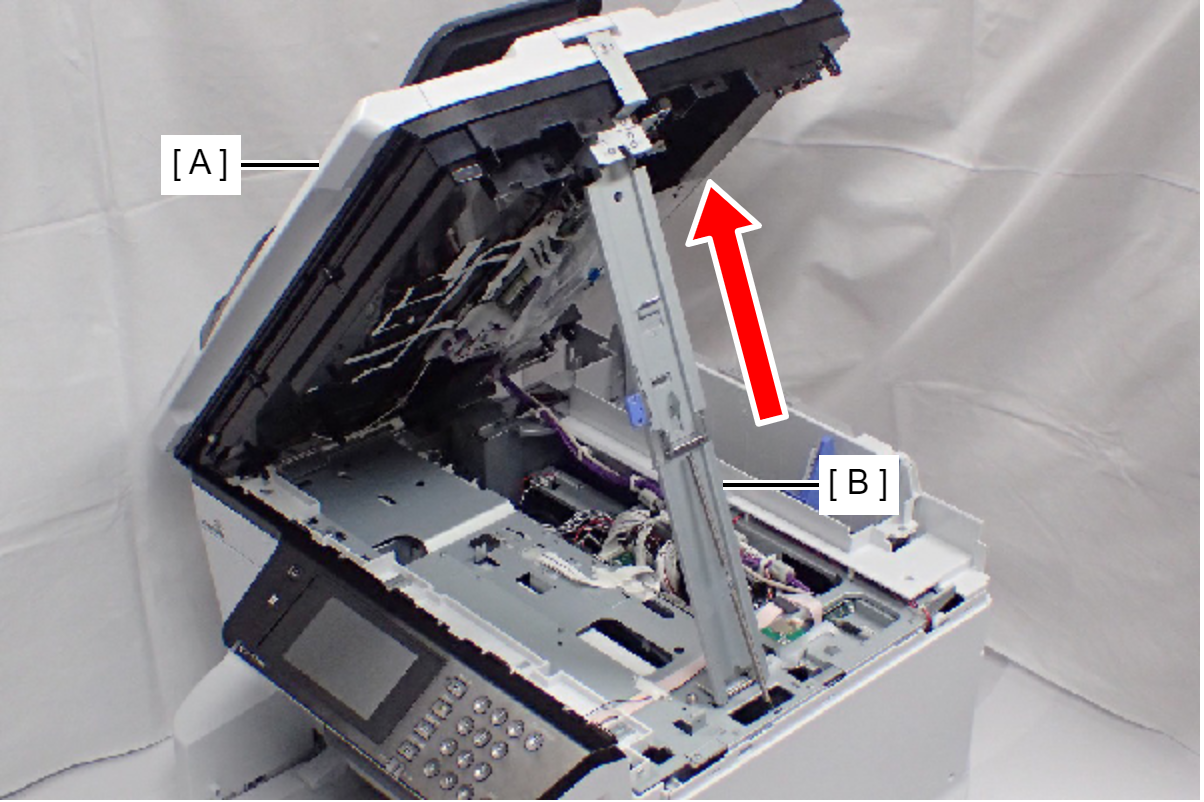
- Open the ADF/SCN Unit (A).
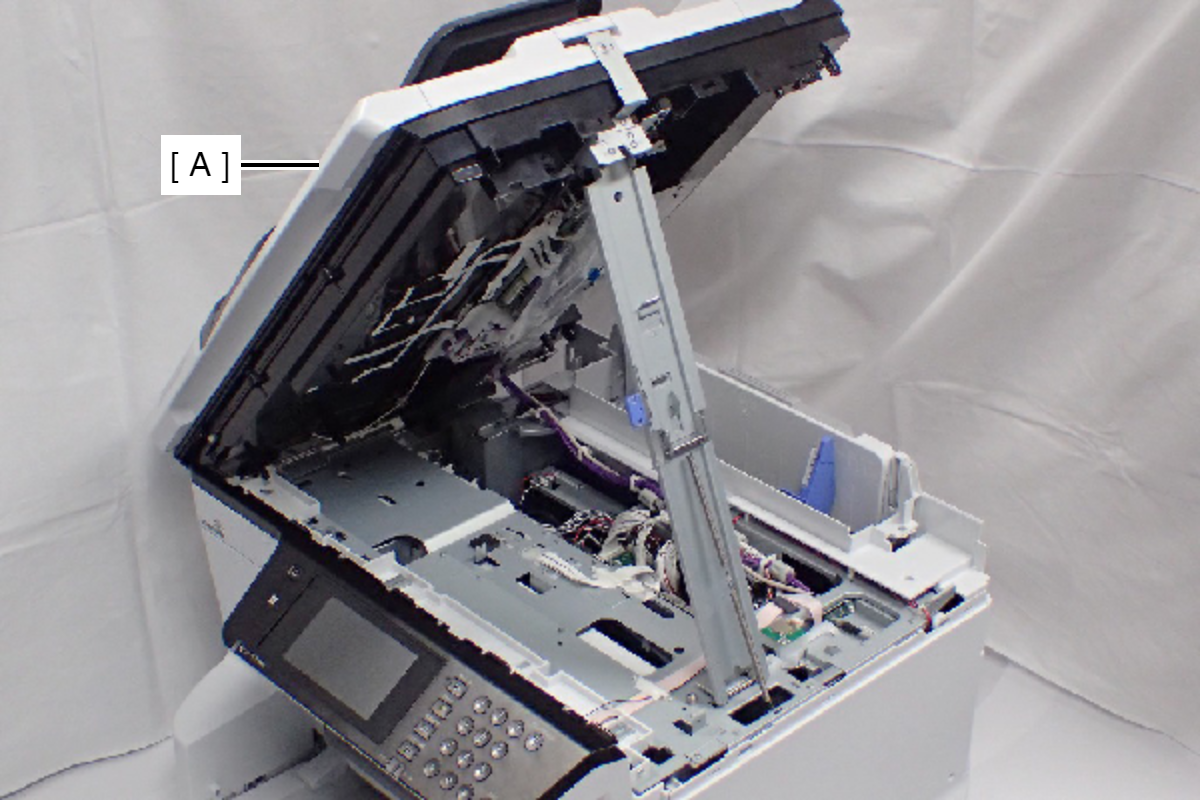
- Open the ADF/SCN Unit (A) and extend the support stand (B) as far as it goes, then support the ADF/SCN Unit with the support stand.
 Caution / 注意
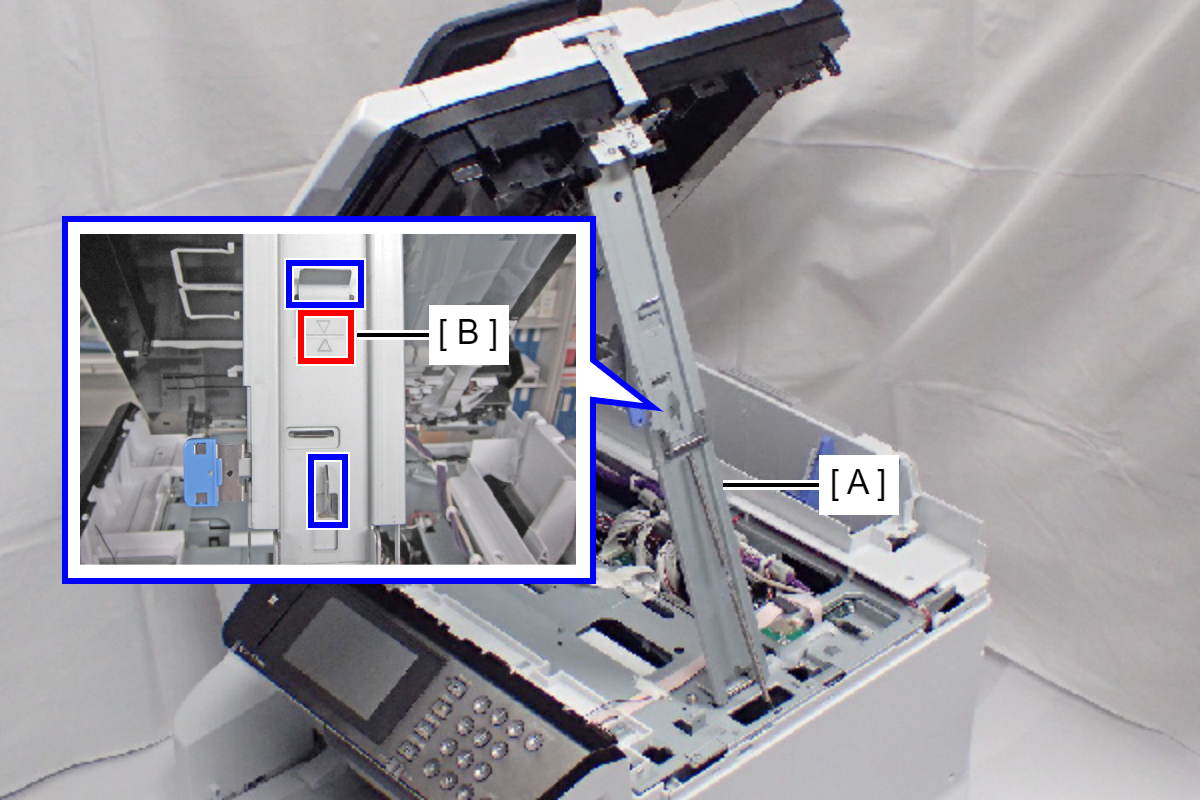
Make sure that the support stand (A) is fixed with the two hooks, and the two triangle marks (B) face to each other.
 Check Point / チェックポイント
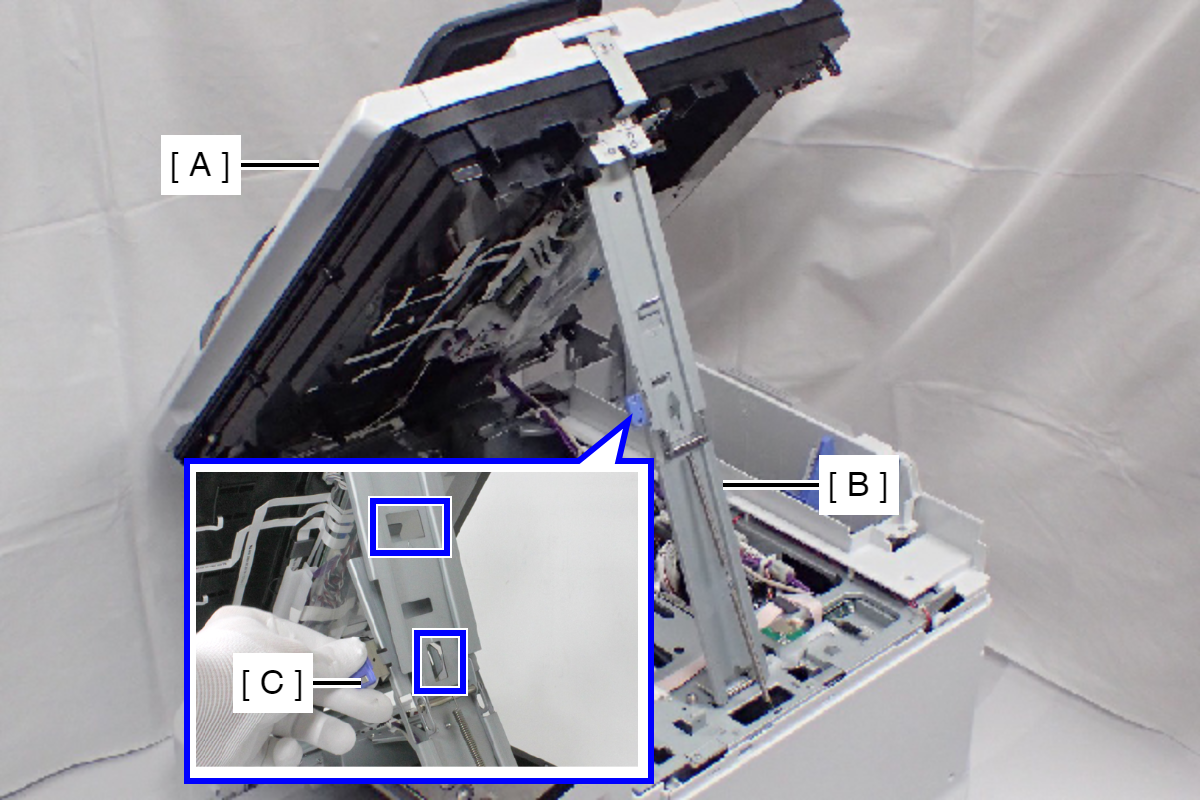
When closing the ADF/SCN Unit (A), press the switch (C) on the ADF/SCN support stand (B) and hold up the ADF/SCN Unit to disengage the two hooks, then fold the ADF/SCN support stand.
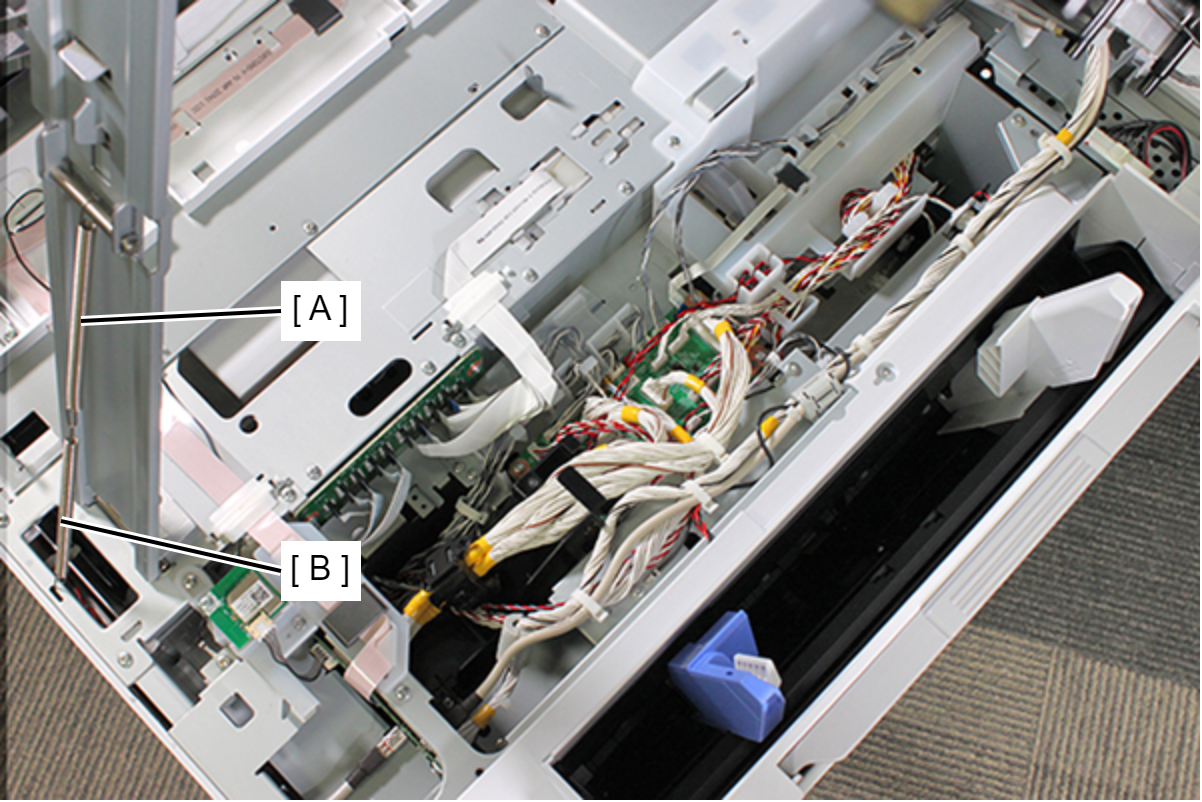
- Separate the upper spring (A) and lower spring (B).
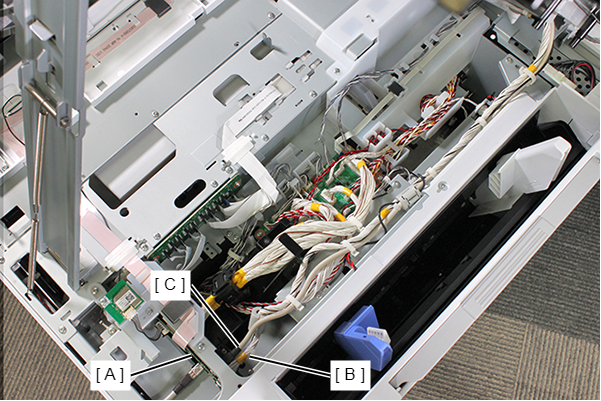
- Disconnect the following cables from the connector of the Main Board (A).
- ADF/SCN cable (USB) (CN104) (B)
- ADF/SCN Cable (CN103) (With hook) (C)
- Remove the screw, and release the ADF/SCN ground cable (A).
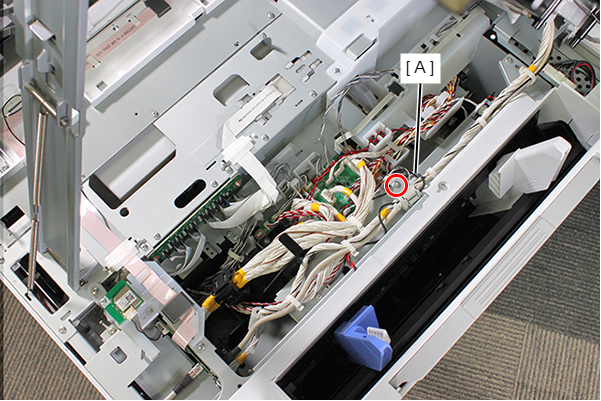
- : C.B.S-TITE-SCREW-3x8-F.ZN-3C
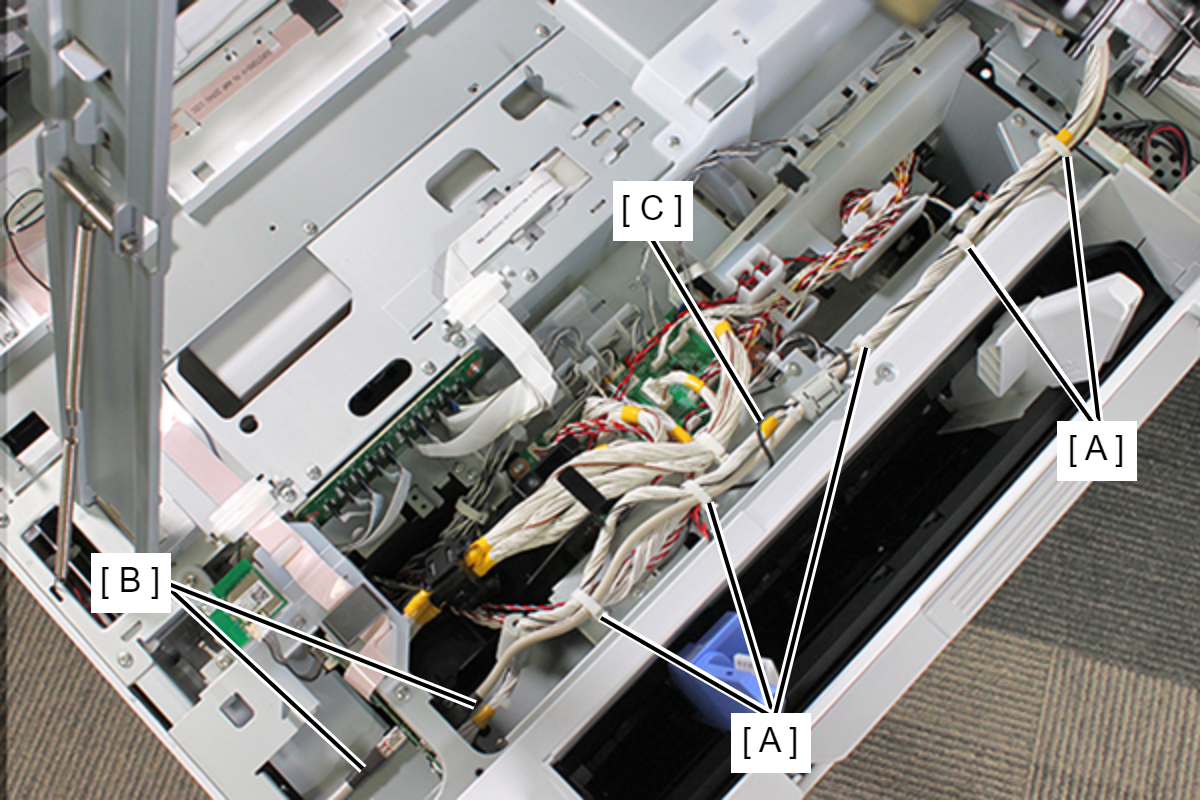
- Release the five clamps (A), and then release the two ADF/SCN cables (B) and the Scanner Grounding Wire (C).
- Release the ADF/SCN cable (A) from the hooks of the center cable cover.
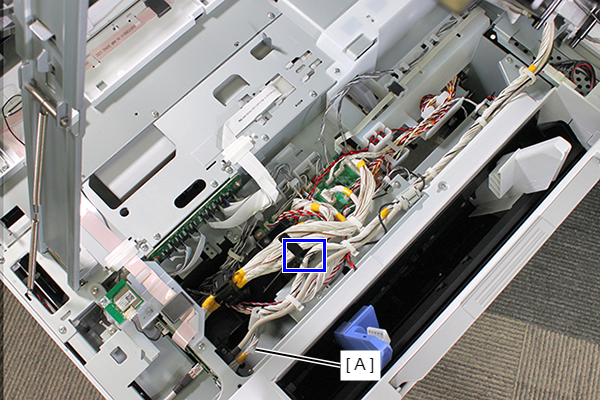
- Wind the Scanner Grounding Wire (A) around the ADF/SCN cable (B), and secure it on the two hooks together with the two ADF/SCN Cables (B).
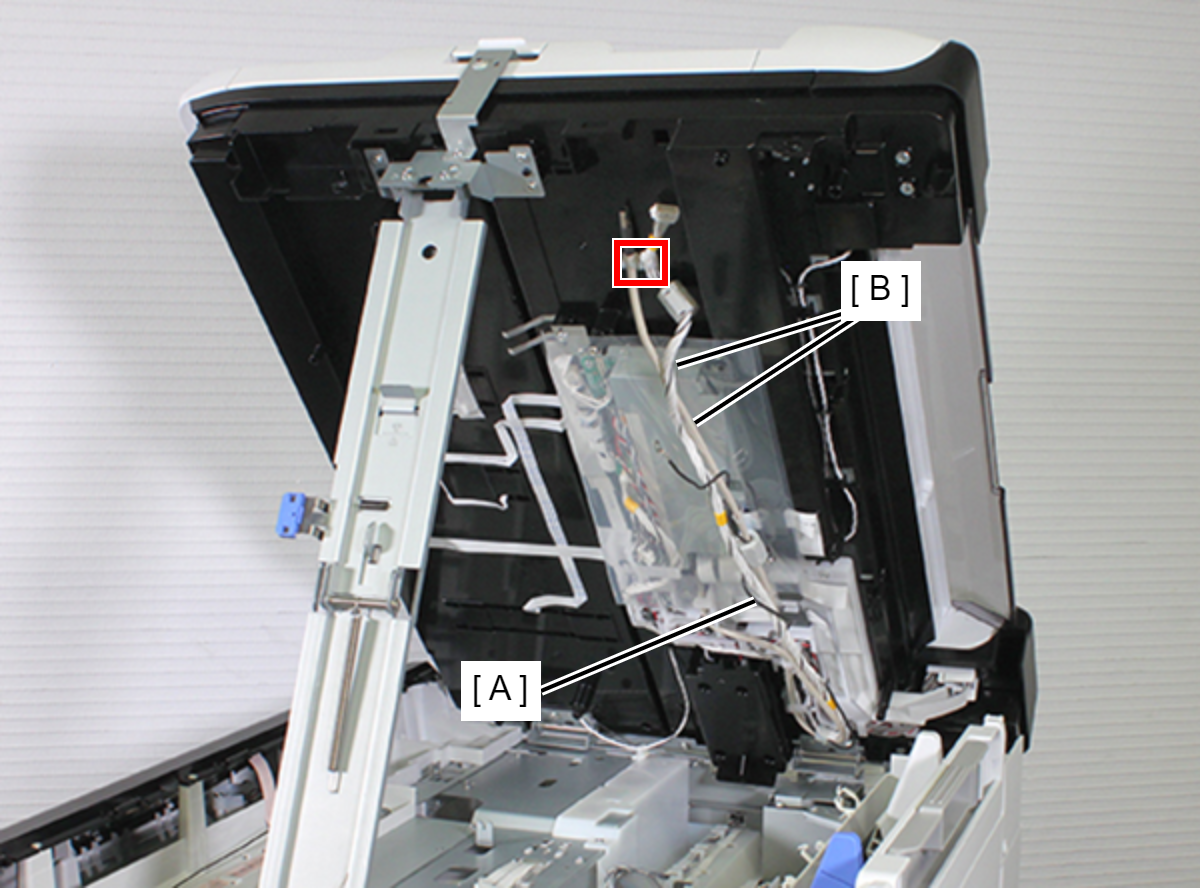
- Release the Grounding Wire (B) and Cable from the clamp (A).
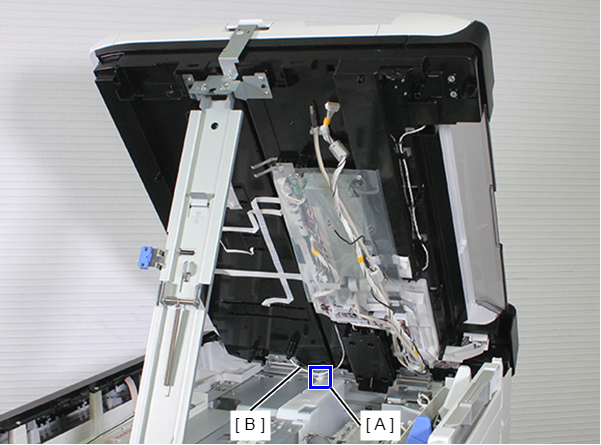
- Close the ADF/SCN Unit (A).
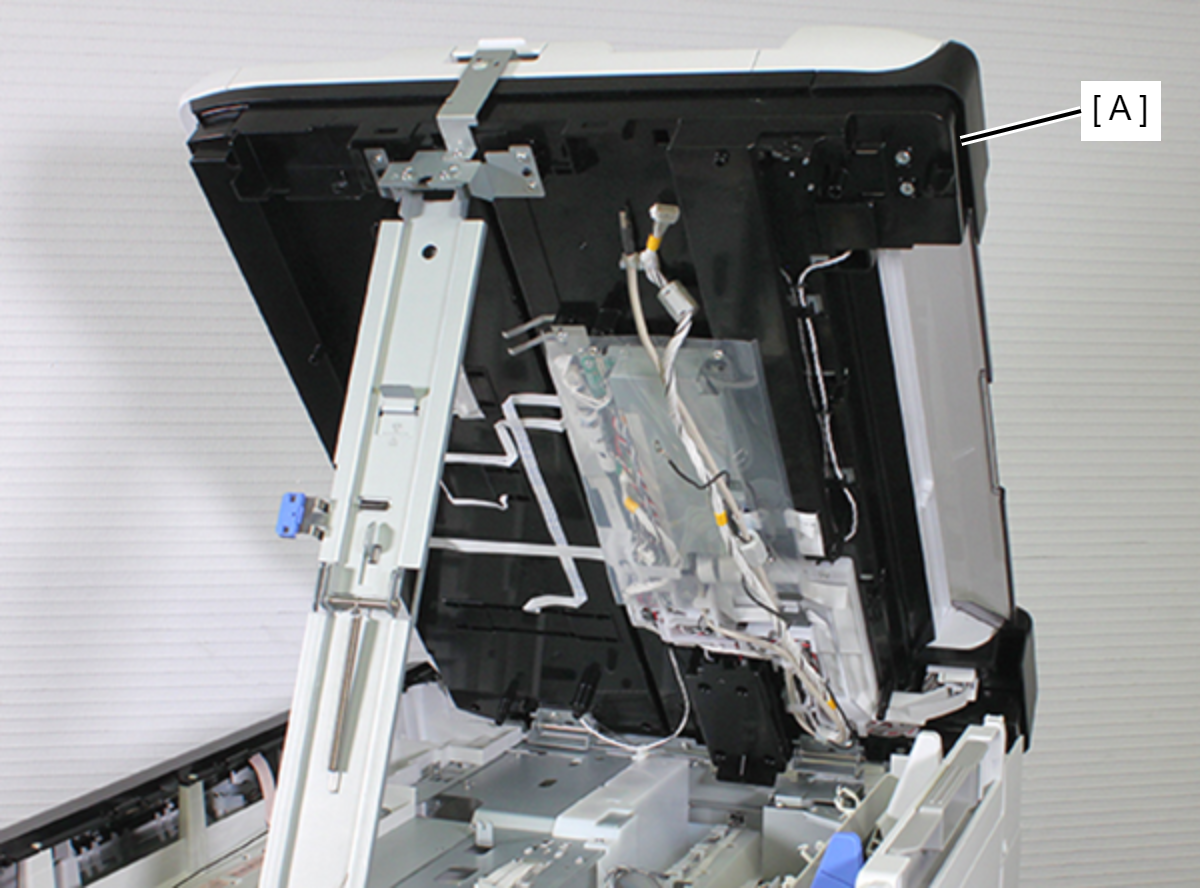
 Assembly / 組み立て
When opening the ADF/SCN Unit, the upper spring and lower spring become separated. Be careful because even if the ADF/SDN Unit is pushed all the way, the Support Stand will not open automatically.
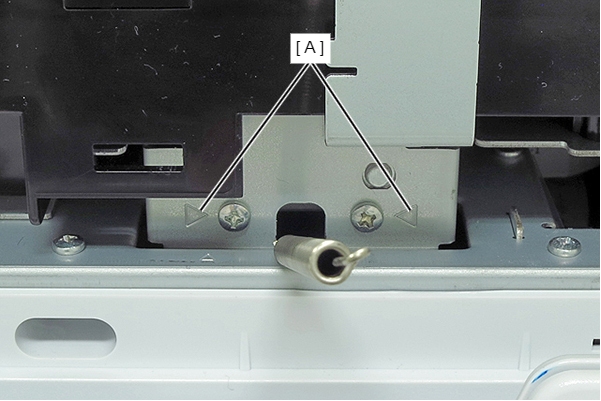
- Remove the six screws.
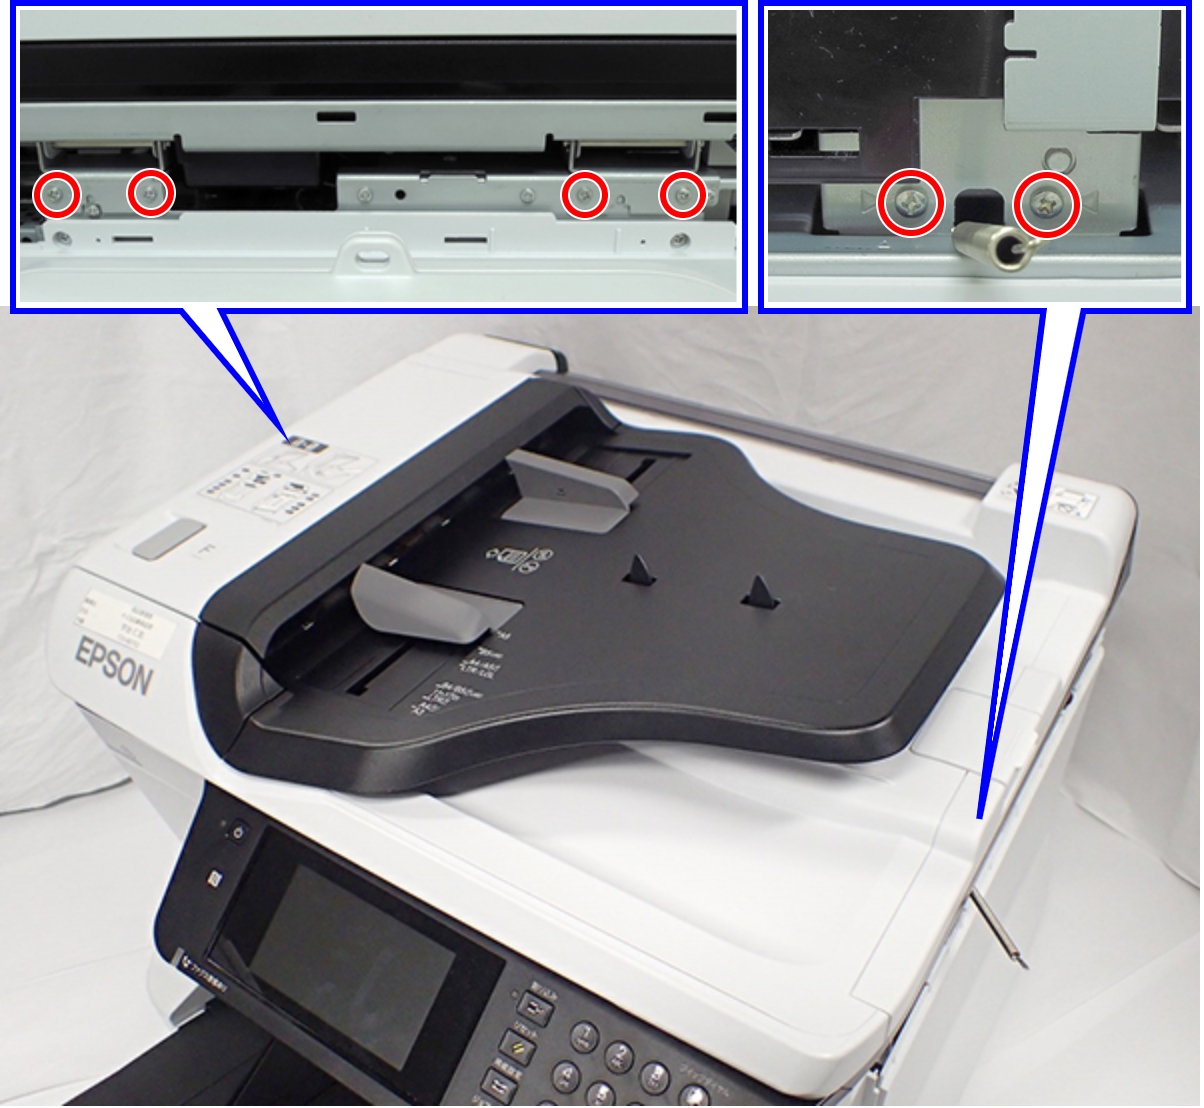
- : C.B.S-TITE-SCREW-3x8-F.ZN-3C
Check Point / チェックポイントThe screw to be removed is indicated by a triangle mark (A).
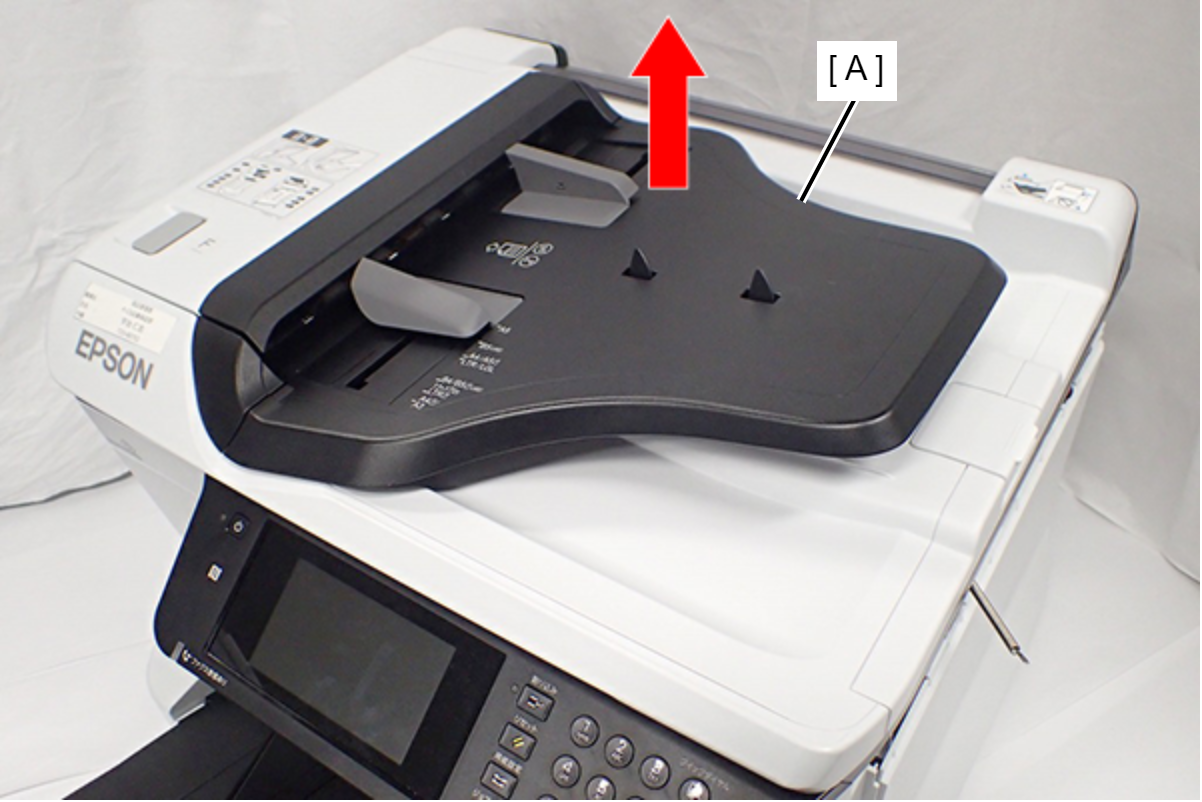
- Pull the ADF/SCN Unit (A) upward to remove it.
 WARNING / 警告
After replacing the ADF/SCN Unit, a fatal error (1000050) may occur due to a difference in version between the printer firmware and the scanner firmware.
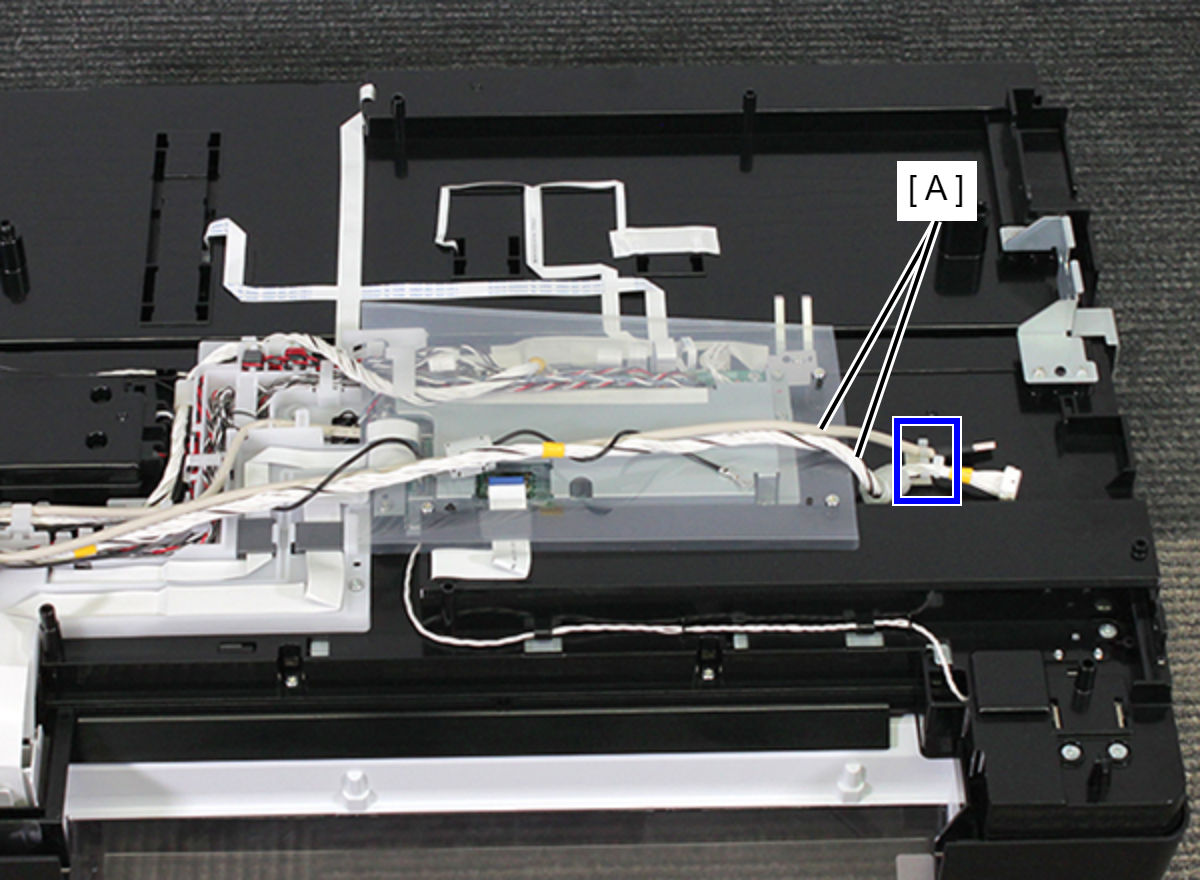
Therefore, make sure to update the firmware after replacing the ADF/SCN Unit. - Release the two ADF/SCN cables (A) from the two hooks.
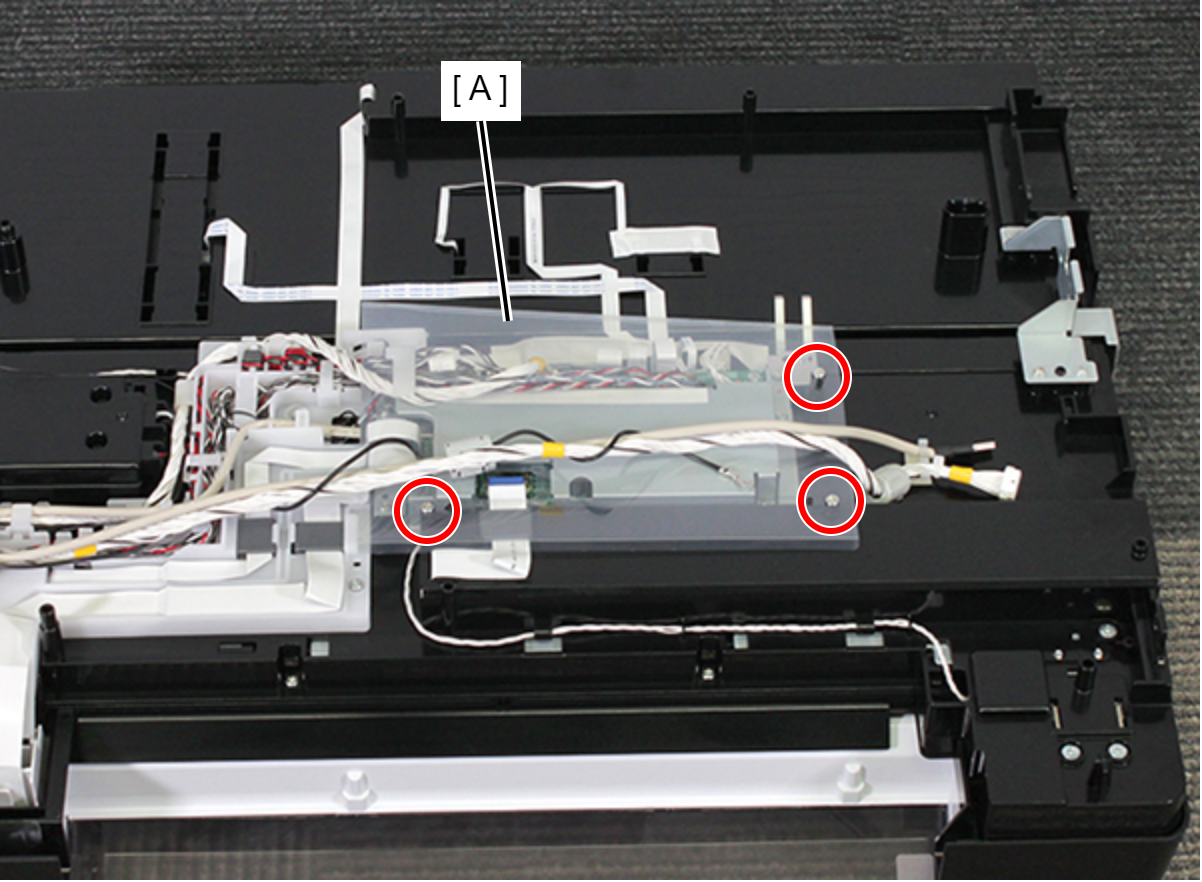
- Remove the three screws, then remove the ADF/SCN Board Protective Sheet (A).
- Remove the screw, then remove the cable band (A).
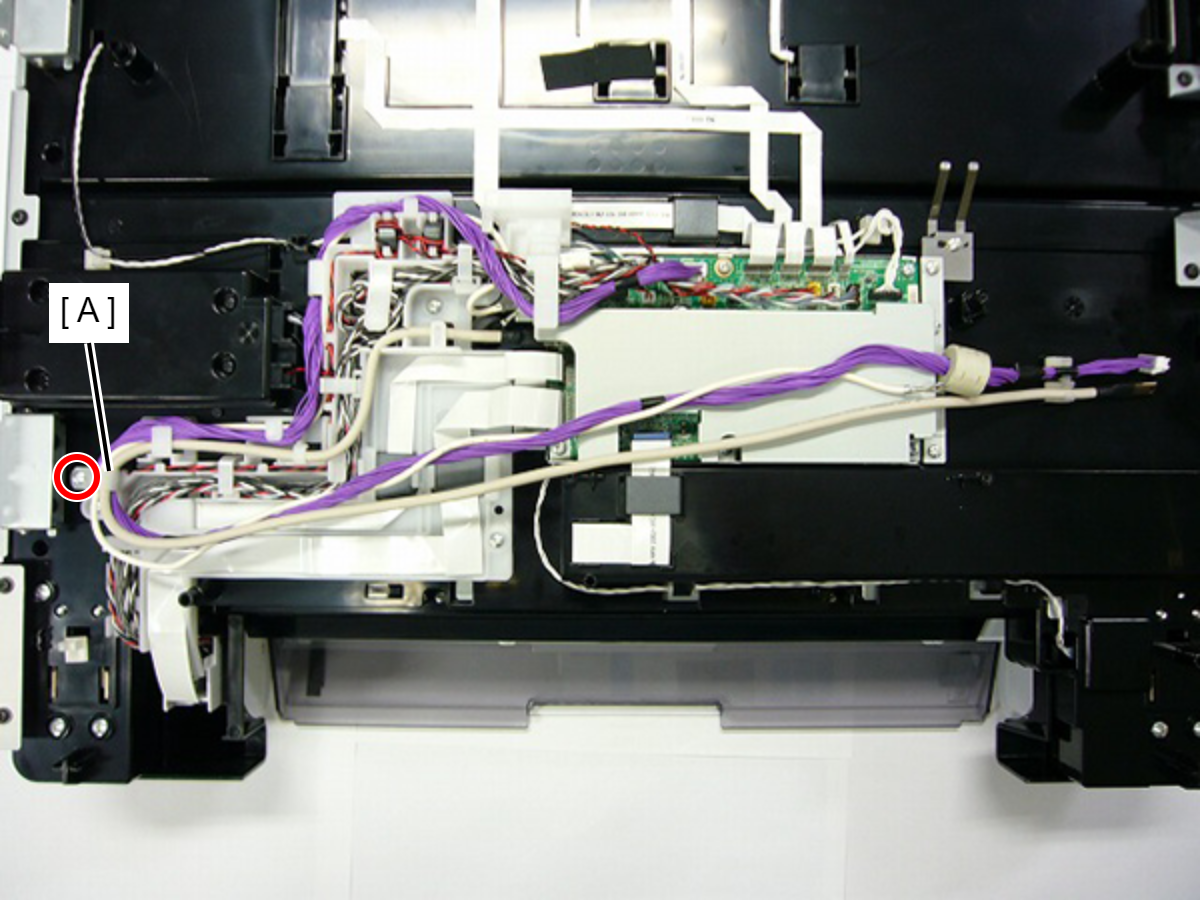
- : C.B.P-TITE-SCREW-3x10-F.ZN-3C
- Disconnect the ACN/SCN cables (A) from the following connectors of the ADF/SCN board.
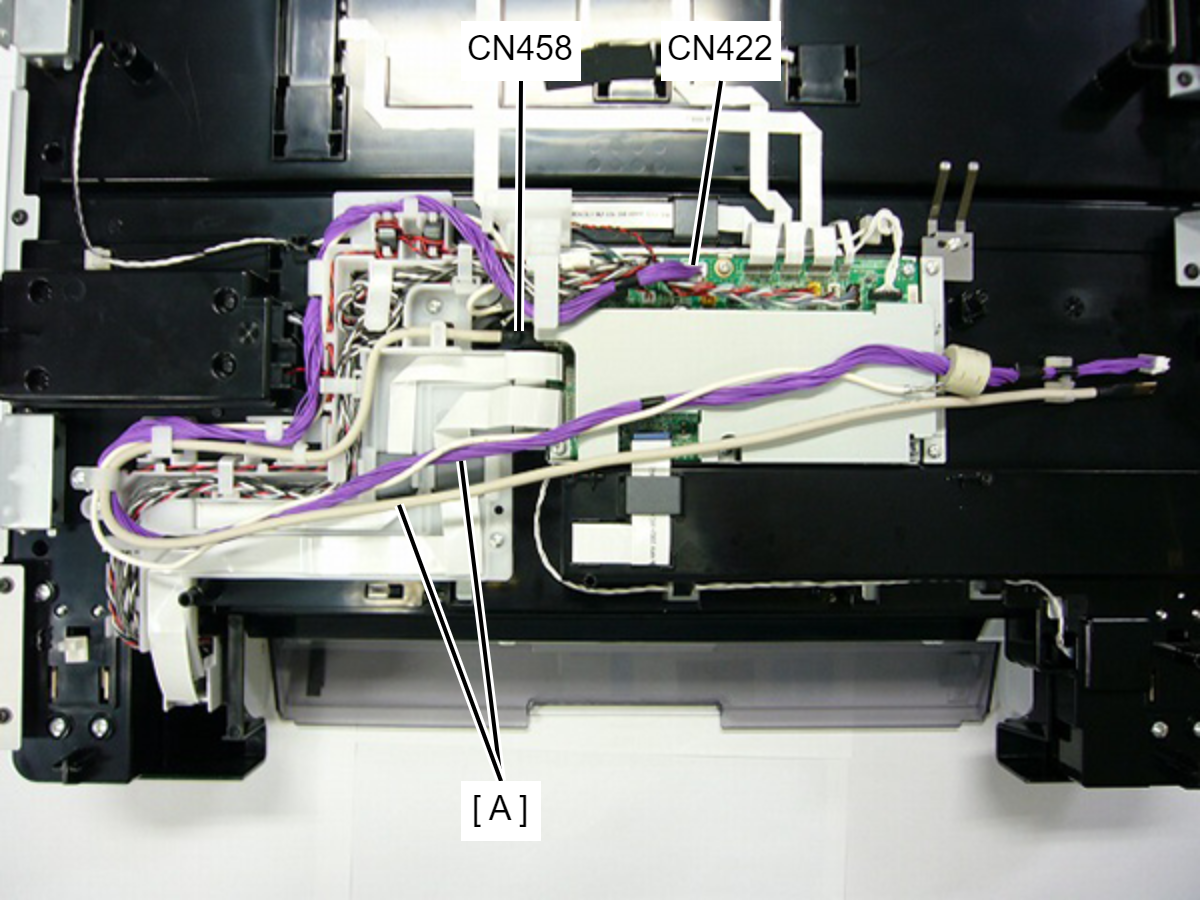
- ADF/SCN cable (USB) (CN458)
- ADF/SCN Cable (CN422) (With hook)
- Remove the screw, and release the ADF/SCN ground cable (A).
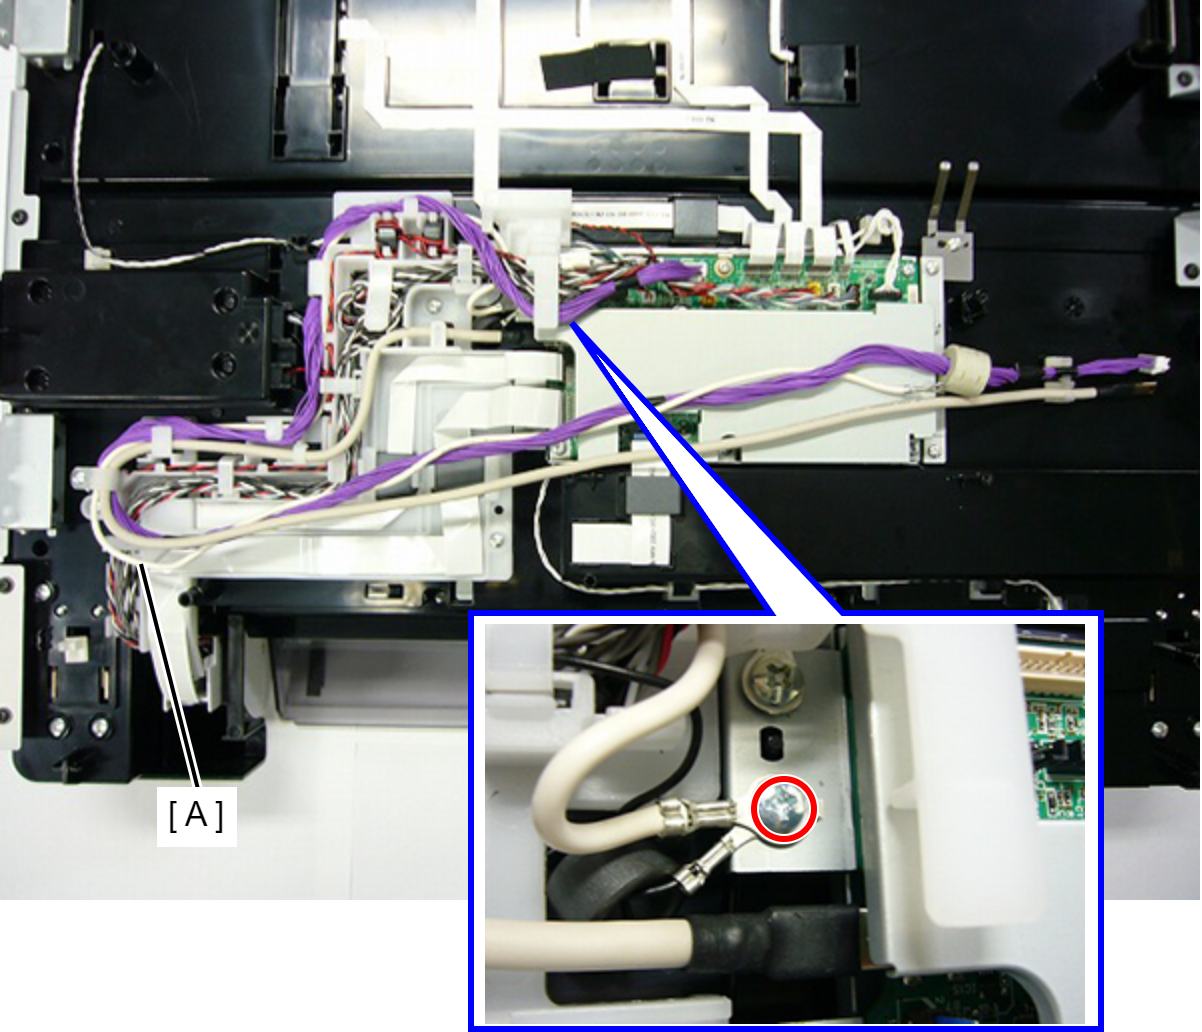
- : C.B.S-TITE-SCREW-3x8-F.ZN-3C
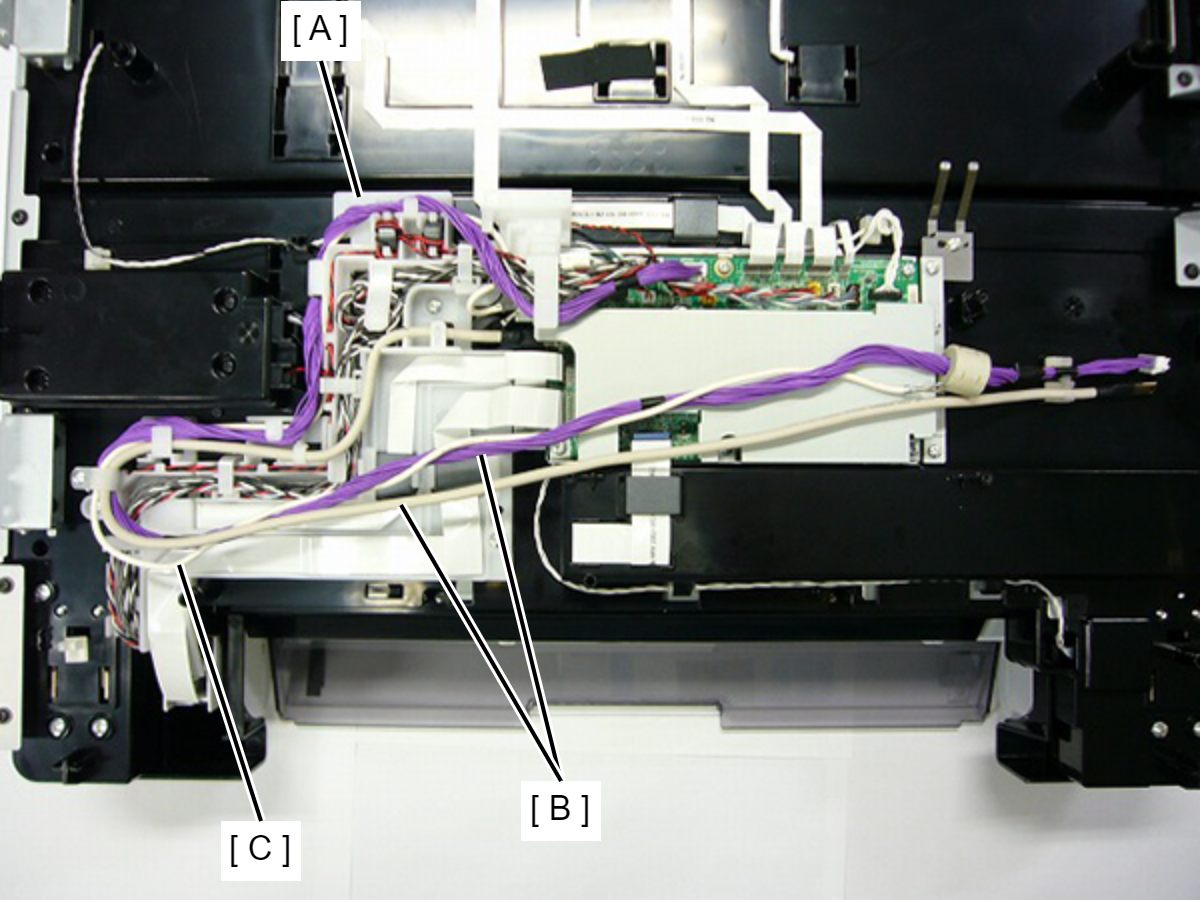
- Release the two ACN/SCN cables (B) and ADF/SCN ground cable (C) from the cable guide (A).
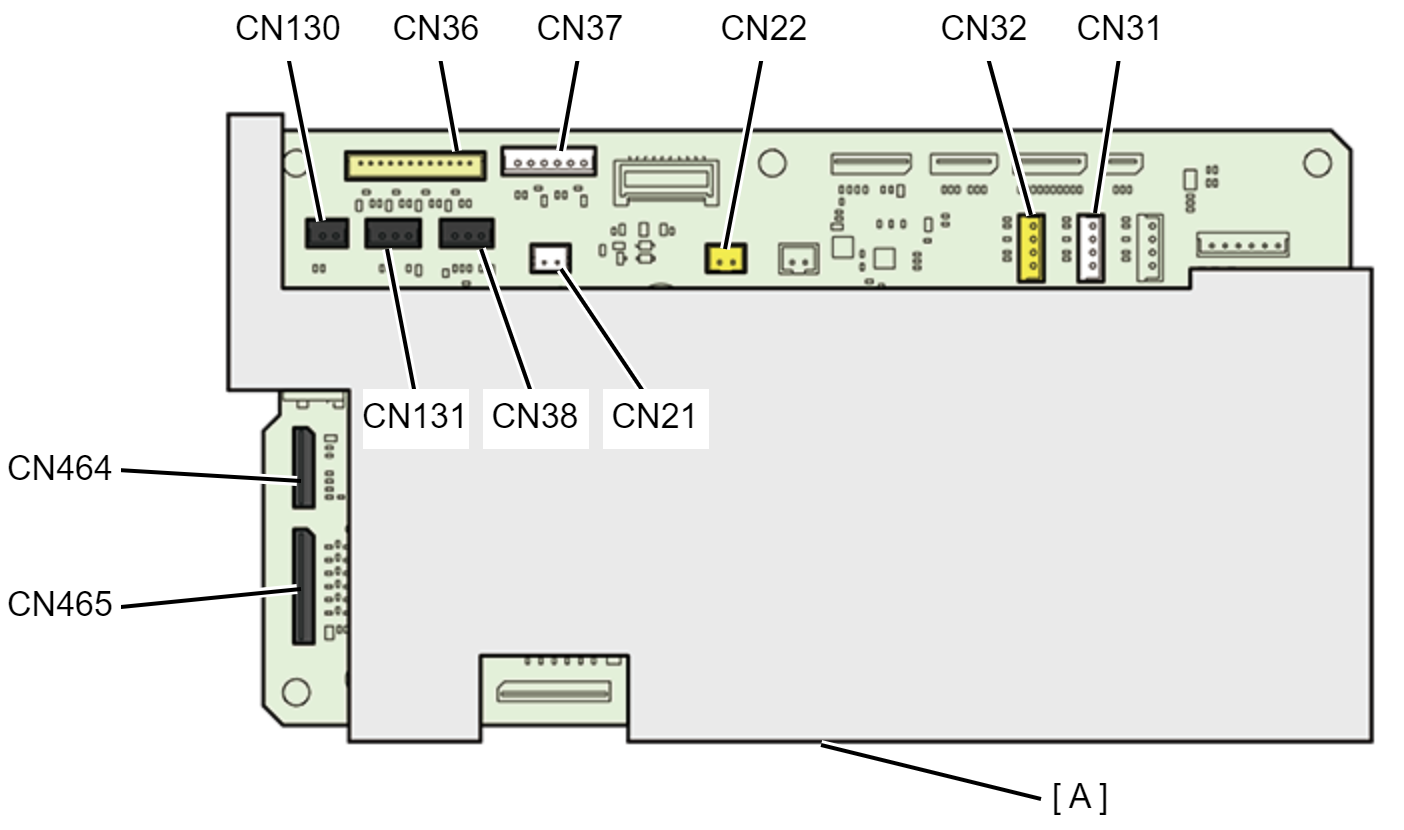
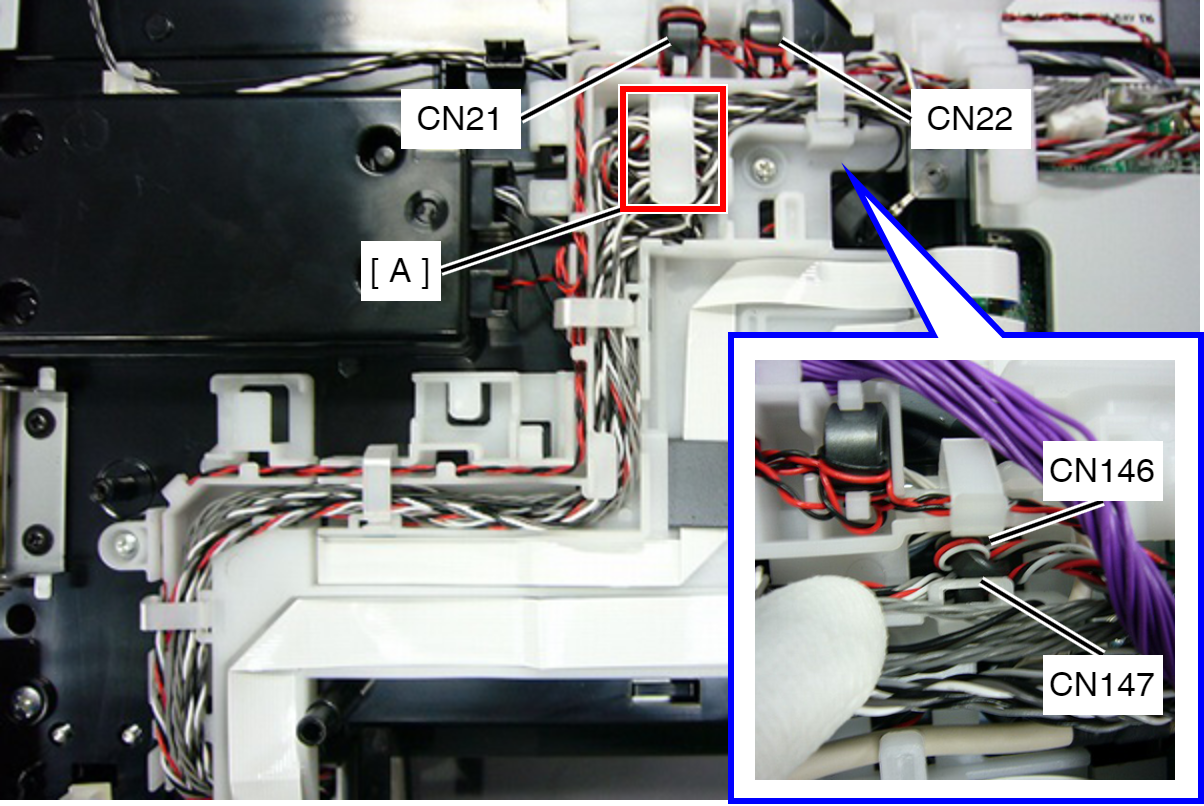
- Remove the cables and FFCs from the connector (CN21, CN22, CN31, CN32, CN36, CN37, CN38, CN130, CN131, CN464, CN465) of the ADF/SCN Board (A).
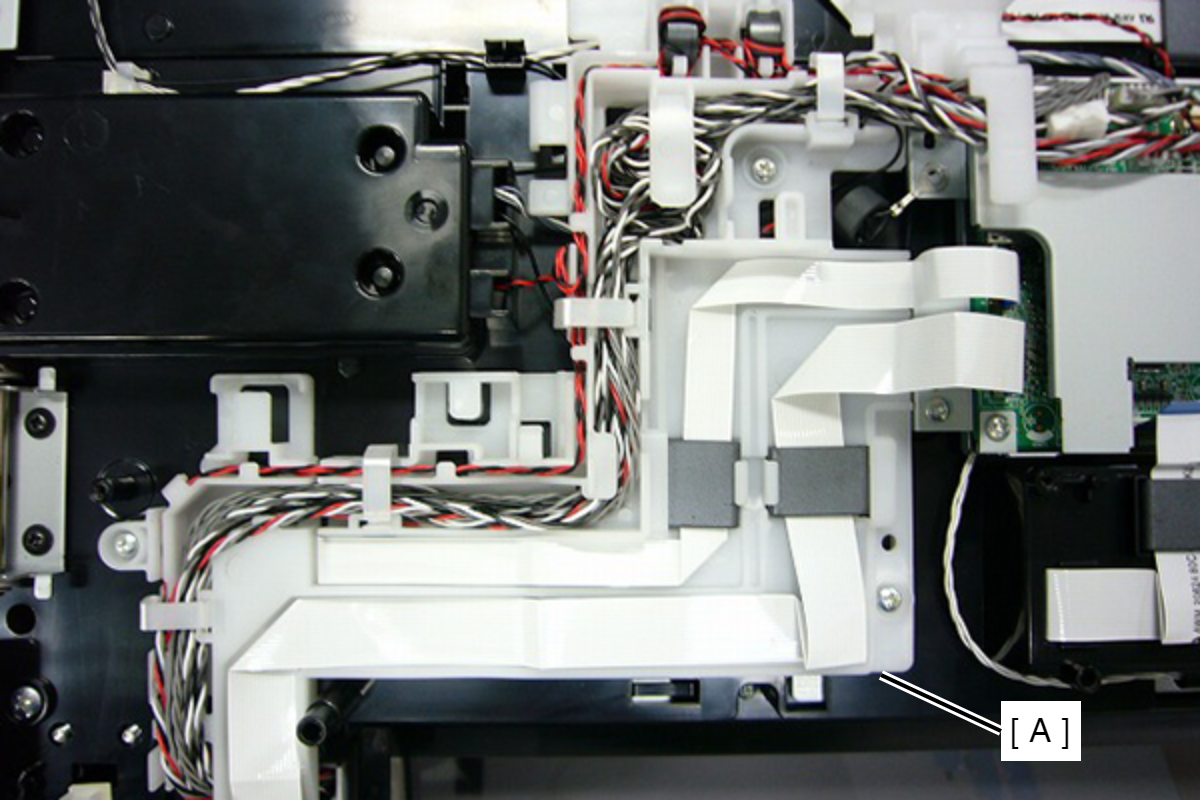
- Remove all the cables and FFCs from the ADF/SCN Harness Holder (A).
- Remove the three screws, then remove the ADF/SCN Harness Holder (A).
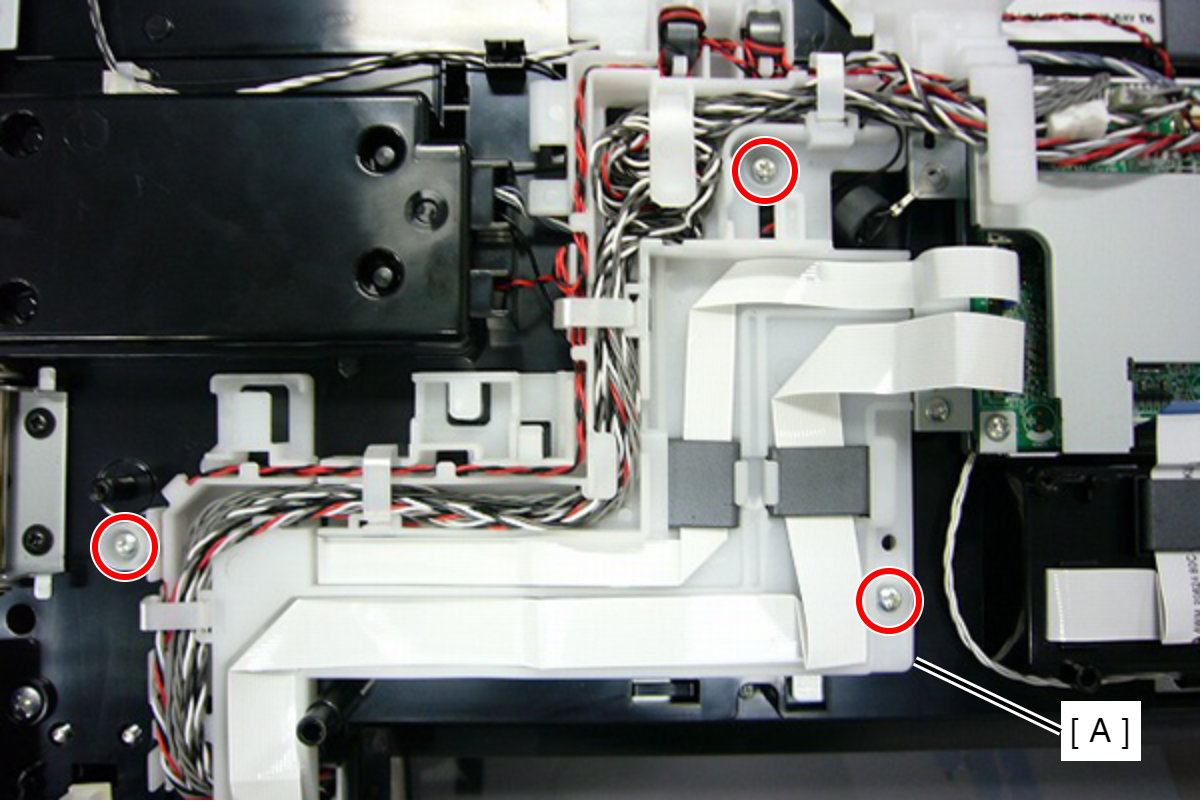
- : C.B.P-TITE-SCREW-3x10-F.ZN-3C
Assembly / 組み立てCheck the following points, and route the cables and FFCs.
- Pull out the FFC (CN464) (A) from the slit of the ADF/SCN Harness Holder.
- Stick the FFCs with the double side tapes (B).
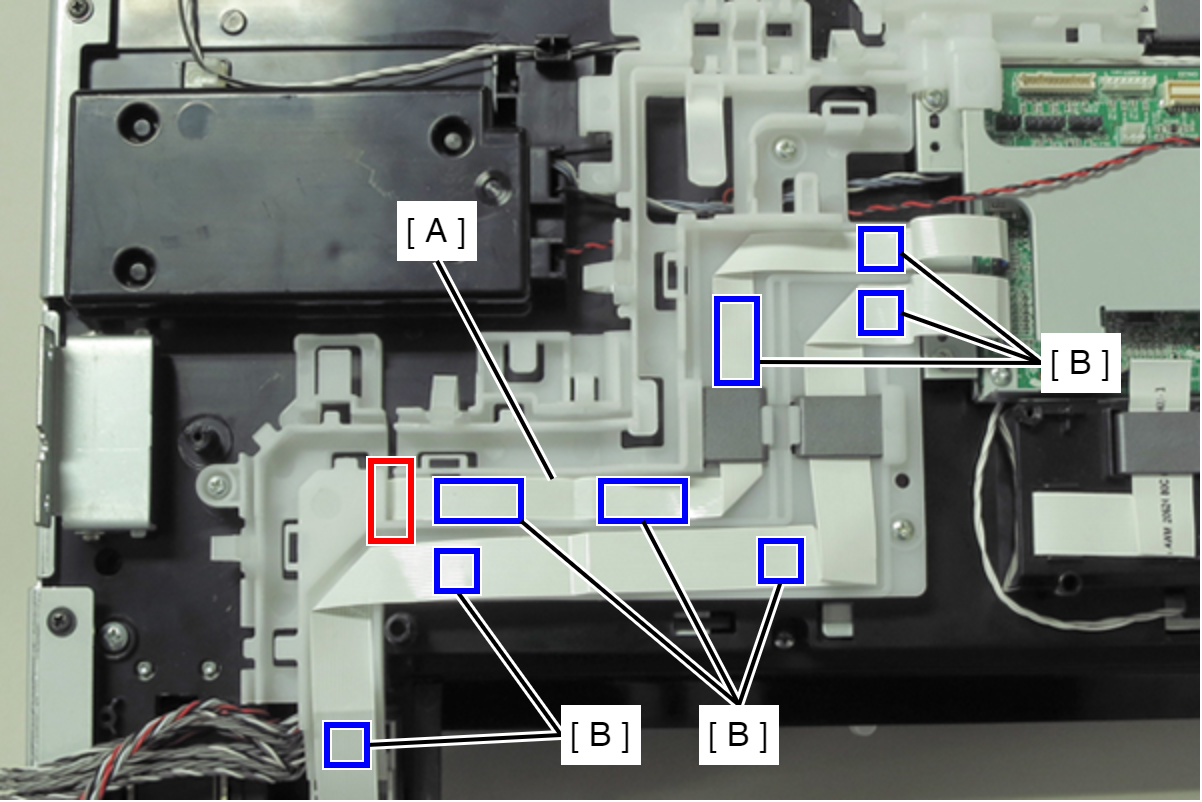
- Set the ferrite core of each cable in the position shown figure.
- Set the surplus (A) of the cable and the grounding wire in the position shown figure.
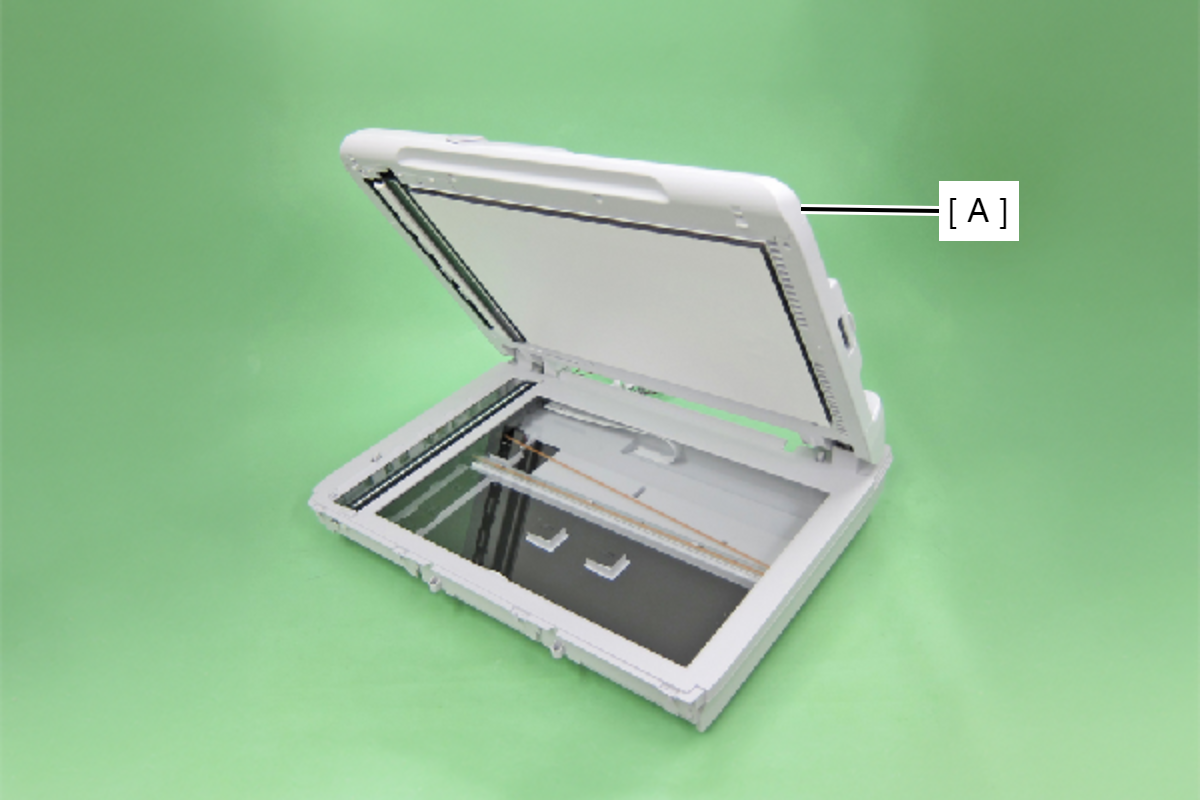
- Open the ADF Unit (A).
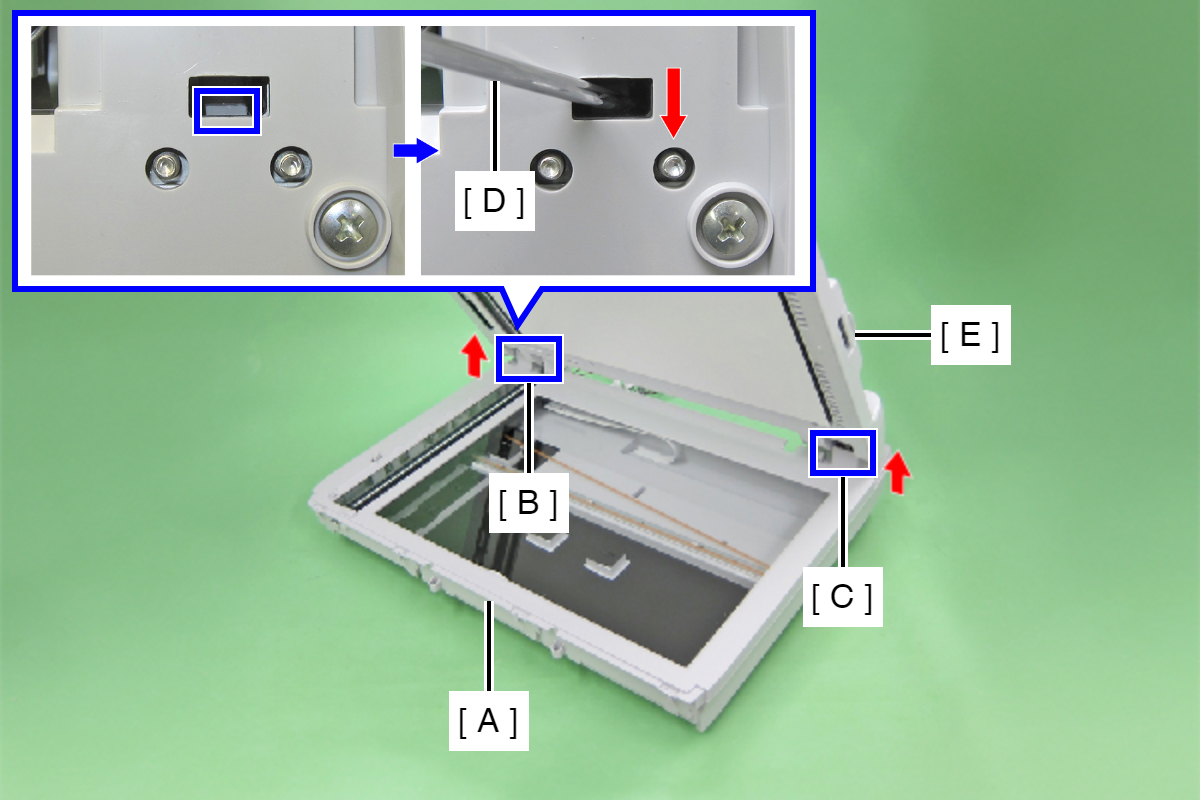
- Pull the ADF Unit (E) upward to remove it while pushing up the hooks fixing the left hinge (B) and right hinge (C) from the bottom of the SCN Unit (A) with the flathead screwdriver (D).
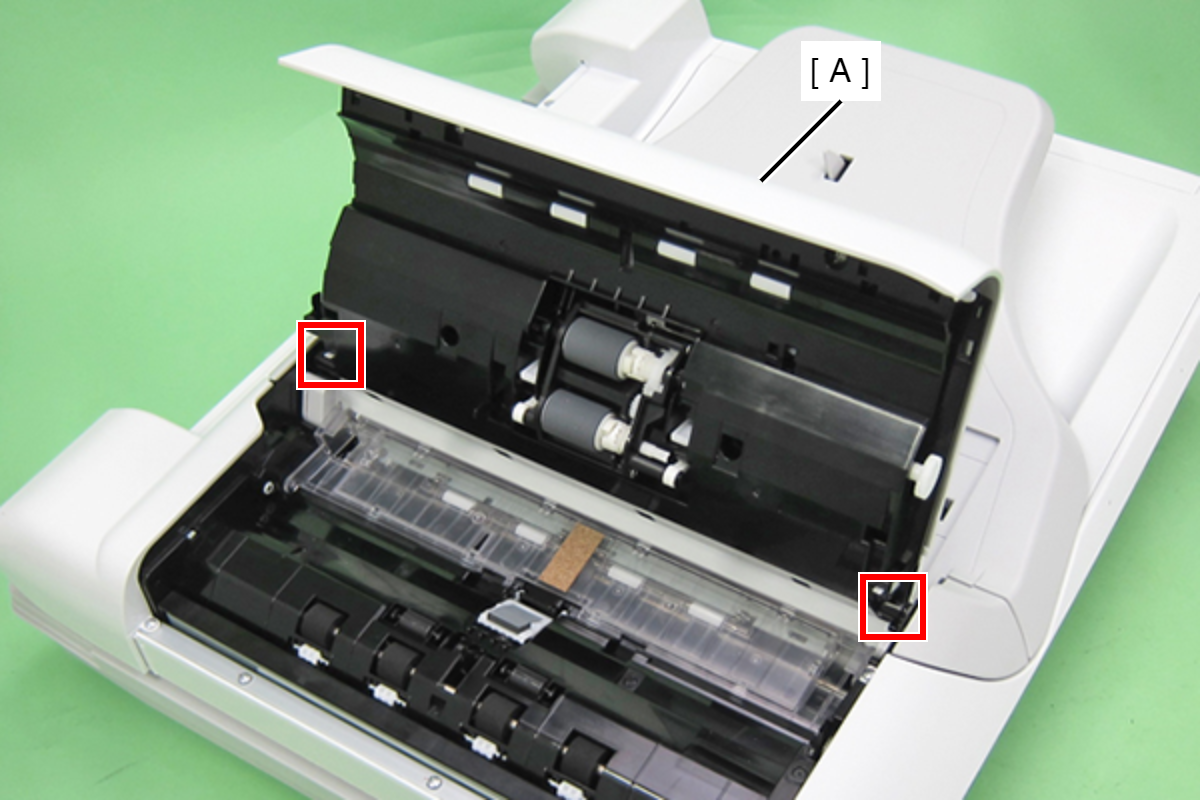
- Disengage the two dowels, then remove the ADF Cover Assy (A).
- Disengage the two dowels, then remove the ASF Cover (A).
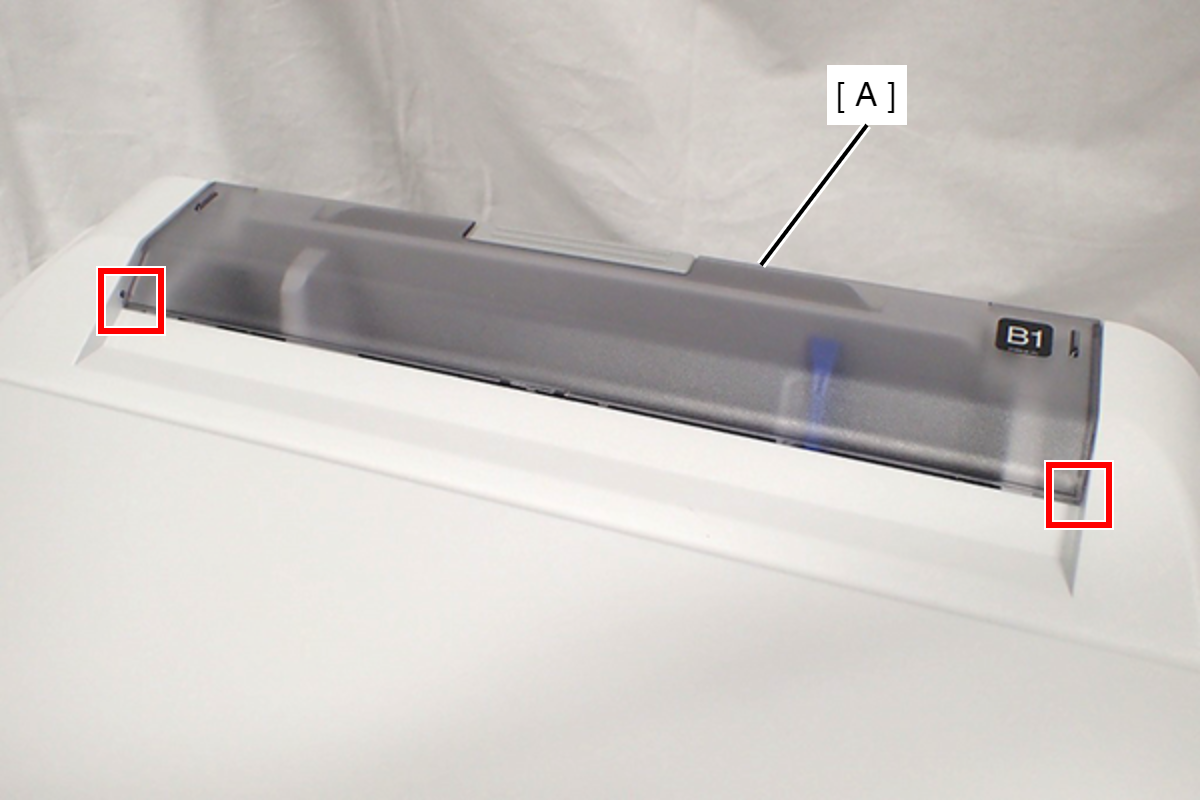
- Remove the two Screw Cover Seals (A).
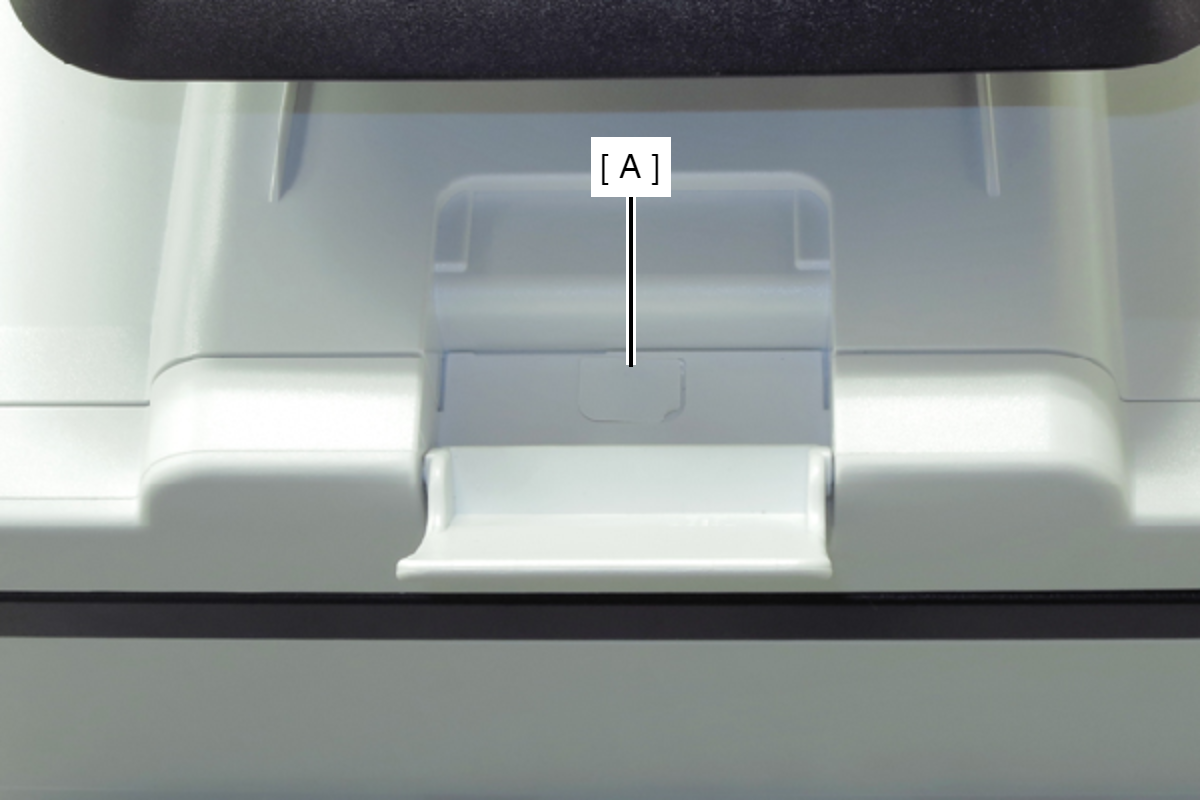
- Remove the three screws.
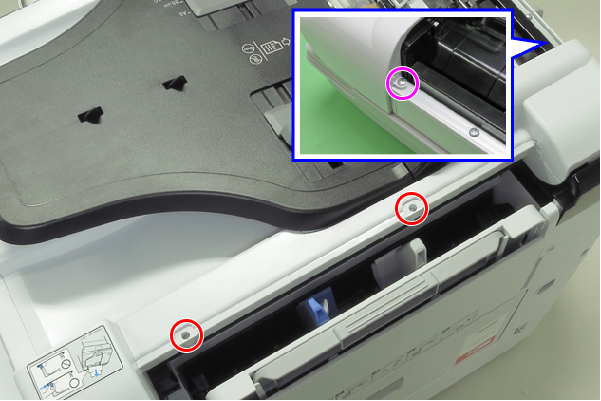
- : C.B.P-TITE-SCREW-3x10-F.ZN-3C
 : C.B.S-TITE-SCREW-3x8-F.ZN-3C
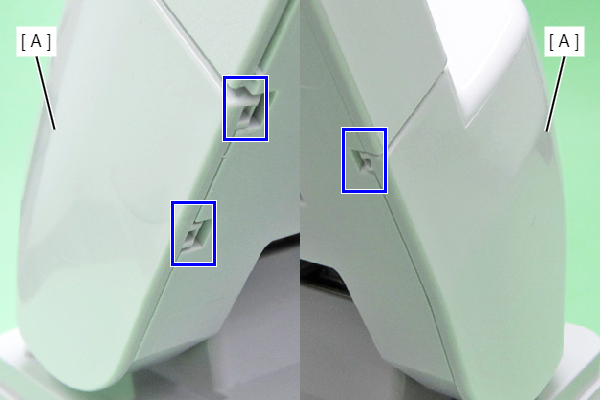
- Disengage the three hooks, and remove the Rear ADF Cover Assy (A).
- Remove the screw, then remove the Front ADF Base (A).
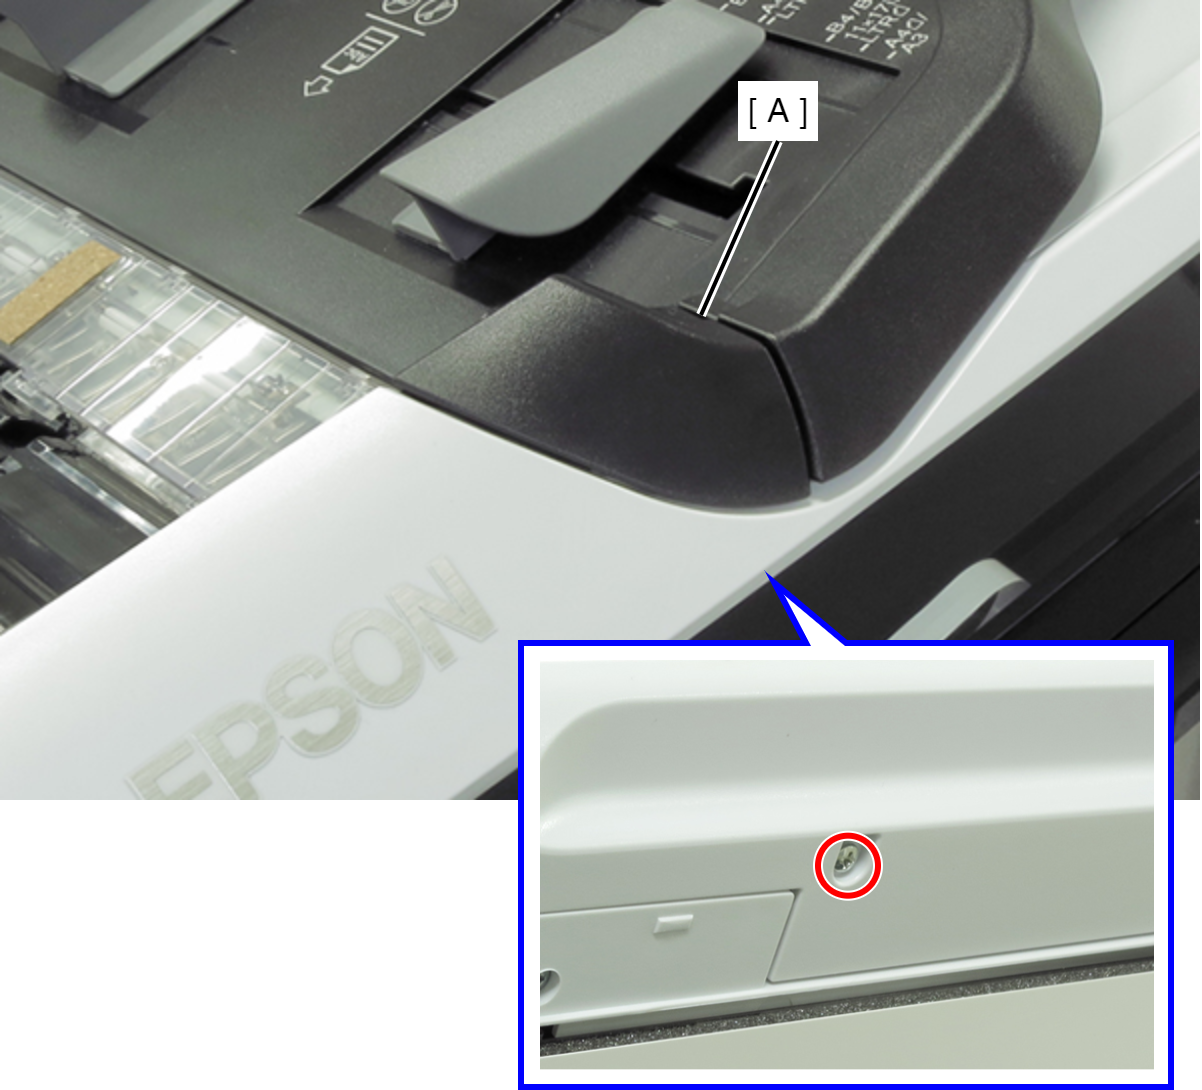
- : C.B.P-TITE-SCREW-3x10-F.ZN-3C
- Remove the three screws of the Front ADF Cover (A) and the screw of the ADF Cover Assy (B).
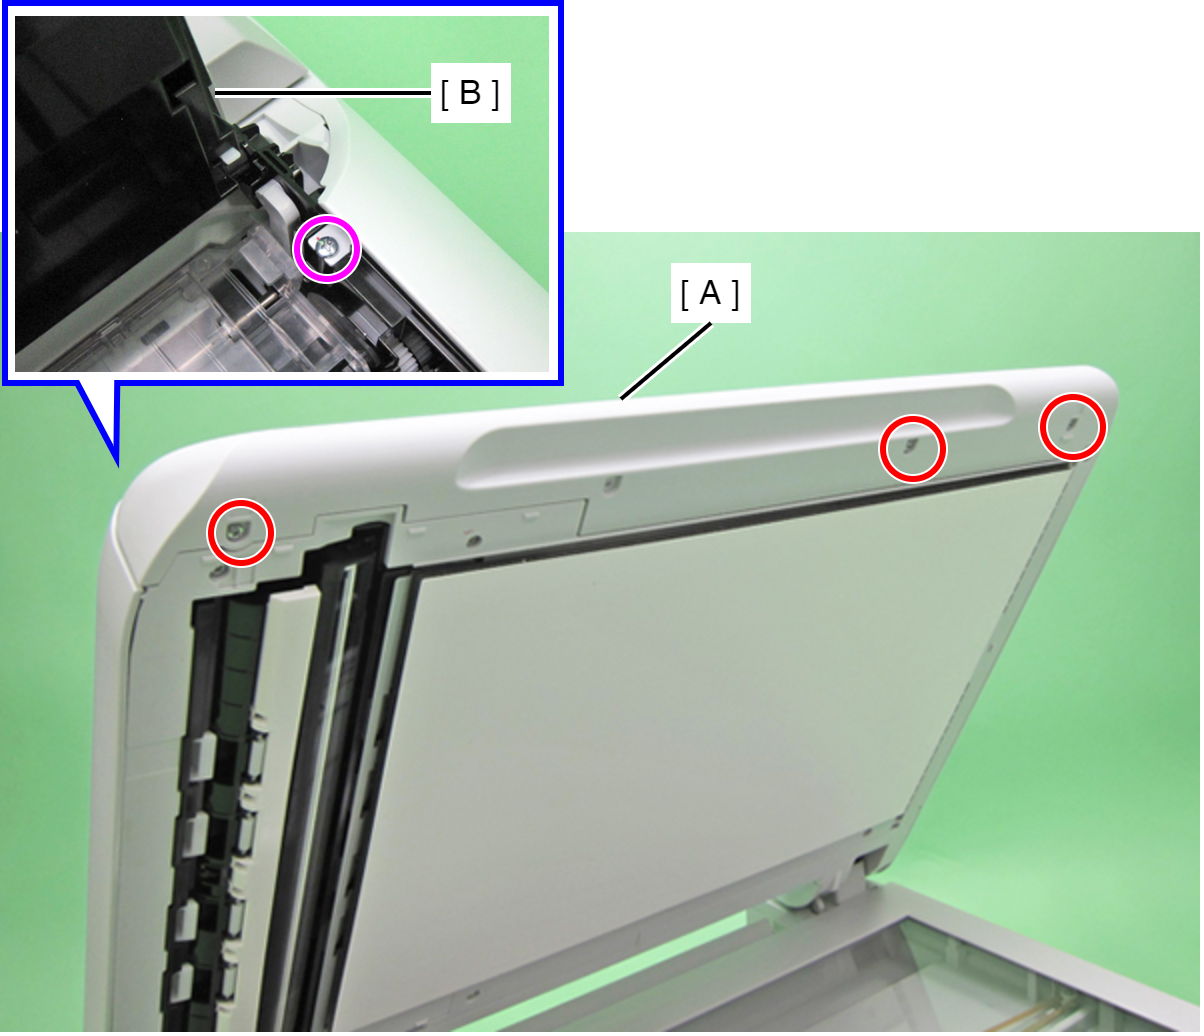
- : C.B.P-TITE-SCREW-3x10-F.ZN-3C
- : C.B.P-TITE-SCREW-W2-3x10-F.ZN-3C
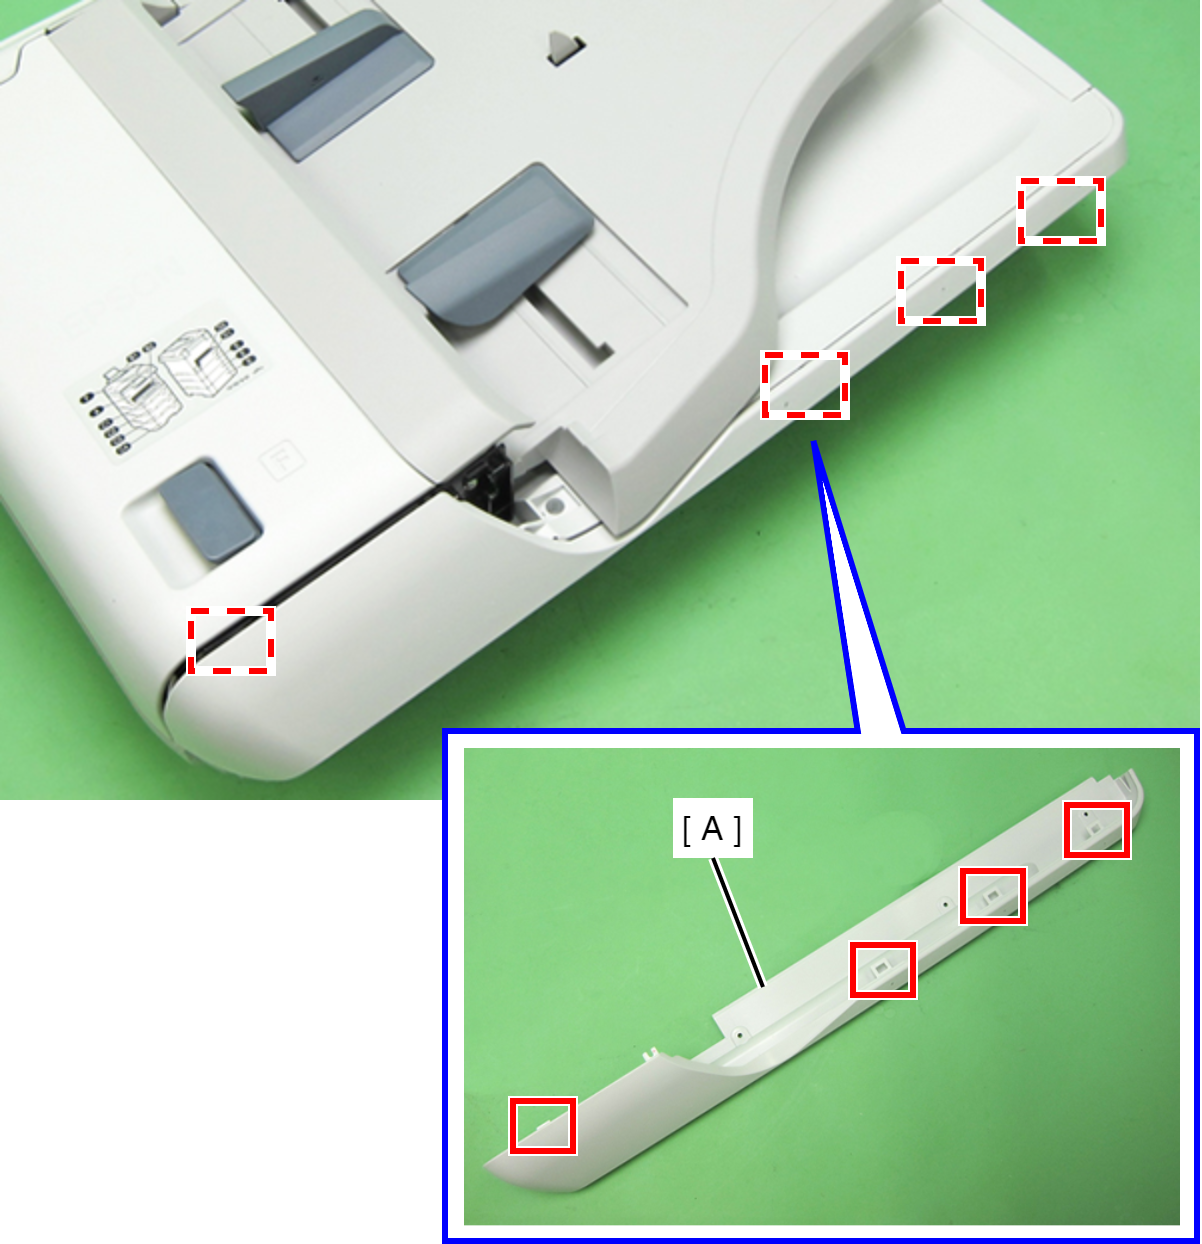
- Disengage the four hooks, and remove the Front ADF Cover (A).
- Release the cables (C) of the grounding wire (B) and the Top ADF Document Support Assy from the Cable Holder (A).
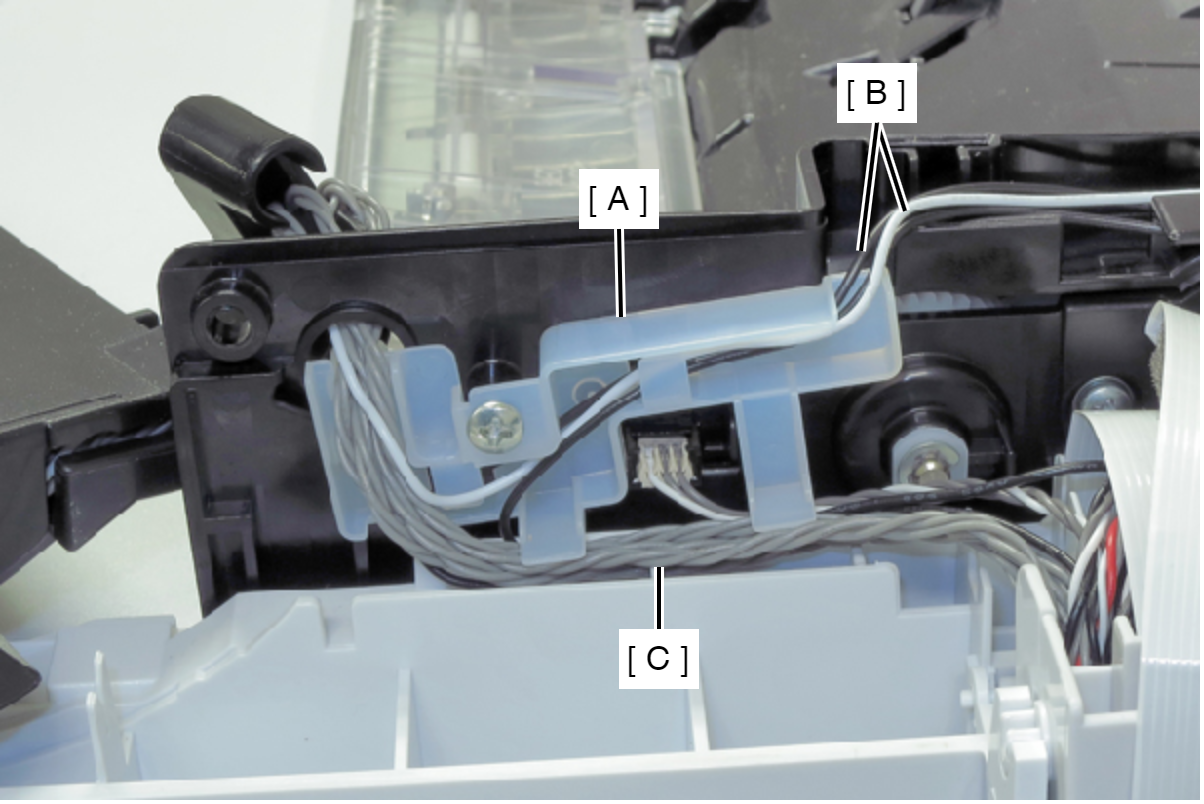
- Remove the screw, then remove the Cable Holder (A).
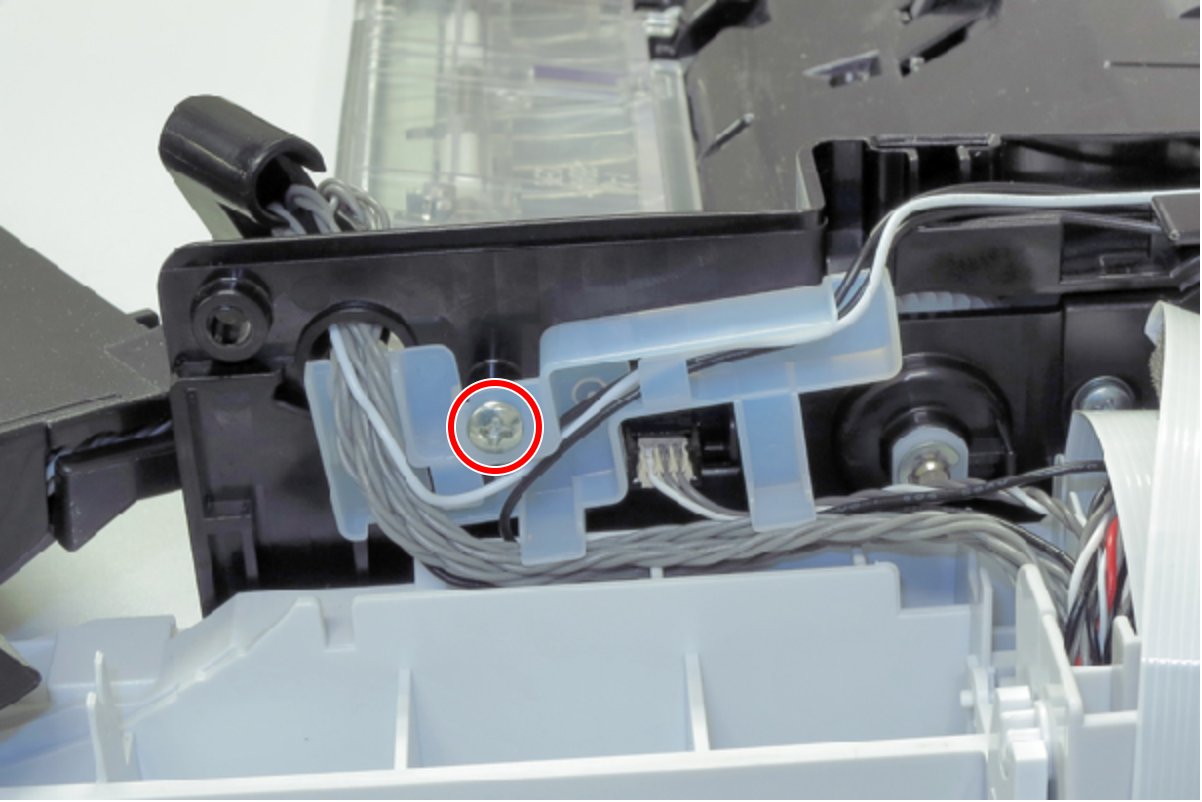
- : C.B.P-TITE-SCREW-3x8-F.ZN-3C
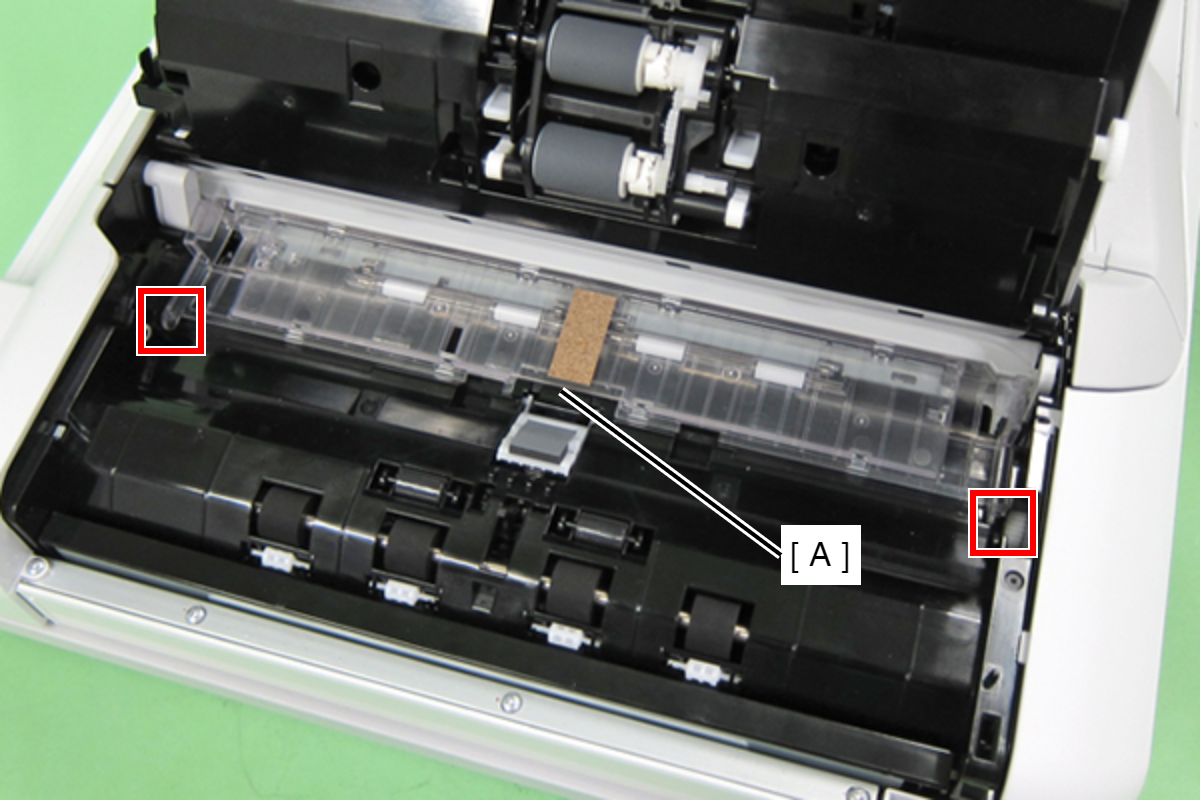
- Disengage the two dowels, and then remove the ADF PF Support Guide (A).
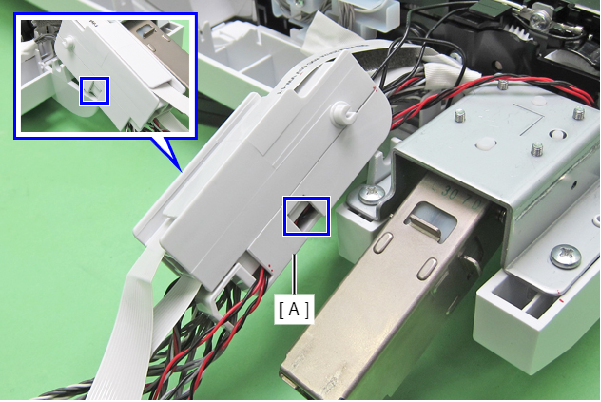
- Disengage the two hooks and separate the ADF Hinge Guide (A).
 Assembly / 組み立て
Route the cable without slackness when installing the ADF Hinge Guide.
- Take care not to catch the cables during installation.
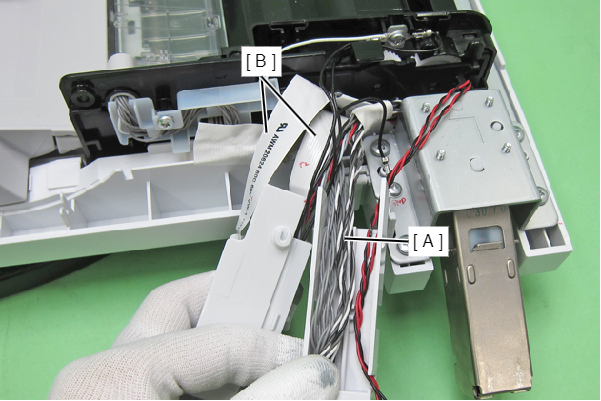
- Release the cables (A) and FFCs (B) from the ADF Hinge Guide.
- Release the cables (A) of the Top ADF Document Support Assy.
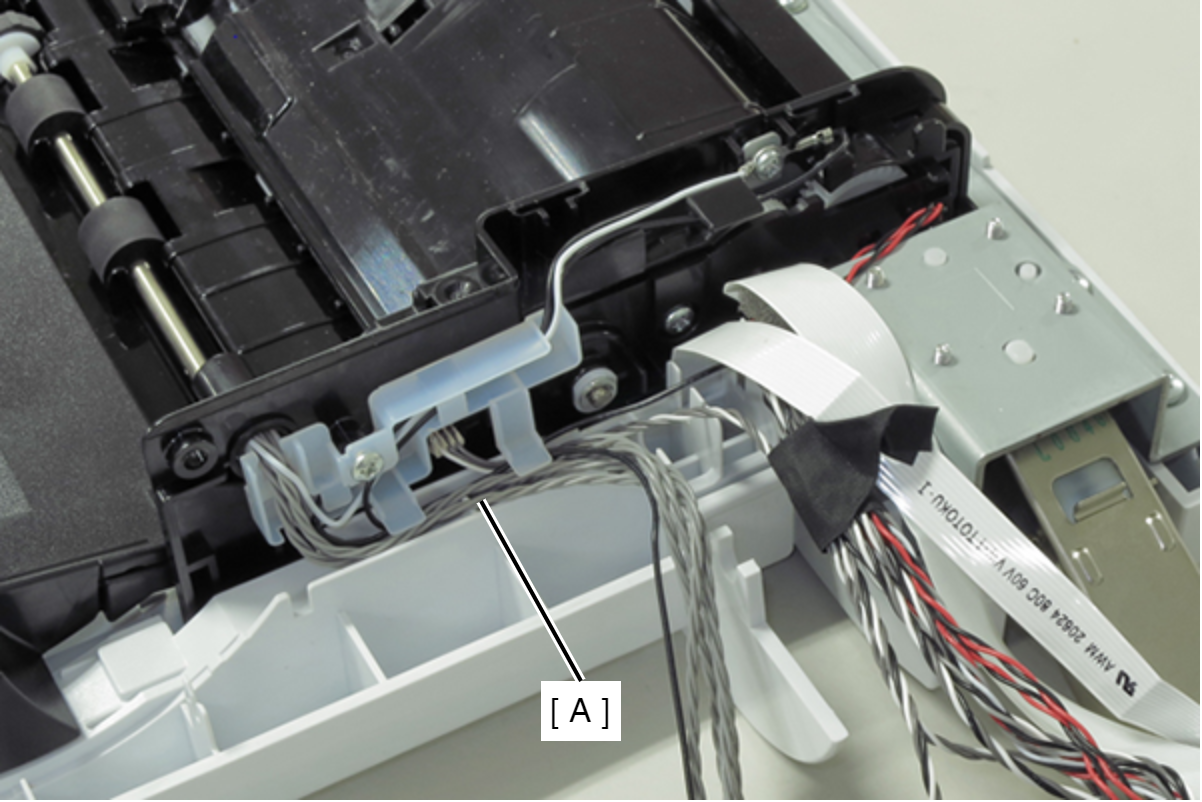
- Remove one screw, then release the Grounding Wire (A).
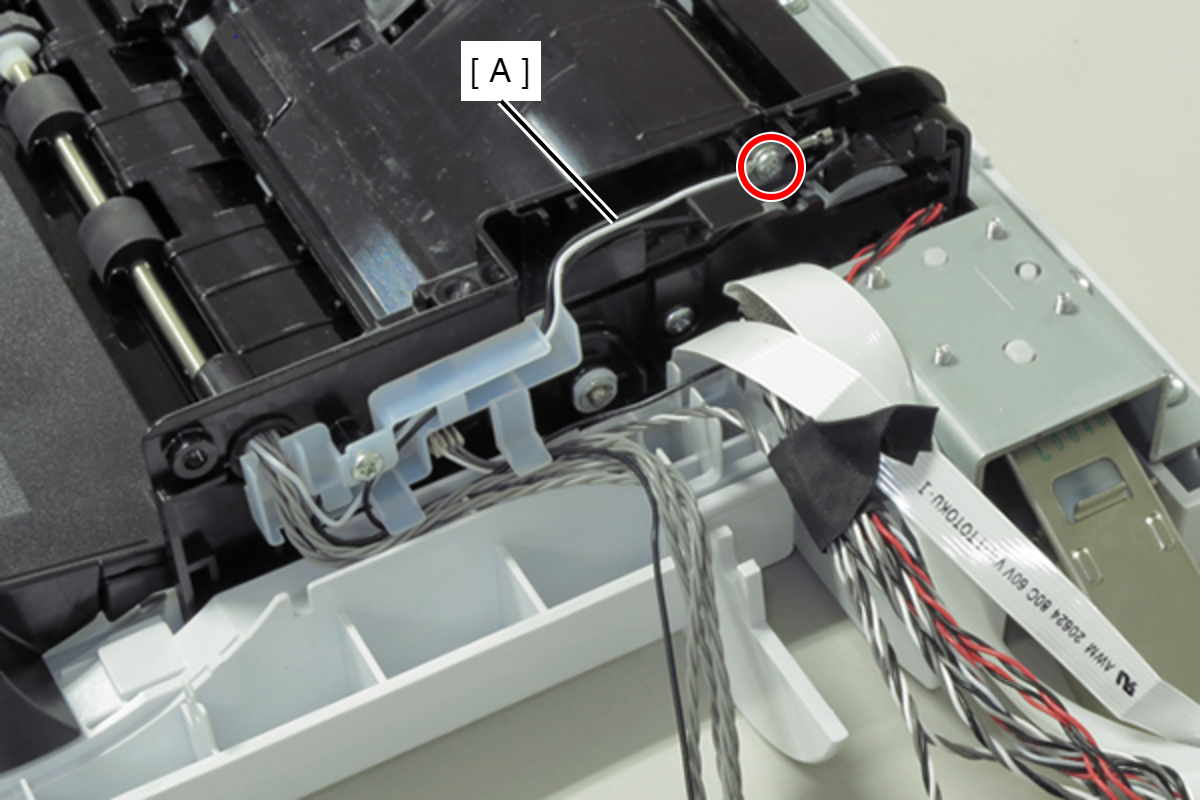
- : C.B.S-TITE-SCREW-3x6-F.ZN-3C
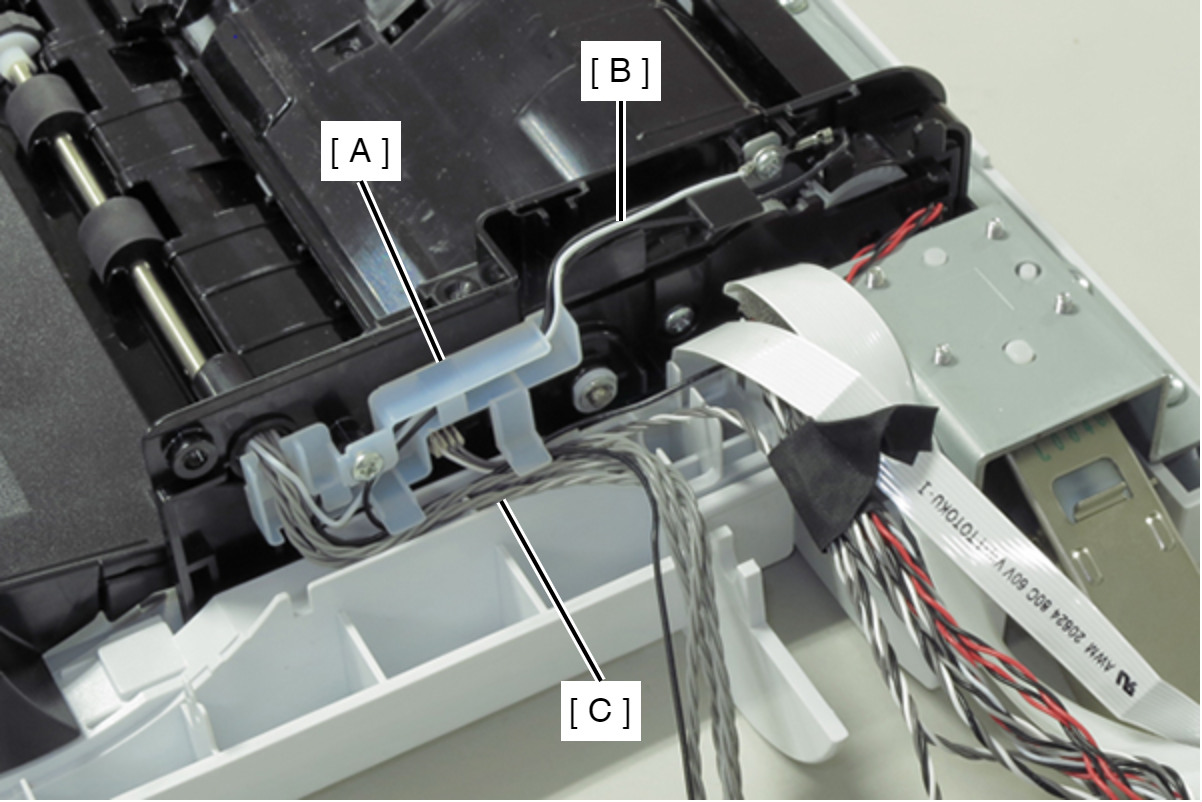
- Release the cables (C) of the grounding wire (B) and the Top ADF Document Support Assy from the Cable Holder (A).
- Remove the screw.
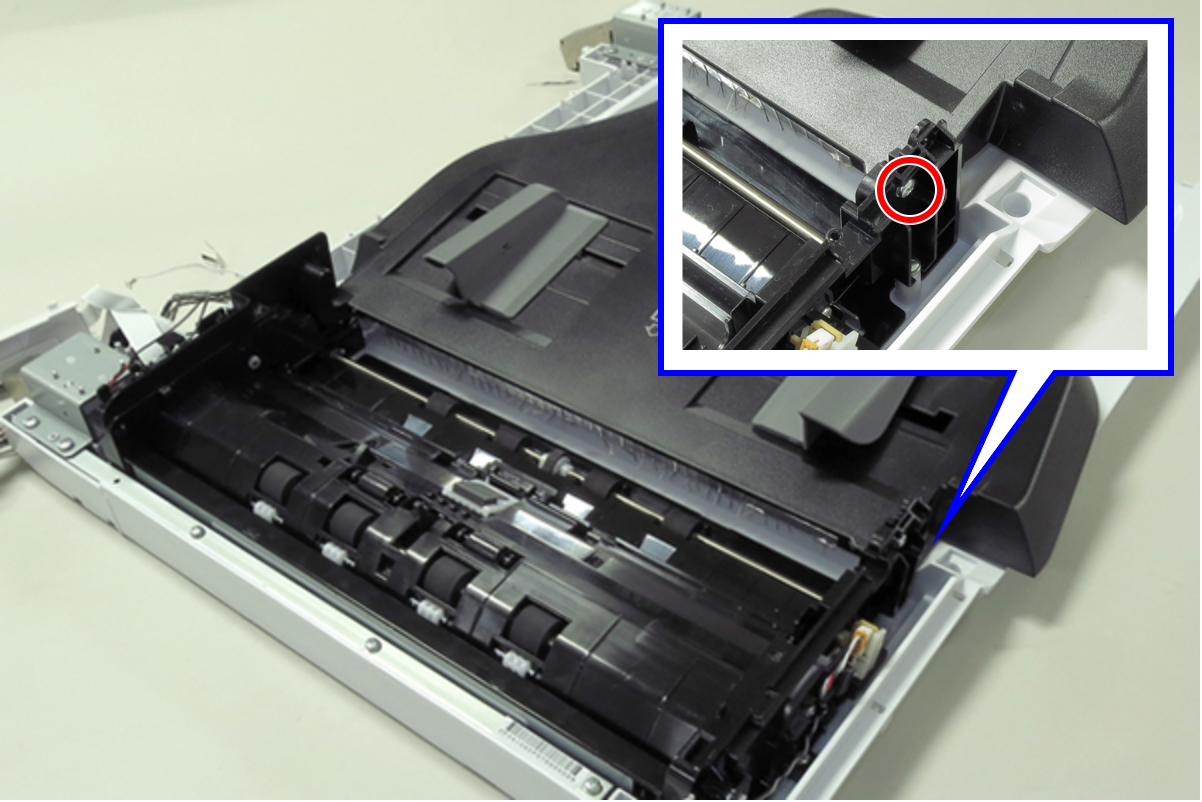
- : C.B.P-TITE-SCREW-W2-3x8-F.ZN-3C
- Remove the shaft (C) of the Top ADF Document Support Assy (B) from the hole of the Right ADF Base Gear Cover (A).
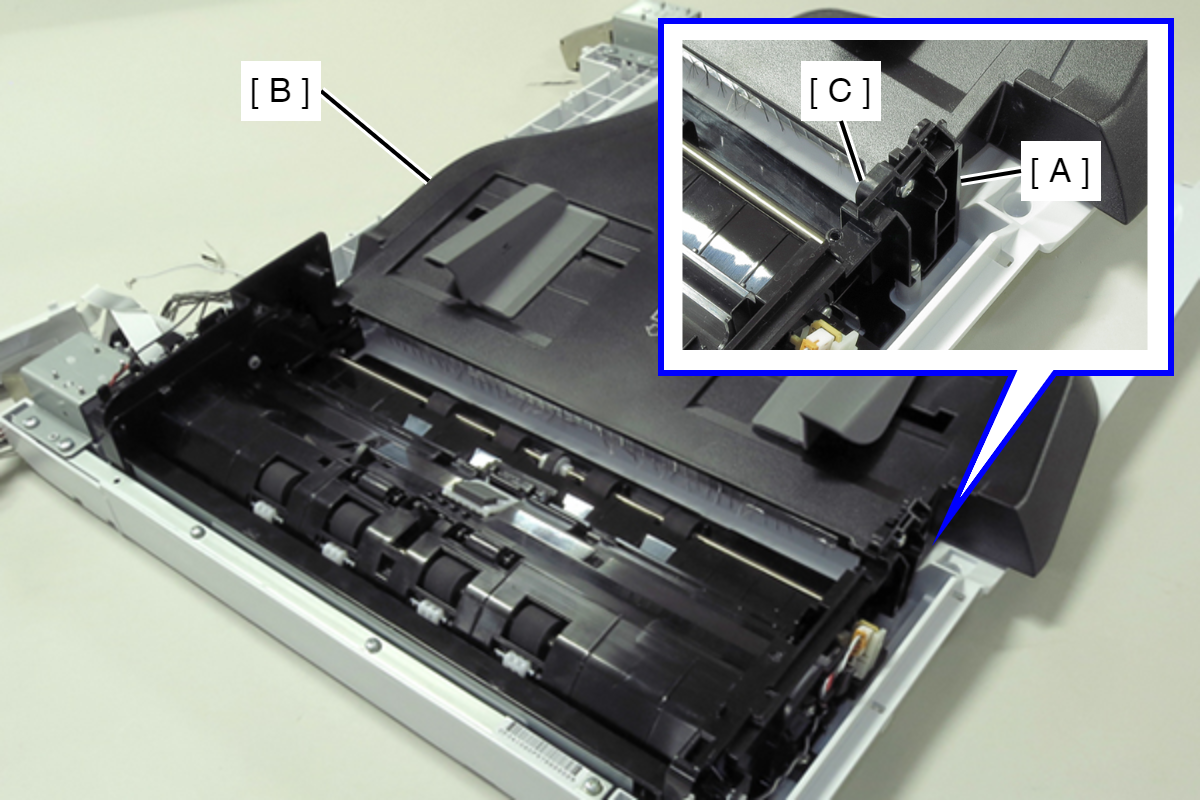
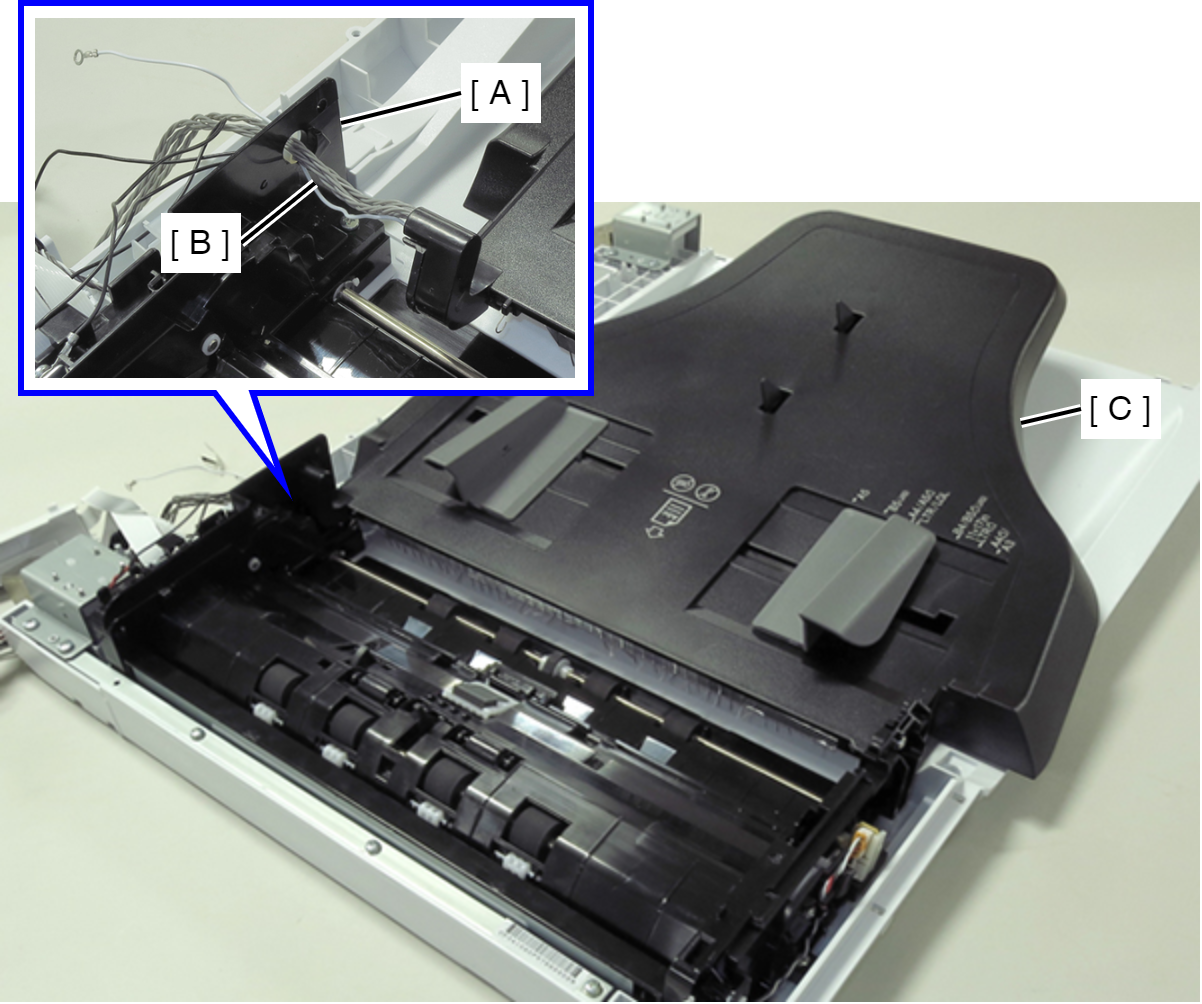
- Pull out the cables (B) and the grounding wire (B) through the hole of the ADF Base Unit (A), and remove the Top ADF Document Support Assy (C).
- Remove the three screws, then remove the Bottom ADF Document Support (A).
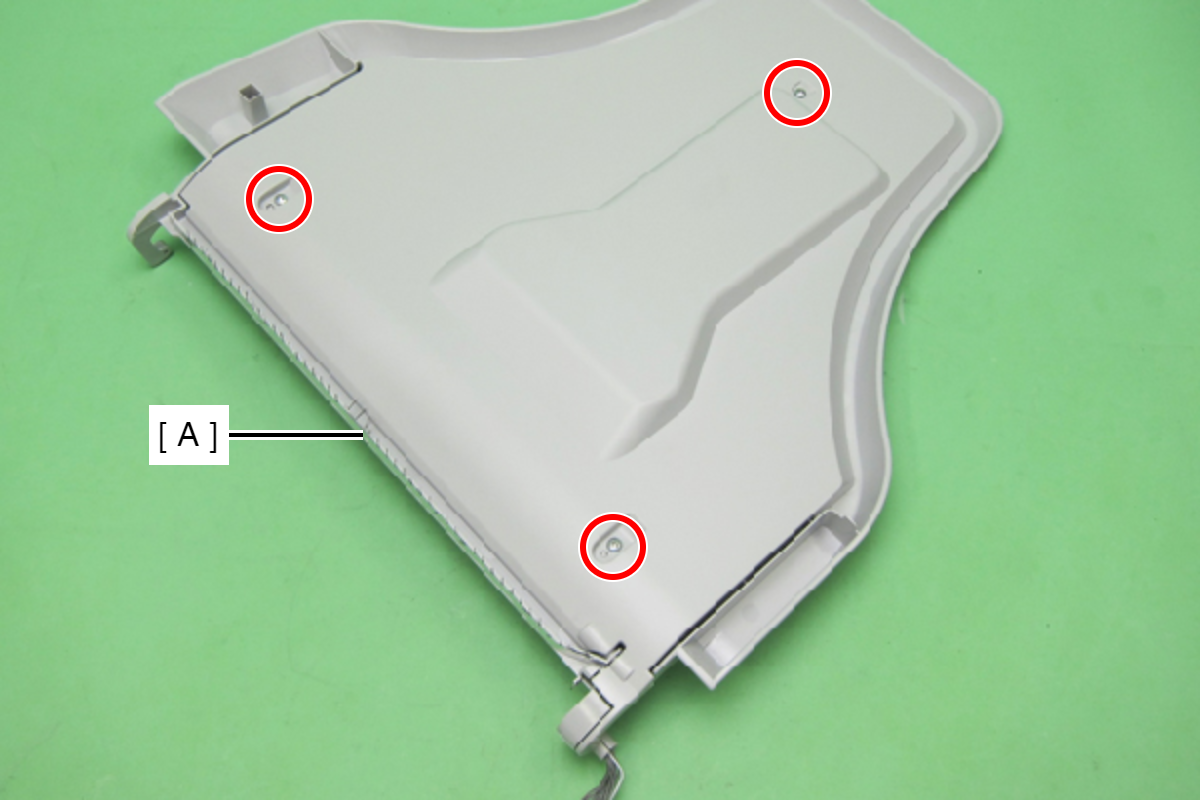
- : C.B.S-TITE-SCREW-3x6-F.ZN-3C
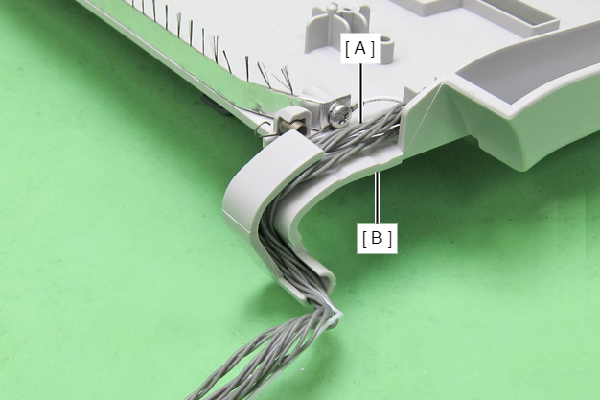
Assembly / 組み立てRoute the cables (A) of the Top ADF Document Support Assy through the Top ADF Document Support Assy (B) as shown below.
- Remove the screw, then remove the Sensor Holder Assy (A).
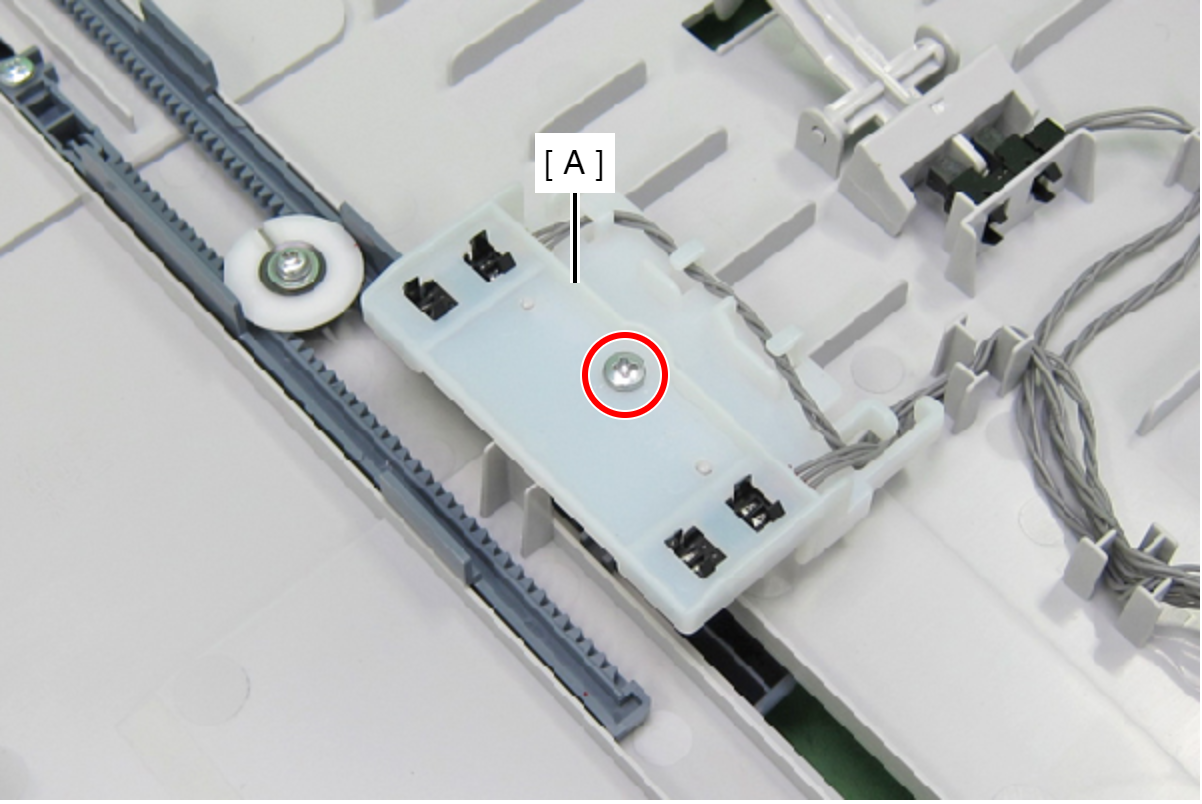
- : C.B.P-TITE-SCREW-3x10-F.ZN-3C
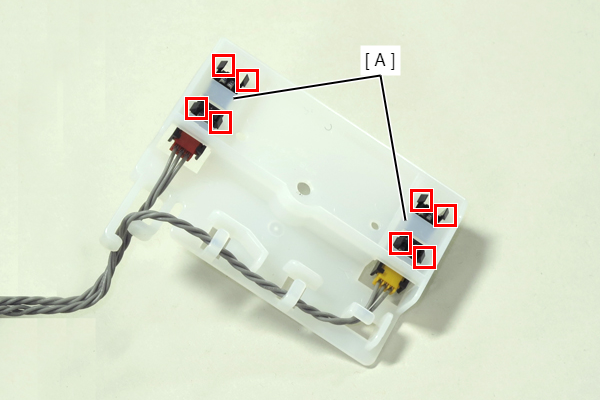
- Disengage the four hook, then remove the two ADF Document Size Sensors (A).
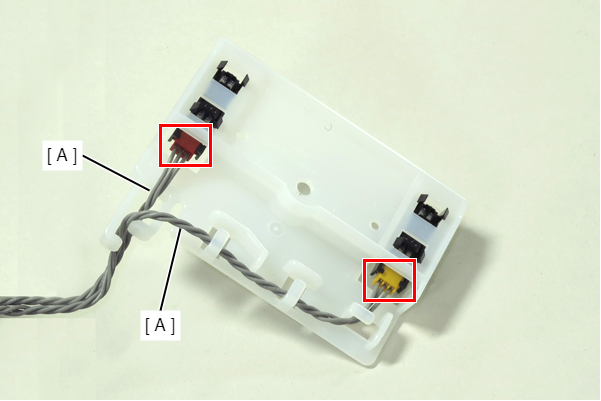
- Disconnect the cables from the sensor connector (A).
-
 : C.B.P-TITE-SCREW-3x10-F.ZN-3C