
Ink bleed
Symptom
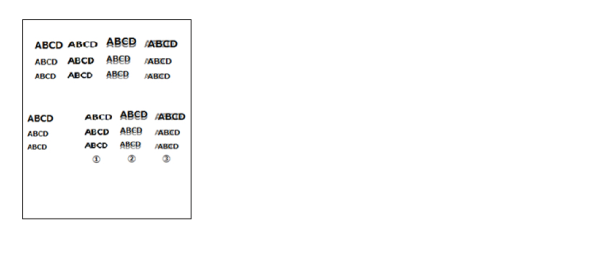
- Characters and images are distorted or blurred.
Suspected cause
- ADF/SCN Unit failure
- Paper matter
- Ink
- Miss-match the Printer setting and print paper.
- Print head failure
- Temp./Humidity Sensor failure
- PG adjustment value deviation
Troubleshooting
| Step | Confirmation and action | Yes | No |
|---|---|---|---|
| 1 | Check whether printing or copying Check whether the symptom occurs with printing or with copying. |
Occurs with printing and copying. |
Occurs with copying only Refer to ADF/scanner trouble |
| 2 | Check implementation of printing troubleshooting (answer and handing an incoming call) Check implementation of printing troubleshooting at an incoming call. |
Go to step 3 |
Get a service engineer to perform printing troubleshooting. If nozzle missing is not improved after performing the above, go to step 3. |
| 3 | Check the settings (print settings, paper type) (answer and handing an incoming call) Check the print settings from the service information portal. |
This is to be dealt with by a service engineer. Go to step 4 |
If nozzle missing is not improved after performing the above, go to step 3. If the symptom is not resolved even after performing printing troubleshooting, judge that this needs to be dealt with by a service engineer, and go to step 4. |
| 4 | Check the reproducibility of settings on genuine paper Print on standard paper (genuine paper), and check that there are no distorted or blurred characters. |
Go to step 5 | Explain that the phenomena is due to the paper, and recommend use of standard paper (genuine paper). |
| 5 | Check the ink packs Check that genuine ink packs are attached. |
Go to step 6 | Recommend using genuine ink packs. Check whether or not the corresponding error occurs by using genuine packs. If the symptom continues to occur after changing to the genuine ink packs, go to step 6. |
| 6 | Check the nozzle check pattern Print nozzle check patterns and check whether there are nozzles missing or deflection.
|
Go to step 7 | Obtain the information as follows from the service status sheet and execute head cleaning according to the nozzle missing state check matrix table.
* If nozzle missing is not improved, refer to Nozzles missing. If the symptom is not improved after performing the above, go to step 7. |
| 7 | Check the PG Is the PG within the specified value range (1.35 ±0.05 mm)? |
Go to step 8 | Perform the " Check the PG". If the symptom continues to occur after performing the PG adjustment, go to step 8. |
| 8 | Check the temperature Check that the head thermistor and temperature and humidity sensor temperatures are appropriate. Execute the following items from the Service Support mode then. Appropriate temperature: (2) - (1) = -3 to +5[ºC] * The head temperature becomes very hot after continuous printing so wait about 1 hour after printing before performing the check. |
Contact the Epson Service Support department. |
|