
Print Position Offset In Feed Direction
Symptom
- The image is offset in the sub scanning (feed) direction.
(Top and bottom margins are not equal.) - Top or bottom edge of the image is cut off.
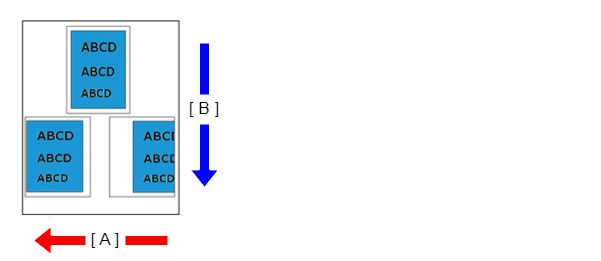
-
- A: Main scanning line (CR operation) direction
- B: Sub scanning line (feed) direction
Suspected cause
- The paper that is being used is inappropriate
- The paper settings of main unit or printer driver are not appropriate.
- PE sensor lever
- PE Sensor
- PW sensor problem
Troubleshooting
| Step | Check and measure | Yes | No |
|---|---|---|---|
| 1 |
Check the paper Check that suitable paper (paper is not printed or does not have any punch holes, etc.) is being used. Has the appropriate paper been used? |
Go to step 2 |
Use appropriate paper, as the printer cannot properly detect paper with pre-printed or perforated paper. |
| 2 | Check the settings Check the settings of the main unit/printer driver listed below.
Are the printer/driver settings appropriate? |
Go to step 3 |
Change the settings. |
| 3 | Check the feed rollers and conveyance rollers Check the state of the feed rollers and conveyance rollers as shown below.
Nozzle condition is excellent? |
Go to step 4 |
Clean or replace the feed rollers. See "Retard Roller". |
| 4 | Check the PE sensor lever Check that the state and movement of the PE sensor lever are normal.
Nozzle condition is excellent? |
Go to step 5 |
Replace the PE sensor lever |
| 5 | Check the PE sensor adjustment value Check that the PW sensor process adjustment value is appropriate. |
Go to step 6 | Enter an appropriate value from the adjustment pattern. |
| 6 | Check the PE sensor adjustment value
|
Contact Epson local service representatives. |
If trouble is occurred in “1”, replace the PW sensor |