
Front RIPS Housing
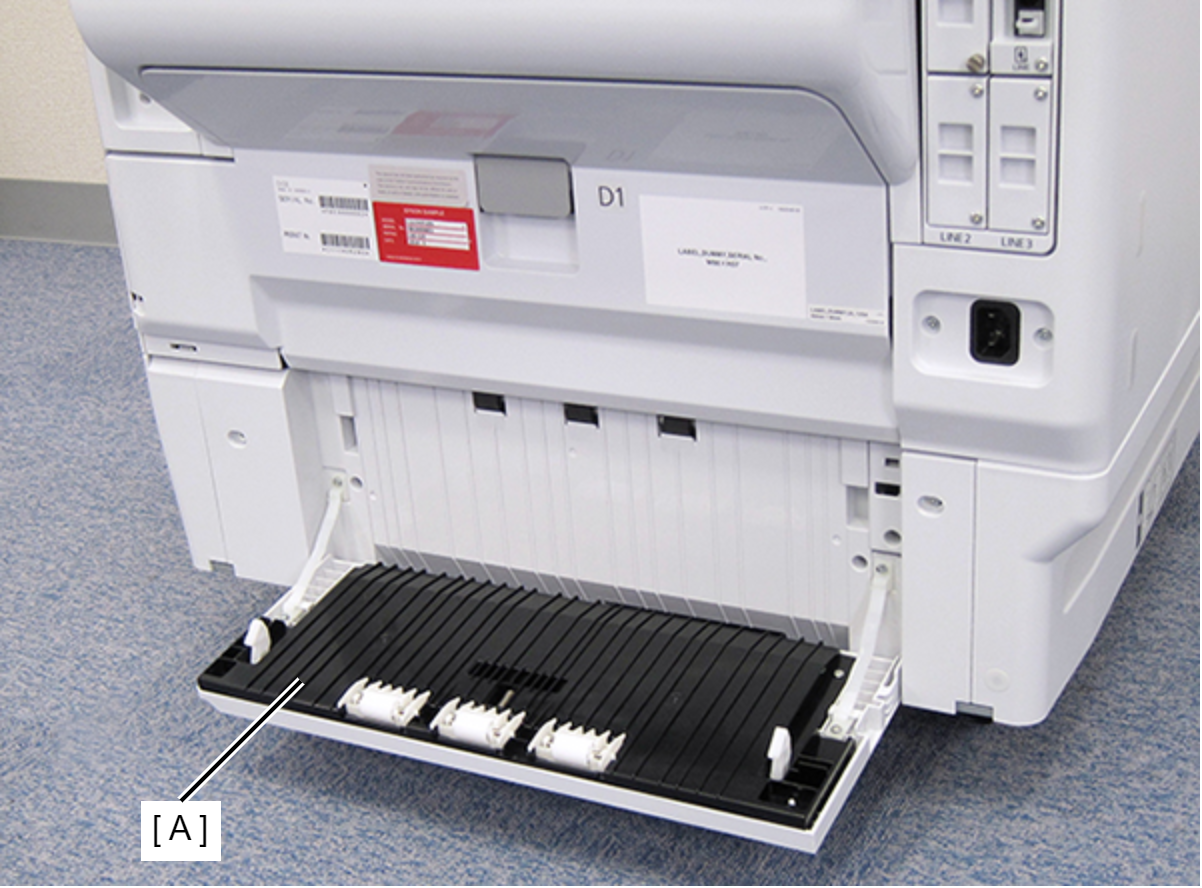
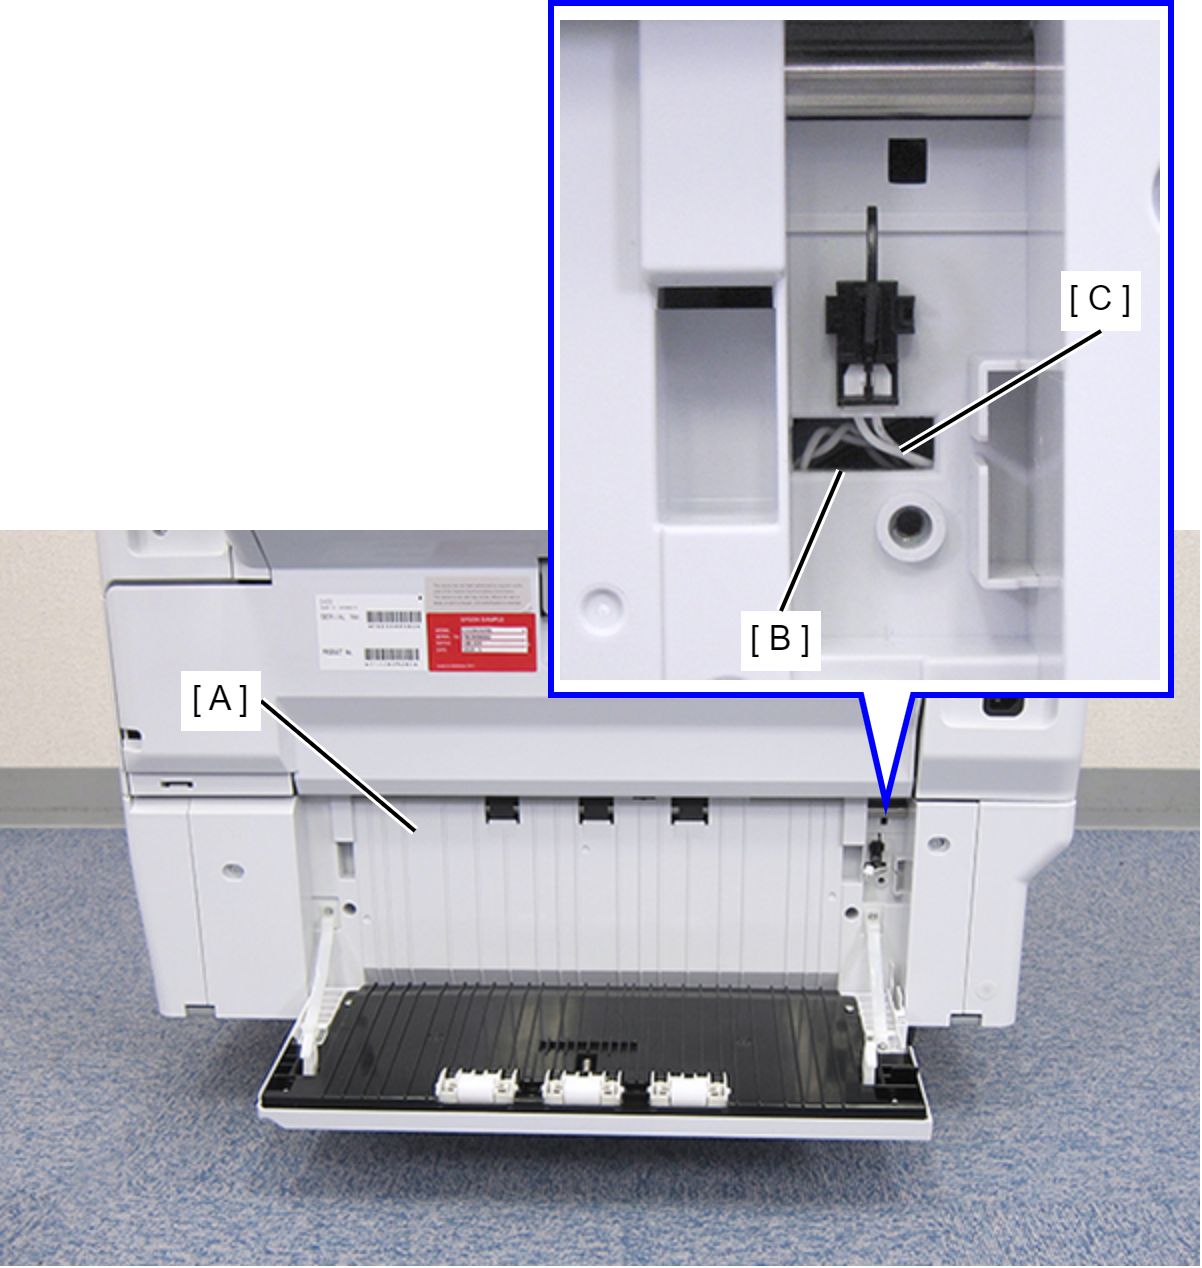
- Open the Paper Jam Clear Cover (A).
- Remove the screw on the rear side of the product, then remove the Paper Jam Clear Cover Holder (A).
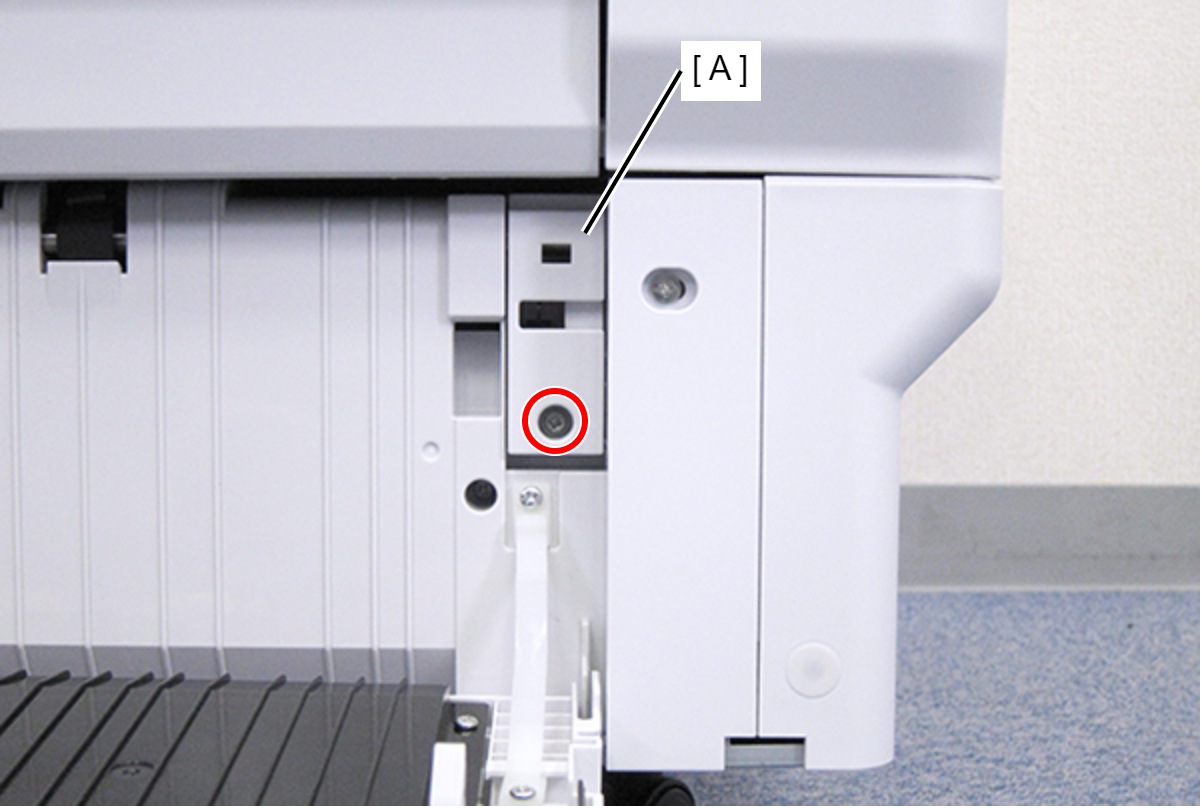
 : C.B.S-TITE-SCREW-3x8-F.ZN-3C
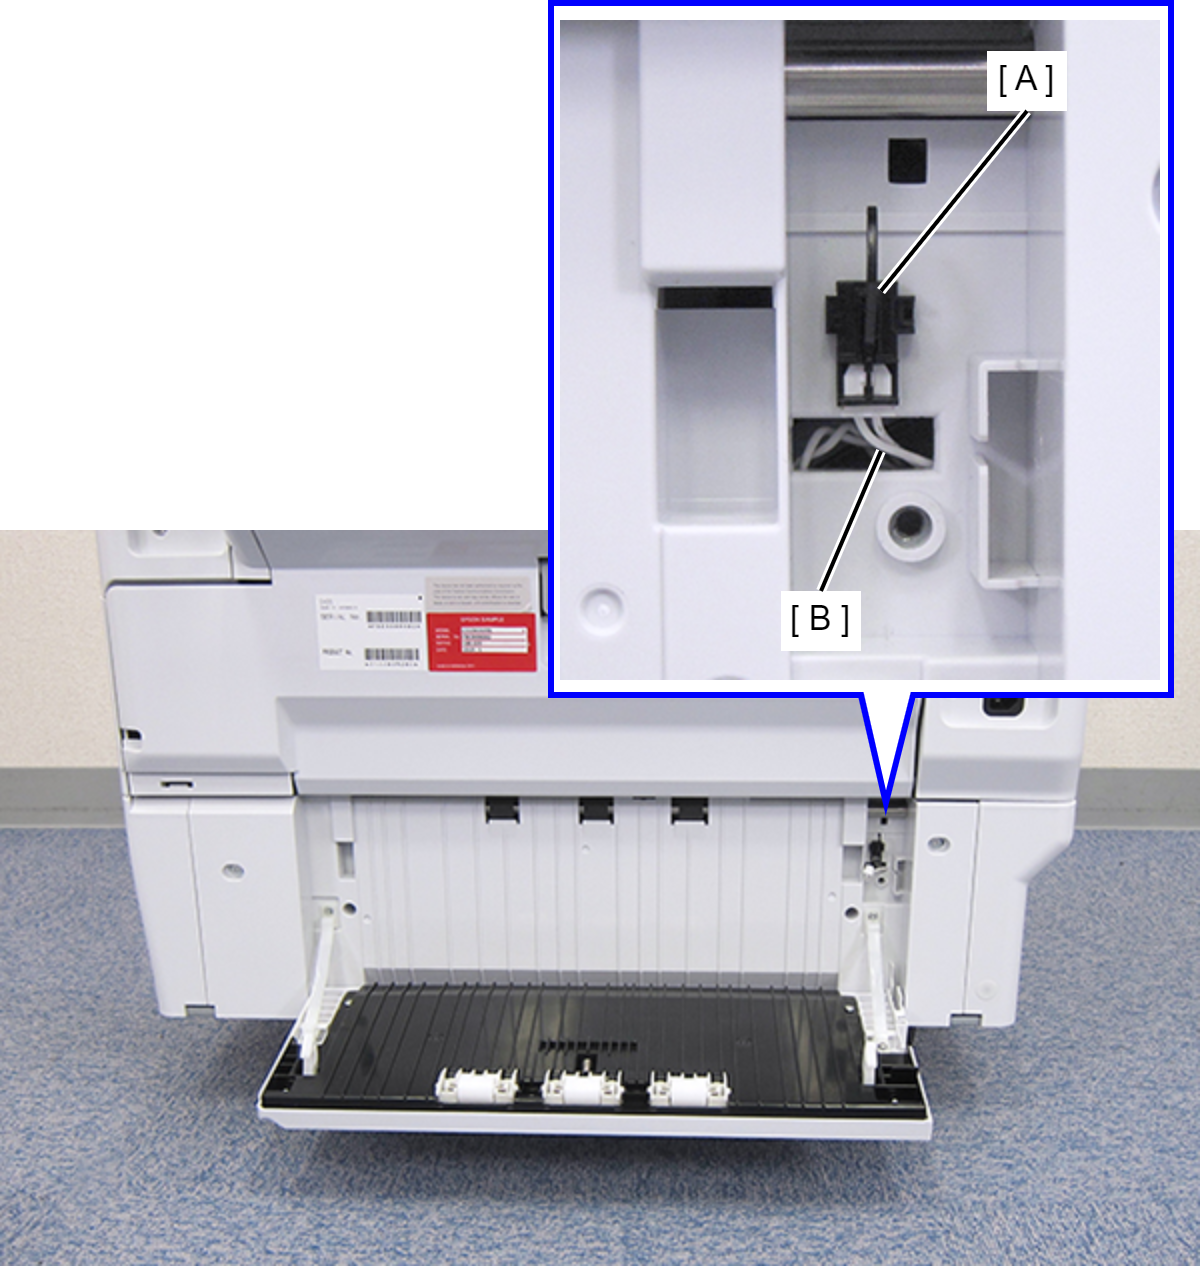
- Disconnect the cable (B) from the connector of the Paper Jam Clear Cover Sensor (A).
- Remove the four screws that secure the Rear RIPS Housing Assy (A).
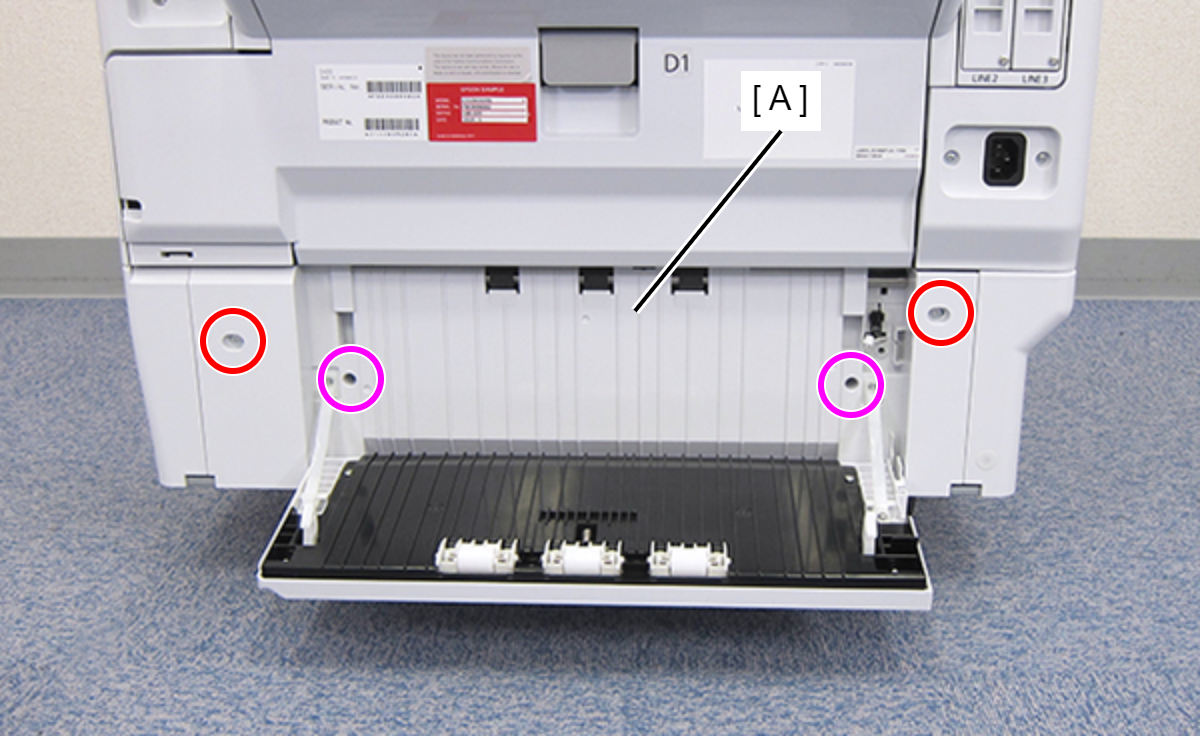
 : C.SHOULDER S-TITE,3X5
 : C.B.P-TITE-SCREW-3x10-F.ZN-3C
- Remove the Rear RIPS Housing Assy (A) pulling out the cable (C) through the hole (B) of the assy.
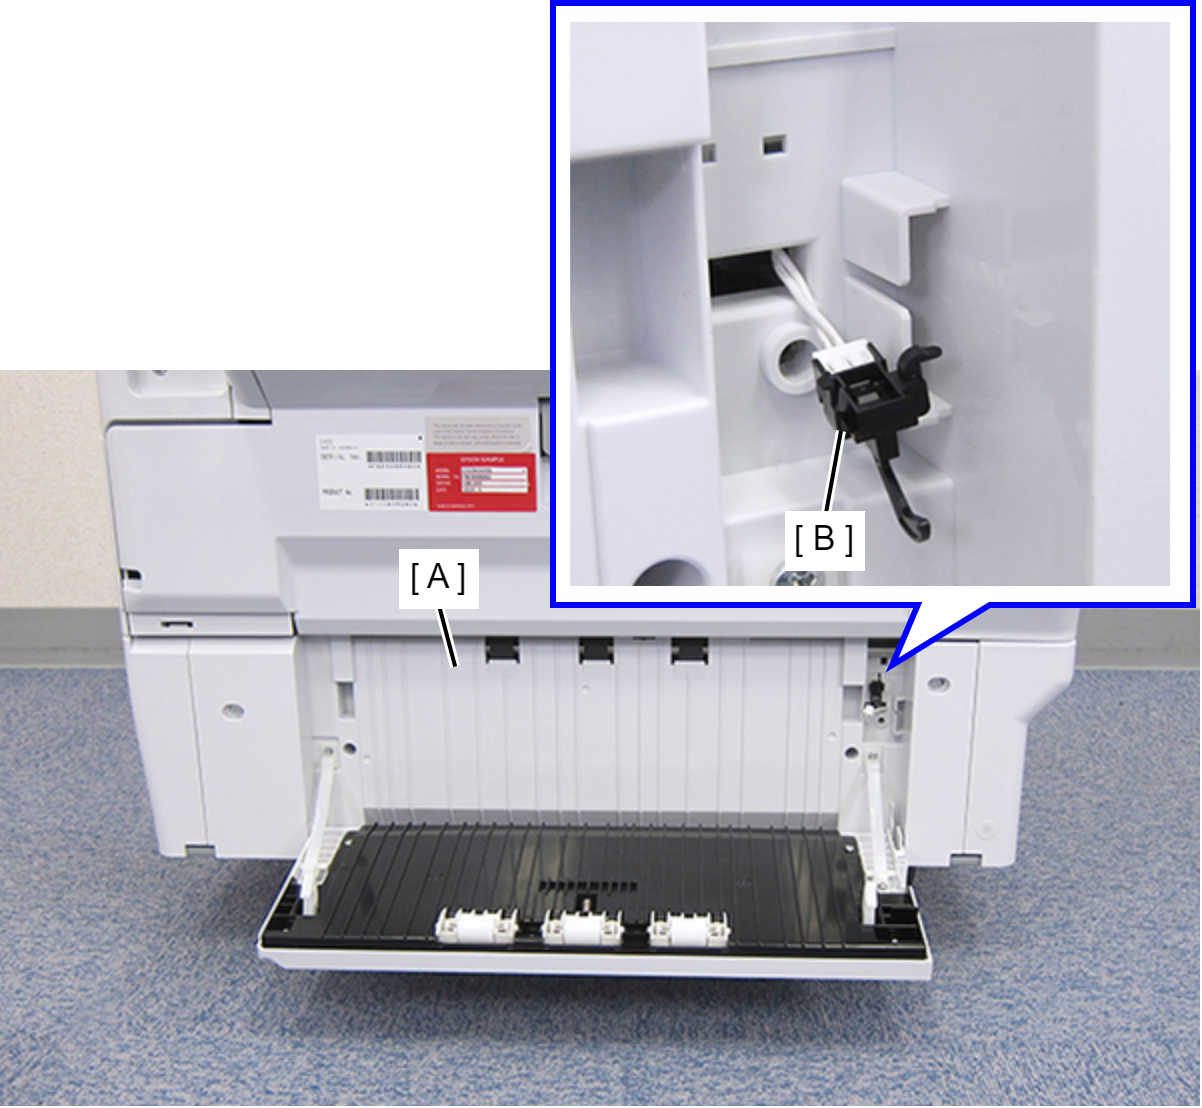
 Assembly / 組み立て
Before reinstalling the Rear RIPS Housing Assy (A), remove the Paper Jam Clear Cover Sensor (B). After connecting the cable, install the sensor to the Rear RIPS Housing Assy.
- Remove the two screws on each side.
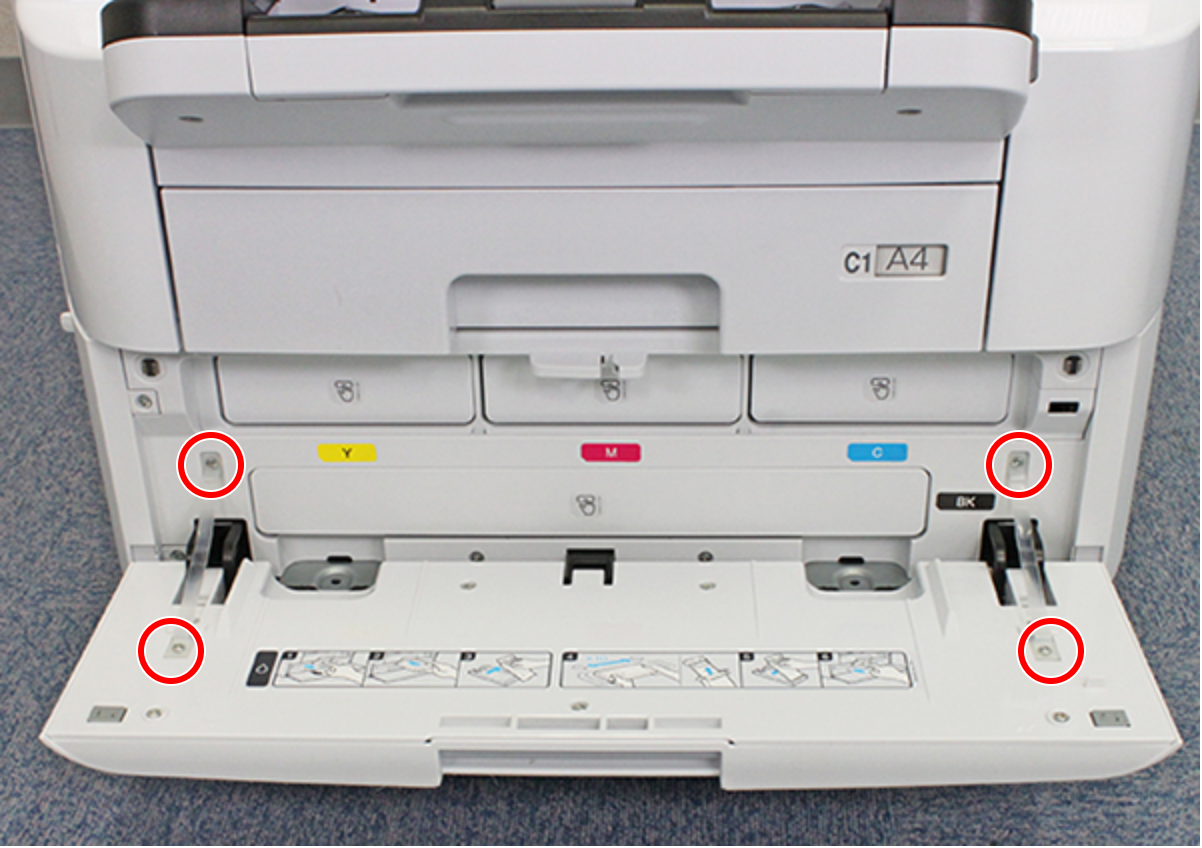
- : C.B.P-TITE-SCREW-3x10-F.ZN-3C
- Release the two hooks on each side and remove the two Ink Pack Cover Belts (A).
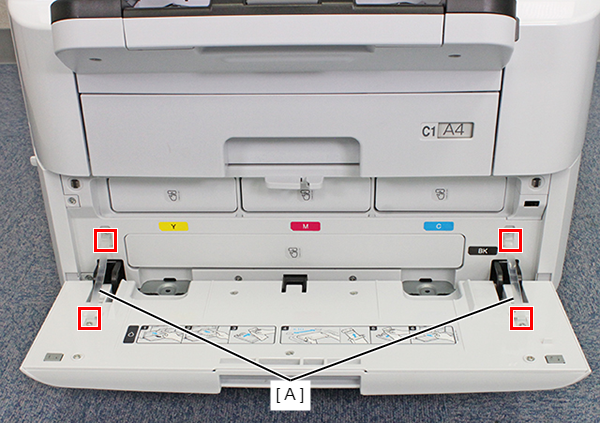
- Release each hook and remove the two Hinge Covers (A).
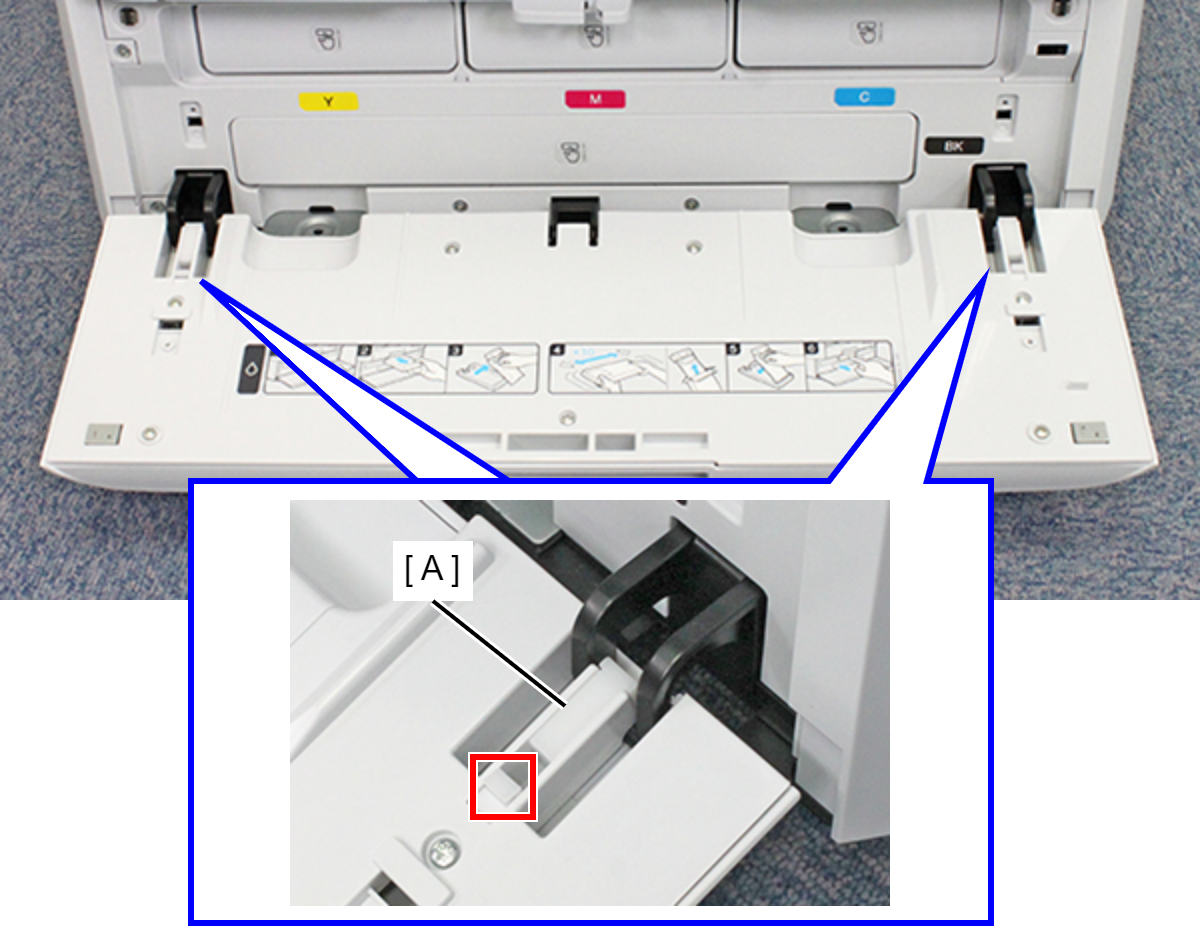
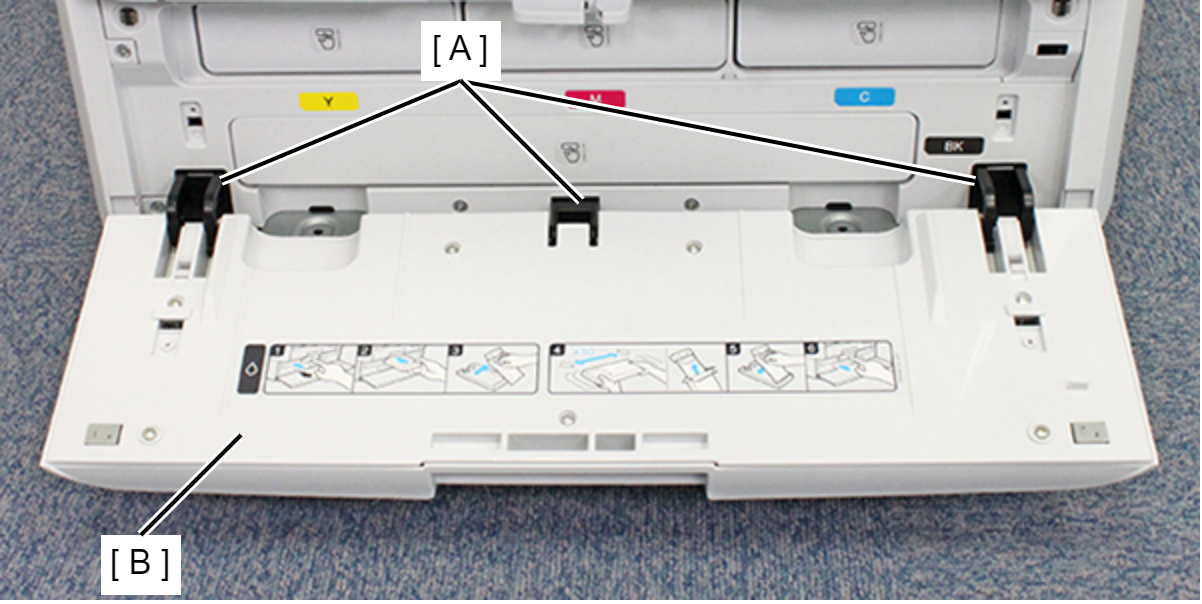
- Remove the Ink Pack Cover (B from the three hinges (A).
- Remove one screw.
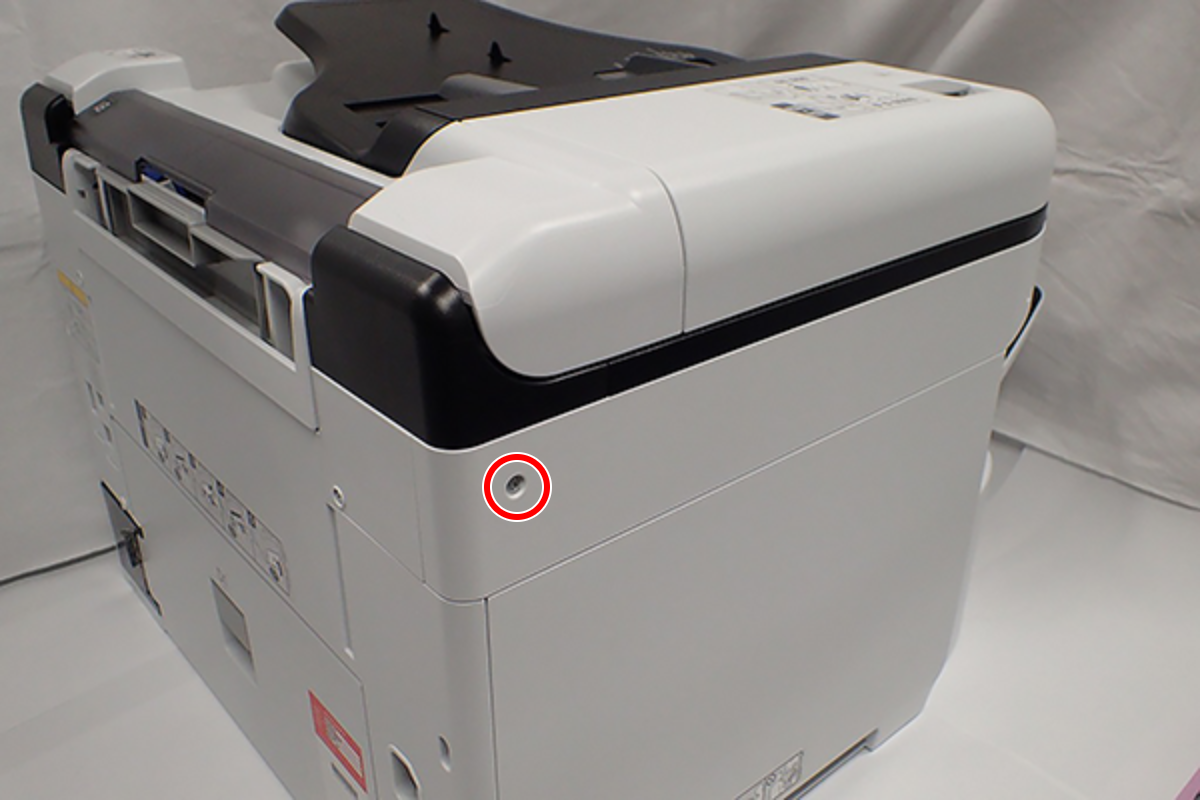
- : C.B.S-TITE-SCREW-3x8-F.ZN-3C
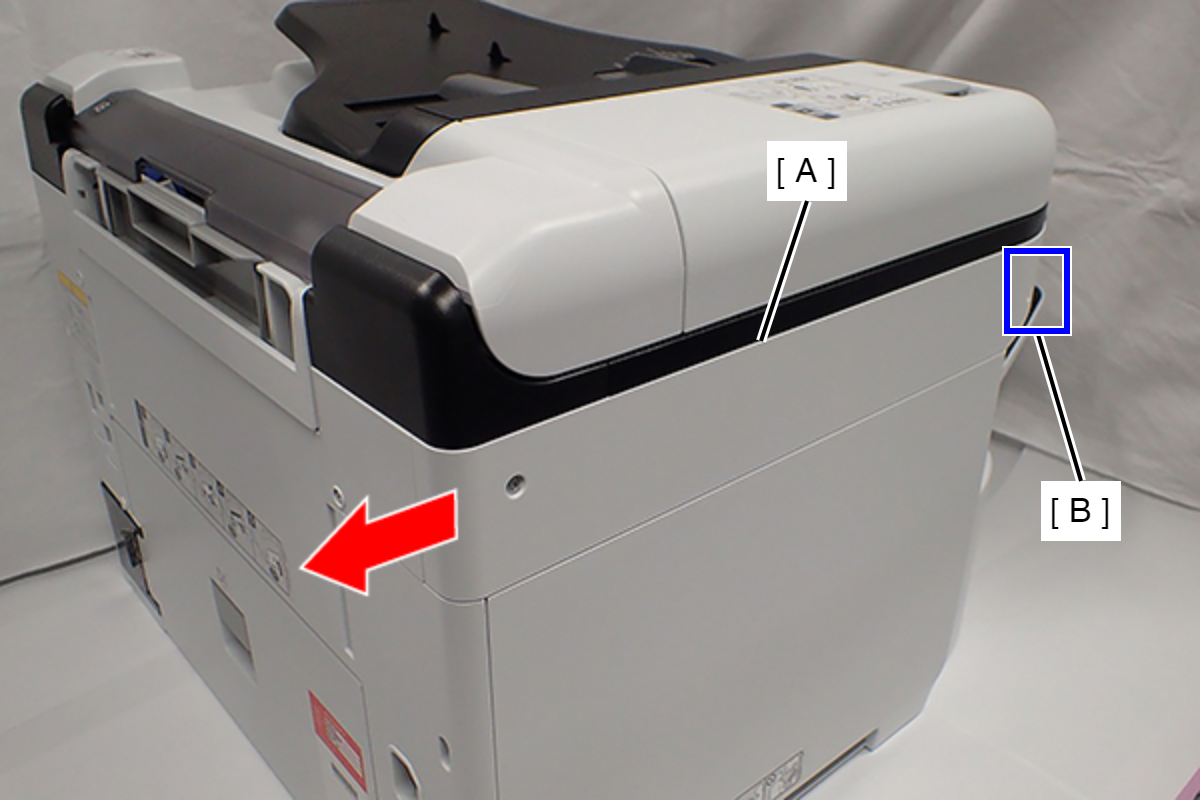
- Slide the Left SC Cover (A) while pushing the dent (B) of Left SC Cover, and remove it.
- Remove the four screws fastening the Left Housing (A).
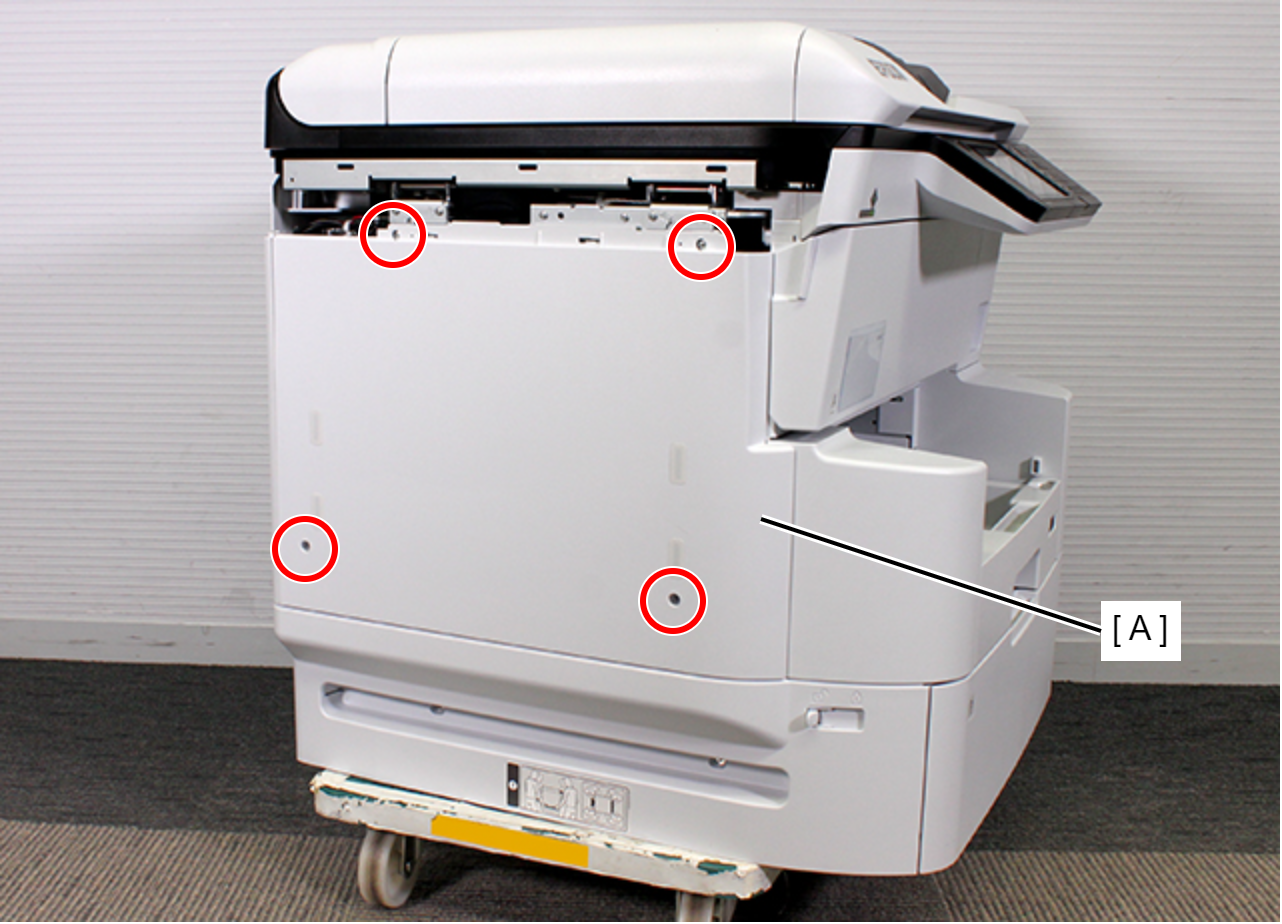
- : C.B.S-TITE-SCREW-3x8-F.ZN-3C
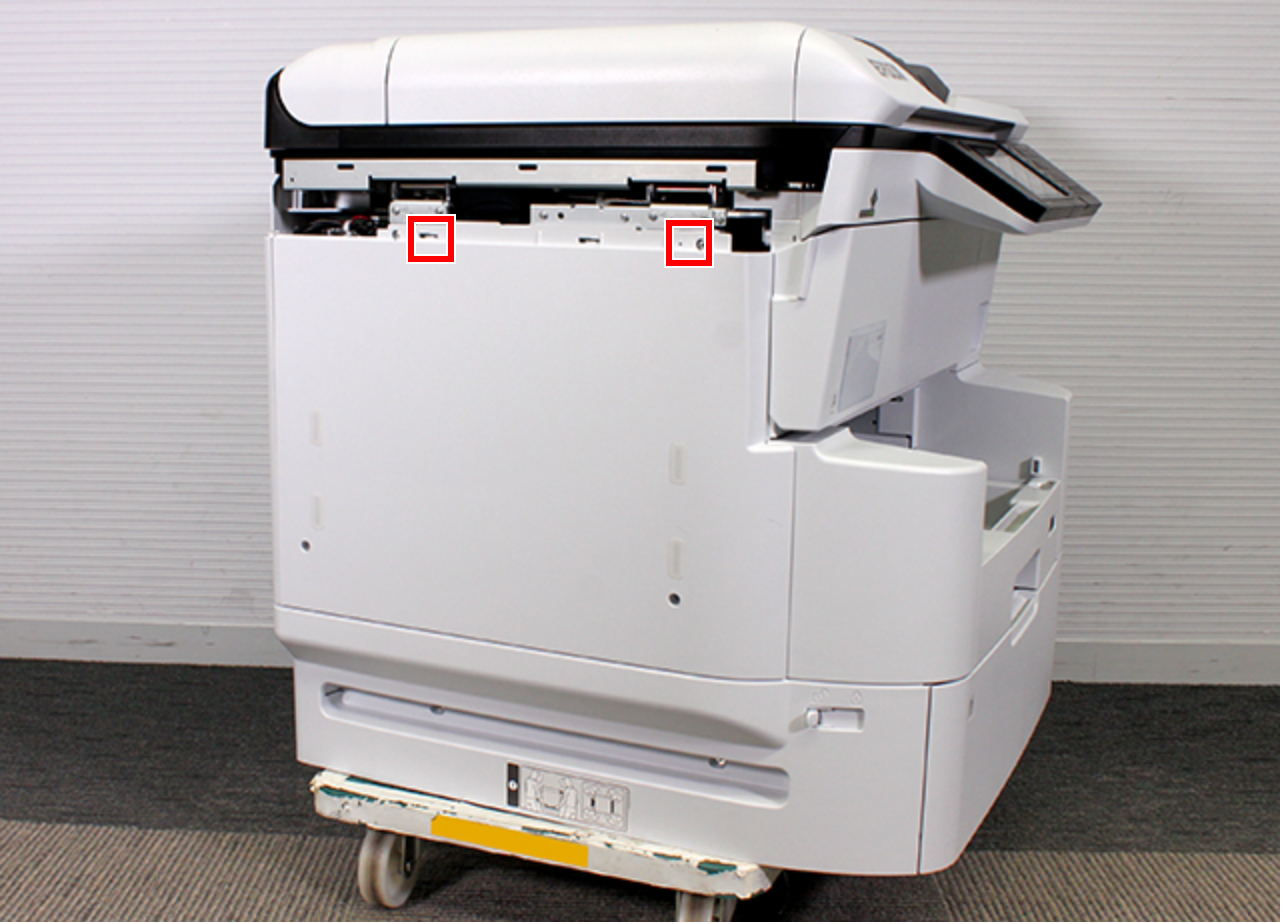
- Remove the two dowels.
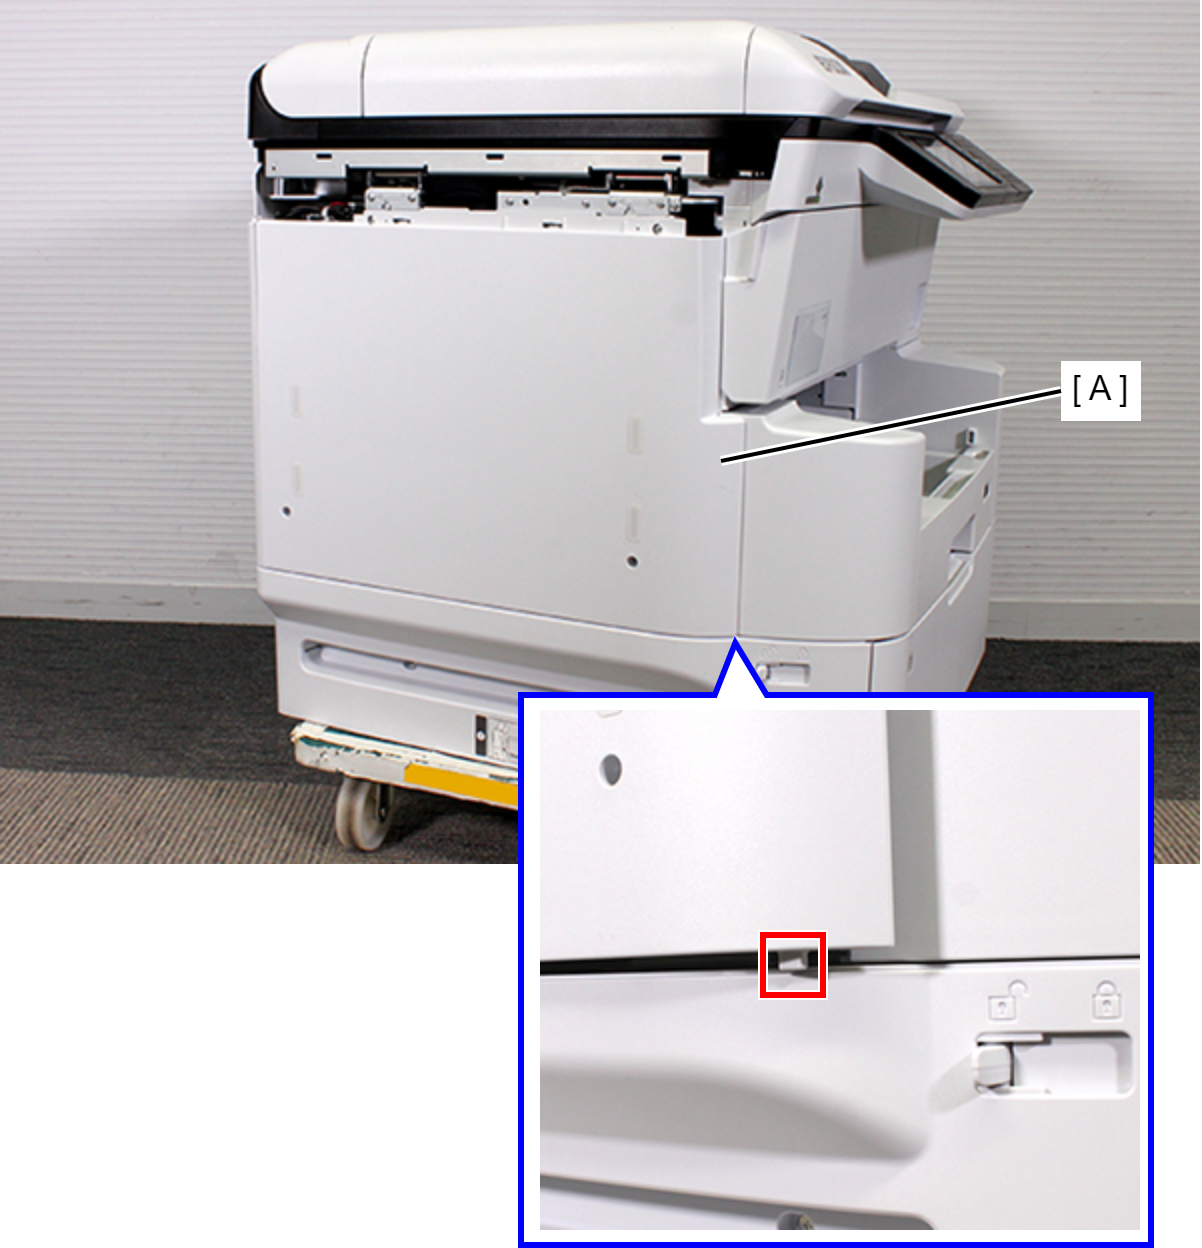
- Remove the rib on the front side while lifting up the Left Housing (A).
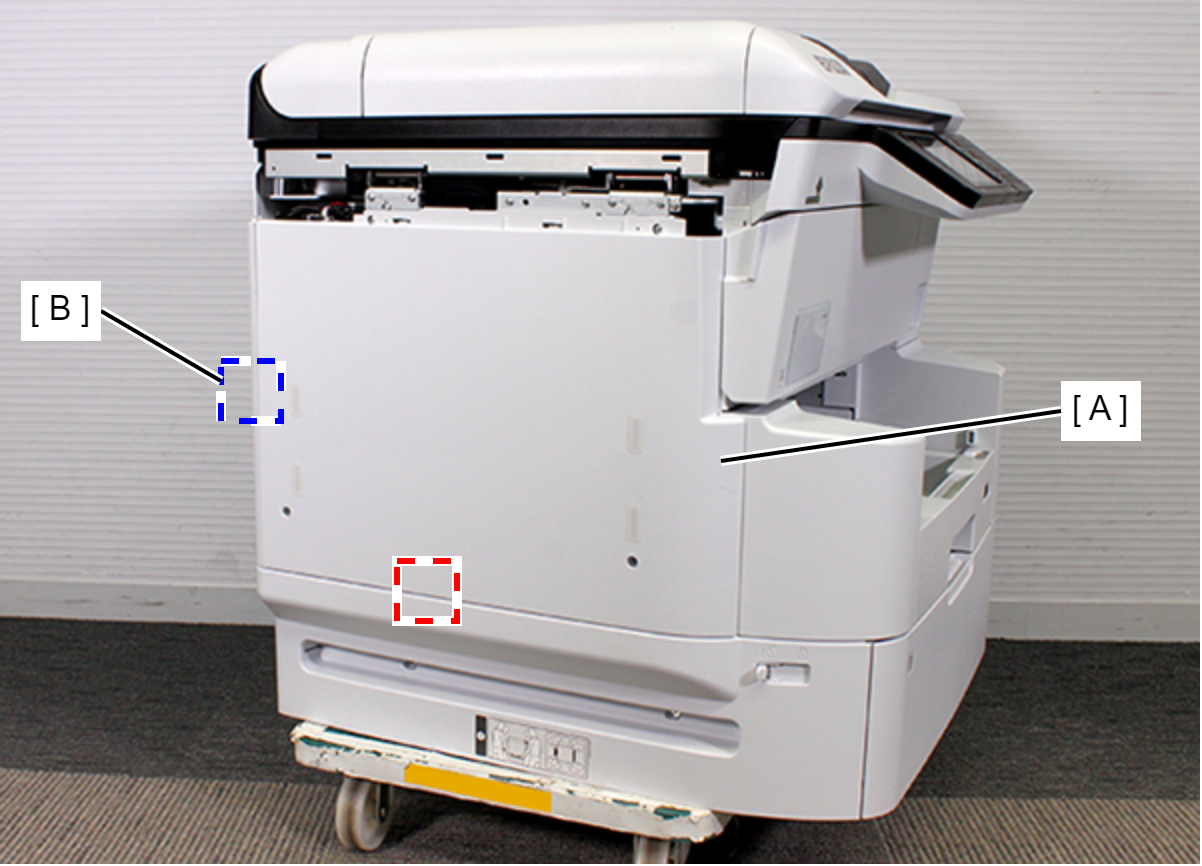
- Remove the rib on the back side while lifting up the Left Housing (A), release the hook (B) and then remove the Left Housing (A).
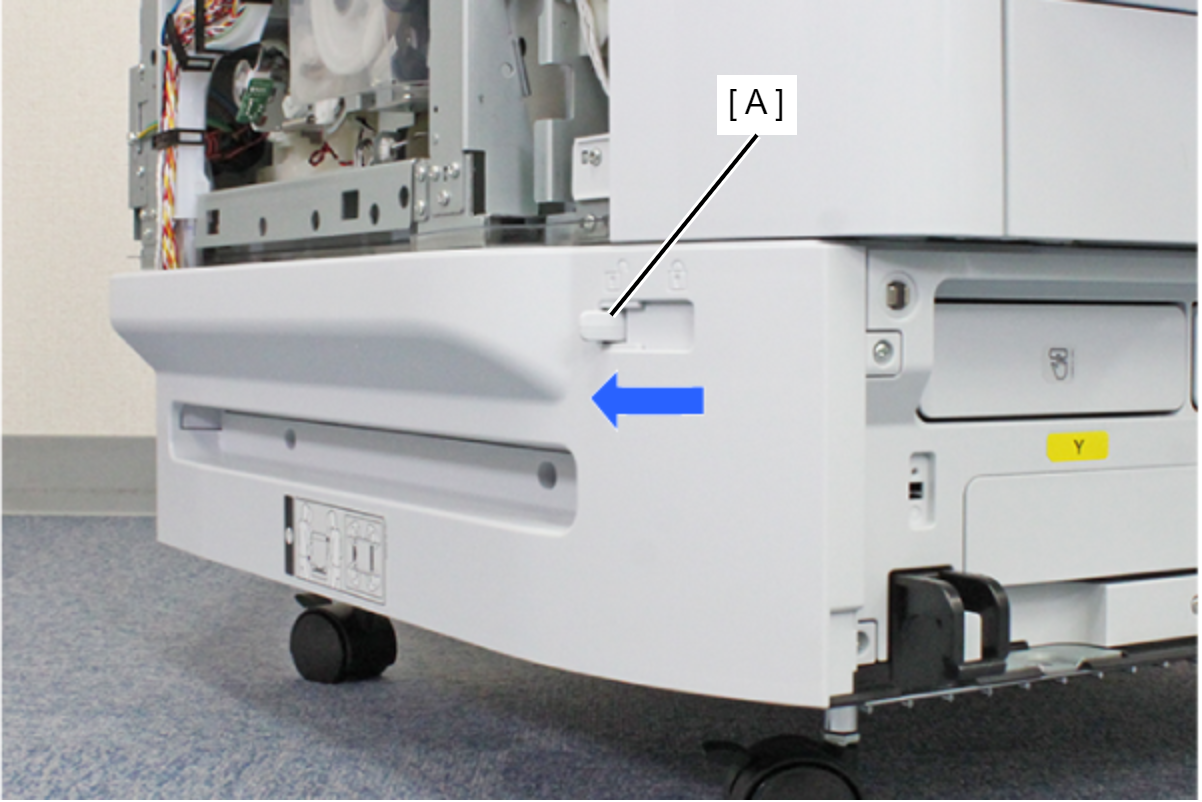
- Move the Lock Lever (A) in the direction of the arrow to set the Ink Pack Cover lock in the released state.
- Remove the two screws fastening the Left RIPS Housing Assy (A).
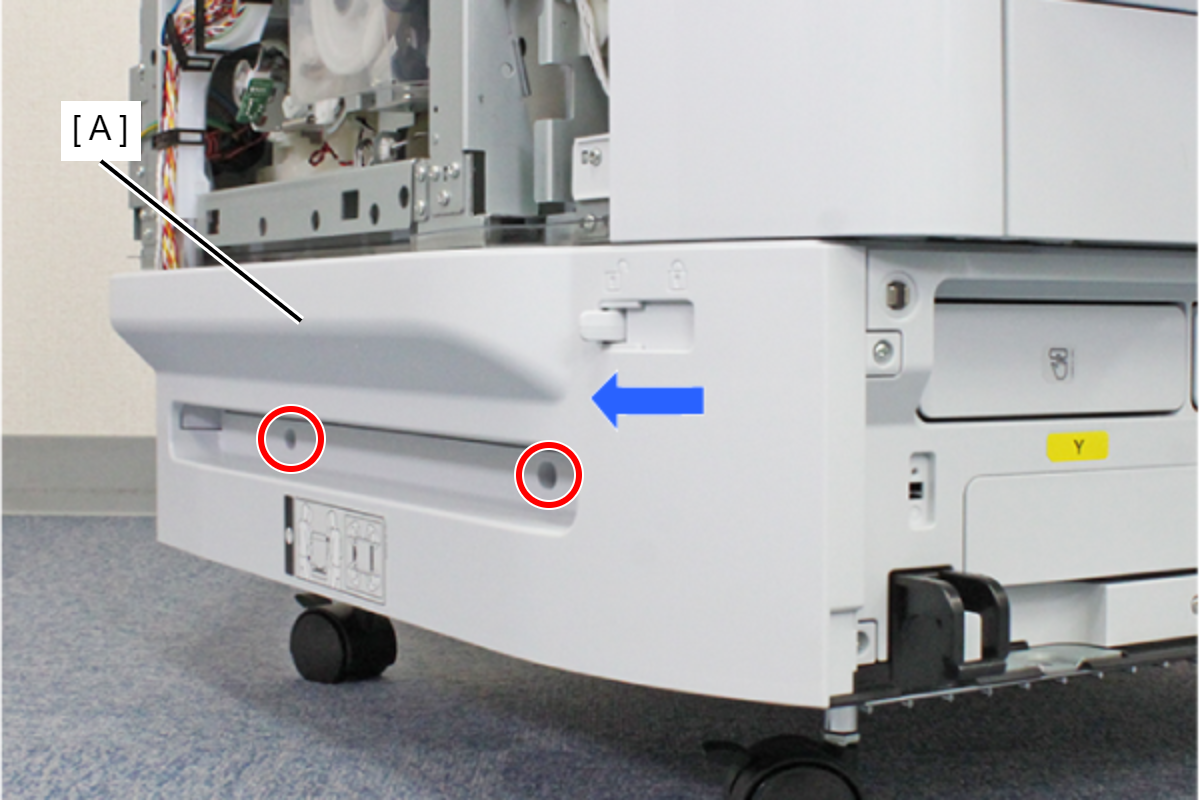
- : C.SHOULDER S-TITE,3X5
- Remove the two screws fastening the Left RIPS Housing Assy (A).
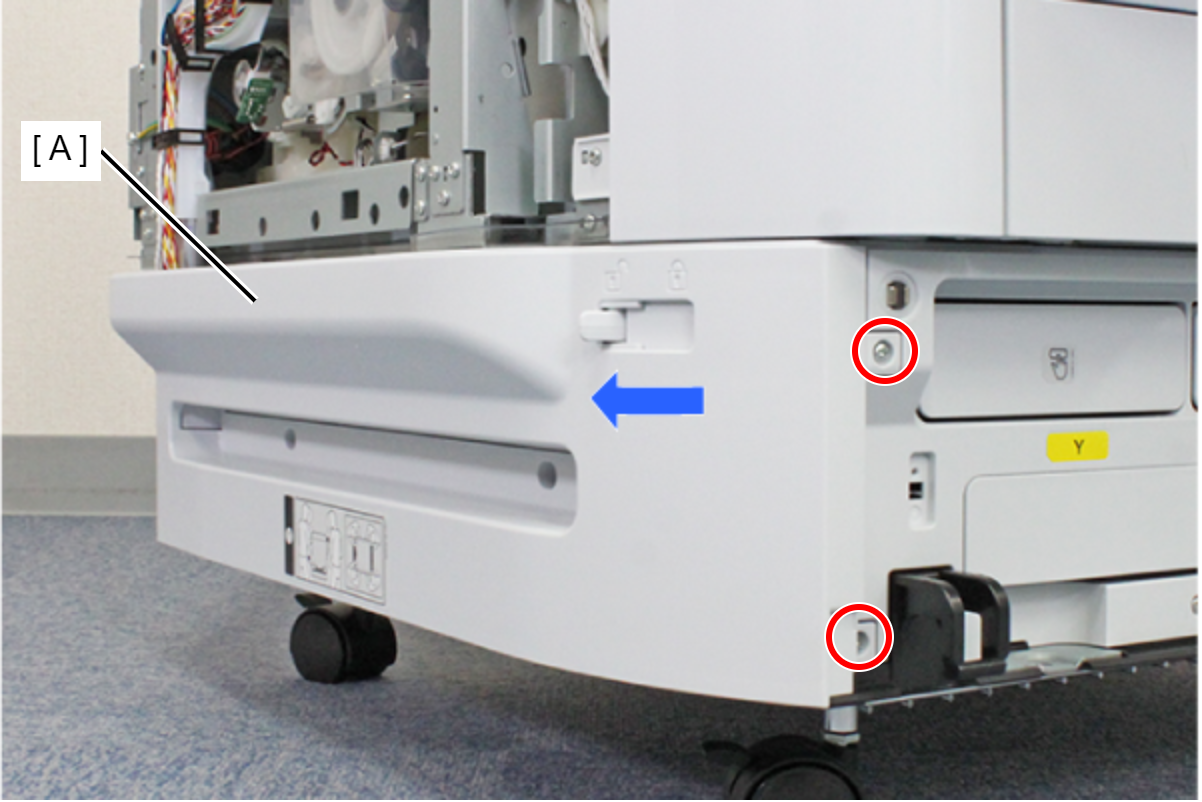
- : C.B.P-TITE-SCREW-3x10-F.ZN-3C
- Lift the Left RIPS Housing Assy (B) and rotate in the direction of the arrow while releasing the two hooks to release the interfering unit (A) behind the Left RIPS Housing Assy (B).
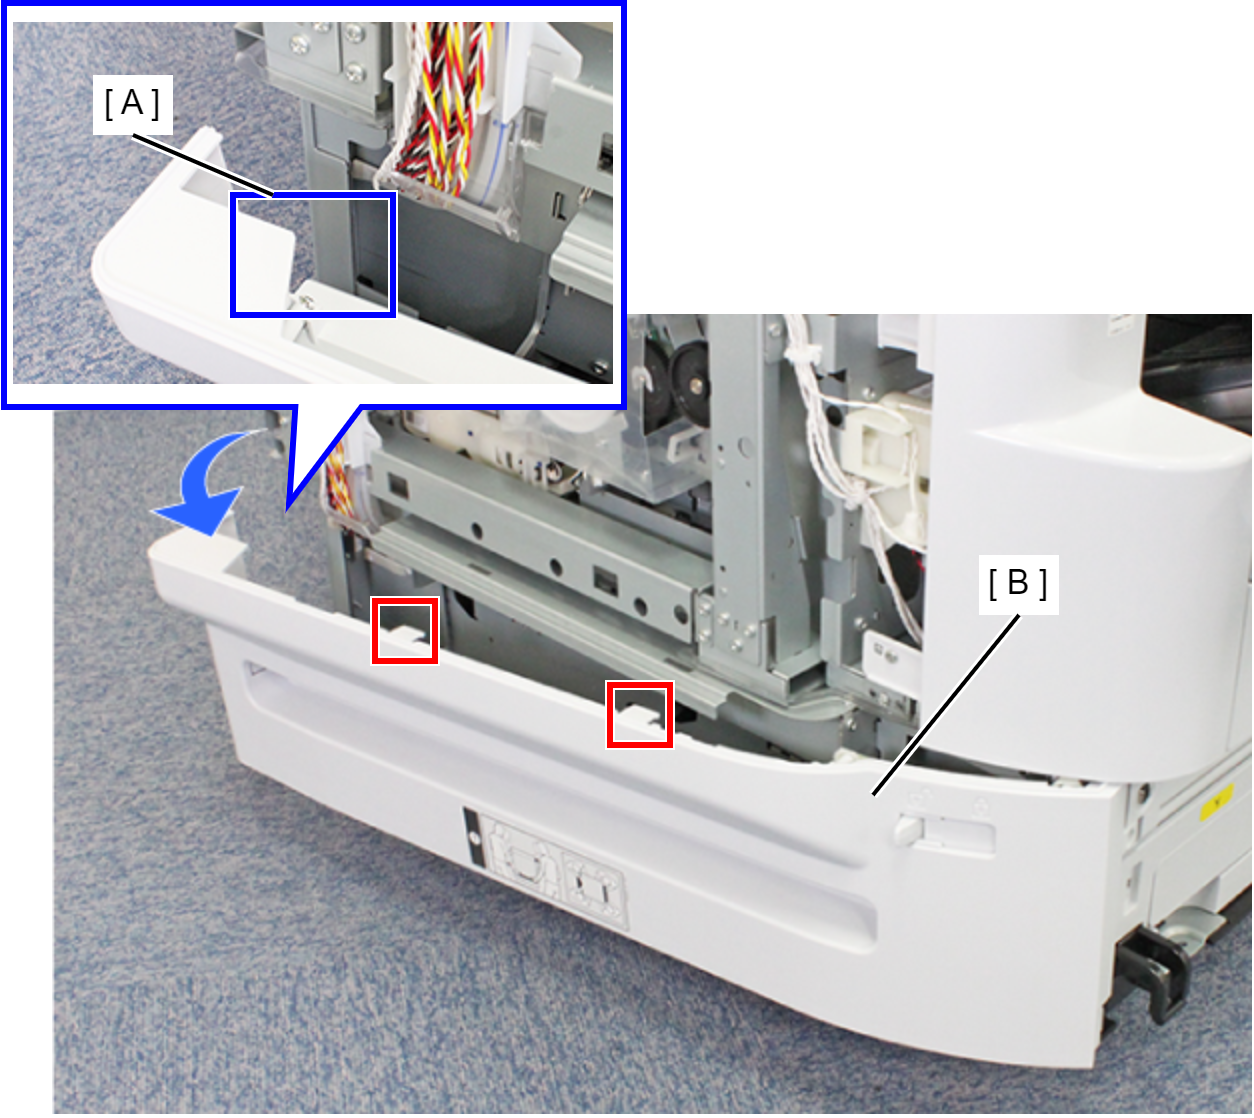
- Remove the three ribs and remove the Left RIPS Housing Assy (A).
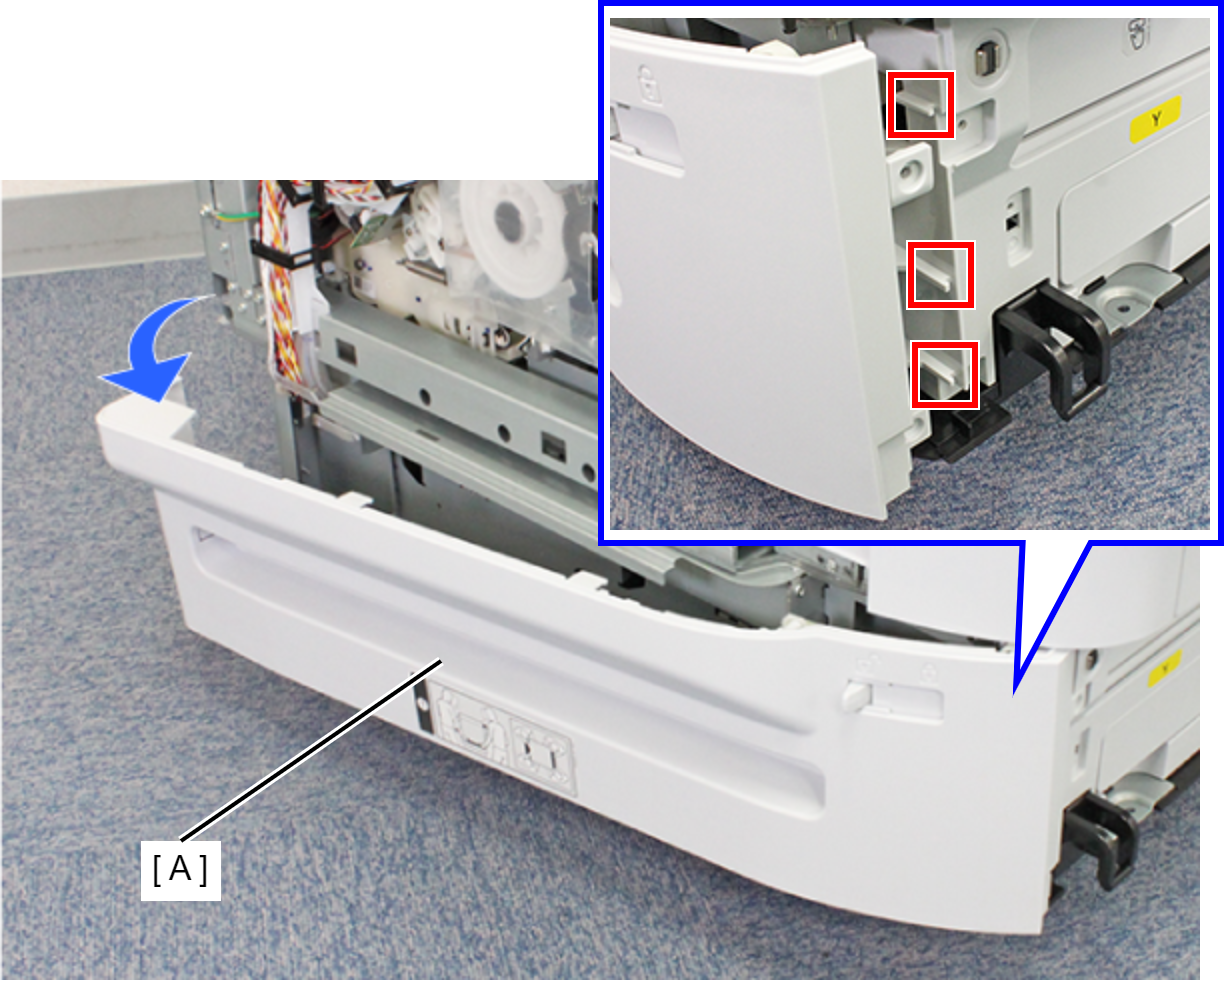 Assembly / 組み立て
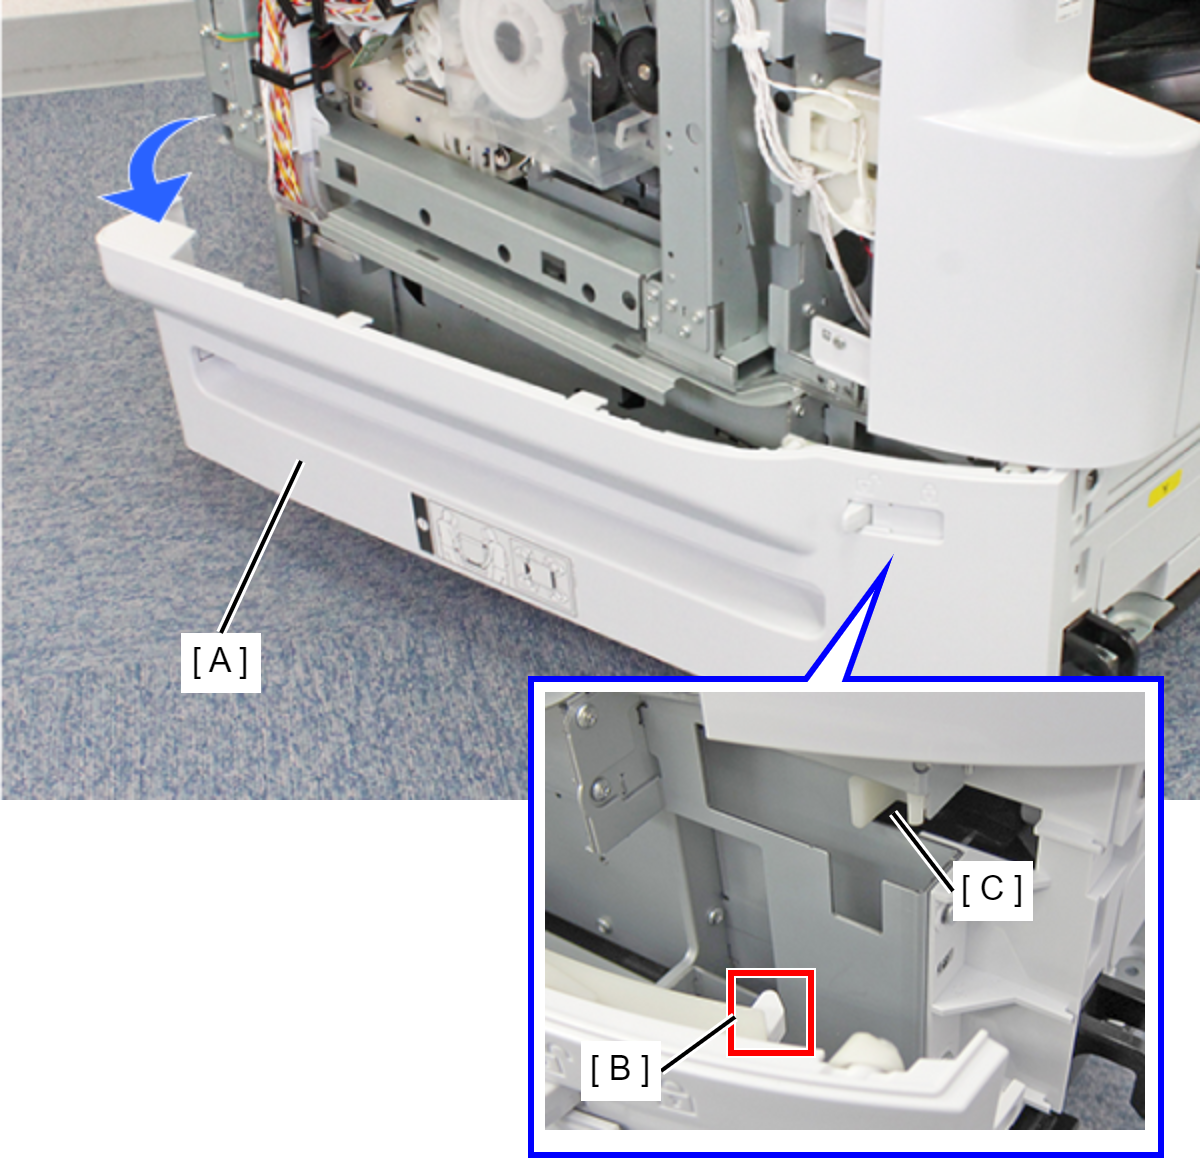
When mounting the Left RIPS Housing Assy (A), mount by aligning the Lock Lever Shaft (B) and the receiving part (C).
- Remove one screw.
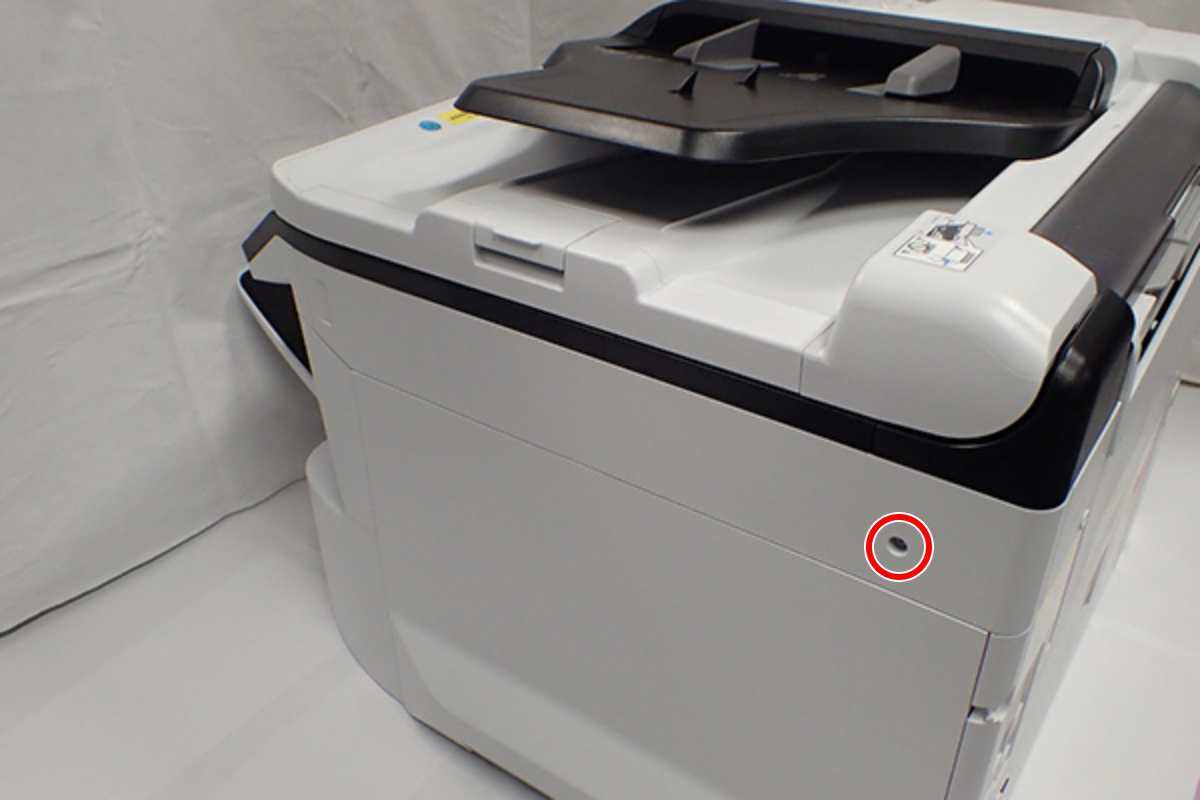
- : C.B.S-TITE-SCREW-3x8-F.ZN-3C
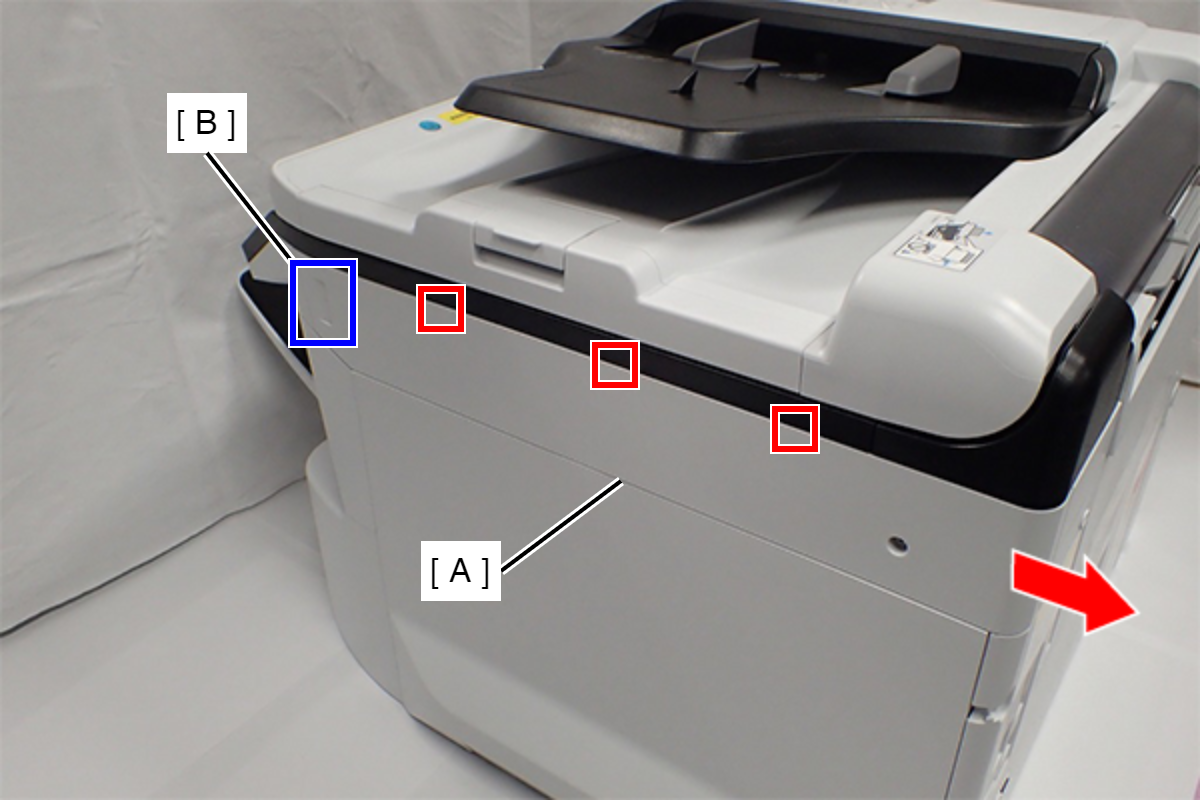
- Slide the Right SC Cover (A) while pushing the dent (B) of Right SC Cover, and release the three tabs. Remove the Right SC Cover (A).
- Remove the four screws fastening the Right Housing (A).
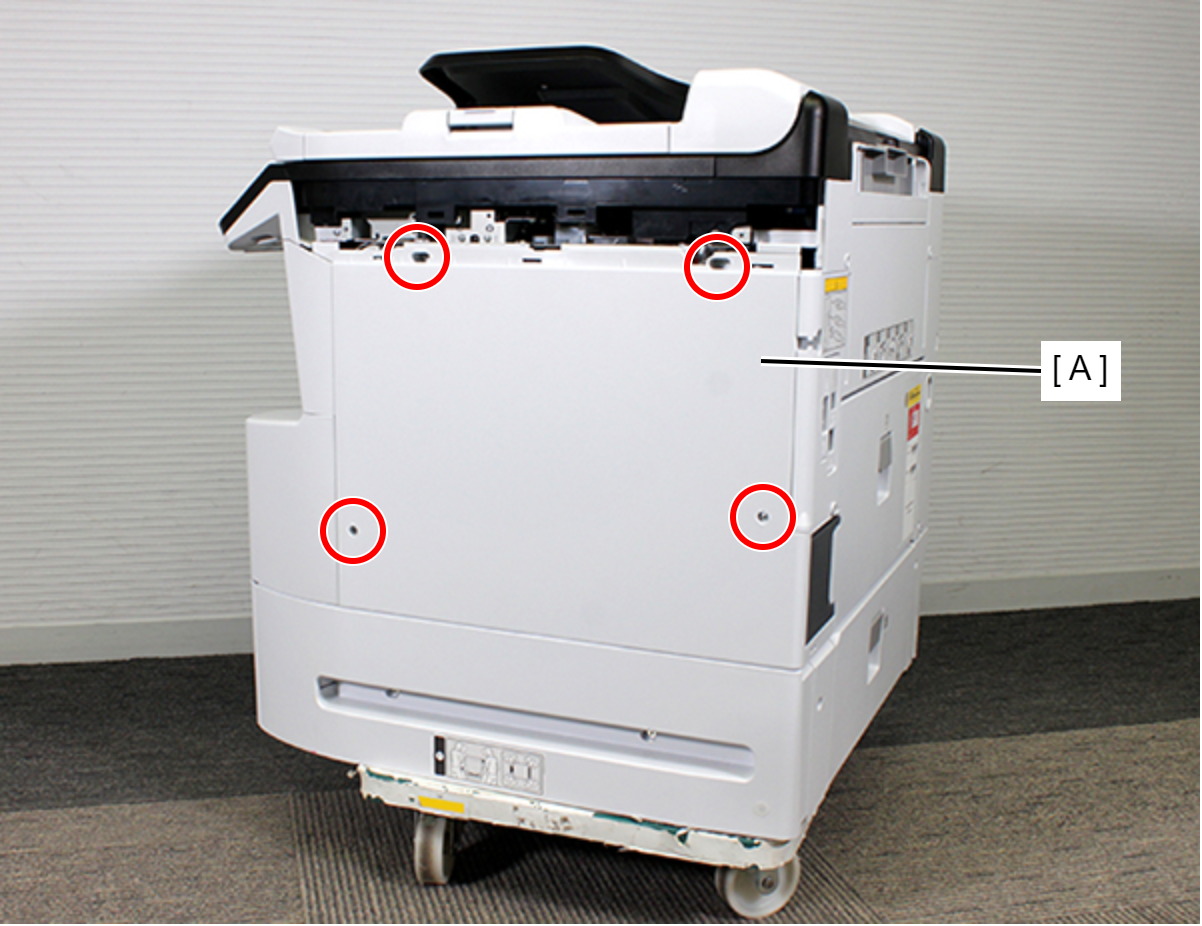
- : C.B.S-TITE-SCREW-3x8-F.ZN-3C
- Release the hook.
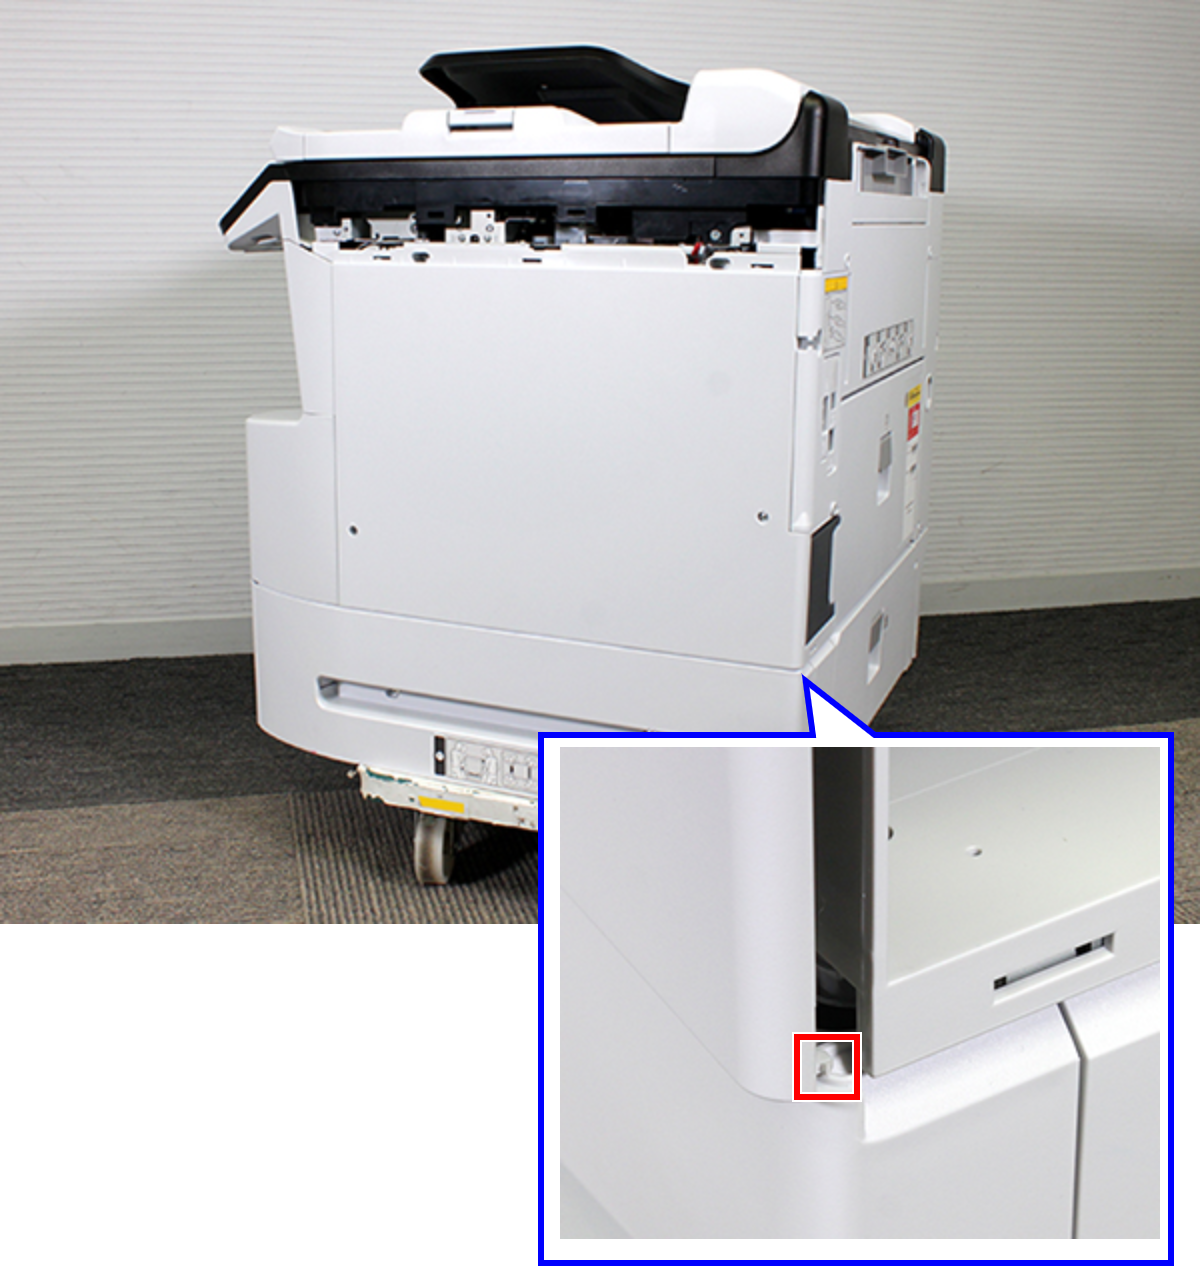
- Remove the two dowels.
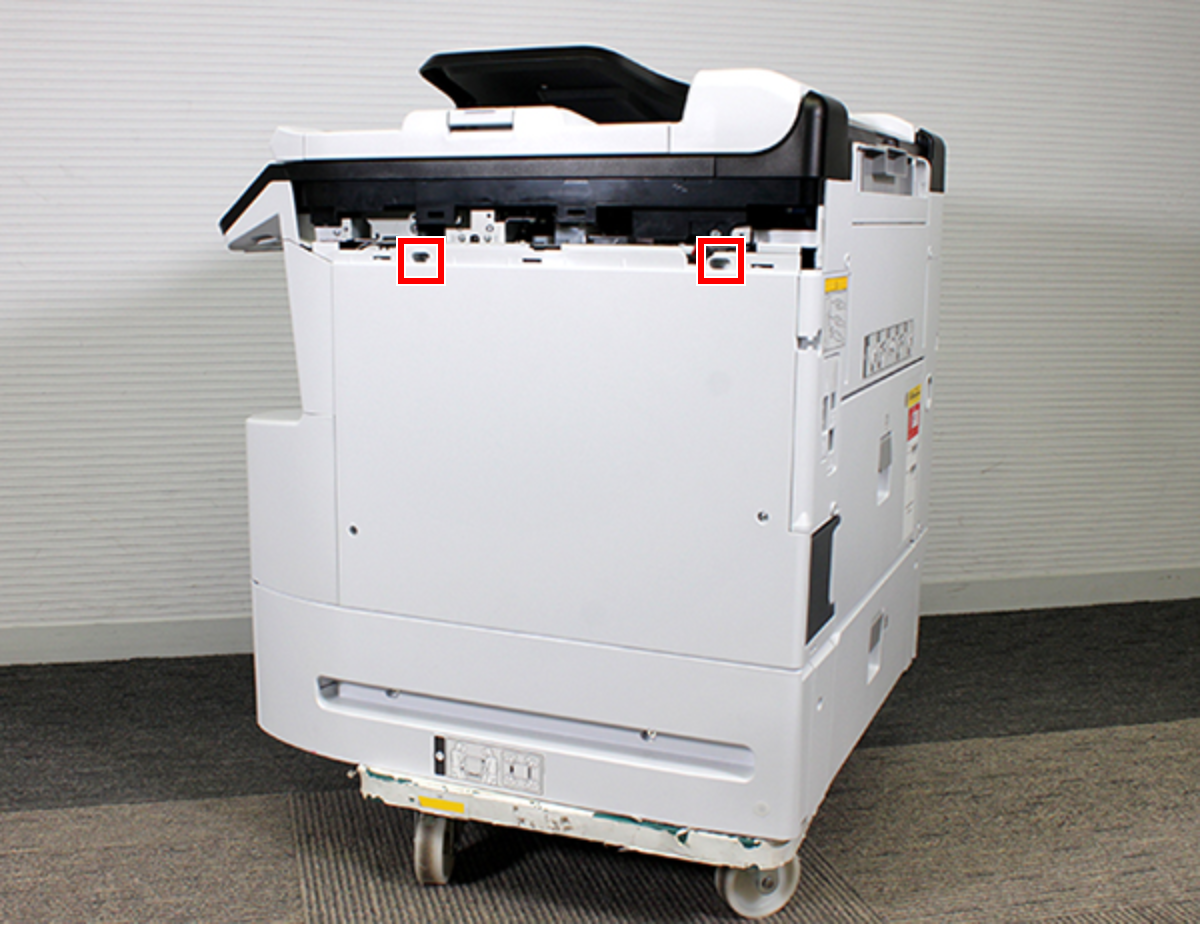
- Release the four hooks.
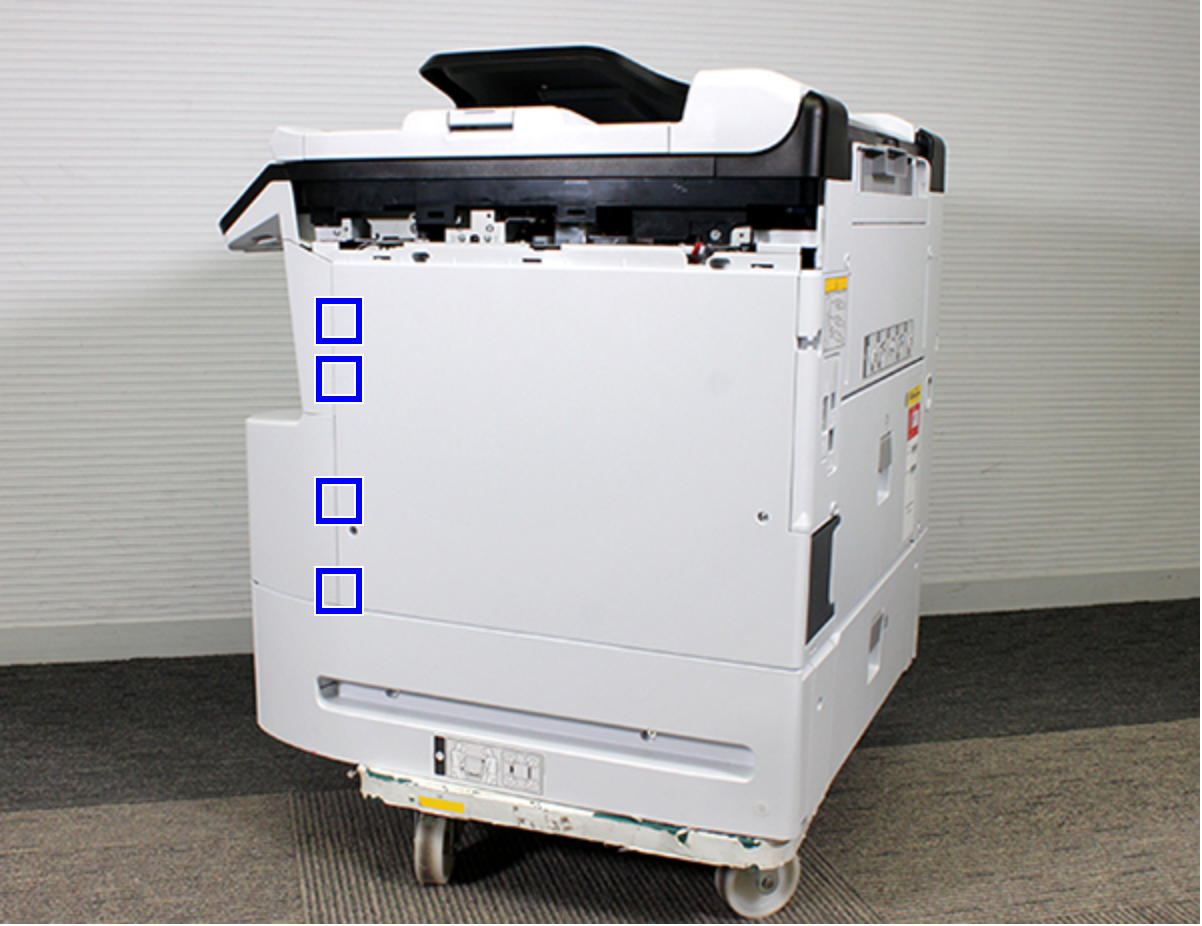
- Remove the Right Housing (A) while removing the rib.
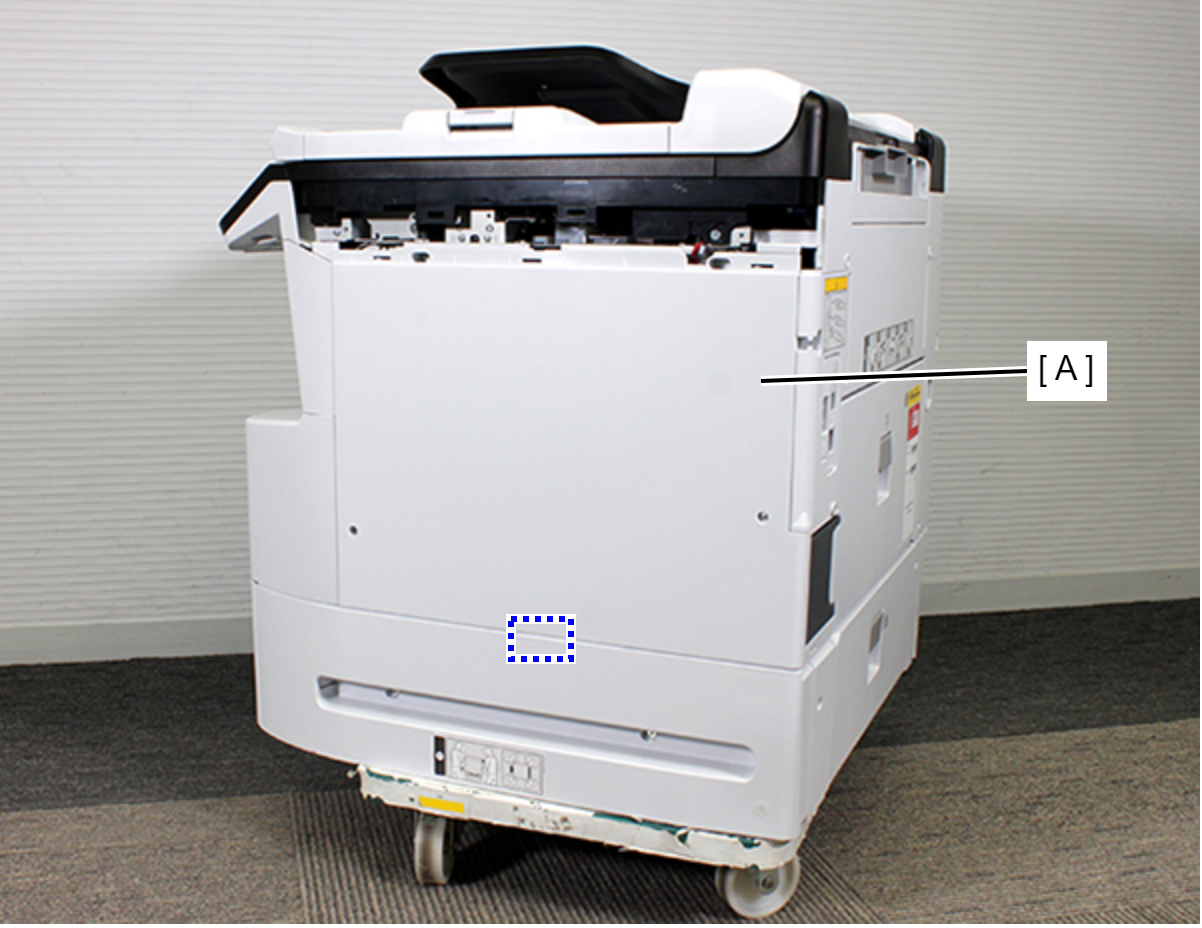
- Remove the two screws fastening the Right RIPS Housing Assy (A).
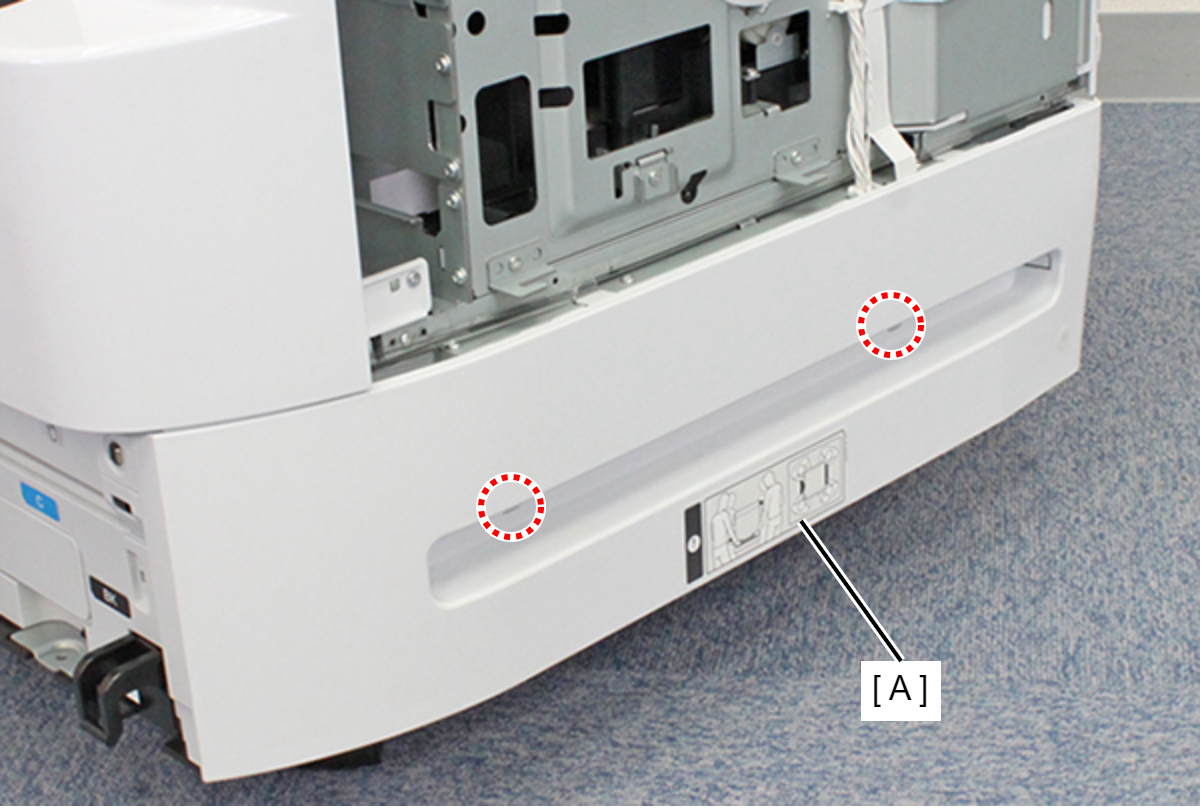
- : C.SHOULDER S-TITE,3X5
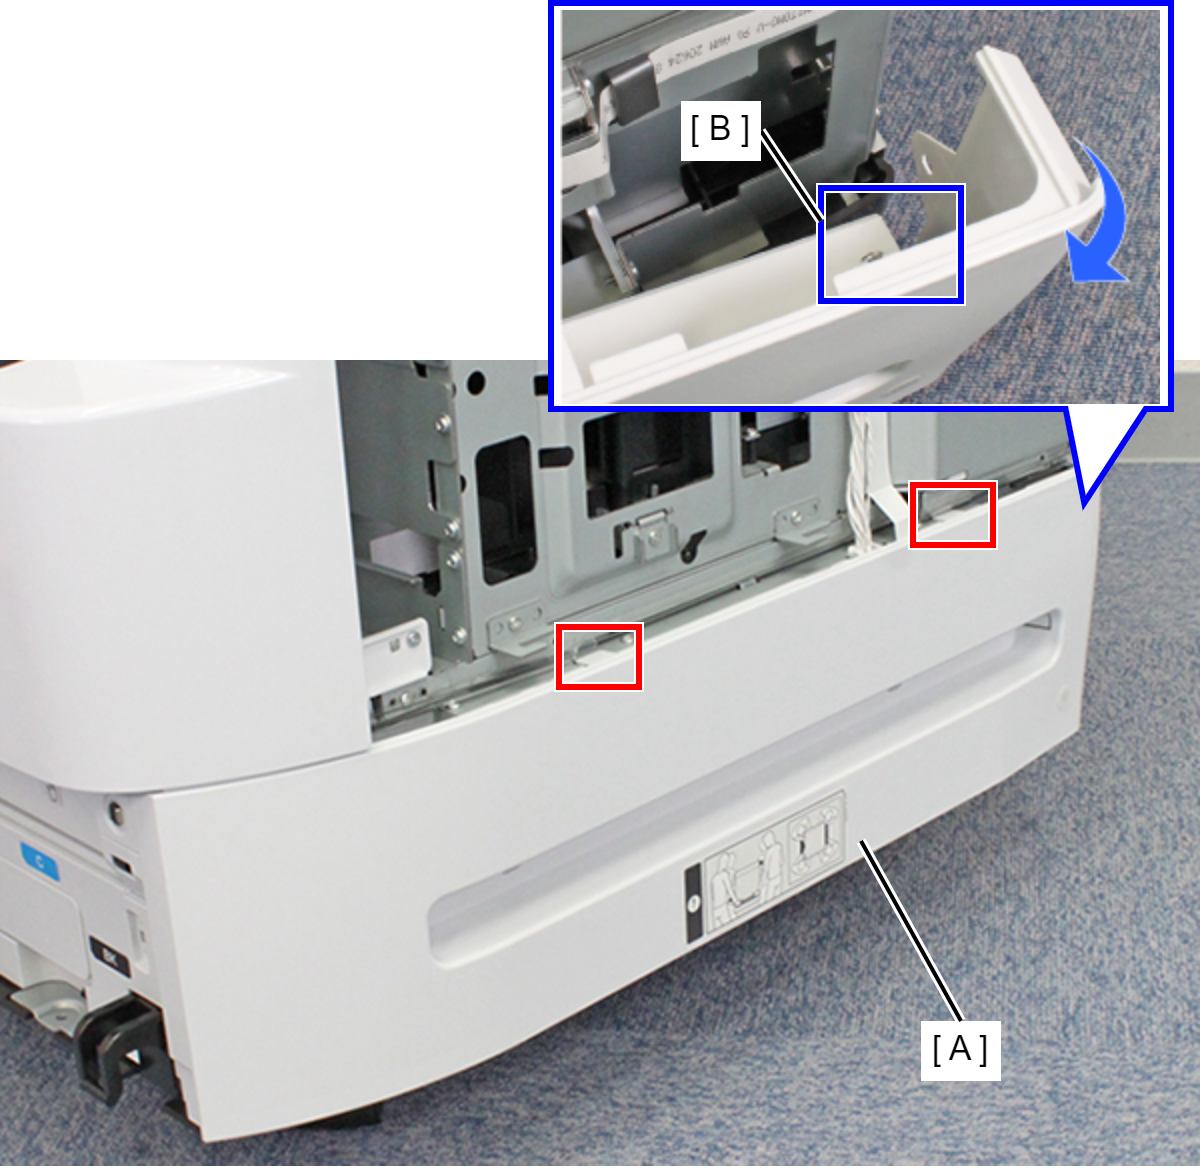
- Lift the Right RIPS Housing Assy (A) and rotate in the direction of the arrow while releasing the two hooks to release the interfering unit (B) behind the Right RIPS Housing Assy (A).
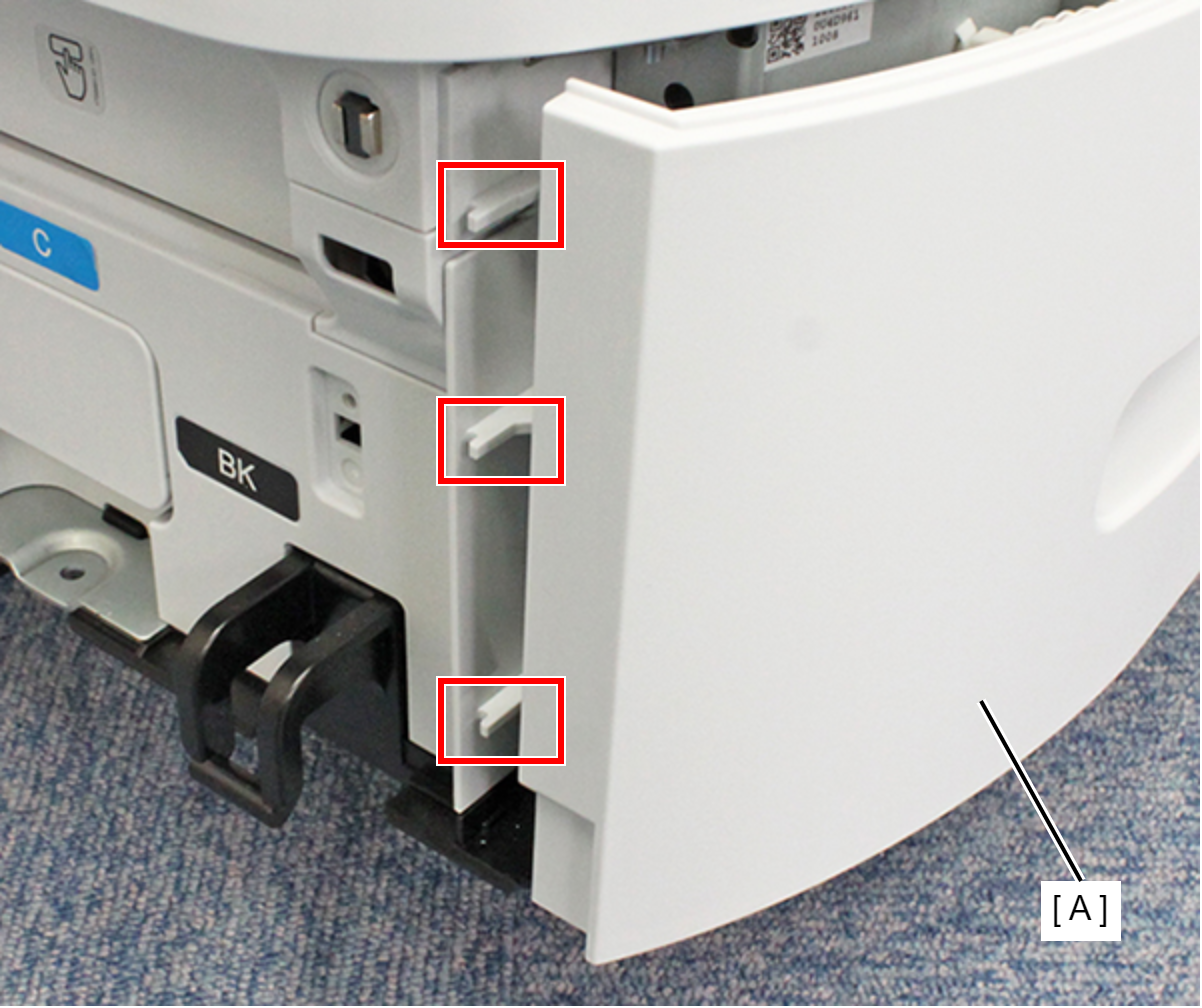
- Remove the three ribs on the front side of the Right RIPS Housing Assy (A) and remove the Right RIPS Housing Assy (A).
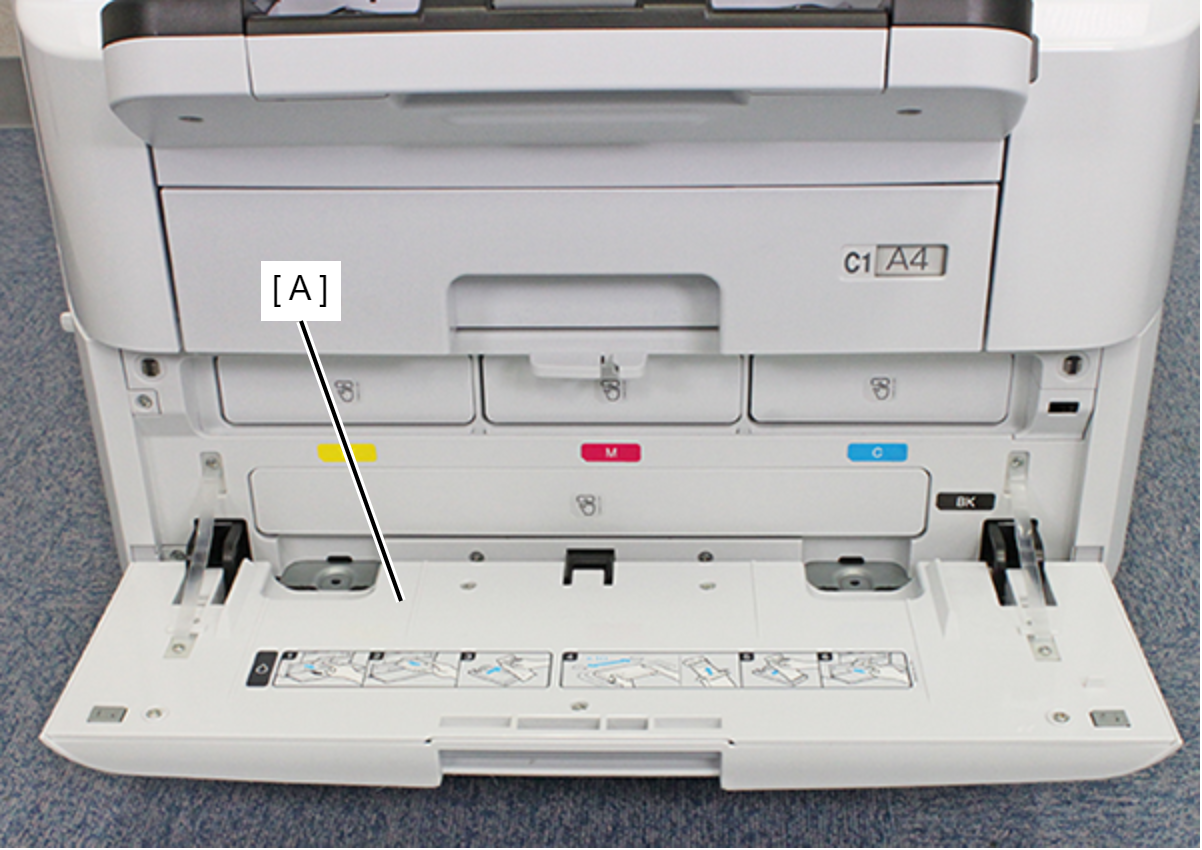
- Open the Ink Pack Cover (A).
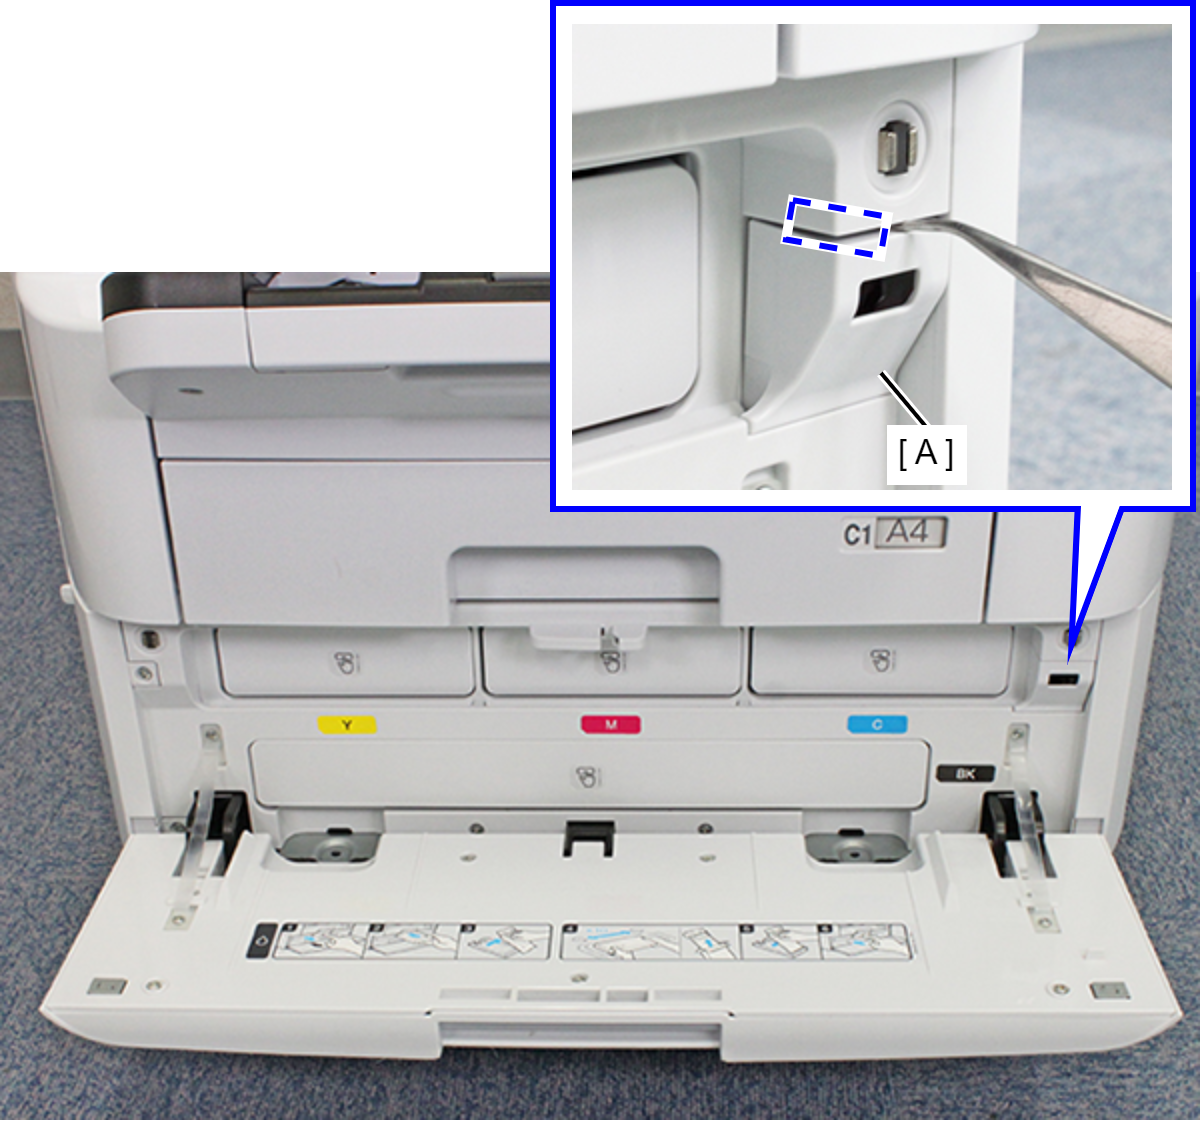
- Release the hook by inserting a narrow-tipped object, such as tweezers or the like, as shown below, and remove the Ink Pack Cover Open Sensor Holder (A).
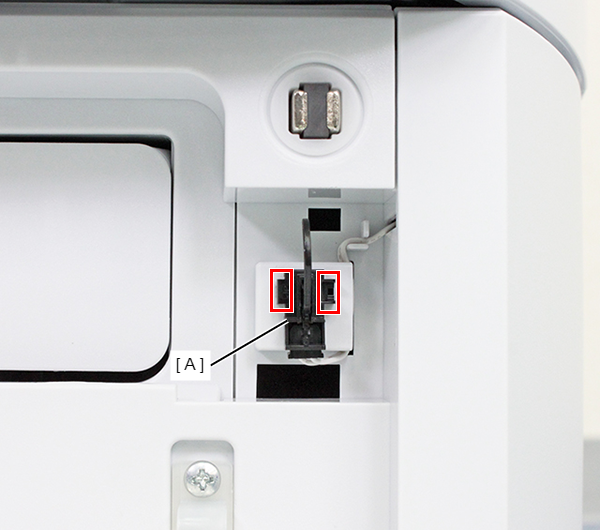
- Release the two hooks and remove the Ink Pack Cover Open Sensor (A).
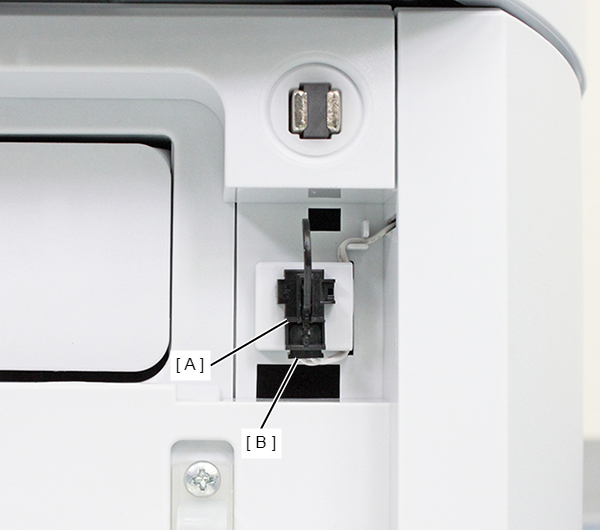
- Remove the cable from the connector (B) of the Ink Pack Cover Open Sensor (A), and remove the Ink Pack Cover Open Sensor.
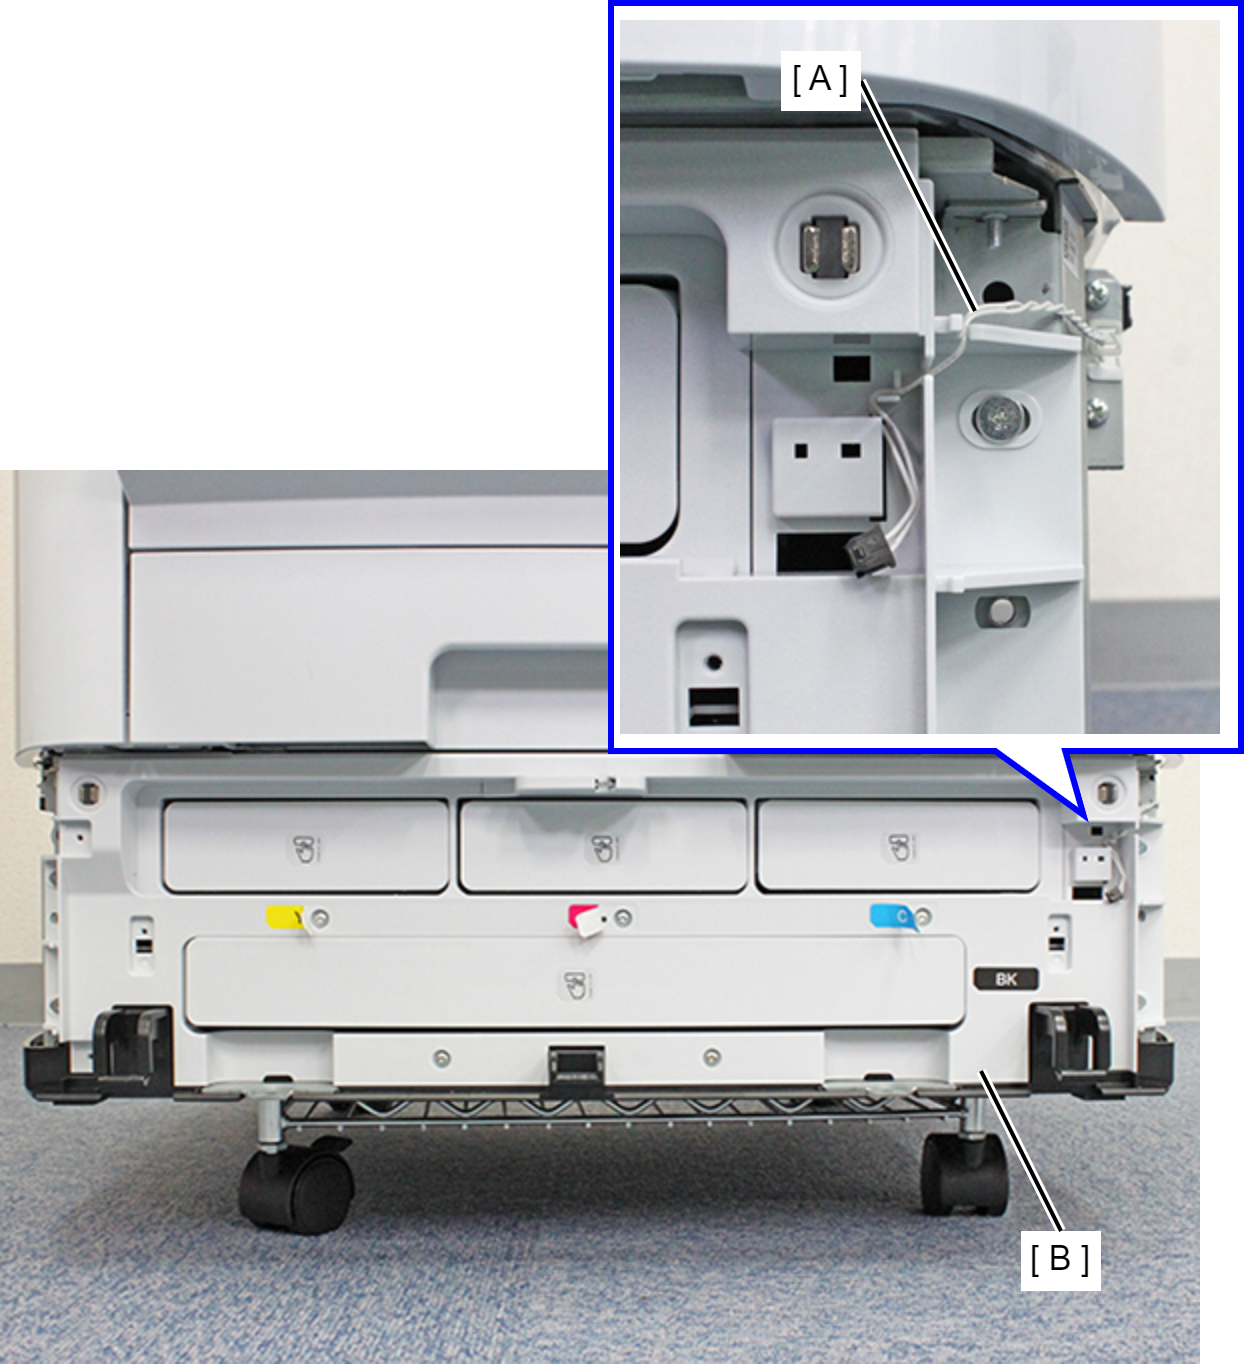
- Release the Ink Pack Cover Open Sensor Cable (A) from the Front RIPS Housing (B).
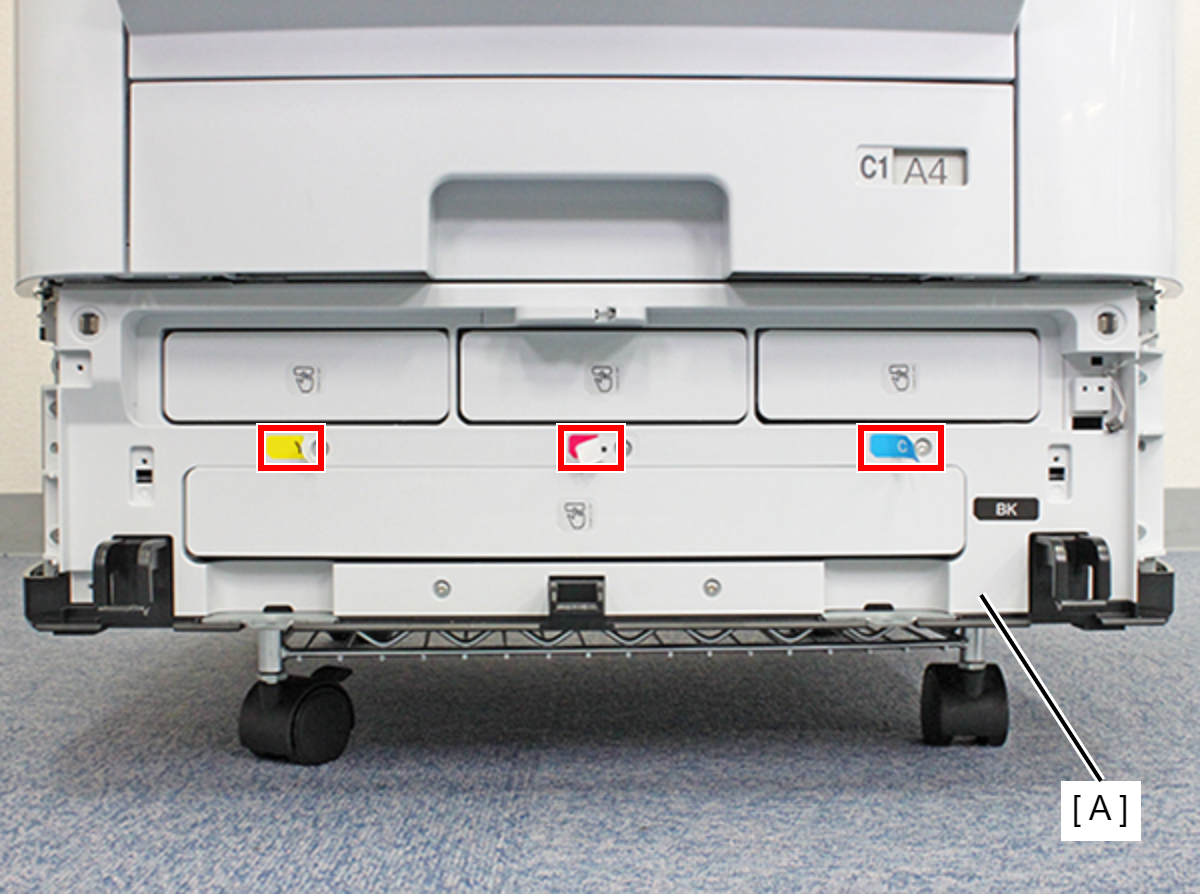
- Peel away the three color labels on the Front RIPS Housing (A).
- Remove the nine screws, and remove the Front RIPS Housing (A).
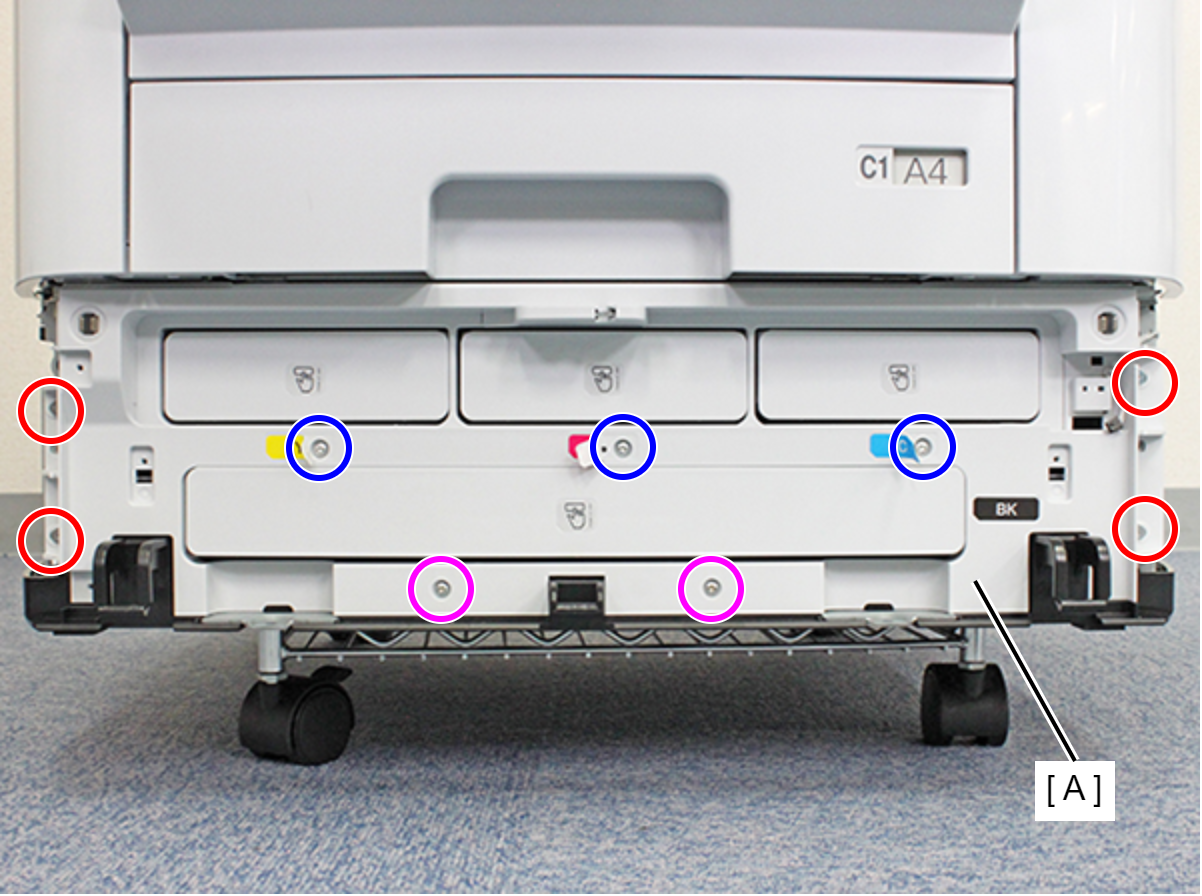
- : C.SHOULDER S-TITE,3X5
 : C.B.P-TITE-SCREW-3x10-F.ZN-3C
 : C.B.S-TITE-SCREW-3x8-F.ZN-3C