Attaching additional cassette unit and printer stand (option)
 Check Point / チェックポイント Check Point / チェックポイント |
|
 Caution / 注意 Caution / 注意 |
The printer stand is heavy so the work to unpack and move it must be carried out by at least two people. |
- Preparing the additional cassette and a printer stand
Check that the following items are included in the package.
Optional Paper Cassette
Name Remarks 1 Optional Paper Cassette 2 Paper size label 3 Cassette number label 4 Additional cassette fixing screw For fixing front (x2), for fixing back (x2) 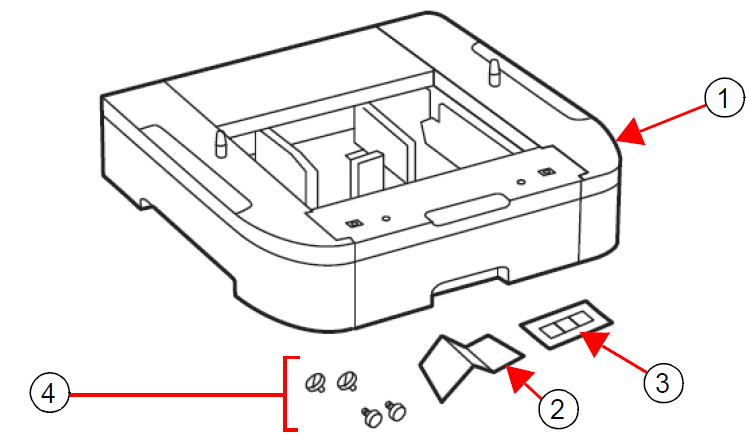
Printer Stand (Option)
Name Remarks 1 Cabinet main unit 2 Overturn prevention legs frame 1 for each of left and right 3 Side decorative plates 1 for each of left and right 4 Front decorative plate 5 Reinforcing bars For front (short), for rear (long) 6 Coupling plate (metal fitting) 2 pcs 7 Cable clamp 2 pcs 8 Overturn prevention leg fixing screw 18 pcs 9 Additional cassette fixing screw 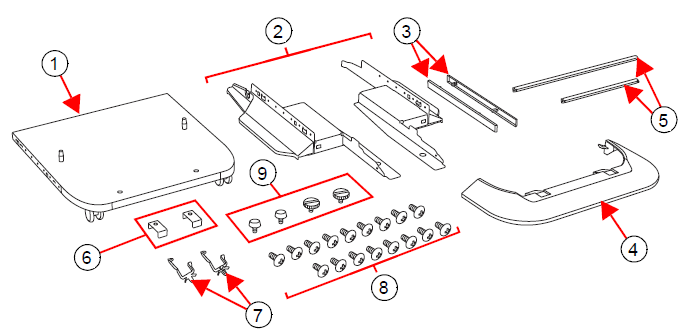
- Assembling the Printer Stand (Option)
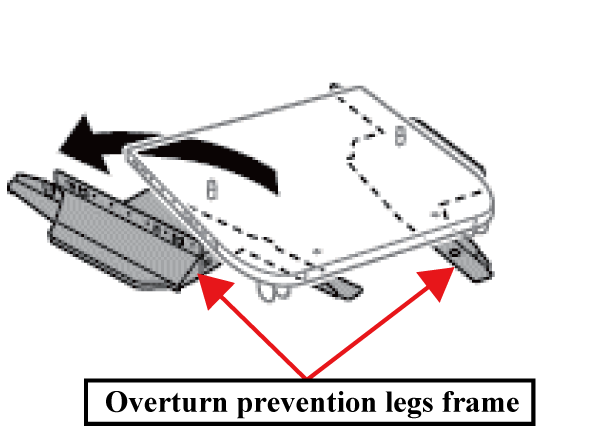
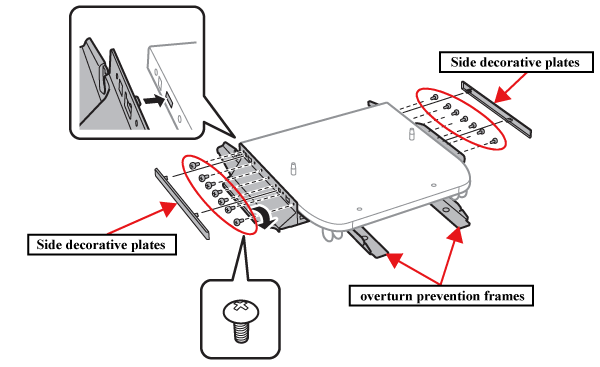
- Insert the overturn prevention legs frame into the inside of the caster.
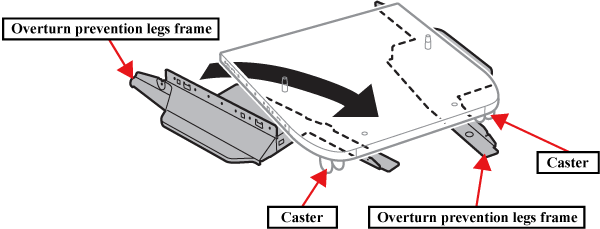
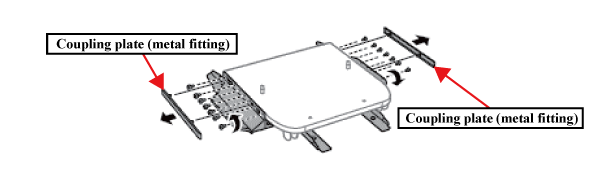
- Attach the overturn prevention frames and secure them in place with the fourteen screws and coupling plates (metal fittings).
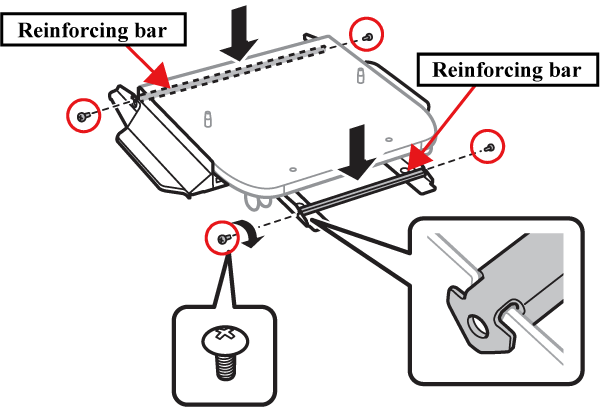
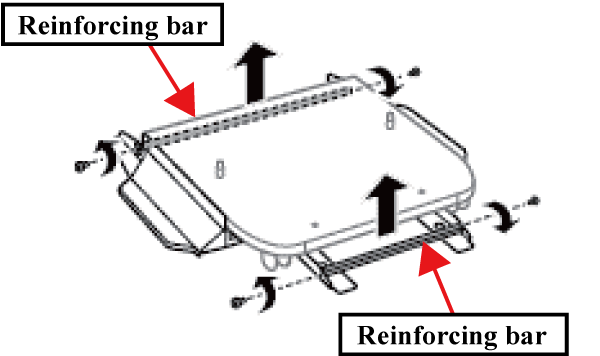
- Attach the reinforcing bars, then fix them in place with the four screws.
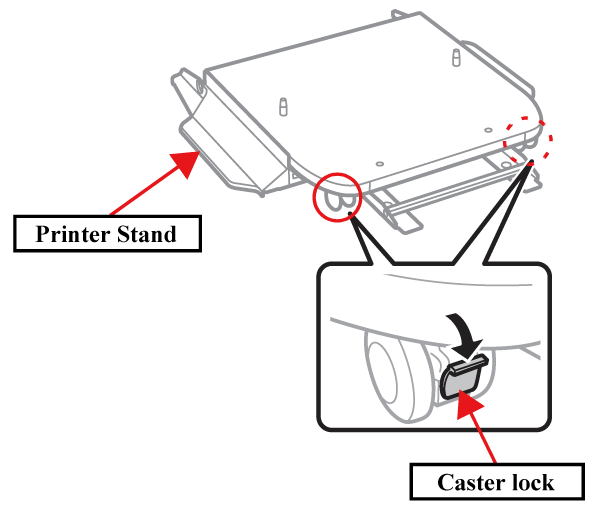
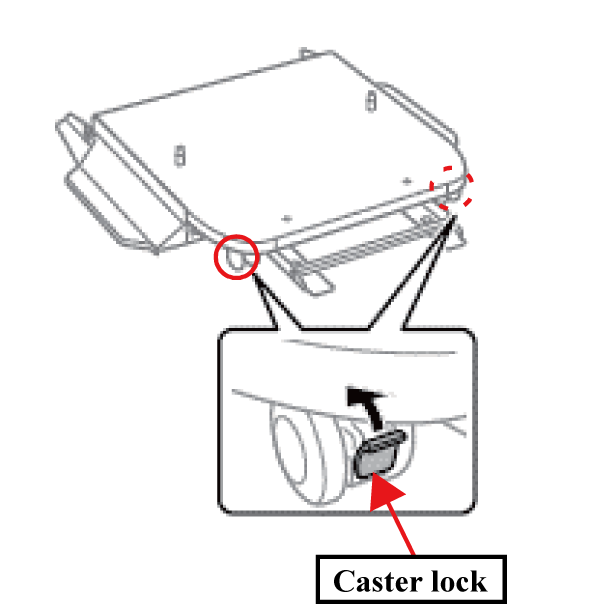
- Place the printer stand at a level location, and lock the two casters at the front.
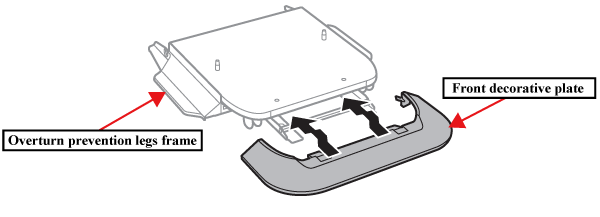
- Install the front decorative plate onto the overturn prevention legs frame.
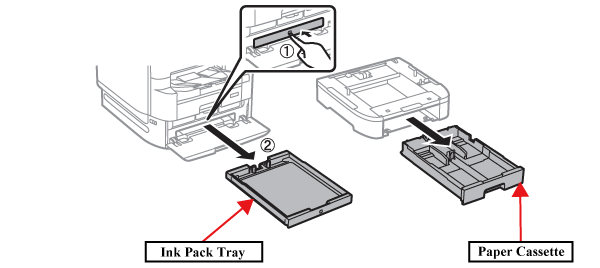
- When installing the printer onto the printer stand, draw out the Ink Pack Tray for the black ink, and when installing an additional cassette unit, draw out the paper cassette.
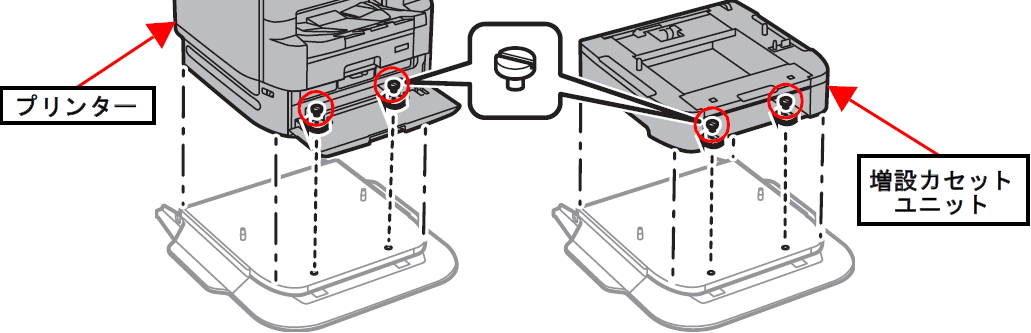
- Gently lower the printer or additional cassette unit into place while ensuring that it is aligned with the four corners of the printer stand, and fix it in place with the two screws.
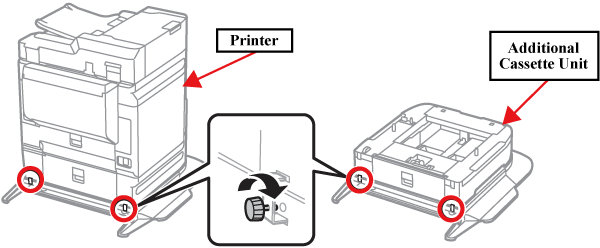
- Turn the printer around, and fix the printer or additional cassette unit in place with the metal fittings and screws.
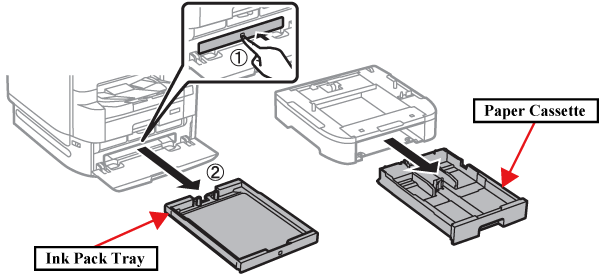
Install the Ink Pack Tray or paper cassette that was removed in Step 6.
- Insert the overturn prevention legs frame into the inside of the caster.
- Attaching Additional Cassette Unit
- Place the additional cassette unit at the installation site.
- Pull out the Ink Pack Tray for the black ink and paper cassette.
- When using two or more additional cassette units, stack all of the additional units on top of each other, and fix them in place with the screws.
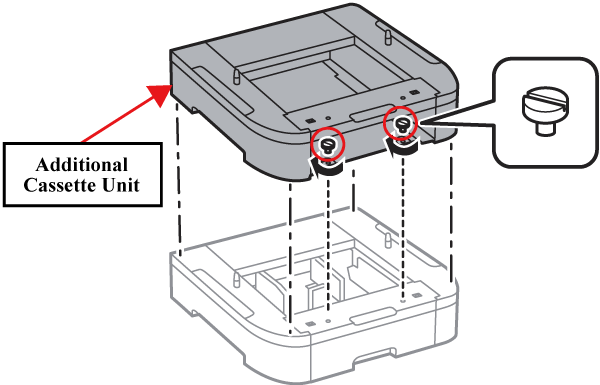
- Gently lower the printer into place while ensuring that it is aligned with the four corners of the additional cassette unit, and fix it in place with the screws.
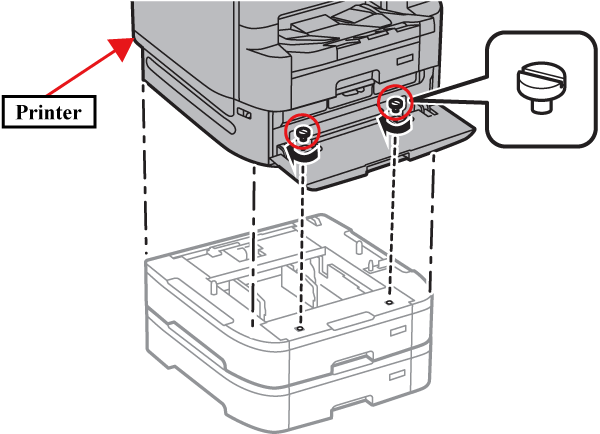 Caution / 注意
When placing the printer on the additional cassette and cabinet, there is a risk of damaging the connector of the additional cassette, so be sure to lower it down vertical while aligning the four corners of the printer and the additional cassette.
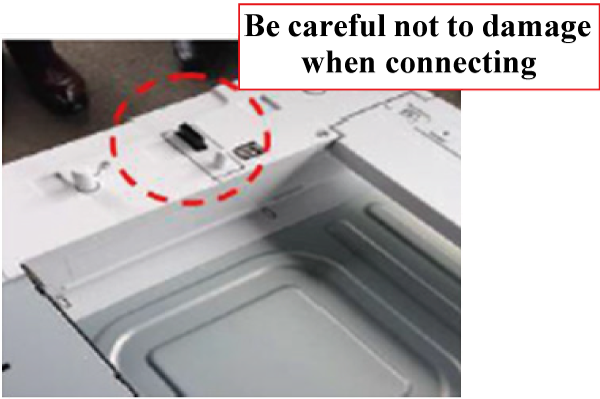
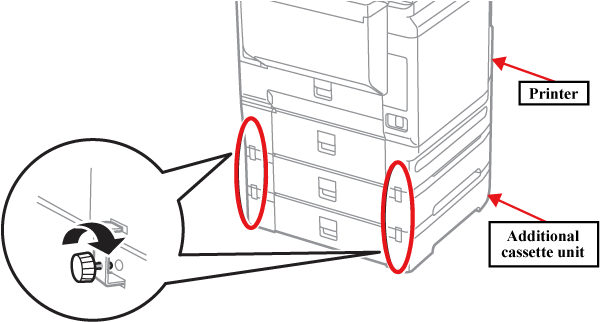
- Turn the printer around, and fix the rear of the printer to the additional cassette unit with the metal fittings and screws.
- Insert the paper size label of the paper size to load into the additional cassette unit in the label holder.
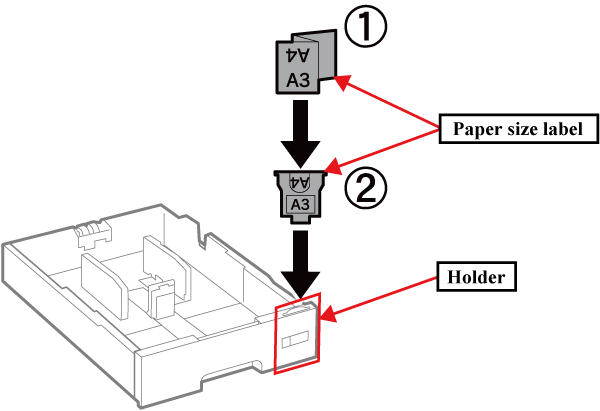
- Load the Ink Pack Tray for the black ink and the paper cassette.
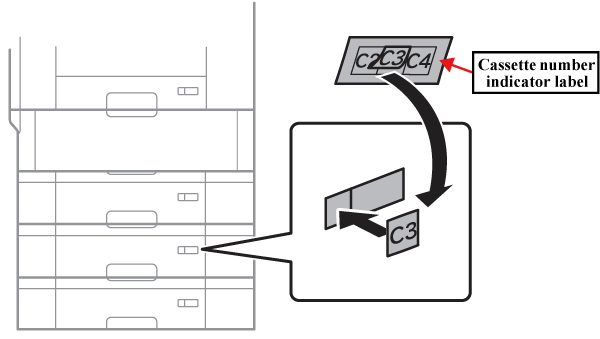
Paste the cassette number label.
Moving a printer with additional cassette unit
Before moving the printer, draw out cassettes 2, 3 and 4 and perform the following.
- Remove the metal fittings fixing the printer to the additional cassette unit at the rear.
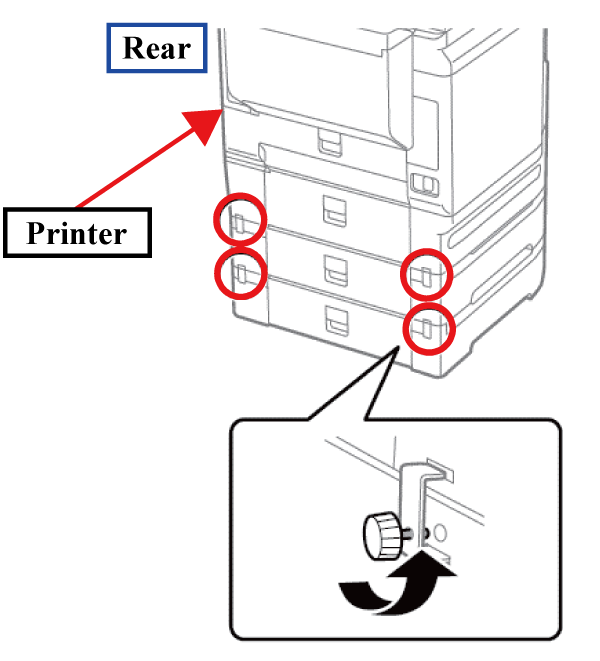
- Remove the printer from the additional cassette unit.
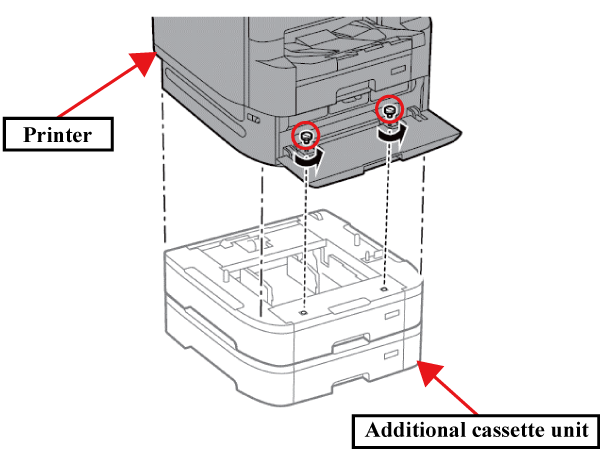
Moving a printer with printer stand
Before moving the printer, remove the overturn prevention legs on the printer stand by the procedure below.
- Remove the front decorative plate from the overturn prevention legs frame.
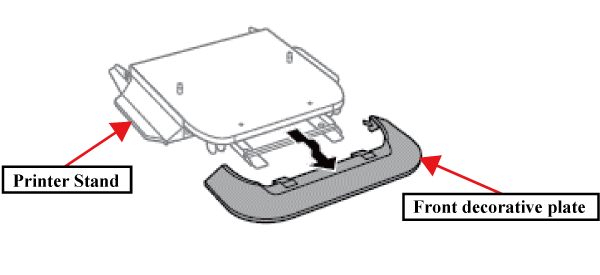
- Place the printer stand at a level location, and unlock the two casters at the front.
- Remove the reinforcing bars.
- Remove the coupling plates (metal fittings).
- Remove the overturn prevention legs frame.